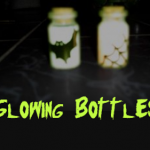
How to make Glowing Bottles for Halloween Craft for Kids

Here is a funny decoration idea for Halloween time. This is really easy to do and it glows in the in the dark, which is always fun! This craft tutorial was by Laura from Dacian Moon Handmade  will show you, step by step, how to do it .

How to make Glowing Bottles for Halloween Craft for Kids


How to make Glowing bottles for Halloween


CRAFTS MATERIALS NEEDED:

– two mini bottles
– black permanent marker
– orange glow in the dark acrylic paint
– white glow in the dark acrylic paint
– water


Step 1.

First we decorate bottles, using the black marker.


Draw 5 lines starting at the bottle base, as in the picture…


… then we will connect them with curves.


Add two more rows of curves to finish the spider web.


Step 2.

We will decorate the second one with a bat. Draw a large curve – this will be the upper part.


Starting from one end of the curve, draw a bat wing, like this.


Draw another one on the other side, joining them.


Add a „M”-like head in the middle of the curve.


Color the bat with black, leaving two holes for the eyes.


Step 3.

Put some orange glow paint in the spider web bottle (about 1/3 of it)


Like this.


Fill it with water.


Put the cap and mix well


Step 4.

We will do the same for the bat bottle.


Add white glow paint (about 1/3 of the bottle)


Fill with water.


Put the cap and mix well.


These are our bottles.


And if the lights go out … 😀


I hope that you enjoyed this craft. Come back soon for more crafts ideas that are great for children.

Technorati Tags: , , , ,

How to Make Candy Corn Stalks for Thanksgiving Treats

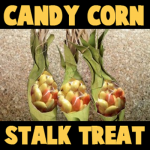
Who says that you can only have candy for Halloween. Here is a great treat to use as placeholders at the Thanksgiving table. You make these cute little cornstalks out of candy corn and cardboard tubes from paper towel rolls. This is a  fun way to give treats on Thanksgiving. This tutorial is offered by Laura from Dacian Moon Handmade


How to make Candy Corn Stalks for Thanksgiving treats


How to make Candy Corn Stalks for Thanksgiving treats

Crafts Materials Needed:

– recycled paper roll
– green paint
– yellow and orange candies
– paintbrush
– scissors
– bag


Step 1.

Cut a rectangle with rounded corners out of the paper roll…


… like this.


Step 2.

Using green paint…


… and paintbrush, color the roll.


Let it dry.


Step 3.

Cut triangles on the lower part…


Like this.


Step 4.

Put the candies in the bag…


… and place it inside the tube.


Step 5.

Take the rest of tube (the part that was not painted)…


… and cut thin strips of it.


Like this.


Put them in the tube above the candies, so that a part to go over the edge, outside ..


Step 6.

Squeezes the top to remain fixed (if doesn’t work, you can tie with a cord of similar color, or you can stick it.)


Then bend inward at the bottom…


And that’s all 😀


Technorati Tags: , , , , , , ,

How to make Vampire Teeth and Fangs for Halloween

If you want to be a spooky vampire for Halloween, you are going to need a set of fangs for your costume. Here is the easiest way to complete your Halloween costume with vampire fangs / teeth. You will need a disposable fork and little less to complete this craft.  Laura from  Dacian Moon Handmade  will show you, step by step, how to make them.

WARNING: This is only for older kids … and make sure they know to be careful to not swallow the fangs/teeth.


How to make Vampire Teeth and Fangs for Halloween


CRAFTS MATERIALS NEEDED:

– plastic fork
– scissors
– nail file
– straight pliers


Step 1.

Break fork tail.


Like this.


Step 2.

Straighten the edges with scissors so that it remains a convenient length.


Like this.


Step 3.

Use pliers to shorten the teeth in the middle of the fork.


Like this.


Round all edges and corners (using nail file) that will not hurt when you wear them.


Your perfect vampire fangs are ready ! 😀


WARNING: This is only for older kids … and make sure they know to be careful to not swallow the fangs/teeth.

Technorati Tags: , , , , ,

How to Make Glow in the Dark Ghost Nails for Halloween

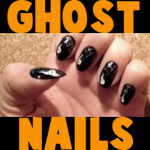
If you want to be unique around Halloween time, you will love this idea for painted on ghost nails. This is a perfect nail decoration for Halloween:  and these nails  glow in the dark! . Laura from  Dacian Moon Handmade  will show you, step by step, how to paint them.


How to Make Glow in the Dark Ghost Nails for Halloween


CRAFTS MATERIALS NEEDED:

– protective base (nail shield )
– very dark blue nail polish
– clear lacquer
– acrylic paints – silver, opaque white, white glow
– toothpick


Step 1.

Apply a protective layer on your nails using the base…


Like this. Let it dry.


Step 2.

Apply a layer of dark nail polish and let it dry well.


If color is not uniform, apply another layer. Let it dry well.


Step 3.

Put a drop of silver paint on a cardboard.


We will apply it using a toothpick.


Draw 3 lines from a corner…


… then connect them with curves. Like this.


Add a new row of curves and the spider web is ready.


Draw this spider web on every nail.

Let it dry.


Step 4.

Next we add ghosts using opaque white.


I will show on the cardboard what to do. Put a small drop of paint.


Using toothpick pull down a little to make her tail. Like this.


Let it dry a bit, then with the other end of the toothpick make the eyes and mouth. Like this.

If you can’t make the eyes and mouth this way, use a little black paint to draw them, once the white paint is dry.


So, do that on your nails, on the opposite corner.


Repeat for all the nails.


Step 5.

Add a layer of glow in the dark paint on the ghost. You can apply it with a toothpick or a cotton stick. Let it dry.

Take care if you will use black paint for the eyes and mouth, the glow in the dark layer should be applied before that.


Your nails are almost ready.


Step 6.

To protect your manicure, apply a coat of clear lacquer.


Thus colors will not fade with water. In order to remove them, use nail polish remover.


Technorati Tags: , , , , , , , ,

How to make Floating Ghosts for Halloween

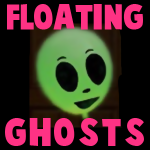
Picture Trick-or-Treaters coming to your house, and you coming to the door. When you open the door, they see glowing ghosts behind you. They scream until they realize that they didn’t see a real ghost; all they saw was just a floating balloon. Laura from  Dacian Moon Handmade  will show you, step by step, how to make a cool decoration for Halloween: a floating ghost :D.

How to Make Floating Glow in the Dark Ghosts for Halloween


How to make Floating Ghosts for Halloween


CRAFTS MATERIALS NEEDED:

– balloon
– black permanent marker
– glow in the dark acrylic paint (I use orange glow paint with gold balloon. If you have white glow paint, use a white balloon)
– paintbrush


Step 1.

Put some paint on a cardboard…


… and apply it with the paintbrush…


… on the balloon.


Like this.


Let it dry well.


Step. 2

Use the permanent marker to add eyes and mouth. Let it dry.


Now, on daylight the balloon is gold, but in the dark, it glows.

Note:

If for some reason the paint is peeling, clean the balloon and repeat the steps above on the inflated balloon.


Technorati Tags: , , , , , ,


How to Make Cute Halloween Candy Bats

You can’t have Halloween without the treats! So we might as well make them cute 😉  Laura from  Dacian Moon Handmade  will show you, step by step, how to turn a normal candy bar into vampire bats. This bat can close his wings around the candy bar.


Candy Bats


CRAFTS MATERIALS NEEDED:

– black cardboard
– little chocolate
– pen
– scissors
– paper glue
– self adhesive eyes


Step 1.

Measuring the right size, we leave 2 cm above and below the chocolate. On the sides we let 4 cm.


Cut the cardboard to the right size.


Step. 2

We measure chocolate on board, marking the corners.


Draw two lines from the upper markings to the edges, like this.


Step 3.

Draw a bat wing on the right side, based on the markings. Like this.


Draw another one on the left side.


Step 4.

Next, we will draw some feet for our bat – not too complex because you’ll find it hard to cut when is ready.


The feet looks like this, because the bat has claws 😀


To finish our design we must add the head…


… so, draw it as a half of a circle with two pointy ears.


Step 5.

Cut it out.


It will look like this.


Step 6.

Add the eyes.

Bend the wings up…


… like this.


Step 7.

Add a layer of glue on the chocolate…


… and place it on its place.


Join the wings in front and you have the cutest treat ever 😀


Technorati Tags: , , , , ,


How to Make Your Own Personal Microphone Broadcast System

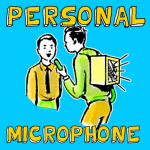
This is a craft to make a simple & personal microphone machine that you wear on your back. There are no wires or technology here, it is made simply with a box, hose, funnel, and a few other items. Any boy or girl can make this simple home broadcasting system, through which you can really “broadcast.” However, mom or dad should probably be there to assist you. This might be good to include with a Halloween costume as you can make creepy sounds broadcast out of your back…depending on what your costume is.

How to Make Your Own Personal Microphone Broadcast System


How to Make Your Own Personal Microphone Broadcast System


CRAFTS MATERIALS NEEDED:

Large cardboard box

Brass paper fasteners

Piece of garden hose (ask mom or dad first)

Piece of window screening (ask mom or dad first)

Funnel

Scotch tape

Old belt or strap

Paints & brush

Scissors

Long nail (ask mom or dad first)

Glue

How to Make Them:

Step 1

Remove the cover from the box and throw it away as you will not need it. On the opposite side of the opening, cut out a window, leaving a 2 inch margin all around.

Step 2


Cut a piece of window screening a little larger  than the window opening, and glue it over the opening from the inside


Cut a piece of window screening a little larger  than the window opening, and glue it over the opening from the inside, as in illustration A.


Step 3


Drive a long nail through the hose to prevent it from slipping out of the hole in the carton


Make a small round hole in the bottom of the box, and pull a piece of garden hose up through the hole. Insert the snout of the tin funnel into the end of the hose inside the carton. Make the hose fit tightly over the funnel snout by wrapping Scotch tape around it. Drive a long nail through the hose to prevent it from slipping out of the hole in the carton, as in illustration B.

Step 4


Fasten the belt shoulder straps to the top and the bottom of the carton with brass paper fasteners


Fasten the belt shoulder straps to the top and the bottom of the carton with brass paper fasteners, as in Illustration C.

Step 5


The person who is broadcasting speaks into the loose end of the hose in the operator's hands


To broadcast thru the system, the user slips the straps over his shoulders, with the open end of the device to his back, and the loose end of the hose in his hand. The person who is broadcasting speaks into the loose end of the hose in the operator’s hands, as in illustration D.  His voice is transmitted through the hose, through the funnel, and out through the screened window at the back of the Walkie-Talkie Like Microphone Machine.

Technorati Tags: , , , , , , ,

How to Make a Fairy Crown for Halloween

Girls love pretending to be Fairys.  They can pretend to be Fairys on any day of the year, but they especially love dressing up as a Fairy on Halloween.  Well, a fairy just can’t truly be a fairy without their Fairy Crown.  In this post I will show you how to make a Fairy Crown for Halloween.  Add this to your Fairy Skirt and Fairy Mask to have the most perfect Fairy Costume this Halloween.  Or, use the Fairy Costume to play dress-up all year long.  Let’s get started with the craft.  NOTE: you will need a little bit of help from an adult for this tutorial.

Check out our other Halloween Crafts.

Laura from  Dacian Moon Handmade  will show you, step by step, how to make this.


fairy-crowns-necklaces


Materials Needed

– 2 pieces of tulle: green and cream colored
– ribbon
– red beads
– needle and thread
– pen
– scissors
– a piece of brown cord
– lighter and pliers or tweezers (with Adult help)


Step 1

Draw 5 circles on cream tulle.


Cut them out.


Do the same with green tulle but make those circles smaller.


Step 2

This is the step where you need help. Fold a circle in quarter


… hold it with pliers and burn it a very little on the edges…. enough to wrinkle a bit.  (Must Have Adult Help.)  It is a very quick move with the lighter.


Do the same for all the circles. If you skip this step, the circles will remain flat.


Step 3

Set the pattern and make a mark where you should have the first circle (flower).


Using needle and thread sew the end of the ribbon…


… twist the ribbon…


… and sew it loose.


It will look like this.


Step 4

When you reach the marker, put a white circle on the needle…


… then a red bead …


and sew it to the spot.


Continue twisting the ribbon and sewing it loose, then add a green circle with a red bead… and so on.


Like this.


Step 5

Take the brown cord and put it through the tube of ribbon, under the first stitch.


Let enough cord free and make a knot.


This will keep the cord in place.

Begin to wrap loosely around the necklace…


… along with flowers, like this.


When you reach the other end pass the cord through the ribbon tube again.


The crown will be tied at the back…


… and it is ready to complete your Fairy costume.


Isn’t this Fairy Crown adorable?  Any Fairy would love to wear this crown.  Make sure to make the Fairy Skirt and Fairy Mask to accompany this Fairy Crown.

Technorati Tags: , , , , , , , , , , , ,

How to Make a Spider Pendant for Halloween

I have a treat for you crafters today….. I’m going to show you how to make a Spider Pendant for Halloween.  Made from jewelry wire and beads this Spider Pendant turns out beautifully.  Make it for yourself or as a gift for someone special…. they will surely love it.  What is awesome about this Spider Pendant is that you can wear it all year long…. not just for Halloween.  It turns out that amazing….. you don’t want to just save it for Halloween.  So, grab the materials needed and let’s get started.

Check out our other Halloween Crafts.

Laura from  Dacian Moon Handmade  will show you, step by step, how to make this Spider Pendant.


How to make Spider Pendants for Halloween


Materials Needed

– black crystal
– red coral (you can use any red bead, just keep in mind it should be bigger than the black one)
– 2 little beads (seed beads)
– one piece of wire (about 3 cm)
– 3 pieces of wire (about 4.5 cm)
– chain
– round nose pliers

NOTE: Wire should be neither too soft nor too hard.


Step 1

Take the small piece of wire…


…and begin making a loop on one end.


Put the 2 seed beads on it…


… and close the loop. These will be the eyes.


Step 2

Add the black crystal…


… and the red coral bead.


Using the pliers make another loop on the other end.


Take care to let about 5mm between the black bead and the red one.


Step 3

Take the 3 pieces of wire…


… and bend them in half, like this.


Continue to press on the ends until it looks like this.


Put the spider body through it, like this…


… and tighten the knot.


Press on the ends again…


… and make another knot, like this.

NOTE: It is not actually a knot. You just wrap the 3 wire around the spider body 2 times.


Step 4

Separate spider legs.


Fold down the first leg almost half (smallest side towards the body)…


… and make a little loop on the end, using the pliers.


Repeat for all the legs…


… and your spider is ready.


Add a chain to it (you can put it through the head – between the eyes) and is ready to be worn.


Ok, how awesome is this Spider Pendant?  It is perfect for the Halloween season…. or really any time of year.  It is that beautiful to wear… wear it all year long.

Technorati Tags: , , , , , , , , , , ,

How to Make a Fairy Skirt Costume for Halloween

Earlier today I showed you How to Make a Fairy Mask for Halloween.  But your Fairy Costume wouldn’t be complete if you didn’t have a Fairy Skirt to wear along with it.  I have an easy craft to show you how to make a Fairy Skirt using some green and cream tulle.  Tulle is a wonderfully light material perfect for Fairys.  After all, how else could a Fairy fly around like she does if she wasn’t wearing something light like Tulle.  Your little girl will love this fairy skirt…. she will surely use it well after Halloween is over for dress-up fun.   So, let’s get started.

Check out our other Halloween Crafts.

Laura from Dacian Moon Handmade   will show you, step by step, how to make it.


How to make Fairy Skirts for Costumes on Halloween


Materials Needed

– tulle : green and cream colored
– elastic cord
– scissors


Step 1

Cut strips of tulle with a width of 2 cm. The strips must be twice the length of the skirt.


Green and cream tulle…. When you think you have enough you can begin to assemble the skirt.


Step 2

Take the cord…


… and place it behind  one strip folded in half.


Bring the ends through the loop, over the cord…


… and pull to get a knot.


Add another one…


… and another one… and so on.


Take care to alternate the green and cream strips and all the knots to be oriented in one direction, for the strips to sit well.


Step 3

When you added enough strips, just tie the ends of the cord …


… and the skirt is ready.


 NOTE: I am using a doll as example, but the skirt is actually meant for girls.

What a beautiful fairy skirt to wear over leggings this Halloween.  Make sure to Make the Fairy Mask to wear with this Fairy Skirt…. it will complete your Fairy Costume this Halloween.

Technorati Tags: , , , , , , , , , ,

How to Make a Fairy Mask for Halloween

Little girls love to be Fairys.  They just do.  But, sometimes those store bought Fairy Masks can be a real nuisance to wear during Trick-or-Treating.  Well, I have a treat for you today.  I’m going to show you how to Make a Fairy Mask for Halloween.  This Fairy Mask is made with Tulle so it is wonderfully light.  Not like those plastic or vinyl store bought Fairy Masks…. this mask is simply beautiful.  Plus, your little girl will have a blast making her mask too…. almost as much as wearing it.  Keep an eye out as I will show you How to Make a Fairy Skirt Costume later today.

Check out our other Halloween Crafts.

Laura from  Dacian Moon Handmade  will show you, step by step, how to make this.


fairy-masks


Materials Needed

– mask template (you can download it from here)
– transparent foil
– scissors
– a piece of tulle
– silver textile paint
– silver ribbon
– tape


Step 1

Print the template and fix it on the table with tape.


Place on top of it the transparent foil and fix it with tape.


Over the foil place the tulle and fix it with tape also.


Now the setting is ready.


Step 2

Take the silver textile paint (multi-surface paint will work fine too)…


… and trace the pattern with it.


Take care to follow every swirl and every line and don’t touch the lines you already painted.


When you finish it will look like this. Let it dry overnight.


Step 3

Gently peel tulle away from the transparent foil.


It will look like this.


Cut out around the mask, including eye holes.


Like this.


Cut the ribbon in two and fix them with paint (or with craft glue) to the mask…


… like this.


Let it dry well and your mask is ready.


Didn’t this Fairy Mask come out amazing?!  Any Fairy would love to wear this Fairy Mask for Halloween.  Keep an eye out as I will be showing you How to Make a Fairy Skirt Costume next.

Technorati Tags: , , , , , , , , , ,

How to Make Leather or Vinyl Eyebrows for Halloween

Did you ever notice how by just moving your eyebrows it changes your entire expression on your face?  It’s true.  Eyebrows can make you look happy, sad, mean, angry or mystified.  Well, today I’m going to show you how to make Leather or Vinyl Eyebrows for Halloween.  These eyebrows can change any Halloween Costume to give it that extra special “Wow” factor.  If you want to look mystifying…. it can do that.  If you want to look mean…. eyebrows can do that.  I think you get the idea.  So, grab the materials needed and let’s get started.

Check out our other Halloween Crafts.

Laura from  Dacian Moon Handmade  will show you, step by step, how to make these.


How to make Leather or Vinyl Eyebrows for Halloween


Materials Needed

– a piece of light brown leather or vinyl
– pen
– scissors
– paint markers (green, gold, red)
– spirit gum


Step 1

Using the pen, draw the shape of a brow on leather.


Step 2

We will decorate it with leaves.


Mine looks like this.


Step 3

Cut it out…


… like this.


Turn it over and place it on leather to trace the contour of the other eyebrow.


Step 4

Is time to add some colors.


Use green marker to add an overall color.


With the red one make leaf veins…


… like this.


And with gold add some highlights.


Like this.


Repeat for the other one. Let them dry well.

You can attach them using water – soluble spirit gum… and you can remove them by washing with soap and water.


Imagine how these Eyebrows can change your look for Halloween.   If you are planning on being a Nature Goddess, elf, nymph or fairy these eyebrows can help you pull it off.

Technorati Tags: , , , , , ,

How to Make Spider Web Bracelets for Halloween

I have a fun girly craft for you today.  In this post I’m going to show you how to make a festive Halloween bracelet that any girl would love to wear this Halloween season.  Made from a recycled soda bottle and some paint this bracelet craft is an easy and fun one.  Plus, you will get a good feeling from recycling an old soda bottle instead of throwing it away.  Isn’t that wonderful?!  So, grab that cleaned out used soda bottle and let’s get this fun craft started.

Check out our other Halloween Crafts.

Laura from  Dacian Moon Handmade  will show you, step by step, how to make this.


How to Make Spider Web Bracelets for Halloween


Materials Needed

– recycled plastic bottle
– black multi-surface paint
– scissors
– nail file


Step 1

Cut the middle part of the recycled plastic bottle (the one without writing or patterns)…


… like this. Now you have the base of the bracelet.


Step 2

Round the edges using nail file.


Step 3

Take the lower part of the bottle…


And put the bracelet around it.   This will help you to paint it.


Step 4

Make a line on the lower part with the black paint.


Then, choose a point somewhere and make some rays around it, like this.


Connect them with curves, like this.


Continue until you have a full spider web.


I added two more smaller cobwebs on one side and the other.


Step 5

Let it dry overnight.


Take it off the bottle…


… and you have the coolest bracelet for this Halloween!


How cool is this bracelet?!  Any girl will love wearing this bracelet for Halloween.  And, I can promise you no one will have one exactly like it.  Enjoy!!

Technorati Tags: , , , , , , , ,

How to Make Devil Horns for your Halloween Costume

Do you have the Halloween costume and the only thing you need are the horns?  Not a problem…. in this post I’m going to show you how to Make Horns for your Halloween Costume.  These horns will add the extra bit of creepiness you are looking for to your costume.  You could have a scary costume all ready, but you add some horns and you just took your Halloween costume to the next level.  Isn’t that what Halloween is all about…. adding a little bit of creepy and scary?  So, grab the materials needed and let’s get started.

Check out our other Halloween Crafts.

Laura from  Dacian Moon Handmade will show you, step by step, how to make this.


How to Make Devil Horns for your Halloween Costume


Materials Needed

– tinfoil
– simple headband
– black multi-surface paint
– red paint marker
– paintbrush
– scissors


Step 1

Cut some strips of tinfoil (4 -5)…


…and begin to wrap the headband with them.


Step 2

Stop when you reach the point where the horns should be.


Take a bigger piece of tinfoil…


… and crumple it…


… to finally have a horn shape.


Make another one.


Step 3

Wrap a strip of tinfoil around one horn…


…fixing it to the headband….


… like this.


Do the same with the other horn and and continue to wrap all the way.


Step 4

Put some black paint on a cardboard…


… and paint the headband using the paintbrush.


Like this.


You have one small thing to do yet: paint the top of the horns with red.


Like this.  Let it dry well.


And, there you have it…. you have just made Horns for your Halloween Costume.  Now, have fun getting dressed up this Halloween!!

Technorati Tags: , , , , , , , ,

How to Make Gloves with Claws for Halloween

Are you still trying to figure out how to add an extra scary effect to your Halloween costume this year?  Well, I just might have the perfect idea for you.  Why not make these Gloves with Claws for Halloween?  They are sure to make any costume you are planning to wear even more scary.  Even if you are planning to be a cat this year…. you can’t do it without claws or your costume is just not finished.  Add these scary Gloves with Claws for a truly scary effect this Halloween.  Let’s get started.

Check out our other Halloween Crafts.

Laura from Dacian Moon Handmade  will show you, step by step, how to make this craft.


How to make a Glove with claws for Halloween


Materials Needed

– gloves
– a piece of black canvas
– scissors
– needle and thread


Step 1

Cut 5 rounded triangles from the canvas.


Like this.


Step 2

Using the needle and thread, sew the lower part of one triangle to one glove finger (where the nails should be)…


… like this.


Do the same for all the triangles / fingers. Repeat for the other glove…


… and they are ready to be worn.


There is something about adding claws to any costume that makes it scary.  Add these scary gloves with claws to your costume and give it an extra creepy effect.

Technorati Tags: , , , , , , , , , ,

How to make Paper Ghosts for Halloween

This cute Halloween decoration is so easy to do and kids just love how each ghost takes on a life of its own. Each design is unique and each one is adorable in its own way. Find out how to make your very own spiral paper ghosts with the easy to follow instructions below.

Laura from Dacian Moon Handmade   will show you, step by step, how to make it.


How to make Paper Ghosts for Halloween


CRAFTS MATERIALS NEEDED:

– paper
– black permanent marker
– pencil
– needle and thread
– scissors


Step 1.

Draw a „snail” on the paper, like this.


Step. 2

Use the permanent marker…


… to draw eyes and mouth on „snail” head.


Step 3.

Cut on the line.


It will look like this.


Step 4.

Put the needle through the head, over the eyes…


Cut the thread and make a knot.


Now the ghost is ready to hang.


Technorati Tags: , , , , , , ,