My Favorite Mayflower Craft Ideas for Thanksgiving

Thanksgiving will be here in no time at all.  And, one of the lessons we try to teach our children about the Thanksgiving Holiday is the Pilgrims and the Mayflower.  What I found during lessons is that teaching them visually is the easiest way to get them to understand…. hence doing a craft.  So, today I thought I would show you my Favorite Mayflower Craft Ideas for Thanksgiving.  I found these Mayflower crafts while searching the internet.  They are all really incredible and a ton of fun.  Surely, you will be able to find some Mayflower craft ideas from this list….. use them to help teach your children about the Pilgrims and their travel on the Mayflower.
Check out our other Thanksgiving Crafts.


My Favorite Mayflower Craft Ideas for Thanksgiving


My Favorite Mayflower Craft Ideas for Thanksgiving

(1)  Model Mayflower


Model Mayflower


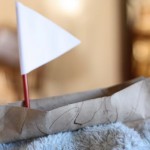
Here is a wonderful way to make a model Mayflower.  Made from disposable coffee cups and coffee stirrers this is a great way to recycle items as well as teach your children about the Mayflower.  I found this Mayflower craft over at Parenting.  Make sure to check it out.


(2)  Hand Print Mayflower


Hand Print Mayflower


I love this Mayflower craft.  It is just simply adorable.  And, any young crafter will have a lot of fun making it.  I found this Thanksgiving craft over at Almost Unschoolers.  Make sure to check out her site to get all the Mayflower craft details.


(3)  Mayflower Walnut Boat


Mayflower Walnut Boat


Even we have our own Mayflower crafts.  Here is our first one.  We will show you how to make a Mayflower out of a walnut.  And, what is really cool about this Mayflower craft is that the boat will actually float in water.  Check out How to Make a Mayflower Walnut Boat to make one for yourself.


(4)  Mayflower Paper Plate Craft


Mayflower Paper Plate Craft


Here is a fun Mayflower craft that your little ones will really enjoy.  The Crafty Classroom will show you how to take two paper plates and a popsicle stick and make it into this awesome Mayflower.  Oh boy, this sounds like fun.


(5)  The Mayflower Simplified


Mayflower Simpliefied


I love this bloggers idea.  Her idea was to come up with a Mayflower craft that she could make with young children.  I Can Teach My Child came up with this idea and it is a great one.  Made from a paper towel roll, a straw and some other materials this craft will take on a life of its own.  Share it with your child…. they will love it.


(6)  Mayflower Sandwich


Mayflower Sandwich


I just couldn’t pass this one up.  I know it’s not technically a craft, but it is a Mayflower recipe that you and your little ones can have fun putting together.  Little Nummies put this one together and it is just precious.  Made from bread, cream cheese and pretzels this yummy recipe will be a whole lot of fun to put together… almost as much fun as eating it.


(7)  Mayflower Photo Craft


Mayflower Photo Craft


This is a great Thanksgiving craft to enhance your teachings of the Pilgrims, Mayflower and the first Thanksgiving.  Here Classified Mom adds actual photos of her own children to better engage her children in the lesson.  You can do the same.


(8)  Mayflower Crayon Holder


Mayflower Crayon Holder


I love, love, love this idea.  Made from a creamer container this Mayflower actually holds crayons.  I think this Mayflower craft will be perfect for the Thanksgiving Kids Table.  Imagine every child having one of these Mayflower Crayon Holders on Thanksgiving…. the fun they will have.  Check out It’s Overflowing for all the craft details.


(9)  Mayflower Milk Carton Craft


Mayflower Milk Carton Craft


Made from a milk carton and some tissue paper this Mayflower Craft is sure to be a fun one.  Hidden underneath the tissue paper are some apples…. perfectly festive for the fall season.  Check out Creative Holiday Gift Ideas to find out how you too can make this with your children.


(10)  Mayflower Hats


Mayflower Hats


What kid doesn’t love hats?  They just all do.  And, these Mayflower hats will be no exception.  Spoonful shows you step-by-step how to make these adorable and festive hats.  Make a few and have them ready for the kids table at Thanksgiving.  All the children will love to wear them.


(11)  Mayflower Centerpiece


Mayflower Centerpiece


Why not center your entire Thanksgiving Meal around the Mayflower…. or perhaps the kids table.  Martha Stewart shows you how to with these very detailed instructions on how you too could have a Mayflower Centerpiece.


(12)  Mayflower Cut, Tape & Play


Mayflower Cut Tape Play


Homespun With Love shows you how you can print off this really cool Mayflower and let your kids cut, tape and then play with this Mayflower.  Use this as a visual tool when teaching your children about the Mayflower, the Pilgrims and the first Thanksgiving.


(13)  Mayflower Popsicle Craft


Mayflower Popsicle Craft


Here is a fun Mayflower craft that all the children will love.  Made from Construction Paper and Popsicle Sticks it is very likely you have all the craft materials needed right in your home.  Ramblings of a Crazy Woman will show you in detail how to make this craft…. she even shows you how to make waves to remind us how the Pilgrims endured a lot to find their way here.


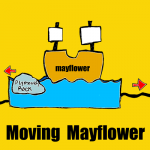
(14)  Moving Mayflower


Moving Mayflower


Here is another of our Mayflower crafts from our very own site.  This Mayflower craft is a little bit different than the others because it can actually move.  Made with items like a paper towel roll, craft sticks and string this moveable mayflower will make the kids smile.  Gotta love something that actually moves.  Check out our site to find out how to make this Moveable Mayflower.


(15)  Mini Mayflower


Mini Mayflower


Get the kids excited about the Pilgrims and the Mayflower with this mini mayflower craft.  Made from a milk container this mayflower is the perfect size for little kids hands.  The kids will love to play with this mayflower and it also makes the perfect Thanksgiving decoration.  Check out Parents Connect for all the details.


(16)  Cardboard Tube Mayflower


Cardboard Tube Mayflower


When I found this Mayflower craft I thought it was quite original.  I found this Thanksgiving craft over at Naturally Educational.  Here she uses a cardboard tube along with some twigs to make her original Mayflower craft.  Make sure to check out her site for all the step-by-step details.  She also adds some Mayflower book choices to help you teach your children about the Mayflower.

Technorati Tags: , , , , , , , , , , ,

Giving Thanks Thanksgiving Crafts Roundup


Giving Thanks Thanksgiving Crafts Roundup


Thanksgiving is coming up quickly.  This month wouldn’t it be a great idea to fill it with crafts that remind us what this Holiday is all about….. being thankful.  We all have so much to be thankful for.  So, in this link roundup I have scoured the internet to find crafts that all have to do with being thankful.  Each craft is a lot of fun and all can be used as a Thanksgiving decoration…. but most of all they remind us to be thankful.  With these crafts you will be doing them as a family…. and family is one of the most important reasons to be thankful.  So, get ready to spend some time looking at some amazing Thanksgiving “Giving Thanks” Crafts….. you are sure to find one that you will love.

Check out our other Thanksgiving Crafts.

Giving Thanks Thanksgiving Crafts Roundup

(1)  Thanksgiving Countdown Calendar


Thanksgiving Countdown Calendar


This Thanksgiving craft is kind of like a Holiday Advent Calendar.  You and your family can express your thanks and gratitude simply by writing your thanks on your color piece of paper and adding it to the envelopes.  Look at them each day to remind each other what you are Thankful for.  I found this great Thanksgiving craft at Parents.com.


(2)  Give Thanks Napkin Rings


Give Thanks Napkin Rings


In this Thanksgiving thankful craft Jeanne Winters shows you how to create these amazing napkin rings that inspire your Thanksgiving guests to go around the Thanksgiving table before the feast and let everyone know what they are thankful for.


(3)  Give Thanks Yarn Turkey


Give Thanks Yarn Turkey


This Thanksgiving thankful craft was one of our crafts posted last Thanksgiving Season.  It’s a craft that your children will love putting together.  Plus, it is part finished when it is presented at the Thanksgiving table and finished by the guests adding to each feather what they are thankful for.  Check it out.


(4)  Gratitude Tree Advent Calendar


Gratitude Tree Advent Calendar


Here is another advent calendar idea using this time a tree.  Trees are great for this Thanksgiving craft because they have many branches to add your thankful ideas to…. plus trees are perfect for this fall craft.  Oopsey Daisy came up with this Thanksgiving craft and I love it.  Check it out to see how she uses a magnetic sheet and bottle caps for this craft.


(5)  Give Thanks Board


Give Thanks Board


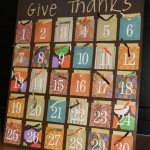
This Thanksgiving thankful craft is similar to the first one, but instead of it being a garland it is actually all out on a board.  What is really cool about this Thanksgiving thankful craft is the use of  a variety of coordinating scrapbook paper giving it an amazing look.  Check it out for yourself at JellybeanJunkyard.


(6)  Thankful Bucket


Thanksgiving Thankful Bucket


Here one family shows you how they use a Thankful Bucket to remind each other what they are thankful for this Thanksgiving season.  Here The Idea Room shows us how to put together this festive bucket.  Have the family fill it with things they are thankful for…. after dinner share these things with the rest of the family.  Great idea.


(7)  Changeable Frames for Thankfulness


Changeable Frames for Thankfulness


Here is a clever idea by Flamingo Toes.  Here the writer of this post shows you how to make a place that your family can write down what they are thankful for.  This particular Thanksgiving thankful craft is made with glass over the embroidery so they can write different things all month long.  They can wipe it clean and start over as often as they would like.


(8)  Thankful Leaf Garland Decoration


Thankful Leaf Garland Decoration


Here is a cute Thanksgiving thankful craft.  And, one that looks awesome as a Thanksgiving decoration.  Full Circle shows you how to make this festive craft.  Simply string together construction paper leaves and have family members write on the leaves what they are thankful for.  String together as garland for all to see.


(9)  Thankful Tree


Thanksgiving Thankful Tree


Here is a great Thanksgiving thankful craft that is perfect for even the youngest of crafters with just a lit bit of help from you.  Playful Learning shows you how to make one of these Thankful Trees for your houses.  Simply have the kids make leaves, color them and cut them out.  Have the children write down what they are thankful for.  She will show you how to finish it off with a tree branch.  Check it out for yourself.


(10)  Thanksgiving Hat


Thanksgiving Hat


Here is a fun Thanksgiving thankful craft that the little kiddies will love.  Dim Sum, Bagels and Crawfish shows you how to make this craft.  The kids will love making it, but even more so love wearing it.  If you are having a Thanksgiving dinner at your house considering doing this craft with the little ones at your feast…. they will love it.


(11)  Paper Cornucopia of Thanks


Paper Cornucopia of Thanks


Flip Flops and Applesauce shows you how to take some paper and posicle sticks and make it into a beautiful and meaningful table centerpiece for Thanksgiving.  Make sure to involve the whole table…. have your guests each write down what they are thankful for and read them out loud.


(12)  Thanksgiving Clothespin Wreath


Thanksgiving Clothespin Wreath


Here is a cool Thanksgiving thankful craft that also works as an awesome Thanksgiving wreath decoration for the Holidays.  I found this Thanksgiving craft over at Chica and Jo.  This amazing Thanksgiving wreath is made from Clothespins.  Add a sharpie to your wreath and let your visitors add what they are thankful for.  Save it for years to come.

Technorati Tags: , , , , , , , , , , , , ,

How to Make Wigwams and Canoes for Thanksgiving

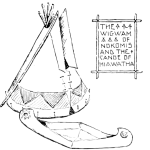
Today I’m going to show you how to Make Wigwams and Canoes for Thanksgiving.  These items are perfect to use as decorations for Thanksgiving.   Actually, add these items to our Indian Village Craft and have an entire Indian Village to Display for Thanksgiving.  Wouldn’t that be wonderful?  You can use both of these crafts to talk about the Native Americans and what they have given our Country.  Remind the children about the story of Thanksgiving.  Do a fun craft and a wonderful lesson at the same time.

Check out our other Thanksgiving Crafts.


How to Make Wigwams and Canoes for Thanksgiving


Materials Needed

Printer & Paper

Scissors

Paste

Twigs

Crayons, Markers or Colored Pencils (optional)


Template 1

Black & White Template

Indian Canoe Template black & white


Colored Template


Indian Canoe Template Color


1.  Click on one of the images above.  Click on the black and white image if you want to color it later.  Or, print off the colored image and there is no need to color it later.   Once the new page opens up print off the template.

2.  Cut out the canoe.

3.  Slit at ‘A’.

4.  Fold in half along center line.  And, paste both halves together at ‘B’.

5.  Where you slit at ‘A’, fold towards each other and paste together.


Template 2

Black & White Template


Template 2 Black & White


Colored Template


Template 2 Colored


1.  Click on one of the images above.  Click on the black and white image if you want to color it later.  Or, print off the colored image and there is no need to color it later.   Once the new page opens up print off the template.

2.  Cut out the Wigwam.

3.  Cut on the slits that are noted.

4.  Cut out portion ‘A’.

5.  Bend back the flaps ‘D’, bring ‘C’ flaps together and paste together.

6.  Optionally, get a few twigs (or some raffia) and glue at the top of the Wigwam.


Finished Wigwams and Canoes for Thanksgiving


And, there you have it…. that’s how you make Wigwams and Canoes for Thanksgiving.  Use these as Thanksgiving Decorations…. everyone will surely love them.

Technorati Tags: , , , , , , , , , , , , , , , , , , , ,

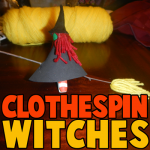
How to Make Clothespin Witches

Halloween is later this month.  It is coming up quickly….. so now is the time to decorate your house for Halloween.  Today I’m going to show you how to make Clothespin Witches.  The craft calls for a wooden clothespin.  My suggestion to you is to use the old-fashioned clothespins…. not the “pinch-to-open” ones.  Make a few of these Clothespin Witches to decorate your whole house.   Grab the materials needed and let’s get started.

Check out our other Halloween Crafts.


How to Make Clothespin Witches


Materials Needed

Wooden Clothespin

Green and Red Paint

Black Felt, Paper or Craft Foam

Pencil

Scissors

Stapler

Glue

Red and Yellow Yarn

Stick


Step 1


Paint a wooden clothespin green.


Paint a wooden clothespin green.


Step 2


Draw a big circle on felt, paper or craft foam.


Draw a big circle on felt, paper or craft foam.


Step 3


Cut out the circle.


Cut out the circle.


Step 4


Draw a line thru the center.... both ways.


Draw a line thru the center…. both ways.


Step 5


Cut out one of the pizza slices.


Cut out one of the pizza slices.


Step 6


Staple closed like this.


Staple closed like this.


Step 7


Now push the head thru the hole.


Now push the head thru the hole.


Step 8


Now, your piece looks like this.


Now, your piece looks like this.


Step 9


Paint stripes on legs.


Paint stripes on legs.


Step 10


Cut out a small circle and a pizza slice shape


Cut out a small circle and a pizza slice shape… Use paper, felt or craft foam.


Step 11


Glue pizza slice into cone shape for top of hat.


Glue pizza slice into cone shape for top of hat.


Step 12


Cut slits at bottom of cone.


Cut slits at bottom of cone.


Step 13


Glue slits to top of circle.


Glue slits to top of circle.


Step 14


Fold yarn in half several times


Fold yarn in half several times…


Step 15


Glue yarn on top of head.


Glue yarn on top of head.


Step 16


Now cut looped ends of yarn to make hair.


Now cut looped ends of yarn to make hair.


It should look like this.


Like this.


Step 17


Glue the hat on top of head.


Glue the hat on top of head.


Glue the hat on top of head.


Like this.


Step 18


Find a stick.


Find a stick.


Step 19


 Cut a slit in front of dress.  Then put stick thru clothespin and slit in dress.


Cut a slit in front of dress.  Then put stick thru clothespin and slit in dress…


Step 20


It should look like this.


Like this.


Step 21


Fold some yellow yarn in half a few times


Fold some yellow yarn in half a few times… Like this…


Step 22


Take a 2nd piece of yarn and tie it around folded yarn.


Take a 2nd piece of yarn and tie it around folded yarn.


It should look like this.


Like this.

Step 23


Take loops on each side and cut the loops open.


Take loops on each side and cut the loops open.


It should look like this.


Like this.


Step 24


Tie this on to end of stick with another piece of yarn.


Tie this on to end of stick with another piece of yarn.


It should look like this.


Like this.


Step 25


Finished Clothespin Witch


And, that’s it.  You just finished making a Clothespin Witch.  Isn’t it awesome?!  This will make for a wonderful Halloween Decoration in your house.  Enjoy!!

Technorati Tags: , , , , , , , , , ,

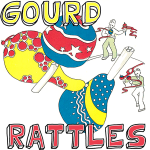
How to Make Gourd Rattles and Maracas

I have an awesome fall craft for you today.  In this post I’m going to show you how to make Gourd Rattles and Maracas.  When you fill these gourds with pebbles they make the most playful sounds.  It is a festive way to use these gourds this fall season.  The kids will love playing with these noise makers…. Not to mention the great fun they will have making this craft.  So, grab the materials needed and let’s get started.

Check out our other Fall Crafts.


How to Make Gourd Rattles and Maracas


Materials Needed

Gourds (2 Round or 1 Oblong)

Large Bowl & Water

Awl (Parental Supervision)

Pebbles

Paper

Glue

2 Sticks (for Round Gourds)

Acrylic or Tempera Paints

Paintbrush

1/2 Glue & 1/2 Water Mixture


Step 1


Soak the dry gourd for 24 hours.


Soak the dry gourd for 24 hours.


Step 2


Using an Awl.... punch a hole in the gourd.


Using an Awl…. punch a hole in the gourd.  (Parental help needed for younger kids.)


Step 3


Shake out seeds.


Shake out seeds.


Step 4


Drop in pebbles.


Drop in pebbles.


Step 5


Glue paper over the hole.


Glue paper over the hole.


For Round Gourds

Step 6


Punch holes in both ends.  Shake out the seeds.


Punch holes in both ends.  (Parental Supervision)   Shake out the seeds.


Step 7


Put stones in the gourd.  Insert stick.


Put stones in the gourd.  Insert stick.


Step 8


Paint bright designs with acrylics or tempera paints.


Paint bright designs with acrylics or tempera paints.  Let dry.  Make a mixture of half glue and half water.  Brush it over gourd.  Let dry.  Re-apply.


And, there you have it…. you have a gourd rattle or gourd maracas.  What did you decide to make?  Let me know in the comments below.  And, don’t forget to take a picture of your finished gourd craft…. add it to the comment too.  I’d love to see it.

Technorati Tags: , , , , , , , , , , , , , , , , ,

How to Make a Coffee Can Drum

I have a fun craft for the youngest of crafters.  Today I’m going to show you how to make a coffee can drum.  What child doesn’t love playing drums?  They all love playing the drums.  This drum is made from a coffee can, denim and some other materials you probably have at home.  Once you have made the drum simply grab a couple of pencils or any wooden sticks and your drums are good to go.  So, grab the materials needed and let’s get started.

Check out our other Can Crafts.

Laura from Dacian Moon Handmade will show you how to make this, step by step.


Materials Needed

– aluminum coffee can with plastic lid
– colored paper
– denim
– yarn
– glue
– pencil
– scissors


Step 1

Cut the paper the same height as the can.


Step 2

Apply a layer of glue on the paper…


… and place it on the can.


Step 3

Cut a rectangle out of the denim.


Step 4

Take the plastic lid and add a layer of glue on it’s exterior side…


… then place it on the denim rectangle. Let the glue dry.


Step 5

Close the coffee can.


Step 6

Cut a generous piece of yarn…


… and spin it around the can, just under the lid.


Step 7

Do the same on the lower part of the can.


Step 8

Your drum is ready. You can use two pencils or any wooden sticks to play it.


Wasn’t that easy peasy?!  Now, your drum is all ready to play all day long.  How did your Coffee Can Drum turn out?  Let me know in the comments below.  Also, you can add a picture of your drum to the comments as well… that way I can see how it turned out.

Technorati Tags: , , , , , , , , ,

Chinese New Year Crafts – Year of the Dragon


Chinese New Years Crafts


Chinese New Year falls on January 23rd this Year.  And, in honor of Chinese New Year I put together a list of crafts just about the Chinese New Year.  You will find that most of them are Dragon Crafts and you might wonder why….. well, I will tell you why.  This year is the Year of the Dragon.  So, to honor that fact the majority of the crafts I have listed here will be Dragon Crafts.  Not all of them…. there are plenty of fun other crafts that have nothing to do with Dragons.  So, check out the post and pick a few Chinese New Year Crafts to do with the kids….. they are sure to love them.  So, let’s get started.

Here are Even More Chinese New Years Crafts

Chinese New Year Crafts – Year of the Dragon

(1) Festive Ribbon Dragon


Festive Ribbon Dragon


Here is an adorable dragon perfect for this years Chinese New Years.  This is the mini sized version of the huge size dragon they use in parades for Chinese New Years.  Check out FamilyFun for all the crafting details.


(2) Pop-Up Greeting Card


Pop-Up Greeting Card


Isn’t this Chinese Pop-Up Greeting card gorgeous?  I think it is really beautiful.  Imagine giving this to someone to celebrate the Chinese New Year.  Go to FreePaperCraftTemplate for all the details on how to print off this free template.


(3) Origami Dragon


Origami Dragon


Since this Chinese New Year is the year of the Dragon how could I not include an Origami Dragon in this post.  And, look how awesome this Origami Dragon turns out.  You can get the full instructions for this Origami by going to Origami-Instructions.


(4) Chinese New Year Fish


Chinese New Year Fish


Fish is a very popular dish on Chinese New year.  Fish is a sign of prosperity…. so it is very common to see people eating fish on Chinese New Year.  With that being said I thought it was a good idea to include Fish in this Chinese New Year Post.  Go to Julie K in Taiwan for all the craft details.


(5) Chinese Dragon Door Hanger


Chinese Dragon Door Hanger


Here is a cute craft for the youngest of crafters.  If you go to NickJr they show you how to make a simple Chinese Dragon Door Hanger that is perfect for any kid’s room.  Plus, making this craft with them is the perfect time to explain to your kids a little bit about the Chinese New Year.


(6) Dragon Mask


Dragon Mask


Now, isn’t this Dragon Mask incredible?  What little one wouldn’t love wearing this Dragon Mask all over the house.  After all, children love dressing up.  Find all the Dragon Mask “how-to’s” over at AlphaMom.  This is such a great Chinese New Year craft!!


(7) Pull-A-Long Dragon Craft


Pull-A-Long Dragon Craft


Here is a great way to make a Dragon for Chinese New Year….. made out of paper cups.  How awesome is that?!  It turns out so cute too.  This is a great way to teach your children about the Chinese culture.  Make sure to check out the craft in its entirety over at FreeKidsCrafts.


(8) Toy Spinning Hand Drum


Toy Spinning Hand Drum


Here is a fun toy for the Chinese New Year.  Not only fun to play with…. but also fun to make.  This toy is a great way to make lots of noise during the Chinese New Year.  Make sure to check out 4CrazyKings for all the fun details.


(9) Paper Dragon


Paper Dragon


This is a fun craft for the Chinese New Year.  This Paper Dragon turns out so beautiful…. I just love the colors.  I found this craft over at CraftJr and I just love it.  She explains how this craft is really so easy that a toddler can do it.  And, trust me…. the kids will love maneuvering around the dragon with the sticks.


(10) Marbled Red Vinasse Eggs


Marbled Red Vinasse Eggs


This Marbled Egg  is an extremely popular Chinese snack…. and it is extremely popular during Chinese New Year as the egg represents fertility.  To get this marbled effect you first crack the egg and then simmer the egg in colored liquid.  Get the full details at Pig Pigs Corner.


(11) Paper Chain Dragons


Paper Chain Dragons


One of the easiest crafts to teach a young child is how to make a paper chain.  So, let’s use that technique to make a Paper Dragon.  The kids will have such a fun time making this craft.  The Chinese tradition is a rich tradition….. why not show this to your kids by creating this craft.  Check out NaturallyEducational for all the craft details.


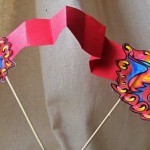
(12) Flying Dragon Puppet


Flying Dragon Puppet


Okay, I officially love this craft…. I just love how it turns out.  It turns out so colorful and festive…. just like any New year should be.  Check out JellyFishJelly for the craft details and put this Flying Dragon Puppet together.  I don’t know what your kids will love more…. putting the craft together or playing with the puppet.

Technorati Tags: , , , , , , , , ,

How to Make a Moving Mayflower for Thanksgiving

In 1620 the Pilgrims came to America from England on a 3000 mile voyage.  They came here on the Mayflower and landed on Plymouth Rock.  Today we will celebrate this first voyage by making a moving Mayflower for Thanksgiving.  After all, if the Pilgrims never made this trip on the Mayflower there would be no Thanksgiving.  I shutter at the thought.

Check out our other Thanksgiving Crafts.


How to Make a Moving Mayflower for Thanksgiving


Materials Needed

Paper Towel Tube

Blue, Brown and Black Construction Paper

Gray Paper (or use white paper and color it gray)

White Paper

String or Yarn

Straws, Craft Sticks or Pencils (optional)

Glue

Scissors


Step 1


Put glue all over paper towel tube.


Put glue all over paper towel tube.  Rub glue on it so now it is a thin layer of glue.


Step 2


Place cardboard tube in the center of a piece of blue construction paper.


Place cardboard tube in the center of a piece of blue construction paper.


Step 3


Fold paper so top and bottom meet.


Fold paper so top and bottom meet.


Step 4


Cut waves at the top of the blue paper.


Cut waves at the top of the blue paper.


Step 5


draw Plymouth Rock out of the paper.


First cut a gray piece of paper in half.  Then draw Plymouth Rock out of the paper. (You could also use white paper and then color it gray later.)


Step 6


draw a ship with the bottom along the fold.


Fold brown paper in half.  Then draw a ship with the bottom along the fold.  Then cut out.  Notice that the boat is a sideways bubble letter ‘C’.


Step 7


Place a 3 foot piece of string or yarn in fold of ship


Place a 3 foot piece of string or yarn in fold of ship so that equal amount is sticking out from each side.  Glue sides together.


Step 8


Cut out 2 white rectangles


Cut out 2 white rectangles…. one bigger than the other.  For masts… cut out 2 black rectangle strips.  You could also use straws, craft sticks, pencils or other items.


Step 9


Place masts in between top of glued ship while it is still wet.


Place masts in between top of glued ship while it is still wet.  Glue sails to masts by putting glue on one side and then folding together, as you see in pic #1 and #2.

Step 10


Place ship in between waves


Place ship in between waves, pull string back and forth on each side to make ship sail back and forth.

There you go…. you just finished your Moving Mayflower Boat for Thanksgiving.  How did it turn out for you?  Let me know in the comments below.

Technorati Tags: , , , , , , , , , , , ,

How to Make a Yarn Turkey for Thanksgiving

Thanksgiving is a wonderful holiday.  It is all about giving thanks for all that you have.  But, sometimes we forget about the true meaning of Thanksgiving with the food, parades and football games…. we lose focus.  Well, I have a great craft for you that will keep the focus on the true meaning of Thanksgiving.  Everyone that is at your Thanksgiving celebration will write down the reason they are thankful on a turkey feather which is then added to this Turkey craft.  Everyone will love participating in this beautiful Turkey craft.  So, let’s get started.

Check out our other Thanksgiving Crafts.


How to Make a Yarn Turkey for Thanksgiving


Materials Needed

Dark Brown Yarn

Tan Yarn

Chopstick, Dowel or Knitting Needle

Colorful Construction Paper

Glue, Tape or Pins

Scissors

Pen

Plastic Forks


Step 1


Stick a chopstick, dowel or knitting needle into a dark brown ball of yarn.


Stick a chopstick, dowel or knitting needle into a dark brown ball of yarn.


Step 2


Find a smaller tan ball of yarn.


Find a smaller tan ball of yarn.  Stick it on the end of the chopstick for turkey’s head.


Step 3


Cut out various shapes and glue, tape or pin down on face.


Cut out various shapes and glue, tape or pin down on face.


Step 4


Cut out diamond shape and fold in half.


Cut out diamond shape and fold in half.  Then paste or pin to the head.


Step 5


Have everyone at Thanksgiving dinner write what they are thankful for


Have everyone at Thanksgiving dinner write what they are thankful for on a paper feather that you cut out beforehand.


Step 6


Tape each feather to the front of a fork


Tape each feather to the front of a fork… and then stick it into the body of the turkey.


Tape each feather to the front of a fork


Isn’t that an awesome Turkey?!  There will be no turkey that will compare to this one…. after all, this turkey was made by your friends and loved ones.  It will make for a beautiful centerpiece during your Thanksgiving meal.

Technorati Tags: , , , , , , , , , , ,

How to Make an Indian Village for Thanksgiving

I have a fun craft for you today.  Today I’m going to show you how to make an Indian Village perfect for the Holiday season.  Thanksgiving is coming quickly and with Thanksgiving comes decorating for the Holiday.  This Indian Village would be a great Thanksgiving decoration.  Let’s do it.

Check out our other Thanksgiving Crafts


How to Make an Indian Village for Thanksgiving


Materials Needed

Printer

Paper

Markers or Crayons

Glue or Paste

Sand, Gravel and Rocks

Twigs

Small Table


Below are the printable templates.  Click on the image to make larger and to print.

8×10 Size Template


Printable 8x10 size template


Large Template


Printable large template


Step 1


Print out template.


Print out template.


Step 2


It is fun to draw Indian like designs all over each teepee.


It is fun to draw Indian like designs all over each teepee.


Step 3


Cut out... Fold... Paste.


Cut out… Fold… Paste.


Step 4


Finished Indian village craft


On a table, place a mound of course sand and gravel with rocks, large and small.  The rocks can be placed to hold the sand on the table.  Get twigs and stick in the sand for a forest effect.  Place the wigwams as you wish.  After wigwams are placed on the sand pile, stick a few twigs through the holes to help keep them in place.

Wow, what an amazing Thanksgiving decoration, huh?!  Can you believe just from 4 easy steps you were able to create this Indian Village?  You did an awesome job!!

Technorati Tags: , , , , , , , , , , , , , , ,

How to Make a Bats Mobile for Halloween

Bats come out at night….. and Halloween is no exception.  Why not totally spook out your house by adding this creative Bats Mobile decoration inside this Halloween.  Or, better yet…. have your child make a few of these mobile crafts and they can fill their bedroom with these spooky Halloween creatures.

Check out our other Halloween Crafts.


How to Make a Bats Mobile for Halloween


Materials Needed

Sticks of Different Sizes

Thread

Printer

Hole Punch

Scissors


CLICK ON IMAGE TO OPEN IT UP BIGGER TO PRINT.


Printable Template for Bats Mobile


You will be printing the above template shortly.


Step 1


Fasten a few sticks of different sizes together with thread


Fasten a few sticks of different sizes together with thread.  Tie some pieces of thread from these sticks.


Step 2


Print bat templates.  Cut out... Punch a hole in each bat


Print bat templates.  Cut out… Punch a hole in each bat.


Step 3


Now just pull thread thru hole and tie a knot


Now just pull thread thru hole and tie a knot.


How to Make a Bats Mobile for Halloween


Now, THAT’S a fun craft that is pretty easy to make.  Have fun decorating for Halloween and don’t forget to get a little “Batty”.   🙂

Technorati Tags: , , , , , , , , ,

How to Make a Halloween Spider on His Web

I don’t know about you, but when I think of Halloween there are a few spooky characters I think of.  I think of witches, ghosts, skulls and of course the spider.  I just find spiders very scary.  In this post you will learn how to make a Halloween spider on his web perfect for decorating and displaying with your other Halloween paraphernalia.  On lookers will love it!!

Also check out our other Halloween Crafts OR Learn How to Draw a Cartoon Spider Web.


Halloween Spider and his Web Craft.


Materials Needed:

Chopsticks (or other type of sticks)

Glue

Yarn

Black Pom Poms (one big and one small)

Googly Eyes

4 Pipe Cleaners


Step 1


Place chopsticks on top of each other like above


Place chopsticks on top of each other like above (an x shape with a line through it).


Step 2


Glue all the sticks together and then take some yarn and wrap it around the middle


Glue all the sticks together and then take some yarn and wrap it around the middle.  Glue all together in the middle again.


Step 3


Start wrapping the string around the chopsticks


Start wrapping the string around the chopsticks.  Make a loop around each stick as you create the web.

Step 4


Keep wrapping yarn or string all around the sticks


Keep wrapping yarn or string all around the sticks like you see above.  Wrap the yarn around each stick as you continue the web pattern.  At the end tie a knot and glue to the end.


Step 5


Glue 2 black pom poms together


Glue 2 black pom poms together… one big and one small.  Glue googly eyes on smaller pom pom.


Step 6


Cut 4 pipe cleaners in half


Cut 4 pipe cleaners in half.  Each half is a leg.  Bend each half into a letter Z shape and glue onto big pom pom.


Step 7


 Glue the spider on the web or tie a piece of yarn


Glue the spider on the web or tie a piece of yarn to it and attach to web.


Halloween Spider and his Web Craft.


Isn’t this craft perfect for Halloween?  The kids will love doing this craft, but they will also love the finished product even more.  They will certainly enjoy displaying it proudly this Halloween season.  And, make sure to check out our other Halloween Crafts so you can decorate your entire house this Halloween.

Technorati Tags: , , , , , , , ,

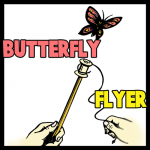
How to Make a Flying Butterfly Toy Arts and Crafts Project for Kids

Kids love playing with this flying butterfly toy. This is an arts and crafts project to make a  butterfly toy that will really fly up to 15 feet up in the air. This is for older kids as it is too difficult for younger kids to master…although they can with some supervised guidance from an adult.


How to Make a Flying Butterfly Toy Arts and Crafts Project for Kids


How to Make a Flying Butterfly Toy Arts and Crafts Project for Kids

Crafts Materials Needed

– Paper

–  Thread Spool

– Pins

– Dowel or Stick

– Strong String or Cord

Step 1


Firstly, fold an oblong piece of paper 4 inches by 5 1/2 inches on its short diameter.


Firstly, fold an oblong piece of paper 4 inches by 5 1/2 inches on its short diameter.

Step 2


One fourth inch from fold draw a line and mark an 'x' halfway down on it.


One fourth inch from fold draw a line and mark an ‘x’ halfway down on it.


Step 3


Draw butterfly like in the drawing that you see above.


Draw butterfly like in the drawing that you see above. The dashed line is the line that we drew in the previous step. Cut out this pattern and trace on to a piece of cardboard, making a large pin hole through the ‘x’ on each side of the body. Cut out cardboard butterfly and color on both surfaces.

Step 4


Step 4 : Butterfly Flier Flying Toy


Fasten 2 pins, securely, in the top of an empty thread spool. Make sure to let them stick out about an eighth of an inch. Also, try to placed the pins so that they are exactly opposite each other across the hole and about a half inch apart from each other.

Step 5


A piece of dowel or any round stick about a half inch in diameter and a foot in length is the next requirement.


A piece of dowel or any round stick about a half inch in diameter and a foot in length is the next requirement.


Step 4 How to Make a Flying Butterfly Toy Arts and Crafts Project for Kids


Parental help / permission might be require for this part of the craft, depending on your age. Shave off some of the wood on the stick or dowel so that the stick is a little less as wide as the diameter (width) of the spool’s hole. Do this on the end of the dowel…the same length as the length of the spool. Finish so that the spool has a little platform on which to rest when thrust over end of stick.

Step 6


Step 6 in making butterfly flyer toy


Tie a knot near the end of a piece of strong string or cord about 2 feet long. Place the end with NO knot on the spool and start winding the string on the spool.

Step 7 – The Fun Part – How to Play With Your New Butterfly Toy.


Step 7 - The Fun Part - How to Play With Your New Butterfly Toy.


Now for the fun. Put the spool on the stick. Now slip pinholes in butterfly’s body over the pins that are in the spool. Then catching hold of a knot, give the string a quick jerk. Away will fly the butterfly … sometimes 15 feet or more up into the air.

Alternative to Butterfly : A Pair of Bird’s Wings


Alternative to Butterfly : A Pair of Bird's Wings


Technorati Tags: , , , , , , , , , , , , , ,