A Collection of Hanukkah Menorah Crafts


A Collection of Hanukkah Menorah Crafts


Hanukkah is just days away.  And, with the beginning of Hanukkah comes the lighting of the candles.  How about making a unique and creative Menorah yourself?  Don’t think you can?  Well, take a look at the following 15 Hanukkah Menorah Crafts I found on the internet.  All are amazing and you are sure to love them all.  Some are easier than others, but surely you can find one that will meet your needs…. and you will enjoy making them yourself no doubt.

Check out our other Hanukkah Crafts.

A Collection of Hanukkah Menorah Crafts

(1)  Styrofoam Hanukkah Menorah Craft


Styrofoam-Menorah-Craft


This is a super cute craft.  It’s made from Styrofoam and some birthday candles.   It’s a whole lot of fun and it’s not difficult to make at all.  I found this craft over at All Kids Network and it is definitely worth checking out.


(2)  Plastic Toy Menorah


Plastic Toy Menorah


Isn’t this Hanukkah Menorah craft adorable?!  It really is.  I found this craft over at Aunt Peaches and I just love it.  Here she shows you how to take a toy, some clay, paint and glitter and presto you can make a super cute Hanukkah Menorah.


(3)  Plaster of Paris Hanukkah Menorah 


Plaster of Paris Hanukkah Menorah


Here with this creative Hanukkah Menorah craft you will be making 9 individual candle holders.  You and your children will be able to arrange them any way you would like to celebrate the 8 nights of Hanukkah.  Check out Kveller for all the craft details.


(4)  Birthday Candle Menorah


Birthday Candle Menorah


This might look like you are celebrating a child’s birthday that is turning 9, but it’s not.  This is a Birthday Candle Hanukkah Menorah.  Made from Birthday candles, clay and paint you and your kids will have a blast making this Hanukkah Menorah.  I found this craft over at Activity Village.  Make sure to check it out for yourself.


(5)  Tot Friendly Hanukkah Menorah


Tot Friendly Hanukkah Menorah


Here is a kid-friendly Menorah that everyone in the family will enjoy making… and lighting.  Instructables shows you how to take a few recycled materials, some Mod Podge and LED tea lights and make your very own tot friendly Hanukkah Menorah for your home.  Check it out.


(6)  Handprint Menorah


Handprint Menorah


Well, I know this isn’t exactly a Hanukkah Menorah you can light…. but it is a super fun Menorah craft for the youngest of Crafters.  This is one of our very own Menorah crafts and the kids love it.  Simply made from paint and your child’s hands your little one will love making this Handprint Menorah.


(7)  Baby Food Jar Menorah


Baby Food Jar Menorah


Here is a unique spin on the traditional Hanukkah Menorah.  Aparently Speaking shows us how to take some baby food jars and make them into a beautiful Hanukkah Menorah.  I love the way this Menorah looks.  Check out her site for all the craft details.


(8)  Glass Bottle Menorah


Glass Bottle Menorah


I love this Hanukkah Menorah craft.  I just love how natural and clean the white bottle look against the blue candles.  This is an easy craft that is sure to be a lot of fun.  Ready Made shows you how to get this same Menorah look for yourself in great detail.


(9)  Alphabet Blocks Menorah Craft


Alphabet Blocks Menorah Craft


If you have little ones at home you surely have some alphabet blocks.  Your kids will get a kick out of this Hanukkah Menorah Craft.  Here Creative Jewish Mom shows you how to take ordinary alphabet blocks and transform them into this creative Hanukkah Menorah.


(10)  Wood Menorah


Wood Menorah Craft


I love this creative Menorah Craft.  It’s so colorful and just makes me happy to look at it.  I found this Menorah craft at Better Homes & Gardens.  Here they use different sized wooden beads and spools to create the individualized candlesticks used for this Menorah.  Check it out for yourself.


(11)  Cookie Menorah


Cookie Menorah


Here is a tasty Menorah you are sure to love.  Using a lollipop stick attached to the cookies you are able to attach them to a Menorah.  This Hanukkah Menorah craft looks beautiful finished and added as a centerpiece to any table.  Go to Sweet Designs to check it out.


(12)  Spool Menorah


Spool Menorah


This is a cool idea.  Here Parents explains how you can make this adorable and colorful Hanukkah Menorah for yourself.  Made from spools, colored pencils and yellow erasers (and some other materials) you can create this same look for yourself.  And, there is no flame…. so this Menorah your child can touch.


(13)  Macaroni Menorah


Macaroni Menorah Craft


I love macaroni crafts…. and so do kids.  Here is a Hanukkah Menorah Macaroni craft.  Free Kids Crafts shows you how you can take macaroni and lentils and make a festive Menorah.  Hang it up proudly during Hanukkah for all to see.  You can even talk about the Festival of Lights while doing this craft.


(14)  Sparkly Hanukkah Menorah


Sparkly Hanukkah Menorah Craft


Here is a fun Hanukkah Menorah craft that you and your kids are sure to love.  Upper West Side Mom shows us how to take a block of wood, hex nuts and some other materials and create these elegant looking Menorahs.  Check out the site for all the craft details.


(15)  Manzanita Branch Hanukkah Menorah


Manzanita Branch Hanukkah Menorah


How beautiful is this Hanukkah Menorah?  So beautiful.  And, Martha Stewart shows us how you too can have this Manzanita Branch Hanukkah Menorah.  I love how this Menorah looks as a centerpiece at the table.  It’s breathtaking.

Technorati Tags: , , , , , , , , , , , , ,

How to Make a Mayflower Walnut Boat

I have a fun craft for you…. it is a Thanksgiving craft.  Today I’m going to show you how to make a Mayflower Walnut Boat.  This boat will actually float.  So, it is a craft that will not only be a ton of fun making, but will also be loads of fun playing with.  You will need a bit of help from an adult.  Have an adult break open the walnut with a nutcracker.  It needs to be broken in half…. not crushed.  So, an adult will be able to help you with this.  Let’s get started with this fun craft…. grab the materials needed and we will get to it.

Check out our other Thanksgiving Crafts.


How to Make a Mayflower Walnut Boat


Materials Needed

Walnut

Nutcracker

Paper

Pen or Pencil

Scissors

Clay, Play Doh, Gum or Wax

Toothpick


Step 1


Get a nice walnut.


Get a nice walnut.


Step 2


Adult should split shell without cracking.


Adult should split shell without cracking.


Step 3


Draw a shape that is like a square, but wider at the bottom.


Draw a shape that is like a square, but wider at the bottom.  Now cut it out.


Step 4


Fill with clay, play doh, gum or wax


Fill with clay, play doh, gum or wax (with help).


Step 5


Now take a toothpick and stick it into the gum (or clay or wax) as well as thru the paper twice (as seen).


Now take a toothpick and stick it into the gum (or clay or wax) as well as thru the paper twice (as seen).


Step 6


The boat actually works.... set it to sail in the bathtub.


The boat actually works… set it in the bathtub and blow on its sail.

Technorati Tags: , , , , , , , , , , , ,

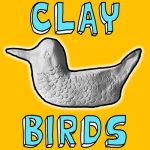
How to Make Clay Birds

I have a fun clay activity for you.  Today I’m going to show you how to make Clay Birds…. or really any Clay Animal you would like to make.  The only material you will need for this craft is clay…. that’s it.  The first sight of clay as it is taken from a crock or plastic bag is enough to get kids interested. Show them to roll, flatten, remove air bubbles, and what to do so the clay will not dry too fast and crack.  This first clay project serves to give kids experience with the clay, and incidentally endears it to them.  So, grab some clay and let’s get started.

Check out our other Clay & Sculpting Craft Ideas


How to Make Clay Birds


Materials Needed

Clay


Step 1


Start with a ball or an egg-shaped lump of clay


Start with a ball or an egg-shaped lump of clay, modeling it with the palms of the hands – but not working over long on it.


Step 2


Model in a solid mass with no detail.


Model in a solid mass with no detail.


Step 3


Begin shaping the clay into an animal.


Begin shaping the clay into an animal.


Step 4


Give the animal some detail


Give the animal some detail…. Shape head, wings, and tail if you are making a bird. If an animal, keep legs and ears close to the body.


How to Work with Clay

STORE natural and water-base clays in galvanized garbage buckets, earthenware crocks, jars with screw-top lids, or plastic bags. Avoid high temperatures, but do not let the clay freeze.

WHEN WORKING with clay, keep the excess covered with a damp cloth, or return it to the covered crock or can in which it is kept. Pieces will soften if soaked in water.

CLAY SHRINKS during the drying process, preventing the use of any type of permanent framework. Children can note shrinkage in drying and make things large enough to allow for this.

LIMIT the child to making compact, bulky figures without delicate appendages—unless there is plenty of time for him to experiment and find out these appendages fall off. Show him how to pull out head, arms, and legs for figures of people and animals.

COVER tables or desks with paper or cardboard when clay work is being done. For the surface of a permanent clay area, a piece of hall-runner linoleum looks well and is practical. Wooden boards are sometimes used for working surfaces.

Technorati Tags: , , , , , , , , , ,

How to Make a Clay Pinch Pot

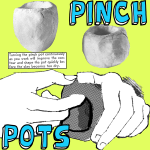
I have a fun and creative craft for you today.  In this post I’m going to show you how to make a Clay Pinch Pot.  Actually, in this post I don’t show you how to make this pot step-by-step…. instead I just direct you.   This way you are using your own creative juices to make this clay pinch pot yourself.   Use the image and instructions below to give direction on how to make your own Clay Pinch Pot.  So, grab some clay and let’s get started.

Check out our other Clay & Sculpting Craft Ideas


How to Make a Clay Pinch Pot


Materials Needed

Clay

Sponge & a bit of Water

Paint (optional)


How To:

The simplest clay dish to make is fashioned from a ball of clay into which the thumb is pressed as the clay is turned in the palm of one hand and guided with the other. From this thumb hole, the sides are slowly pressed out uniformly. This is called a pinch pot. Make sure that there is at least 1/4 inch thickness on the bottom of the pot.  **Note** Turning the pinch pot continuously as you work will improve the contour and shape the pot quickly before the clay becomes too dry.

Pinch pots should be dried on a hard and clean surface. When the surface is hard, the children can sponge their pieces gently to remove irregularities. Caution them to use water, sparingly. Under glaze colors can be applied with a clean paintbrush. Dry the pinch pot until completely dry and then you can paint it.

Alternatively:

If you are with a teacher or an artist who has access to a kiln…then this adult can fire your pinch pot in a kiln. When the pieces are cold, they may be dipped or sprayed with transparent glaze and fired a second time in the kiln. This makes them glossy. Such pottery will hold water and can be used as vases.

Technorati Tags: , , , , , , , , , , , , ,

How to make a Tricorn Hat Badge

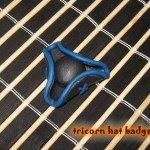
Today I’m going to be showing you how to make a Tricorn Hat Badge.   The Tricorn Hat was a very popular hat in the 18th Century.  The turned-up portions of the brim formed gutters that directed rainwater away from the wearer’s face, depositing most of it over his shoulders.  Well, in this post I’m going to show you had to make this style Hat into a brooch that you can wear.  Because we’ll use oven-hardening polymer clay you’ll need a little help from an adult.

Check out our other Jewelry Pin Crafts.

Laura from Dacian Moon Handmade will show you, step by step how to make this tricorn hat badge.


Materials Needed

– toothpick
– black and blue polymer clay
– roll (you can use anything tubular – I used a vitamins container)
– baking paper
– baking tray
– cutter
– brooch base
– craft glue


Step 1

Cut a piece of black clay.


Condition it by hand, simply mix it and squish it with your fingers. You may want to roll it into a log between your palms, fold it in half, and then roll again.
Finally, make a ball with it.


Step 2

Cut another piece (about the same size as the first).


Condition it too and make another ball.


Place it on a piece of baking paper and flatten it.


Use the roll to flatten it well, until is thin enough.


Like this.


Step 3

Place the ball on the flatten one, in the center.


Step 4

Lift the margins around the ball to form three corners.


Step 5

Take the blue polymer clay…


… and condition it.


Make a roll from it, moving your fingers forward and backward, as in the picture.


Do that until your roll is as thin as the toothpick.


Step 6

Gently, place the blue roll on the edge of the hat, pressing a little bit.


It will look like that.


Cut the extra blue clay…


… and with it make another roll, thinner than the first.


Step 7

Cut the new roll in 6 pieces.


Step 8

Place them two by two into “x’s” on the hat’s sides.


It will look like that.


Step 9

Now you’ll need the help of an adult.
Place the hat (with it’s piece of baking paper) on the baking tray, and bake it according to the instructions on the polymer clay package (they depend on the brand you use: fimo, cernit, sculpey…, but usually it is one half of hour at 230 F or 110 C)


Step 10

Let it cool down.


Step 11

Apply a layer of craft glue on the brooch base…


… place it on the back side of the hat. Let it dry well, and…


… the badge is ready !


And, there you have it…. you just finished making your Tricorn Hat Badge.  How did your badge turn out?  Let me know in the comments below.  And, make sure to take a picture of it too and add it to the comment…. I’d love to see it.  Now, go wear your Tricorn Hat Badge proudly.

Technorati Tags: , , , , , , , , , ,

How to Make a Wooden Beads Bracelet with an African Mask Charm

Black History Month will be coming to a close in the next couple of days.  With that being said…. I thought we could use this opportunity to make a craft for Black History Month.  Today I’m going to show you how to make a Wooden Beads Bracelet with an African Mask Charm.  The bracelet turns out just absolutely beautiful…. it truly does.  And, when using the ochre paint it ages the charm to give it an authentic look.   Because we’ll use oven-hardening polymer clay for the mask, you’ll need a little help from an adult.  So, grab the materials needed and let’s get started.

Check out our other Jewelry Crafts

Laura from Dacian Moon Handmade will show you how to make this craft.


Materials Needed

– toothpick
– brown polymer clay (I placed the toothpick beside it to show you how much polymer clay you’ll need)
– thread and needle
– scissor
– wooden beads
– paints (ochre, red and green)
– paintbrush
– baking paper
– baking tray


Step 1

Condition polymer clay by hand, simply mix it and squish it with your fingers. You may want to roll it into a log between your palms, fold it in half, and then roll again. Part it in two:  a small part and a bigger part.


Step 2

Take the bigger part and make a roll with it.


Gently squish one part, to have a pointy end.


Do the same with the other part.


Step 3

Place it on a piece of baking paper and flatten it.


Step 4

Using the toothpick, start to sculpt the eyes…


… like this.


Add eyebrows.


Make an outline of a nose.


Step 5

Take a small part of polymer clay and make it as a shape of a tear.


Place it inside the nose markings. Press gently to “glue” it.


Step 6

Sculpt the mouth.


Step 7

With the toothpick make a hole in the upper part of the mask.


Take care that the toothpick goes through the mask and gets out on the other side.


Step 8

Place the mask on the baking paper again and take another small part of polymer clay.


Roll it and place it under the hole.


Flatten it and make an “x” on the lower part of it.


Step 9

Sculpt the markings on the forehead, like in the picture.


Step 10

Now you’ll need the help from an adult.  Place the mask (with it’s piece of baking paper) on the baking tray, and bake it according to the instructions on the polymer clay package (they depend on the brand you use: fimo, cernit, sculpey…, but usually it is one half of hour at 230 F or 110 C).


Step 11

Let it cool down.


Step 12

With the ochre paint… coat the markings on the sides.


Make points around the bar on the forehead…


… and on the face, like this:


Step 13

With red paint coat the upper part …


… and add a line on the middle of the lower lip.


Step 14

With green paint mark the lines between the red and ochre. Let it dry.


Step 15

Now we’ll need the beads, needle and thread and the mask.


Make a knot near the end of the thread…


… and start adding beads on it (using the needle, of course).


Step 16

Measure on your hand to know when you are at the middle of the bracelet.


Put a jump ring on the mask and put it on the thread too (or just knot it on the thread).


Step 17

Continue to add wooden beads to complete the other half of the bracelet, then make a knot.


Now, you can wear your bracelet.


Isn’t this bracelet just absolutely gorgeous?  The ochre paint makes this African Mask Charm look very old, doesn’t it?  Just like it should.  I hope you had fun making it…. now enjoy wearing it.

Technorati Tags: , , , , , , , , , , , , , , ,

How to Make a Sailor Moon Wand

Do you like the Sailor Moon cartoon?  If so, then I have a fun craft for you today.  In this post I will show you how to make a Sailor Moon Wand from the Sailor Moon cartoon.  Isn’t that a treat?  The craft is not complicated at all and it is a ton of fun.  Made with Play Dough and a Crystal this craft turns out looking exactly like the Sailor Moon Wand on TV.  So, grab the materials needed and let’s get started on this fun craft!!

Check out our other Clay & Play Dough Crafts.

Laura from Dacian Moon Handmade will show you how to make it.


Materials Needed

– one piece of yellow play dough
– one piece of pink play dough
– transparent crystal
– pin


Step 1

Take ¾ of the yellow play dough (you’ll need a little bit of yellow later)…


… and make a roll with it.


It is ok for the edges to be thinner because we’ll make a Moon of it. Just bend it like a backwards “C” for that.


Step 2

Take the pink play dough, condition it… Put down a little piece …


… and from the rest make another roll.


Step 3

Condition the little piece of pink …


… and make a ring of it, to link the pink roll to the Moon.


It will look like this.


Step 4

Now we’ll start decorating.
With a small part of yellow make a little ball. Flatten it and then squish it with two fingers, like in the picture.


Make a crease on the opposite site of it and you’ll have a little wing.


Make another one and place them on the pink ring.


You’ll need another small flattened ball…


… to place on top of the two wings.


Add three more little flatten balls on the pink roll and we are almost done.


Step 5

Put the pin through the crystal…


… and place it through the moon and the pink roll.


That’s it! A perfect Sailor Moon wand.


And, there you have it…. you just made a Sailor Moon Wand.  Isn’t it pretty?  It’s probably powerful too.  Now, enjoy imagining that you are part of the Sailor Moon team.

Technorati Tags: , , , , , , , , , , , , , , ,

How to Make a Crab Ring

Oh boy…. do I have a fun craft for you right now.  I am going to be showing you how to make a Crab Ring out of Clay.  Yep…. and it’s going to be a lot of fun.  You might need a little bit of adult help as the clay will need to be baked for a little bit to harden the clay.  But, other than that you should be good on your own.  This crab ring will be perfect for you to wear this coming Spring….. or better yet, give it as a gift.  Either way…. this crab ring is sure to be loved.  So, let’s get started.

Check out our other Clay & Sculpting Crafts.

Laura from Dacian Moon Handmade will show you how to make this crab ring.


Materials Needed

– toothpick
– polymer clay : white, black, red – I used transparent red for this project, but any red will do
– acrylic paints (white, black and red/pink)
– metallic ring base
– baking paper
– baking tray


Step 1

Take a small piece of red clay and condition it.

(Condition polymer clay by hand – simply mix it and squish it with your fingers. You may want to roll it into a log between your palms, fold it in half, and then roll again.


Press it well on the back of the base.


This way we will incorporate the base in the clay and we don’t risk breaking it.


Step 2

Take a little bit more than a half of the red clay, condition it …


… and make a ball with it.


Step 3

Place the ball over the base…


… and raise one part. This will be the face.


Take care to merge the sides of the clay from the back of the base with that new ball of clay, to incorporate the base.


Step 4

Let’s make the claws.


Take the remaining red clay and part it in half. Make an oval shape from one half…


… and press on head with your fingers.


On the other head make a crease – you can use the toothpick for that.


Now we have a claw. Place it on the crab body, like in the picture.


Step 5

Repeat the previous step to make the other claw, then place it on the crab body too.


Step 6

Part the small piece of black clay in half.


Condition it and make the eyes from it.


Then add small white circles to the eyes…


… like that.


Step 7

Place the ring on the baking tray, and bake it according to the instructions on the polymer clay package (they depend on the brand you use: fimo, cernit, sculpey…, but usually it is one half of hour at 230 F or 110 C) – this is the part when you could use a little help.

Let it cool down.


Step 8

If you used transparent red clay, like me, you’ll notice that the color has become more alive and intense because of the baking.


Step 9

Use black paint to draw the crab mouth.  Make it cute … or fierce! Just have fun.


And, there you have it…. you just finished making your Crab Ring.  How did it turn out for you?  Let me know in the comments below.  And, take a picture of your crab ring and share that in the comments as well.  I’d love to see it.

Technorati Tags: , , , , , , , , , , , ,

How to Make Clay Bowls and Dishes

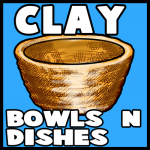
If you love sculpting with clay….. then I have a fun craft for you.  Today I’m going to show you how to make Bowls and Dishes made out of Clay.  You will need some adult supervision for this craft as the clay will need to be baked once you have finished forming your Bowls and Dishes.  Simply bake the clay according to the clay’s instructions.  Are you ready to get started?  Simply grab some clay and we will move on with the craft.

Check out our other Clay & Sculpting Crafts.


How to Make Clay Bowls and Dishes


Materials Needed

Clay


Step 1


Roll a lump of clay between your hands and the table until it forms a coil.


Roll a lump of clay between your hands and the table until it forms a coil.


Step 2


Flatten a lump of clay to form a round cookie shape.


Flatten a lump of clay to form a round cookie shape.  It is called a disk.


Step 3


Lay the coil of clay on and around the edge of the disk.


Lay the coil of clay on and around the edge of the disk.  Overlap the tapering edge.


Step 4


With the tip of your index finger, rub the coil on the outside and inside.


With the tip of your index finger, rub the coil on the outside and inside.  This should make a firm edge and the object resembles a small dish.


Step 5


Let dry.


Let dry.  Bake or place in kiln depending on your clay’s instructions.


Step 6


Add coil upon coil to form a higher edge like a bowl.


Add coil upon coil to form a higher edge like a bowl.


Step 7


After building up the straight edge bend it wavy.


After building up the straight edge bend it wavy.  Be sure it is moist or it will crack.


Step 8


Fasten a coil to the cup for a handle.


Fasten a coil to the cup for a handle.

So, there you have it…. now you know how to make Bowls, Cups and Dishes out of Clay.  What did you make?  Let me know in the comments below.  Don’t forget to take a picture and post that in the comment as well…. I’d love to see what you made.

Technorati Tags: , , , , , , , , , , ,

How to Make a Whistling Birdie Toy

I have a fun craft for you today.  I’m going to show you how to make a Whistling Birdie Toy.  This Whistling Birdie toy is a traditional toy from Romania.  It is common to see the children of Romania playing with a Whistling Birdie toy like the one I’m going to show you how to make today.  And, believe it or not…. it will actually whistle.  And, if you add a little water to the whistling birdie it will sound like it is a real bird.  Because you will be using polymer clay you will need a little help from an adult.  So, grab the materials needed and let’s get started.

Check out our other Toy Crafts.

Laura from Dacian Moon Handmade will show you, step by step, how to make this toy.


Materials Needed

– toothpick
– a piece of polymer clay (the color you want your bird to be)
– two little tubes (I use two little pieces from a flexible straw)
– baking paper
– baking tray


Step 1

Take a small part of clay…


… and condition it by hand, simply mix it and squish it with your fingers.


Roll it into a log using your fingers, like that:


The log will look like that.


Make a circle with the roll, by pressing the ends together.


Step 2

Take a little less than half of the remaining clay, condition it by hand.


Make it a ball and flatten it.


Using your big finger press the center of the clay piece.


Place the piece on the circle, like in the picture.


Step 3

Take a half of the remaining clay, condition it …


… and make it the same.


Later we will place it on top of the other one, reverted, so it should fit there.


Step 4

Place the tubes near the edges of the top piece, taking care to get off the clay that will get on the tubes.


Step 5

Use a half of the remaining clay to cover one tube, taking care to be higher than the tube, like in the picture.


Completely cover the tube.


Use the toothpick to make a hole like in the picture (that’s the reason we need the covering to be higher than the tube)


Step 6

Use all remaining clay to cover the second straw.


Completely cover it (not on top, of course.)


Try to make it look, as much as possible, like a bird’s head with an open beak.


Step 7

Place the top on the bottom of the figure, like in the picture.


Step 8

***Now you’ll need the help of an adult.
Place the bird (with it’s piece of baking paper) on the baking tray, and bake it according to the instructions on the polymer clay package (they depend on the brand you use: fimo, cernit, sculpey…, but usually is one half of hour at 230 F or 110 C)


Step 9

Let it cool down.


Step 10

You can use paints to make the bird beautiful.  I used a toothpick and silver paint.


And… This is our bird.


You can fill it half with water…


… and whistle. Without water it will simply whistle, with water it will make sounds like real birds.


Have fun whistling with your Whistling Birdie Toy.  How did your Whistling Birdie Toy turn out?  Did you paint it differently than me?  Let me know in the comments below.  And, take a picture of your birdie too…. you can leave it in the comments as well.  I’d love to see it.

Technorati Tags: , , , , , , , , , ,

How to Make Cute Fruit Pendants

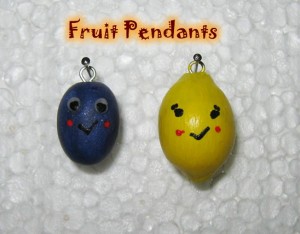
If you were looking for a super fun craft that turns out equally super cute…. then I have the craft for you today.  I’m going to show you how to make Cute Fruit Pendants.  These pendants are made from Polymer Clay, so they turn out really durable…. another words, they will last.  Add a little paint and a couple of eye pins and you have the materials needed to do this craft.  Keep in mind that the polymer clay will need to be baked, so you will need an adult for this part.  So, grab the materials needed and let’s get this craft started.

Check out our other Jewelry Crafts.

Step-by-step tutorial offered by Laura from Dacian Moon Handmade.


Materials Needed

– toothpick
– polymer clay: blue and yellow – we will make a plum and a lemon
– cutter
– acrylic paints (white, black and red/pink)
– 2 eye-pins
– baking paper
– baking tray


Step 1

Let’s start with the plum. Take the blue clay.


Condition polymer clay by hand, simply mix it and squish it with your fingers. You may want to roll it into a log between your palms, fold it in half, and then roll again.


Step 2

Make a little egg with it by rubbing it gently between your hands.


Step 3

Take one pin…


… and fix it on top of the blue egg.


Press until only the eye stays outside.


Step 4

Because we don’t bake every piece separately, we must do the lemon too. So, take the yellow clay…


… and condition it.


Step 5

Repeat the 2nd and 3rd steps: make a yellow egg…


… and place the pin on top of it.


Step 6

With three fingers squish the head.


Now it looks like a lemon.


Step 7

Place the fruits on the baking tray, and bake them according to the instructions on the polymer clay package (they depend on the brand you use: fimo, cernit, sculpey…, but usually it is one half of hour at 230 F or 110 C) – this part you need a little help from an adult.

Let them cool down.


Step 8

Use the toothpick to paint them. Add two white circles…


… then two black smaller circles to complete the eyes


Draw the mouth – make them smile.

That is the plum.


Now take the lemon…


… and paint it too. Be creative.


You can add red cheeks, for a drop of color.


Now, you can attach them to a chain or a thread or a bracelet… even to a key chain. Either way it will be super cute.  What way did you decide to display your Cute Fruit Pendants?  Let me know in the comments below.  And, take a picture of your fruit pendants and share that in the comment at well… I’d love to see how they turned out.

Technorati Tags: , , , , , , , , , ,

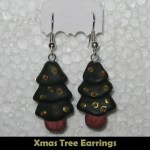
How to Make Christmas Tree Earrings

I have a fun and festive craft for you today.  I am going to show you how to make Christmas Tree Earrings.  They are perfect for a giftimagine how excited the receiver of this gift would be.  They would absolutely love them.  Or, they are so beautiful…. maybe you would like to keep them for yourself.  Either way…. the craft turns out lovely and perfect for this Holiday Season.

Check out our other Christmas Crafts.

Laura from Dacian Moon Handmade will show you how to make this, step by step.  You will need help from an adult for this tutorial.


MATERIALS NEEDED

– polymer clay: green and brown
– metallic gold paint (optional)
– cutter
– toothpick
– 2 pins with loop on one end
– 2 earring hooks
– baking tray
– baking paper


Step 1

Take a piece of brown polymer clay.


Condition it .

(Condition polymer clay by hand, simply mix it and squish it with your fingers. You may want to roll it into a log between your palms, fold it in half, and then roll again).

Part it in half.


Take one half and, with your nail or with the toothpick, make some creases on it – like bark.


Place it on a small piece of baking paper.


Step 2

Take a piece of green clay.


Condition it …


… and part it in three: one bigger, one a little bit smaller and the third even smaller.


Take the big one and flatten it.


Squish it gently between two fingers…


… then place it over the brown piece…


… like this.


Take the second piece of green clay…


And do the same…


… then put it over the first.


Do the same with the third piece of green clay – this will be the top.


Place it over the other two and the tree is ready.


Because we want to put it on an earring hook, we must place the pin through it.


Like this.


Step 3

Repeat the steps 1 and 2 to make another tree.


Step 4

Place them on the baking tray, and bake them according to the instructions on the polymer clay package (they depend on the brand you use: fimo, cernit, sculpey…, but usually it is one half hour at 230 F or 110 C) – this is the part when you could use a little help.

Let them cool down.


Step 5

Open the loop of the earring hook…


… and place the pin through it, like in the picture. Close the loop.


Do the same for the other tree and the earrings are ready.


Step 6 – optional

Use metallic gold paint to make points on the trees – they will look like globes.


The earrings are ready to be worn.


I told you these earrings are beautiful.  How did you earrings turn out?  Let me know in the comments below.  And, don’t forget to take a picture…. you can share your picture in the comment as well.  Now, go wear your Christmas Tree Earrings proudly.

Technorati Tags: , , , , , , , , , , , ,

How to make a Turkey Brooch

What is the most known symbol of Thanksgiving Day? The turkey, of course! Thanksgiving wouldn’t be Thanksgiving without the Turkey.  So, with that being said…. today I’m going to show you how to make a Turkey Brooch perfect for Thanksgiving.  What better way to show your love for the Thanksgiving Holiday than to parade around town wearing a Turkey Brooch?  So, let’s get started.

Check out our other Thanksgiving Crafts and Jewelry Crafts.

Tutorial offered by Laura from Dacian Moon Handmade . You will need help from an adult for this tutorial.


MATERIALS NEEDED

– white, red, green, terracotta polymer clay (and small parts of pink, black and blue)
– black paint
– craft glue
– cutter
– toothpick
– 1 brooch base


Step 1

Take a piece of white polymer clay.


Condition it .

(To condition polymer clay by hand… simply mix it and squish it with your fingers. You may want to roll it into a log between your palms, fold it in half, and then roll again).

Divide it in 4 parts.


Take 1 part, make a ball of it and flatten it…


Squish an end between two fingers, like this…


… then the other. Now it looks like a petal.


Repeat and make another 2 white petals.


Step 2

Take a piece of green polymer clay…


… condition it and divide it in 4 parts too.


Make two green petals and place them over the white ones, between them.


Step 3

Take the last piece of white clay…


… and make a bar under the petals with it…


… then continue with another two green petals, taking care that their edges are over the white bar too. This will make the brooch stronger.


Step 4

It’s time to make his head, so, take a piece of terracotta clay…


…condition it and make a ball with it. Flatten it.


Squish gently one end to look like this.


Place it in the middle of petals. This is the head.


Step 5

Take the blue clay and condition it. Make two bigger parts and one smaller of it.


Make a ball of one bigger part and flatten it.


Squish it gently on one end to look like this.


Place it beside the head and make two lines on it with the toothpick.


Make another one …


… and a small ball flattened in the middle. Now our turkey has a bow.


Step 6

Make a small heart of the pink clay…


… and place it in the middle of his face.


Over it we will put his nose, made of a small piece of red clay. Make it a roll …


… and squish an end.


Then, using the toothpick, place it over the small heart (this is his beak).


Step 7

Take a smaller piece of black clay…


… and part it in half. Those will be his eyes.


Step 8

Place it on the baking tray, and bake it according to the instructions on the polymer clay package (this depends on the brand you use: fimo, cernit, sculpey…, but usually it is one half of an hour at 230 F or 110 C) – this is the part when you could use a little help from an adult.


Let it cool down.


Step 9

The only thing you should do now is glue the brooch base on the back of our turkey… and, using the black paint and the toothpick, write something on the white bar. It can be anything but I think “How about a cheeseburger?” will be funny.


Now your brooch is ready.  Isn’t it adorable?  How did your turkey turn out?  Make sure to let me know in the comments below.  Add a picture to your comments so I can see your turkey.  I’d love to see how it turned out.

Technorati Tags: , , , , , , , , , , , , , ,

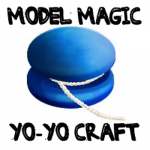
How to Make a Model Magic Yo-Yo

Yo-yo’s have been a popular toy since the 1920’s.  Kid’s love them now just as much as they loved them then.  When I was a kid I use to love playing with Yo-yo’s.  I actually got pretty good at it.  Well, today I’m going to show you how to make your very own yo-yo.  Made from Model Magic Clay and string you will be playing with your homemade Yo-yo in no time.

Check out our other Clay & Sculpting Crafts Ideas


How to Make a Model Magic Yo-Yo


Materials Needed

Model Magic Clay

Dull Butter Knife

2 Feet of String


Step 1


Roll Model Magic clay into a ball within the palms of your hand.


Roll Model Magic clay into a ball within the palms of your hand.


Step 2


Use a dull butter knife to cut two lines about a pinkie's width apart.


Use a dull butter knife to cut two lines about a pinkie’s width apart.  Dig out the clay… leave center intact.


Step 3


Let dry and then... Tie 2 feet of string onto center of the yo-yo.


Let dry and then… Tie 2 feet of string onto center of the yo-yo.


Step 4


Go play with your yo-yo.


That’s it…. you did it.  You just made a model magic yo-yo yourself.  Good for you!!  Now, go play with your yo-yo.

Technorati Tags: , , , , , , ,

How to make Ghost Earrings

Do you love Halloween like I do?  Do you love the dressing up and the scary Halloween characters?  Well good, today I have the craft for you.  Today I will show you how to make Ghost Earrings that you will surely enjoy wearing this Halloween….. and the future ones too.

Check out our other Halloween Crafts.

Tutorial offered by Laura from Dacian Moon Handmade . You will need help from an adult for this tutorial.


CRAFT MATERIALS NEEDED:

– night glow polymer clay
– eyes
– cutter
– toothpick
– jump-rings
– 2 earring hooks
– baking tray
– baking paper


Step 1

Take a piece of night glow polymer clay.


Cut it in half.


Condition it .

(Condition polymer clay by hand… simply mix it and squish it with your fingers. You may want to roll it into a log between your palms, fold it in half, and then roll again.)

Take the night glow polymer clay and make a ball of it and flatten it.


Squish an end between two fingers, like that.


Do the same with the other half.


Step 2

Using the toothpick or your nails…. make each ghost a mouth.


Make a hole on top of both ghosts…


… like that.


Step 3

Place them on the baking tray, and bake them according to the instructions on the polymer clay package (they depend on the brand you use: fimo, cernit, sculpey…, but usually it is one half  hour at 230 F or 110 C) – *Must have adult supervision.*


Let them cool down.


Step 4

Take one eye, remove the paper from its back…


And place it on its place.


Do the same with the other eye.


Do the same with the other ghost. Aren’t they cute?!


Step 5

Open one jump ring …


… and place it through the hole.


With it, link the ghost of the earring hook.

Do the same for the other and you have a pair of earrings that will glow in the night.


And, there you have it.  Two adorable earrings that will be so fun to wear this Halloween.

Technorati Tags: , , , , , , , , ,

How to make Halloween Glasses

I love making a big deal about Halloween…. dressing up in festive Halloween clothing and wearing funky Halloween jewelry.  But, have you ever thought of doing more?  Something that will undoubtedly get everyone’s attention?  How about wearing blinged out Halloween Glasses?  In this post I will show you how to transform everyday glasses into a fun pair of Halloween Glasses.

Check out our other Halloween Crafts.

Tutorial (a long one but easy to do) offered by Laura from Dacian Moon Handmade . You will need help from an adult for this tutorial.


CRAFT MATERIALS NEEDED:

– night glow polymer clay
– black polymer clay
– cutter
– toothpick
– glasses (they must be made of glass because we will bake them)
– baking tray
– baking paper


Step 1 – The Ghosts

Take a piece of night glow polymer clay.


Condition it .

(Condition polymer clay by hand, simply mix it and squish it with your fingers. You may want to roll it into a log between your palms, fold it in half, and then roll again)

Take the night glow clay and make a ball of it and flatten it… then squish an end between two fingers to form a ghost, like that.


Place it on the glasses frame, as if it is staying on the edge. You can see that it is not very firm, so we better add its hands.


Add a small night glow piece on one side…


… and split it in two on the lower part… like in the picture. These are her fingers.


Do the same on the other part. Now, the ghost is firm on her position.


Repeat making another ghost…


… and place it on the other side of the frame…


… like this


Using the toothpick …


Make them some mouths.


Step 2 – the Bats

Take the black polymer clay.


Split it in 3 parts. Two smaller and one bigger.


Take one smaller piece and condition it.


Lay a small piece aside… from the remainder make a ball.


Flatten it.


Using your nails mark the middle of it…


… then squish the new formed part like this…


… to form two corners.


Do the same on the lower part and on the side, until it looks like that.


Using your toothpick …


… define the center part.


This will be the body of the bat.


Use your nails to separate the body from the wings a little… in the lower part, like this.


Now, let’s make his wings. Press the toothpick on the sides to form the wing bones.


Like this.


Do the same on the other wing. Now it looks almost like a bat… he’s just missing his head.


Take the small part you left aside and make a little ball of it. Flatten it a little…


… and place it on the upper part.


Almost done. With two even smaller pieces of clay make its ears…


… and put them on their places.


You can make a mouth too.


Let’s put the bat on the frame corner, to mask it.


Repeat this step to make another bat for the other side.


Step 3 – The Cat

Take the bigger part of black polymer clay and condition it.


Make it in the form of a bread stick…


… then bend its ends.


Flatten it a little…


… and place it on the middle of the frame, between the ghosts.


Take a smaller part of black clay and make a ball with it.


Squish between two fingers to form a cat ear…


… then the other.


With your toothpick make her mouth and nose.


Make two small balls of white (or night glow) clay…


… to make her eyes.


And two even smaller black ones …


… to complete the eyes.


What do we still need? A tail!

So, let’s make another “bread stick” – a little thinner than the first one.


Curl it to look like a tail and put it on its place.


Then add the head… the black cat is ready.


Step 4 – the Baking

Place the glasses on the baking tray, and bake them according to the instructions on the polymer clay package (they depend on the brand you use: fimo, cernit, sculpey…, but usually it is one half hour at 230 F or 110 C).  *Must have adult supervision*


Let them cool down.


Now, the last thing is to make eyes for the ghosts, so use a paint marker to do that.


There you go…. you have finished your Halloween Glasses.


Now, those are some cool and unique Halloween Glasses.  You are going to look so festive this Halloween with your homemade Halloween Glasses.  Put them on and wear them proudly.

Technorati Tags: , , , , ,