How to Make a “Unity for All” Bracelet for Martin Luther King Day

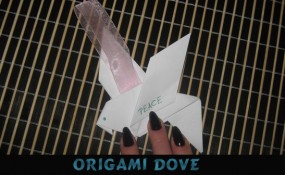
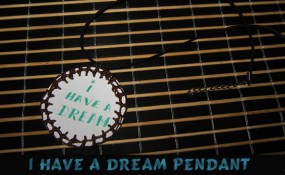
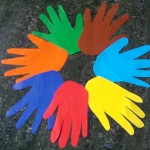
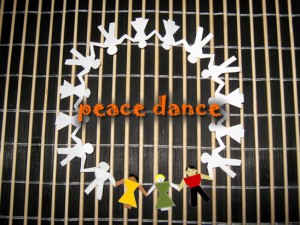
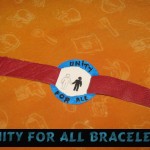
Today is Martin Luther King Day.  Martin Luther King is best know for his “I Had a Dream” speech where he basically said in his dream all men were created equal.  He lived his entire life fighting for that fact.   Today I’m going to show you how to make a “Unity for All” Bracelet for Martin Luther King Day.  This bracelet represents Unity for all…. bringing us all together no matter the color of our skin.  Isn’t that what Martin Luther King would have wanted?  So, grab the materials needed and let’s get started.

Check out our other Martin Luther King Crafts.

Tutorial offered by Laura from Dacian Moon Handmade.


Materials Needed

– cardboard
– pencil
– a band of leather (can be replaced with ribbon)
– varnish (can be nail varnish too)
– black and blue paint
– paintbrush
– toothpick
– round nose pliers
– 2 jump rings
– 2 ribbon cord ends
– 1 lobster clasp


Step 1

Draw a circle on the cardboard.


Cut it out.


Step 2

Place the cardboard circle over the leather …


… and mark the  places where leather will go through the cardboard…


… like this.


Make two cuts on the marks.


Put a side of the leather through one cut…


… then the other side through the other cut, until the circle is in the middle.


Step 3

Using the pencil…


… draw two curves on the cardboard, like this.


Then two human silhouettes.


Step 4

Paint one of them with black – I used the toothpick.


It will look like this.


With blue, color the up and down parts…


… like this…


… and write with black…


… “Unity for All”.


Step 5

To protect the cardboard it is good to use a varnish on it. It can even be nail varnish.


Apply it with the paintbrush all over the cardboard.


Let it dry well.


Step 6

Take a cord end…


… and put it on one end of the leather band, using the round nose pliers.


Like this.


Open one jump ring…


… and attach the lobster clasp of the cord end with it.


Do the same on the other side. You can add here a piece of chain (or you can put only the jump ring).

Now your bracelet is ready.


And, there you have it… you just finished your “Unity for All” Bracelet for Martin Luther King Day.  Wear it proudly….. after all Martin Luther King worked hard to make sure that everyone is created equal.

Technorati Tags: , , , , , , , , , , , ,

How to Make an Origami Dove

Today I’m going to show you how to make an Origami Dove.  I thought since today is Martin Luther King Day that today would be a perfect time to make a dove craft.  After all a Dove represents Peace and Tranquility and bottom line….. isn’t that what Martin Luther King wanted for everybody?  Martin Luther King was a great man and today it is all about remembering how wonderful he was and what he represented….. equality for all.  So, gather up the materials needed and let’s get started.

Check out our other Origami & Paper Folding Crafts or Check out our other Martin Luther King Crafts.

Laura from Dacian Moon Handmade  will show you, step by step, how to make an origami dove decoration.


Materials Needed

– white paper
– colored pen
– scissors
– ribbon
– glue


Step 1

Cut a square of white paper.


Place it with a corner to you.


Bring the left part over the right one.


Step 2

Bring the upper corner over the middle one, like this.


Do the same for the lower corner.


Step 3

Turn it over.


Bring the upper corner over the lower one.


Fold the left corner over the piece, like this.


Unfold.


Fold the lower corner over the piece.


Unfold.

Let’s make the wings.

Open the right part like this…


And bring the lower corner to the left, following the crease you created. Press.


It will look like this.


Do the same on the other side.


Step 4

Now it is time for the beak. Fold the left corner on the back…


… like this. Press it well because it is thick enough that it will unfold itself.


Step 5

To make the tail, bring the right part down, like this…


… and press.


Step 6

We will fold one wing down, like this, to make it look better.


Step 7

Using the colored pen draw an eye and decorate it the way you like. I wrote “Peace” on one wing.


Step 8

Apply a layer of glue on the ends of the ribbon…


… and place it between the back wing and the body.


It will look like this.


Doesn’t the Dove turn out lovely?  It will be perfect to decorate a window or a doorknob this Martin Luther King Day.  After all a Dove represents Peace and Tranquility.  Isn’t that what Martin King longed for?

Technorati Tags: , , , , , , , , , , , , ,

How to make an “I Have a Dream” Pendant for Martin Luther King Day

Today is Martin Luther King Day.  And, what better way to celebrate Martin Luther King’s Life than to make a craft in is honor.  Remember that Martin Luther King had a dream….. in his dream everyone was created equal.  Martin Luther King was a great man and today we are going to honor the “I Have a Dream” speech he made by making an “I Have a Dream” pendant.  You can wear this pendant to honor Martin Luther king today and everyday you want to remember what Martin Luther King was all about.

Check out our other Martin Luther King Day crafts.

Laura from Dacian Moon Handmade will show you, step by step, how to make this simple pendant.


Materials Needed

– a cardboard disc
– colored pen
– scissors
– cord
– thick thread and needle


Step 1

Put the thread in two on the needle and make a little hole on one side of the disc, near the edge.


Like this.


Put the thread again through the same hole, next make another hole near first, and so on…


… until you cover all the edge.


Step 2

Now, put the needle under a bunch of thread…


… and make a knot, like this.


Make knots on every bunch of threads.


Step 3

Start a second row of knots.


It will look like this (if you make the holes more close to one another, the pattern will look more tight).


Use the pen to write in the middle “I Have a Dream”…


… like this.


The only thing you have to do now is put the cord through the upper part (under a bunch of thread).


And there you go…. the finished Martin Luther King Day “I Have a Dream” pendant.  Doesn’t it turn out awesome?!  How did your pendant turn out?  Let me know in the comments below.  Also, take a picture of the “I Have a Dream” Pendant and share that with me in the comments below too…. I’d love to see it.

Technorati Tags: , , , , , , , , , , , , , ,

How to Make a Multicultural Kids Around Earth Craft for Martin Luther King Day

Martin Luther King Day is this Monday.  The Martin Luther King Day Holiday represents what he taught us…. equality in all people…. no matter what color their skin is.  That is an amazing thing.  So, today we will be honoring Martin Luther King and all he taught us… by making a craft for this Holiday.  So, in this post I will be showing you how to make a Multicultural Kids Around Earth craft for Martin Luther King Day.  The craft is a lot of fun and has tons of meaning.  So, let’s get started, shall we…

Check out our other Martin Luther King Day crafts.


Multicultural Kids Around Earth Craft for Martin Luther King Day


Materials Needed

Printer & Paper

Scissors

pencil

Many Different Colored Pieces of Paper

Black Marker

Glue


Click on Templates below to make larger and to print both off.

Children Template


Children Template


Earth Template


Earth Template


Step 1


 Print out Template.


Print out Template.


Step 2


Cut out


Cut out the images on the template.


Step 3


trace on different colors of paper


Cut out like this then trace on different colors of paper.


Trace it like this.


Trace it like this.


Step 4


Cut about 7 out


Cut about 7 out… all in different colors.


Step 5


outline with black marker.


To make each one look nicer, outline with black marker.


Step 6


Draw a dot for each eye.


Draw a dot for each eye.


Draw a letter 'C' for nose.


Draw a letter ‘C’ for nose.


Draw a curved line for mouth.


Draw a curved line for mouth.


Draw a curved line above each eye


Draw a curved line above each eye and on each side of the mouth.


Step 7


Trace hair on colored paper


Trace hair on colored paper…. like you did with the people.


You can outline the hair too


You can outline the hair too.


Step 8


 You can draw on clothes too


You can draw on clothes too if you want to.


Step 9


Glue hair on figure.


Glue hair on figures.


Step 10


Cut out circle.  Then trace it on blue paper


Cut out circle.  Then trace it on blue paper like seen above.


Step 11


Cut out the pencil outline of the circle.


Cut out the pencil outline of the circle.


Step 12


Now cut out the small parts of the template.


Now cut out the small parts of the template.


Step 13


Trace the template onto green paper.


Trace the template onto green paper.


Step 14


Outline the blue circle in black marker.


Outline the blue circle in black marker.


Step 15


Glue green land on to the blue circle


Glue green land on to the blue circle globe.


Step 16


Glue kids around the globe.


Glue kids around the globe.

Awesome job!!  You just finished making your Multicultural Kids Around Earth craft for Martin Luther King Day.  Now go hang it proudly for all to see.  You are sure to get some really amazing compliments on it.

Technorati Tags: , , , , , , , , , , , , , , ,

All Colors are Beautiful Martin Luther King Craft

I have a really special craft for you today.  I am going to show you how to make an All Colors are Beautiful Martin Luther King Craft.  This craft is meant to remind all of us how no matter the color of the skin that people are the same and should be treated equally.  That is what Martin Luther King represented.  In this craft you will draw a picture of yourself, copy it and color each picture with different colors.   The craft turns out beautifully…. and should be hung up this Martin Luther King Day.  So, let’s get started.

Check out our other Martin Luther King crafts.


All Colors are Beautiful Martin Luther King Craft


Materials Needed

Large piece of Cardboard, Paper or Poster Board

Paper

Pencil

Photocopier

Glue

Crayons or Markers


Step 1


Draw a picture of yourself.


Draw a picture of yourself.


Step 2


Make 3 photocopies of the picture and glue them on a big piece of cardboard


Make 3 photocopies of the picture and glue them on a big piece of cardboard or paper…. like this.


Step 3


Now color each picture with different colors


Now color each picture with different colored skin, hair, background, shirt…


It should look something like this.


…. like this.


Finished Martin Luther King - All Colors are Beautiful Craft


Doesn’t this Martin Luther King Craft turn out just amazing?!  It really gets the idea across that you are beautiful no matter what color skin, hair or clothes you wear.  You still are the same person inside.  Please let me know how your Martin Luther King craft turned out by posting your picture in the comments below.  I would love to see it.

Technorati Tags: , , , , , , , , ,

How to Make a Paper Kids Holding Hands Craft for Martin Luther King Day

I have a great craft to share with you today.  I’m going to show you how to make a Paper Kids Holding Hands craft for Martin Luther King Day.  Martin Luther King Day is about remembering Martin Luther King and what he was all about.  This craft is a great way to honor Martin Luther King and to remind the children what the holiday is all about.   Today’s craft reminds us that no matter what we look like…. no matter the color of our skin we should all be created equal.  So, in honor of that and Martin Luther King let’s make today’s craft together.  So, gather up the materials needed and let’s get started.

Check out our other Martin Luther King crafts.


How to Make a Paper Kids Holding Hands for Martin Luther King Day


Materials Needed

Printer and Paper

Many Different Colored Sheets of Paper

Pencil

Scissors

Black Marker

Round Object or Lid (I used an Ice Breakers Container)

Glue


Click on Template below to make larger and to print off.


Children Holding Hands Template


Step 1


Print out Template


Print out template.


Step 2


Cut out images on Template


Cut out images on template.


Step 3


trace on different colors of paper


Cut out like this and then trace on different colors of paper.


Trace it like this.


Trace it like this.


Step 4


Cut about 7 out


Cut about 7 out… all in different colors.


Step 5


outline with black marker


To make each one look nicer, outline with black marker.


Step 6


Draw a dot for each eye


Draw a dot for each eye.


Draw a letter 'C' for the nose.


Draw a letter ‘C’ for the nose.


Draw a curved line for the mouth.


Draw a curved line for the mouth.


Draw a curved line above each eye


Draw a curved line above each eye and on each side of the mouth.


Step 7


Trace hair on colored paper


Trace hair on colored paper like you did with the people.


You can outline the hair too.


You can outline the hair too.


Step 8


You can draw on clothes too


You can draw on clothes too if you want to.


Step 9


 Glue hair on figure.


Glue hair on figure.


Step 10


To connect the hands... cut a slit on each arm


To connect the hands… cut a slit on each arm.  To connect two hands… Cut a slit on top of one arm and the bottom of the other.  Then slide the two arms together to hold in place.


Slide arms together.


Slide arms together… do with all arms.


Hook arms together


Hook arms together like so.


Step 11


connect arms around a round lid


I connected the last 2 arms around an Ice Breakers container, but you can use any round object like a lid.


Finished Martin Luther King Kids Holding Hands Craft


Isn’t this Martin Luther King Day craft cute?!  I love the meaning behind it too…. that makes it even more beautiful.  How did your Martin Luther King Day craft turn out?  Let me know in the comments below.  And, don’t forget to take a picture of the craft and share that too in the comments…. I’d love to see how yours turned out.

Technorati Tags: , , , , , , , , , , , , , , ,

How to Make a Colored Hands Wreath for Martin Luther King Day

Martin Luther King Day is just around the corner.  Martin Luther King Day is always the 3rd Monday in January and it marks Martin Luther King’s Birthday.  Well, today’s craft is in honor of Martin Luther King’s Birthday.  I’m going to show you how to make a colored hands wreath for Martin Luther King Day.  This craft is just perfect for the occasion, in celebration of Martin Luther King’s birthday. The colored hands represents children of different races joining hands in peace and unity.  A few colored papers, a pair of scissors and a glue is what you need.  So, let’s get started.


MATERIALS NEEDED

colored papers, assorted
scissors
glue


Step 1

With the back portion of the colored papers, let your child trace his/her hand with a marker. Do the same to the other paper colors until you have around 7-8 pieces.


Step 2

With a pair of scissors, cut the drawings and set aside.


Step 3

When all hand shapes are cut, arrange it in a circle as if the hands are reaching outwards. Make sure the colors are alternately placed. Glue the outer side so it touches the side of the other hand. Continue doing this until you create a circle that resembles a wreath.

There you have it….. you just finished making your colored hands wreath for Martin Luther King Day.  Doesn’t it look awesome when finished?  Now go hang it proudly for all to see.

Technorati Tags: , , , , , , , , , , , ,

How to Make a Peace Handprints Flower Craft Idea for Martin Luther King Day

What is Equality? What is Peace? Peace is to get up in the morning and your mommy and daddy will welcome you with a smile. You have good friends and you can play and have fun with them. You have dreams that one day will be true…Every children on this word wants those things. Think at Peace as a beautiful flower. How this flower will look like? You can make this to celebrate the great Martin Luther King Jr. on Martin Luther King Day.


How to Make a Peace Handprints Flower Craft Idea for Martin Luther King Day

CRAFTS MATERIALS NEEDED:

– paper
– scissors
– pencil
– colored paper (pink, light brown, dark brown, green)
– glue


Step 1.

We take the pink paper,


Place your left hand on it,


And draw it’s contour with your pencil.


Step 2.

Take the scissor and cut out the drawing.


Now you have a paper hand.


Step 3.

Repeat the steps 1 and 2 using the brown papers, so, in the end you’ll have 3 paper hands, to use as petals.


Step 4.

We want to make a flower… what every flower have? You said steam? Yes, you’re right! So, let’s draw a steam on the green paper. You can add some leaves too.


Step 5.

Take the scissor and cut out the steam and the leaves.


It really looks like a plant 🙂


Step 6.

Apply a thin layer of glue on the back of the steam and leaves,


Then place it on the white paper.


Take care to put the steam low enough to let space for the flower.


Step 7.

Apply the glue on the back of the paper hands too and place them on top of the steam.


That’s it! The Peace flower…


offered by Laura from Dacian Moon Handmade

You Might Like Our Other Martin Luther King Day Crafts as well.

Technorati Tags: , , , , , , , , , , , , , ,

How to Make a People Peace Dance Paper Cutout Craft for Martin Luther King Day

Because Martin Luther King Day is approaching, I think we should remember that, even if we are looking different, we are equals and we wish for the same things in life. One of those things is PEACE. Today, Laura from Dacian Moon Handmade will be showing you how to make a Peace Dance out of paper.

You Might Like Our Other Martin Luther King Day Crafts as well.


peace dance


CRAFTS MATERIALS NEEDED:

– paper
– scissors
– pencil
– colored pencils


Step 1.

Take one corner of the paper and bend it to the opposite side.


Step 2.

Press well the edge…


… and then, with the scissor cut the remaining part of paper.


Step 3.

Now, we have a triangle. Set it on the table with the peak to you. Bring the right corner over the left one, like in the picture.


We have now a smaller triangle. Press well the new formed edge.


Step 4.

Set the triangle on the table with the bigger edge to you.


Then bring again the right corner over the left one.


Now, we have an even smaller triangle who have on one side 3 corners one over the other, and on the other side, only one corner.


Step 5.

Let the triangle folded, with the 3 corners one over the other in the left.


Draw with the pencil two silhouettes – one girl and one boy, like in the following picture.


Step 6.

With the scissor cut out the silhouettes from the paper, following the contour. First the lower part…


… then the upper part. Take care at the hands of the silhouettes because they should be merged, so don’t cut them on the paper edge.


On this point you should have :


Step 7.

Look at the boy’s hand. You’ll see that can be opened:


Gently, pull the detachable corners and you’ll have 4 kids.


Repeat that and …


Mmm, it looks good. Look very carefully: can you open it more?


Yes, you can !
Now, you have the “peace dance”.


Step 8.

The last step:


You can play with coloured pencils, to make the dance full of joy. Don’t forget to make kids with different skin colours, because we are all equals, we like to play, to dance… we like Peace. I begin to play with colours. What are you waiting for?


… and most important: HAVE FUN!

You Might Like Our Other Martin Luther King Day Crafts as well.

Technorati Tags: , , , , , , , , , , , , ,