How to Make Autumn Dolls or Figurines in Easy Craft Idea for Kids

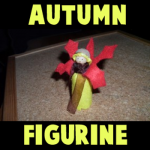
You can make this Autumn themed doll or figurine to celebrate fall, using an acorn cap for the hat and making a leaf out of felt for the “wings” of this little Autumn Fairy. This is a great Autumn-time craft that you will enjoy.
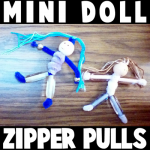
 Step by step tutorial offered by Laura from Dacian Moon Handmade


How to Make Autumn Dolls or Figurines in Easy Craft Idea for Kids


How to Make Autumn Dolls or Figurines in Easy Craft Idea for Kids

CRAFTS MATERIALS NEEDED:

– yellow and red felt
– pens (or permanent markers) – for eyes and mouth
– wooden bead
– scissors
– cork
– toothpick
– acorn cap
– toothpick
– brown ribbon
– craft glue


Step 1.

Glue the wooden bead on toothpick.


Step 2.

Stick toothpick in cork…


… until there are about 0.5 cm left.


Step 3.

Draw a circle and a rectangle on yellow felt. The circle must be a little bigger than the wooden bead and width of the rectangle must be from the bottom of the cork to the wooden ball.


Also draw a shape like this on red felt.


Step 4.

Cut them out.


Step 5.

Apply a layer of glue on the yellow circle…


… and place it on the wooden bead, like this.

Let it dry.


Next, put a bit of glue inside the acorn cap and on the edges…


… then fix it over the yellow circle.


You have now the head with yellow hair and acorn hat.


Step 6.

Adjust the upper part of the cork…


… like this.


Step 7.

Apply a layer of glue on the rectangle…


… like this…


And cover the cork with it.


Let it dry well.


Wrap the ribbon around the neck, over the yellow rectangle but take care to let the hair free.


Make a knot to keep it in place. You can cut the ribbon ends if they are too long.


Step 8.

Apply a stripe of glue on the lower part of red shape…


… and fix it over the ribbon, like this. Let it dry well.


Now use your pens / markers to add eyes and mouth and your cute doll is ready 😉


I hope your Autumn Fairy Doll turned out great. This would be a great decoration for the Thanksgiving table or any dinner in Autumn. I hope that you had fun. Come back soon for more crafts.

Technorati Tags: , , , , , , ,

How to Make Mini People or Dolls as Zipper Pulls as Back to School Craft for Kids

This makes a great back to school craft as this can be used to decorate your backpack! My daughter and I made a few of these to give to her special friends at school. We landed up having to make more than 20 of them to give out to everyone who was asking for them. She couldn’t make enough of them because they were so popular. I think you will love these too. They are very easy to make and you can use different materials each time. Any bead size or thread color will work. Just have fun and be creative with it!

How to Make Mini People or Dolls as Zipper Pulls as Back to School Craft for Kids


mini doll zipper pulls


Crafts Materials Needed:

– beads

– embroidery thread, yarn, string, or thread

– pipe cleaners

– scissors

– (Optional) metal snap spring hooks

Step 1


finished-step01-beaded-people-zipper-pulls


I started off with a round bead that already had a face drawn on it. You can use paint or a Sharpie to draw 2 eyes and a mouth on a round bead if you don’t have face beads already.

Then put a pipe cleaner thru the bead. The  beaded head should be in the center of the pipe cleaner, as seen above.

Step 2


finished-step02b-beaded-people-zipper-pulls


– Now put the pipe cleaner that is thru the top of the head back down into the top of the head again until there is a loop….as seen above. The legs (bottom 2 pieces of the pipe cleaner) should match up too.


Step 3


finished-step03-beaded-people-zipper-pulls


Take some embroidery thread (or whatever you have available) and fold it in half a few times (as you see that I did above). Then stick it in the loop hole, as seen above.


finished-step04a-beaded-people-zipper-pulls


If you want to make this a zipper pull, put a metal hook on it (optional…only for zipper pulls). Then Pull the pipe cleaner legs downwards so that the pipe cleaner on top of the head closes down on the hair and hook.

Step 4


finished-step04-beaded-people-zipper-pulls


Cut the loops that are in the embroidery thread so that it resembles hair.

 Step 5


finished-step05a-beaded-people-zipper-pulls


Cut a pipe cleaner in half. Wrap it around the top of the body, so you will have arms.

 Step 5 b


finished-step05b-beaded-people-zipper-pulls


Like in the above picture.

Step 6


finished-step06-beaded-people-zipper-pulls


Take the other half of the pipe cleaner and wrap it around the chest area as I did above.

Step 7


finished-step07-beaded-people-zipper-pulls


– Now we can place beads on the arms and legs. I have long beads, but you can also use multiple small round or oval beads. Then just push the pipe cleaner back into the bead to make it so the beads can’t fall off.

 Step 7 b


finished-step08-beaded-people-zipper-pulls


– This is what it looks like when all the beads are on there.

Finished Bead People


Finished Mini Figures


– My daughter originally only made a few of these for her to give to her closest friends. It lands up everyone in the class were BEGGING her to give them one. We landed up making enough for the entire class. Kids do Love these! Even boys! I hope that you had fun!

Technorati Tags: , , , , , ,

How to Make Cellophane Dancers

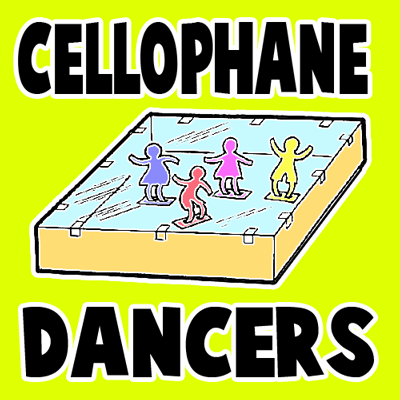
You can make a whole dance studio filled with boys and girls who will jump and dance about as if they were really alive. The trick is causing enough static electricity to make these little guys jump and dance. Find out how to make cellophane dancers below.

How to Make Cellophane Dancers


How to Make Cellophane Dancers


Crafts Materials Needed:

Large deep cardboard box

Light cardboard

Cellophane

Scotch tape

Silk handkerchief

Glue or paste

Scissors

Tissue paper

Pencil

How to Make Them:

Step 1


Fold the strips back and forth


To make the dancers, cut 2 strips of tissue paper, 5 inches long and 3/4 of an inch wide. Fold the strips back and forth, as in illustration A.

Step 2


You will have 2 square tissue paper packets


You will have 2 square tissue paper packets, as in illustration B.


Step 3


Draw Half Figures


Fold each packet down the center. On the fold of one packet, draw and then cut out, the half figure of a girl, and on the other packet, the half figure of a boy, as in illustration C.

Step 4

Open up the strips, you will have one continuous row of girls, and one of boys.

Step 5


you will have one continuous row of girls


Cut 2 strips of light cardboard 1/8 of an inch wide. Glue a standing row of dancers to each cardboard strip, bending back the feet of the dancers about 1/8 of an inch to make them stand firmly, as in illustration D.

Step 6


Glue a standing row of dancers to each cardboard strip


Cut the hands of the dancers apart, and cut the cardboard between them. Each dancer will be standing on a separate cardboard platform, as in illustration E.

Step 7


Cut a piece of celluloid to fit the top of the box, and fasten with pieces of Scotch tape


Stand the dancers in the cardboard box ballroom. Cut a piece of cellophane to fit the top of the box, and fasten with pieces of Scotch tape, as in illustration F.

To make the dancers jump and dance, rub a silk handkerchief over the celluloid top. This will generate enough static electricity to make the dancers come “alive.”

Technorati Tags: , , , , , , , ,

How to Make a Mini Puppet Theater with a Matches Box

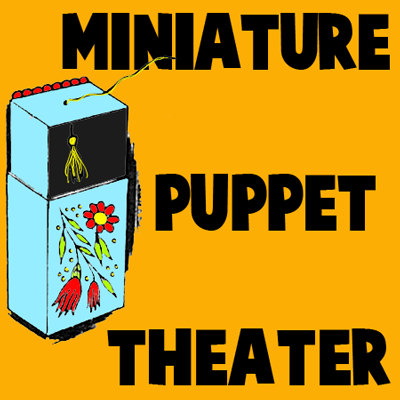
I be you will want this miniature puppet playhouse and its tiny dancing puppet for a pocket toy or to use  in your doll houses. This is a mini yarn puppet that is controlled with a matches box puppet theater. Find out how to make this little mini toy below.


How to Make a Mini Puppet Theater with a Matches Box


CRAFTS MATERIALS NEEDED:

Sliding drawer matches box

Scissors

Nail

Black paint or ink

Black thread

Paints  & brush

Colored yarn

Screw eye

How to Make These Miniature Puppet Shows

Step 1


Remove the sliding drawer from the matchbox.


Remove the sliding drawer from the matchbox. Paint the inside of the drawer with black paint or ink and allow it to dry thoroughly. Paint the outside of the drawer and the matchbox cover with a neutral color paint, and allow them to dry thoroughly.


Step 2


make the dancing puppet


To make the dancing puppet, cut several 2-inch pieces of colored yarn. Fold the yarn over the head of an ordinary screw eye, and wind a piece of black thread under the head to make the neck.

Step 3


Tie a short piece of black thread to the top of the puppet's head to make the control-thread.


Tie a short piece of black thread to the top of the puppet’s head to make the control-thread.

Step 4


Slip the end of the control-thread attached to the puppet through the hole.


With a nail, punch a small hole in the center of one of the short ends of the sliding drawer. Slip the end of the control-thread attached to the puppet through the hole. Replace the sliding drawer in the matchbox cover so that the control-thread is at the top, and the puppet is in the drawer.

Step 5

Decorate the front of the puppet playhouse with paints or wax crayons. To make the puppet perform, slide the drawer about halfway out of the cover and pull the control-thread up and down. If you want to make a larger playhouse for more puppets, use a kitchen size matchbox with a sliding drawer, and make 2 or 3 yarn puppets the same way.

Technorati Tags: , , , , , , ,

How to Make Doll Pencil Toppers for Back to School

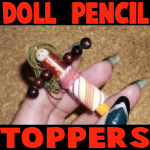
Do you want to create an adorable companion for your time back at school? Here is an easy-to-make doll that can be stored on the top of your pencil. Laura from  Dacian Moon Handmade  will show you, step by step, how to make it.


how to make doll pencil toppers for back to school


CRAFTS MATERIALS NEEDED:

– pencil
– thick tread
– wooden beads (one white and 6 brown)
– small cloth piece
– matching cord
– a piece of wire
– needle
– rubber tube


Step 1.

Take the thread …


… and spin it on your fingers, like this.


Step 2.

Tie it on the middle with the wire…


… like this.


Put the wire through the white bead – this will be the head of our doll.


Step 3.

Take the rubber tube…


… and make two holes in it with the needle.


Place it under the head, put the wire through the holes you made.


Step 4.

Is time to form her arms.


Add three brown beads like this…


… and put the wire end through the last bead one more time. That way the beads will not fall.


Repeat for the other arm.


Step 5.

Is time to place the topper on the pencil…


Like this.


Let’s dress her. Roll the piece of cloth over the rubber tube, under the arms…


… like this.


Tie it with the cord…


… and that is our doll.


You can use markers to make her eyes and mouth too. And she will make your classes easier 😉


Technorati Tags: , , , , , ,

Puppets for Thumb wrestling: Father’s Day Gift

Here’s a Father’s day gift that guarantees hours of fun. Make a set of thumb puppets for your dad and yourself, and play thumb wrestling. The simple illustrated instructions to make the thumb puppets follow:


Craft materials required:

-White fabric

-black yarn

-ribbon

-scissors

-needle and thread

-fabric glue

-Permanent marker


Step 1:

Cut out a piece of cloth double the length of your thumb and about an inch wider than the width of your thumb.


Step 2:

Fold it into half and stitch along the two sides as shown.


Step 3:

Fold it inside out as shown:


Step 4:

Glue small pieces of yarn to make hair


Step 5:

Glue a strip of ribbon along the bottom as shown


Step 6:

Add facial features with a marker.


Make another one for your dad in the same way. Make sure its big enough for your dad’s thumb. Your dad is sure to enjoy this Father’s day gift.

Technorati Tags: , , , , , , , , , ,

How to Make a Stand-Up Dress-Up Doll

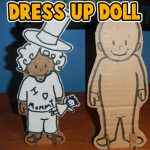
When I was a little girl I would have so much fun dressing up paper dolls.  You know…. the paper dolls you buy in a book at the store where you cut out the clothes to put on them?  I loved them.  I used to spend hours dressing up the paper dolls and changing their clothes over and over again.  Well, today I’m going to show you how to make with your children a stand-up dress-up doll.  I got the idea from a post I saw on another site ( ikatbag.com). You are going to make the doll out of cardboard… it is much stiffer and will hold up to many, many clothes changes.  Also, in this craft you will find 4 different template sheets of different accessories for your dress-up doll.  That means hours of fun for you and your children dressing up the doll.  So, grab the few materials needed and let’s get started.

Check out our other Doll Making Crafts.


How to Make a Stand-Up Dress-Up Doll


Materials Needed

Printer & Paper

Scissors

Black Marker

Cardboard

Paste or Glue (optional)

Glue Dots


Click on template images below to open and to print off.

Accessories Template 1


Accessories Template 1


Accessories Template 2


Accessories Template 2


Accessories Template 3


Accessories Template 3


Accessories Template 4


Accessories Template 4


Stand Up Dress Up Doll Template


Stand Up Dress Up Doll Template


Step 1


Print out template.  Cut it out.  Then trace it or paste it onto cardboard.


Print out template.  Cut it out.  Then trace it or paste it onto cardboard.


Step 2


Draw a face on the doll.


Draw a face with ovals for eyes.  A letter “C” for the nose.  A curved line for the smile.


Step 3


Cut around the figure.


Cut around the figure.


Step 4


 Cut two cardboard rectangles out.  Cut slits as the image shows you.


Cut two cardboard rectangles out.  Then cut the following slits out…. On one cardboard cut a slit on the top and a slit on the bottom.  On the other cardboard rectangle cut two slits on the top.


Step 5


Now put the cardboard rectangle's slits into the doll's feet slits.


Now put the cardboard rectangle’s slits into the doll’s feet slits.


Step 6


Turn doll around.  Put these two slits into each other.


Turn doll around.  Put these two slits into each other.  One rectangle has a slit on the bottom and one has a slit on the top.


It should look like this.


Like this.


Here is a different view.


Here is a different view.


Step 7


It should stand.


It should stand.


Step 8


Print out accessories.


Print out accessories.


Step 9


Cut them out.


Cut them out.


Step 10


I used glue dots to stick the clothes on the doll.


I used glue dots to stick the clothes on the doll.  They stay sticky time after time of changing clothes.


Here are some examples of how to dress up your new stand up dress up doll.

Example 1


Example 1


Example 2


Example 2


Example 3


Example 3


Example 4


Example 4


Example 5


Example 5


I bet you and your children had fun making these stand up dress up dolls….. but wait till you see the amount of fun they have dressing them up too.  They will love it.  I gave you 5 examples of ways to dress up your doll…. How many other ways can your child come up with?  Have fun!!

Technorati Tags: , , , , , , , , , , , , , , , , , ,

How to Make Clothespin People Figures

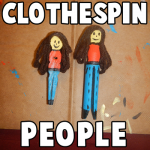
I have a fun craft for you today that you can make out of any kind of wooden clothespin.  In this post I’m going to show you how to make a Clothespin People Figure.  Grab a few clothespins and you can even make an entire clothespin family.  Simply use your imagination to make each figure a little bit different.  The kids will love this craft because it is so much fun and you will love how your children use their imagination to create their clothespin figures.

Check out our other Clothespin Crafts.


How to Make Clothespin People Figures


Materials Needed

Wooden Clothespin (Any Type)

Glue

Paint (Colors for Face, Clothes & Skin)

Black Paint

Paintbrush

Yarn


Step 1


Get either type of clothespin


Get either type of clothespin as above picture.


Step 2


If you have the clothespin with the metal parts take it apart like above.


If you have the clothespin with the metal parts take it apart like above.


glue the pieces like this.


And then glue the pieces like this.


If you have the above type you don't have to do anything.


If you have the above type you don’t have to do anything.


Step 3


 Paint clothes and skin.


Paint clothes and skin.


Step 4


Paint a face.


Paint a face.


Step 5


It looks good to outline shirt in black.


It looks good to outline shirt in black.


Step 6


Draw three sides of rectangle for sleeve.


Draw three sides of rectangle for sleeve.


And a circle for hand.  Color it the same color as face.


And a circle for hand.  Color it the same color as face.


Step 7


Paint details you want.


Paint details you want.


Step 8


Wind some yarn up like above.


Wind some yarn up like above.


Step 9


Wind some yarn up like above.


Glue on top of head and cut loops at bottom.

And, there you have it…. you just finished a Clothespin people figure.  Make a few more and you got yourself a Clothespin family.

Technorati Tags: , , , , , , ,

How to make a Pine Cone Christmas Figurine Ornament

Today I’m going to continue with another Christmas Craft.  This one will be a Pine Cone Christmas Figurine Ornament.  It is super cute and will look terrific on the Christmas Tree.  Let each of the kids make one of these figurine ornaments…. they will love hanging something up on the tree that they made themselves.  Plus, it is so much fun.  So, grab the materials needed and let’s get started.

Check out our other Christmas Crafts.

Tutorial offered by Laura from Dacian Moon Handmade .


Materials Needed

– cardboard
– red leather
– a cotton pad
– 1 wooden bead (big enough to be the head)
– scissors
– 1 piece of ribbon
– 1 pine cone
– craft glue
– black paint
– toothpick


Step 1

Take the cardboard…


…and make a cone of it: bring one side over the middle.. .


… then the other. Glue the two parts together.


Place the pine cone inside, to measure how long the cardboard cone should be.


Cut the extra cardboard.


It will look like this.


Step 2

Apply a border of glue inside the cardboard cone…


… like this.


Then fix it over the pine cone.


Step 3

Take the wooden bead…


And place the toothpick inside.


Make a collar of glue where the toothpick comes out…


… and place it inside the cardboard cone, like in the picture. Keep it a little pressed, until the glue is dry.


Step 4

Take the leather and put it over the cardboard cone.


Measure the length and trace it with a pen.


Cut it out…


… like this


Apply glue on the back of the leather…


… and place it again over the cardboard cone.


Let it dry.


Step 5

Make another cardboard cone, narrower than first. This will be the cap.


Glue the cardboard cone.


Apply a layer of glue on the lower part that goes down from the cone and fold it over it.


Now cut the extra cardboard.


Measure the cone cover on the leather…


… like this.


Cut it out.


It will look like this now.


Apply glue on it…


… and place the cardboard cone on it.


Cover it with the leather.


Apply glue on the back…


… and place there the folded ribbon. Keep it in place until the glue is dry.


Now, let’s put it on the head. Put glue over the upper part of the head…


… like this…


…and fix the cap on it. Let it dry.


Step 6

Take the cotton pad…


… and break it into pieces to make one beard like this.


Apply glue on the lower part of the head and on the front part of the coat…


… and place the beard on it, fix it well on the face.


Take a little black paint with a toothpick…


… and draw its eyes.


Now you have a funny figurine to put on your Xmas tree.


The figurine is cute, huh?!  It will look wonderful on the Christmas Tree.  Enjoy!!

Technorati Tags: , , , , , , , , , , , , , ,

A Collection of Fun Nativity Scene Crafts for Kids


A Collection of Fun Nativity Scene Crafts for Kids


One thing you see at most houses at Christmas time is a Nativity Scene.  But, the problem with the store bought Nativity Scenes is that they are usually very delicate…. too delicate for the children to actually play with.  And, the thing about that is…. children love to play with the Nativity Scenes.  I mean, what’s not to want to touch…. there are small people, animals and a manger.  There is an entire scene for the kids to want to act out with the characters.  Well, why not make a Nativity Scene craft ….. put together a Nativity Scene of your very own that the children can actually play with.  So, today I have put together a bunch of Fun Nativity Scene Crafts that I have found around the internet.  All are a ton of fun…. and they are all meant to be played with.

Check out our other Christmas Crafts.

A Collection of Fun Nativity Scene Crafts for Kids

(1)  Pipe Cleaners & Yarn Nativity Scene


Pipe Cleaners and Yarn Nativity Scene


Here Spoonful shows us how to make an entire Nativity Scene using such materials as yarn and pipe cleaners.  She is very detailed, so this nativity craft is very enjoyable.  This Nativity Scene would look wonderful as a Christmas decoration and it surely will be so much fun to make.


(2)  Printable Nativity Scene


Printable Nativity Scene


I love this idea.  I found this Nativity Scene Craft at Catholic Icing and it is so cute.  Here you will be able to print off about 8 pages of templates.  Cut them out, decorate them and glue them to toilet paper tubes.  It’s so much fun.  check it out.


(3)  Flower Pot Nativity Scene


Flower Pot Nativity Scene


Ok, this is really cute, right?!  Suite 101 shows us how to transform 3 terra cotta flower pots (along with some other materials) into a ridiculously cute Nativity Scene.  The craft promises to be a lot of fun.  Plus, no doubt, you will be tempted to keep this Nativity Scene out year round.


(4)  Basket Nativity Scene


Basket Nativity Scene


This Nativity Scene craft is one of ours from last Christmas.   This Nativity surely will be one that you will keep for years to come.  We show you how to make each of the figures in great detail including the Three Wise Men, Baby Jesus & Cradle, Mary & Joseph, sheep and the donkey.  It’s so much fun.  Check it out for yourself.


(5)  Rock Nativity Scene


Rock Nativity Scene


Here is another super cute and original Nativity Scene Craft.  Here Roper 5 shows us how to make this fantastic Nativity Scene completely out of backyard rocks and markers.  So, no need to buy any craft materials…. you can have fun with the kids hunting in the backyard for the perfect rocks.


(6)  Wooden Block Nativity Scene


Wooden Block Nativity Scene


Here is an awesome Nativity Scene craft you can make with your kids with some wooden blocks, felt, glue and a few embellishments.  Imagine the fun you will have putting this craft together with your kids.  Fun part is that they are durable enough the kids can even play with this Nativity Scene.  Check out The Pioneer Woman for all the details.


(7)  Lego Nativity Scene


Lego Nativity Scene


This is such a clever idea for all you Lego fans.  Here Johan van Benthem shows us all how to make an entire Nativity Scene out of Legos.  Imagine the excitement of your kids as well as anyone who sees your Nativity Scene made completely out of Legos.  They will absolutely love it!!


(8)  Nativity Hand Puppets


Nativity Hand Puppets


What child doesn’t love hand puppets?  They all love them.  Here eHow shows us how you and your children can make these Nativity Hand Puppets for yourself.  Imagine the fun Christmas show your kids can put on with these hand puppets?  They will love using their imaginations to put on their very own program.


(9)  Nativity Blocks


Nativity Blocks


These blocks are just simply adorable.  I am a Momma – Hear Me Roar came up with this idea and I love it!!  She used homemade blocks, stickers and modge podge to make her Nativity Scene, but you can also print off Nativity Scene characters from the computer and do it that way as well.


(10)  Sun Catcher Nativity Scene


Sun Catcher Nativity Scene


Here is a clever idea by Peace Creek on the Prairie.  She uses wax paper, crayon shavings and an iron to make this beautiful Sun Catcher Nativity Scene.  Because of some of the materials used in this craft it does require some adult help.  You will have so much fun doing this Nativity Scene with your kids.


(11)  Gingerbread Nativity Scene


Gingerbread Nativity Scene


This Nativity Scene is absolutely delicious!!  Made from some of my most favorite treats this Nativity Scene craft is sure to be a big hit with the kids.  I found this craft at AOK Corral and it looks like so much fun.  You and your kids will surely enjoy putting this together.


(12)  Cardboard Tubes Nativity Scene


Cardboard Tubes Nativity Scene


Here is a simple yet fun Nativity Scene craft that all children will love putting together…. plus they can even play with this Nativity Scene once they are done.  Nurture Store shows us how to make this Nativity Scene out of toilet paper rolls.  How fun is that?!


(13)  Clothespin Nativity Scene


Clothespin Nativity Scene


This is truly a clever idea and almost all the materials used in this Nativity Scene craft can already be found in your home.  Our Dish shows us how to use a cardboard box, sharpie and a couple of clothespins (as well as a few other things) to put together this fun Nativity Scene craft.


(14)  Foam Nativity Craft


Foam Nativity Craft


Craft foam is a wonderful material that children love working with.  And, this Nativity Scene craft will be no exception.  Piggy Giggles shows us how to make a unique Nativity Scene out of craft foam.  The craft is wonderfully detailed, so believe me when I say they have covered everything.


(15)  Egg Carton Nativity Scene


Egg Carton Nativity Scene


Made from egg carton bottoms and beads this Nativity Scene is really cute.  Plus, the great thing about it is the kids will have just as much fun playing with this Nativity Scene as they had making it.  I found this craft at April Showers.  Check it out for all the craft details.

Technorati Tags: , , , , , , , , , , , , , , , ,

How to Make a Christmas Fairy Ornament

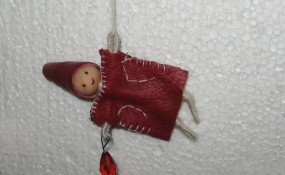
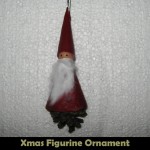
I have a special little Christmas craft for you older kids and adults.  Today I’m going to show you how to make a Christmas Fairy Ornament.  This cute fairy even has a crystal light she is holding.  The crystal will look as it is really lit when the Christmas tree’s lights shine through it.  This Christmas Fairy Ornament will be sure to get you in the Christmas spirit…. after all Christmas is less than a month away.  So, grab the materials needed and let’s get started.

Check out our other Christmas Crafts.

Tutorial offered by Laura from Dacian Moon Handmade .


Materials Needed

– red leather
– thick thread
– 1 wooden bead (big enough to be the head)
– scissors
– needle and thread
– 2 toothpicks
– craft glue
– black and red paint
– crystal (preferably drop)
– wire
-1 pin


Step 1

Take the wooden bead and put a toothpick through it (if doesn’t stay by itself, glue it).


Cut two pieces of wire, one slightly bigger than the other.


Take the smaller one and bend its ends, like this.


Coil it once around the toothpick – those will be her arms.


Step 2

Take the thick thread – you don’t need to cut it for that – and start to roll it over the toothpick.


When you arrive at the wire, cover the intersection in “x”, like this. That will make the arms stay fixed.


Continue covering one arm, and the loop at the end of it. When it is covered, press the end of the wire well and cover it with the other part…


… like this. Continue to roll over back to the toothpick and go on on the second arm.


Cover it the same way and from the middle go down covering the toothpick until you think it is the place for the legs.


Step 3

Take the other piece of wire and bend its ends.


Then bend the wire like this, with one part a little bit longer than the other.


Now bend again the longer part, so she has a leg fold at the knee.


Place the legs over the toothpick and fix them with thread as you did for the arms.


Cover them in an “x” then go down over one leg.


Secure the end and go up again.


Cut the toothpick, keeping a small part to keep the legs in place…


… and cover this part too.


Go down on the second leg, then up until you reach the head.


Here cut the thread and make a knot.


Step 4

Place the figurine on leather and measure her coat.


Mark it on the leather.


Cut double the part you measured…


… and cut that in two…


… one of them will be the front and the other the back of her coat. Make a small “v” cut in the front and back parts, where the head will be.


Start sewing the two parts together, using the cross stitch technique…


… like this.


When you reach the “v” sew only the front part, like this.


Place the fairy inside…


… and continue stitching the front and back together.


Step 5

Sew the two parts together under the arms…


… like this.


Then make a “L” stitch to mark out the arm and the body of the fairy.


It will look like this.


Step 6

Cut a triangle of leather to make her a cap.


Apply a layer of glue on the upper part of the head…


… like this…


… then put the leather on her head, making a cone.


Keep it in place until it is dry.


Step 7

Take a little black paint with a toothpick…


… and draw her eyes.


And some red paint to make her mouth.


Take the pin…


… and put the crystal on it.


Bend it and hang it on her hand. Like this. Then close the loop.


The last thing that must be done is to put a thick thread through her other hand and the fairy ornament is ready.


How adorable is this Christmas Fairy Ornament?  So cute!!  And, it will look even better hung on the Christmas tree.

Technorati Tags: , , , , , , , , , , ,

How to Make Cardboard Little People Figures

Yesterday I showed you how to make a Glue Stick Man out of your recycled glue sticks.  Today I’m going to continue showing you how to make toy figures out of recycled materials.  In this post I’m going to show you how to make Cardboard Little People Figures.  Just simply use pieces of used cardboard boxes.  This craft is a great way to recycle those cardboard boxes that you would normally throw away.  These Cardboard Little People Figures are fun to make…. almost as much fun as they will be to play with.  So, let’s get started.

Check out our other Green Environmental Crafts.


How to Make Cardboard Little People Figures


Materials Needed

Thin Cardboard

Small Circles to Trace…. One Smaller than the Other (like buttons)

Pencil

Scissors

Glue

A Couple Different Colors of Paint

Button


Step 1


Trace a bunch of circles onto thin cardboard.


Trace a bunch of circles onto thin cardboard.


Step 2


The thinner the cardboard, the more circles you will need to cut.


The thinner the cardboard, the more circles you will need to cut.

Step 3


Cut them out.


Cut them out.


Step 4


Glue together all pieces.


Glue together all pieces.


Step 5


Press down until dry.


Press down until dry.


Step 6


Get a smaller circle to trace and trace a bunch of these circles.


Get a smaller circle to trace and trace a bunch of these circles.


Step 7


Glue together.


Glue together.


Step 8


Glue smaller circles on top of large circles.


Glue smaller circles on top of large circles.


Step 9


Paint it.


Paint it.


Step 10


Paint other details.


Paint other details…


Step 11


Add button or other item for hat or hair.


Add button or other item for hat or hair.


Step 12


Make them all different sizes.


Make them all different sizes.

Aren’t these adorable little people?  Make a whole family of little people figures to play with your friends.  They will surely love it.

Technorati Tags: , , , , , , , , , , ,

How to Make a Glue Stick Man out of your Recycled Glue Sticks

With all the crafts that I do  I go through a lot of glue sticks.  I always hate the idea of throwing them away…. I always try to find crafts that I can make out of recycled items.  And, glue sticks are no exception.  Here is a great craft you can make with your used glue sticks.  Today I’m going to show you how to make a Glue Stick Man out of your recycled glue sticks.  You will see what a great feeling you get from making something out of recycled materials.  Plus, you get a very cool toy man.

Check out our other Green Environmental Crafts.


How to Make a Glue Stick Man


Materials Needed

Empty Glue Stick

Glue

Paint, Paper, Foam or Felt

Black & White Paint


Step 1


Take an empty Glue Stick and peel the label off of it.


Take an empty Glue Stick and peel the label off of it.


Step 2


Glue the cap in place like this.


Glue the cap in place like this.


Step 3


Paint on clothes or glue on clothes with paper, foam or felt.


Paint on clothes or glue on clothes with paper, foam or felt.


Step 4


If painted clothes, then use black paint to outline.


If painted clothes, then use black paint to outline.


Step 5


Paint a sleeve on each side.


Paint a sleeve on each side.  Also, draw a dot for each eye.


Step 6


Draw a circle for each hand.


Draw a circle for each hand.


Step 7


Paint each hand white.


Paint each hand white.  Also, paint white buttons on the shirt.

How adorable is this little guy?  So adorable!!  Make a few of these Glue Stick people and you can have a small family.  What a great way to recycle those used glue sticks.

Technorati Tags: , , , , , , , , ,

How to Make a Trick-or-Treat Paper Toy

Today I have a fun and festive Halloween craft.  It can be either a spooky Halloween decoration as well as a fun Halloween toy for the little ones.  In this post I’m going to show you how to make a Trick-or-Treat Paper Toy.  Using the 4 templates included in this craft you are going to make a little town with people that you can actually pretend they are going Trick-or-Treating.  Kids love pretending and even more than that they will love pretending to trick-or-treat with this toy because they made it themselves.  Let’s get started.

Check out our other Halloween Crafts.


How to Make a Trick-or-Treat Paper Toy


Materials Needed

Printer & Paper

Scissors

Cereal Box

Tape

Black Paint

Glue

Thread


Click on template images below to make larger and to print off.

Template 1


Template 1


Template 2


Template 2


Template 3


Template 3


Template 4


Template 4


Step 1


Print out first three templates.


Print out first three templates.


Step 2


Cut out parts.


Cut out parts.


Step 3


Cut both slits.  Then fold sides in to center.


Cut both slits.  Then fold sides in to center.


It should look like this.


Like this.


Step 4


Place a person in the slots.


Place a person in the slots…


Step 5


Here's the line up of figures.


Here’s the line up of figures.


Step 6


The cat and pumpkin just need to be folded in half.


The cat and pumpkin just need to be folded in half.


Step 7


Cut everything out.


Cut everything out…. Leave a white outline around the edges…


Step 8


Cut off the front of a cereal box so you get this


Cut off the front of a cereal box so you get this…


Step 9


Tape outside of box together.


Tape outside of box together.


Step 10


Paint the inside of box black.


Paint the inside of box black…


Step 11


Glue pieces of cardboard to back of paper cutouts so they appear like they are sticking out from box.


Glue pieces of cardboard to back of paper cutouts so they appear like they are sticking out from box.


Step 12


It should look like this.


Like this.


Step 13


Tape thread to back of moon and clouds and tape to top of box.


Tape thread to back of moon and clouds and tape to top of box.  Now, they pop out at you.


Step 14


Print out houses paper


Print out houses paper (template 4).


Step 15


Cut out like this... then fold on the dotted lines.


Cut out like this… then fold on the dotted lines.


Step 16


If first dotted line is folded towards you... then fold the next away from you.


If first dotted line is folded towards you… then fold the next away from you.


Step 17


Notice you also fold the right and left side away from you


Like this…. Notice you also fold the right and left side away from you…


Step 18


Here are all the pieces... Now you can play pretend Trick-or-Treat games.


Here are all the pieces… Now you can play pretend Trick-or-Treat games.

Technorati Tags: , , , , , , , , , , , ,

How to Make Clothespin Witches

Halloween is later this month.  It is coming up quickly….. so now is the time to decorate your house for Halloween.  Today I’m going to show you how to make Clothespin Witches.  The craft calls for a wooden clothespin.  My suggestion to you is to use the old-fashioned clothespins…. not the “pinch-to-open” ones.  Make a few of these Clothespin Witches to decorate your whole house.   Grab the materials needed and let’s get started.

Check out our other Halloween Crafts.


How to Make Clothespin Witches


Materials Needed

Wooden Clothespin

Green and Red Paint

Black Felt, Paper or Craft Foam

Pencil

Scissors

Stapler

Glue

Red and Yellow Yarn

Stick


Step 1


Paint a wooden clothespin green.


Paint a wooden clothespin green.


Step 2


Draw a big circle on felt, paper or craft foam.


Draw a big circle on felt, paper or craft foam.


Step 3


Cut out the circle.


Cut out the circle.


Step 4


Draw a line thru the center.... both ways.


Draw a line thru the center…. both ways.


Step 5


Cut out one of the pizza slices.


Cut out one of the pizza slices.


Step 6


Staple closed like this.


Staple closed like this.


Step 7


Now push the head thru the hole.


Now push the head thru the hole.


Step 8


Now, your piece looks like this.


Now, your piece looks like this.


Step 9


Paint stripes on legs.


Paint stripes on legs.


Step 10


Cut out a small circle and a pizza slice shape


Cut out a small circle and a pizza slice shape… Use paper, felt or craft foam.


Step 11


Glue pizza slice into cone shape for top of hat.


Glue pizza slice into cone shape for top of hat.


Step 12


Cut slits at bottom of cone.


Cut slits at bottom of cone.


Step 13


Glue slits to top of circle.


Glue slits to top of circle.


Step 14


Fold yarn in half several times


Fold yarn in half several times…


Step 15


Glue yarn on top of head.


Glue yarn on top of head.


Step 16


Now cut looped ends of yarn to make hair.


Now cut looped ends of yarn to make hair.


It should look like this.


Like this.


Step 17


Glue the hat on top of head.


Glue the hat on top of head.


Glue the hat on top of head.


Like this.


Step 18


Find a stick.


Find a stick.


Step 19


 Cut a slit in front of dress.  Then put stick thru clothespin and slit in dress.


Cut a slit in front of dress.  Then put stick thru clothespin and slit in dress…


Step 20


It should look like this.


Like this.


Step 21


Fold some yellow yarn in half a few times


Fold some yellow yarn in half a few times… Like this…


Step 22


Take a 2nd piece of yarn and tie it around folded yarn.


Take a 2nd piece of yarn and tie it around folded yarn.


It should look like this.


Like this.

Step 23


Take loops on each side and cut the loops open.


Take loops on each side and cut the loops open.


It should look like this.


Like this.


Step 24


Tie this on to end of stick with another piece of yarn.


Tie this on to end of stick with another piece of yarn.


It should look like this.


Like this.


Step 25


Finished Clothespin Witch


And, that’s it.  You just finished making a Clothespin Witch.  Isn’t it awesome?!  This will make for a wonderful Halloween Decoration in your house.  Enjoy!!

Technorati Tags: , , , , , , , , , ,

How to Make a Sock Baby Doll

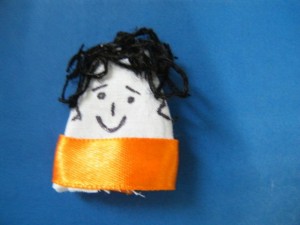
I have a fun craft for you today.  In this post I’m going to show you how to make a Sock Baby Doll.  That’s right…. it’s a baby doll made out of a sock.  This craft is a great way to put to use those socks that no longer have a match.  Plus, you probably have all the materials needed for this craft in your house… so no need to buy any more materials.  Give this sock baby doll to your best friend…. or better yet keep it for yourself.  The choice is yours.  So, let’s get started.

Check out our other Sock Crafts or Doll Making Crafts.


How to Make a Sock Baby Doll


Materials Needed

Sock

Scissors

Needle & Strong Thread

Stuffing

Black Marker (optional)


Step 1


Cut a sock where you see dashed lines


Cut a sock where you see dashed lines… to look like this…


After cutting, the above pieces are what you should see.


After cutting, the above pieces are what you should see.


Step 2


Turn sock so top hole is in the front as in image B.


Turn sock so top hole is in the front as in image B.


Sew front and back of each leg together as shown.


Sew front and back of each leg together as shown.


Step 3


Stuff the legs and sew hole closed.


Stuff the legs and sew hole closed.


Step 4


Turn doll around so that sewn up hole is in the back.


Turn doll around so that sewn up hole is in the back.  Gather and draw in with strong thread the section shown in the image above.


Step 5


Draw or sew a face on.


Draw or sew a face on.


Step 6


Fold each square in half.


Fold each square in half.


Sew sides with dashed lines.


Sew sides with dashed lines.


Fill with stuffing.


Fill with stuffing.


Sew shut.


Sew shut.


Step 7


Sew on arms.


Sew on arms.

Awesome job…. you just finished making your Sock Baby Doll.   How did your baby doll turn out?  Let me know in the comments below.  Also, take a picture of your sock baby doll and add that to your comment as well… I’d love to see it.

Technorati Tags: , , , , , , , , ,