How to make a Phone and Cards Pouch for Your Dad on Fathers Day

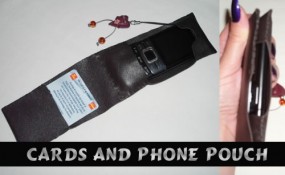
Learn how to make a great leather / vinyl wallet for your dad’s gift for Father’s Day. This wallet makes a perfect gift for Father’s Day: it is great to hold his phone and business cards. This step by step tutorial is by by Laura from Dacian Moon Handmade


phone cards cover


How to make a Phone and Cards Pouch for Your Dad on Fathers Day

CRAFTS MATERIALS NEEDED:

– leather or vinyl
– needle and thread
– scissors
– pen
– phone to be sure it fits


IMG_5357


Step 1.

Measure and cut the piece of skin to be 1 cm wider than the phone and 3 times longer.  Should be so long because we must cover one end of the phone, like this…


IMG_5358


… make another fold on the other end for the cards, like this…


IMG_5359


… and the two parts must fit one over the other, like this.


IMG_5360


Step 2.

To easily remove the phone will cut a little the cover. First draw the desired shape…


IMG_5362


… then we cut it out.


IMG_5363


It will look like this.


IMG_5364


Step 3.

Starting at the fold…


IMG_5365


sew the two sides, like this…


IMG_5366


… and the phone fits perfectly.


IMG_5367


Step 4.

We will use a piece of leather to make the bottom of the phone holder. Place it under the phone, like this…


IMG_5369


… and sew the bottom, to fix it in place.


IMG_5370


Also continue to sew the edges.


IMG_5372


Now the phone holder is ready.


IMG_5373


Step 5.

Measure the available part to make the card holder…


IMG_5375


… and sew the edges.


IMG_5376


The card holder is also ready 🙂


IMG_5377


Close it and it will look like this : cute and practical.


IMG_5379


I hope that your wallet / case turned out well and that your dad likes it!

Technorati Tags: , , , , ,

How to Make Leather Wallets with Stitching Craft for Kids & Teens

Here is a great project for groups of kids…for Summer Camps, After-school programs, as well as in school settings. This craft is for making a leather wallet that is laced together. This is a very basic leather wallet craft and I think you will be able to follow it with some adult supervision. This craft requires adult supervision and assistance! Please refer to our article about Working with Leather!

You Might Enjoy Our Leather Crafts

How to Make Leather Wallets with Stitching Craft for Kids & Teens


How to Make Leather Wallets with Stitching Craft for Kids & Teens


CRAFTS MATERIALS NEEDED:

Leather

Cutting knife and board (For Adult to Use)

Steel angle (With Adult Supervision)

#0 Punch

3/32″ goatskin (or whatever leather you have on hand)

Rubber cement

How to Make These Leather Laced Wallets

Step 1


leather-wallets-01


(Adult Should Do This Part) Using steel angle and knife, cut two pieces of leather 9″ x 31/2″, as in Figure 1.


 Step 2


leather-wallets-02


Fold one piece of leather in half, and punch a small hole in the center to allow for folding. Open leather up, as in Figure 2.

 Step 3


leather-wallets-03


Run spacing wheel on three sides of both pieces of leather, 1/8 ” from the edge, as in Figure 3.

 Step 4


leather-wallets-04


Skive wrong side of leather on three sides where the pieces are to be joined, as in heavy line in Figure 4. (Here is How You Skive)

 Step 5


leather-wallets-05


Cement skived areas and make holes for lacing using fib and mallet or #0 punch, as in Figure 5.

 Step 6


leather-wallets-06


Lace pieces of wallet together using whip stitch, as in Figure 6.  (Here is How You Use the Whip Stitch)


You Might Enjoy Our Leather Crafts

Technorati Tags: , , , , , , ,

How to Make Leather Eye Glasses Cases with Etched Design

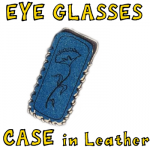
Here on this page you will find instructions for a beautiful eye glasses case to make. This is a leather craft, so you will need leather crafting tools. Also, if you are new to working with leather, you will want to refer to our article about Working with Leather!  This craft instructional will also guide you through etching a design into the cover of the case. When this craft is complete, it would make a great gift for mom, dad, or someone else that you love.  This craft requires adult supervision and assistance! 

How to Make Leather Eye Glasses Cases with Etched Design


How to Make Leather Eye Glasses Cases with Etched Design


Crafts Materials Needed

2 Pieces of tooling leather 3″ x 61/2″

4 yards lacing

Steel angle and board

Spacing wheel

#0 punch

Water and sponge

Tracing paper

Pencil

Modeling tool

How to Make This Etched Leather Eye Glass Case Craft

Step 1


Round off corners of both pieces of leather, as shown by broken line in Figure 1.


Round off corners of both pieces of leather, as shown by broken line in Figure 1.

Step 2


eyeglasses-cases-02


On strong tracing paper, draw pattern to fit eye glass ease, allowing 1″ all around for lacing. Draw design within pattern. Put a dab of rubber cement to hold design in place on leather, and transfer design to right side of leather with tracer, as in Figure 2.

HOW TO TOOL LEATHER (Etch Design into Leather)

Step 3

Moisten leather on both sides with a sponge and water, until leather becomes dark. Place leather, face up, on work board. Deepen the outline of the design with the tracer, using a ruler for straight lines (as in Figure 3 above) If leather puckers while in work, dampen all over again, and deepen outline again with tracer. Holding spoon end of modeling tool sideways, follow outline of design. The edge of the tool should rest in the dent. Press down and away from outline towards the center of the background. Go around the entire design this way to throw design in sharp relief. To stipple background of design, use tracer end of modeler.

Step 4


eyeglasses-cases-04


Trim edges. Run spacing wheel on three sides of case. Skive leather where it is to be joined. Cement skived areas and make holes for lacing. Lace pieces together with whip stitch, as in Figure 4.

You Might Enjoy Our Leather Crafts

Technorati Tags: , , , , ,

How to make a Pine Cone Christmas Figurine Ornament

Today I’m going to continue with another Christmas Craft.  This one will be a Pine Cone Christmas Figurine Ornament.  It is super cute and will look terrific on the Christmas Tree.  Let each of the kids make one of these figurine ornaments…. they will love hanging something up on the tree that they made themselves.  Plus, it is so much fun.  So, grab the materials needed and let’s get started.

Check out our other Christmas Crafts.

Tutorial offered by Laura from Dacian Moon Handmade .


Materials Needed

– cardboard
– red leather
– a cotton pad
– 1 wooden bead (big enough to be the head)
– scissors
– 1 piece of ribbon
– 1 pine cone
– craft glue
– black paint
– toothpick


Step 1

Take the cardboard…


…and make a cone of it: bring one side over the middle.. .


… then the other. Glue the two parts together.


Place the pine cone inside, to measure how long the cardboard cone should be.


Cut the extra cardboard.


It will look like this.


Step 2

Apply a border of glue inside the cardboard cone…


… like this.


Then fix it over the pine cone.


Step 3

Take the wooden bead…


And place the toothpick inside.


Make a collar of glue where the toothpick comes out…


… and place it inside the cardboard cone, like in the picture. Keep it a little pressed, until the glue is dry.


Step 4

Take the leather and put it over the cardboard cone.


Measure the length and trace it with a pen.


Cut it out…


… like this


Apply glue on the back of the leather…


… and place it again over the cardboard cone.


Let it dry.


Step 5

Make another cardboard cone, narrower than first. This will be the cap.


Glue the cardboard cone.


Apply a layer of glue on the lower part that goes down from the cone and fold it over it.


Now cut the extra cardboard.


Measure the cone cover on the leather…


… like this.


Cut it out.


It will look like this now.


Apply glue on it…


… and place the cardboard cone on it.


Cover it with the leather.


Apply glue on the back…


… and place there the folded ribbon. Keep it in place until the glue is dry.


Now, let’s put it on the head. Put glue over the upper part of the head…


… like this…


…and fix the cap on it. Let it dry.


Step 6

Take the cotton pad…


… and break it into pieces to make one beard like this.


Apply glue on the lower part of the head and on the front part of the coat…


… and place the beard on it, fix it well on the face.


Take a little black paint with a toothpick…


… and draw its eyes.


Now you have a funny figurine to put on your Xmas tree.


The figurine is cute, huh?!  It will look wonderful on the Christmas Tree.  Enjoy!!

Technorati Tags: , , , , , , , , , , , , , ,

How to Make a Christmas Fairy Ornament

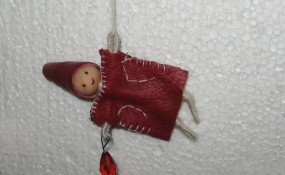
I have a special little Christmas craft for you older kids and adults.  Today I’m going to show you how to make a Christmas Fairy Ornament.  This cute fairy even has a crystal light she is holding.  The crystal will look as it is really lit when the Christmas tree’s lights shine through it.  This Christmas Fairy Ornament will be sure to get you in the Christmas spirit…. after all Christmas is less than a month away.  So, grab the materials needed and let’s get started.

Check out our other Christmas Crafts.

Tutorial offered by Laura from Dacian Moon Handmade .


Materials Needed

– red leather
– thick thread
– 1 wooden bead (big enough to be the head)
– scissors
– needle and thread
– 2 toothpicks
– craft glue
– black and red paint
– crystal (preferably drop)
– wire
-1 pin


Step 1

Take the wooden bead and put a toothpick through it (if doesn’t stay by itself, glue it).


Cut two pieces of wire, one slightly bigger than the other.


Take the smaller one and bend its ends, like this.


Coil it once around the toothpick – those will be her arms.


Step 2

Take the thick thread – you don’t need to cut it for that – and start to roll it over the toothpick.


When you arrive at the wire, cover the intersection in “x”, like this. That will make the arms stay fixed.


Continue covering one arm, and the loop at the end of it. When it is covered, press the end of the wire well and cover it with the other part…


… like this. Continue to roll over back to the toothpick and go on on the second arm.


Cover it the same way and from the middle go down covering the toothpick until you think it is the place for the legs.


Step 3

Take the other piece of wire and bend its ends.


Then bend the wire like this, with one part a little bit longer than the other.


Now bend again the longer part, so she has a leg fold at the knee.


Place the legs over the toothpick and fix them with thread as you did for the arms.


Cover them in an “x” then go down over one leg.


Secure the end and go up again.


Cut the toothpick, keeping a small part to keep the legs in place…


… and cover this part too.


Go down on the second leg, then up until you reach the head.


Here cut the thread and make a knot.


Step 4

Place the figurine on leather and measure her coat.


Mark it on the leather.


Cut double the part you measured…


… and cut that in two…


… one of them will be the front and the other the back of her coat. Make a small “v” cut in the front and back parts, where the head will be.


Start sewing the two parts together, using the cross stitch technique…


… like this.


When you reach the “v” sew only the front part, like this.


Place the fairy inside…


… and continue stitching the front and back together.


Step 5

Sew the two parts together under the arms…


… like this.


Then make a “L” stitch to mark out the arm and the body of the fairy.


It will look like this.


Step 6

Cut a triangle of leather to make her a cap.


Apply a layer of glue on the upper part of the head…


… like this…


… then put the leather on her head, making a cone.


Keep it in place until it is dry.


Step 7

Take a little black paint with a toothpick…


… and draw her eyes.


And some red paint to make her mouth.


Take the pin…


… and put the crystal on it.


Bend it and hang it on her hand. Like this. Then close the loop.


The last thing that must be done is to put a thick thread through her other hand and the fairy ornament is ready.


How adorable is this Christmas Fairy Ornament?  So cute!!  And, it will look even better hung on the Christmas tree.

Technorati Tags: , , , , , , , , , , ,

How to Make Leather or Vinyl Eyebrows for Halloween

Did you ever notice how by just moving your eyebrows it changes your entire expression on your face?  It’s true.  Eyebrows can make you look happy, sad, mean, angry or mystified.  Well, today I’m going to show you how to make Leather or Vinyl Eyebrows for Halloween.  These eyebrows can change any Halloween Costume to give it that extra special “Wow” factor.  If you want to look mystifying…. it can do that.  If you want to look mean…. eyebrows can do that.  I think you get the idea.  So, grab the materials needed and let’s get started.

Check out our other Halloween Crafts.

Laura from  Dacian Moon Handmade  will show you, step by step, how to make these.


How to make Leather or Vinyl Eyebrows for Halloween


Materials Needed

– a piece of light brown leather or vinyl
– pen
– scissors
– paint markers (green, gold, red)
– spirit gum


Step 1

Using the pen, draw the shape of a brow on leather.


Step 2

We will decorate it with leaves.


Mine looks like this.


Step 3

Cut it out…


… like this.


Turn it over and place it on leather to trace the contour of the other eyebrow.


Step 4

Is time to add some colors.


Use green marker to add an overall color.


With the red one make leaf veins…


… like this.


And with gold add some highlights.


Like this.


Repeat for the other one. Let them dry well.

You can attach them using water – soluble spirit gum… and you can remove them by washing with soap and water.


Imagine how these Eyebrows can change your look for Halloween.   If you are planning on being a Nature Goddess, elf, nymph or fairy these eyebrows can help you pull it off.

Technorati Tags: , , , , , ,

How to Work with Leather : Leatherworking Techniques for Kids Working with Adults

There are a few basics you need to know before you work with leather. Leather is one of those things that might need to be cut, so always make sure that you have adult assistance nearby. This is a great craft for Summer Camps, which is why many times kids come home with handmade leather wallets and billfolds. This article will help you with some of the basics and techniques that you might not know about. You will also learn the different lacing methods. You Might Enjoy Our Leather Crafts

Goatskin, cowhide, steer-hide, calfskin and Morocco are the most commonly used leathers. Leather can be bought in whole, half and quarter skins, and is priced by the square foot. Scrap leather, useful for small articles, can be bought by the pound. Only bark-tanned leathers are suitable for tooling. The center back part of the skin is the strongest and is used in the making of wallets, billfolds and key cases. Leather lacing is usually made of 3/32″ goatskin and can be obtained in colors.


How to Work with Leather : Leatherworking Techniques for Kids Working with Adults


How to Work with Leather : Leatherworking Techniques for Kids Working with Adults

TOOLS FOR LEATHER-CRAFT


leather-tools


1. Cutting knife — for cutting and skiving leather. (ADULT ASSISTANCE NEEDED FOR THIS TOOL)

2. Spacing wheel — for making evenly spaced marks for punching lacing holes.

3. Spoon and tracer   —  for tracing, line tooling, flat repousse’.

4. Drive punch — to make holes for lacing.

5. Wooden mallet — for striking tools used in leather-craft.

6. Fid or belt awl — for enlarging holes, stippling, and tightening laces.

7. Revolving punch—for punching holes. Has six different sized tubes on a revolving wheel.

 HOW TO WORK WITH LEATHER

Place the craft work on a smooth, soft, clear-grained board. It is wise to keep one side of the board smooth for tooling, and the other side for cutting and pounding.

Step 1


leatherworking-techniques-01


Run the spacing wheel 1/8″ in from the edge of craftwork, as in Figure 1. Punch the holes, using either the fid and mallet, or #0 punch (for 3/32″ laces) on revolving punch. Make larger holes for heavier laces.

 Step 2A


leatherworking-techniques-02A


If two pieces of leather of equal thicknesses are to be laced, edges must be “skived” so that when glued together, they will be no more than one thickness. To skive leather, shave off about 1/2″ on the wrong side of ends to be joined, as in Figure 2A.

Step 2B


leatherworking-techniques-02B


Cover skived areas with rubber cement, and when almost dry, press together and pound with mallet, as in Figure 2B.

Step 3A


leatherworking-techniques-03A


To splice or join leather, skive about 1/2″ of ends, one on the finished side, and one on the unfinished side, as in Figure 3A.

 Step 3B


leatherworking-techniques-03B


Cement skived ends, and when almost dry, press together and pound with a mallet, as in Figure 3B.

 Step 4


leatherworking-techniques-04


To point lace, cut end of lace at an angle, and cover end with household cement. Allow to dry and stiffen, as in Figure 4.

 HOW TO LACE STITCHES

Single Strand Running Stitches


leatherworking-lacing-01


A single strand running stitch, as seen above, is usually used for decoration or on a single thickness of leather.

 Spiral – Overcast or Whip Stitch (used as an edge trimming and binding thicknesses together.)

2A


leatherworking-lacing-02A


2B


leatherworking-lacing-02B


Bend end of strand (X) down over the leather and continue over casting with end Y, as in Figure 2B.

 2C


leatherworking-lacing-02C


Continue overcasting until corner is reached. Go through corner hole three times to make the turn, as in Figure 2C.

 2D


leatherworking-lacing-02D


Continue overcasting with end Y until work is completed. Finish off work by slipping end Y back under two stitches and cut off, as in Figure 2D.

You Might Enjoy Some of Our Leather Crafts

Technorati Tags: , , , , , ,

How to Make an Elegant Mask for Purim

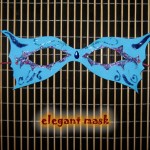
Purim is coming up quickly….. it will be here this year on the evening of March 7th.  So, since Purim is all about hiding ones identity I thought we should make a mask perfect for celebrating Purim.  So, today I will be showing you how to make an Elegant Mask for Purim.  Made from paper and whatever you would like to use to decorate the mask…. the outcome is a Mask that you would be proud to wear.  So, grab the materials you will need and let’s get started.

Check out our other Dressing Up Crafts.

Step by step tutorial offered by Laura from Dacian Moon Handmade


Materials Needed

– colored paper
– leather cord (or any other cord)
– glitter glue (or paint markers / colored pens)
– scissors
– pencil
– synthetic self adhesive crystal


Step 1

Use the cord to measure how big should be the mask…


… and make the markings on the paper, according to your measurements.


Step 2

Draw the lower part of the mask.


Step 3

Make an arch in the middle, where the nose will be.


Step 4

Continue with the upper part of the mask – you can make any shape you like. I made it in the shape of spread wings.


Step 5

Make an inverted arch on the middle.


Step 6

Cut out the mask.


Like this.


Step 7

Measure again and make the markings for the eyes.


Step 8

Draw the eyes…


… and cut them out.


It will look like that.


Step 9

Use the pencil and decorate the mask. I like curved lines and swirls so I used them. I marked the paper near the eyes holes and the corners.


In the middle make space for the crystal.


Step 10

Using glitter glue (or paint markers / colored pens) highlight the decorations. Because my paper is light blue, I use blue glitter glue on the upper part…


… like that,


pink near the eyes…


… like this,


and mauve on the corners.


Step 11

With the scissor make two little holes on the outer edge of the eye holes, like this:


Cut the cord in half.


Make a knot on one side of every half…


… place it through the little holes…
… and the mask is ready to be worn.


Isn’t this mask just simply gorgeous?  Anyone would be proud to wear this elegant mask for Purim.  Did you use your creativity to make your mask differently from mine?  Let me know in the comments below.  And, take a picture of your mask and add that too to the comments…. I’d love to see it.

Technorati Tags: , , , , , , , , , ,

How to Make a “Be My Valentine” Owl

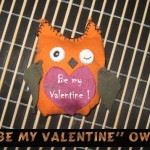
Today I’m going to show you how to make a stuffed Owl toy.  And, not just any stuffed Owl toy, but a “Be My Valentine” Owl that you can give to someone special this Valentines Day.  Imagine their surprise when they receive something that you made yourself.  Or, if you would prefer to keep it…. don’t even give it to someone.  Instead of writing “Be My Valentine” on the heart you can leave it blank or write whatever message you would like.  So, whether it is for you or someone special…. either way it is sure to be loved.  Let’s get started.

Check out our other Valentines Day Crafts.

Tutorial offered by Laura from Dacian Moon Handmade.


Materials Needed

– three pieces of fabric (a large piece – about 16 cm x16 cm – the color that the owl will have, a smaller piece in a contrasting color and a red piece of about 5 cm x 5 cm)
– small pieces of white and black (or brown) leather
– scissors
– pen
– stuffing material (I used some cotton pads)
– needle and thread


Step 1

Fold the large fabric piece in half.


Draw the outline of the owl using your pen. Like this.


Cut it out. You will find it useful to use some pins to keep the two parts together.


It will look like this.


Step 2

Start sewing the two parts together…


… like this.


Stop when you reach the ears.


Sew the other side too.


Step 3

Turn it inside out.


Prepare the stuffing material .


I tore the cotton pads into small fluffy pieces.


Stuff your little bird so that it has a wonderfully squishy and cuddly softness.


When you are satisfied, sew the top.


Like this.


Step 4

Draw two circles on the piece of white leather.


Cut them out.


Apply a layer of glue on the back of one…


… and place it where the eye should be. Do the same with the other one.


Take the black / brown leather…


… and cut out a diamond from it.


This is the beak and we will stick it between the two eyes.


Use the pen to give it some personality by finishing the eyes.


Step 5

Cut 2 wings from the fabric in contrasting color. Like this.


Then sew them on the two sides of the owl…


… like this.


Step 6

Draw a heart on red fabric.


Cut it out, then apply a layer of glue on its back.


Place it under the beak, like this.


Now you can let it like this, decorate it or write “Be my Valentine !” on it, like I did.


And, there you have it…. you just finished the “Be My Valentine” Owl.  Did you make your owl like mine or did you do something different?  Let me know in the comments below.  If you want, take a picture of the owl and share that too in the comments…. I’d love to see it.

Technorati Tags: , , , , , , , , , , ,

How to Make a Valentines Key Chain

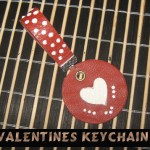
I have a fun craft for you today.  I’m going to show you how to make a Valentines Key Chain perfect for carrying your keys around this Valentines Day.  Made out of Leather this key chain is extremely durable and will hold up for this Valentines Day and for many Valentines Days to come.  Wouldn’t you be proud to carry around your keys on a key chain you made yourself?  So, grab the materials needed and let’s get started.

Check out our other Valentines Day Crafts.

Laura from Dacian Moon Handmade  will show you today how to make this key chain step-by-step.


Materials Needed

– leather (one red round piece of 4 cm diameter; one red band of about 1.3 cm x 10 cm and one piece of white leather)
– white paint
– craft glue
– pen
– scissors
– 1 jump ring
– 1 ribbon end
– 1 eyelets
– punch pliers
– vario pliers
– flat nose pliers


Step 1

Using your pen…


… draw a heart on the white leather piece.


Cut it out.


Step 2

Apply a layer of glue on the back of the heart…


… like this.


Place the heart in the middle of the round leather piece. Let it dry well.


Step 3

Make small points on the rectangular piece of leather, using white paint.


It will look like this.  Let it dry.


Step 4

Make a hole on top of the heart, near upper edge of the round leather piece.


Like this.


You can use white paint to decorate it too.


Step 5

When the rectangular piece is dry, take it and bend it in half.


Place the ribbon end over the edges, like this…


… and use the flat nose pliers to tighten.


Step 6

Put the eyelet into the hole you made earlier.


It will look like this on the back of the piece.


Put the vario pliers like this…


… and press well.


That is. The eyelet is in its place.


The front looks like this.


Step 7

The final step is to attach the two parts together.  Open the jump ring with your flat nose pliers…


Put it through the eyelet…


… and through the ribbon end…


… then close the jump ring.


And, there you have it…. you just finished your Valentines Key Chain.  Isn’t it perfectly festive for Valentines Day?!  How did your Key Chain turn out?  Let me know in the comments below.  And, take a picture of it too and add it to the comments…. I’d love to see it.

Technorati Tags: , , , , , , , , , ,

How to Make a Kawaii Hair Clip

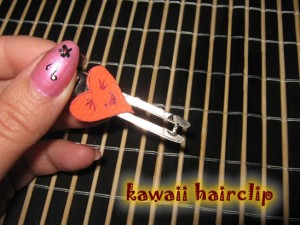
Kawaii means cuteness in Japanese culture (literally, adorable, precious, lovable, or innocent). So, in honor of that today we are going to make a Hair Clip that is totally Kawaii.  The craft is an easy one, but the outcome is a hair clip that you will love to wear.  Made from a piece of leather, a hair clip and a couple of other materials you’ll have this craft put together in no time.  So, grab the materials needed and let’s get started.

Laura from Dacian Moon Handmade will show you this tutorial step-by-step.


Materials Needed

– a piece of red leather (about 3 cm x 3 cm)
– hair clip
– scissors
– craft glue
– black, thin marker


Step 1

Draw a cute figure on the leather (I chose a heart).


Step 2

Cut out the figure with the scissor…


… like this.


Step 3

Draw on a super kawaii face with the marker.


Step 4

Apply a layer of glue on the back of your figure.


Step 5

Place the figure on the hair clip and that’s all. Now, you have a kawaii hair clip.


Doesn’t this Kawaii Hair Clip turn out quite adorable.  I guess it should…. after all that is what Kawaii is all about.  How did you Kawaii Hair Clip turn out?  Let me know in the comments below.  And, make sure to take a picture of your hair clip and add it to the comment…. I’d love to take a peek at it.

Technorati Tags: , , , , , , ,

How to Make a Cute Stuffed Owl

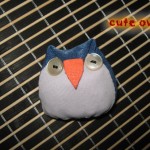
If you love stuffed animals then you are going to love today’s craft.  I’m going to show you how to make a Cute Stuffed Owl.  You can decide to keep in for yourself or give it to one of your best friends to love.  Either way you can guarantee that people are going to love this stuffed owl… especially when they find out that you made it yourself.  So, grab the materials needed and let’s get started.

Laura from Dacian Moon Handmade will show you how to make this, step-by-step.


Materials Needed

– two different pieces of fabric (one smaller than the other) – in my case I used blue and grey.
– one small piece of red leather or felt
– scissors
– craft glue (optional)
– 2 white buttons
– stuffing material (I use some cotton pads)
– string and needles


Step 1

Draw a big triangle (with curved edges) on the blue fabric.


Draw a smaller triangle on the grey fabric.


Step 2

Cut the triangles out.


They should look like this.


Step 3

Place the right sides together…


… and stitch them.


Step 4

Force the left sides together and stitch them too.


This will cause the top of the body piece to come together …


… so sew that shut too.


Step 5

Turn the owl right-side-out …


… and fold down the top of the triangle. If you fold it lower, you’ll have a fatter and shorter owl. It will be taller and thinner if you fold it higher.  Secure this with a quick whip stitch.


Step 6

Cut a small triangle (with curved edges) out of the red leather.


Sew it or glue it on top of the fold.


Step 7

Sew the buttons on the sides of the beak…


… like this.


Step 8

Do a nice running gather stitch along the bottom of the owl, but don’t tie it yet.


Step 9

Prepare the stuffing material – I tore the cotton pads in small fluffy pieces.


Stuff your little bird so that it has a wonderfully squishy and cuddly softness to it.


Tie off the gather threads….


…and now you have a new cute friend to play with.


Isn’t this Stuffed Owl just simply cute?!  And, the cool part is that you made it yourself.  How did your stuffed owl turn out?  Let me know in the comments below.  And, don’t forget to add a picture of your owl to the comment too…. I would love to see it.

Technorati Tags: , , , , , , , , , , ,

How to Make a Cute Valentine’s Card for Valentine’s Day

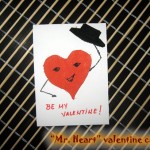
Valentine’s Day is just around the corner.  And, with Valentine’s Day comes what?  Valentines Cards, of course.  Store bought Valentine’s Day cards can be expensive….. plus, they can be extremely boring.  How about making your own Valentine’s Day Card.  Imagine the surprise of the receiver to receive a handmade card from you.  Plus this card is so cute…. no one can resist it.  So, grab the materials needed and let’s get started.

Check out our other Valentines Day crafts.

This tutorial is offered by Laura from Dacian Moon Handmade


CRAFTS MATERIALS NEEDED:

– paper (not too thin)
– scissors
– two pieces of leather (red and black)
– glue
– paints
– toothpick
– pencil


Step 1

Fold the paper in half.


Step 2

Draw with your pencil a heart on the red leather…


… and then cut out the heart.


It should look like this.


Step 3

Draw a hat on the black leather.


Now, we’ll cut out the hat.


Here it is:


Step 4

Apply a good layer of glue on the back side of the heart…


… and place it on the middle of the folded paper.


Step 5

Take the toothpick and use it to paint with black paint the eyes and the mouth on the Heart.


We use a toothpick because with it we can make more thin traces and it will give us accuracy.


Now draw the hands with black paint on the heart.


Step 6

Apply a good layer of glue on the back side of the hat…


… and place it on one hand of the heart.


Step 7

Write with red “Be my Valentine”.


How could someone resist this cute heart?


Now the outside of your Valentine’s Card is done…… write something on the inside and your card is ready to hand out to someone special.  Now the real question is….. who is this someone special?  hmmmm….

Technorati Tags: , , , , , , , , , ,

How to Make a “Unity for All” Bracelet for Martin Luther King Day

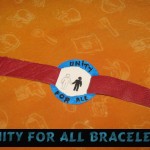
Today is Martin Luther King Day.  Martin Luther King is best know for his “I Had a Dream” speech where he basically said in his dream all men were created equal.  He lived his entire life fighting for that fact.   Today I’m going to show you how to make a “Unity for All” Bracelet for Martin Luther King Day.  This bracelet represents Unity for all…. bringing us all together no matter the color of our skin.  Isn’t that what Martin Luther King would have wanted?  So, grab the materials needed and let’s get started.

Check out our other Martin Luther King Crafts.

Tutorial offered by Laura from Dacian Moon Handmade.


Materials Needed

– cardboard
– pencil
– a band of leather (can be replaced with ribbon)
– varnish (can be nail varnish too)
– black and blue paint
– paintbrush
– toothpick
– round nose pliers
– 2 jump rings
– 2 ribbon cord ends
– 1 lobster clasp


Step 1

Draw a circle on the cardboard.


Cut it out.


Step 2

Place the cardboard circle over the leather …


… and mark the  places where leather will go through the cardboard…


… like this.


Make two cuts on the marks.


Put a side of the leather through one cut…


… then the other side through the other cut, until the circle is in the middle.


Step 3

Using the pencil…


… draw two curves on the cardboard, like this.


Then two human silhouettes.


Step 4

Paint one of them with black – I used the toothpick.


It will look like this.


With blue, color the up and down parts…


… like this…


… and write with black…


… “Unity for All”.


Step 5

To protect the cardboard it is good to use a varnish on it. It can even be nail varnish.


Apply it with the paintbrush all over the cardboard.


Let it dry well.


Step 6

Take a cord end…


… and put it on one end of the leather band, using the round nose pliers.


Like this.


Open one jump ring…


… and attach the lobster clasp of the cord end with it.


Do the same on the other side. You can add here a piece of chain (or you can put only the jump ring).

Now your bracelet is ready.


And, there you have it… you just finished your “Unity for All” Bracelet for Martin Luther King Day.  Wear it proudly….. after all Martin Luther King worked hard to make sure that everyone is created equal.

Technorati Tags: , , , , , , , , , , , ,

How to Make a Leather Star Brooch

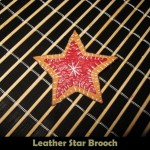
Today I have a very special craft for you.  I’m going to show you how to make a Leather Star Brooch perfect to be worn all Winter long.  Made from two different shades of leather this craft is sure to turn out beautifully.  Imagine how proud you will be to wear a brooch that you made yourself.  Every compliment you will get will make you feel so good…. because you, in fact, made it yourself.  So, grab the materials needed and let’s get started.

Check out our other Leather Crafts and Jewelry Crafts.

Tutorial offered by Laura from Dacian Moon Handmade .


MATERIALS NEEDED

– red and brown leather
– pen
– scissors
– needle and thread
– brooch base
– craft glue


Step 1

Take the red leather and using your pen…


…draw a star on it.


Draw another star, bigger, on the brown leather.


Cut them out…


… like this.


Step 2

Place the red star over the brown one…


… and start sewing them.


You should sew the red star to the brown one, then continue over the edge of the brown one.


It will look like this.


Step 3

Let’s make the center decoration. Start somewhere on the center part…


… and make this snowflake. When you are finished…. make a knot on the back and cut the thread.


Step 4

Apply a layer of glue on the brooch base…


… and place it on the back of the star, over the knot.


Take a small piece of red leather and glue it over the base. Let it dry well.


That’s all! The brooch is ready.


And, there you have it.  You just finished your Leather Star Brooch.  How did your star turn out?  Let me know in the comments below.  And, don’t forget to take a picture and post that too…. I would love to see it.

Technorati Tags: , , , , , , , , , , , ,

How to Make a Rose Pendant

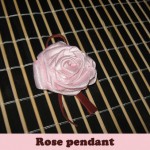
The Holidays are coming up really quickly.  And, with the Holidays comes the joy of gift giving.  For today’s craft I’m going to show you how to make a Rose Pendant perfect for giving to a special person this Holiday season.  Made from ribbon and a piece of leather….. this craft is sure to be loved by anyone receiving it as a gift.  So, let’s get started.

Step by step tutorial offered by Laura from Dacian Moon Handmade


MATERIALS NEEDED:

– pink satin ribbon
– some burgundy leather
– scissors
– needle and thread


Step 1

Take the ribbon and roll it tight for two – three times.


Secure the base by sewing it. This will make the work a lot easier.


Step 2

Now fold the ribbon against itself …


… and continue to gently roll around the center…


… like that.


Now secure again by sewing it.


Step 3

Repeat step 2: fold….


… and roll … then sew.


Step 4

Do that again and again until the ribbon is ending. It should look like that.


Step 5

Bring the last part of ribbon behind the rose and sew it there.


This is the rose.


Step 6

Take the burgundy leather and put it like that on the back of the rose.


Sew it there.


Now the pendant is ready.


And, there you go…. you made a Rose Pendant perfect for gift giving this Holiday Season.  How did your Rose Pendant turn out?  What color did you make your Rose?  Let me know in the comments below.  Now, the real question is…. who are you going to give it to this Holiday?  Whoever it is…. they are sure to love it.

Technorati Tags: , , , , , , , ,