How to Make a Sewn Notebook Cover with Cute Bunny on Top for Girls

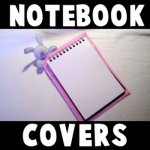
School is about to start yet again and we thought you would love this craft to make a hand-sewn notebook cover. It is a super cute notebook cover that includes a stuffed bunny rabbit at the top. You love to write on it!  Laura from Dacian Moon Handmade  will show you, step by step, how make it.

How to Make a Sewn Notebook Cover with Cute Bunny on Top for Girls


How to Make a Sewn Notebook Cover with Cute Bunny on Top for Girls


CRAFTS MATERIALS NEEDED:

– light colored fabric
– pink felt
– pen
– notebook
– scissors
– pink ribbon
– pink bead for the nose
– instant glue
– filling material
– black paint marker


IMG_7041


Step 1

Fold the felt in half and place the notebook over it.


IMG_7043


Let about 0.5 cm on both parts (left and right) and cut the extra felt.


IMG_7044


Step 2.

Sew the two parts together until you reach about 3/4 of it.


IMG_7046


Measure with the notebook if the height is OK. You should have about 2.5 cm to the notebook spire.


IMG_7047


Step 3.

Put the ribbon here …


IMG_7048


… and sew it in place.


IMG_7049


Like this.


IMG_7051


Step 4.

Continue sewing for another 3 cm then fold the felt backward…


IMG_7052


And sew the parts together. This way, the upper part will be stronger.


IMG_7053


Do the same on the other part.


IMG_7054


The Cover will look like this.


IMG_7055


Now separate the default covers of the notebook and put them between the ribbon and felt.


IMG_7056


Like this.


IMG_7057


This is our notebook 😉 Do you think we can make it cuter?


IMG_7058


Step 5.

Of course! Let’s make a bunny! Draw a head with 2 long ears and two small paws on fabric.


IMG_7059


Cut them out.


IMG_7060


Place it again on fabric and draw the outline. Cut the second bunny out.


IMG_7061


Like this.


IMG_7062


Step 6.

Start sewing the two parts together. Let’s start with an ear.


IMG_7063


When you arrive in this point…


IMG_7064


… prepare the filling material…


IMG_7066


… and fill the ear.


IMG_7067


Then continue to sew until you finish the ear. It is important to sew only a little bit over half, then fill it because if you sew first and then fill, you can’t reach all the corners.


IMG_7068


This is the ear finished.


IMG_7069


Continue with the other ear…


IMG_7070


… the paws, and close the head. Don’t forget to fill it when you sew.


IMG_7071


The bunny head looks like this.


IMG_7072


Step 7.

Choose a point where you want the nose to be…


IMG_7073


… and sew the bead there.


IMG_7074


Like this. (If you prefer, you can glue the bead there)


IMG_7075


We will put the bunny in the corner.


IMG_7076


Sew it in place.


IMG_7077


Like this.


IMG_7078


Add the notebook and you are almost ready.


IMG_7080


Use the paint marker to draw 2 eyes and a mouth for the bunny 😉


IMG_7081


And there you have it…the finished notebook cover…the  bunny will keep you company as you write in it…whether is a journal or a school notebook. I hope that you had a lot of fun!

You Might Also Enjoy Our Other Back to School Crafts

Technorati Tags: , , , , , , ,

How to Make Rubberband Decorated Binders

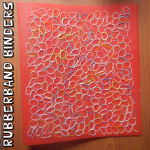
I’m going to continue with the back to school crafts by showing you how to make this Rubberband Decorated Binder.  You can use any style binder you would like and we are going to give it a bit of flair by adding a bunch of mini rubberbands.  You can find these mini rubberbands at most stores…. just check out the hair section of the store.  So, grab the materials needed for this craft and let’s get started.

Check out our other Back to School Crafts.


How to Make Rubberband Decorated Binders


Materials Needed

Binder

Glue

Mini Rubberbands


Step 1


Get a binder


Get a binder…. any type.


Step 2


Add glue to an area


Add glue to an area…. add bunches.


Step 3


Place rubberbands on glue


Buy mini rubberbands (hair section of store).  Place rubberbands on glue.


Keep going.


Keep going.


Step 4


If you want to you can go all the way to the edges.


And going.  If you want to you can go all the way to the edges.


Finished Rubberband Decorated Binder


And, there you have it….. your finished Rubberband Decorated Binder.  Isn’t awesome?!   Your friends are sure to ask you where you found such an awesome back to school binder.  Have fun at school.

Here is our video on How to Make Rubberband Decorated Binders

Technorati Tags: , , , , , , , , , , , ,

Decorating Spiral Notebooks with Decorative Paper for Back to School Craft

Do you want to make your Plain Jane notebooks look awesome?! This is a great craft for teens (boys and girls – it doesn’t have to be flowers) who want to have the coolest notebooks in school. All you will need is a spiral notebook, some wrapping paper or decorative paper (or even a poster or magazine layout), and some glue…and about 30 minutes of your time. Find out how to decorate your spiral notebooks below.


Decorating Spiral Notebooks with Decorative Paper for Back to School Craft


Decorating Spiral Notebooks with Decorative Paper for Back to School Craft

Step 1


Step 1 Decorating School Notebooks


First of all, buy a cheapo spiral bound notebook…at the dollar store or at the store.

Step 2


Step 2 Decorating Notebooks


Then you will need to untwist the ends of the spiral wire. Then twist the wire so that it slowly comes out of the holes….do this until the wire is completely out.


Step 3


step-03-decorative-notebook


Now take both the front and back cover and put it out on the table (protect the table with newspaper or a garbage bag first). Put it on the table so that the sides that you need to decorate are facing up. Then spread glue on one side of both covers.

Step 4


step-04-decorative-notebook


Now turn the covers over so that the decorative paper is at the bottom. You can now see where you can cut the excess paper off of the covers.

Step 5


step-05-decorative-notebook


You can now use the holes that are in the spiral notebook’s covers to guide you to where you need to poke holes in the decorative paper. You can use an awl (a tool that has a point at the end)…or you can use a needle, hole puncher, or a ball point pen if you have no other options. Poke holes all the way down each cover.

Step 6


Decorating Spiral Notebooks with Decorative Paper for Back to School Craft


Now you just need to thread the spiral wire through the covers again and bend the ends so that it doesn’t come out again. Doesn’t this look beautiful? You can further personalize and decorate your notebook to make it more your own…but this is definitely enough if you don’t feel like customizing it further.

Here is our video on How to Decorate a Spiral Notebook with Decorative Paper.

Technorati Tags: , , , , , , ,