Turn a Deck of Cards into a 52 Reasons I Love You Book for a Valentines Day Gift

I am sure that you can think of way more than 52 reasons that you love someone. However, it will only take those 52 reasons to make your loved-one break down into tears of happiness. Take the time to tell your Mom / Dad / Sister / Brother / Grandparents etc how much you love them with this special project. Versions of this craft are all over the Internet…each a little different from the other, and I am not sure who was the first craftster to come up with this idea…but it is super cool. So know that I didn’t come up with this idea, however, it isn’t exactly the same as others.


Turn a Deck of Cards into a 52 Reasons I Love You Book for a Valentines Day Gift


Crafts Materials Needed:

A Deck of Cards

Glue or Paste

Jump Rings

Paper / Printer (or you can write out by hand)

Hole Puncher

Templates


template 3 - 52 ways i love you template 1


Click on Pic and Save Pic That Opens Up


template 1 - 52 ways i love you template 1


Click on Pic and Save Pic That Opens Up


template 2 - 52 ways i love you template 1


Click on Pic and Save Pic That Opens Up


template 4 - 52 ways i love you template 1


Click on Pic and Save Pic That Opens Up

Step 1


step1


Download and then print out the 4 pages of templates. Then write something for each number. Each thing should be something you love about the person you are writing the book for.

Step 2


step2 : 52 reasons why I love you


Cut each number rectangle out.


Step 3


step 3 : 52 reasons why I love you


Paste each number rectangle on a playing card.

Step 4


step4a


Now take a hole puncher and punch 2 holes in each card. Line cards up so holes are in about the same place on each card.


step4b


Here is what the holes look like on the other side of the cards.

Step 5


step 5 : 52 reasons why I love you


Open jump rings and thread it through all the cards…2 this for both holes.

Now Your Loved One Can Flip Thru Pages


step6d


step6c


step6b


step6a


This might be the most special gift you ever give any one. Your loved one will cherish this book forever.

Technorati Tags: , , , , , , , , , ,

10 Cool Crafts Made from Old, Worn Out Books – Upcycled Books


11 Cool Crafts Made from Recycled Books


While roaming the internet the other day I came across quite a few cool crafts made from old, worn out books….. 10 of them to be exact.  They were so cool I had to show them to you.  All of them have instructions so that you too can make these creative items.  From Wreaths to a Kindle Case you are going to be surprised in the things you can do with books to upcycle them…. I know I was.

10 Cool Crafts Made from Old, Worn Out Books

(1) Rose Wreath


Rose Wreath


Look how beautiful this wreath is!!  It is just incredible.  And, the cool thing is that if you check out ByStephanieLynn you will see that the instructions on how to make this book wreath isn’t that complicated at all.  And, it sounds like so much fun.


(2) Kindle Case


Kindle Case


Look how creative this craft is…. so creative.  Here is a great way to hold and protect your Kindle…. and it is inexpensive.  I found this craft over at SuddenlyFound and she will show you how you can have this Kindle case made from a book too.


(3) Book Page Fabric


Book Page Fabric


This book craft is pretty interesting.  Turn book pages into pieces of fabric.  DesignSponge turned book pages into a writing pad, a tiny notebook and a cleanable writing pad for under the computer.  Make sure to check out her site so you can see all the pictures of all she made.


(4) Secret Storage Areas


Secret Storage Area


This craft always reminds me of something from a Spy Movie.  This is so cool…. what child wouldn’t love a secret hiding space?  And, what better way to do this than in a book.  Education.com shows you how to do this.


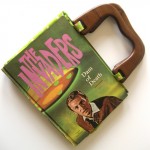
(5) Book Purse


Book Purse


Isn’t this book purse an original idea?  It really is.  And, I can totally assume that you would be the only one carrying around a purse like this.  If you are wondering how to make this purse go check out Curbly for all the details.


(6) Book Vase


Book Vase


Check out these beautiful vases made from books.  Aren’t they so cool?!  And, they aren’t that difficult to make either.  You can find out the step-by-step “how-to” over at CountryLiving.  Just skip over to slide 8 to see this particular craft.


(7) Book Table


Table Made from Books


Here is a table constructed out of books.  Looking at this I would wonder how stable this desk could possibly be.  But, if you check out the original post over at Instructables they explain how if constructed correctly this table is quite stable.  Check it out for the full how-to.


(8) Book Page Wreath


Book Page Wreath


Here is another Book Wreath that I loved so much I had to include in this post.  This particular book page wreath was done by LivingWithLindsay and she explains beautifully how to make this wreath for yourself.


(9) Book Clock


Book Clock


This clock is absolutely adorable and would work out perfectly in any child’s room.  I found this book craft over at DesignDazzle and it’s a fun craft.  She has the complete tutorial over there, so make sure to check out her site.


(10) Book Picture Frame


Book Picture Frame


Here is a cool way to present those photographs for all to see.  How about use an old book with an interesting cover and recycle it this way.  WikiHow shows you how to do this beautifully with a step-by-step tutorial.

Technorati Tags: , , , , , , , ,

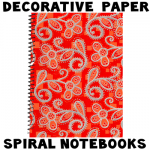
Decorating Spiral Notebooks with Decorative Paper for Back to School Craft

Do you want to make your Plain Jane notebooks look awesome?! This is a great craft for teens (boys and girls – it doesn’t have to be flowers) who want to have the coolest notebooks in school. All you will need is a spiral notebook, some wrapping paper or decorative paper (or even a poster or magazine layout), and some glue…and about 30 minutes of your time. Find out how to decorate your spiral notebooks below.


Decorating Spiral Notebooks with Decorative Paper for Back to School Craft


Decorating Spiral Notebooks with Decorative Paper for Back to School Craft

Step 1


Step 1 Decorating School Notebooks


First of all, buy a cheapo spiral bound notebook…at the dollar store or at the store.

Step 2


Step 2 Decorating Notebooks


Then you will need to untwist the ends of the spiral wire. Then twist the wire so that it slowly comes out of the holes….do this until the wire is completely out.


Step 3


step-03-decorative-notebook


Now take both the front and back cover and put it out on the table (protect the table with newspaper or a garbage bag first). Put it on the table so that the sides that you need to decorate are facing up. Then spread glue on one side of both covers.

Step 4


step-04-decorative-notebook


Now turn the covers over so that the decorative paper is at the bottom. You can now see where you can cut the excess paper off of the covers.

Step 5


step-05-decorative-notebook


You can now use the holes that are in the spiral notebook’s covers to guide you to where you need to poke holes in the decorative paper. You can use an awl (a tool that has a point at the end)…or you can use a needle, hole puncher, or a ball point pen if you have no other options. Poke holes all the way down each cover.

Step 6


Decorating Spiral Notebooks with Decorative Paper for Back to School Craft


Now you just need to thread the spiral wire through the covers again and bend the ends so that it doesn’t come out again. Doesn’t this look beautiful? You can further personalize and decorate your notebook to make it more your own…but this is definitely enough if you don’t feel like customizing it further.

Here is our video on How to Decorate a Spiral Notebook with Decorative Paper.

Technorati Tags: , , , , , , ,

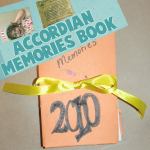
Making a New Years Memory Accordion Pocket Book to Hold Precious Memories

It is almost New Years Eve and Day so I thought that I would make a special craft for this special time. It is nice to put aside special treasures, mementos, pictures, certificates, love letters, or whatever else you find important to you. You can use this special fold-up, accordion pocketed book to hold all the memories of this year or next year … and then you can put it away as if it were a time capsule. Then you can try not to look at it for 10 years. You will be surprised at how much you have changed in that amount of time. Have fun.

Making a New Years Memory Accordion Pocket Book to Hold Precious Memories


Making a New Years Memory Accordian Pocket Book to Hold Precious Memories


Crafts Materials That You Need:

..Ribbons
..Decorative Paper (Any Size That You Want…my paper was 11 x 14…but this will also work with 8×11 or any other paper)
..Scissors
..Glue
..Ruler

Step 1


Step 01 : How to Make Accordion Fan Out Memory Scrapbook to Hold Pictures


Take one of your decorative pieces of paper and cut it lengthwise (in half) as you see above.

Step 2


Step 02 : How to Make Accordion Fan Out Memory Scrapbook to Hold Pictures


No bend one of these pieces of paper in half lengthwise.


Step 3


Step 03 : Kids Craft to Make New Years Scrapbook Project for Photos


Now bend it again inwards.

Step 4


Step 04 : Kids Craft to Make New Years Scrapbook Project for Photos


Unfold it…turn it onto its opposite side. It probably will stand up like mind does above. Now fold it inwards again (now it will be in the opposite direction of the original crease).

Step 5


Step 05 : How to Make Accordion Fan Out Memory Scrapbook to Hold Pictures


Like I said above, you are re-creasing the folds in the opposite direction.

Step 6


Step 06 : How to Make Accordion Folding Pocketed Memory Book for New Years Craft for Kids


Now do the same exact thing with the second piece of paper.

Step 7


Step 07 : Kids Craft to Make New Years Scrapbook Project for Photos


Overlap both of these folded pages so that they look like mountains (look at the above picture). Now glue them together.

ALSO CUT OFF THE FIRST OR LAST RECTANGLE.

Step 8


Step 08 : Kids Craft to Make New Years Scrapbook Project for Photos


If you want pockets in your accordion memory book…then follow this step. You will be doing step 1-7 over again….but in half the height. This is for the accordion pockets. Just figure out how high your original accordion fold was and then make 2 accordions half the height.

Step 9


Step 09 : How to Make Accordion Fan Out Memory Scrapbook to Hold Pictures


It is a little hard to see but I have glued the pockets down to the first accordion folds that we made. You should glue it to the bottom and to the creases. Don’t glue the entire thing down or you won’t be able to use them as pockets.

Step 10


Step 10 : How to Make Accordion Folding Pocketed Memory Book for New Years Craft for Kids


This part is a bit complicated and you might need a parent to help you. Don’t over-think it. Basically just put your folded up accordion paper in the middle of a piece of decorative paper….Lightly draw a line around this paper book. Now just take a ruler and draw lines vertically and horizontally across the paper. Now you should have a grid. On the farthest left line draw a triangle at the top and at the bottom of the paper (as seen above). These 2 triangles should be cut out so they are removed from the piece of paper. On the right side of the paper, cut the top and bottom square so that they are removed from the paper. It would be better if you could make these cuts larger than the line (as you see above). Fold on the dashed lines that you see above.

Step 11


After you cut out everything...this is what it should look like.


After you cut out everything…this is what it should look like.

Step 12


Step 12 : Kids Craft to Make New Years Scrapbook Project for Photos


Now fold the middle and left tabs inwards (as seen in the diagram above). Basically fold top left down…bottom left up. Fold middle top down and middle bottom up. Then it will look like the picture above.

Step 13


Step 13 : How to Make Accordion Fan Out Memory Scrapbook to Hold Pictures


Now fold the left over the middle.

Step 14


Step 14 : How to Make Accordion Folding Pocketed Memory Book for New Years Craft for Kids


Now fold the right rectangle into the pocket that you created in the previous step.

This will be one of the covers.

Get another piece of decorative paper and do the same thing that you did in steps 10 – 14.

Step 15


Step 15 : Kids Craft to Make New Years Scrapbook Project for Photos


Yes…I know…all of a sudden my covers turned orange. I messed up the green ones. Anyways. This is what you should have in front of you right now. 2 covers and your accordion paper with pockets (unless you decided not to).

Step 16


Glue Covers to Accordion


Glue the front cover to one side of the accordion and the back cover to the other side of the accordion.

Step 17


Step 16 : Kids Craft to Make New Years Scrapbook Project for Photos


Cut 2 slits in the back of  the back cover because you will be putting ribbon through it and then tying the ribbon in the front of the book.

Step 18 – Finishing up Your Memory Scrapbook


Step 17 : How to Make Accordion Fan Out Memory Scrapbook to Hold Pictures


Draw whatever you want on the front of the cover. You can even draw a picture if you want to. Stick pictures, ticket stubs, invitations, memos, special notes, and other special mementos from this year (or next year) so you can remember your special memories from that year. You can use it as a time capsule. Look at this in ten years if you want to.

Technorati Tags: , , , , , , , , , , , , , , , , ,

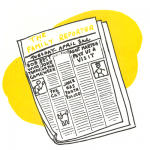
Make a Family Newspaper to Talk About Family News

Every family has news—lots of news—so why not make a family newspaper! This would be a great gift to make for Mom on Mother’s Day or Dad on Father’s Day or for birthdays. For gifts, you can put clever titles like ‘The Best Mom in the World Has Been Found’ … or The Sweetest Mother in the World Has Been Found to Be Timmy’s Mom (if your name is Timmy). This is a great crafts idea that will produce a keepsake to cherish in years to come. Find out how to make a Family Magazine or Newspaper below.

How to Make a Family Newspaper to Talk About Family News – Great Gift Idea for Kids to Make


Crafts Materials Needed

-Paper
-Pencil
-A ruler

Directions for Making This Arts and Crafts Project:

Step 1

Print the name across the top of a large sheet of paper.

Step 2


Insert a dateline by drawing two parallel lines under the title and printing the date in this space.

Step 3

Divide the rest of the sheet into four columns.

More Instructions

The main news should be put under a two-column headline. Print headlines in pencil or ink. You can write the news itself in longhand.
What’s the main piece of news? Well, it might be a visit from a relative, someone’s graduation from school, a new business venture by some member of the family, a furlough visit of your older brother, a party, or any other event that makes that particular week memorable.

A joke column is always good. You can print the home schedules for washing dishes or doing other chores around the house.
Ask other members of the family to contribute. Father will be glad to offer a parental bit—perhaps some special announcement about a picnic that is being planned.

Maybe one of the other boys or girls will contribute a poem or a funny cartoon.

If the newspaper consists of two or more sheets, they can be bound together by running scotch tape down the edges of the left-hand side of the sheets. The newspaper will then open like a book.

Technorati Tags: , , , , , , , , , , ,

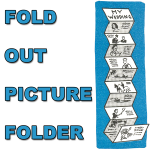
Make Picture Folder Gift with Accordion Fold Out Photo Holder

This is a special arts and crafts project for kids who want to make a special gift for Mom or Dad for a gift for Mother’s Day or Father’s Day. This is a fold-out, accordion-style photo book / folder. You can either use real photos or make your own comic book or use pictures from a magazine to make a funny story. This is a great craft to build imagination or to give as a gift to a loved one or friend.


How to Make Picture Folder Gift with Accordion Fold Out Photo Holder Craft Idea for Kids

CRAFTS MATERIALS NEEDED:

*About 6 sheets of paper (old letterheads, writing paper, shelf paper)

*A jar of paste

*old pictures from magazines or special photos

*scissors

*pencil (or crayons)

EASY DIRECTIONS FOR THIS ARTS AND CRAFTS ACTIVITY

You can have a wonderful time making up this picture folder, either with a friend or by yourself.

Step 1


Paste 6 or 8 sheets of paper together, end to end, the long way. The picture above shows you how to do this. This will make a very long strip of paper.

Step 2


Fold this, accordion fashion, leaving about 4 inches between each fold, so that you will have 12 to 16 spaces. To fold accordion style, you fold forward then backwards, forwards, then backwards…see the picture above.

Step 3

Now choose whether you want to make this with family or friend photos to give to a loved one or friend as a gift or whether you want to make this a fun, fictional, made up comic book or story.

Directions for Making Fold Out, Accordion Style Photo Book Folder

Now just paste special pictures or photos on to each page. The Fun Part is Making Clever or Funny Captions. Make sure that it is okay to use special photos on this photograph project. ASK YOUR MOM OR DAD FIRST!!!!

OR

Directions for Making a Fictional – Fun Story Picture Folder or Fold Out Comic Book

A picture folder is going to be made. The first thing you must do is choose a subject. Let’s suppose that the idea you’re going to work on is “My Life as a Movie Star.” Cut out appropriate pictures for your subject from old magazines. Then paste these pictures on the accordion folder, one picture on a square. You print a title on the folder for each picture. This will be loads of fun because you will be creating a story.
For example, if you decide on “My Life as a Movie Star,” the first picture might be that of a crying baby. It could be entitled “How I looked when I first went into the movies.” The next picture could be that of an older baby in a carriage, which you might call “When I won first prize in the Atlantic City Baby Parade.” In this way, you follow the subject through the years with a picture pasted on each space of your Accordion Folder. Of course, you can use both sides of your folder, as shown in the picture.
Some good subjects are: “My Experiences as a Flyer;” “My Wedding;” “My Summer Vacation;” “When I Was an Explorer.”
It’s great fun to make up a humorous folder. Cut out comic pictures and give them humorous titles. For instance, you might entitle a picture “My Student Days at State College,” the picture being that of someone sleeping deeply, apparently snoring loudly. If you made up a whole folder of this type, you could display it at a party. Your friends will have great fun reading it. They, very likely, will start making up folders themselves as soon as possible, and you’ll be starting a very enjoyable fad.

Technorati Tags: , , , , , , , , , , , , , , , , ,

Make Recipe Books for Recipes for Mom on Mother’s Day

What Mom or Grandmother doesn’t love getting a personalized recipe book? This one is so special too….It is completely filled with envelopes so your Mom or Grandma can put recipes that they find in magazines or books, and keep them all in one categorized place. Make this for Mother’s Day, for a gift on a birthday, or any other reason you have to show love to your family and friends. Have fun.


Make Recipe Books for Recipes for Mom on Mother’s Day

CRAFTS MATERIALS YOU WILL NEED:

*notebook, 8Y2 by 11 inches

*decorative paper

*2 pieces of ribbon, each 8 inches long

*glue

*colored pencil

*scissors

*tape measure

DIRECTIONS FOR MAKING RECIPE FILE BOOK:

Step 1


Paste two pages together on two sides (marked A and B in drawing) and leave side C open. Repeat this until you have 24
“envelopes” in the notebook. Mark each envelope with the kind of recipes to be kept there—Appetizers, Soups, Meats, Fish, Vegetables, Desserts, Drinks, Sandwiches, etc.

Step 2


Glue the pieces of ribbon onto the center of the back and front covers of the notebook.

Step 3


Glue decorative paper onto the covers. Cut the ends of the ribbon on the bias, to prevent fraying. You can make the same file for patterns, bills, or personal letters.