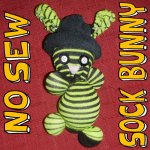
How to Make a Simple No-Sew Sock Bunny Rabbit for Easter or for Fun

Today, we will show you how to make a sock doll bunny rabbit…the best part is that there is NO sewing involved in this craft. Anybody can make these sock bunnies and they can make it pretty quickly. I think you can probably make one of these is 20 or 30 minutes. And these sock bunnies turn out so adorable that you are going to make a few of them so your bunnies can keep each other company. This shouldn’t be played with by young kids who might eat the rubber bands if they come off!


How to Make a Simple No-Sew Sock Bunny Rabbit for Easter or for Fun


Crafts Materials Needed

– 1 Stretchy Sock  – I used Knee High Girls Socks
– 1 Normal Sock for the Hat
– Small Rubber Bands or Yarn
– Buttons or Sharpie Marker or Fabric Markers or Needle and Thread
– Stuffing
-Scissors

Step 1 Thru 9


Step 1 Thru 9 How to Make a Simple No-Sew Sock Bunny Rabbit for Easter or for Fun


We have a crafts tutorial for making a no-sew sock doll. Steps 1-9 are the same for this tutorial…so first go to the sock doll tutorial, and do steps 1-9 and then come back to this tutorial for step 10. Your doll should look like the above picture when you are done with step 9.

Step 10


Step 10


Now cut the top part in half…as seen in picture above.


Step 11


Step 11


Now, in this picture above, we have already done one of the 2 sides. The left side has been braided already…we did this by cutting the left side into three strips and then braiding that side and rubber banding the end as if it was hair. Now the right side needs to be done…we cut the right side into 3 strips…now we just need to braid it. If you don’t know how to braid, please see this tutorial.


real-pic-06


Now both sides should be braided and look like this.

Step 12


Step 12


Now both the right side and left side is looped into a letter ‘U’ shape. Then hold both loops together in the center and rubber band both sides together. I used more than one rubber band to make sure both sides stayed together.

Step 13


Step 13


Cut a second sock in half.

Step 14


Step 14


Now put the bottom of the sock (toe part) on top of the bunny.

Step 15


Step 15


Now fold up the bottom of the sock…so it is rolled up like a normal winter hat is.

Step 16


Step 17


Now cut a small slit on both sides of the hat.

Step 17


Step 18


Now pull an ear thru


real-pic14


And another ear thru.

Step 18


Step 19


Cut a nose out of fabric or felt (a triangle shape). Use a button(s) for eyes.

Step 19


Step 19


Ask mom or dad to help you hot glue the eyes and nose on. That is it…you have a stuffed bunny rabbit to play with. Wasn’t that easy?!

This shouldn’t be played with by young kids who might eat the rubber bands if they come off!

How to Make Rubberband Decorated Binders

I’m going to continue with the back to school crafts by showing you how to make this Rubberband Decorated Binder.  You can use any style binder you would like and we are going to give it a bit of flair by adding a bunch of mini rubberbands.  You can find these mini rubberbands at most stores…. just check out the hair section of the store.  So, grab the materials needed for this craft and let’s get started.

Check out our other Back to School Crafts.


How to Make Rubberband Decorated Binders


Materials Needed

Binder

Glue

Mini Rubberbands


Step 1


Get a binder


Get a binder…. any type.


Step 2


Add glue to an area


Add glue to an area…. add bunches.


Step 3


Place rubberbands on glue


Buy mini rubberbands (hair section of store).  Place rubberbands on glue.


Keep going.


Keep going.


Step 4


If you want to you can go all the way to the edges.


And going.  If you want to you can go all the way to the edges.


Finished Rubberband Decorated Binder


And, there you have it….. your finished Rubberband Decorated Binder.  Isn’t awesome?!   Your friends are sure to ask you where you found such an awesome back to school binder.  Have fun at school.

Here is our video on How to Make Rubberband Decorated Binders

Technorati Tags: , , , , , , , , , , , ,

How to Make a Decorated Elastic for Your Hair

Here is a fun craft for the girls today.  I’m going to show you how to make a Decorated Elastic for your Hair.  The craft is super easy, but it is so much fun.  Made from a basic elastic and some extra buttons you have laying around…..  the elastic turns out so beautiful.  People will actually be surprised you made it yourself.  So, grab the few materials you need for this craft and let’s get started.

Check out some of our other Crafts for Girls.

Laura from  Dacian Moon Handmade  will show you how this craft step-by-step.


Materials Needed

– elastic for hair
– buttons in assorted colors
– needle and thread
– scissors


Step 1

Choose the place on the elastic where you will add the decoration.


Add the bigger button.


If it has 4 holes, we will use two of the holes to sew it to the elastic.


Take care to sew through the elastic, not around it. That way, the decoration will stay fixed.


Step 2

When the first button is secured add the second.


Sew it well …


… and then the next one.


You can let it like that or you can add a crystal, a flower or anything you like.


That’s it!!  How easy was that?!  Now you have an original elastic that no one else has.  How did your decorated elastic turn out?  Let me know in the comments below.  Also, take a picture of your elastic and share it in the comment as well… I’d love to see it.

Technorati Tags: , , , , , , , , , , ,

How to Make Pretend Witch Legs for Halloween

One of my favorite movies as a young child was the Wizard of Oz.  There was one part of the movie that I couldn’t wait for each time I saw it… when Dorothy’s house fell on top of the wicked witch and all that was showing was the witch’s legs.  Well, I’m going to show you how to do that too without actually having to drop your house on a witch.  We are going to make pretend witch legs for Halloween.  Set them outside your home as if your house fell on a witch…. Now, THAT’S an awesome Halloween Decoration.

Check out our other Halloween Crafts.


How to Make Pretend Witch Legs for Halloween


Materials Needed

Knee High Socks

Stuffing

Red Heels or other Cool Looking Shoes

Rubber Band or Yarn


Step 1


Go to the Dollar Store to get some cheap knee high socks


Go to the Dollar Store to get some cheap knee high socks.  They don’t have to be striped… but a pattern would be great.  Or, go to a Department Store and get some socks on sale.


Step 2


Put stuffing in socks deep enough to reach the tips of the toes


Put stuffing in socks deep enough to reach the tips of the socks.


Step 3


Finish adding stuffing to each sock and tie off with rubber band or yarn


Finish adding stuffing to each sock and tie off with rubber band or yarn.


Step 4


Add some cool looking shoes


Add some cool looking shoes and then place them in a spot that makes it look like something landed on them… Like your house.

You are going to get some amazing compliments for this Halloween Decoration.  Mostly from kids trick or treating who are just going to be totally creeped out by the legs…. wondering what you did to get them there.  But, isn’t that what Halloween is all about?

Technorati Tags: , , , , , , , ,

Mask Making Fun – How to Make 3 Different Style Masks

Everyone knows that Masks are a perfect craft for Halloween.  But, if your kids are anything like my two littlest ones…. Masks are fun ANY time of year.  My children LOVE masks… love them!!  So, today I’m going to show you how to make three different style masks….. make your favorite or make all three.  Plenty of mask making fun.

Check out our other Halloween Crafts.


How to Make 3 Different Style Masks


Mask 1


Mask 1 Directions


Materials Needed

Paper Bag

Chalk

Crayons

Scissors

Paint, Construction paper, yarn…. and anything you would like to decorate the mask with.

Directions:

  1. Put a paper bag over your head. Mark with chalk or crayon the places for eyes and mouth.
  2. Remove the bag and carefully cut these openings.
  3. Funny ears, a nose, and hair may be added by painting and pasting. Color with crayons or water colors.


Mask 2


Mask 2


Materials Needed

Firm Paper (butcher paper would work)

Paint, Construction paper, yarn…. and anything you would like to decorate the mask with.

Pencil

Scissors

Hole Punch

Notebook Reinforcements (makes holes stronger)

String

Rubber Bands

Paper Clips

Directions:

  1. Cut a piece of firm paper large enough to cover your face and reach your ears. Hold the paper to your face and mark places for your eyes and mouth.
  2. Remove the paper and cut the openings.
  3. Punch holes in the sides just above the ears. Put notebook reinforcements or paper rings over the holes.
  4. Decorate the mask however way you would like.
  5. Use string, rubber bands, and paper clips to fasten the mask around your head.


Mask 3


Directions for Mask 3


Materials Needed

Clay

Cardboard, Slate or Wood

Paper Towels

Bright Colored Paint

Directions:

  1. Model a face of clay on a firm base of heavy cardboard, slate, or wood.
  2. Let the model dry. Cover it with a layer of damp strips of paper toweling.
  3. Paste four more layers over the first layer. Each layer should be at right angles to the one under it. When the paper is dry and rigid, remove the mask from the clay model.
  4. Paint the mask with bright colors.

There you have it…. 3 different style masks.  Your child is sure to find a Mask craft that fits their needs.  Have fun!!

Technorati Tags: , , , , , , , ,

How to Make No-Sew Stuffed Puppy Dog Animal Toy with Socks & Rubber Bands

Today we will show you how to make stuffed puppy dogs out of socks and rubber bands. This craft will probably take less than 10 minutes for you…it is that easy. These are no-sew stuffed animals…that is right…no sewing necessary at all. If you like sock monkeys, but you were too lazy to make them, then this arts and crafts project is for you. Have fun.

You Might Like Our No-Sew Baby Doll Craft

You Might Like Our Other No-Sew Crafts


How to Make No-Sew Stuffed Puppy Dog Animal Toy


How to Make No-Sew Stuffed Puppy Dog Animal Toy with Socks & Rubber Bands

Crafts Materials Needed

– Stretchy Socks – I used Knee High Girls Socks
– Small Rubber Bands or Yarn
– Buttons or Sharpie Marker or Fabric Markers or Needle and Thread
– Stuffing
-Scissors

Step 1


Step 1 : Start Sock Doggy with a Sock


Take out your sock….preferably socks that are stretchy and ones that have an interesting pattern or color.

Step 2


Step 2 : Put Stuffing in the Sock


Put your stuffing in to your sock…put it all the way down to the tip of the sock.

Step 3


Step 3


Now on the side ‘A’ (pictured above), form a ball by making sure that some of the stuffing is at that corner and then just pushing down with your thumbs to form a ball.

Step 4


If this stuffed dog is being made for a younger child (under 3 or 4 of age) you should use yarn instead of a rubber band, just in case it comes off…you never know what a child will put in his or her mouth and chock on. If you use a rubber band just put the rubber band around the ball until it is tight. If you are using yarn, wrap it around that ball-shape and tie knots and wrap it around more and tie more knots…then cut it off.

Step 5


Now you should do the same thing for the other dog paw, side B.

Step 6


Now put stuffing above the paws for the puppy dog’s belly area.

Step 7


Now make 2 arms the same way that you made the paws.

Step 8


Tie the yarn or rubber band next for the neck.

Step 9


This is what the real thing looks like so far.

Step 10


Add stuffing to the sock for the puppy dog’s head and then again, tie off with rubber band or yarn.

Step 11


This is what the real puppy dog looks like so far.

Step 12


Now cut the remaining sock (the part above the head and rubber band) in the center….like you see above.

Step 13


Now on each side – there are 2 sides – cut in 3 slits. So basically you have 6 slits in all then.

Step 14


Now braid each side. If you don’t know how to braid…then visit the Wikipedia page on braiding.

Step 15


Now rubber band each side in a loop.

Step 16


Now rubber band both loops together in the center.

Step 17


How to Make No-Sew Stuffed Puppy Dog Animal Toy


Cut off the excess that was on the top of the 2 loops (you will be cutting off the rubber bands too from step #15)

Step 18


Now this is what your doggy will look like.

Step 19


How to Make No-Sew Stuffed Puppy Dog Animal Toy


If you want to…glue on button eyes and nose. If your parents are around, ask them to hot glue them on, otherwise use fabric glue. If you have a sharpie or paint, make the dog’s mouth too.

I hope that you had a lot of fun.

You Might Like Our No-Sew Baby Doll Craft

You Might Like Our Other No-Sew Crafts

Technorati Tags: , , , , , , , , , , , , , , , , , , , ,

How to Make Easy No-Sew Sock Dolls Crafts Idea for Kids

Today we will show you how to make dolls out of socks. This craft will probably take less than 10 minutes for you…it is that easy. These are no-sew dolls…that is right…no sewing necessary at all. If you like sock monkeys, but you were too lazy to make them, then this arts and crafts project is for you. Have fun.

You Might Like Our No-Sew Puppy Dog Craft

You Might Like Our Other No-Sew Crafts


How to Make Easy No-Sew Sock Dolls Crafts Idea for Kids


How to Make Easy No-Sew Sock Dolls Crafts Idea for Kids

Crafts Materials Needed

– Stretchy Socks  – I used Knee High Girls Socks
– Small Rubber Bands or Yarn
– Buttons or Sharpie Marker or Fabric Markers or Needle and Thread
– Stuffing
-Scissors

Step 1


Step 1 : Making No-Sew Sock Monkey Dolls Crafts Project


Take out your sock.

Step 2


Step 2 : Making No-Sew Sock Monkey Dolls Crafts Project


Put stuffing in your sock…all the way down to the tip of the sock.


Step 3


Step 3 : Making No-Sew Sock Monkey Dolls Crafts Project


Now on side ‘A’, form a ball by making sure that some of the stuffing is at that corner and then just pushing down with your thumbs to form a ball.

Step 4


Step 4 : Making No-Sew Sock Monkey Dolls Crafts Project


If this doll is being made for a young child (under 3 or 4 of age) you should use yarn instead of a rubber band, just in case it comes off….it could be a choking hazard. If you use a rubber band just put the rubber band around the ball until it is tight. If you are using yarn, wrap it around that ball-shape and tie knots and wrap it around more and tie more knots…then cut it off.

Step 5


Step 5 : Making No-Sew Sock Monkey Dolls Crafts Project


Do the same thing for the other foot, side B.

Step 6


Step 6 : Making No-Sew Sock Monkey Dolls Crafts Project


Now put stuffing above the feet for the baby doll’s belly.

Step 7


Step 7 : Making No-Sew Sock Monkey Dolls Crafts Project


Now make 2 arms the same way that you made the feet.

Step 8


Step 8 : Making No-Sew Sock Monkey Dolls Crafts Project


Tie the yarn or rubber band next for the neck.

Step 9


Step 9 : Making No-Sew Sock Monkey Dolls Crafts Project


Add stuffing to the sock for the doll’s head and then again, tie off with rubber band or yarn.

Step 10


Step 10 : Making No-Sew Sock Monkey Dolls Crafts Project


Now there is extra sock above the head….fold it down over the head to form a hat for the doll.

Step 11


Step 11 : Making No-Sew Sock Monkey Dolls Crafts Project


This is what is should look like…another pic is below.


Step 11 : Making No-Sew Sock Monkey Dolls Crafts Project


This is what the doll looks like so far.

Step 12

Now we have to choose a way to put the eyes on…thinking about the safety of the child we are making it for. If this is for a child that doesn’t put little items in his mouth anymore…then I would say use buttons  – they look super cute. You can either sew the eyes on or you can use either strong fabric glue or hot glue ( in that case, please ask a parent for help so you don’t get hurt.)


Step 12 : Making No-Sew Sock Monkey Dolls Crafts Project


Otherwise, you can sew dolls eyes, use fabric paint or sharpie, permanent markers. If you have any other ideas for eyes, please let me know.


How to Make Easy No-Sew Sock Dolls Crafts Idea for Kids


This is what your doll will look like. He is super cute. And my 4 year old loves this baby doll. She was playing with him for quite a long time and talking to him and feeding him, etc. So I think this craft was a hit.

You Might Like Our No-Sew Puppy Dog Craft

You Might Like Our Other No-Sew Crafts

Technorati Tags: , , , , , , , , , , , , , ,