How to Make Wind-Up Moving Cardboard Carousels or Merry-Go-Rounds

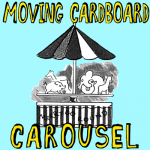
Today we will show you how to make a moving carousel / merry-go-round. You will be able to make this moving toy with some spools, some string, a pencil, and a few cardboard boxes. The motor works by winding string around a spool by spinning the pencil…then it moves on its own. Pretty cool…and you don’t have to use any difficult-to-use materials. Learn how to make your very own working carousel with the following step by step tutorials.


400x400-cardboard-carousel-merry-go-round


How to Make Wind-Up Moving Cardboard Carousels or Merry-Go-Rounds

CRAFTS MATERIALS NEEDED:

2 boxes (A shoe box and a small pill box)

2 spools (A button hole twist spool and a regular size spool)

A new pencil with an eraser

Cardboard

String

Glue

Paints

Step 1


cardboard-carousel-merry-go-round-01


1. Cut a shoe box with cover in half. It will measure 6″ square and about 31/2″‘ high. With a pencil, make a small hole in the center of the shoe box cover (A ). Glue a small pill box with cover (about 1″ high) to the center at the bottom of the shoe box. With a pencil, punch a hole in the cover of the small box, directly under the top hole, as in Figure 1.

Step 2


cardboard-carousel-merry-go-round-02


2. Cut a cardboard circle 6 1/2 ” in diameter. In the exact center, on the underside, glue the small twist spool, as in Figure 2.

Step 3


cardboard-carousel-merry-go-round-03


3. Cut 6 small colored pictures of animals from a magazines or from the Internet (with parental assistance or permission) and mount on coardboard. Make small cardboard easel backs and glue to backs of animals to make them stand, as in Figure 3.

Step 4


cardboard-carousel-merry-go-round-04


4. Glue animal pictures, easel side in, around edge of cardboard circle, as in Figure 4.

Step 5


cardboard-carousel-merry-go-round-05


Tie one end of a four-foot piece of string tightly around the regular sized spool, as in Figure 5.

Step 6


cardboard-carousel-merry-go-round-06


For the canopy, cut a circle of heavy white paper, about 8″ in diameter. Scallop the edges. Paint red stripes radiating from the center of the canopy to the middle of each scallop. (shaded area) Make a straight cut from the edge to the center of the canopy, as shown by the broken line in the illustration. Lap over the cut edges about 1″ and glue together, as in Figure 6.

Step 7


cardboard-carousel-merry-go-round-07


To assemble merry-go-round, stick pencil through center cardboard circle; through the twist spool; through the cover of the large box; through the spool wound with string, and then through the hole in the pill box. Stick a thumb tack through the center of the canopy and pin firmly to the maser at the top of the pencil, as in Figure 7.

Step 8


cardboard-carousel-merry-go-round-08


Paste colored paper around three sides of the merry-go-round, and decorate with paint, as in Figure 8.

Step 9 : MAKING THE MERRY-GO-ROUND TURN!!!


cardboard-carousel-merry-go-round


Pull the string at the open end of the box. To rewind, remove canopy top and twirl pencil so that the string rewinds around spool. Make sure end of string is at the right, otherwise animals will whirl around backwards when string is pulled.

And there you have it…enjoy making your moving merry-go-round carousels!!! Don’t forget to post your pictures!

Technorati Tags: , , , , , , , , ,

How to Make Pencil Pendants or Necklaces for Back to School

August is here and school is drawing nearer. This is a great Back-To-School Craft … make a cute pendant with a pencil that can still be used. Laura from Dacian Moon Handmade will show you, step by step, how to make it.

How to Make Pencil Pendants or Necklaces for Back to School


How to Make Pencil Pendants or Necklaces for Back to School


CRAFTS MATERIALS NEEDED:

– pencil
– glue
– scissors
– white thick thread
– khaki thick thread


Step 1.

Apply a good layer of glue on the pencil (not on the sharpened part)


Step 2.

Begin to cover the bottom of the pencil, wrapping around it the white thread.


Let the center uncovered and make another white part near the other end.


Step 3.

If the glue on the uncovered part is already dry, add another layer. Glue the end of the khaki thread beside the  white thread, and begin to cover the other parts.


The middle one…


… and the upper one (you will go with a khaki thread over the white for that). When you reach the top, make a loop of khaki thread and put glue on it to set it on top of the pendant…


… like this.

Now you can wear it on a chain or cord and, if you forget your pencils… you can use it 😉


Technorati Tags: , , , , , , ,

How to Make Doll Pencil Toppers for Back to School

Do you want to create an adorable companion for your time back at school? Here is an easy-to-make doll that can be stored on the top of your pencil. Laura from  Dacian Moon Handmade  will show you, step by step, how to make it.


how to make doll pencil toppers for back to school


CRAFTS MATERIALS NEEDED:

– pencil
– thick tread
– wooden beads (one white and 6 brown)
– small cloth piece
– matching cord
– a piece of wire
– needle
– rubber tube


Step 1.

Take the thread …


… and spin it on your fingers, like this.


Step 2.

Tie it on the middle with the wire…


… like this.


Put the wire through the white bead – this will be the head of our doll.


Step 3.

Take the rubber tube…


… and make two holes in it with the needle.


Place it under the head, put the wire through the holes you made.


Step 4.

Is time to form her arms.


Add three brown beads like this…


… and put the wire end through the last bead one more time. That way the beads will not fall.


Repeat for the other arm.


Step 5.

Is time to place the topper on the pencil…


Like this.


Let’s dress her. Roll the piece of cloth over the rubber tube, under the arms…


… like this.


Tie it with the cord…


… and that is our doll.


You can use markers to make her eyes and mouth too. And she will make your classes easier 😉


Technorati Tags: , , , , , ,