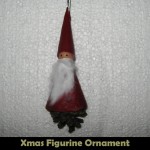
How to make a Pine Cone Christmas Figurine Ornament

Today I’m going to continue with another Christmas Craft.  This one will be a Pine Cone Christmas Figurine Ornament.  It is super cute and will look terrific on the Christmas Tree.  Let each of the kids make one of these figurine ornaments…. they will love hanging something up on the tree that they made themselves.  Plus, it is so much fun.  So, grab the materials needed and let’s get started.
Check out our other Christmas Crafts.

Tutorial offered by Laura from Dacian Moon Handmade .


Materials Needed

– cardboard
– red leather
– a cotton pad
– 1 wooden bead (big enough to be the head)
– scissors
– 1 piece of ribbon
– 1 pine cone
– craft glue
– black paint
– toothpick


Step 1

Take the cardboard…


…and make a cone of it: bring one side over the middle.. .


… then the other. Glue the two parts together.


Place the pine cone inside, to measure how long the cardboard cone should be.


Cut the extra cardboard.


It will look like this.


Step 2

Apply a border of glue inside the cardboard cone…


… like this.


Then fix it over the pine cone.


Step 3

Take the wooden bead…


And place the toothpick inside.


Make a collar of glue where the toothpick comes out…


… and place it inside the cardboard cone, like in the picture. Keep it a little pressed, until the glue is dry.


Step 4

Take the leather and put it over the cardboard cone.


Measure the length and trace it with a pen.


Cut it out…


… like this


Apply glue on the back of the leather…


… and place it again over the cardboard cone.


Let it dry.


Step 5

Make another cardboard cone, narrower than first. This will be the cap.


Glue the cardboard cone.


Apply a layer of glue on the lower part that goes down from the cone and fold it over it.


Now cut the extra cardboard.


Measure the cone cover on the leather…


… like this.


Cut it out.


It will look like this now.


Apply glue on it…


… and place the cardboard cone on it.


Cover it with the leather.


Apply glue on the back…


… and place there the folded ribbon. Keep it in place until the glue is dry.


Now, let’s put it on the head. Put glue over the upper part of the head…


… like this…


…and fix the cap on it. Let it dry.


Step 6

Take the cotton pad…


… and break it into pieces to make one beard like this.


Apply glue on the lower part of the head and on the front part of the coat…


… and place the beard on it, fix it well on the face.


Take a little black paint with a toothpick…


… and draw its eyes.


Now you have a funny figurine to put on your Xmas tree.


The figurine is cute, huh?!  It will look wonderful on the Christmas Tree.  Enjoy!!

Technorati Tags: , , , , , , , , , , , , , ,

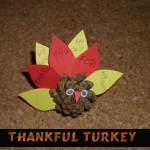
How to Make a Thankful Turkey for Thanksgiving

Thanksgiving is all about giving thanks.  Sometimes we tend to forget the true meaning of Thanksgiving…. being thankful for what you have.  This craft is a great way to teach your kids about the true meaning of thanksgiving.  And, your kids will have so much fun doing this.  This turkey’s feathers will tell everyone what you are thankful for.  Plus, it makes for a great Thanksgiving decoration.  Made from a pine cone and some construction paper this craft is sure to be a lot of fun.  So, let’s get started.

Check out our other Thanksgiving Crafts.

Tutorial offered by Laura from Dacian Moon Handmade


Materials Needed

– pine cone
– white, yellow and red paper
– pencil
– pen
– scissors
– craft glue


Step 1

Draw 4 feathers (only outline) on yellow paper and 3 on red paper.


Cut them out.


Step 2

On the three red ones write “thank”, “you” and “for”…


… and on the yellow ones write the things you are thankful for.


Step 3

Take the pine cone…


… and begin to stick into it the red “feathers”. “Thank” is the first…


… then “you” …


… and “for”. Like this.


Then start adding the yellow ones…


… like this.


Step 4

Draw 2 eyes on white paper.


Draw a red beak also, then cut them out.


Apply a little bit of glue on the back of the eyes…


… and glue them in place.


Add the beak in the middle of the face… and your thankful turkey is ready.


Isn’t this turkey a cute one?  And, he’s so smart too…. he tells everyone what you are thankful for.

Technorati Tags: , , , , , , , , , , , , ,

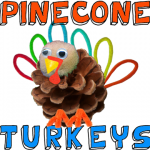
How to Make Pinecone Turkeys

Oh boy, do I have a fun craft for you today perfect for the Thanksgiving season.  Today I’m going to show you how to make Pinecone Turkeys perfect for Thanksgiving.  These pinecone turkeys will look great around the house as Thanksgiving decorations.  Plus, your kids will love to make them.  They are a lot of fun and your kids will have great pride in knowing they made items you could actually put around the house as decorations.  So, grab the materials needed and let’s get started.
Check out our other Thanksgiving Crafts.


How to Make Pinecone Turkeys


Materials Needed

Pinecone

Tan Puffball

Glue

Googly Eyes

Yellow Felt or Foam

Red Felt

Orange Pipe Cleaner

Different Color Pipe Cleaner, Construction Paper or Craft Feathers


Step 1


Get a pinecone.


Get a pinecone.


Step 2


Glue a tan puffball to the top of pinecone.


Glue a tan puffball to the top of pinecone.


Step 3


Glue googly eyes on.


Glue googly eyes on.


Step 4


Cut yellow triangle out of felt or foam and glue on face.


Cut yellow triangle out of felt or foam and glue on face.


Step 5


Draw a #7 like shape on red felt like above picture.  Glue red felt on top of beak.


Draw a #7 like shape on red felt like above picture.  Glue red felt on top of beak.


Step 6


Wrap orange pipe cleaner around pinecone.


Wrap orange pipe cleaner around pinecone.  Then take smaller pieces of pipe cleaner to make claws.


Step 7


Loop pipe cleaners and stick into back of pinecone for feathers.


Loop pipe cleaners and stick into back of pinecone for feathers.  Or, use paper or craft feathers.

And, now you are all finished.  You just made your Pincone Turkey.  Now, use it to decorate your house for Thanksgiving.  Actually, make a few to put around the house….. everyone will love it!!

Technorati Tags: , , , , , , , , , , , ,