How to Make a Changing Story Board

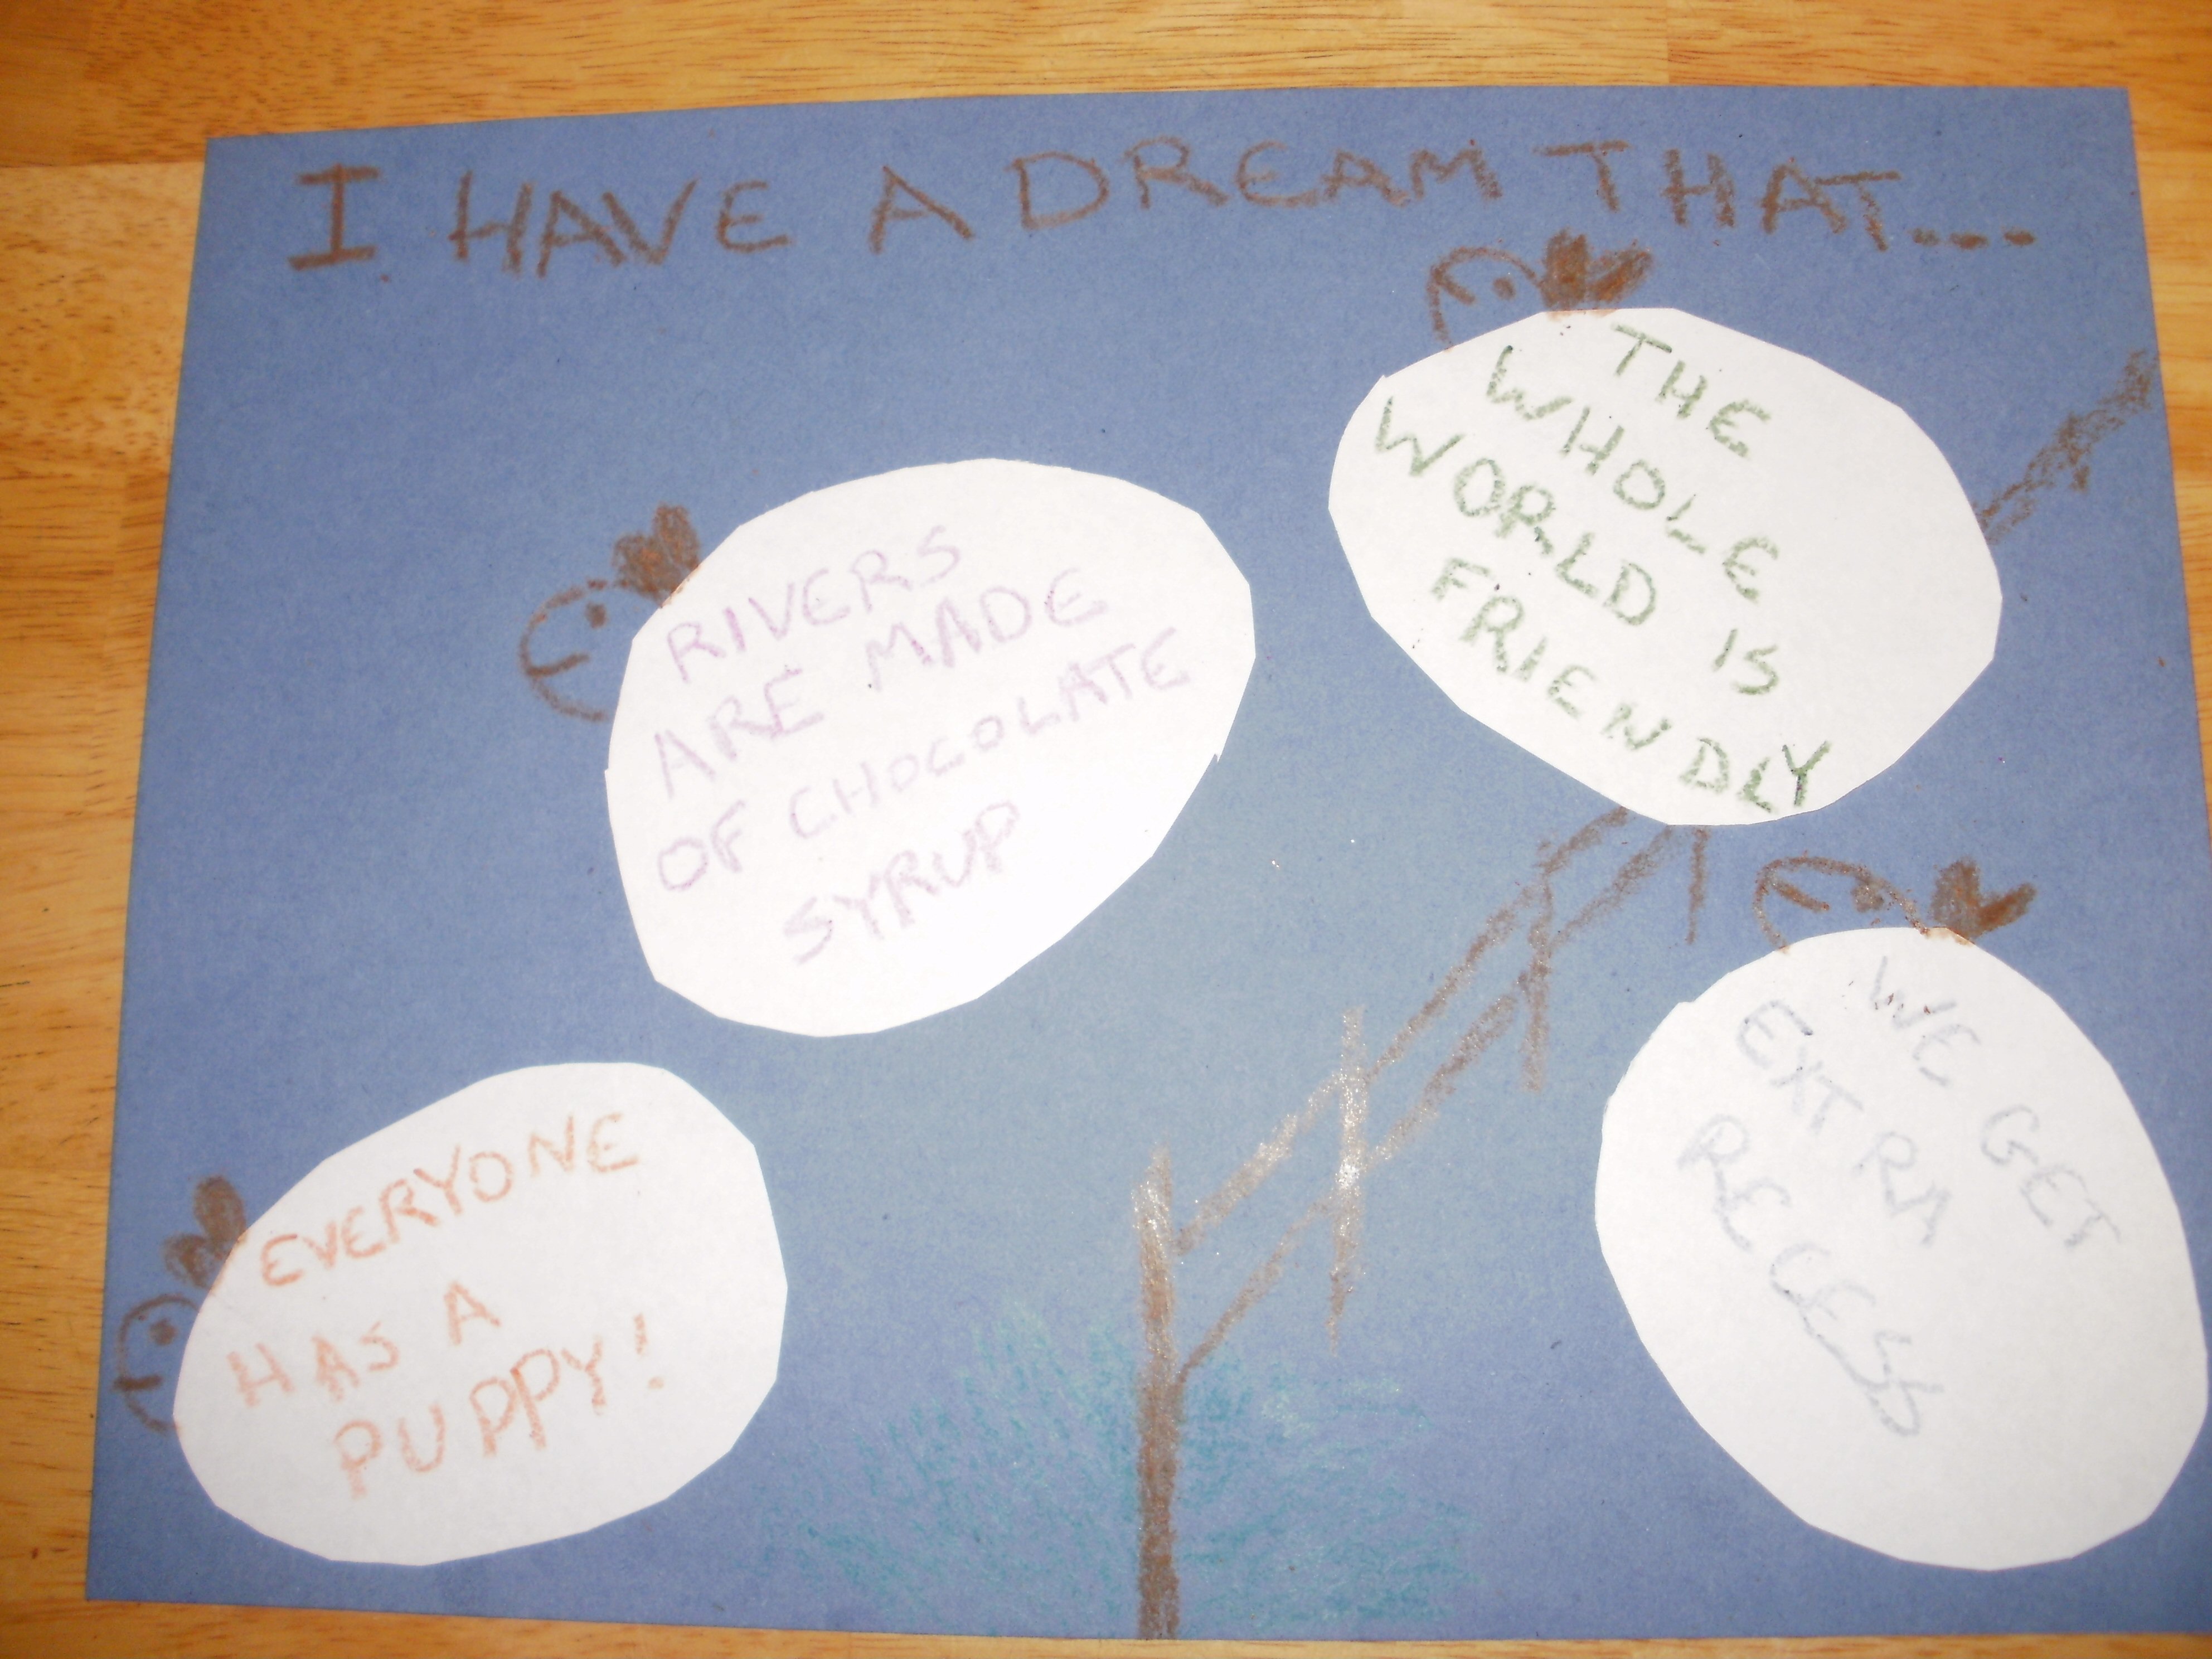
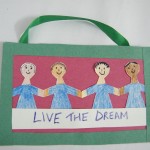
Today I’m going to show you how to make a changing story board.  You can bring your stories to life by using your creativity and a little bit of imagination.  As the story evolves you can change your story board to depict the story you are trying to tell to your family and friends.   You will actually have moveable figures and changeable backgrounds for your story…. what better way to actually tell your story than to have visuals.  So, grab the materials needed and let’s get started.


How to Make a Changing Story Board


Materials Needed

2 poster boards

markers and / or poster paints

scissors

stapler and staples (optional)

glue or paste

tape

card stock to make figures


Step 1


Fold one of the poster boards as seen in above


Fold one of the poster boards as seen in above. Basically folding forward and then fold backwards…then forwards…backwards…etc.


Step 2


Tape folds on back of poster board.


Tape folds on back of poster board.


Step 3


Glue folds onto bottom of the second poster board


Glue folds onto bottom of the second poster board, as seen in the picture. You can cut off folds that you don’t want before you glue it down. along sides of board.


Step 4


Draw a background that depicts your story.


Draw a background that depicts your story. This should be drawn on on upper section (2nd poster board).


Step 5


Bind edges with tape.


Bind edges with tape.


Step 6


Place figures in various folds as story is told.


Make cut out figures or objects.  Place figures in various folds as story is told.


Step 7


Scenes may be changed easily.


Scenes may be changed easily. Night or stormy sky may be added by drawing and coloring on another poster board and folding along top about 2 in from edge.  Hang over top of board, as seen above. Cut the bottom of sky to show hills in background. Shrubs, houses, wells, etc. may be placed in folds.

And, that’s it.  Use your imagination to make any story line you can come up with for your story board.  Share your story with your family and friends…. they are sure to love it.

Technorati Tags: , , , , , , , , , ,

I Have a Dream Wall Hanging “Poster” Martin Luther King Day Craft

For Martin Luther King Jr’s Birthday, why not make a poster or wall hanging full of your dreams?  This craft can be done at home by one or two children on construction paper, as in the example, or as a class project, if you use poster board.  The age of the children doing the craft can decide what kind of “dreams” to fill it with.  A preschool or kindergarten child could put memories of bedtimes dreams they’ve had, whereas older children can put what they want to be when they grow up, wishes for their own future, or put dreams more like Martin Luther King’s.

You Might Like Our Other Martin Luther King Day Crafts as well.


Martin Luther King Day Crafts Activity for Kids Who Have a Dream


I Have a Dream Wall Hanging “Poster” Martin Luther King Day Craft

Craft Materials Needed:

  • Construction Paper or Poster Board (blue, for a sky)
  • Crayons, Colored Pencils, or Washable Markers (if you have permission to use markers)
  • White paper (for sheep)
  • Safety scissors (be sure to ask for help if you’re not allowed to use scissors by yourself)
  • Tape, glue stick, or glue

Step 1


Step 1: Cut out sheep. Using your imagination or a stencil, cut a few egg shapes out of the white paper.

Step 2


Step 2: Write your dreams. Using your writing utensil put your dreams on a few of the egg shapes. You don't have to use all of the shapes you cut out. I found out only four would fit on my paper.


Step 3


Step 3: Color background. Using your crayons (or whatever else you’re using) draw a fence for your sheep to jump over, and a little grass. This is just a suggestion, you can draw whatever you want. But, if you’re using crayons don’t cover the whole background or it will be harder for your sheep to stick.

Step 4


Step 4: Add tape (or glue) The least messy way to attach the sheep is to roll up a piece of tape, sticky side out, and put it in the middle of the sheep. You could also use a glue stick, or a little dab of school glue.

Step 5


Step 5: Attach the sheep. After you’ve put some tape or glue on the sheep, place them on the page. I put mine jumping over the fence, like I see them when I try to go to sleep at night. But you can put them however you want.

Step 6


Step 6: Add faces and text. Now decide which way they’re jumping and add faces and ears. At the top write “I Have A Dream That…” so that each of your dreams will finish the sentence. Don’t forget to have fun and enjoy yourself.

You Might Like Our Other Martin Luther King Day Crafts as well.

Technorati Tags: , , , , , , , , , , , ,

Make Keepsake Hand Print Poster Gift for Mom on Mother’s day Craft

Moms and Dads always love hand print crafts AND they are very easy to make. Here is a cute arts and crafts project for kids to make for Mom on Mother’s Day or Dad on Father’s Day. This is also great for toddlers and preschoolers. Make this beautiful hand print poster for your Mom this Mother’s day. She’ll treasure it forever.

Make Keepsake Hand Print Poster Gift for Mom on Mother’s day Craft


Craft materials required:

Red acrylic paint

Brush

Thick paper

Ribbon

Red colored paper

Scissors

Glue

Tape

Crayon


Step 1

Cut out a piece of paper larger than the size of your hand. Use the paintbrush to apply paint on your palm and stamp your hand on the paper.


Step 2

Write a message for your mom below the print.


Step 3

Cut out strips of red paper and glue it on the sides to make a border.


Step 4

Cut a piece of ribbon and tape it to the back as shown.


Step 5

Your poster is ready! Gift it to your mom on mother’s day and she can hang it up on the wall.


Technorati Tags: , , , , , , , , , , , , ,

Make Silhouette Self-Portraits for Mom or Dad Gift Craft

Silhouette portraits make a wonderful gift for Mom and Dad for Birthdays or for Mother’s Day or for Father’s Day … and better yet,  they are very easy to make. This will make a wonderful keepsake craft for Mom and Dad as they watch you grow up and get to see how small your head used to be in comparison to how you look now (when they look back on it years later). Have fun with the easy instructions below.

Make Silhouette Portraits for Mom or Dad Gift Arts &  Crafts Project for Kids


Crafts Materials Needed

-Large sheet of wrapping paper (or large piece of other type of paper if you don’t have wrapping paper)
-Thumb tacks or Masking Tape
-Black crayons
-Lamp

Step 1

Find a friend or family member to help you make your self portrait.

Step 2


Tack or Tape a large piece of wrapping paper to the wall (with permission from an adult).

Step 3

– Seat yourself sideways on a chair, close to the wall, directly in front of the paper.

Step 4

Now have your friend place a lighted lamp close behind you with the light shining on you, in such a way that his shadow is cast on the tacked-up paper.

Step 5

With your crayon, have your friend follow the outline of the shadow.

Step 6

Then take the paper off the wall and fill in the shape you have drawn with black crayon, as shown in the picture below.


Technorati Tags: , , , , , , , , , , , , ,

Martin Luther King Day Poster Arts & Crafts Activity for Kids

Martin Luther King Day is coming up fast and you might be looking for a fun, yet educational crafts activity to work on with your kids or school students. Here’s a poster to remind you to live Martin Luther King’s dream. Lets be friends with every one no matter what their race, creed, religion, color, etc. You can hang this poster up on your wall. The simple steps to make it are as follows. You Might Also Like Our Next Article : How to Make a Martin Luther King Day Poster Craft


Martin Luther King Day Poster Arts & Crafts Project Idea : Arts and Crafts Activities for Kids for Kids, Teens, Preschoolers


Craft materials required:

Thick card paper- colored- 2 colors

White paper

Markers and crayons

scissors

glue

ribbon

ruler


Step 1

Take a piece of white paper about 8 in x 4 in and fold one end 2 inches from the edge of the longer side as shown.


Step 2

Fold in a zig zag manner like a paper fan. Each fold will be 2 inches wide and there will be four folds.


Step 3

Draw a picture of a child on the top of the folded paper as shown.


Step 4

Cut it out in the shape of the child as shown.


Step 5

Open it out to find a string of children. Draw Faces and color the faces, necks and hands in different colors as shown.

Color their dresses.


Step 6

Glue the children on to a piece of colored card about 8 in x 6 in in size.


Step 7

On a strip of white paper write the words Live The Dream


Step 8

Glue the paper strip on the picture as shown.


Step 9

Cut out strips of paper of a contrasting color as shown.


Step 10

Glue them to make a frame as shown.


Step 11

Tape some ribbon to the back like below,


Your poster is ready. Hang it on your wall and Live the Dream!!


You Might Also Like Our Next Article : How to Make a Martin Luther King Day Poster Craft

HERE ARE EVEN MORE MARTIN LUTHER KING JR. CRAFTS

Technorati Tags: , , , , , , , , ,