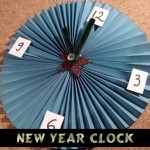
How to Make a New Year Countdown to 12 Clock Craft for Preschoolers and Kids

Here is a fun craft for younger kids who can’t stay up to 12:00 yet. You can make a countdown to 12  and have a pre-party with your young children, counting down to 12. This way your children don’t feel like they missed out on any of the New Year celebrations. Step by step tutorial offered by Laura from Dacian Moon Handmade

Check out our other New Years Crafts


NYclock


How to Make a New Year Countdown to 12 Clock Craft for Preschoolers and Kids

CRAFTS MATERIALS NEEDED:

– 2 sheets of blue paper
– paper glue
– white paper
– scissors
– pencil
– eye pin (or a brass fastener)
– crystal (optional)
– 1 auto-adhesive star
– 2 pieces of chenille stem (pipe cleaners)


IMG_3109


Step 1.

Cut the sheets of blue paper in half, lengthwise. You will have 4 rectangles.


IMG_3111


Step 2.

Accordion fold them.


IMG_3112


Like this.


IMG_3113


Step 3.

Apply a layer of glue on the last fold and stick it to the first on the next paper accordion.


IMG_3114


Repeat until you complete the circle.


IMG_3123


Like this.

NOTE: if the space in the middle is too big, put a small piece of tape on the back. It will keep it in place.


IMG_3124


Step 4.

Remove the protective foil of the star and place it on the middle. Like this.


IMG_3125


Cut 4 small rectangles of white paper and write on them „12”, „9”, „6”, „3”.


IMG_3127


Apply a layer of glue on one of them (on the back, of course) …


IMG_3128


… and place it on the clock, in its place.


IMG_3129


Do the same for the other ones.


IMG_3130


Step 5.

If you want to put a crystal or a bead on the eye pin, you can do that now. (Don’t use small beads or crystals with very young children). Put the crystal on the eye pin…


IMG_3132


… then wrap a piece of chenille around the pin, like this.


IMG_3134


Add the second piece of chenille. It will look like this.


IMG_3135


Put the pin through star, fix the chenille steams to point almost at 12, and the clock is ready !


IMG_3136


And there you have it. Use this cool clock to have an early countdown to 12:00 New Year Party! Have Fun!

Check out our other New Years Crafts

Technorati Tags: , , , ,

Using Legos to Learn Sight Words and How to Read and Sound Out Words

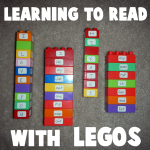
My youngest daughter is in Kindergarten and she is learning how to read. Her teacher sends home lists of sight words that she has to learn and although we use flash cards to help her learn them, using Legos / Duplo Blocks  sounds a lot more fun to her. I saw someone else online use Legos to make sight words fun and I just loved the idea. Legos are also great for alphabet letters. The child can snap the Legos together to form and sound out words.

My daughter was getting bored with playing with these ‘little kid’ blocks as she now only wants to play with the little Lego blocks that older kids use. So this is a great way to recycle these Duplo / Lego blocks.


1st-pic-learning-sight-words-and-reading-with-legos


Crafts Materials Needed

Legos / Duplo Blocks

Labels (These are the ones I used   … Avery Removable Rectangular Labels, 0.5 x 0.75 Inches, White, Pack of 525  -6737  )

Step 1


Write Sight Words and Alphabet Letters on Labels


If you want to use the Legos to practice sight words and making sentences, then write sight words on the labels. If you want your child to practice creating words and sounding out letter combinations, then write alphabet letters on labels. I repeated consonants a few times and I repeated vowels many times.


Step 2


Add Alphabet Letters to 4 Sides of Blocks


I used the 4 peg Duplo squares for the Alphabet letter blocks. I put a letter on each side, so then the child can spin the blocks to make different words. My child loved forming words with the letters. I used blank squares to for spaces.

Step 3


Put Word Labels on the blocks


Then I put sight words on bigger Duplo blocks. They would fit on the square blocks but I didn’t have any more left. I put a label on 2 sides of the blocks, but you can definitely put them on all 4 sides if you want to. I also added other words that my child knows. I also made several blocks with words such as ‘I’, ‘and’, ‘my’, ‘too’, and ‘the’. I also added labels for people and animals that she knows so that she can talk about specific people. She LOVES playing with these blocks now.


My Favorite Mayflower Craft Ideas for Thanksgiving

Thanksgiving will be here in no time at all.  And, one of the lessons we try to teach our children about the Thanksgiving Holiday is the Pilgrims and the Mayflower.  What I found during lessons is that teaching them visually is the easiest way to get them to understand…. hence doing a craft.  So, today I thought I would show you my Favorite Mayflower Craft Ideas for Thanksgiving.  I found these Mayflower crafts while searching the internet.  They are all really incredible and a ton of fun.  Surely, you will be able to find some Mayflower craft ideas from this list….. use them to help teach your children about the Pilgrims and their travel on the Mayflower.

Check out our other Thanksgiving Crafts.


My Favorite Mayflower Craft Ideas for Thanksgiving


My Favorite Mayflower Craft Ideas for Thanksgiving

(1)  Model Mayflower


Model Mayflower


Here is a wonderful way to make a model Mayflower.  Made from disposable coffee cups and coffee stirrers this is a great way to recycle items as well as teach your children about the Mayflower.  I found this Mayflower craft over at Parenting.  Make sure to check it out.


(2)  Hand Print Mayflower


Hand Print Mayflower


I love this Mayflower craft.  It is just simply adorable.  And, any young crafter will have a lot of fun making it.  I found this Thanksgiving craft over at Almost Unschoolers.  Make sure to check out her site to get all the Mayflower craft details.


(3)  Mayflower Walnut Boat


Mayflower Walnut Boat


Even we have our own Mayflower crafts.  Here is our first one.  We will show you how to make a Mayflower out of a walnut.  And, what is really cool about this Mayflower craft is that the boat will actually float in water.  Check out How to Make a Mayflower Walnut Boat to make one for yourself.


(4)  Mayflower Paper Plate Craft


Mayflower Paper Plate Craft


Here is a fun Mayflower craft that your little ones will really enjoy.  The Crafty Classroom will show you how to take two paper plates and a popsicle stick and make it into this awesome Mayflower.  Oh boy, this sounds like fun.


(5)  The Mayflower Simplified


Mayflower Simpliefied


I love this bloggers idea.  Her idea was to come up with a Mayflower craft that she could make with young children.  I Can Teach My Child came up with this idea and it is a great one.  Made from a paper towel roll, a straw and some other materials this craft will take on a life of its own.  Share it with your child…. they will love it.


(6)  Mayflower Sandwich


Mayflower Sandwich


I just couldn’t pass this one up.  I know it’s not technically a craft, but it is a Mayflower recipe that you and your little ones can have fun putting together.  Little Nummies put this one together and it is just precious.  Made from bread, cream cheese and pretzels this yummy recipe will be a whole lot of fun to put together… almost as much fun as eating it.


(7)  Mayflower Photo Craft


Mayflower Photo Craft


This is a great Thanksgiving craft to enhance your teachings of the Pilgrims, Mayflower and the first Thanksgiving.  Here Classified Mom adds actual photos of her own children to better engage her children in the lesson.  You can do the same.


(8)  Mayflower Crayon Holder


Mayflower Crayon Holder


I love, love, love this idea.  Made from a creamer container this Mayflower actually holds crayons.  I think this Mayflower craft will be perfect for the Thanksgiving Kids Table.  Imagine every child having one of these Mayflower Crayon Holders on Thanksgiving…. the fun they will have.  Check out It’s Overflowing for all the craft details.


(9)  Mayflower Milk Carton Craft


Mayflower Milk Carton Craft


Made from a milk carton and some tissue paper this Mayflower Craft is sure to be a fun one.  Hidden underneath the tissue paper are some apples…. perfectly festive for the fall season.  Check out Creative Holiday Gift Ideas to find out how you too can make this with your children.


(10)  Mayflower Hats


Mayflower Hats


What kid doesn’t love hats?  They just all do.  And, these Mayflower hats will be no exception.  Spoonful shows you step-by-step how to make these adorable and festive hats.  Make a few and have them ready for the kids table at Thanksgiving.  All the children will love to wear them.


(11)  Mayflower Centerpiece


Mayflower Centerpiece


Why not center your entire Thanksgiving Meal around the Mayflower…. or perhaps the kids table.  Martha Stewart shows you how to with these very detailed instructions on how you too could have a Mayflower Centerpiece.


(12)  Mayflower Cut, Tape & Play


Mayflower Cut Tape Play


Homespun With Love shows you how you can print off this really cool Mayflower and let your kids cut, tape and then play with this Mayflower.  Use this as a visual tool when teaching your children about the Mayflower, the Pilgrims and the first Thanksgiving.


(13)  Mayflower Popsicle Craft


Mayflower Popsicle Craft


Here is a fun Mayflower craft that all the children will love.  Made from Construction Paper and Popsicle Sticks it is very likely you have all the craft materials needed right in your home.  Ramblings of a Crazy Woman will show you in detail how to make this craft…. she even shows you how to make waves to remind us how the Pilgrims endured a lot to find their way here.


(14)  Moving Mayflower


Moving Mayflower


Here is another of our Mayflower crafts from our very own site.  This Mayflower craft is a little bit different than the others because it can actually move.  Made with items like a paper towel roll, craft sticks and string this moveable mayflower will make the kids smile.  Gotta love something that actually moves.  Check out our site to find out how to make this Moveable Mayflower.


(15)  Mini Mayflower


Mini Mayflower


Get the kids excited about the Pilgrims and the Mayflower with this mini mayflower craft.  Made from a milk container this mayflower is the perfect size for little kids hands.  The kids will love to play with this mayflower and it also makes the perfect Thanksgiving decoration.  Check out Parents Connect for all the details.


(16)  Cardboard Tube Mayflower


Cardboard Tube Mayflower


When I found this Mayflower craft I thought it was quite original.  I found this Thanksgiving craft over at Naturally Educational.  Here she uses a cardboard tube along with some twigs to make her original Mayflower craft.  Make sure to check out her site for all the step-by-step details.  She also adds some Mayflower book choices to help you teach your children about the Mayflower.

Technorati Tags: , , , , , , , , , , ,

How to Make a Changing Story Board

Today I’m going to show you how to make a changing story board.  You can bring your stories to life by using your creativity and a little bit of imagination.  As the story evolves you can change your story board to depict the story you are trying to tell to your family and friends.   You will actually have moveable figures and changeable backgrounds for your story…. what better way to actually tell your story than to have visuals.  So, grab the materials needed and let’s get started.


How to Make a Changing Story Board


Materials Needed

2 poster boards

markers and / or poster paints

scissors

stapler and staples (optional)

glue or paste

tape

card stock to make figures


Step 1


Fold one of the poster boards as seen in above


Fold one of the poster boards as seen in above. Basically folding forward and then fold backwards…then forwards…backwards…etc.


Step 2


Tape folds on back of poster board.


Tape folds on back of poster board.


Step 3


Glue folds onto bottom of the second poster board


Glue folds onto bottom of the second poster board, as seen in the picture. You can cut off folds that you don’t want before you glue it down. along sides of board.


Step 4


Draw a background that depicts your story.


Draw a background that depicts your story. This should be drawn on on upper section (2nd poster board).


Step 5


Bind edges with tape.


Bind edges with tape.


Step 6


Place figures in various folds as story is told.


Make cut out figures or objects.  Place figures in various folds as story is told.


Step 7


Scenes may be changed easily.


Scenes may be changed easily. Night or stormy sky may be added by drawing and coloring on another poster board and folding along top about 2 in from edge.  Hang over top of board, as seen above. Cut the bottom of sky to show hills in background. Shrubs, houses, wells, etc. may be placed in folds.

And, that’s it.  Use your imagination to make any story line you can come up with for your story board.  Share your story with your family and friends…. they are sure to love it.

Technorati Tags: , , , , , , , , , ,

How to Make a Collage for Pi Day 3-14

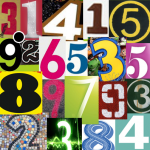
Today is 3/14….. do you know what that means?  It’s Pi Day.  π (or Pi) is a mathematical constant that is the ratio of any circle’s circumference to its diameter. π is approximately equal to 3.14.  I know it sounds confusing, but in mathematics it is one of the most important mathematical constants.  So, since today is March 14th or 3-14 it is considered Pi Day.  With that being said we are going to work on a collage surrounding all the numbers in Pi.  So, grab the materials needed and let’s get started.


How to Make a Collage for Pi Day 3-14


Materials Needed

Magazines, Brochures, Leaflets, Advertisements

Scissors

Glue

Paper


Step 1

Go through your magazines, leaflets, brochures and advertisements and find the numbers in Pi….. cut them out.  The numbers in Pi are the following:  3.141592653589793238462643383279502884197169399375105820974944592307816406286208998628
034825342117067982148086513282306647093844609550582231725359408128481117450284102701938
521105559644622948954930381964428810975665933446128475648233786783165271201909145648566
923460348610454326648213393607260249141273724587006606315588174881520920962829254091715
3643678925903600113305305488204665213841469519415116094330572703657595919530921861173819
3261179310511854807446237996274956735188575272489122793818301194912983367336244065664308
6021394946395224737190702179860943702770539217176293176752384674818467669405132000568127
1452635608277857713427577896091736371787214684409012249534301465495853710507922796892589
23542019956112129021960864034418159813629774771309960518707211349999998372978049951059731
7328160963185950244594553469083026425223082533446850352619311881710100031378387528865875
3320838142061717766914730359825349042875546873115956286388235378759375195778185778053217
12268066130019278766111959092164201989

Now, obviously Pi is an extremely long number.  Feel free to use as many numbers as you would like on your collage.


Step 2

Glue your Pi numbers in order to a piece of paper.


Step 3

Let your Pi collage dry and then hang it up proudly to celebrate Pi Day.


Pi Day Collage


Technorati Tags: , , , , , , , , , , , , , , ,

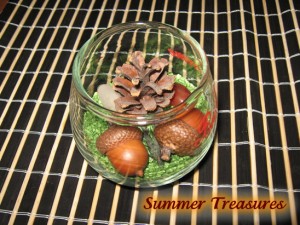
How to Make a Nature Treasure Bowl

Mother nature is absolutely beautiful….. just breathtaking.  Did you ever wish you could hold some of nature in a jar so you can look at it whenever you want?  Well, today I’m going to show you how to do just that.  In this post I’m going to show you how to make a Nature Treasure Bowl.  Simply take a walk in a park or in the woods and collect some of the things you find along the way like acorns, stones, pine cones…. whatever you want to place in a jar.  So, let’s get started.

Laura from Dacian Moon Handmade will show you how to make this decorative bowl step by step.


Materials Needed

– transparent bowl
– moss – or you can use decorative green scented sand from the store, like me.
– 2 acorns
– 2 stones
– 1 pine cone
– 1 little twig


Step 1

Take the transparent bowl …


… and place the moss / green sand in it (about a half of bowl)


Step 2

Let’s start with the twig.


It should be in the middle and we’ll decorate around it.


Step 3

Place the stones on the sides of the twig.


Step 4

Add the acorns…


And in the middle of it place the pine cone.


Now it looks complete. You have a little piece of the woods in your home.


Feel free to use your own creativity to make your Nature Treasure Bowl how you see fit.  You can even do this project using normal sand, shells, starfish… to bring the sea home to you.

Technorati Tags: , , , , , , , , , , ,

How to Make a St. Patrick’s Day Matching Game

St. Patrick’s Day will be here before you know it…. so in the spirit of that this craft is all about St. Patrick’s Day.  In this post I will be showing you how to make a St. Patrick’s Day Matching Game.  This craft is perfect for the Preschool crafter as this game is all about matching the size of each shape of the shamrocks.  Get a couple Preschoolers together and listen to them giggle as they try to match the shape of the shamrocks.  So, with that being said…. let’s get started.

Check out our other St. Patrick’s Day Crafts.


Materials Needed

Crayons

Markers

Scissors

Thick paper

Cardboard/ thick paper for base


Step 1

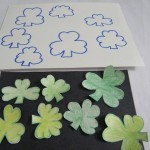
Draw and color shamrocks of different shapes and sizes.


Step 2

Cut them out as shown below.


Step 3

Place them on your cardboard/ thick paper which is going to be your base and trace the outline of each shamrock on it.


Step 4

The game is to match each shamrock to its outline.


Now grab some friends or your parents and start playing the St. Patrick’s Day Matching Game.  Enjoy!!

Technorati Tags: , , , , , , , , , , , , , ,

How to Make Paper Chains for the 100th Day of School

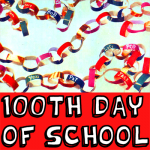
It is hard to believe, but our children have been in school almost 100 days now.  And, if your school is anything like mine they have a big party celebrating the 100th day of school.  For the younger kids it is sometimes difficult for them to grasp  just how long 100 days are.  A great way to teach them how large 100 of something is….. is to actually show them 100 of something.  That is what today’s craft is all about.  I’m going to show you how to make Paper Chains for the 100th Day of School.  Ideally, this craft should be started on the first day of school and add a chain piece to each other each day of school until you reach 100.  But, if you haven’t started that already you can do this craft on the 100th day of school as well.  So, grab the materials needed and let’s get started.
Check out our other 100th Day of School Crafts.


How to Make Paper Chains for the 100th Day of School


Materials Needed

Colorful Paper

Scissors

Black Marker

Tape


Step 1


Cut strips of colorful paper.


Cut strips of colorful paper.


Step 2


Write a number on each strip from 1 to 100.


Write a number on each strip from 1 to 100.


Step 3


Tape #1 strip into a loop.


Tape #1 strip into a loop.


Step 4


Take strip #2 and wrap around strip #1.


Take strip #2 and wrap around strip #1.  Tape.  Continue with this all the way thru #100.


Finished 100th day of school paper chain.


Now your chain is complete.  Hang the paper chain proudly and show the kids just how long 100 chains of paper is.  They will surely be amazed.  Remind them this is just how long they have been going to school.

Technorati Tags: , , , , , , , ,

How to Make a Fruit Loop Necklace for the 100th Day of School

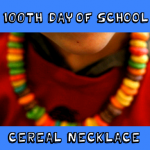
Depending on when your school district started school the 100th Day of School will be coming up quickly.  Now, is the time to start planning what kind of crafts you are going to do to celebrate the 100th Day of School.  I’m going to show you an easy, and tasty, craft for you to do…  Today I’m going to show you how to make a Fruit Loop Necklace perfect for the 100th Day of School.   Each child will get 100 of these colorful circles of cereal and they will string them to make a necklace.  The kids will love making it almost as much as they will love eating it.  So, let’s get started.

Check out our other 100th Day of School Crafts.


How to Make a Fruit Loop Necklace for the 100th Day of School


Materials Needed

Fruit Loops (100 for each child)

String or Yarn


Step 1


Get enough fruit loops for all the children


Get enough fruit loops for all the children making necklaces.


Step 2


String 100 Fruit Loops on a String.


Cut a piece of string or yarn large enough for a necklace and then string 100 fruit loops on it.


Finished Fruit Loop Necklace


The Fruit Loop Necklaces are now finished and are ready to be tied on each child so they can wear them proudly.  Don’t they look colorfully beautiful….. almost as good as they are going to taste.  YUM!!

Technorati Tags: , , , , , , , , , ,

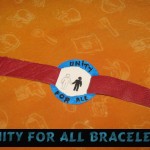
How to Make a “Unity for All” Bracelet for Martin Luther King Day

Today is Martin Luther King Day.  Martin Luther King is best know for his “I Had a Dream” speech where he basically said in his dream all men were created equal.  He lived his entire life fighting for that fact.   Today I’m going to show you how to make a “Unity for All” Bracelet for Martin Luther King Day.  This bracelet represents Unity for all…. bringing us all together no matter the color of our skin.  Isn’t that what Martin Luther King would have wanted?  So, grab the materials needed and let’s get started.
Check out our other Martin Luther King Crafts.

Tutorial offered by Laura from Dacian Moon Handmade.


Materials Needed

– cardboard
– pencil
– a band of leather (can be replaced with ribbon)
– varnish (can be nail varnish too)
– black and blue paint
– paintbrush
– toothpick
– round nose pliers
– 2 jump rings
– 2 ribbon cord ends
– 1 lobster clasp


Step 1

Draw a circle on the cardboard.


Cut it out.


Step 2

Place the cardboard circle over the leather …


… and mark the  places where leather will go through the cardboard…


… like this.


Make two cuts on the marks.


Put a side of the leather through one cut…


… then the other side through the other cut, until the circle is in the middle.


Step 3

Using the pencil…


… draw two curves on the cardboard, like this.


Then two human silhouettes.


Step 4

Paint one of them with black – I used the toothpick.


It will look like this.


With blue, color the up and down parts…


… like this…


… and write with black…


… “Unity for All”.


Step 5

To protect the cardboard it is good to use a varnish on it. It can even be nail varnish.


Apply it with the paintbrush all over the cardboard.


Let it dry well.


Step 6

Take a cord end…


… and put it on one end of the leather band, using the round nose pliers.


Like this.


Open one jump ring…


… and attach the lobster clasp of the cord end with it.


Do the same on the other side. You can add here a piece of chain (or you can put only the jump ring).

Now your bracelet is ready.


And, there you have it… you just finished your “Unity for All” Bracelet for Martin Luther King Day.  Wear it proudly….. after all Martin Luther King worked hard to make sure that everyone is created equal.

Technorati Tags: , , , , , , , , , , , ,

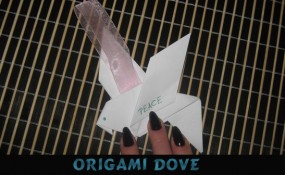
How to Make an Origami Dove

Today I’m going to show you how to make an Origami Dove.  I thought since today is Martin Luther King Day that today would be a perfect time to make a dove craft.  After all a Dove represents Peace and Tranquility and bottom line….. isn’t that what Martin Luther King wanted for everybody?  Martin Luther King was a great man and today it is all about remembering how wonderful he was and what he represented….. equality for all.  So, gather up the materials needed and let’s get started.
Check out our other Origami & Paper Folding Crafts or Check out our other Martin Luther King Crafts.

Laura from Dacian Moon Handmade  will show you, step by step, how to make an origami dove decoration.


Materials Needed

– white paper
– colored pen
– scissors
– ribbon
– glue


Step 1

Cut a square of white paper.


Place it with a corner to you.


Bring the left part over the right one.


Step 2

Bring the upper corner over the middle one, like this.


Do the same for the lower corner.


Step 3

Turn it over.


Bring the upper corner over the lower one.


Fold the left corner over the piece, like this.


Unfold.


Fold the lower corner over the piece.


Unfold.

Let’s make the wings.

Open the right part like this…


And bring the lower corner to the left, following the crease you created. Press.


It will look like this.


Do the same on the other side.


Step 4

Now it is time for the beak. Fold the left corner on the back…


… like this. Press it well because it is thick enough that it will unfold itself.


Step 5

To make the tail, bring the right part down, like this…


… and press.


Step 6

We will fold one wing down, like this, to make it look better.


Step 7

Using the colored pen draw an eye and decorate it the way you like. I wrote “Peace” on one wing.


Step 8

Apply a layer of glue on the ends of the ribbon…


… and place it between the back wing and the body.


It will look like this.


Doesn’t the Dove turn out lovely?  It will be perfect to decorate a window or a doorknob this Martin Luther King Day.  After all a Dove represents Peace and Tranquility.  Isn’t that what Martin King longed for?

Technorati Tags: , , , , , , , , , , , , ,

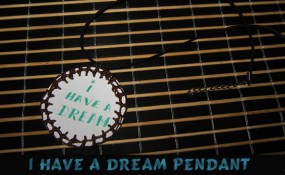
How to make an “I Have a Dream” Pendant for Martin Luther King Day

Today is Martin Luther King Day.  And, what better way to celebrate Martin Luther King’s Life than to make a craft in is honor.  Remember that Martin Luther King had a dream….. in his dream everyone was created equal.  Martin Luther King was a great man and today we are going to honor the “I Have a Dream” speech he made by making an “I Have a Dream” pendant.  You can wear this pendant to honor Martin Luther king today and everyday you want to remember what Martin Luther King was all about.

Check out our other Martin Luther King Day crafts.

Laura from Dacian Moon Handmade will show you, step by step, how to make this simple pendant.


Materials Needed

– a cardboard disc
– colored pen
– scissors
– cord
– thick thread and needle


Step 1

Put the thread in two on the needle and make a little hole on one side of the disc, near the edge.


Like this.


Put the thread again through the same hole, next make another hole near first, and so on…


… until you cover all the edge.


Step 2

Now, put the needle under a bunch of thread…


… and make a knot, like this.


Make knots on every bunch of threads.


Step 3

Start a second row of knots.


It will look like this (if you make the holes more close to one another, the pattern will look more tight).


Use the pen to write in the middle “I Have a Dream”…


… like this.


The only thing you have to do now is put the cord through the upper part (under a bunch of thread).


And there you go…. the finished Martin Luther King Day “I Have a Dream” pendant.  Doesn’t it turn out awesome?!  How did your pendant turn out?  Let me know in the comments below.  Also, take a picture of the “I Have a Dream” Pendant and share that with me in the comments below too…. I’d love to see it.

Technorati Tags: , , , , , , , , , , , , , ,

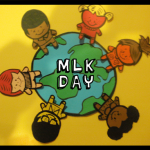
How to Make a Multicultural Kids Around Earth Craft for Martin Luther King Day

Martin Luther King Day is this Monday.  The Martin Luther King Day Holiday represents what he taught us…. equality in all people…. no matter what color their skin is.  That is an amazing thing.  So, today we will be honoring Martin Luther King and all he taught us… by making a craft for this Holiday.  So, in this post I will be showing you how to make a Multicultural Kids Around Earth craft for Martin Luther King Day.  The craft is a lot of fun and has tons of meaning.  So, let’s get started, shall we…

Check out our other Martin Luther King Day crafts.


Multicultural Kids Around Earth Craft for Martin Luther King Day


Materials Needed

Printer & Paper

Scissors

pencil

Many Different Colored Pieces of Paper

Black Marker

Glue


Click on Templates below to make larger and to print both off.

Children Template


Children Template


Earth Template


Earth Template


Step 1


 Print out Template.


Print out Template.


Step 2


Cut out


Cut out the images on the template.


Step 3


trace on different colors of paper


Cut out like this then trace on different colors of paper.


Trace it like this.


Trace it like this.


Step 4


Cut about 7 out


Cut about 7 out… all in different colors.


Step 5


outline with black marker.


To make each one look nicer, outline with black marker.


Step 6


Draw a dot for each eye.


Draw a dot for each eye.


Draw a letter 'C' for nose.


Draw a letter ‘C’ for nose.


Draw a curved line for mouth.


Draw a curved line for mouth.


Draw a curved line above each eye


Draw a curved line above each eye and on each side of the mouth.


Step 7


Trace hair on colored paper


Trace hair on colored paper…. like you did with the people.


You can outline the hair too


You can outline the hair too.


Step 8


 You can draw on clothes too


You can draw on clothes too if you want to.


Step 9


Glue hair on figure.


Glue hair on figures.


Step 10


Cut out circle.  Then trace it on blue paper


Cut out circle.  Then trace it on blue paper like seen above.


Step 11


Cut out the pencil outline of the circle.


Cut out the pencil outline of the circle.


Step 12


Now cut out the small parts of the template.


Now cut out the small parts of the template.


Step 13


Trace the template onto green paper.


Trace the template onto green paper.


Step 14


Outline the blue circle in black marker.


Outline the blue circle in black marker.


Step 15


Glue green land on to the blue circle


Glue green land on to the blue circle globe.


Step 16


Glue kids around the globe.


Glue kids around the globe.

Awesome job!!  You just finished making your Multicultural Kids Around Earth craft for Martin Luther King Day.  Now go hang it proudly for all to see.  You are sure to get some really amazing compliments on it.

Technorati Tags: , , , , , , , , , , , , , , ,

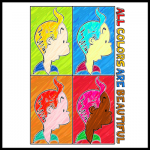
All Colors are Beautiful Martin Luther King Craft

I have a really special craft for you today.  I am going to show you how to make an All Colors are Beautiful Martin Luther King Craft.  This craft is meant to remind all of us how no matter the color of the skin that people are the same and should be treated equally.  That is what Martin Luther King represented.  In this craft you will draw a picture of yourself, copy it and color each picture with different colors.   The craft turns out beautifully…. and should be hung up this Martin Luther King Day.  So, let’s get started.

Check out our other Martin Luther King crafts.


All Colors are Beautiful Martin Luther King Craft


Materials Needed

Large piece of Cardboard, Paper or Poster Board

Paper

Pencil

Photocopier

Glue

Crayons or Markers


Step 1


Draw a picture of yourself.


Draw a picture of yourself.


Step 2


Make 3 photocopies of the picture and glue them on a big piece of cardboard


Make 3 photocopies of the picture and glue them on a big piece of cardboard or paper…. like this.


Step 3


Now color each picture with different colors


Now color each picture with different colored skin, hair, background, shirt…


It should look something like this.


…. like this.


Finished Martin Luther King - All Colors are Beautiful Craft


Doesn’t this Martin Luther King Craft turn out just amazing?!  It really gets the idea across that you are beautiful no matter what color skin, hair or clothes you wear.  You still are the same person inside.  Please let me know how your Martin Luther King craft turned out by posting your picture in the comments below.  I would love to see it.

Technorati Tags: , , , , , , , , ,

11 Cool Outer Space Crafts for Kids


11 Cool Outer Space Crafts for Kids


Today I have some awesome craft ideas for you.  Not just any craft ideas…… today I have cool outer space crafts for you.  I was making my way through the internet looking for some really creative outer space crafts and I think I found them.  I found some that are made from food and others that are made from recycled materials.  I found crafts that are perfect for the youngest of crafters and others that are meant for older children.  But, bottom line…. there is an outer space craft here for you.  So, enough with the chit-chat….. let’s get started.

11 Cool Outer Space Crafts for Kids

(1)  Orbiting Planets


Orbiting Planets


Here is a great craft to help teach your kids about space and all the orbiting planets.  Plus, the craft is a lot of fun.  I found this craft over at BusyBeeKidsCrafts and they have the right idea….. use a fun craft to help teach your children about space.


(2) Recycled Robot Craft

Recycled Robot Craft

Look how cute this robot is….. so cute!!  And, it is made from many recycled materials which makes this robot even cooler.  FreeKidsCrafts shows you how you can take tin foil, an empty container and soda bottle lids and make it into a robot like above.  How fun!!


(3) Alien Pipe Cleaner Craft


Alien Pipe Cleaner Craft


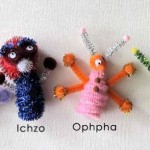
I love this craft…. I just love how these little aliens turn out.  I found this Outer Space craft over at Craft Jr. She shows you step-by-step how to make the aliens as pictured above.  But, she also explains how if you have mismatched colors or pipe cleaners of different sizes it doesn’t matter…. they are aliens after all.


(4) Spiral Galaxy


Spiral Galaxy


What a pretty craft….. I love all the colors in this Spiral Galaxy Craft.  And, believe it or not this Outer Space craft is made with a paper plate and some glow in the dark paint.  TheCraftyClassroom shows you in detail how you too can make this craft.


(5) Out of this World Centerpiece


Out of this World Centerpiece


Here is a cool craft that will be a lot of fun to put together.  Plus, this Out of this World Centerpiece is perfect if you are having an Outer Space birthday party.  Imagine this being the centerpiece at the Birthday table.  Find out how to make this over at MakingFriends.


(6) Grass Head Monster


Grass Head Monster


This is an awesome Outer Space craft because your child is going to have to care for it everyday.  It is actually made with real grass seed so your child will have to care for it everyday for the grass to grow.  Check out FreeKidsCrafts for all the details.


(7) Googly Eyed Green Blobs


Googly Eyed Green Blobs


These are pretty creepy looking…. aren’t they?  I found this craft over at MakeAndTakes and she had it posted as a Halloween craft, but I thought this craft would also fit for an Alien…. so I am including it in this Outer Space crafts list.  Check out her site for all the “how-to” details.


(8)  Rocket Craft


Rocket Craft


Isn’t this Rocket craft just adorable?  I love it!!  And, it is made out of a cardboard box.  What a creative idea.  You will need help from an adult for this craft as they do use a craft knife.  But, it would be so much fun making this with your parents.  Check out Se7en for the step-by-step details.


(9) Space Cake


Space Cake


I just had to add this cake to this post.  I know it really isn’t a craft Per Se, but I think cooking can be quite crafty…. and it is also a ton of fun to do with an adult.  So, check out this Outer Space cake over at FamilyFun and get the recipe to cook with your parents.  This would be great for an Outer Space birthday party.


(10) Puffy Paint Moon Craft


Puffy Paint Moon Craft


AllKidsNetwork shows us how if you mix shaving cream and glue together it makes a lumpy and bumpy surface….. just like the moon.  Actually, what they explain is that while the glue dries it makes a smooth-textured material that puffs while it’s drying and then flattens out.  Isn’t that cool?  Go to AllKidsNetwork to check out the full details.


(11) Space Shuttle Craft


Space Shuttle Craft


Wow, isn’t this space shuttle amazing?!  It’s just so creative.  And, the best part…. It’s made out of mostly all recycled materials.  How cool is that?!  Kids of all ages will love making this space shuttle…. the younger kids will need help from an adult.  Check out LooLeDo for the entire craft tutorial.

Technorati Tags: , , , , , , , , , , ,

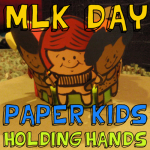
How to Make a Paper Kids Holding Hands Craft for Martin Luther King Day

I have a great craft to share with you today.  I’m going to show you how to make a Paper Kids Holding Hands craft for Martin Luther King Day.  Martin Luther King Day is about remembering Martin Luther King and what he was all about.  This craft is a great way to honor Martin Luther King and to remind the children what the holiday is all about.   Today’s craft reminds us that no matter what we look like…. no matter the color of our skin we should all be created equal.  So, in honor of that and Martin Luther King let’s make today’s craft together.  So, gather up the materials needed and let’s get started.
Check out our other Martin Luther King crafts.


How to Make a Paper Kids Holding Hands for Martin Luther King Day


Materials Needed

Printer and Paper

Many Different Colored Sheets of Paper

Pencil

Scissors

Black Marker

Round Object or Lid (I used an Ice Breakers Container)

Glue


Click on Template below to make larger and to print off.


Children Holding Hands Template


Step 1


Print out Template


Print out template.


Step 2


Cut out images on Template


Cut out images on template.


Step 3


trace on different colors of paper


Cut out like this and then trace on different colors of paper.


Trace it like this.


Trace it like this.


Step 4


Cut about 7 out


Cut about 7 out… all in different colors.


Step 5


outline with black marker


To make each one look nicer, outline with black marker.


Step 6


Draw a dot for each eye


Draw a dot for each eye.


Draw a letter 'C' for the nose.


Draw a letter ‘C’ for the nose.


Draw a curved line for the mouth.


Draw a curved line for the mouth.


Draw a curved line above each eye


Draw a curved line above each eye and on each side of the mouth.


Step 7


Trace hair on colored paper


Trace hair on colored paper like you did with the people.


You can outline the hair too.


You can outline the hair too.


Step 8


You can draw on clothes too


You can draw on clothes too if you want to.


Step 9


 Glue hair on figure.


Glue hair on figure.


Step 10


To connect the hands... cut a slit on each arm


To connect the hands… cut a slit on each arm.  To connect two hands… Cut a slit on top of one arm and the bottom of the other.  Then slide the two arms together to hold in place.


Slide arms together.


Slide arms together… do with all arms.


Hook arms together


Hook arms together like so.


Step 11


connect arms around a round lid


I connected the last 2 arms around an Ice Breakers container, but you can use any round object like a lid.


Finished Martin Luther King Kids Holding Hands Craft


Isn’t this Martin Luther King Day craft cute?!  I love the meaning behind it too…. that makes it even more beautiful.  How did your Martin Luther King Day craft turn out?  Let me know in the comments below.  And, don’t forget to take a picture of the craft and share that too in the comments…. I’d love to see how yours turned out.

Technorati Tags: , , , , , , , , , , , , , , ,