How to Make Tissue Paper Flower Bracelets for Mom on Mothers Day or Easter

This versatile, large and beautiful flower can be used as a basket topper, bracelet or hair decoration. They are simple to make and you’ll be amazed to see your own flower bloom right in front of you. Since Mother’s Day is coming up, and we didn’t post this craft for Easter, I thought it might also be good to make as a gift for your Mom.


Flower Bracelets to Make for Mom on Mothers Day or For Easter


How to Make Tissue Paper Flower Bracelets for Mom on Mothers Day or Easter


Crafts Materials list:
  • 1 large sheet of tissue paper (2’6″ X 20″)


  • Pipe Cleaner (Green for the stem, but could be any color)


  • Scissors


  • Ruler


Step 1: Cut sheet into eight equal pieces. Then stack the pieces, putting any smaller ones on top.


Step 2: Fold the stack like an accordion, length-ways


Step 3: Wrap the pipe cleaner around the middle of your folded stack, twisting it tightly.


Step 4: Separate the sheets, pulling up to the center, one piece at a time. This is the fun part and you shouldn’t worry about making it perfect.


Step 5: Marvel at your new flower. Try to hold yourself back from making an entire garden.

Technorati Tags: , , , , , , , , , , , , ,

How to Make Stained Glass Easter Ornaments

For this craft you will learn how to turn normal paper into a fun, translucent stained glass decoration which you can hang on a window. It’s a definite eye-catcher.  In this craft we will be making an Easter decoration that will look gorgeous hanging from any window.  You can chose to print off the templates I have below or you can simply draw and color your own…. the choice is yours.  So, grab the materials needed and let’s get started.

Check out our other Easter Crafts.


How to Make Stained Glass Easter Ornaments


Materials Needed

Sheet of paper
Printer, or a thick black marker
Crayons, colored pencils and/or markers
Safety scissors
Vegetable oil
Cotton ball
Paper towels
Newspaper

Step 1

Print out the design or draw your own with a thick black marker. You can print out these templates (one cross, one egg, or a sheet with one of each).

Click on template image below to make larger and to print.


Step 2


Color the design however you see fit, make sure to use brighter colors so the light shines through when finished. Markers provide the most vibrant colors but be wary of purples and reds when only using them.


Step 3


Cut out the designs, leaving some of the black outline.


Step 4


Flip the designs around and put them face down on the newspaper. Apply oil over the entire back of each design using the cotton ball or paper towel.


Step 5


Lay the designs between two sheets of paper towel and blot and/or rub off the excess oil. Be sure to be gentle, this is only paper after all.


Step 6


Hang your new beautiful stain glass decoration outside or in a window so it can catch the sunlight.

Doesn’t this make for a beautiful Easter decoration?  Any window will look beautiful with this hung up on it.  Take a picture of your Stained Glass Easter Ornament and post it along with a comment in the comment section below.  I would love to see how your ornament turned out.

Technorati Tags: , , , , , , , , , , , , , ,

Make a Groundhogs Day Board Game Crafts Idea for Kids

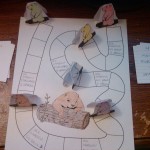
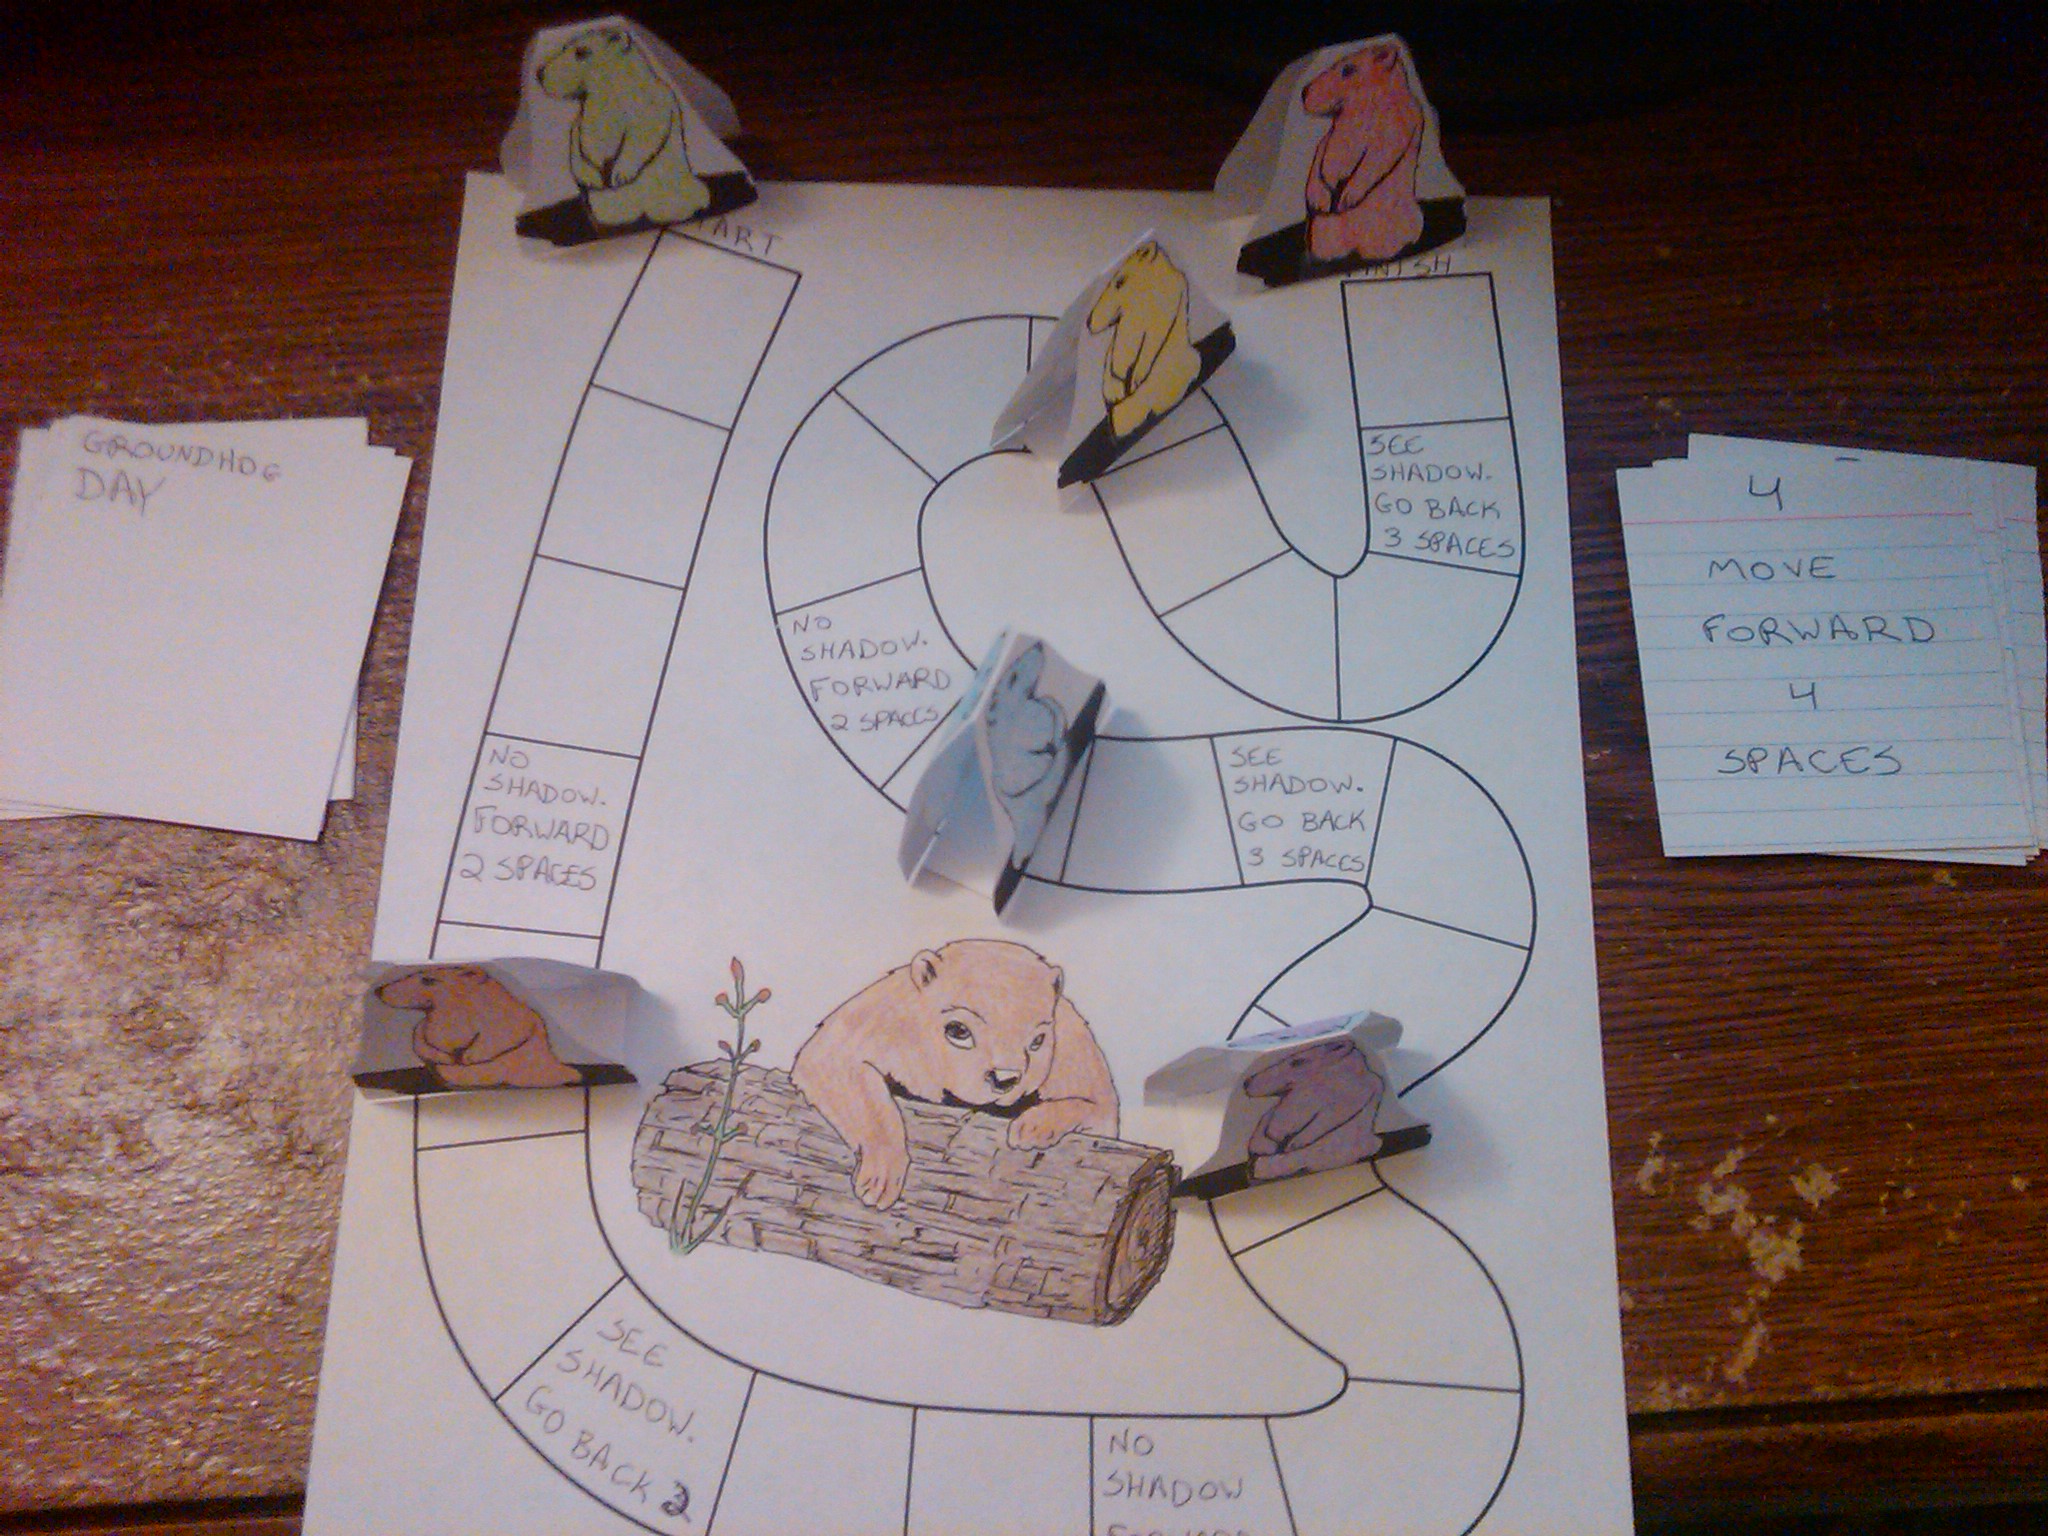
This activity starts as a coloring page, then a craft, and finally a board game to play with friends or family.  We have provided you with two templates to print out: a game board and a sheet of six movers.  However, if you do not have a printer, or do not have permission to use one, you can get two sheets of plain white paper and make your own.

Here are More Groundhogs Day Crafts


Make a Groundhogs Day Board Game Crafts Idea for Kids


Make a Groundhogs Day Board Game Crafts Idea for Kids

Crafts Materials Needed:

  • Paper
  • Printer
  • Colored pencils, crayons or washable markers
  • Index cards
  • Tape
  • Safety scissors
  • Pen or pencil
  • Imagination

To start with print out the two pages provided, or draw your own.


Groundhog Gameboard


Groundhog Movers

STEP 1 – PREPARE THE BOARD

Color in the groundhog with your colored pencils, crayons, or washable markers.  I used colored pencils to get the details.  Then you can decide which side is start and which is finish, mark those.  I put START and FINISH, but you could also put WINTER and SPRING.


Add special instructions to spaces, if you want to make the game a little harder.  I put “See shadow.  Go back 3 spaces” and “No shadow.  Go forward 2 spaces” on mine.  Make sure you don’t put too many, and that you don’t put one where another space will end.  I accidentally put “Go back 3 spaces” 3 spaces in front of a “Go forward” space, so I had to change it to “Go back 2 spaces”.  If you make a mistake like this, it’s very easily fixed.


STEP 2 – MAKE THE PLAYING PIECES

First you will pick 6 different colors and color your groundhogs.  Make sure the colors are different enough you won’t get confused during game play.


Now, cut them apart leaving each pair together.  Once you have 6 pieces of paper, fold them in half so the groundhogs of the same color are both facing out.  You can hold it up towards a light to make sure the holes that the groundhogs are popping out of line up.  Then, cut a flat bottom and up around the ground hog.  Make sure you leave the two sides attaches by the heads.  I have included a picture of the pieces at various stages.


Now, take an index card and fold it lengthwise.  Cut along the fold and discard one half.  Cut the other into 3/4″ strips, you will have a little left over that you can also discard.  Now take a 1 1/2″ length of tape and lay it on your work surface, sticky side up.  Place a strip of index card on it, and tape it to the bottom of a playing piece.  Do this for each piece.  Again, I have including a picture with various stages.


STEP 3 – MAKE CARDS

If you are short on time you can grab a die from another board game, just make sure you have permission first.   If you want to play the game following the rules below then you will need 8 index cards.  Cut each one on half the short way and write Groundhog Day on the blank side.  You should now have 16 cards that look like this:


Now flip them over to the lined side and write down how many moves each card is worth.  You will need 4 each of 1, 2, 3 and 4.  Mine has the number at the top and instructions underneath, but you can make yours however you wish.


STEP 4 – PLAY THE GAME

  1. Mix the numbered cards and lay them face down to the left of the board.
  2. Place all colored playing pieces in front of the “start” space.
  3. Youngest player (or whoever made the game) goes first.  They pick the top card from the pile, move the amount of spaces stated, and discard face up to the right of the board.
  4. Play moves clockwise around the board.
  5. If a player lands on a special space they must follow all instructions on that space.
  6. The goal is to be the first player to reach the end of the game.


Here are More Groundhogs Day Crafts

Technorati Tags: , , , , , , , , , ,

Making Rabbit Chinese New Year Fan Arts and Crafts Project for Kids

2011 is the Year of the Rabbit, so today we will be making a Chinese-style fan with rabbits on it.  Included is a template with 3 rabbit outlines, but you can also draw your own.  Just make sure they aren’t too big.

Here are Even More Chinese New Years Crafts


Making Rabbit Chinese New Year Fan Arts and Crafts Project for Kids


Making Rabbit Chinese New Year Fan Arts and Crafts Project for Kids

CRAFTS MATERIALS NEEDED:

  • White paper
  • Colored pencils, crayons, or washable markers
  • Safety Scissors
  • Tape
  • 1-sheet of red construction paper
  • Ruler or yard stick at least 12 inches long.

STEP 1 – RABBIT OUTLINES

Print or draw three rabbit outlines.


STEP 2 – COLOR FACES

Color the faces on to your rabbits.  You can give them as much or as little detail as you want.  I added a nose, mouth, eyes, whiskers, and inside of ears.


STEP 3 – CUT OUT RABBITS

Using your safety scissors (or ask an adult to use sewing scissors) cut out all three rabbit faces.


STEP 4 – TAPE RABBITS ON TO FAN

Arrange the rabbits on the construction paper and tape them down.  For starters use one piece of tape on the bottom of the face, and one on the top of each ear.  You will need more tape later.


STEP 5 – MEASURE FOR FOLDS

Set your ruler down and lay your paper on top of it.  Mark each inch on the bottom of the construction paper so you will know where to fold.


STEP 6 – FOLD THE FAN

Starting at the first inch mark fold the fan up and inward then crease the edge.


On the second inch mark fold backward and crease again.


Keep going back and forth until you reach the end.  Now you can tape down any parts of the faces that didn’t fold down.


STEP 7 – SECURE BASE

Hold the bottom of the fan together and secure with a few pieces of tapes.


STEP 8 – FINISHING OFF

Pull the fan open as far as you can, and starting in the middle fold the top of the fan forward by about half an inch to and inch.  Work your way out to the edges of the fan.  This fold should keep the fan open for display.


Here are Even More Chinese New Years Crafts

Technorati Tags: , , , , , , , , , , , ,

Making Unity Placemats Craft for Martin Luther King Day Activity

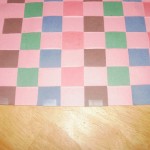
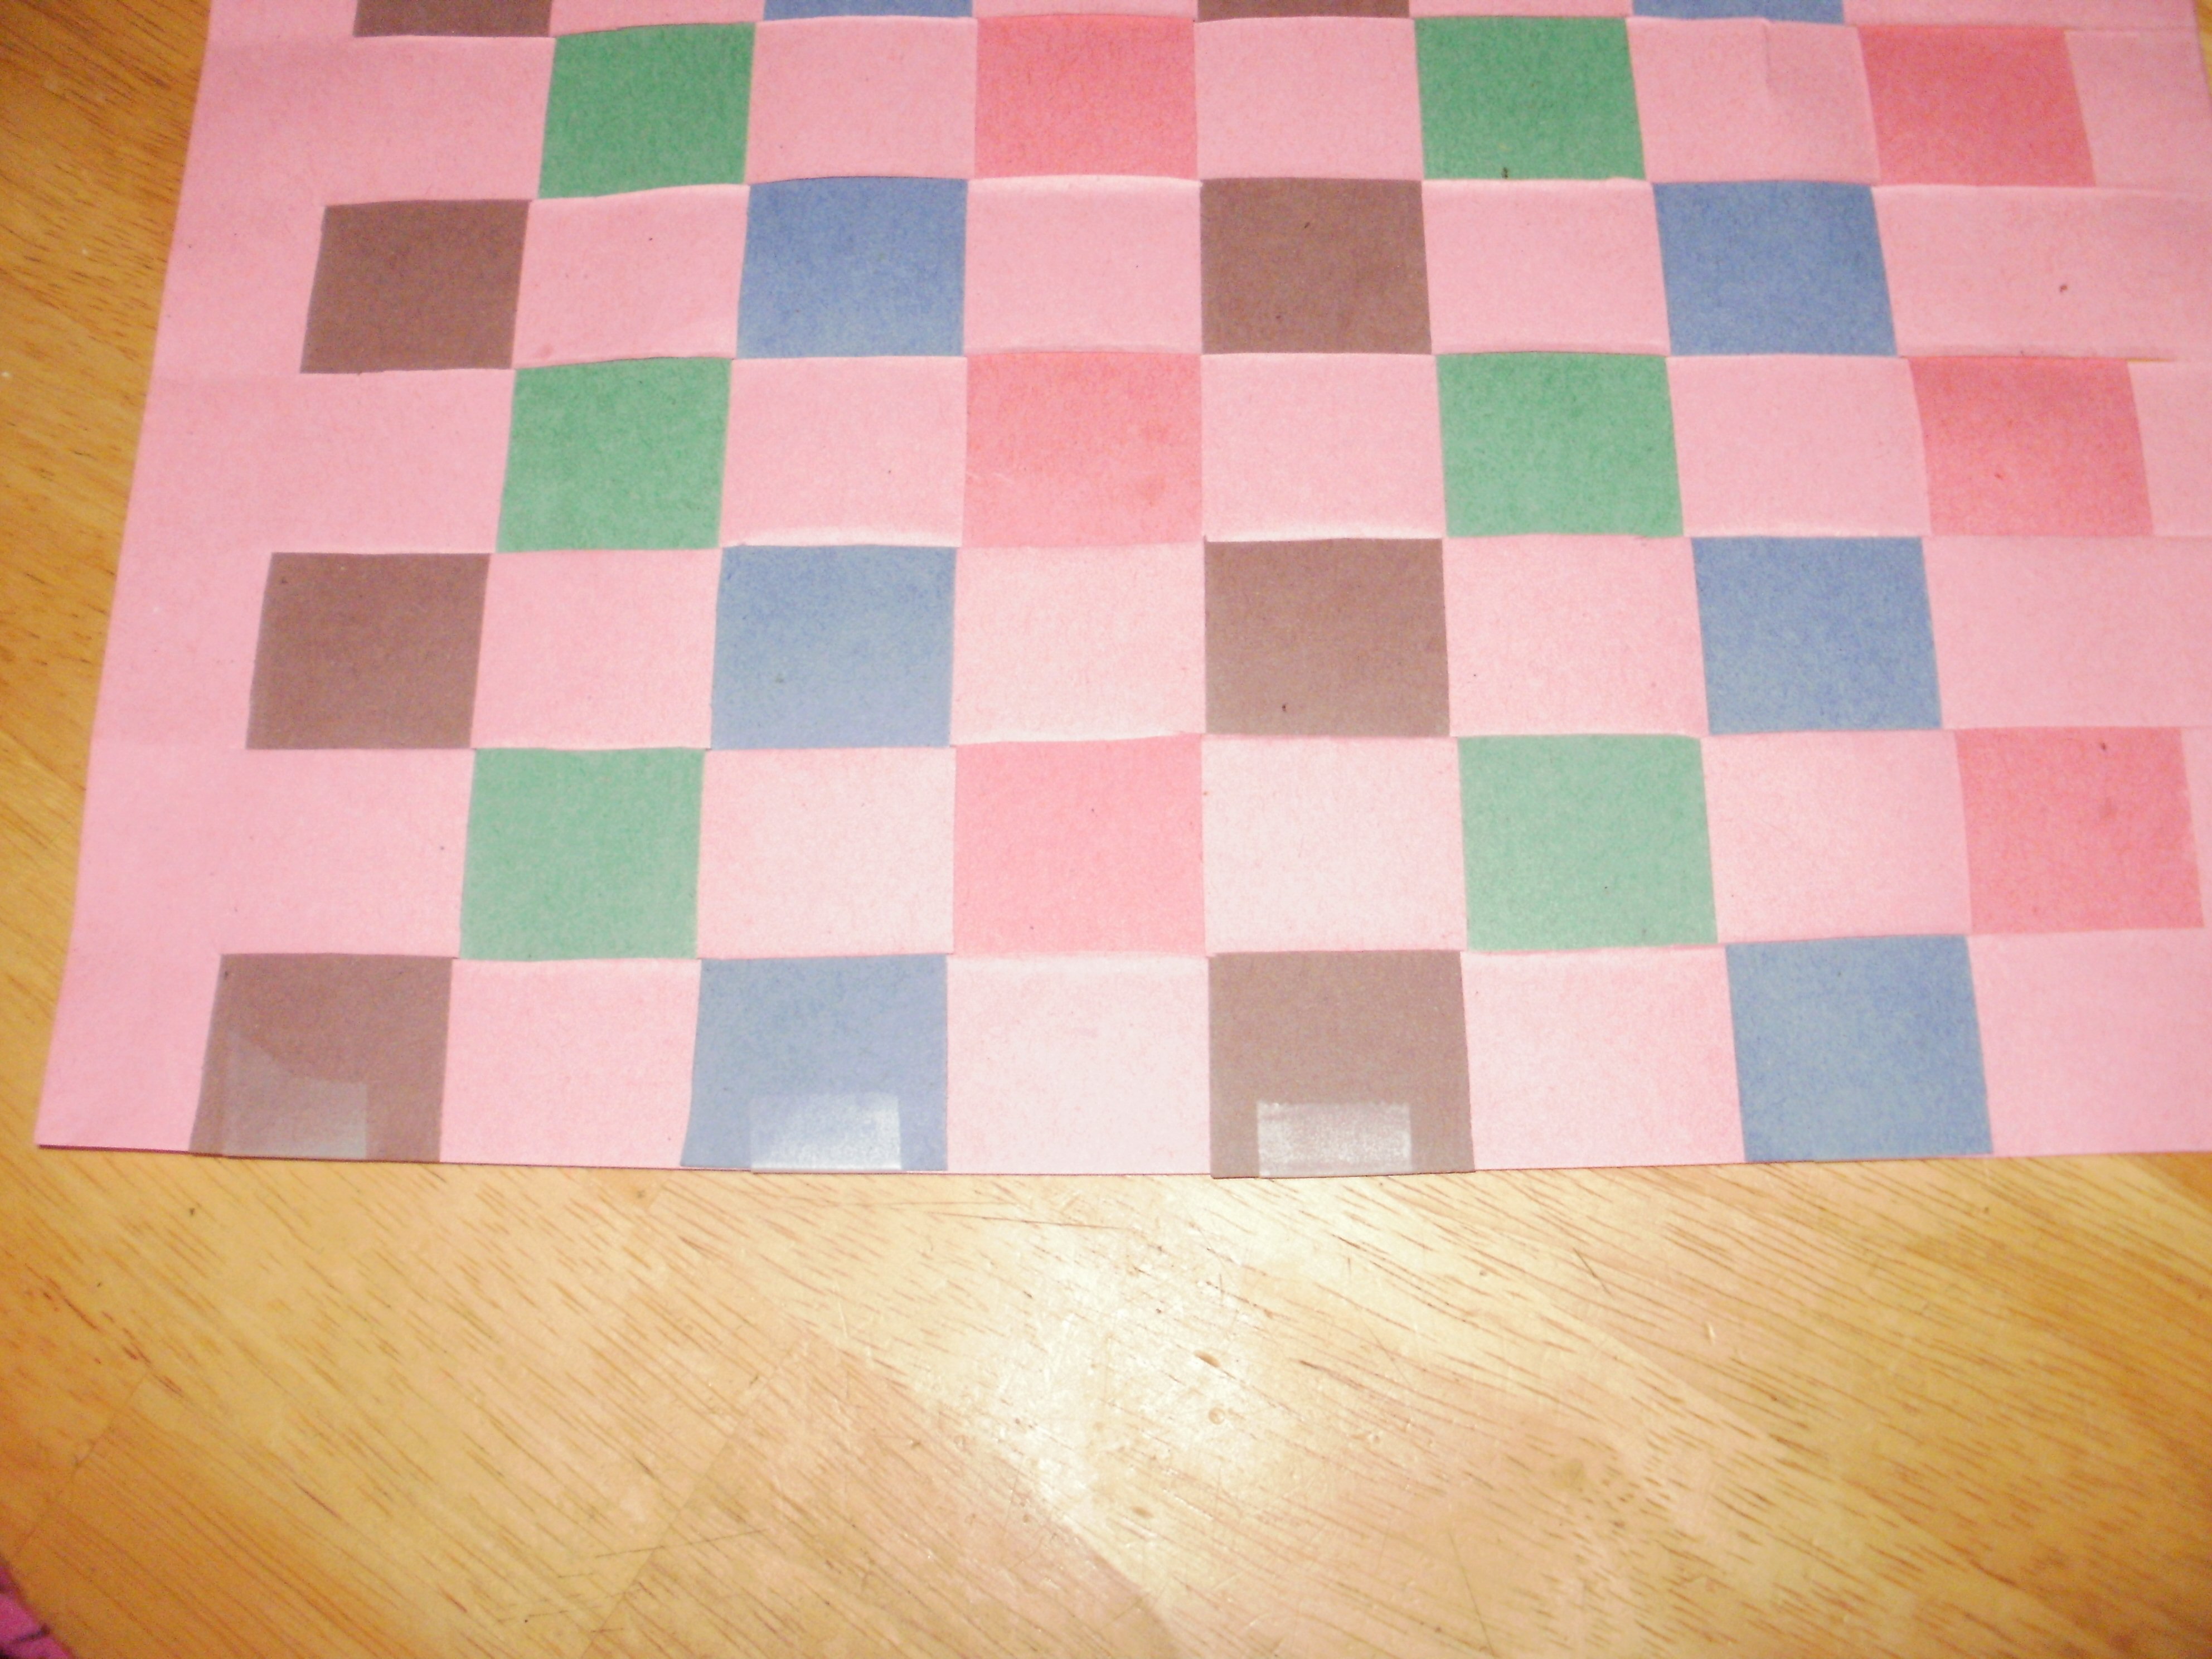
This is a great project to do while thinking about Martin Luther King Jr’s famous “I Have a Dream” speech. Specifically the quote “I have a dream that my four little children will one day live in a nation where they will not be judged by the color of their skin, but by the content of their character.” This craft can help remind us that all colors, whether they be the colors on a piece of paper, or the colors of our skin, can work well together and create wonderful things. This would be a good project for parents and kids to do together while they discuss the importance of Dr. King’s words. It involves a lot of cutting so I would not suggest this as an “all-by-myself” craft for children under the age of 10.

You Might Like Our Other Martin Luther King Day Crafts as well.

Making Unity Place Mats Craft for Martin Luther King Day Activity

The crafts materials you will need are:

  • Safety Scissors (or have an adult use sewing scissors)
  • 5 sheets of construction paper (I just picked mine randomly)
  • Tape
  • Laminating sheets (if you want it to last longer)

You will pick one color to be the base of your placemat and you will cut it so that one edge is untouched and there are eight strips coming off of it.  You will take the other four colors and cut them so you have 8 pieces that are one and a quarter inches by nine inches (or however wide your construction paper is) and weave them together.  Follow these instructions:

Step 1 : Prepare your base color


Fold base paper in half lengthwise and cut, leaving about one inch at one end.


If unfolded it should look like this. Notice how it's not quite cut in two?


Fold in half again lengthwise and cut, leaving the same amout on the same end.


If unfolded it should now look like this, with four strips.


Fold in half one more time and cut, you may need an adult to help since you will be cutting through 4 thicknesses of paper by now. Make sure to leave the inch at the end!


Now it should look like this and you're ready to start weaving. If it doesn't look like this, see if you can figure out where you went wrong and try again. This may take a time or two to get right, so don't get discouraged!

Step 2 : Prepare your accent colors


Now take the four remaining colors, square them up, fold in half SHORT way and cut. Set aside one half, you won't need it. Then fold again the same way (shown here) and cut again. Set one of those halves aside. Now, fold the last piece you have in half again the same way and cut. You will need all eight of these. Square them up.


You should be left with a pile that looks like this. 4 large rectangles and 4 medium rectangles which you can set aside to use another time, and 8 thin rectangles for this craft. But they're still just a little too big.


So cut just a little off of one side of the eight rectangles you have. About a quarter of an inch. The pieces you are left with should be 1 and a quarter inches. If it's not exact, that's ok.

Step 3 :Weaving


Now we're going to start weaving. Take your first strip and put it under the top strip of the base color, then over the second strip on the base color and so on. Slide it as close to the begining of the base color as possible. You may find that your base color strips aren't quite even and now is a good time to snip a little more so the strips you're weaving can fit in there snugly.


Now you're going to take your second color and put it OVER the first strip in your base, and then under the second and so forth. Push it as close as you can to the first color.


Keep weaving back and forth so you end up with a checkerboard pattern. You may find it easiet to start at the open end of the base color and wiggle it across to the side with the rest of the colors. You will find your own favorite weaving technique, but be careful not to tear the paper.

Step 4 :Taping the base


When you have finished weaving tape the open end of your base color so your alternating color strips won't fall out. Then straighten your color strips as best you can. Don't worry, no one can get them to look perfect.

Step 5 : Taping the accents


Once they are all in the right places tape each one in place at the ends.

Step 6 : Laminating (if you wish)


And there you have it. All the colors working together to make a beautiful placemat. If you would like it to last longer you can have an adult laminate it for you. Mine is not laminated, I'd rather just make a new one next year.

You Might Like Our Other Martin Luther King Day Crafts as well.

Technorati Tags: , , , , , , , , , , , , , , , ,

I Have a Dream Wall Hanging “Poster” Martin Luther King Day Craft

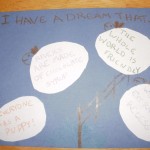
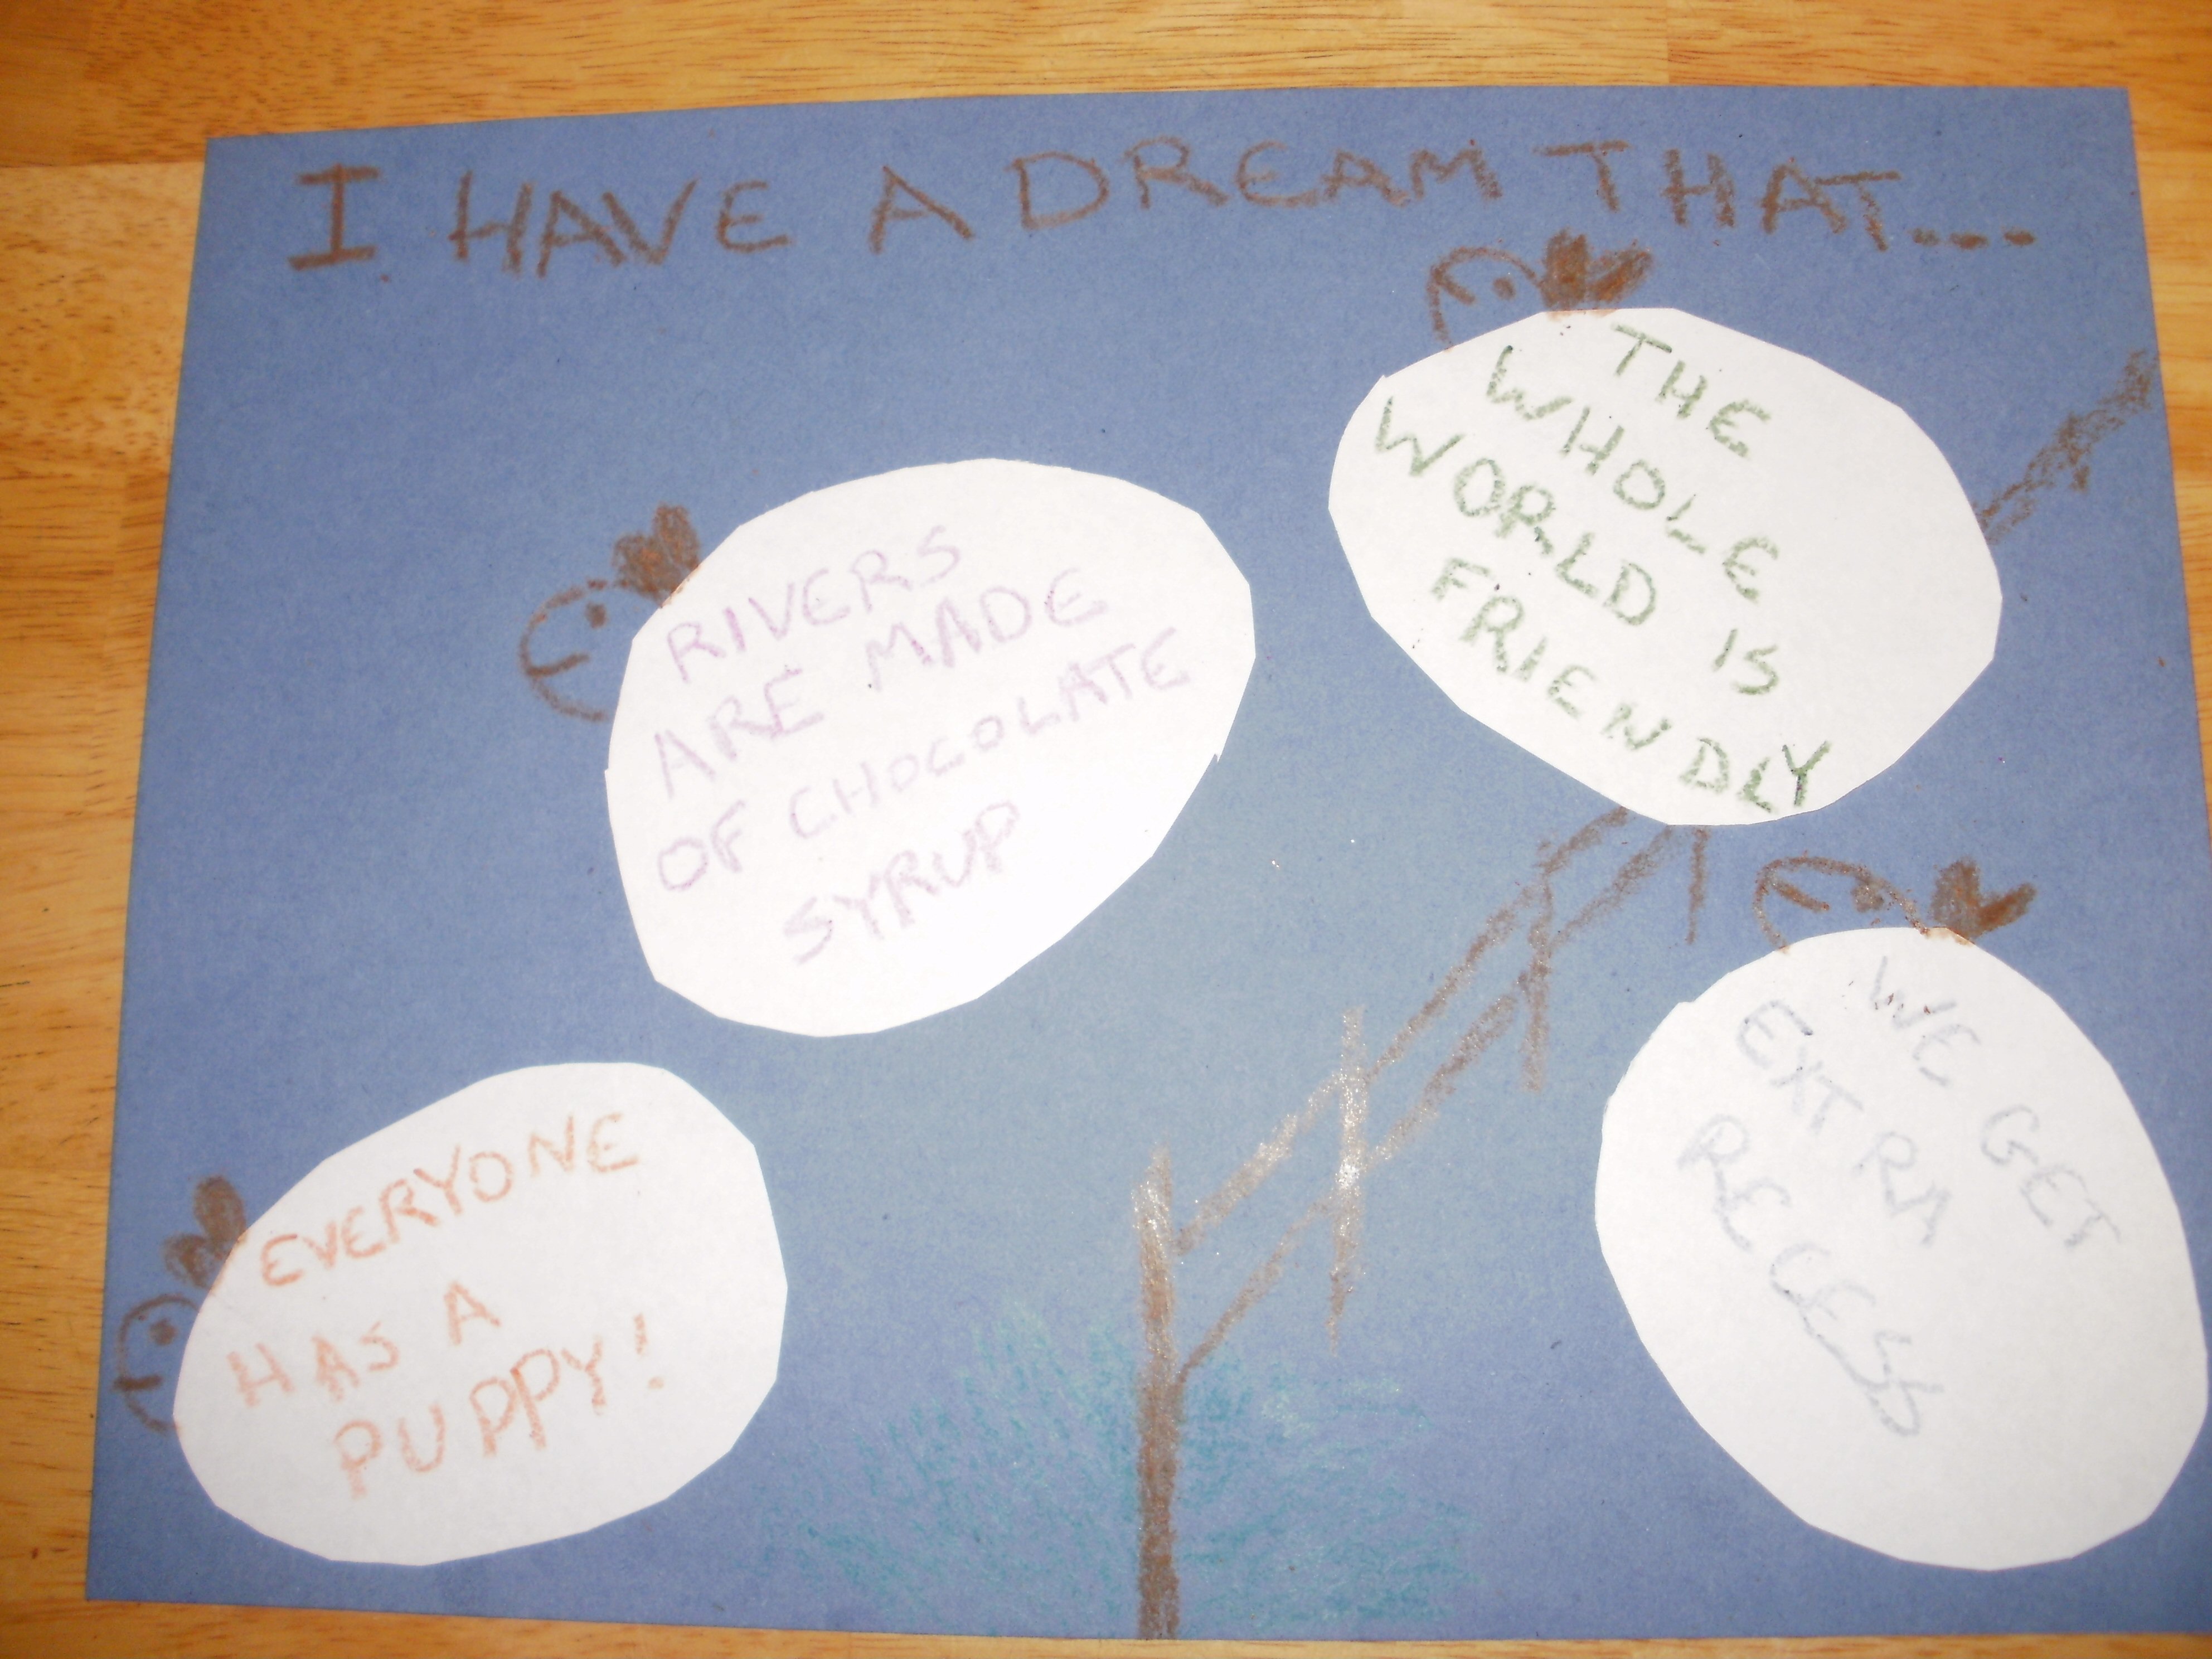
For Martin Luther King Jr’s Birthday, why not make a poster or wall hanging full of your dreams?  This craft can be done at home by one or two children on construction paper, as in the example, or as a class project, if you use poster board.  The age of the children doing the craft can decide what kind of “dreams” to fill it with.  A preschool or kindergarten child could put memories of bedtimes dreams they’ve had, whereas older children can put what they want to be when they grow up, wishes for their own future, or put dreams more like Martin Luther King’s.

You Might Like Our Other Martin Luther King Day Crafts as well.


Martin Luther King Day Crafts Activity for Kids Who Have a Dream


I Have a Dream Wall Hanging “Poster” Martin Luther King Day Craft

Craft Materials Needed:

  • Construction Paper or Poster Board (blue, for a sky)
  • Crayons, Colored Pencils, or Washable Markers (if you have permission to use markers)
  • White paper (for sheep)
  • Safety scissors (be sure to ask for help if you’re not allowed to use scissors by yourself)
  • Tape, glue stick, or glue

Step 1


Step 1: Cut out sheep. Using your imagination or a stencil, cut a few egg shapes out of the white paper.

Step 2


Step 2: Write your dreams. Using your writing utensil put your dreams on a few of the egg shapes. You don't have to use all of the shapes you cut out. I found out only four would fit on my paper.


Step 3


Step 3: Color background. Using your crayons (or whatever else you’re using) draw a fence for your sheep to jump over, and a little grass. This is just a suggestion, you can draw whatever you want. But, if you’re using crayons don’t cover the whole background or it will be harder for your sheep to stick.

Step 4


Step 4: Add tape (or glue) The least messy way to attach the sheep is to roll up a piece of tape, sticky side out, and put it in the middle of the sheep. You could also use a glue stick, or a little dab of school glue.

Step 5


Step 5: Attach the sheep. After you’ve put some tape or glue on the sheep, place them on the page. I put mine jumping over the fence, like I see them when I try to go to sleep at night. But you can put them however you want.

Step 6


Step 6: Add faces and text. Now decide which way they’re jumping and add faces and ears. At the top write “I Have A Dream That…” so that each of your dreams will finish the sentence. Don’t forget to have fun and enjoy yourself.

You Might Like Our Other Martin Luther King Day Crafts as well.

Technorati Tags: , , , , , , , , , , , ,