
How to Make Drinking Straw Flowers

I have a fun craft for you today.  In this post I will show you how to make Drinking Straw Flowers.  The supplies are for just one flower, but make a whole bunch and you have yourself a bouquet.  They would look fun and festive this Spring in a vase or pot.  Any age child will enjoy making these flowers even the youngest of crafters.  So, grab the materials needed and let’s get started with this craft.
Check out our other Drinking Straw Crafts.


How to Make Drinking Straw Flowers


Materials Needed

Drinking Straw

Scissors

Green Pipe Cleaner

Colored Pom Pom

Glue


Step 1


Cut the end of the straw about 1/2 inch down.


Cut the end of the straw about 1/2 inch down.  Do many of these cuts.


Step 2


Cut a bit down from the slits you made.


Cut a bit down from the slits you made.


Step 3


Spread out petals.  Push green pipe cleaner up thru bottom.


Spread out petals.  Push green pipe cleaner up thru bottom.


Step 4


Bend green pipe cleaner so it won't fall out of flower.


Bend green pipe cleaner so it won’t fall out of flower.  Then glue colored pom pom in center.


Finished Drinking Straw Flowers


And, there you have it…. you just finished your Drinking Straw Flower.  How did it turn out for you.  Now, make a few and put together a beautiful bouquet of Drinking Straw Flowers.

Here is our video on how to Make Drinking Straw Flowers.

Technorati Tags: , , , , , , , , , ,

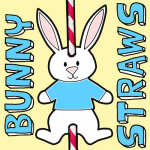
How to Make Easter Bunny Straws

Today I’m going to show you how to make Easter Bunny Straws.  This would be a great craft to present the kids that you are having over this Easter Holiday.  Simply print off enough templates for the amount of Children you are having over… place them at the Children’s table and let them color and put the straws together.  Not only will they be entertained by the craft, but also by drinking through the fun Easter straws.  You can choose to print off the colored template or the black and white and let the children color them themselves.  So, let’s get started.

Check out our other Easter Crafts.


How to Make Easter Bunny Straws


Materials Needed

Printer & Paper

Scissors

Hole Punch

Straw

Crayons (optional)


Click on template image below to make larger and to print.

Black & White Template


Black & White Bunny Template


Color Template


Colored Bunny Template


Step 1


Print out template.


Print out template.


Step 2


Cut out bunny.


Cut out bunny.


Step 3


Use a hole punch to punch 2 holes in bunny.


Use a hole punch to punch 2 holes in bunny.


Step 4


Now stick straw thru the holes.


Now stick straw thru the holes.

And, that’s it.  You now have an Easter Bunny Straw.  Now, make a few and use these Easter Bunny Straws at the Children’s Table this Easter.  They kids are sure to love drinking from these straws.

Technorati Tags: , , , , , , , , , , , , , , ,

How to Make a Patriotic Fan

Today I’m going to show you how to make a Patriotic Fan.  Made from a printed-off template, some glue and a flexible straw…. it makes for an excellent decoration to be used on any Patriotic day.  Rather make a fan that is not patriotic?  Not a problem.  Simply print of a template of your choosing and follow the rest of the directions to complete the fan.  Sound good?  Awesome!!  So, grab the materials you need to make the craft and let’s get started.

Check out our other Drinking Straw Crafts.


Materials Needed

– template (found here)
– scissors
– glue
– 1 flexible straw (it is not important that it’s flexible)
– pencil
– stapler


Step 1

Print the template from here.   Cut off the white margins.


Step 2

With your pencil, make markings on the long sides at 1 cm of one another.


Step 3

Accordion fold on the markings…


… like this.


Fold the whole paper.


Step 4

Cut off one corner…


… like this.


Do the same with the other corner.


Step 5

Bring together the two corners of one side…


… and staple them.


Do the same on the other side.


Step 6

Apply a layer of glue on the straw…


… and place it on one crease (on the back side, of course)


And, that’s it. A cute patriotic fan that can be used as a decoration for any Patriotic Day.


Isn’t that an awesome Patriotic Fan?  It’s make for an excellent decoration for any day that you are feeling especially Patriotic.

Technorati Tags: , , , , , , , , ,

How to Make a Valentines Critter

I have a fun craft for you today.  I’m going to show you how to make a Valentines Critter.  This Valentines Critter is perfect to give your someone special as a gift this Valentines Day.  The critter holds on to the sweetest lollipops that any receiver will be sure to love.  Add a sweet and loving note and you have the perfect gift ready for giving to your someone special.  So, grab the materials needed and let’s get started.

Check out our other Valentines Day Crafts.

Laura from Dacian Moon Handmade  will show you how to make this critter, step by step.


Materials Needed

– cardboard (a rectangle of 7 cm x 5 cm)
– red paper
– scissors
– pen
– pencil
– 2 flexible straws
– lollipop
– card punch


Step 1

Draw two hearts on the red paper…


… and cut them out.


Using your pen draw eyes, nose, mouth on one of them and write “Happy Valentines Day” on the other one.


Step 2

Take the cardboard…


And make 4 holes in it, like this (using the card punch).


Apply a layer of glue on the lower part of the heart with eyes…


… like this…


… and place it over the cardboard, like this.


Step 3

Take a straw…


… measure the distance between two holes, like this…


… and bend it…


… to go through both holes.


It will look like that. Now the critter has one arm and one leg.


Bend the leg down…


… then bend it again at 2 cm of the straw end to make the foot.


Repeat this step to make the second arm and leg.


Step 4

Move the hands outward…


… and bend one from the middle inward (from the elbow)


This arm will support the lollipop.


Step 5

Using the scissors make a small cut on the other arm.


Put the second heart on this cut and the critter is ready.


Imagine the surprise of the receiver of this Valentines Day Gift…. they are sure to love it.  How did your Valentines Critter turn out?  Let me know in the comments below.  And, take a picture of your critter as well… you can share that too in the comments.  I’d love to see it.

Technorati Tags: , , , , , , , , , , , ,

Making a Valentines Day Pinwheel Sweet Candy Gift Box Craft for Kids – Part 2

This is part 2, today we will make the upper part (the vane – pinwheel part). Laura from Dacian Moon Handmade will show you today how to make a complex looking, but very easy to do, Valentine’s Day Candy Gift box with sweets or candies.

Visit Part One of Making a Valentines Day Pinwheel Sweet Candy Gift Box Craft for Kids

Here are Even More Valentines Day Crafts Ideas

Making a Valentines Day Pinwheel Sweet Candy Gift Box Craft for Kids – Part 2


Making a Valentines Day Pinwheel Sweet Candy Gift Box Craft for Kids – Part 2


CRAFTS MATERIALS NEEDED (for part 1 and 2):

– colored paper (not too thin) – two squares ~15 cm and two other of ~5 cm
– scissors
– paint marker (red)
– glitter glue (to match the paper colours, in my case, gold and blue)
– 1 flexible straw (is not important to be flexible)
– one piece of crepe
– 1 pin
– pencil
– candies


Step 1

Take the second large square of coloured paper.


Fold it in half then unfold.


Do the same in the other direction. This is the same like the first part.


Step 2

Fold one half in half again.


Then the other half.


Fold again the halves …


… to obtain this little square.


Step 3

Unfold the last two.


Step 4

Keep the center immobile …


… and open one half like in the picture.


Repeat on the other side. This will lift the edge.


Flatten the edge like this:


Step 5

Turn it with the worked part to you…


… and repeat the step 4.


Step 6

Lift the upper right part and fold it up.


Like this.


Now lift the lower left part and fold it down. Now we have a vane that will spin in the wind.


Step 7

Take one little square…


… and fold it at least four times (in cross)


With the scissor make a criss-cross cut around one corner.


Like this.


Now unfold: we have one of the center pieces.


Step 8

Cut a circle from the crepe, or if you want, cut it the same like in the step 7.


Step 9

Cut a little blue circle.


Step 10

Place the pin through all the center pieces…


… then through the vane …


… and finally through the flexible straw.


Step 11

Now is time to assemble the two parts.
With the scissor, cut the top of the lower part, just enough that the straw to pass.


Like this.
Note: if you want to be extra-sure of it, place a layer of craft glue on the back side, where the straw gets out of the paper. Let it dry well.


Step 12

Fill the lower part with candies.


Last Step

From the other little square…


… cut out a heart.


Adorn it with glitter glue and write „Happy Valentine”, and place it beside the straw in the top of the lower part.
Note: you can glue the heart on the straw, if you want.


Visit Part One of Making a Valentines Day Pinwheel Sweet Candy Gift Box Craft for Kids

Here are Even More Valentines Day Crafts Ideas

Technorati Tags: , , , , , , , , , , , , , ,

Making a Valentines Day Pinwheel Sweet Candy Gift Box Craft for Kids – Part 1

Laura from Dacian Moon Handmade will show you today how to make a complex looking, but very easy to do, Valentine’s Day Candy Gift box with sweets or candies. This is a two part, step by step crafts tutorial for kids or someone of any age. In this part we will make the lower part of this candy box….(the one with candies).

GO TO PART 2

Here are Even More Valentines Day Crafts Ideas


Making a Valentines Day Pinwheel Sweet Candy Gift Box Craft for Kids – Part 1


Making a Valentines Day Pinwheel Sweet Candy Gift Box Craft for Kids – Part 1

CRAFTS MATERIALS NEEDED (for part 1 and 2):

– colored paper (not too thin) – two squares ~15 cm and two other of ~5 cm
– scissors
– paint marker (red)
– glitter glue (to match the paper colors, in my case, gold and blue)
– 1 flexible straw (is not important to be flexible)
– one piece of crepe
– 1 pin
– pencil
– candies


Step 1

Take one of the large pieces of paper and fold it in half, then unfold.


Do the same in the other direction. It will look like that:


Step 2

Bring one corner to the middle and press well.


Do the same with all the corners.


Step 3

Turn the new square on the other side.


Bring the corners to the center again…


… like that.


Step 4

Place it to the table with one corner to you (keep it on the same side)


And bring the upper corner over the lower one. Press well.


Step 5

Now, keeping immobile the lowest corner, bring the right corner over it.


It will look like this.


Turn on the other side and bring again the right corner over the lowest one…


… like this.


Step 6

Open the edges.


Then pull gently the other ones…


… and we have the lower part ready to be filled with candies 🙂


Note: you can use this to store various things and it will look pretty on your desk.

GO TO PART 2

Here are Even More Valentines Day Crafts Ideas

Technorati Tags: , , , , , , , , , , , , , ,