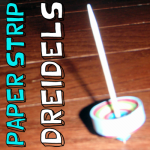
How to Make a Paper Strip Dreidel – With Dreidel Game Instructions

I have a cool craft for you today.  I’m going to show you how to make a Paper Strip Dreidel.  This Dreidel craft actually produces a Dreidel that actually spins.  Not just spins…. but spins amazingly well.  So well in fact that I also am giving you the Dreidel game instructions so that you can use your Paper Strip Dreidel to play with your friends.  So grab the materials needed and let’s get started.

Check out our other Hanukkah Crafts.


How to Make a Paper Strip Dreidel


Materials Needed

Paper of All Different Colors

Scissors

Glue

Toothpick

Marker


Step 1


Cut some long strips of  paper.


Cut some long strips of  paper.  Mine were 1/4 inch wide.


Step 2


Add glue to the tip of one of the strips of paper.


Add glue to the tip of one of the strips of paper.


Step 3


Wrap paper strip tightly around the bottom of the toothpick.


Get a toothpick.  Wrap paper strip tightly around the bottom of the toothpick… but leaving some of the tip sticking out.


Step 4


glue the end of another strip to the 1st strip


When you near the end of one of your paper strips, then glue the end of another strip to the 1st strip.


Step 5


Keep rolling tightly.


Keep rolling tightly.


Step 6


Add more strips.


Add more strips.


Step 7


Add still more strips.


Add still more strips.


Step 8


It is looking like this.


It is looking like this.


Step 9


Glue the tip of the last strip down.


Glue the tip of the last strip down.  Hold tightly for a few minutes to let completely dry.


Step 10


Pull strips of paper slowly up to look like this.


After dries… Pull strips of paper slowly up to look like this.


Look how pretty.


Look how pretty.


Step 11


Each side of the dreidel has a different letter from the Hebrew alphabet.


Each side of the Dreidel bears a letter of the Hebrew alphabet:  נ (nun), ג (gimel), ה (hei) and ש (shin).


Draw these Hebrew letters on the sides of your paper strip Dreidel.


Draw these Hebrew letters on the sides of your paper strip Dreidel.


Step 12


It spins really well.


Your paper Dreidel should spin really well.


Dreidel Game Instructions

Each player begins with an equal number of game pieces (usually 10–15). The game pieces can be any object, such as chocolate gelt, pennies, or raisins.

At the beginning of each round, every participant puts one game piece into the center “pot”. In addition, every time the pot is empty and sometimes if it has one game piece left, every player puts one in the pot. Each player spins the dreidel once during their turn. Depending on which player side is facing up when it stops spinning, they give or take game pieces from the pot:

  1. If נ (nun) is facing up, the player does nothing.
  2. If ג (gimel) is facing up, the player gets everything in the pot.
  3. If ה (hei) is facing up, the player gets half of the pieces in the pot. (If there is an odd number of pieces in the pot, the player takes half the pot rounded up to the nearest whole number)
  4. If ש (shin) or פ (pei) is facing up, the player adds a game piece to the pot.

If the player is out of pieces, they are either “out” or may ask another player for a “loan”.

There you have it.  You just made your very own Paper Strip Dreidel and have the instructions for playing the Dreidel game….. now go grab your friends and play the game of Dreidel.  Let me know how you did in the comments below…. I’d love to hear about it.

Technorati Tags: , , , , , , , , , , , , , , ,

How to Make a Flying Butterfly Toy Arts and Crafts Project for Kids

Kids love playing with this flying butterfly toy. This is an arts and crafts project to make a  butterfly toy that will really fly up to 15 feet up in the air. This is for older kids as it is too difficult for younger kids to master…although they can with some supervised guidance from an adult.


How to Make a Flying Butterfly Toy Arts and Crafts Project for Kids


How to Make a Flying Butterfly Toy Arts and Crafts Project for Kids

Crafts Materials Needed

– Paper

–  Thread Spool

– Pins

– Dowel or Stick

– Strong String or Cord

Step 1


Firstly, fold an oblong piece of paper 4 inches by 5 1/2 inches on its short diameter.


Firstly, fold an oblong piece of paper 4 inches by 5 1/2 inches on its short diameter.

Step 2


One fourth inch from fold draw a line and mark an 'x' halfway down on it.


One fourth inch from fold draw a line and mark an ‘x’ halfway down on it.


Step 3


Draw butterfly like in the drawing that you see above.


Draw butterfly like in the drawing that you see above. The dashed line is the line that we drew in the previous step. Cut out this pattern and trace on to a piece of cardboard, making a large pin hole through the ‘x’ on each side of the body. Cut out cardboard butterfly and color on both surfaces.

Step 4


Step 4 : Butterfly Flier Flying Toy


Fasten 2 pins, securely, in the top of an empty thread spool. Make sure to let them stick out about an eighth of an inch. Also, try to placed the pins so that they are exactly opposite each other across the hole and about a half inch apart from each other.

Step 5


A piece of dowel or any round stick about a half inch in diameter and a foot in length is the next requirement.


A piece of dowel or any round stick about a half inch in diameter and a foot in length is the next requirement.


Step 4 How to Make a Flying Butterfly Toy Arts and Crafts Project for Kids


Parental help / permission might be require for this part of the craft, depending on your age. Shave off some of the wood on the stick or dowel so that the stick is a little less as wide as the diameter (width) of the spool’s hole. Do this on the end of the dowel…the same length as the length of the spool. Finish so that the spool has a little platform on which to rest when thrust over end of stick.

Step 6


Step 6 in making butterfly flyer toy


Tie a knot near the end of a piece of strong string or cord about 2 feet long. Place the end with NO knot on the spool and start winding the string on the spool.

Step 7 – The Fun Part – How to Play With Your New Butterfly Toy.


Step 7 - The Fun Part - How to Play With Your New Butterfly Toy.


Now for the fun. Put the spool on the stick. Now slip pinholes in butterfly’s body over the pins that are in the spool. Then catching hold of a knot, give the string a quick jerk. Away will fly the butterfly … sometimes 15 feet or more up into the air.

Alternative to Butterfly : A Pair of Bird’s Wings


Alternative to Butterfly : A Pair of Bird's Wings


Technorati Tags: , , , , , , , , , , , , , ,

Making a Valentines Day Pinwheel Sweet Candy Gift Box Craft for Kids – Part 2

This is part 2, today we will make the upper part (the vane – pinwheel part). Laura from Dacian Moon Handmade will show you today how to make a complex looking, but very easy to do, Valentine’s Day Candy Gift box with sweets or candies.

Visit Part One of Making a Valentines Day Pinwheel Sweet Candy Gift Box Craft for Kids

Here are Even More Valentines Day Crafts Ideas

Making a Valentines Day Pinwheel Sweet Candy Gift Box Craft for Kids – Part 2


Making a Valentines Day Pinwheel Sweet Candy Gift Box Craft for Kids – Part 2


CRAFTS MATERIALS NEEDED (for part 1 and 2):

– colored paper (not too thin) – two squares ~15 cm and two other of ~5 cm
– scissors
– paint marker (red)
– glitter glue (to match the paper colours, in my case, gold and blue)
– 1 flexible straw (is not important to be flexible)
– one piece of crepe
– 1 pin
– pencil
– candies


Step 1

Take the second large square of coloured paper.


Fold it in half then unfold.


Do the same in the other direction. This is the same like the first part.


Step 2

Fold one half in half again.


Then the other half.


Fold again the halves …


… to obtain this little square.


Step 3

Unfold the last two.


Step 4

Keep the center immobile …


… and open one half like in the picture.


Repeat on the other side. This will lift the edge.


Flatten the edge like this:


Step 5

Turn it with the worked part to you…


… and repeat the step 4.


Step 6

Lift the upper right part and fold it up.


Like this.


Now lift the lower left part and fold it down. Now we have a vane that will spin in the wind.


Step 7

Take one little square…


… and fold it at least four times (in cross)


With the scissor make a criss-cross cut around one corner.


Like this.


Now unfold: we have one of the center pieces.


Step 8

Cut a circle from the crepe, or if you want, cut it the same like in the step 7.


Step 9

Cut a little blue circle.


Step 10

Place the pin through all the center pieces…


… then through the vane …


… and finally through the flexible straw.


Step 11

Now is time to assemble the two parts.
With the scissor, cut the top of the lower part, just enough that the straw to pass.


Like this.
Note: if you want to be extra-sure of it, place a layer of craft glue on the back side, where the straw gets out of the paper. Let it dry well.


Step 12

Fill the lower part with candies.


Last Step

From the other little square…


… cut out a heart.


Adorn it with glitter glue and write „Happy Valentine”, and place it beside the straw in the top of the lower part.
Note: you can glue the heart on the straw, if you want.


Visit Part One of Making a Valentines Day Pinwheel Sweet Candy Gift Box Craft for Kids

Here are Even More Valentines Day Crafts Ideas

Technorati Tags: , , , , , , , , , , , , , ,

Making a Valentines Day Pinwheel Sweet Candy Gift Box Craft for Kids – Part 1

Laura from Dacian Moon Handmade will show you today how to make a complex looking, but very easy to do, Valentine’s Day Candy Gift box with sweets or candies. This is a two part, step by step crafts tutorial for kids or someone of any age. In this part we will make the lower part of this candy box….(the one with candies).

GO TO PART 2

Here are Even More Valentines Day Crafts Ideas


Making a Valentines Day Pinwheel Sweet Candy Gift Box Craft for Kids – Part 1


Making a Valentines Day Pinwheel Sweet Candy Gift Box Craft for Kids – Part 1

CRAFTS MATERIALS NEEDED (for part 1 and 2):

– colored paper (not too thin) – two squares ~15 cm and two other of ~5 cm
– scissors
– paint marker (red)
– glitter glue (to match the paper colors, in my case, gold and blue)
– 1 flexible straw (is not important to be flexible)
– one piece of crepe
– 1 pin
– pencil
– candies


Step 1

Take one of the large pieces of paper and fold it in half, then unfold.


Do the same in the other direction. It will look like that:


Step 2

Bring one corner to the middle and press well.


Do the same with all the corners.


Step 3

Turn the new square on the other side.


Bring the corners to the center again…


… like that.


Step 4

Place it to the table with one corner to you (keep it on the same side)


And bring the upper corner over the lower one. Press well.


Step 5

Now, keeping immobile the lowest corner, bring the right corner over it.


It will look like this.


Turn on the other side and bring again the right corner over the lowest one…


… like this.


Step 6

Open the edges.


Then pull gently the other ones…


… and we have the lower part ready to be filled with candies 🙂


Note: you can use this to store various things and it will look pretty on your desk.

GO TO PART 2

Here are Even More Valentines Day Crafts Ideas

Technorati Tags: , , , , , , , , , , , , , ,

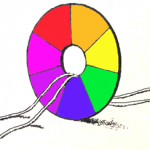
How to Make Color Wheel Spinning Toys Craft Idea for Kids

This is a good arts and crafts activity to teach kids about colors (and it is a lot of fun to play with). Kids will be so surprised when they find out that when they spin the toys, the colorful rainbow of colors turns into a charcoal gray. You can teach kids a little bit of science and lit bit of art with the use of this crafts project. Have fun.

You Might Enjoy Our Other Toy Making Crafts and Our Spinning Toys Crafts


How to Make Color Wheel Spinning Toys Craft Idea for Kids


How to Make Color Wheel Spinning Toys Craft Idea for Kids

Crafts Materials Needed

– Cardboard
-String
-Crayons or Paint
-Scissors

Step 1


Take a piece of white cardboard, and from it cut a circle about 3 inches across.


Take a piece of white cardboard, and from it cut a circle about 3 inches across.

Step 2


Now from the middle of this cut another circle about 3/4 inches across.


Now from the middle of this cut another circle about 3/4 inches across.


Step 3


Divide the circle into 7 equal parts, and paint or crayon the sections with the colors of the rainbow


Divide the circle into 7 equal parts, and paint or crayon the sections with the colors of the rainbow : red, orange, yellow, green, blue, indigo, and violet.

Step 4


When this is dry, make a large loop of string and put it through the round hole of the card.


When this is dry, make a large loop of string and put it through the round hole of the card.

How to Play With Your New Color Wheel Spinning Toy

Now hold the ends of the loop one in each hand. Now if you turn the string at one end as if you were turning a skipping rope, and then suddenly pull it tight, your card will revolve very rapidly, and you will find that instead of a colored card you have what appears to be a light grey one. This is really a little piece of science, for it shows that the white light about us is really made up of the different colors of the rainbow.

You Might Enjoy Our Other Toy Making Crafts and Our Spinning Toys Crafts

Here is our video on how to make a Color Wheel Spinning Toy

Technorati Tags: , , , , , , , , , , ,

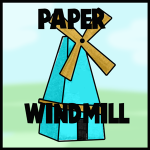
How to Make Paper Windmills with Paper Modelling Craft Instructions

Today, we will show you how to make a cute paper windmill. Below you will find two printable paper models. All you will need to do is cut and fold the model into the proper shape. Have fun.


How to Make Paper Windmills with Paper Modeling Craft Instructions for Kids


Below you will find 2 pages to print. These are diagrams to print out….then you will need to cut them out. Fold on the dotted lines and glue on the tabs. The picture of the windmill (above) is what you will want your windmill to look like so base your folding on that picture. You might want to draw windows / ladders on the windmill too…to make it unique to you. If you want your windmill to spin….you will need a paper fastener (one of those things that you push it through the paper and close it on the other side.)


How to Fold Paper Windmills craft for Kids


Click on The Above Picture to Print Out the First Set of Instructions


How to Fold Paper Windmills craft for Kids


Click on The Above Picture to Print Out the Second Set of Instructions

To attach the windmill blades to the windmill structure, use a paper fastener so that it can spin. If you don’t have a paper fastener, you can either use two buttons sewed on either side of the paper so that it can still turn, or you can just fasten it with glue (in which case it won’t be able to spin)

Technorati Tags: , , , , , , , , , , , , , ,

Thanksgiving Activities : Make Thanksgiving Games with 3D Pilgrim & Turkey Tic-Tac-Toe Game


Thanksgiving Tic Tac Toe Game Paper Crafts Thanksgiving Activity


Free Thanksgiving Pigrim & Turkey Activity Game  : Make Printable Foldable Pilgrims & Turkeys Thaksgiving Tic-Tac-Toe Paper Crafts Game for Kids


Have a free afternoon and want to make the coolest craft you have ever made? All you need are a box, chopsticks, printer, paper, scissors, glue, and patience and you will have a fun Thanksgiving arts and crafts activity to keep you busy. This Thanksgiving game was a big hit in my house and I think your kids will love it too. Find out more below.

(Also learn how to fold up a 3D paper turkey)

(Also learn how to fold up a 3D pilgrim girl)

Materials Required:

Printer

Paper

Scissors

Chopsticks

Cardboard Box

Glue

Small Stick

Patience

Free Tic-Tac-Toe Thanksgiving Game Paper Models Diagrams Below:


tic-tac-toe-thanksg-papermodelstoy-blue


Print this template out 3 times.


tic-tac-toe-thanksg-papermodelstoy-orange


Print this template out 3 times.


tic-tac-toe-thanksg-papermodelstoy-red


Print this template out 3 times.

Instructions for Making Tic-Tac-Toe Thanksgiving Game Activity:


Cut Out Thanksgiving 3D Tic-Tac-Toe Games Paper Pilgrims Turkeys Paper Model


(1) Cut out the templates (9 pages in all – 3 of each template) along the outer lines.


Cut Out Thanksgiving 3D Tic-Tac-Toe Games Paper Pilgrims Turkeys Paper Model


(2) This is what the template should look like after cut out along the lines. (above)


Cut Out Cut up with Scissors Thanksgiving 3D Tic-Tac-Toe Games Paper Pilgrims Turkeys Paper Model


(3a) A hole must be cut in both ‘+’ marks on the template. You can either fold lightly (without creasing) and cut a slit in both directions on both ‘+’ marks  OR


Cut Out Put Pencil Through Hole Thanksgiving 3D Tic-Tac-Toe Games Paper Pilgrims Turkeys Paper Model


(3b) put a pencil through the ‘+’ marks


Cut Out Thanksgiving 3D Tic-Tac-Toe Games Paper Pilgrims Turkeys Paper Model


(4) Fold along all inner lines and along each tab…after folding at these lines, the paper will sort of take shape (as seen above).


Cut Out Glue Tabs Thanksgiving 3D Tic-Tac-Toe Games Paper Pilgrims Turkeys Paper Model


(5) Glue along all white tabs (as seen above).


Cut Out Glue Sides Together Thanksgiving 3D Tic-Tac-Toe Games Paper Pilgrims Turkeys Paper Model


(6) Push tabs into sides of box as seen above and hold down for about 8 seconds along each corner (as seen above).


Cut Out Squeeze sides together Thanksgiving 3D Tic-Tac-Toe Games Paper Pilgrims Turkeys Paper Model


(7) The very last side is hardest to put together … the only way to close it is to squeeze tightly and hope the crease doesn’t stay.

(8) Fold all 9 cubes together.


Put Chopsticks through all the 3d boxes


(9) Take 3 chopsticks and put each one through 3 of the cubes. You can put each color on one chopstick like I did, or mix up the colors the way that you want to.


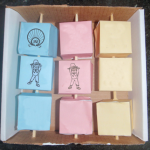
Finished Thanksgiving Activities Games 3D Paper Craft Tic Tac Toe Games


Find a cardboard box that is a bit bigger than all of the squares so that there is space for the cubes to turn. Space the chopsticks out evenly and then with a scissor, put the tip through the sides of the box so that you can put the chopsticks through each side. At the end, the game should look like this and the cubes should turn easily.

MORE THANKSGIVING ARTS AND CRAFTS IDEAS BELOW

It is almost Thanksgiving time so check out our Thanksgiving Coloring Pages & Thanksgiving Crafts for Kids Page to find some great turkey and thanks-giving crafts project ideas for kids to celebrate Thanksgiving such as

Autumn / Fall Crafts ..
Cornucopia Crafts
..
Indian Corn Crafts
..
Pilgrim Crafts
..
Preschoolers & Toddlers Thanksgiving Crafts
..
Scarecrow Crafts
..
Thanksgiving Coloring Pages & Printouts
..
Thanksgiving Decorations Crafts
..
Thanksgiving Table Decorations Crafts ..
Thanksgiving Turkey Crafts ..
Thanksgiving Worksheets & Printouts

Technorati Tags: , , , , , , , , , , , , , , , , , , , , , , , , , , , , , , , , , , , , ,

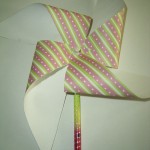
Easy Pinwheel Pencil Craft for Kids for Independence Day on July 4th


rimg19691


Easy Pinwheel Pencil Craft for Kids for Independence Day on July 4th


This article was written in the Spring, and as Fourth of July is tomorrow, I thought of pinwheels and how with red, white, and blue paper, they could be very festive on a hot fourth of July night. Although this article was intended for Spring, when the days are windier, I think it is a good thing that this article was pushed to Fourth of July, as I think your children will have a lot of fun using these pinwheels tomorrow night.

Pinwheels are such an easy craft.  I remember making them as a young child all the way back to kindergarten and I remember being really proud of my accomplishment as the wind spun it around and around on the walk home.

Today, I love making pinwheels with my kids because they get as much enjoyment out of it as I did.  They are very easy to use and they only require a few supplies that most people have in their homes or home offices.

To Celebrate fourth of July, just use paper that is red, white, and blue and make sure to keep these pinwheels away from any sparks created by sparklers or any other types of miniature fireworks items that kids use for fun. Have fun and Happy Fourth of July.

Pinwheel Pencil Craft for Kids: How to Make a Pinwheel Pencil


rimg1957


Gather all the Craft Supplies That You Will Need:

  • Scissors
  • Pencil with an eraser
  • Paper (I like to use a printed paper that has a print on one side but you can use any type of paper)
  • Pushpin


rimg1958


1 – Cut out a square of paper.  I use about 8 inch by 8 inch paper for this craft.


rimg1959


2 – Fold the paper in half on the diagonal line so you make a triangle.  Unfold so that the paper is creased.


rimg1960


3 – Repeat the process with the other diagonal.  Unfold again.


rimg1962


4 – With the printed paper facing down, mark a line on the crease with your pencil. The line should be a third of the way up from the center of the paper.  Do this on all four diagonal lines.


rimg1963


5 – Carefully cut the diagonal crease until your scissors reach the guideline.  Repeat on all four diagonals.


rimg1964


6 – Take on corner and fold it into the center of the paper.  It should form a loop and you shouldn’t flatten it at all.  Leave it loose.


rimg1965


7 – Take the next corner, it should be every other corner, and bring that in the exact same way.

8 – Repeat the process until you have one loop, then one straight, then one loop, then one straight paper; forming a pinwheel.


rimg1966


9 – Connect together in the center with a pushpin.


rimg1967


10 – Push the pin into the eraser on the tip of your pencil.

And that is all it takes to make a pinwheel.  Easy but with hours of fun and a few cute decoration for your pencil.

More Online Crafts for Kids That You Might Enjoy

Homemade Pinwheel Kids Craft – Kids love to make things move and work. Homemade Pinwheels are a fun children’s activity to make and kids love to play with them.

Flower Pinwheels Craft for Kids – These simple pinwheels can be made for decorations, party favors, or just for fun. We made ours with colored card stock, but you might try cereal boxes, or you could use plain paper and let the kids draw or paint a design.

How to Make a Pinwheel – Easy and fun directions to Make a Pinwheel. Great summer fun for the kids and the printable paper included is great for Fourth of July, too!

Summer Crafts Pinwheel Craft – Pinwheels are a great activity for kids to make during the summers. The bright colors and spinning of the spiked disc is representative of the sun.

Easy-to-make Patriotic Pinwheels: Great craft to celebrate July 4th – What is it about a pinwheel that makes every child smile? Make these with your kids this weekend and use them in your Fourth of July celebration.

3 Kids Craft Ideas for Independence DayThere are many fun ways that you can craft the way to July 4. There are many things you can do to make this day truly extraordinary. If you are ready to celebrate, here are some ideas to consider craft. You can find full details about how to create them in the web or use your own creativity.

10 of the best fourth of July crafts – For US residents celebrating fourth of July – here are my picks for the best fourth of July crafts to get you in the patriotic mood.

Technorati Tags: , , , , , , , , , , , , ,