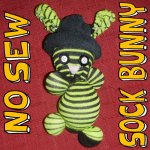
How to Make a Simple No-Sew Sock Bunny Rabbit for Easter or for Fun

Today, we will show you how to make a sock doll bunny rabbit…the best part is that there is NO sewing involved in this craft. Anybody can make these sock bunnies and they can make it pretty quickly. I think you can probably make one of these is 20 or 30 minutes. And these sock bunnies turn out so adorable that you are going to make a few of them so your bunnies can keep each other company. This shouldn’t be played with by young kids who might eat the rubber bands if they come off!


How to Make a Simple No-Sew Sock Bunny Rabbit for Easter or for Fun


Crafts Materials Needed

– 1 Stretchy Sock  – I used Knee High Girls Socks
– 1 Normal Sock for the Hat
– Small Rubber Bands or Yarn
– Buttons or Sharpie Marker or Fabric Markers or Needle and Thread
– Stuffing
-Scissors

Step 1 Thru 9


Step 1 Thru 9 How to Make a Simple No-Sew Sock Bunny Rabbit for Easter or for Fun


We have a crafts tutorial for making a no-sew sock doll. Steps 1-9 are the same for this tutorial…so first go to the sock doll tutorial, and do steps 1-9 and then come back to this tutorial for step 10. Your doll should look like the above picture when you are done with step 9.

Step 10


Step 10


Now cut the top part in half…as seen in picture above.


Step 11


Step 11


Now, in this picture above, we have already done one of the 2 sides. The left side has been braided already…we did this by cutting the left side into three strips and then braiding that side and rubber banding the end as if it was hair. Now the right side needs to be done…we cut the right side into 3 strips…now we just need to braid it. If you don’t know how to braid, please see this tutorial.


real-pic-06


Now both sides should be braided and look like this.

Step 12


Step 12


Now both the right side and left side is looped into a letter ‘U’ shape. Then hold both loops together in the center and rubber band both sides together. I used more than one rubber band to make sure both sides stayed together.

Step 13


Step 13


Cut a second sock in half.

Step 14


Step 14


Now put the bottom of the sock (toe part) on top of the bunny.

Step 15


Step 15


Now fold up the bottom of the sock…so it is rolled up like a normal winter hat is.

Step 16


Step 17


Now cut a small slit on both sides of the hat.

Step 17


Step 18


Now pull an ear thru


real-pic14


And another ear thru.

Step 18


Step 19


Cut a nose out of fabric or felt (a triangle shape). Use a button(s) for eyes.

Step 19


Step 19


Ask mom or dad to help you hot glue the eyes and nose on. That is it…you have a stuffed bunny rabbit to play with. Wasn’t that easy?!

This shouldn’t be played with by young kids who might eat the rubber bands if they come off!

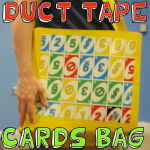
How to Make a Duct Tape Playing Cards Shoulder Bag

Oh boy…. do I have a fun craft for you today!!  I’m going to show you how to make a Duct Tape Playing Cards Shoulder Bag.  The front and back side of this durable bag is covered with playing cards to give it a playful style.  I used Uno Cards for this craft, but feel free to use any style playing cards you wish.  Whatever style you choose will look great.  So, grab a deck of cards, duct tape and scissors and you are good to go.  Let’s get started.

Check out our other Duct Tape Crafts.


How to Make a Duct Tape Playing Cards Shoulder Bag


Materials Needed

Deck of Cards

Purple & Yellow Duct Tape (or other colors you prefer)

Scissors


Step 1


Overlap 6 cards slightly.


Overlap 6 cards slightly.


Step 2


Duct tape these cards together.


Duct tape these cards together.


Step 3


Do this 4 times and then duct tape all together


Do this 4 times and then duct tape all together… Like this.  Duct tape only one side.


Step 4


Do step 1 thru 3 again so you have two of these.


Do step 1 thru 3 again so you have two of these.


Step 5


Make duct tape fabric.


Make duct tape fabric that is about this much bigger than the 2 card pieces you made.  ***Look below this step to see a detailed description on how to make Duct Tape Fabric***


How to Make Duct Tape Fabric


How to make duct tape fabric


  • Unroll a long piece of duct tape so that it is sticky side up.
  • Now place a piece of  duct tape, sticky side down, on top of the first piece of duct tape so that it is sealed closed.
  • Take a new piece of duct tape and place it sticky side up.  Now overlap the sealed piece of duct tape (from last step) slightly on top of this new piece, just enough so it will stick.
  • Take a new piece of duct tape and place it sticky side down on top of the piece of tape that is sticky side up.  Keep going until your duct tape fabric is as large as you need it to be.


Step 6


Place the purple pieces, card side down.


Place the purple pieces, card side down.  Place yellow piece on top of both… and then overlap a long strip of yellow duct tape over both yellow and purple fabric so they stick together.


Step 7


 Turn over and cover and add a piece of yellow duct tape, sticky side down, over both cards and yellow duct tape.


Turn over and cover and add a piece of yellow duct tape, sticky side down, over both cards and yellow duct tape.


Step 8


Pull yellow part up and duct tape to purple part like this.


The yellow part will be the sides of the bag.  Pull yellow part up and duct tape to purple part like this.  A friend should help.


Step 9


Now duct tape other yellow side up to purple fabric.


Now duct tape other yellow side up to purple fabric.


This is what you have done so far.


This is what you have done so far.


Step 10


Now tape the yellow part to the other purple side.


Now tape the yellow part to the other purple side.  Here is a pic looking down into the bag.


Step 11


This is what fronts of bag look like.


This is what fronts of bag look like.  We have to now tape edges of cards.


It should look like this now.


Like this.


Step 12


You might have these sticking up


You might have these sticking up….


Just fold them into the bag.


Just fold them into the bag.


Step 13


Make some more duct tape fabric.... make it long.


Make some more duct tape fabric…. make it long.  This will be the handle.


even longer than this


Nope…. even longer than this.


Step 14


Make a small slit, about 3 inches down on both sides of bag.


Make a small slit, about 3 inches down on both sides of bag.


Step 15


Duct tape all around hole so it won't rip later.


Duct tape all around hole so it won’t rip later.


Step 16


Place yellow strap in hole and tie large knot at end to secure in place.... do on both sides of bag.


Place yellow strap in hole and tie large knot at end to secure in place…. do on both sides of bag.


Step 17


It's done and ready to wear.


It’s done and ready to wear.

Isn’t this bag awesome?  It is so big that you can pretty much hold in it whatever you wish.  Enjoy carrying around this fun loving bag.

Technorati Tags: , , , , , , , , , , , , , , ,

Awesome Crafts Made with Duct (Duck) Tape


Awesome Crafts Made with Duct (Duck) Tape


Duct tape is commonly used in situations that require a strong, flexible, and very sticky tape.  When I originally thought of Duct Tape I thought of construction workers and fathers using duct tape to fix things.  As a matter of fact, my father could use duct tape to fix anything.  Well, that is what he thought…. most things were not fixed at all.  Well, that’s a whole other story.   Today’s post is about duct tape, but not duct tape used in that way.  No, today’s post is about Awesome Crafts made with Duct (Duck) Tape.  Here in this post I have looked around the internet and found some amazing duct tape crafts that are made by some creative people.  You have to check them out.  I have Duct Tape crafts that you can wear and I have Duct Tape crafts that you can play with….. you are sure to find here duct tape crafts that you will enjoy.  So, let’s get started.
Awesome Crafts Made with Duct (Duck) Tape

(1)  Baseball Cap


Duct Tape Baseball Cap


It’s Spring time.  And, in Spring there is something that I can’t get enough of…. Baseball.  But, you can’t go to a baseball game without wearing a cap.  Well, here is a baseball cap I would be proud to wear…. a Duct Tape Baseball Cap.  Check out Duck Brand for the full instructions on how to make this for yourself.


(2)  Bowling Pin


Duct Tape Bowling Pin


Do you like bowling?  Do your kids like bowling?  Well, how about making these duct tape bowling pins for an indoor bowling game…. that would be so much fun.  It is incredible how creative people can be….. just look at this awesome bowling pin.  Make sure to go to Duck Tape Fun for all the details.


(3)  Duct Tape Dress


Duct Tape Dress


Do you have somewhere special to go…. but nothing to wear?  Well, check out this beautiful dress made out of duct tape.  I found this duct tape dress over at Craftster and it is really something.   She explains how she used garbage bags, streamers and duct tape to make this beautiful dress.


(4)  Duct Tape Wallets


Duct Tape Wallets


These aren’t your standard gray duct tape wallets…. these are super colorful and wild duct tape wallets.  I love them!!  And, the cool part is that you can actually hold your money and cards inside of them.  Make sure to check out Crafty Nest for all the fun crafting details.


(5)  Valentine Heart


Duct Tape Valentine Heart


It is true that the best gifts are not the ones bought, but the ones that were made from scratch.  Well, how about showing your love with this Duct Tape Valentine’s Heart.    It is pretty much a duct tape stuffed item and it is super duper cute.  Make sure you check out Duck Brand for yourself.


(6)  Bedroom Accessories


Duct Tape Bedroom Accessories


Now, these bedroom accessories are absolutely adorable.  Who would have thought they are made from Duct Tape.  She used the zebra print duct tape for this project and with the pink pop of color these accessories couldn’t look any better.  Check out House of Hepworths for all the crafty details.


(7)  Duct Tape Hair Bow


Duct Tape Hair Bow


This bow is BEAUTIFUL and it is made out of duct tape….. who would have thought that the word “beautiful” and “duct tape” could appear in the same sentence.  But, apparently they have.  I found this duct tape craft over at HubPages and Daisy Mariposa explains in great detail how you too can make this duct tape hair bow.


(8)  Duct Tape Tote Bag


Duct Tape Tote Bag


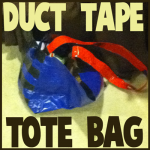
This Duct Tape Tote Bag is one of our crafts that we did a little while ago.  This tote bag is made completely out of duct tape….  nothing else.  And, believe it or not it is amazingly strong.    You can even use it for carrying your groceries…. it’s just that strong.  Make sure to check out our post “How to Make Duct Tape Tote Bags” and make one of these duct tape tote bags for yourself.


(9)  Duct Tape Clutch


Duct Tape Clutch


What an amazing purse!!  It is pretty incredible and it is, of course, made out of duct tape.  The crafter made it out of different color duct tape to give this duct tape clutch a colorful look.  I just love it!!  JoAnn has all the details.  Make sure to go to that site and check it out for yourself.


(10)  Duct Tape Flip-Flops


Duct Tape Flip-Flops


These flip-flops are just so adorable….. they are really, really cute.  And, the flower and straps are made from purple duct tape.  They are just so cute!!   I found this duct tape craft over at Skip To My Lou ….. make sure to go there and check it out to find out how she took an ordinary pair of flip-flops and made them special with duct tape.


(11)  Duct Tape Sun Hat


Duct Tape Sun Hat


If you want to see a truly adorable craft that was made from duct tape then you have found it here.  100 Directions shows you how you can take Hello Kitty Duct Tape and some hot pink Duct Tape and you can make it into these cutie patootie sun hats…. just brilliant.  Make sure to check out the craft for yourself.


(12)  Duct Tape Rose Wreath


Duct Tape Rose Wreath


This amazing Rose Wreath is beautiful enough to be hung on any door anytime of the year….. it is just that attractive.  And, it is made of Duct Tape, of course… Otherwise it wouldn’t be in this post.  I found this duct tape craft over at Poppies at Play…. check it out because she gives a really excellent tutorial.


(13)  Duct Tape Rings


Duct Tape Rings


Aren’t these rings adorable?  They really truly are.  No one would believe that these rings are a duct tape craft…. but they are.  Any girl would love not only crafting them, but wearing them too.  Make sure to check out Living Locurto for all the fun crafting details.


(14)  Duct Tape Flower Pens


Duct Tape Flower Pens


These Duct Tape Flower Pens are so cute….. what girl wouldn’t love using these pens to write?  I think they would all love using them.  I love how she used all different color duct tape to make the flowers…. it just makes them even more colorful and lovely.  Make sure you check out Seven Sisters so you too can make these.

Technorati Tags: , , , , , , , , , ,

How to Make a No-Sew Water Bottle Holder

I have a very useful craft for you today.  I’m going to show you how to make a No-Sew Water Bottle Holder.  No more holding on to a wet and cold water bottle with your bare hands.  The water bottle cover-up will keep your hands nice and warm while keeping your water bottle cold.  Let’s do it.

Check out our other No-Sew Crafts.


How to Make a No-Sew Water Bottle Holder


Materials Needed

2 Different Color Socks

Water Bottle

More than 48″ of String

Beads

Scissors


Step 1


Cut cuffs off 2 socks in different colors.


Cut cuffs off 2 socks in different colors.


Step 2


Place one cuff over bottle up to the very top.


Place one cuff over bottle up to the very top.  Tie closed with 48 inch long string.


Step 3


Cut slits at the top of the socks like in image above.


Cut slits at the top of the socks like in image above.  Pull string through slits.


Step 4


Place beads on string and then tie strings closed.


Place beads on string and then tie strings closed.


Step 5


Turn second sock inside out.


Turn second sock inside out.


Step 6


Tie cut end closed with string.


Tie cut end closed with string.  Turn right side out.


Step 7


Now your item looks like this.


Now your item looks like this.


Step 8


Pull second sock over first sock.


Pull second sock over first sock.


Finished water bottle holder


There you have it.  You just finished your No-Sew Water Bottle Holder out of socks.  Now grab your water bottle with holder and go off and have some fun.

Technorati Tags: , , , , , , , ,

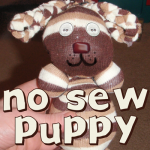
How to Make No-Sew Stuffed Puppy Dog Animal Toy with Socks & Rubber Bands

Today we will show you how to make stuffed puppy dogs out of socks and rubber bands. This craft will probably take less than 10 minutes for you…it is that easy. These are no-sew stuffed animals…that is right…no sewing necessary at all. If you like sock monkeys, but you were too lazy to make them, then this arts and crafts project is for you. Have fun.

You Might Like Our No-Sew Baby Doll Craft

You Might Like Our Other No-Sew Crafts


How to Make No-Sew Stuffed Puppy Dog Animal Toy


How to Make No-Sew Stuffed Puppy Dog Animal Toy with Socks & Rubber Bands

Crafts Materials Needed

– Stretchy Socks – I used Knee High Girls Socks
– Small Rubber Bands or Yarn
– Buttons or Sharpie Marker or Fabric Markers or Needle and Thread
– Stuffing
-Scissors

Step 1


Step 1 : Start Sock Doggy with a Sock


Take out your sock….preferably socks that are stretchy and ones that have an interesting pattern or color.

Step 2


Step 2 : Put Stuffing in the Sock


Put your stuffing in to your sock…put it all the way down to the tip of the sock.

Step 3


Step 3


Now on the side ‘A’ (pictured above), form a ball by making sure that some of the stuffing is at that corner and then just pushing down with your thumbs to form a ball.

Step 4


If this stuffed dog is being made for a younger child (under 3 or 4 of age) you should use yarn instead of a rubber band, just in case it comes off…you never know what a child will put in his or her mouth and chock on. If you use a rubber band just put the rubber band around the ball until it is tight. If you are using yarn, wrap it around that ball-shape and tie knots and wrap it around more and tie more knots…then cut it off.

Step 5


Now you should do the same thing for the other dog paw, side B.

Step 6


Now put stuffing above the paws for the puppy dog’s belly area.

Step 7


Now make 2 arms the same way that you made the paws.

Step 8


Tie the yarn or rubber band next for the neck.

Step 9


This is what the real thing looks like so far.

Step 10


Add stuffing to the sock for the puppy dog’s head and then again, tie off with rubber band or yarn.

Step 11


This is what the real puppy dog looks like so far.

Step 12


Now cut the remaining sock (the part above the head and rubber band) in the center….like you see above.

Step 13


Now on each side – there are 2 sides – cut in 3 slits. So basically you have 6 slits in all then.

Step 14


Now braid each side. If you don’t know how to braid…then visit the Wikipedia page on braiding.

Step 15


Now rubber band each side in a loop.

Step 16


Now rubber band both loops together in the center.

Step 17


How to Make No-Sew Stuffed Puppy Dog Animal Toy


Cut off the excess that was on the top of the 2 loops (you will be cutting off the rubber bands too from step #15)

Step 18


Now this is what your doggy will look like.

Step 19


How to Make No-Sew Stuffed Puppy Dog Animal Toy


If you want to…glue on button eyes and nose. If your parents are around, ask them to hot glue them on, otherwise use fabric glue. If you have a sharpie or paint, make the dog’s mouth too.

I hope that you had a lot of fun.

You Might Like Our No-Sew Baby Doll Craft

You Might Like Our Other No-Sew Crafts

Technorati Tags: , , , , , , , , , , , , , , , , , , , ,

How to Make Duct Tape Tote Bags with Easy Steps Crafts Tutorial for Kids

Today we will show you how to make a very sturdy tote bag out of nothing other than duct tape. This duct tape bag is able to hold about 30 hard covered library books without tearing. You can also make these for grocery shopping so that you don’t have to waste plastic and paper bags. Learn how to make this cool duct tape bag with the following steps below.


How to Make Duct Tape Tote Bags with Easy Steps Crafts Tutorial for Kids


How to Make Duct Tape Tote Bags with Easy Steps Crafts Tutorial for Kids

Crafts Materials Needed

– Duct Tape
– Scissors

Step 1

We aren’t going to give you any specific measurements because we don’t know how big or small you want your bag. I wanted a huge bag to hold my library books, but you might just want a normal sized tote bag.

Firstly, we make the fabric. The way that we make the fabric is by sticking tape together, stick end to stick end.


When you have one strip done, then take another piece of tape and stick it lengthwise along the finished strip (illustrated above).  Then turn it around and cover up the sticky part with another piece of tape the same size.


Step 1 : Making Duct Tape Tote Bags Kids Arts and Crafts Instructions


Make 2 rectangles about the same size (it is optional to make them 2 different colors) and one long rectangle that is a little bit longer than the combined height of both of the other rectangles that you made.

Step 2


Step 2 : Making Duct Tape Tote Bags Kids Arts and Crafts Instructions


Now duct tape them together like the picture above….the long strip in the middle and 2 around it as if it ere a bird or airplane.


Step 3


The above illustrations show you how you will need to tape the sides together. You might need an extra hand to do this so ask a friend or parent or sibling if you need some help.


Step 3 : Making Duct Tape Tote Bags Kids Arts and Crafts Instructions


Here is a picture of me taping the sides together.

Step 4


Step 6 : Making Duct Tape Tote Bags Kids Arts and Crafts Instructions


I taped together the strap by taping end to end pieces of  tape. I then cut a hole in the bag, pulled the strap through and taped from the outside and the inside of the bag. It seems to hold really well.

Finished Duct Tape Tote Bag.


How to Make Duct Tape Tote Bags with Easy Steps Crafts Tutorial for Kids


The finished tote bag.

Technorati Tags: , , , , , , , , , , ,

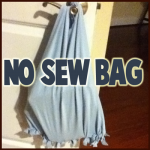
How to Make No-Sew Tote Bag Craft from Recycled Old T-Shirts

Who doesn’t have tons of old t-shirts that they don’t even wear anymore? I have tons so I decided to make a tote bag out of one of them. I hate to sew, so I thought of a way to do it without sewing. It landed up being very easy to make. These are so easy to make that you can make a dozen of them to take with you to use instead of plastic or paper grocery bags. Why throw more plastic bags into a trash heap, when you can help the environment by not using these wasteful bags anymore. Follow the easy-to-follow, step by step instructions below.

You Might Like Our Other No-Sew Crafts


How to Make No-Sew Tote Bag Craft from Recycled Old T-Shirts


How to Make No-Sew Tote Bag Craft from Recycled Old T-Shirts

Crafts Materials Needed

– Old T-Shirt
– Scissor

Step 1


Step 1 : Making No-Sew Tote Bags with T-Shirts Craft for Kids


Take out your t-shirt. Cut off the sleeves and a portion of the collar as well.

Step 2


Step 2 : Making No-Sew Tote Bags with T-Shirts Craft for Kids


This is what your t-shirt will look like after you cut off the sleeves and collar.


Step 3


Step 3 : Making No-Sew Tote Bags with T-Shirts Craft for Kids


Now cut slits on the bottom of the t-shirt (going through both sides). Cut each slit about a half inch apart. We are going to use these slits to tie the bottom of the t-shirt together with double knots. If you don’t know how to tie knots, then the instructions below will help.

Step 4


Step 4 : Making No-Sew Tote Bags with T-Shirts Craft for Kids


Step 5


Step 5 : Making No-Sew Tote Bags with T-Shirts Craft for Kids


Step 6


Step 6 : Making No-Sew Tote Bags with T-Shirts Craft for Kids


Now pull the 2 tabs sticking out until it is tight and you have one knot. Now do this process again to make a double knot.

Step 7


Step 7 : Making No-Sew Tote Bags with T-Shirts Craft for Kids


After you have tied all of the slits together, your bag will look something like the above picture.

Step 8


How to Make No-Sew Tote Bag Craft from Recycled Old T-Shirts


This is what your bag looks like with stuff in it. It is very sturdy as this tote bag is filled with very heavy books. I hope that you had fun.

You Might Like Our Other No-Sew Crafts

Technorati Tags: , , , , , , , , , , , , , , ,

How to Make Easy No-Sew Sock Dolls Crafts Idea for Kids

Today we will show you how to make dolls out of socks. This craft will probably take less than 10 minutes for you…it is that easy. These are no-sew dolls…that is right…no sewing necessary at all. If you like sock monkeys, but you were too lazy to make them, then this arts and crafts project is for you. Have fun.

You Might Like Our No-Sew Puppy Dog Craft

You Might Like Our Other No-Sew Crafts


How to Make Easy No-Sew Sock Dolls Crafts Idea for Kids


How to Make Easy No-Sew Sock Dolls Crafts Idea for Kids

Crafts Materials Needed

– Stretchy Socks  – I used Knee High Girls Socks
– Small Rubber Bands or Yarn
– Buttons or Sharpie Marker or Fabric Markers or Needle and Thread
– Stuffing
-Scissors

Step 1


Step 1 : Making No-Sew Sock Monkey Dolls Crafts Project


Take out your sock.

Step 2


Step 2 : Making No-Sew Sock Monkey Dolls Crafts Project


Put stuffing in your sock…all the way down to the tip of the sock.


Step 3


Step 3 : Making No-Sew Sock Monkey Dolls Crafts Project


Now on side ‘A’, form a ball by making sure that some of the stuffing is at that corner and then just pushing down with your thumbs to form a ball.

Step 4


Step 4 : Making No-Sew Sock Monkey Dolls Crafts Project


If this doll is being made for a young child (under 3 or 4 of age) you should use yarn instead of a rubber band, just in case it comes off….it could be a choking hazard. If you use a rubber band just put the rubber band around the ball until it is tight. If you are using yarn, wrap it around that ball-shape and tie knots and wrap it around more and tie more knots…then cut it off.

Step 5


Step 5 : Making No-Sew Sock Monkey Dolls Crafts Project


Do the same thing for the other foot, side B.

Step 6


Step 6 : Making No-Sew Sock Monkey Dolls Crafts Project


Now put stuffing above the feet for the baby doll’s belly.

Step 7


Step 7 : Making No-Sew Sock Monkey Dolls Crafts Project


Now make 2 arms the same way that you made the feet.

Step 8


Step 8 : Making No-Sew Sock Monkey Dolls Crafts Project


Tie the yarn or rubber band next for the neck.

Step 9


Step 9 : Making No-Sew Sock Monkey Dolls Crafts Project


Add stuffing to the sock for the doll’s head and then again, tie off with rubber band or yarn.

Step 10


Step 10 : Making No-Sew Sock Monkey Dolls Crafts Project


Now there is extra sock above the head….fold it down over the head to form a hat for the doll.

Step 11


Step 11 : Making No-Sew Sock Monkey Dolls Crafts Project


This is what is should look like…another pic is below.


Step 11 : Making No-Sew Sock Monkey Dolls Crafts Project


This is what the doll looks like so far.

Step 12

Now we have to choose a way to put the eyes on…thinking about the safety of the child we are making it for. If this is for a child that doesn’t put little items in his mouth anymore…then I would say use buttons  – they look super cute. You can either sew the eyes on or you can use either strong fabric glue or hot glue ( in that case, please ask a parent for help so you don’t get hurt.)


Step 12 : Making No-Sew Sock Monkey Dolls Crafts Project


Otherwise, you can sew dolls eyes, use fabric paint or sharpie, permanent markers. If you have any other ideas for eyes, please let me know.


How to Make Easy No-Sew Sock Dolls Crafts Idea for Kids


This is what your doll will look like. He is super cute. And my 4 year old loves this baby doll. She was playing with him for quite a long time and talking to him and feeding him, etc. So I think this craft was a hit.

You Might Like Our No-Sew Puppy Dog Craft

You Might Like Our Other No-Sew Crafts

Technorati Tags: , , , , , , , , , , , , , ,