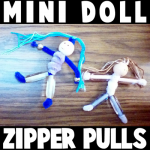
How to Make Mini People or Dolls as Zipper Pulls as Back to School Craft for Kids

This makes a great back to school craft as this can be used to decorate your backpack! My daughter and I made a few of these to give to her special friends at school. We landed up having to make more than 20 of them to give out to everyone who was asking for them. She couldn’t make enough of them because they were so popular. I think you will love these too. They are very easy to make and you can use different materials each time. Any bead size or thread color will work. Just have fun and be creative with it!

How to Make Mini People or Dolls as Zipper Pulls as Back to School Craft for Kids


mini doll zipper pulls


Crafts Materials Needed:

– beads

– embroidery thread, yarn, string, or thread

– pipe cleaners

– scissors

– (Optional) metal snap spring hooks

Step 1


finished-step01-beaded-people-zipper-pulls


I started off with a round bead that already had a face drawn on it. You can use paint or a Sharpie to draw 2 eyes and a mouth on a round bead if you don’t have face beads already.

Then put a pipe cleaner thru the bead. The  beaded head should be in the center of the pipe cleaner, as seen above.

Step 2


finished-step02b-beaded-people-zipper-pulls


– Now put the pipe cleaner that is thru the top of the head back down into the top of the head again until there is a loop….as seen above. The legs (bottom 2 pieces of the pipe cleaner) should match up too.


Step 3


finished-step03-beaded-people-zipper-pulls


Take some embroidery thread (or whatever you have available) and fold it in half a few times (as you see that I did above). Then stick it in the loop hole, as seen above.


finished-step04a-beaded-people-zipper-pulls


If you want to make this a zipper pull, put a metal hook on it (optional…only for zipper pulls). Then Pull the pipe cleaner legs downwards so that the pipe cleaner on top of the head closes down on the hair and hook.

Step 4


finished-step04-beaded-people-zipper-pulls


Cut the loops that are in the embroidery thread so that it resembles hair.

 Step 5


finished-step05a-beaded-people-zipper-pulls


Cut a pipe cleaner in half. Wrap it around the top of the body, so you will have arms.

 Step 5 b


finished-step05b-beaded-people-zipper-pulls


Like in the above picture.

Step 6


finished-step06-beaded-people-zipper-pulls


Take the other half of the pipe cleaner and wrap it around the chest area as I did above.

Step 7


finished-step07-beaded-people-zipper-pulls


– Now we can place beads on the arms and legs. I have long beads, but you can also use multiple small round or oval beads. Then just push the pipe cleaner back into the bead to make it so the beads can’t fall off.

 Step 7 b


finished-step08-beaded-people-zipper-pulls


– This is what it looks like when all the beads are on there.

Finished Bead People


Finished Mini Figures


– My daughter originally only made a few of these for her to give to her closest friends. It lands up everyone in the class were BEGGING her to give them one. We landed up making enough for the entire class. Kids do Love these! Even boys! I hope that you had fun!

Technorati Tags: , , , , , ,

How to Make a Shark Pencil Holder Pouch

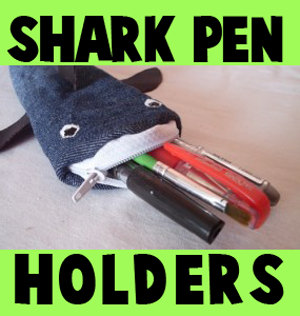
I think you’ll love this pencil pouch … He is so fierce! And when I say ‘He’, I mean Sharky…Sharky the Pencil Pouch. And he will keep your pencils safe as nobody messes with sharks! 😉  Laura from  Dacian Moon Handmade will show you, step by step, how to make it this awesome (yet adorable) shark pencil holder pouch.

How to Make a Shark Pencil Holder Pouch


How to Make a Shark Pencil Holder Pouch


CRAFTS MATERIALS NEEDED:

– a piece of denim (or other fabric if you don’t have it)
– a piece of black leather or vinyl or different colored fabric
– paints: white and black
– needle and thread
– scissors
– zipper


IMG_6850


Step 1.

You need a rectangle piece of denim to make the shark body.  To start, cut two of the corners off. Like this.


IMG_6853


Bring the long edges toward the center line…


IMG_6854


… and draw a curve, like this. This will be the mouth.


IMG_6855


Cut it out and unfold.


IMG_6859


Sew the two edges together…


IMG_6860


… like this, until you almost reach the end. The shark will have the stitch on his belly.


IMG_6861


Step 2.

Take the piece of leather…


IMG_6862


… and draw on it a tail, two lateral fins and the central fin.


IMG_6864


Cut them out.


IMG_6865


Step 3.

It is time to add some teeth to our shark. Flatten the body with the stitch on the middle, like this.


IMG_6866


Place the zipper over the mouth…


IMG_6867


… and start sewing each part on a side.


IMG_6868


Like this.


IMG_6870


Cut the extra zipper.


IMG_6871


Step 4.

Now is time to assemble all the pieces. Turn it inside out.


IMG_6872


This is the other end, where we will attach the tail.


IMG_6873


Apply a layer of glue on the start of the tail…


IMG_6875


and put it in place. Keep it there a bit until it is glued (take care not to glue your fingers).


IMG_6876


Then take a lateral fin…


IMG_6877


… put some glue on the starting edge…


IMG_6878


… and fix it on the shark body.


IMG_6879


Do the same with the other one…


IMG_6880


… and with the central fin.


IMG_6881


Like this. Our shark looks good but… it is blind!!!


IMG_6882


Step 5.

Let’s make the eyes!  Use some white paint to make two white circles.


IMG_6884


Like this.


IMG_6885


Then some black to complete the eyes.


IMG_6886


Let it dry well…


IMG_6887


… then you can put some pencils in it 😉


IMG_6888


Technorati Tags: , , , , , , , ,

How to Make Fabric Oatmeal Container Drawstring Bags

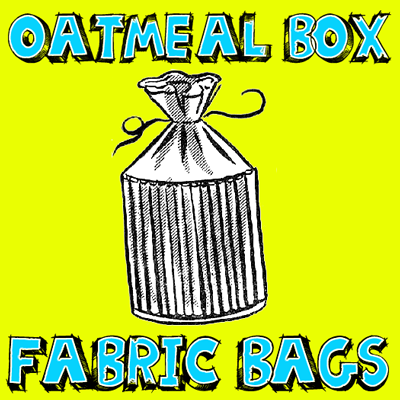
Here is a craft for making a great drawstring bag out of a cylinder oatmeal container, fabric, some cardboard, and a few other items. This bag turns out looking beautiful and would make a great bag for yourself or as a gift to mom, grandma, or someone else you love.


How to Make Fabric Oatmeal Container Drawstring Bags


CRAFTS MATERIAL NEEDED:

Fabric

Oatmeal Container

6″ x 6″ cardboard square

Glue

Magazine pictures

Knitting needle (size 3 or 4)

White shellac

Scissors

Pencil

Ruler

How to Make These Drawstring Bags:

Step 1


fabric-oatmeal-container-drawstring-bags-01


Cut cereal box to 4″ height, as shown by broken line in Figure 1.


Step 2


fabric-oatmeal-container-drawstring-bags-02


Make cardboard pattern, 4″ wide at base and 5″ high to center point, as in Figure 2.

Step 3


fabric-oatmeal-container-drawstring-bags-04


Using cardboard pattern trace triangles on colorful smooth magazine pictures. Cut triangles out, and lay, face down, on work table. Apply glue lightly down middle of triangle, making sure the top point is well covered to prevent unrolling. Place the knitting needle along the 4″ base, and roll triangle tightly around the needle to make a tube, as in Figure 3. Slip the tube off the needle and set aside to dry. It will take about 90 tubes to cover a box, 5 1/2″ in diameter.

Step 4


fabric-oatmeal-container-drawstring-bags-05


fabric-oatmeal-container-drawstring-bags-03


Apply a liberal amount of glue to the outside of the cereal box. Stand tubes, side by side, around the box. Hold in place with rubber bands. When dry, apply several coats of shellac over tubes. Make a drawstring top from a piece of material and sew around top of tube-covered box. Cut a circle of the same material, 1″ larger than bottom of the box. Center and paste circle to bottom of the box with fabric glue. Bend the extra inch of material over and sew to base to cover ends of tubes, as in Figure 4.


Technorati Tags: , , , , , ,

How to Make Leather Wallets with Stitching Craft for Kids & Teens

Here is a great project for groups of kids…for Summer Camps, After-school programs, as well as in school settings. This craft is for making a leather wallet that is laced together. This is a very basic leather wallet craft and I think you will be able to follow it with some adult supervision.
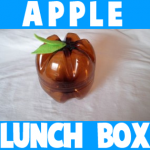
 This craft requires adult supervision and assistance! Please refer to our article about Working with Leather!

You Might Enjoy Our Leather Crafts

How to Make Leather Wallets with Stitching Craft for Kids & Teens


How to Make Leather Wallets with Stitching Craft for Kids & Teens


CRAFTS MATERIALS NEEDED:

Leather

Cutting knife and board (For Adult to Use)

Steel angle (With Adult Supervision)

#0 Punch

3/32″ goatskin (or whatever leather you have on hand)

Rubber cement

How to Make These Leather Laced Wallets

Step 1


leather-wallets-01


(Adult Should Do This Part) Using steel angle and knife, cut two pieces of leather 9″ x 31/2″, as in Figure 1.


 Step 2


leather-wallets-02


Fold one piece of leather in half, and punch a small hole in the center to allow for folding. Open leather up, as in Figure 2.

 Step 3


leather-wallets-03


Run spacing wheel on three sides of both pieces of leather, 1/8 ” from the edge, as in Figure 3.

 Step 4


leather-wallets-04


Skive wrong side of leather on three sides where the pieces are to be joined, as in heavy line in Figure 4. (Here is How You Skive)

 Step 5


leather-wallets-05


Cement skived areas and make holes for lacing using fib and mallet or #0 punch, as in Figure 5.

 Step 6


leather-wallets-06


Lace pieces of wallet together using whip stitch, as in Figure 6.  (Here is How You Use the Whip Stitch)


You Might Enjoy Our Leather Crafts

Technorati Tags: , , , , , , ,

How to Make Apple Lunch Boxes with Recyled Plastic Soda Bottles

This project is perfect as a “back to school” project. It is very simple and fun, as well as a great way to store your packed lunch. This is also a great way to recycle / upcycle plastic soda bottles. Laura from  Dacian Moon Handmade  got inspiration for this craft from Creative Jewish Mom. Laura will show you, step by step, how to make this new lunch box.


How to Make Apple Lunch Boxes with Recyled Plastic Soda Bottles


CRAFTS MATERIALS NEEDED:

– two 2.5l plastic bottles (the sort where the bottom looks a bit like a flower with five petals)
– scissors
– instant glue
– green felt
– pen


IMG_6745


Step 1.

Clear the bottles – remove the labels.


IMG_6746


Step 2.

Use the scissors to cut off the end of one bottle.


IMG_6747


Like this.


IMG_6748


Cut also the end of the other bottle .


IMG_6749


Take care to cut one a centimeter taller than the other…


IMG_6750


… so you could overlap them and they stick together.


IMG_6751


Like this.


IMG_6752


Step 3.

Draw two leaves on the felt…


IMG_6753


… then cut them out.


IMG_6754


Step 4.

Add a bit of glue on the middle of one “flower”…


IMG_6755


… and place one leaf on it.


IMG_6756


Add the second leaf.


IMG_6757


Let it dry and you have an apple lunch box 😉


IMG_6759


Technorati Tags: , , , , , ,

How to Make an Afikoman Bag for Passover

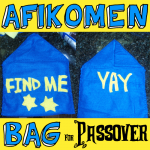
Passover starts in about a week and I thought that some of our Jewish followers might want a Passover craft. Today I will show you how to make an Afikoman Bag, which can then be used to hide Matzah for the little kiddies to search for. Although I sewed this Afikoman Bag, you could use fabric glue to put your Afikoman bag together. Learn how to make it below.


How to Make an Afikomen Bag for Passover


Crafts Materials Needed:

Long Piece of Felt or Fabric

A Second Color of Fabric to Use for Letters and Stars

Either Needle and Thread or Fabric Glue

Scissors

Step 1


step1


step2


You May Use Felt or Fabric, either one is fine. Place a piece of Matza on the Felt and measure out enough felt to place two and a half pieces of matzah. This will be enough felt to make your bag.

Then place the matzah a little bit to the right of the center of the felt. Then fold the felt over the matzah as seen in the picture above.

Step 2


step3


Now sew on either side of the felt (or use fabric glue), as seen in the picture above.


Step 3


step4


Now the right side of the felt will be the flap. You can fold it over now.

Step 4


step4b


Like This.

Step 5


step5


Now Push fabric inwards to form a triangle (in the same fashion you would do with wrapping paper when wrapping a present). Pin the triangle in place with a safety pin or sewing pins, then sew the triangle so that the fabric stays like this…this will be the flap.


This is What the Flap Looks Like When Sewn


step5b


Above is what the flap looks like when open.


step5c


And this is what the flap looks like from the inside.

Step 6


step6


I think yellow and blue are perfect for this craft because it is the colors of Israel and Judaism. Get some yellow felt and cut out some letters. I used Find Me for the outside of the Afikoman bag and Yay for the inside. But I’ve seen ‘Find This’ for the outside and ‘Found It’ on the inside. The normal thing to do is to write Afikoman on the outside or in hebrew  –

אפיקומן

Step 7


step7


Before sewing or gluing letters on, put cardboard into the bag to keep you from sewing bag’s two sides together.

Step 8


finished-afikomen-bag-craft-for-passover


Sew the letters on the front – ‘Find Me’ or ‘Afikoman’ or אפיקומן  or what you wish.

Sew the letters on the inside – ‘Found Me’ or ‘Yay’ or what you wish.

Finish Up


step9


Now wrap some matzah in a cloth napkin and then place in your bag. Close the flap and then hide it someplace. Let kiddies go searching for it. Give the ones who find the matzah some sort of prize. Have fun and Happy Passover!

Technorati Tags: , , , , , , , , , ,


How to Make Leather Eye Glasses Cases with Etched Design

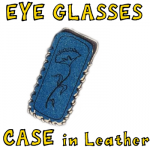
Here on this page you will find instructions for a beautiful eye glasses case to make. This is a leather craft, so you will need leather crafting tools. Also, if you are new to working with leather, you will want to refer to our article about Working with Leather!  This craft instructional will also guide you through etching a design into the cover of the case. When this craft is complete, it would make a great gift for mom, dad, or someone else that you love.  This craft requires adult supervision and assistance! 

How to Make Leather Eye Glasses Cases with Etched Design


How to Make Leather Eye Glasses Cases with Etched Design


Crafts Materials Needed

2 Pieces of tooling leather 3″ x 61/2″

4 yards lacing

Steel angle and board

Spacing wheel

#0 punch

Water and sponge

Tracing paper

Pencil

Modeling tool

How to Make This Etched Leather Eye Glass Case Craft

Step 1


Round off corners of both pieces of leather, as shown by broken line in Figure 1.


Round off corners of both pieces of leather, as shown by broken line in Figure 1.

Step 2


eyeglasses-cases-02


On strong tracing paper, draw pattern to fit eye glass ease, allowing 1″ all around for lacing. Draw design within pattern. Put a dab of rubber cement to hold design in place on leather, and transfer design to right side of leather with tracer, as in Figure 2.

HOW TO TOOL LEATHER (Etch Design into Leather)

Step 3

Moisten leather on both sides with a sponge and water, until leather becomes dark. Place leather, face up, on work board. Deepen the outline of the design with the tracer, using a ruler for straight lines (as in Figure 3 above) If leather puckers while in work, dampen all over again, and deepen outline again with tracer. Holding spoon end of modeling tool sideways, follow outline of design. The edge of the tool should rest in the dent. Press down and away from outline towards the center of the background. Go around the entire design this way to throw design in sharp relief. To stipple background of design, use tracer end of modeler.

Step 4


eyeglasses-cases-04


Trim edges. Run spacing wheel on three sides of case. Skive leather where it is to be joined. Cement skived areas and make holes for lacing. Lace pieces together with whip stitch, as in Figure 4.

You Might Enjoy Our Leather Crafts

Technorati Tags: , , , , ,

How to Make a Duct Tape Playing Cards Shoulder Bag

Oh boy…. do I have a fun craft for you today!!  I’m going to show you how to make a Duct Tape Playing Cards Shoulder Bag.  The front and back side of this durable bag is covered with playing cards to give it a playful style.  I used Uno Cards for this craft, but feel free to use any style playing cards you wish.  Whatever style you choose will look great.  So, grab a deck of cards, duct tape and scissors and you are good to go.  Let’s get started.

Check out our other Duct Tape Crafts.


How to Make a Duct Tape Playing Cards Shoulder Bag


Materials Needed

Deck of Cards

Purple & Yellow Duct Tape (or other colors you prefer)

Scissors


Step 1


Overlap 6 cards slightly.


Overlap 6 cards slightly.


Step 2


Duct tape these cards together.


Duct tape these cards together.


Step 3


Do this 4 times and then duct tape all together


Do this 4 times and then duct tape all together… Like this.  Duct tape only one side.


Step 4


Do step 1 thru 3 again so you have two of these.


Do step 1 thru 3 again so you have two of these.


Step 5


Make duct tape fabric.


Make duct tape fabric that is about this much bigger than the 2 card pieces you made.  ***Look below this step to see a detailed description on how to make Duct Tape Fabric***


How to Make Duct Tape Fabric


How to make duct tape fabric


  • Unroll a long piece of duct tape so that it is sticky side up.
  • Now place a piece of  duct tape, sticky side down, on top of the first piece of duct tape so that it is sealed closed.
  • Take a new piece of duct tape and place it sticky side up.  Now overlap the sealed piece of duct tape (from last step) slightly on top of this new piece, just enough so it will stick.
  • Take a new piece of duct tape and place it sticky side down on top of the piece of tape that is sticky side up.  Keep going until your duct tape fabric is as large as you need it to be.


Step 6


Place the purple pieces, card side down.


Place the purple pieces, card side down.  Place yellow piece on top of both… and then overlap a long strip of yellow duct tape over both yellow and purple fabric so they stick together.


Step 7


 Turn over and cover and add a piece of yellow duct tape, sticky side down, over both cards and yellow duct tape.


Turn over and cover and add a piece of yellow duct tape, sticky side down, over both cards and yellow duct tape.


Step 8


Pull yellow part up and duct tape to purple part like this.


The yellow part will be the sides of the bag.  Pull yellow part up and duct tape to purple part like this.  A friend should help.


Step 9


Now duct tape other yellow side up to purple fabric.


Now duct tape other yellow side up to purple fabric.


This is what you have done so far.


This is what you have done so far.


Step 10


Now tape the yellow part to the other purple side.


Now tape the yellow part to the other purple side.  Here is a pic looking down into the bag.


Step 11


This is what fronts of bag look like.


This is what fronts of bag look like.  We have to now tape edges of cards.


It should look like this now.


Like this.


Step 12


You might have these sticking up


You might have these sticking up….


Just fold them into the bag.


Just fold them into the bag.


Step 13


Make some more duct tape fabric.... make it long.


Make some more duct tape fabric…. make it long.  This will be the handle.


even longer than this


Nope…. even longer than this.


Step 14


Make a small slit, about 3 inches down on both sides of bag.


Make a small slit, about 3 inches down on both sides of bag.


Step 15


Duct tape all around hole so it won't rip later.


Duct tape all around hole so it won’t rip later.


Step 16


Place yellow strap in hole and tie large knot at end to secure in place.... do on both sides of bag.


Place yellow strap in hole and tie large knot at end to secure in place…. do on both sides of bag.


Step 17


It's done and ready to wear.


It’s done and ready to wear.

Isn’t this bag awesome?  It is so big that you can pretty much hold in it whatever you wish.  Enjoy carrying around this fun loving bag.

Technorati Tags: , , , , , , , , , , , , , , ,

13 Cool Crafts Made with Neckties


13 Cool Crafts Made with Neckties


The styles of Neckties comes and goes pretty quickly.   Many men have a ton of extra ties in their closet that they don’t even wear.  Why not put the extra ties to good use?  I am going to show you 13 Cool Crafts made with Neckties.  All of the necktie crafts shown here will have tutorials so that you too can make these crafts.  I will not show you something that you can’t make for yourself.  Whether you want a necktie purse or a necktie coffee cozy…. you will find your necktie crafts here.   So, let’s get started.

13 Cool Crafts Made with Neckties

(1)  Necktie Purse


Necktie Purse


Here is a creative way to make a purse.  Imagine the compliments you will get while you carry this bag.  This purse is made from 8 neckties….. check out Sonya Style for all the crafting details.


(2)  Necktie Daisy Pins


Necktie Daisy Pins


I found this craft over at Crafters and it is a great Necktie craft.  She will show you how you too can make these Daisies out of Neckties.  Imagine how gorgeous you will look wearing these Necktie Daisy Pins.  Check out the site for the details.


(3)  Tie Angel


Tie Angel


How gorgeous is this Angel?  So pretty.  And, she is made from a man’s necktie.  This Angel would be great for Christmas time decorating.  Make sure to check out Blue Bonnet Village for the instructions on how to make this craft.


(4)  Necktie TV Remote Holder


Necktie TV Remote Holder


I found this necktie craft over at Yahoo Voices.  Here she made this craft for father’s day…. and it is such a great idea.  Ironically people give ties for father’s day…. here she upcycles a necktie into a TV Remote Holder.  What a clever idea!!


(5)  Cellphone or iPod Bag


Cellphone or iPod Bag


Here is a clever way to hold a cellphone or iPod….. carry it in this awesome Cellphone or iPod bag made from Neckties.  How cute is that?!  So cute.  I found this necktie craft over at Mindful Momma and I love it.  Make sure to check it out for yourself.


(6)  Coffee Cozy


Coffee Cozy


What a great way to drink hot coffee and save your hands….. use this necktie coffee cozy.  I love this idea!!   I found this necktie craft over at Lime and Aqua Studio.  Check out their website for the full craft details.


(7)  Necktie Necklace


Necktie Necklace


Look how beautiful these necklaces are…. and they are made from a necktie.  Made from an old necktie and some Mardi Gras beads this necklace turns out really cute.  You can get the full craft “how-to” by going to artstar by aletha.


(8)  Necktie Pumpkins


Necktie Pumpkins


Now, these pumpkin are no ordinary fall pumpkins…. these are some of the most creative pumpkins I seen.  I found these necktie pumpkins over at Lisnaweary Quilts and the idea is super creative.  Your house will look awesome with these Necktie Pumpkins as decorations this Fall.


(9)  Necktie Headband


Necktie Headband


This necktie headband is so super cute…. I love the idea.   I found this necktie craft over at Craft Envy and she simply just picked up a necktie from a Thrift Store.  But, feel free to recycle any type of tie that is no longer being used.  Check out the website for all the details.


(10)  Necktie Glasses Case


Necktie Glasses Case


What an awesome idea….. use a necktie to make a glasses case.   What is so cool about using a necktie as a glasses case… it not only looks good, but it also has its own padding for protecting your glasses.  Check out Make Projects for the step-by-step how-to.


(11)  Flower Pin


Flower Pin


Who would have thought that a masculine necktie can be made into such a lovely flower?  But, if you check out My Heart is Yours Blog you will learn that it can.  Here she shows you how to take just a necktie and a hot glue gun to make this flower.  Make sure to check out her site.


(12)  Bow Tie


Bow Tie


Wow, what a super creative idea…. take a Necktie and make it into a Bow Tie.  Clever!!  I found this necktie craft over at Make It and Love It .  And, I must admit it…. I do love it.  She takes a necktie and simple Velcro closure for this craft… make sure to check it out.


(13)  Necktie Skirt


Necktie Skirt


Who would have thought that a few neckties can look so beautiful on a lady, but Rick Rack Ruby shows you that it can.  Check out her site to find out how she takes about 14 ties and makes them into a beautiful skirt.  So creative!!

Technorati Tags: , , , , , , , , , , , , ,

How to make a Ghost Phone Pouch

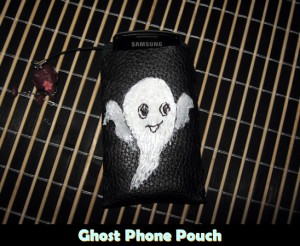
Halloween is right around the corner and I bet you have your house decorated, costumes picked out and you have been wearing your Halloween jewelry for weeks… but what about your phone?  Yes, I said your phone.  Is it decorated for Halloween?  How about carrying your phone in a Halloween decorated phone pouch.  Today I will show you how to make an easy and wonderfully cute night glow ghost pouch for your phone.  How cool is that?!

Check out our other Halloween Crafts.

Laura from Dacian Moon Handmade will show you how to make it, step by step.


CRAFT MATERIALS NEEDED:

– a piece of black leather (about 22 cm x 5 cm)
– needle and black thread
– scissors
– paints (matte white and night glow)
– black marker
– phone


Step 1

Take the black leather and round its corners using the scissors…


… like this.


Place the phone inside it, the way you want your pouch to be.


Step 2

Take out the phone and keeping the leather folded, start sewing.


You should sew around the edge for 3-4 times (do not shrink the leather)…


… then go with the needle under the stitch…


… making a knot, like this.


Space 1 cm then sew again, the same way…


… until you finish the whole side. It should look like this.


Repeat on the other side.


Step 3

Using a pen draw the ghost on the front of the pouch.


Like this.


Then, using the white paint, draw the contour of the ghost. (Actually, you can paint all the ghost with white. It will look more uniform)


This is the contour 🙂


Step 4

Take the night glow paint and apply a generous layer inside the contour.


Like this.


Let it dry.


Step 5

When is completely dry, make the eyes with the black marker. (you can sketch them first with a pencil)


Add the mouth and that’s all! You have a funny phone pouch!


I told you it was easy.  In no time at all you can be carrying around a festive Halloween ghost phone pouch too.  Nothing like having a ghost to protect your phone… so fun.

Technorati Tags: , , , , , , ,

How to make a Nomnom pencil case

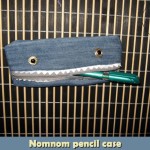
School is back in session once again. And, with school brings tons and tons of school supplies. Instead of using the same old pencil box that everyone else is using why not make a funny case that is like no other. Check out this funny nom nom pencil case craft. Why nom nom? Because it looks like it is eating your pencils….. “Nom nom nom.”

Step by step tutorial offered by Laura from Dacian Moon Handmade


CRAFTS MATERIALS NEEDED:

– a piece of a recycled pair of jeans
– zip
– 2 buttons
– white cardboard
– scissors
– needle and thread
– pencil


Step 1.

Take the piece of jeans and place it with the sewed part up. We will use that the way it is.


Place the pencil on it to measure if it will fit. It will.


Step 2.

Measure 5 cm from the top and cut the fabric on the front part.


On the back part cut it at 10 cm.


It will look like that.


We need the back part longer because it will close on the front.


Step 3.

From the cardboard we must make the teeth. First draw a rectangle to have a guide.


Cut it out.


Using the scissors make a criss cross cut to form the two rows of teeth…


… like this.


Step 4.

Sew one teeth row to the upper part of the fabric…


… like this.


Step 5.

Now sew the zip over the cardboard…


… taking care that the zip not be covered by the teeth.


Step 6.

Repeat the step 4 and 5 on the other side, like that.


Step 7.

Now, we must close the small sides.


First of all fold the rest of the zip on the back…


… then sew using a blanket stitch along the sides.


To make a blanket stitch, push the needle through the fabric then pull the needle through the loop.


Step 8.

Do the same on the other side.


Step 9.

Turn it inside out.


Step 10.

Choose a place where our Nomnom should have one eye…


… and sew a button there…


… then the other.


For a more alive feeling you can paint the middle of the buttons with black.

This is our Nomnom ready to chew all your pencils and pens. And your erasers too 😀


Technorati Tags: , , , ,

How to Decorate Your School Backpacks with Beads and Sequins

School is only days away for many kids so I thought that I would share a way to decorate your backpacks and messenger bags to make them unique and pretty cool to look at. Below, I will show you how to sew on beads so you can sew on cool designs or your initials. It is easy and a lot of fun.


How to Decorate and Personalize Your School Backpacks with Beads and Sequins


How to Decorate and Personalize Your School Backpacks with Beads and Sequins

Step 1


Personalizing Backpacks with Beads


Firstly, thread your needle.

Step 2


Tie a KnotPersonalizing Backpacks with Beads


Now tie a knot at the end of your string.

Step 3


Then sew on your beads


Draw a design or letters with chalk. Now just slide the beads over your needle and pull down over your thread. Then when the bead is down at the fabric level, push the needle back into the backpack as you follow the chalk letters or design that you drew. Then pull the needle back up along the design and again push the bead down over the needle and slide down string again. Do this until you have finished your design.

Step 4


Tie a knot in the back


Now all that is left to do is to tie a few knots on the inside of the bag / backpack so that it isn’t visible from the outside of the bag. Now that is all that is left to do other than show your bag off. I hope that you like it.

Technorati Tags: , , , , , , , , , , , , ,

How to Make a Super Mario Wooden Suitcase From Clementines Boxes Crafts Idea

Today we will show you how to make an old-fashioned looking wooden suitcase out of Clementines Boxes and Wooden Thread Spools. You can decorate the box with any cartoon characters that you want, but my son is obsessed with Nintendo and Super Mario Bros characters so I decided to make this for him. He LOVES it…and I hope you will too. The illustrated instructions can be found below.

By the way…Yes, it does open and close. The pieces fit together so snugly, that you don’t even need a strap to keep it closed.


How to Make a Super Mario Wooden Suitcase From Clementines Boxes Crafts Idea


How to Make a Super Mario Wooden Suitcase From Clementines Boxes Crafts Idea

Crafts Materials Needed

– 2 Wooden Clementines Boxes
– Screwdriver (Prying out Staples with Parental Help)
– Elmer’s Glue
(optional) Glue Gun (with Parental Help)
– Duct Tape
– Wooden Spools
– Magazine Cutouts

Step 1


Step 1 : Making Wooden Suitcases Arts and Crafts Idea for Kids


Take out 2 Clementines Boxes (or other wooden fruit boxes).


Step 2 : Making Wooden Suitcases Arts and Crafts Idea for Kids


There are 4 wooden posts in each clementines box. With parental supervision or permission, take a screwdriver and pry out the staples to take out the 4 posts.


Step 3 : Making Wooden Suitcases Arts and Crafts Idea for Kids


Now you have all 4 posts out.

Step 2

Now glue all 4 sides back together. If your parents are around have them hot glue the sides together so you don’t have to wait for the glue to dry.

Step 3


Step 4 : Making Wooden Suitcases Arts and Crafts Idea for Kids


After the glue has dried, the boxes should fit together now, like the above picture.

Step 4


Step 5 : Making Wooden Suitcases Arts and Crafts Idea for Kids


Now stick duct tape all long the bottom so that the bottom of the boxes looks like this.


Step 6: Making Wooden Suitcases Arts and Crafts Idea for Kids


If you take the boxes apart, this is what it should look like from the inside.

Step 5


Step 7 : Making Wooden Suitcases Arts and Crafts Idea for Kids


To make the handles…use will be using all 4 posts that you took out in step #1.

If you glue 2 posts together, you will get a rectangle like the white illustration above.

Then take 2 spools and glue them to the box as seen above…notice that they are slightly off the box in to the center of the box….Then glue 1 rectangle to the top of each set of spools.

Step 6


Step 8 : Making Wooden Suitcases Arts and Crafts Idea for Kids


Cut out all the pictures that you want to glue to the box. My son loves Super Mario Bros and Donkey Kong and Scribblenauts so I made sure to cut out a lot of those video games characters.

Step 7


Step 9 : Making Wooden Suitcases Arts and Crafts Idea for Kids


We aren’t just going to glue these to the box, we are going to use a process called decoupage.

Decoupage (or découpage) is the art of decorating an object by gluing colored paper cutouts onto and object and then sealing it with a varnish over and over again until it is sealed. It will appear as if it is part of the wood or object.

So take some Elmer’s glue (or any brand obviously) and make a mixture of 50% water and 50% Elmer’s Glue.  Mix it together with a paint brush. Or if you have Modge Podge use that (something that they sell at crafts stores.

Step 8


Step 10 : Making Wooden Suitcases Arts and Crafts Idea for Kids


Brush your  mixture directly on to your suitcase surface.

Step 9


Step 11 : Making Wooden Suitcases Arts and Crafts Idea for Kids


Now start sticking on your pictures, making sure to brush the glue mixture onto the pictures as you put them down. Put more pictures down, continuing to brush the glue mixture all over the surface.


Step 12 : Making Wooden Suitcases Arts and Crafts Idea for Kids


Wrap pictures all around the box…making sure to put plenty of glue mixture all over everything. Make sure to flatten the pictures out and not to make it so wet that there are globs.

Let it dry and then put another coat on. I put 4 coats on … each time letter it dry in between putting more coats on.

Finished Nintendo Suitcase


How to Make a Super Mario Wooden Suitcase From Clementines Boxes Crafts Idea


This is my son’s finished suitcase…he loved it and all my kids want me to make one for them or to help them make one…so I guess we need to eat a LOT of Clementines (I have 4 kids) . I hope that you had fun.

Technorati Tags: , , , , , , , , , , , , , , ,

How to Make Duct Tape Tote Bags with Easy Steps Crafts Tutorial for Kids

Today we will show you how to make a very sturdy tote bag out of nothing other than duct tape. This duct tape bag is able to hold about 30 hard covered library books without tearing. You can also make these for grocery shopping so that you don’t have to waste plastic and paper bags. Learn how to make this cool duct tape bag with the following steps below.


How to Make Duct Tape Tote Bags with Easy Steps Crafts Tutorial for Kids


How to Make Duct Tape Tote Bags with Easy Steps Crafts Tutorial for Kids

Crafts Materials Needed

– Duct Tape
– Scissors

Step 1

We aren’t going to give you any specific measurements because we don’t know how big or small you want your bag. I wanted a huge bag to hold my library books, but you might just want a normal sized tote bag.

Firstly, we make the fabric. The way that we make the fabric is by sticking tape together, stick end to stick end.


When you have one strip done, then take another piece of tape and stick it lengthwise along the finished strip (illustrated above).  Then turn it around and cover up the sticky part with another piece of tape the same size.


Step 1 : Making Duct Tape Tote Bags Kids Arts and Crafts Instructions


Make 2 rectangles about the same size (it is optional to make them 2 different colors) and one long rectangle that is a little bit longer than the combined height of both of the other rectangles that you made.

Step 2


Step 2 : Making Duct Tape Tote Bags Kids Arts and Crafts Instructions


Now duct tape them together like the picture above….the long strip in the middle and 2 around it as if it ere a bird or airplane.


Step 3


The above illustrations show you how you will need to tape the sides together. You might need an extra hand to do this so ask a friend or parent or sibling if you need some help.


Step 3 : Making Duct Tape Tote Bags Kids Arts and Crafts Instructions


Here is a picture of me taping the sides together.

Step 4


Step 6 : Making Duct Tape Tote Bags Kids Arts and Crafts Instructions


I taped together the strap by taping end to end pieces of  tape. I then cut a hole in the bag, pulled the strap through and taped from the outside and the inside of the bag. It seems to hold really well.

Finished Duct Tape Tote Bag.


How to Make Duct Tape Tote Bags with Easy Steps Crafts Tutorial for Kids


The finished tote bag.

Technorati Tags: , , , , , , , , , , ,

How to Make Valentines Day Mailbox Backpack with Cereal Boxes

This is a unique Valentine’s Day Mailbox crafts idea, but I think all of your friends will ooh and aah over it. It is made from a cereal box and ribbons, amongst other crafts materials. AND you can really use it as a backpack, it really works.  Have fun.

Here are Even More Valentines Day Crafts Ideas


How to Make Valentines Day Mailbox Backpack with Cereal Boxes Crafts Idea for Kids


How to Make Valentines Day Mailbox Backpack with Cereal Boxes Crafts Idea for Kids

Crafts Materials Needed

– Cereal Box
– Scissors
– Paper
– Colored Paper or Paint and Brush
– Ribbons
– Paste or Glue

Step 1


Step 1 : Making Valentines Day mail box backpack craft for kids


Glue the Opened End of the Cereal Box Closed. Wait until the glue is dry and then cut on the dotted lines as you see above. Don’t cut the back edge as this will be the hinge to open up the backpack.

Step 2


Step 2 : Making Valentines Day mail box backpack craft for kids


No cut the 2 side tabs off.


Step 3


Step 3 : Making Valentines Day mail box backpack craft for kids


Now cover the cereal box with either red paint or red paper.

Step 4


Step 4 : Making Valentines Day mail box backpack craft for kids


Now cut a bunch of white hearts out of paper and then glue them all over the box.

Step 5


Step 5 : Making Valentines Day mail box backpack craft for kids


Give the box a valentine’s day card look by putting curvy white paper all around the bag’s lid.

Step 6


Step 6 : Making Valentines Day mail box backpack craft for kids


Cut a slot at the top of the backpack’s lid for people to push in the Valentine’s Day cards. Cut out the word ‘MAIL’ and your name from blue construction paper and paste it on the bag.

Step 7


Step 7 : Making Valentines Day mail box backpack craft for kids


Now take 2 strips of ribbon and glue them to the lid, as pictured above. also lower down on the bag, glue two loops for the ribbons to string through.

Step 8


Step 8 : Making Valentines Day mail box backpack craft for kids


Make 4 slits on the back of the box…2 on top and 2 on the bottom.

Step 9


Step 9 : Making Valentines Day mail box backpack craft for kids


thread the ribbons through the slits for the backpack’s straps. Tie them, glue, or tape them from the inside of the box.

Step 10


Step 10 : Making Valentines Day mail box backpack craft for kids


Step 11


How to Make Valentines Day Mailbox Backpack with Cereal Boxes Crafts Idea for Kids


And this is something like what your backpack, Valentine’s Day Mailbox should look like when finished. Just put it on your desk and let your classmate’s put their Valentine’s Day cards into the slot on top. When you go home, you can open up the backpack’s lid to get all of the Valentine’s day cards out to read them.

Here are Even More Valentines Day Crafts Ideas

Technorati Tags: , , , , , , , , , , , , , ,

How to Make No-Sew Tote Bag Craft from Recycled Old T-Shirts

Who doesn’t have tons of old t-shirts that they don’t even wear anymore? I have tons so I decided to make a tote bag out of one of them. I hate to sew, so I thought of a way to do it without sewing. It landed up being very easy to make. These are so easy to make that you can make a dozen of them to take with you to use instead of plastic or paper grocery bags. Why throw more plastic bags into a trash heap, when you can help the environment by not using these wasteful bags anymore. Follow the easy-to-follow, step by step instructions below.

You Might Like Our Other No-Sew Crafts


How to Make No-Sew Tote Bag Craft from Recycled Old T-Shirts


How to Make No-Sew Tote Bag Craft from Recycled Old T-Shirts

Crafts Materials Needed

– Old T-Shirt
– Scissor

Step 1


Step 1 : Making No-Sew Tote Bags with T-Shirts Craft for Kids


Take out your t-shirt. Cut off the sleeves and a portion of the collar as well.

Step 2


Step 2 : Making No-Sew Tote Bags with T-Shirts Craft for Kids


This is what your t-shirt will look like after you cut off the sleeves and collar.


Step 3


Step 3 : Making No-Sew Tote Bags with T-Shirts Craft for Kids


Now cut slits on the bottom of the t-shirt (going through both sides). Cut each slit about a half inch apart. We are going to use these slits to tie the bottom of the t-shirt together with double knots. If you don’t know how to tie knots, then the instructions below will help.

Step 4


Step 4 : Making No-Sew Tote Bags with T-Shirts Craft for Kids


Step 5


Step 5 : Making No-Sew Tote Bags with T-Shirts Craft for Kids


Step 6


Step 6 : Making No-Sew Tote Bags with T-Shirts Craft for Kids


Now pull the 2 tabs sticking out until it is tight and you have one knot. Now do this process again to make a double knot.

Step 7


Step 7 : Making No-Sew Tote Bags with T-Shirts Craft for Kids


After you have tied all of the slits together, your bag will look something like the above picture.

Step 8


How to Make No-Sew Tote Bag Craft from Recycled Old T-Shirts


This is what your bag looks like with stuff in it. It is very sturdy as this tote bag is filled with very heavy books. I hope that you had fun.

You Might Like Our Other No-Sew Crafts

Technorati Tags: , , , , , , , , , , , , , , ,