Some Really Cool Perpetual Calendar Crafts for the New Year


Some Really Cool Perpetual Calendar Crafts for the New Year


Today I am going to show you a bunch of some really cool perpetual calendar crafts perfect for the upcoming New Year.  What is great about perpetual calendars is that they can be changed to show any combination of day, month, and year….. which means that the same calendar can be used year after year after year.  Sure, you can purchase a perpetual calendar at a store or online, but I am pretty sure you would spend way too much money and they wouldn’t be as awesome as the perpetual calendars I have listed here.  I have scoured the internet to find you some really cool perpetual calendar crafts.  You will surely find one here that will fit your needs.
Check out our other New Years Crafts and Calendar Crafts.

Some Really Cool Perpetual Calendar Crafts for the New Year

(1)  Nut Can Perpetual Calendar Craft


Nut-Can-Perpetual-Calendar


This is a super cool Perpetual Calendar.  Made from a nut can this perpetual calendar is quite unique.  If you look closely at the image above this perpetual calendar even has a choice for mood.  In this case they chose nutty.  Check this craft out at Design Sponge.


(2)  Perpetual Button Calendar


Perpetual-Button-Calendar


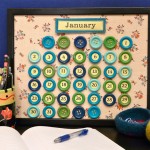
This perpetual calendar is super duper cute.  Make it once, and you can use it forever – just move the numbers to their correct location each month, and change the nameplate!  How fun is that?!  I found this craft over at MakeZine.  Check it out for yourself.


(3)  Paper Box Perpetual Calendar


Paper Box Perpetual Calendar


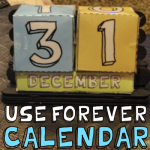
This is one of our very own perpetual calendar crafts.  Here we use some colorful templates that you glue together to make boxes.  Add some popsicle sticks and you have yourself a perpetual calendar.  Check out our Paper Box Perpetual Calendar for all the details.


(4)  Corkboard Perpetual Calendar


Corkboard Perpetual Calendar


I love the idea of this corkboard perpetual calendar.  Here they use a corkboard and foam to give this perpetual calendar a colorful look.  The corkboard is a wonderful material to use as you can easily thumbtack your notes and errands to the corkboard perpetual calendar to remind you what you need to get done.  Check out Michaels for all the craft details.


(5)  Scrapbooking Paper Perpetual Calendar 


Scrapbooking Paper Perpetual Calendar


I found this perpetual calendar craft at Our Big Earth and it is a wonderful idea.  Here they use coordinating scrapbooking paper to give this a unique look.  This is a flip chart type of calendar…. so it would be great for any desktop.  Check out the site for all the details.


(6)  Magnetic Perpetual Calendar


Magnetic Perpetual Calendar


This is actually a cookie sheet perpetual calendar.  For this craft she spray painted the cookie sheet, duct tape the edges and used playing card numbers for the days.  She also attached a dry erase board for notes and special events.  Being that everything is on magnets things can be easily moved.  Check out A Creative Princess for the info.


(7)  Colorful Perpetual Calendar


Colorful Perpetual Calendar


Look how beautiful and colorful this perpetual calendar is.   Here she uses 31 pictures to represent the days of the month…. you can cut out these pictures from scrapbooking paper or just use stickers.  I found this perpetual craft at Sandy’s Space.  Check it out for yourself.


(8)  Thrifty Box Perpetual Calendar


Thrifty Box Perpetual Calendar


Aren’t these perpetual calendars just absolutely beautiful?  No one would believe that you not only made them yourself, but also they are extremely thrifty.  I found this craft at Amazing Paper Grace.  Here she uses $1.00 boxes that she found at Michael’s.  Check out all the details on how she puts these perpetual calendars together.


(9)  Perpetual Calendar / Memo Board


Perpetual Calendar Memo Board


This is such a clever idea!!  I found this craft over at Curbly and I love it.  Here they use six steel bars painted with punchy colors, numbered magnets, plus seven days of the week and twelve months combine to make a perpetual calendar, which also serves as a memo board.  This would look amazing above anyone’s desk.


(10)  Perpetual Family Photo Calendar


Perpetual Family Photo Calendar


This is just absolutely brilliant…. and you will surely get so many compliments on this perpetual calendar.  What you might not be able to tell from the above picture is that there are 31 pictures on the twine.  You will simply flip each day/photo as the days pass.  Check out Shaken Together to see it for yourself.


(11)  Flipping Perpetual Calendar


Flipping Perpetual Calendar


I found this perpetual calendar craft at MomClick.    This is a really neat perpetual calendar because it uses the flip-chart idea.  Easily flip between day of the week, months and number days.  This perpetual calendar will look terrific on any desk.


(12)  Perpetual Chalkboard Calendar


Perpetual Chalkboard Calendar


This perpetual calendar is so awesome…. not just because it is obviously a wonderful perpetual calendar.  But, the materials to make this perpetual calendar is really thrifty.  Gotta love that!!  I found this perpetual calendar craft at I Will Craft.   Here she shows you how she made a perpetual calendar with metal flashing, game pieces and some scrabble tiles all in a framed vintage chalkboard.

Technorati Tags: , , , , , , , , , , ,

How to Make a Paper Box Perpetual Calendar

January is almost here.  And, with January comes the need for a new calendar.  But, what if you had a Perpetual Calendar…. or another words a “Forever Calendar”?  If you did you wouldn’t need to change your calendar every year.   You would simply change the date everyday by rotating the numbers and the month.  Well, with that being said…. today I’m going to show you how to make a Paper Box Perpetual Calendar.  The craft is an easy one, but oh so useful.  So, let’s get started.

Check out our other New Years Crafts and Calendar Crafts.


How to Make a Paper Box Perpetual Calendar


Materials Needed

Paper

Printer

Scissors

Glue

Popsicle Sticks

Paint (optional)

Laminating or Cereal Box Cardboard (optional)


Click on the following templates to make larger and print.

Template 1


Perpetual Calendar Template 1


Template 2


Perpetual Calendar Template 2


Template 3


Perpetual Calendar Template 3


Step 1


Print out templates.


Print out templates.  I laminated them…. but no need to do this.  This is optional.  You can alternatively paste them to cereal box cardboard if you want to make them sturdier.


Step 2


Cut all of templates out.


Cut all of templates out.


Step 3


Fold on dotted lines.


Fold on dotted lines.


Step 4


Glue tabs together.


Glue tabs together…. box will come together.


From a different view


From a different view… you can see how box is going to fold together.


See how it is coming together.


See how it is coming together.


you have a cube.


After you fold and paste final side in… you have a cube.


Step 5


The month templates work the same way


The month templates work the same way… cut out… fold on dotted lines.


Glue tabs together.


Glue tabs together.


Fold and paste sides in


Fold and paste sides in and you have a rectangle shape.


Step 6


See how many Popsicle sticks you will need to use so that 2 blocks will fit on it.


To make the stand… I used Popsicle sticks… Mine are bigger than normal so you might need to use more than me.  See how many Popsicle sticks you will need to use so that 2 blocks will fit on it.  Then line them side to side.


Step 7


Glue pieces vertically


Glue pieces vertically (up and down direction) to keep them in place.


Step 8


Glue 3 or 4 sticks at the top.


Glue 3 or 4 sticks at the top.


Step 9


Glue about 10 Popsicle sticks on opposite side of the sticks you added in the last step.


Turn over.  Glue about 10 Popsicle sticks on opposite side of the sticks you added in the last step.


Step 10


Repeat steps 6 and 7 to make a back for stand.


Repeat steps 6 and 7 to make a back for stand.


Step 11


Glue backing to the stack of Popsicle sticks.


Glue backing to the stack of Popsicle sticks.


Step 12


Glue enough Popsicle sticks so that the month block can be pushed out to the front


Glue enough Popsicle sticks so that the month block can be pushed out to the front… like this.


Step 13


It looks nice when you paint it.


It looks nice when you paint it.


Step 14


The blocks can be placed like this


The blocks can be placed like this to display the date.


a calendar you never have to get rid of.


Change the date everyday… a calendar you never have to get rid of.  How did your perpetual calendar turn out?  Where are you going to display your calendar?  Let me know in the comments below.  I’d love to hear about it.

Technorati Tags: , , , , , , , , , , ,

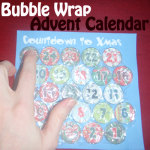
How to Make a Bubble Wrap Advent Calendar

December is just a couple days away.  And, with December comes the countdown to the Christmas Holiday.  What better way to count down to Christmas than to do it with an Advent Calendar.  Today I’m going to show you how to make an Advent Calendar out of Bubble Wrap.  What child doesn’t love popping the bubbles in bubble wrap?  They love it!!  So, a Bubble Wrap Advent Calendar just makes sense.

Check out our other Christmas Crafts.


How to Make a Bubble Wrap Advent Calendar


Materials Needed

Big Bubbled Bubble Wrap

Printer and Paper

Glue


Below is the printable template for this craft.  Click on template image to make larger and to print.


Printable template for advent calendar


Step 1


Print out template and get some big bubbled bubble wrap.


Print out template and get some big bubbled bubble wrap.


Step 2


Match up the circle bubbles to the print out.


Match up the circle bubbles to the print out.  Glue down.


Step 3


Pop the bubbles as days pass.


Pop the bubbles as days pass.  When no more bubbles are left to pop… Christmas is here.

Start the Advent Calendar count down on December 1st…. that way the count down will end on the 25th of December…. Christmas.  Also, check out our Candy Advent Calendar…Eat a piece of candy a day to count down to Christmas.

Technorati Tags: , , , , , , , , , , , ,

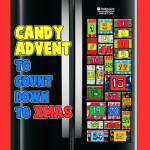
How to Make a Candy Advent Calendar to Count Down to Christmas

I have a great way to use up that Halloween Candy that you still have stashed away…. use them to make a Christmas Advent Calendar.  That’s right…. I’m going to show you how to make a Candy Advent Calendar to Count Down to Christmas.  This is a great way to get the kids excited about Christmas…. as if they weren’t excited already.  This Advent Calendar is a magnet craft…. perfect for displaying on your fridge.  So, let’s get started.

Check out our other Christmas Crafts.


How to Make a Candy Advent Calendar to Count Down to Christmas


Materials Needed

25 Mini Boxes of Candy or Candy Miniatures

Wrapping Paper

25 Magnets

Colorful Pieces of Paper

Glue

Tape

Scissors


Step 1


Collect mini boxes of candy / or miniature chocolates


Collect mini boxes of candy / or miniature chocolates from your Halloween candy stash.  You will need 25 of them.


Step 2


Place candy in center of wrapping paper


Place candy in center of wrapping paper (back).  The color side is down.


Step 3


Fold both sides in towards the center.


Fold both sides in towards the center.


Step 4


Tape sides together.


Tape sides together.


Step 5


Fold the 4 corners inwards.


Fold the 4 corners inwards.


Step 6


Fold inwards to form 2 triangles in X shape.


Fold inwards to form 2 triangles in X shape.


Step 7


Tape shut.


Tape shut.


Step 8


You finished wrapping the box.


Now, turn the box around… you wrapped it.


Step 9


Glue magnets to the back of wrapped candy.


Glue magnets to the back of wrapped candy.


Step 10


Print out or write numbers on colorful pieces of paper or on wrapping paper.


Print out or write numbers on colorful pieces of paper or on wrapping paper.  Glue or tape on front of candy.


Step 11


Then mount the wrapped candy on your fridge.


Then mount the wrapped candy on your fridge.  Each day, eat the candy.  When no candy is left, then you know that it is Christmas.


How to Make a Candy Advent Calendar to Count Down to Christmas


You have just finished your Candy Advent Calendar.  Now, you are all set to count down to Christmas.  How did your Advent Calendar turn out?  Let me know in the comments below.  You can also take a picture of your fridge and post it in the comments too…. that way I can see how it turned out.

Technorati Tags: , , , , , , , , , , , , , ,

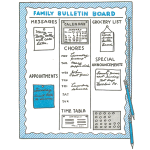
Make Bulletin Boards to Organize Family Events

It is so hard to get everything organized and de-cluttered when you have kids. If you have a lot of dates, appointments, grocery list items, messages, and other important facts straight, then why not make a family oriented family board. Making this family bulletin board can help you and your kids more organized and help you remember dates and other important information and appointments. The easy to make instructions are as follows…this is perfect for Moms and Dads to make or for kids to make as a gift for Mom or Dad … or to even make for their own room.


How to Make Bulletin Boards to Organize Family Events with the Following Arts & Crafts Activity for Kids

CRAFTS MATERIALS NEEDED:

*A large piece of heavy cardboard

*Thumbtacks

*Crayons

*Pad

*Pencils

*String

*Calendar

HOW TO MAKE THIS ARTS AND CRAFTS ORGANIZATIONAL PROJECT:

Everyone in the family will thank you for this cool idea!

Step 1

Cut a heavy piece of cardboard about 3 by 4 feet.

Step 2


Draw and color a simple border around the cardboard.

Step 3

Write “Family Bulletin Board”, or any other name you choose, in crayon across the top.

There are many ways you can decorate and arrange this easy-to-make bulletin board. Here are some suggestions:

Divide your board with crayon lines into three divisions. Print column headings like “Grocery List”, “Messages”, “Regular Chores”, etc. Under the Grocery List heading, tack up a pad. Tie two or three pencils to strings and tack them up next to the pad.

Draw a box in one corner and push about 20 thumbtacks in it. These will be used for tacking up messages. You might want to print the most important telephone numbers, like Daddy’s phone number or the doctor’s phone number in a space marked “Phone Numbers”.

Tack up a small calendar. Under the heading Chores, you can list the things that are to be done on certain days, like you’re to cut the grass on Fridays, or your sister is to take her piano lessons on Tuesdays, or the laundry is to be called for on Mondays.

It is nice to record family appointments like picnics and visiting grandma in a box headed “Special Announcements”. You’ll find that everyone in the family will make much use of your very practical bulletin board.

Technorati Tags: , , , , , , , , ,

Easy to Make Advent Calenders Christmas Crafts for Kids – Part 2

Advent calenders are always lots of fun. But most of them take ages to make. Here’s a simple version of the advent calender that will take you a couple of hours to make- at the most. So sit down one afternoon with your kids and make this simple advent calender. Part 2 of the instructions are given below.  In this page you can learn to make the Calender. Check out part 1 to learn how to make the gifts that go on this calender.

CLICK HERE TO VISIT PART 1 OF HOW TO MAKE EASY ADVENT CALENDARS


DSC04077


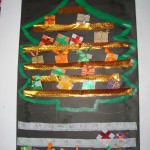
The concept is simple.The bottom of the tree has spaces to store gifts. Every day, your child gets to put one gift on the Christmas tree. When all the gifts are put up,  it’ s Christmas day!!.


Image138


The concept is simple.The bottom of the tree has spaces to store gifts. Every day, your child gets to put one gift on the Christmas tree. When all the gifts are put up, it’ s Christmas day!!.

Easy to Make Christmas Advent Calendars Arts and Crafts Activities for Kids for Kids, Teens, Preschoolers Part 2


Craft materials required for the Whole Advent Calendar:

Gold paper

Wax paper

Colored card paper

Assorted ribbons( narrow), colored tape

Green acryic paint

Paintbrush

Step 1

Take a large sheet of thick black paper. Stick two pieces together, if required.


advent calender


Step 2

Stick three strips of wax paper across the bottom. Make sure you have enough space to accommodate 25 gifts. When you stick the wax paper, apply a little glue near three edges- the right, left and top as shown.


advent calender 5


Image078


Step 3

Number backwards from 25 to 1 as shown, using a permanent marker.


Image099


Step 4

Draw and paint the outline of a Christmas tree on the top of the paper.


Image080


Step 5

Stick strips of gold paper on the tree the same way you did with the wax paper.


Image081


Step 6

Now arrange the gifts that you made in part 1 of this tutorial, and you can start your countdown to Christmas.


Advent calender


Start from the 1st of December.  Each day, take one gift and place it on the tree.


advent calender


CLICK HERE TO VISIT PART 1 OF HOW TO MAKE EASY ADVENT CALENDARS

CHRISTMAS CRAFTS ACTIVITIES & IDEAS FOR KIDS

It is almost Christmas time so check out our Christmas Coloring Pages & Christmas Crafts for Kids Page to find some great Christmas crafts project ideas for kids to celebrate Xmas such as .. Advent Calendar Crafts ..Candy Cane Crafts ..Christmas Angel Crafts ..Christmas Cards Crafts ..Christmas Bells Crafts ..Christmas Coloring Pages .. Santa Coloring Pages .. Christmas Elf Crafts .. Christmas Gift Bags Crafts ..Christmas Gift Tags Crafts .. Christmas Games & Activities .. Christmas Nativity Scenes .. Christmas Soda Can Crafts .. Christmas Placemat Crafts ..Christmas Poinsettias Crafts .. Christmas Sewing Patterns .. Christmas Tree Crafts ..Christmas Tree Ornament Crafts ..Christmas Wreath Crafts ..Gingerbread House Crafts ..Gingerbread Man Crafts .. Mittens and Gloves Crafts ..Recycle Christmas Cards to Make Other Crafts ..Reindeer Crafts .. Winter Penguin Crafts .. Winter Snow Crafts .. Winter Solstice / Yule Crafts ..Santa Clause Crafts .. Santa Hats Crafts .. Santa’s Sleigh Crafts ..Snowflake Crafts ..Snowman Crafts .. Stocking Crafts .. Wrapping Paper Craft

Technorati Tags: , , , , , , , , , , , , ,

Easy to Make Advent Calenders Christmas Crafts for Kids – Part 1

Advent calenders are always lots of fun. But most of them take ages to make. Here’s a simple version of the advent calender that will take you a couple of hours to make- at the most. So sit down one afternoon with your kids and make this simple advent calender. Part ! of the instructions are given below.  In this page you can learn to make the gifts.

VISIT PART 2 OF EASY TO MAKE ADVENT CALENDARS CRAFTS


advent calender


advent calender

The concept is simple.The bottom of the tree has spaces to store gifts. Every day, your child gets to put one gift on the Christmas tree. When all the gifts are put up,  it’ s Christmas day!!.

Easy to Make Christmas Advent Calendars Arts and Crafts Activities for Kids for Kids, Teens, Preschoolers


Craft materials required for the Whole Advent Calendar:

Black card paper- large sheet

Gold paper

Wax paper

Colored card paper

Assorted ribbons( narrow), colored tape

Green acryic paint

Paintbrush


craft materials


To make the gifts:

Cut out a piece of card in the shape of a small square


gift 1


Cut out a piece of ribbon larger than the width of the square and place it behind the square as shown


gift 2


Fold the ends towards the front and tape them in place.


gift3


Take another piece of ribbon longer than twice the width of the square, fold in half and place the square between the two ends as shown.


gift3


Tie the ends together tightly. If required make a second knot.


gift5


Turn over to the side where you had taped earlier. Tape again to hold the second piece of ribbon in place.


gift6


Second technique to make gifts.

If you really don’t have time, and want a short cut- here’s a second technique.

Take a square piece of card and some colored tape.


make gift


” Wrap” your gift as shown in the pictures below


Image074


Image075


Image076


Use a combination of ribbons, colors and tape to make 25 such gifts. Then arrrange them on the advent calender as shown below. The instructions for making the calender are given in part 2 of this tutorial.


advent calender1


VISIT PART 2 OF EASY TO MAKE ADVENT CALENDARS CRAFTS

CHRISTMAS CRAFTS ACTIVITIES & IDEAS FOR KIDS

It is almost Christmas time so check out our Christmas Coloring Pages & Christmas Crafts for Kids Page to find some great Christmas crafts project ideas for kids to celebrate Xmas such as .. Advent Calendar Crafts ..Candy Cane Crafts ..Christmas Angel Crafts ..Christmas Cards Crafts ..Christmas Bells Crafts ..Christmas Coloring Pages .. Santa Coloring Pages .. Christmas Elf Crafts .. Christmas Gift Bags Crafts ..Christmas Gift Tags Crafts .. Christmas Games & Activities .. Christmas Nativity Scenes .. Christmas Soda Can Crafts .. Christmas Placemat Crafts ..Christmas Poinsettias Crafts .. Christmas Sewing Patterns .. Christmas Tree Crafts ..Christmas Tree Ornament Crafts ..Christmas Wreath Crafts ..Gingerbread House Crafts ..Gingerbread Man Crafts .. Mittens and Gloves Crafts ..Recycle Christmas Cards to Make Other Crafts ..Reindeer Crafts .. Winter Penguin Crafts .. Winter Snow Crafts .. Winter Solstice / Yule Crafts ..Santa Clause Crafts .. Santa Hats Crafts .. Santa’s Sleigh Crafts ..Snowflake Crafts ..Snowman Crafts .. Stocking Crafts .. Wrapping Paper Craft

Technorati Tags: , , , , , , , , , , , , ,