Some Really Cool Perpetual Calendar Crafts for the New Year


Some Really Cool Perpetual Calendar Crafts for the New Year


Today I am going to show you a bunch of some really cool perpetual calendar crafts perfect for the upcoming New Year.  What is great about perpetual calendars is that they can be changed to show any combination of day, month, and year….. which means that the same calendar can be used year after year after year.  Sure, you can purchase a perpetual calendar at a store or online, but I am pretty sure you would spend way too much money and they wouldn’t be as awesome as the perpetual calendars I have listed here.  I have scoured the internet to find you some really cool perpetual calendar crafts.  You will surely find one here that will fit your needs.

Check out our other New Years Crafts and Calendar Crafts.

Some Really Cool Perpetual Calendar Crafts for the New Year

(1)  Nut Can Perpetual Calendar Craft


Nut-Can-Perpetual-Calendar


This is a super cool Perpetual Calendar.  Made from a nut can this perpetual calendar is quite unique.  If you look closely at the image above this perpetual calendar even has a choice for mood.  In this case they chose nutty.  Check this craft out at Design Sponge.


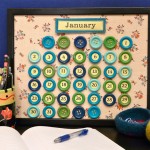
(2)  Perpetual Button Calendar


Perpetual-Button-Calendar


This perpetual calendar is super duper cute.  Make it once, and you can use it forever – just move the numbers to their correct location each month, and change the nameplate!  How fun is that?!  I found this craft over at MakeZine.  Check it out for yourself.


(3)  Paper Box Perpetual Calendar


Paper Box Perpetual Calendar


This is one of our very own perpetual calendar crafts.  Here we use some colorful templates that you glue together to make boxes.  Add some popsicle sticks and you have yourself a perpetual calendar.  Check out our Paper Box Perpetual Calendar for all the details.


(4)  Corkboard Perpetual Calendar


Corkboard Perpetual Calendar


I love the idea of this corkboard perpetual calendar.  Here they use a corkboard and foam to give this perpetual calendar a colorful look.  The corkboard is a wonderful material to use as you can easily thumbtack your notes and errands to the corkboard perpetual calendar to remind you what you need to get done.  Check out Michaels for all the craft details.


(5)  Scrapbooking Paper Perpetual Calendar 


Scrapbooking Paper Perpetual Calendar


I found this perpetual calendar craft at Our Big Earth and it is a wonderful idea.  Here they use coordinating scrapbooking paper to give this a unique look.  This is a flip chart type of calendar…. so it would be great for any desktop.  Check out the site for all the details.


(6)  Magnetic Perpetual Calendar


Magnetic Perpetual Calendar


This is actually a cookie sheet perpetual calendar.  For this craft she spray painted the cookie sheet, duct tape the edges and used playing card numbers for the days.  She also attached a dry erase board for notes and special events.  Being that everything is on magnets things can be easily moved.  Check out A Creative Princess for the info.


(7)  Colorful Perpetual Calendar


Colorful Perpetual Calendar


Look how beautiful and colorful this perpetual calendar is.   Here she uses 31 pictures to represent the days of the month…. you can cut out these pictures from scrapbooking paper or just use stickers.  I found this perpetual craft at Sandy’s Space.  Check it out for yourself.


(8)  Thrifty Box Perpetual Calendar


Thrifty Box Perpetual Calendar


Aren’t these perpetual calendars just absolutely beautiful?  No one would believe that you not only made them yourself, but also they are extremely thrifty.  I found this craft at Amazing Paper Grace.  Here she uses $1.00 boxes that she found at Michael’s.  Check out all the details on how she puts these perpetual calendars together.


(9)  Perpetual Calendar / Memo Board


Perpetual Calendar Memo Board


This is such a clever idea!!  I found this craft over at Curbly and I love it.  Here they use six steel bars painted with punchy colors, numbered magnets, plus seven days of the week and twelve months combine to make a perpetual calendar, which also serves as a memo board.  This would look amazing above anyone’s desk.


(10)  Perpetual Family Photo Calendar


Perpetual Family Photo Calendar


This is just absolutely brilliant…. and you will surely get so many compliments on this perpetual calendar.  What you might not be able to tell from the above picture is that there are 31 pictures on the twine.  You will simply flip each day/photo as the days pass.  Check out Shaken Together to see it for yourself.


(11)  Flipping Perpetual Calendar


Flipping Perpetual Calendar


I found this perpetual calendar craft at MomClick.    This is a really neat perpetual calendar because it uses the flip-chart idea.  Easily flip between day of the week, months and number days.  This perpetual calendar will look terrific on any desk.


(12)  Perpetual Chalkboard Calendar


Perpetual Chalkboard Calendar


This perpetual calendar is so awesome…. not just because it is obviously a wonderful perpetual calendar.  But, the materials to make this perpetual calendar is really thrifty.  Gotta love that!!  I found this perpetual calendar craft at I Will Craft.   Here she shows you how she made a perpetual calendar with metal flashing, game pieces and some scrabble tiles all in a framed vintage chalkboard.

Technorati Tags: , , , , , , , , , , ,

How to Make a Magnetic Hanukkah Menorah

Hanukkah begins on the night of December 8th.  Which means it is coming really quickly.  Today I’m going to show you how to make a Magnetic Hanukkah Menorah.  This menorah is perfect for your children’s room, so they can light their own menorah.  Or, if you have cats or toddlers in your house this menorah is perfect for you…. no need to worry about anyone knocking over the menorah and starting a fire.  Light it every night of Hanukkah…. 8 wonderful nights.

Check out our other Hanukkah Crafts.


How to Make a Magnetic Hanukkah Menorah


Materials Needed

Printable Magnetic Sheet

Printer

Scissors

Fridge or Metal Door


Click on the template image below to open up a new window and to print.


Magnetic Hanukkah Menorah Template


Step 1


Print out the template on a magnetic sheet.


Print out the template on a magnetic sheet.


Step 2


Cut out the menorah and the flames.


Cut out the menorah and the flames.


Step 3


Place on fridge or a door.


Place on fridge or a door.  Light the candle everyday.  Great for houses with cats or toddlers… No worries about knocked over lit candles.


Step 4


Until all the candles are lit.


Until all the candles are lit.

And there you have it.  That’s all you have to do to make a magnetic Hanukkah menorah.  Perfect for celebrating Hanukkah every night for 8 nights.

Technorati Tags: , , , , , , , , , , , , , ,

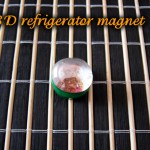
How to Make a 3D Refrigerator Magnet

I have a fun craft for you today.  I’m going to show you how to make a 3D Refrigerator Magnet.  What’s really cool about Refrigerator Magnet crafts is that you always have a place to display your crafts proudly…. your refrigerator or any metallic surface.  I know in my house I never have enough magnets to display all of my children’s artwork so this craft really came in handy with providing us with another magnet.  Keep in mind that the picture in the center can be any picture you want…. I used a bear, but use any cute picture you would like.

Check out our other Magnet Crafts.

Laura from Dacian Moon Handmade will show you, step by step, how to make this magnet.


Materials Needed

– glass nugget
– craft glue (transparent) – or use a transparent glue for the picture and a craft glue for the magnet
– magnet
– cute picture (small)
– scissors
– paints
– paintbrush
– pencil


Step 1

First of all, cover the magnet with the desired color, then let it dry.


I chose green because it will highlight the drawing. Leave the base unpainted.


Step 2

Take the picture…


… and place the glass nugget on it.


Draw the contour of the nugget…


… then cut it out.


It will look like this.


Step 3

Apply a layer of transparent glue on the picture…


… and place it on the bottom of the glass nugget.


It will look like that.


Step 4

Apply a layer of craft glue on the magnet (on painted side)…


… and place the glass nugget on it. Press well and let the glue dry.


Now it is ready for your refrigerator or any other metallic surface.


Awesome job….. you just finished making your 3D refrigerator magnet.  How did your magnet turn out?  What picture did you use in the center of the magnet?  Let me know in the comments below…. and don’t forget to take a picture and share that too.  I’d love to see it.

Technorati Tags: , , , , , ,

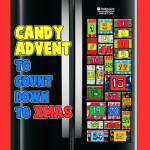
How to Make a Candy Advent Calendar to Count Down to Christmas

I have a great way to use up that Halloween Candy that you still have stashed away…. use them to make a Christmas Advent Calendar.  That’s right…. I’m going to show you how to make a Candy Advent Calendar to Count Down to Christmas.  This is a great way to get the kids excited about Christmas…. as if they weren’t excited already.  This Advent Calendar is a magnet craft…. perfect for displaying on your fridge.  So, let’s get started.

Check out our other Christmas Crafts.


How to Make a Candy Advent Calendar to Count Down to Christmas


Materials Needed

25 Mini Boxes of Candy or Candy Miniatures

Wrapping Paper

25 Magnets

Colorful Pieces of Paper

Glue

Tape

Scissors


Step 1


Collect mini boxes of candy / or miniature chocolates


Collect mini boxes of candy / or miniature chocolates from your Halloween candy stash.  You will need 25 of them.


Step 2


Place candy in center of wrapping paper


Place candy in center of wrapping paper (back).  The color side is down.


Step 3


Fold both sides in towards the center.


Fold both sides in towards the center.


Step 4


Tape sides together.


Tape sides together.


Step 5


Fold the 4 corners inwards.


Fold the 4 corners inwards.


Step 6


Fold inwards to form 2 triangles in X shape.


Fold inwards to form 2 triangles in X shape.


Step 7


Tape shut.


Tape shut.


Step 8


You finished wrapping the box.


Now, turn the box around… you wrapped it.


Step 9


Glue magnets to the back of wrapped candy.


Glue magnets to the back of wrapped candy.


Step 10


Print out or write numbers on colorful pieces of paper or on wrapping paper.


Print out or write numbers on colorful pieces of paper or on wrapping paper.  Glue or tape on front of candy.


Step 11


Then mount the wrapped candy on your fridge.


Then mount the wrapped candy on your fridge.  Each day, eat the candy.  When no candy is left, then you know that it is Christmas.


How to Make a Candy Advent Calendar to Count Down to Christmas


You have just finished your Candy Advent Calendar.  Now, you are all set to count down to Christmas.  How did your Advent Calendar turn out?  Let me know in the comments below.  You can also take a picture of your fridge and post it in the comments too…. that way I can see how it turned out.

Technorati Tags: , , , , , , , , , , , , , ,

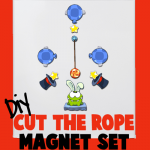
How to Make a “Cut the Rope” Magnet Set

Earlier today I showed you how to make your own Angry Birds Magnet Set.  Well, I’ve got another great magnet craft for you.  I’m going to show you how to make a “Cut the Rope” Magnet Set.  Cut the Rope is an awesome application game.  The premise of the game is simple, but it can be a very challenging game.  The object of the game is to get the piece of candy into the mouth of the green cartoon frog.  Fun stuff!!  So, let’s make the craft.

Check out our other Magnet Crafts.


How to Make a “Cut the Rope” Magnet Set


Materials Needed

Printable Magnet Sheets

Printer

Scissors


Below are the printable templates.  Click on the image to make larger and to print.

Template 1


Template 1


Template 2


Template 2


Template 3


Template 3


Template 4


Template 4


Step 1


Print out the template on printable magnet sheets.


Print out the template on printable magnet sheets.


Step 2


Cut out the figures and items in these templates.


Cut out the figures and items in these templates.


Step 3


Place "Cut the Rope" magnets on your fridge in all different scenarios.


Place “Cut the Rope” magnets on your fridge in all different scenarios.  You have enough scenarios to change the magnets everyday for months before having the same scenario twice.  What scenario is your favorite?  Let me know in the comments below…. take a picture and show me.

Here is a video on How to Make a “Cut the Rope” Magnet Set.   With this video you can easily follow along step-by-step.

Technorati Tags: , , , , , ,

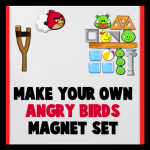
How to Make your own Angry Birds Magnet Set

Angry Birds is the most successful mobile application yet.  Everyone just loves playing Angry Birds.  I mean, what’s not to love?!  You got flying birds, hungry green pigs and slingshots.  The combination guarantees a ton of fun.  Well, today I’m going to show you how to make your own Angry Birds Magnet Set.  And, there are plenty of Angry Birds scenarios on these magnets…. your fridge can look different everyday.

Check out our other Magnet Crafts.


How to Make your own Angry Birds Magnet Set


Materials Needed

Printable Magnet Sheets

Printer

Scissors


Below are the printable templates.  Click on the image to make larger and to print.

Template 1


Angry Birds template 1


Template 2


Angry Birds template 2


Template 3


Angry Birds template 3


Step 1


Print out Angry Bird templates on printable magnet sheets.


Print out Angry Bird templates on printable magnet sheets.


Step 2


Cut out all of the characters and items from the 3 template sheets.


Cut out all of the characters and items from the 3 template sheets.


Step 3


Put the Angry Birds Magnets on your fridge.


Put the Angry Birds Magnets on your fridge.  What Angry Birds scenario did you use?  Take a picture and leave it in the comments for me to see.

Here is a video on How to Make your own Angry Birds Magnet Set.  With this video you can easily follow along with the craft step-by-step.

Technorati Tags: , , , , , ,

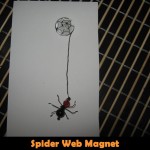
How to make a Spider Web Magnet

What item in your kitchen is seen most often by family members and company?  Your refrigerator, of course.  So, why not decorate your refrigerator too for Halloween.  Today I’m going to show you how to make a Spider Web magnet perfect for the Halloween season.

Check out our other Halloween Crafts.

Laura from Dacian Moon Handmade will show you how to make a funny Halloween magnet, step-by-step.


CRAFT MATERIALS NEEDED:

– cardboard
– pen
– magnet
– glass
– black soft wire (0.5 thickness)
– one red crystal and one black crystal (a little bigger)
– black thread
– craft glue
– round nose pliers


Step 1 – The Web

Place the magnet on the cardboard …


… and draw its contour.


Inside this contour start drawing the web. The drawing should be waterproof.

Fix a center of the web,…


… draw lines from it to the edge. The lines shouldn’t be perfect.


Then link the lines using horizontal ones. Like this.


Cut out the disc with the web.


Like this.


Step 2. Assembling the magnet

Apply a generous layer of glue on one side of the magnet…


… like this.


Then place the web disc on it (with the drawing up)


Apply a layer of glue on the glass too…


… like this…


… and place it over the web.


Take a piece of thread and roll it around the magnet, just under the glass. Don’t pull hard. It just need to be on the glue.


Let it dry well.


Step 3. The Spider

Cut a piece of black wire – about 4 cm.


Make a loop on one end.


Add the crystals – first the red one…


…  then the black one.


Make a closed spiral at the other end, letting 0.5 cm of wire to the crystals.


Place the crystals at the ends of this wire. This is the spider body.


Now we’ll make the legs of the spider.

Cut three pieces of wire about 4 cm each.


Take one piece and start turning it around the spider body, between the crystals. Turn it around for 3-4 times.


Take care that the remaining wire is equal on both sides.


Add the second piece of wire the same way.


Then the third.


Is time to bend its legs. At about 0.5 cm of the body, bend the wire like in the picture.


Do the same for all the legs.


To prevent scratches, make a little loop on the end of every leg.


Step 4 – Adding the spider

Put the black thread through the loop near the red crystal…


… and make a knot. Like this.


Now the magnet is ready to decorate any metallic surface 😉


Isn’t this Spider Web magnet adorable?  I’m not sure a spider and its web is adorable, but if any should be…. this should be the one.  I love how the spider dangles from the web.  It’s perfect as a magnet this Halloween…. or anytime of the year.

Technorati Tags: , , , , , , , ,

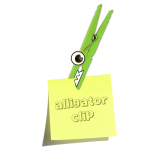
Making Alligator Clips Fridge Magnets With Clothespins Craft Idea for Kids

Do you want to learn how to make this adorable alligator / crocodile clip? When it is done, you can stick it on the refrigerator and post your memos in the alligator’s mouth. It is super easy to make, learn how to below…


Making Alligator Clips Fridge Magnets With Clothespins Craft Idea for Kids


Making Alligator or Crocodile Clips Fridge Magnets With Clothespins Craft Idea for Kids

Crafts Materials Needed

– Clothespin

– Green Paint or Green Sharpie Marker

– Googly Eye

– Magnet

– Glue

– White Paper or Paper Plate or Cup for Alligator’s Teeth


Making Alligator Clips Fridge Magnets With Clothespins Craft Idea for Kids


Step 1


Making Alligator Clips Fridge Magnets With Clothespins Craft Idea for Kids


Paint the Paper Clip Green and Let Dry. If you don’t have paint or you are not allowed to use paint, you can use a green marker, preferably  a permanent marker, such as a Sharpie marker.


Step 2 – Pick The Better Option


Making Alligator Clips Fridge Magnets With Clothespins Craft Idea for Kids


If you put the teeth and eye on the smaller end (the end that opens), you can use it as a clip that looks like the alligator is biting on your memos / notes.

However, putting the eyes and mouth on the larger end looks better (see below). So it is up to you.


Making Alligator Clips Fridge Magnets With Clothespins Craft Idea for Kids


Either way, cut out zig-zags for teeth and use them as teeth and glue them on the end you choose. And put a big googly eye on the top for the eye.

Step 3


Making Alligator Clips Fridge Magnets With Clothespins Craft Idea for Kids


Glue magnets on the opposite side of the clothespin so that you can stick it to the fridge.

End Result


Making Alligator Clips Fridge Magnets With Clothespins Craft Idea for Kids


This is what your finished Alligator / Crocodile Fridge Magnet clip looks like. I hope that you had fun.

Here is our video on how to Make an Alligator Clothespin Fridge Magnet.

Technorati Tags: , , , , , , , , , , ,

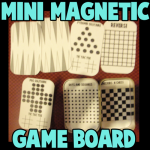
How to Make a Magnetic Travel Board Games Set with Altoids Tins Craft for Kids

Today I will show you how to make a really cool travel board games kit out of magnets, paper and an altoids tin. This is a great travel game board system that you can stick in your pocket to bring to school with you to play on the bus, in the cafeteria, or what ever. You could even bring it in the car with you to play with your sisters and brothers with. Or you can just play solo since there are 2 different solitaire games to play.


How to Make a Magnetic Travel Board Games Set with Altoids Tins Craft for Kids


How to Make a Magnetic Travel Board Games Set with Altoids Tins Craft for Kids

Crafts Materials Needed

– Altoids Tin
– Magnetic Tape, Magnetic Sheets, or Old Unwanted Fridge Magnets
– Paper
– Paste / Glue
– Scissors

First Print Out These 2 Pages


Today I will show you how to make a really cool travel board games kit out of magnets, paper and an altoids tin.


Click on Image Above to Print Out Game Boards Inserts


Today I will show you how to make a really cool travel board games kit out of magnets, paper and an altoids tin.


Click on Image Above to Print Out Game Pieces


How to Make a Magnetic Travel Board Games Set with Altoids Tins Craft for Kids


See this altoids tin…soon it will be your favorite game to take with you in your pocket.

Step 2


Making Magnetic Chess Checkers and Dots and Squares Game Boards


Cut out the game boards and just place the ones that you want to use within the tin. You don’t even need to glue them in…they will just stay inserted.


Step 3


Making a Backgammon Game Boards Kids with Magnets


If you want to use backgammon, then glue both of them to the back of the tin…as I did in the picture above.

Step 4


Making Magnetic Chess Pieces


Cut out the game pieces and glue them to the magnets.  For the Dots and Square game…you can just cut out thin slits of magnet to use as the lines.

Step 5


Backammon, Pegs Solitaire, Pyramid Solitaire, Dots and Squares Checkers and Chess Games


Above you can see all of the game inserts that come with this craft.

Here are Instructions on How to Play the Following Games:

Peg Solitaire Cross

Peg Solitaire Pyramid

Dots and Squares

Checkers

Chess

Backgammon (needs dice)

Reversi

Tic Tac Toe

Technorati Tags: , , , , , , , , , , , , , ,

How to Craft a Chinese Dragon Fridge Magnet Craft for Chinese New Year

In ancient China, dragons did not breathe fire. Dragons were wise and caring. They guarded the wind, the rain, the rivers, precious metals and gems. So dragons are an important part of many Chinese festivals, including Chinese New Year. Let’s celebrate it by crafting this fridge magnet with the mini version of the dragon used during holiday parades and festivities.This crafts ideas was contributed by Laura from Dacian Moon Handmade

You Might Also Like Our Other Chinese New Year Crafts


How to Craft a Chinese Dragon Fridge Magnet Craft for Chinese New Year

CRAFTS MATERIALS NEEDED:

– paper (not too thin)
– scissors
– design template (uncoloured dragon head and tail)
– 4 magnets
– craft glue
– ribbon (about 15 cm)
– paints
– paintbrush


Step 1.

Print the Head and tail of the dragon, then paint them in any way you want your dragon to be. My dragon will guard the rain so it will have colours inspired by it. Blue and white like raindrops, red and yellow like lightnings and a little bit of dark red because of the storm 🙂


Here are my dragon head and tail painted. Let them dry well.


Step 2.

With the scissor, cut out the head and the tail.


Now we are ready to the next step.


Step 3.

Cut a piece of paper of about 7.5 cm length and the same width as the ribbon (or a little bit larger)


Fold it to form a triangle (2 cm x 2 cm x 1 cm) and fold the remaining 2.5 cm around the triangle


Apply a layer of glue on it,


press and it should look like this:


Step 4.

Lay flat the ribbon and mark the places where the magnets will be (the magnets are corresponding to his head, legs and tail). Take care that two of them must be close to ribbon ends.


Apply a layer of glue on one magnet…


… and place it on it’s place.


Do the same with the other magnets.


Step 5.

Turn the ribbon with the magnets down.
Apply a layer of glue on one large face of the triangle…


… and place it on the ribbon, where you want the head to be. Let it dry.


Apply some glue on the head (on unpainted face)…


… and stick it to the triangle, like in this photo.


Now, our dragon have a head 🙂


Step 6.

Apply a layer of glue on the first part of the tail (on unpainted face, of course).


And stick it where you want the tail to be (usually on the other end of the ribbon).


And… That’s it!
This is my Dragon, Guardian of Rain, in his place on the fridge 😀


Technorati Tags: , , , , , , , , , , ,