How to Make a Set of Christmas Napkins

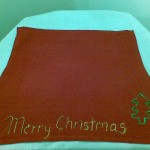
I have an easy craft for you today since the last two crafts I posted were a bit more complicated.  Today I’m going to show you how to Make a Set of Christmas Napkins perfect for the Holiday Season.  You can choose to use them to decorate your Holiday table or give them as a gift.  The choice is yours.  So, let’s get started.

Check out our other Christmas Crafts.


Image095


Materials Needed

Acrylic Glitter Glue – gold, green

Plain Red Napkins

Crayon


Image070


Step 1

Wash, dry and iron the red napkin (you don’t want it to shrink after you write on it).


Image064


Step 2

Write or draw the design you want with crayon. Be as creative as you like.


Image068


Step 3

Go over the crayon writing with acrylic glitter glue.  Do it slowly and make sure you do not spread it over any other part of the napkin.


Image069


Step 4

Allow it to dry overnight. Iron on the back of the napkin. Your napkin can now be packed and gifted or used by you for the Holiday Season.

Feel free to eat wildly from now thru the entire Christmas Season because washing it gently with water and soap will not ruin the design.  So, did you decide to give these Christmas Napkins as a gift or did you keep them for yourself?  Let me know in the comments below.  Also, let me know how your Christmas Napkins turned out by taking a picture of them and posting them with your comment.

Technorati Tags: , , , , , , , , , , ,

How to Make Egg Head Christmas People

I have a fun craft for you today.  I’m going to show you how to make Egg Head Christmas People out of eggshells.  You can even make an entire series of egg people…Use your creativity to make angels, shepherds, Mary and Joseph. These make great tabletop Christmas decorations…. so make a few.  Let’s get started.

Check out our other Christmas Crafts.


Image005


Craft materials required:

Thick purple paper

Thick brown colored paper (or any skin color shade)

Egg Shell

Glitter Glue

Gold Paper

Permanent Marker

Glue

Scissors


Image006


Step 1

Take a square piece of purple paper.


Image105


Step 2

Roll it to make a cone and glue the end to hold it in place. Cut the edge to form a perfect cone that will stand as shown.


Image106


Step 3

Wash and dry an egg which has been broken from one end and emptied as shown.


Image100


Step 4

Cut a strip of gold paper and snip the edges to make a zigzag design as shown.


Image104


Step 5

Roll the strip and glue. Glue the crown to the top of the head as shown.


Image107


Step 6

Take a small strip of brown card paper and fold in the center as shown.


Image001


Step 7

Glue the ends of the paper strip to the cone as shown to form folded hands.


Image002


Step 8

Draw a face using a permanent marker.


Image003


Step 9

Decorate the clothes with glitter glue as shown


Image005


Isn’t it beautiful?  Who would have thought that this could have been started from an eggshell.  But, of course it was.  Please let me know in the comments below how your Egg Head Christmas People turned out.  And, don’t forget to share a picture in your comment…. I’d love to see them.

Technorati Tags: , , , , , , , , , ,

Making a Valentines Day Pinwheel Sweet Candy Gift Box Craft for Kids – Part 2

This is part 2, today we will make the upper part (the vane – pinwheel part). Laura from Dacian Moon Handmade will show you today how to make a complex looking, but very easy to do, Valentine’s Day Candy Gift box with sweets or candies.

Visit Part One of Making a Valentines Day Pinwheel Sweet Candy Gift Box Craft for Kids

Here are Even More Valentines Day Crafts Ideas

Making a Valentines Day Pinwheel Sweet Candy Gift Box Craft for Kids – Part 2


Making a Valentines Day Pinwheel Sweet Candy Gift Box Craft for Kids – Part 2


CRAFTS MATERIALS NEEDED (for part 1 and 2):

– colored paper (not too thin) – two squares ~15 cm and two other of ~5 cm
– scissors
– paint marker (red)
– glitter glue (to match the paper colours, in my case, gold and blue)
– 1 flexible straw (is not important to be flexible)
– one piece of crepe
– 1 pin
– pencil
– candies


Step 1

Take the second large square of coloured paper.


Fold it in half then unfold.


Do the same in the other direction. This is the same like the first part.


Step 2

Fold one half in half again.


Then the other half.


Fold again the halves …


… to obtain this little square.


Step 3

Unfold the last two.


Step 4

Keep the center immobile …


… and open one half like in the picture.


Repeat on the other side. This will lift the edge.


Flatten the edge like this:


Step 5

Turn it with the worked part to you…


… and repeat the step 4.


Step 6

Lift the upper right part and fold it up.


Like this.


Now lift the lower left part and fold it down. Now we have a vane that will spin in the wind.


Step 7

Take one little square…


… and fold it at least four times (in cross)


With the scissor make a criss-cross cut around one corner.


Like this.


Now unfold: we have one of the center pieces.


Step 8

Cut a circle from the crepe, or if you want, cut it the same like in the step 7.


Step 9

Cut a little blue circle.


Step 10

Place the pin through all the center pieces…


… then through the vane …


… and finally through the flexible straw.


Step 11

Now is time to assemble the two parts.
With the scissor, cut the top of the lower part, just enough that the straw to pass.


Like this.
Note: if you want to be extra-sure of it, place a layer of craft glue on the back side, where the straw gets out of the paper. Let it dry well.


Step 12

Fill the lower part with candies.


Last Step

From the other little square…


… cut out a heart.


Adorn it with glitter glue and write „Happy Valentine”, and place it beside the straw in the top of the lower part.
Note: you can glue the heart on the straw, if you want.


Visit Part One of Making a Valentines Day Pinwheel Sweet Candy Gift Box Craft for Kids

Here are Even More Valentines Day Crafts Ideas

Technorati Tags: , , , , , , , , , , , , , ,

Making a Valentines Day Pinwheel Sweet Candy Gift Box Craft for Kids – Part 1

Laura from Dacian Moon Handmade will show you today how to make a complex looking, but very easy to do, Valentine’s Day Candy Gift box with sweets or candies. This is a two part, step by step crafts tutorial for kids or someone of any age. In this part we will make the lower part of this candy box….(the one with candies).

GO TO PART 2

Here are Even More Valentines Day Crafts Ideas


Making a Valentines Day Pinwheel Sweet Candy Gift Box Craft for Kids – Part 1


Making a Valentines Day Pinwheel Sweet Candy Gift Box Craft for Kids – Part 1

CRAFTS MATERIALS NEEDED (for part 1 and 2):

– colored paper (not too thin) – two squares ~15 cm and two other of ~5 cm
– scissors
– paint marker (red)
– glitter glue (to match the paper colors, in my case, gold and blue)
– 1 flexible straw (is not important to be flexible)
– one piece of crepe
– 1 pin
– pencil
– candies


Step 1

Take one of the large pieces of paper and fold it in half, then unfold.


Do the same in the other direction. It will look like that:


Step 2

Bring one corner to the middle and press well.


Do the same with all the corners.


Step 3

Turn the new square on the other side.


Bring the corners to the center again…


… like that.


Step 4

Place it to the table with one corner to you (keep it on the same side)


And bring the upper corner over the lower one. Press well.


Step 5

Now, keeping immobile the lowest corner, bring the right corner over it.


It will look like this.


Turn on the other side and bring again the right corner over the lowest one…


… like this.


Step 6

Open the edges.


Then pull gently the other ones…


… and we have the lower part ready to be filled with candies 🙂


Note: you can use this to store various things and it will look pretty on your desk.

GO TO PART 2

Here are Even More Valentines Day Crafts Ideas

Technorati Tags: , , , , , , , , , , , , , ,

How to Make Hanukkah Decorations Star Ornaments Arts & Crafts Project for Jewish Kids

Hanukkah starts tonight so forgive me for not putting up some crafts earlier. Make  this adorable Hanukkah star with some Popsicle sticks and glitter glue. They’re so easy to make that you can make lots of them and hang them all over the house as you celebrate Hanukkah this year. Enjoy and have fun tonight and for the next week.


Image053


How to Make Hanukkah Decorations Star Ornaments Arts & Crafts Project for Jewish Kids

Craft materials required:

Popsicle sticks

Craft glue

Blue and silver glitter glue ( acrylic glitter glue is better)

Some thread


Image174


Step 1

Glue the ends of 3 sticks to form a triangle as shown


Image175


Step 2

Add a 4th and 5th stick as shown


Image177


Step 3

Glue the 6th stick as shown


Image178


Step 4

Use glitter glue to decorate the star. Allow it to dry


Image183


Step 5

Tie a thread through the top as shown. Now hang the star wherever you like.


Image184


HANUKKAH CRAFTS ACTIVITIES & IDEAS FOR JEWISH CHILDREN

It is almost Hanukkah time so check out Our Mega List of Hanukkah Crafts for KidsMega List of Crafts for Jewish Kids

Technorati Tags: , , , , , , , , , , , , ,