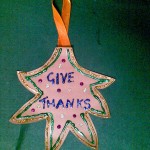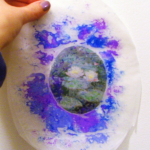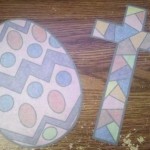
How to Make Stained Glass Easter Ornaments

For this craft you will learn how to turn normal paper into a fun, translucent stained glass decoration which you can hang on a window. It’s a definite eye-catcher.  In this craft we will be making an Easter decoration that will look gorgeous hanging from any window.  You can chose to print off the templates I have below or you can simply draw and color your own…. the choice is yours.  So, grab the materials needed and let’s get started.
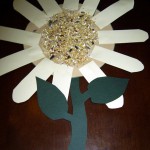
Check out our other Easter Crafts.


How to Make Stained Glass Easter Ornaments


Materials Needed

Sheet of paper
Printer, or a thick black marker
Crayons, colored pencils and/or markers
Safety scissors
Vegetable oil
Cotton ball
Paper towels
Newspaper

Step 1

Print out the design or draw your own with a thick black marker. You can print out these templates (one cross, one egg, or a sheet with one of each).

Click on template image below to make larger and to print.


Step 2


Color the design however you see fit, make sure to use brighter colors so the light shines through when finished. Markers provide the most vibrant colors but be wary of purples and reds when only using them.


Step 3


Cut out the designs, leaving some of the black outline.


Step 4


Flip the designs around and put them face down on the newspaper. Apply oil over the entire back of each design using the cotton ball or paper towel.


Step 5


Lay the designs between two sheets of paper towel and blot and/or rub off the excess oil. Be sure to be gentle, this is only paper after all.


Step 6


Hang your new beautiful stain glass decoration outside or in a window so it can catch the sunlight.

Doesn’t this make for a beautiful Easter decoration?  Any window will look beautiful with this hung up on it.  Take a picture of your Stained Glass Easter Ornament and post it along with a comment in the comment section below.  I would love to see how your ornament turned out.

Technorati Tags: , , , , , , , , , , , , , ,

How to Make a Sunflower Full of Seeds

Spring is literally right around the corner.  And, I thought since Spring is almost here that we could make a beautiful sunflower full of seeds to hang up in your house to get you in the Spring spirit.  If you are feeling a bit of the early spring blah’s, or simply want an easy craft to do with your children, then this is the perfect craft for you.  The finished sunflower was made by a 4 year old so this is an excellent preschool craft.  So, grab the materials needed and let’s get this fun Spring craft started.

Check out our other Spring Crafts.


sunflower-finished


Materials Needed

  • Construction paper (brown, yellow (I used light yellow), green)
  • Scissors
  • White Glue
  • Seeds (I used a mixed seed but you can use sunflower seeds only)
  • Small Plate (to create a circle)
  • Markers


supplies


Step 1

After you have gathered your supplies, place the plate on the brown construction paper.  If you have a compass, you can use that but many times, I find that people don’t have some things handy.  Using a marker, trace around the plate to make a circle.  Cut out the circle and set aside.


circle


Step 2

With the yellow paper, cut out small finger shaped (or petal shaped) strips with a rounded edge on the top.  Cut about a dozen of the shapes and set aside for later. If your child is skilled at cutting, you can draw out the shapes and then have her cut them for you.


Sunflower Leaves


Step 3

Draw the stem and leaves in the green construction paper and either cut it out yourself or have your child cut it.


sunflower-stem


Step 4

Once you have everything cut out, it is time to assemble the sunflower.  Start by gluing the “petals” around the outer edge of the circle.  Once your child has placed all the petals, have them place a small dot of glue onto the front of the stem and then attach it to the back of the sunflower.


supplies-2


Step 5

Spread glue to the center of the sunflower on the front and then spread seeds across the glued surface.  Tap off the excess and then lay it flat to dry.


seeds


Once the artwork is dry, you can hang it on the wall or in a window to bring a bit of sunshine into your house…. even if it is raining outside.  Enjoy!!

Technorati Tags: , , , , , , , , , , ,

14 Fun Snowflake Crafts for Winter


14 Fun Snowflake Crafts for Winter


Winter is well on its way….. and when you think of Winter what do you think of?  I know what I think of….. snow.  So, in honor of Winter and snow today’s craft is all about snowflakes.  I scoured the internet to find some really awesome snowflake crafts.  And, there are some really cool snowflake crafts out there.  So, today I’m going to present you with 14 Fun Snowflake Crafts for Winter.  For some of these crafts you will need to know how to make a snowflake, so check out these great snowflake patterns.

Check out some of our Snowflake Crafts.

14 Fun Snowflake Crafts for Winter

(1) Multicolor Snowflake Wreath


Snowflake Wreath


Here is a really cute Wreath perfect for the Winter Season.  It turns out quite beautiful.  BHG shows you how you too can make this Winter Wreath.  Made from left over card stock from all those Christmas Cards you got during the Christmas Season.  What a great way to recycle those greeting cards.


(2) Sparkly Snowflake


Sparkly Snowflake


Now this is a beautiful snowflake craft.  Made from long and short sparkly beads this winter craft turns out lovely…. perfect for decorating the house for this Winter Season.  CountryLiving shows you how to do this Snowflake craft step-by-step…. you have to scroll to Slide #2.


(3) Wooden Snowflake


Wooden Snowflake


Now this is a fun Snowflake Craft perfect for the youngest of crafters.  Made from Popsicle sticks, glue and fake snow…. this craft promises to be a lot of fun.  You can learn how to do this craft by going to Crafts-for-all-Seasons.


(4) Pipe Cleaner Snowflake


Pipe Cleaner Snowflake


What child doesn’t like a pipe cleaner craft.  Pipe Cleaners are just so much fun to make crafts with…. and this Snowflake craft is no exception.  Check out the MarthaStewart site to get the entire step-by-step tutorial.


(5) Snowflake Window Clings


Snowflake Window Clings


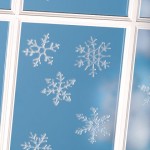
I don’t know about your kids, but I know my kids love window clings.  They love decorating the windows for all the Holidays.  Well, winter is no exception.  Imagine decorating the windows with Snowflakes that you and your child made yourself.  FamilyFun shows you how to achieve this.


(6) Recycled Plastic Ring Snowflake Craft


Recycled Plastic Ring Snowflake Craft


Here is a very cool snowflake craft because it is made out of recycled materials.  FreeKidsCrafts shows you how you can take those 6-pak ring holders from soda and make them into beautiful snowflakes that you can hang proudly this Winter Season.


(7) Q-Tip Snowflakes


Q-Tip Snowflakes


It’s hard to believe that something made from Q-Tips can turn out so beautifully…. but it does.  Made with Q-Tips, glitter and glue this Snowflake craft is not only fun…. but it also turns out perfect to hang up this Winter Season.  Check out AllFreeCrafts for the step-by-step “how-to”.


(8) Snowflake Puzzle


Snowflake Puzzle


Here is an interesting Snowflake Craft.   This easy craft is made from Popsicle sticks and black marker.  BusyBeeKidsCrafts shows you how you can simply take a Snowflake picture and make it into a puzzle just by adding it to a row of Popsicle sticks and cutting the picture with scissors…… this makes it into a puzzle.  Simply mix up the pieces and try to put it back together again.


(9) Woven Snowflake


Woven Snowflake


This woven snowflake is a great craft for kids of all ages.  Made from Popsicle sticks, yarn and glue…. you will have this snowflake craft finished in no time.  Make a few and decorate the whole house this Winter Season.  Check out the “how-to’s” of this craft over at ActivityVillage.


(10) Button Snowflakes


Button Snowflakes


HandMadeBeginnings has the right idea for a Snowflake Craft…. make the snowflakes out of Popsicle sticks and Buttons.  The idea is so easy, but yet very creative.  I love it.  And, I love how the snowflakes turn out.  She explains how taking these snowflakes and adding string will make for great window decorations.  I have to agree.


(11) String Snowflake


String Snowflake


Here is a great snowflake craft for the older children.  Basically this snowflake is made from white string and some fabric stiffener, but look how magnificent it turns out.  The snowflake craft would look awesome hanging in a window by itself or in groups.  Check out FreeCraftUnlimited for the details.


(12) Sparkly Snowflake Mobile


Sparkly Snowflake Mobile


This is a cool craft that when done looks great hung from the ceiling.  Made from paper and glitter this snowflake craft will look festive this Winter Season hung in a classroom or even a child’s bedroom.  Get all the craft details over at Kaboose.


(13) Beaded Snowflake


Beaded Snowflake


I love, love, love this snowflake craft.   I dig that they used pearls in this craft….. it just gives this beaded snowflake a really wintery look.  I found this craft over at Crafts-For-All-Seasons and they did a really beautiful job putting this snowflake craft together.  Make sure to check it out.


(14) Lace Snowflakes


Lace Snowflakes


Who would have thought that Lace can look so much like a snowflake?  But, when put together the right way…. it really does.  AllFreeCrafts did a really great job coming up with this snowflake craft.   They simply added lace to wire to create this beautiful snowflake.  Now, that’s creative.

Technorati Tags: , , , , , , ,

Ideas for Displaying Your Kids’ Artwork So You Can See Your Fridge Again

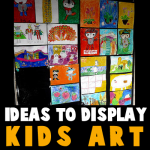
As a parent, I love receiving beautiful artwork from my children. However, there comes a point when you feel like your entire refrigerator is covered with artwork. I have 4 kids, so not only is my fridge covered, but my fireplace’s mantle, my kitchen window, and the rest of my windows are all being taken over with artwork. This got me thinking…what else can I do with the artwork? I would love to see my refrigerator again…what color is it…I want to know….maybe soon I can find out again. 🙂


Ideas for Displaying Your Kids' Artwork So You Can See Your Fridge Again


Now for the ideas. Please comment below to add your own ideas or suggestions…everyone can contribute.

(1) Clothesline Art


Hang childs artwork with clothespins


Hang a Clothesline in your child’s room or playroom (high enough that the child can’t get hurt) and then use clothespins to hang your child’s art.

(2) Curtain Hangers for Art


drapes artwork


This is similar to the clothespin idea, but instead by a curtain hanging system. Instead of hanging curtains with the clips, hang the artwork.  This idea comes from Project Nursery … visit it to find out how she did it.

(3) Plexiglass Table Cover to Display Artwork


Plexiglass Table Cover to Display Artwork


There is a great how-to article, on the Examiner.com, about making a Plexiglass table cover in order to display artwork underneath. You can just go to Home Depot or Lowes and have them cut down a sheet of plexiglass to the same size as your table. Then just  place the plexiglass on top of your child’s art that you want to showcase.

(4) Hang Clipboards to Display Art


Hang Clipboards to Display Art


On a Blog called Clean and Scentsible, we found another way to display your child’s artwork. Hang Clipboards, and place newest artwork on the top layer that is showing. This is a really smart and sensible way to display your child’s artwork.


(5) Vertical Lines of Hanging Yarn


Vertical Lines of Hanging Yarn


I found a great example of hanging art from vertical lines of yarn or string or wire on a site called Spiral Montessori Mama. As this talented teacher / blogger suggests…just hang yarn from the ceiling with tape….then as your child brings home artwork just tape it to the yarn. I like how this teacher places a colorful piece of paper behind each piece of art to sort of frame it or mat it.

(6) Paint a Magnetic Wall – Maybe Even Chalkboard Paint


Paint a Magnetic Wall - Maybe Even Chalkboard Paint


On Zillow.com, I found a great idea. How about paint an entire wall with magnetic paint and then covering it with chalkboard paint (optional). You can then display all of your child’s artwork on a giant wall, instead of your refrigerator. Just a note…I did the same thing…I put 2 coats of magnetic paint and then a coat of chalkboard paint. It isn’t magnetic…although the chalkboard paint works great. I am just telling you this so you know that you might need to coat the wall with many coats of magnetic paint for it to work.

(7) Frame Them on a Special Wall


Frame Kids Artwork on a Special Wall


How about creating a special museum wall in your house….all with your child’s framed artwork. The above picture comes from Inside-OutDesigns.com.

(8) Using a Pocket Display


Using a Pocket Display


I found a simple pocket display case that has 9 pockets on each side of the case. You can then hang it either on a door knob or on the wall without damaging it.  If you want to make one of these one your own (so you don’t have to buy it), you can see a similar sort of creation here.

(9) Give Art as Gifts


Give Art as Gifts


This artwork was found on the blog called Quince and Quire.  This blogger sewed her child’s artwork to a moleskin sketchbook to give to somebody as a gift. This is a great idea…but for somebody who hates sewing, this sounds tedious….how about just using hot glue or even colorful duct tape as a frame. Another idea is finding a notebook that has a clear cover and attaching it underneath the clear cover.

(10) Mod Podge Your Child’s Artwork to Anything


Mod Podge Your Child's Artwork to Anything


You can Mod Podge your kids’ artwork to coasters or any other item such as your child’s bookcase or wooden bed. This will bring your child’s room alive with color…and it is quite easy to do. This was found on the site…Mod Podge Rocks!

(11) Use Artwork for Gift Wrapping Paper


Use Artwork for Gift Wrapping Paper


On Krafty Guts Blog, the blogger used her child’s artwork for wrapping paper. This is a great idea…this makes the child feel so special.

(12) Laminate the Artwork and Use as Placemats


Laminate the Artwork and Use as Placemats


On the blog, Make Create Do, there is an example of a place mat made from a child’s piece of art. This is also a great idea. How special is it to your child that you would make a permanent use for his creativity. Awesome idea.

(13) Showcase Art with Digital Frames


Showcase Art with Digital Frames


I love, love, love this idea. How about you scan all of your child’s work and put them all on permanent display in a digital frame.

(14) Use a L’il DaVinci Store and Display Art Cabinet


Use a L'il DaVinci Store and Display Art Cabinet


This is a really cool idea to have a cabinet that holds up to 50 pages of artwork. It then has a hinge that lets you open up the frame like a book to turn thru the pages. I found it here, see if you like it when you take a closer look.

(15) Make a Puzzles, Notebooks, Stickers, Magnets, Coffee Table Books and Other Items from Artwork


Make a Puzzles, Notebooks, Stickers, Magnets and Other Items from Artwork


On sites like Snapfish.com, you can create all sorts of things from your child’s artwork, such as stickers, puzzles, magnets, notebooks, coffee table books, posters, t-shirts, playing cards, etc.

Technorati Tags: , , , , , , , , , , ,

How to Make Stained Glass Valentines Day Heart Window Hanging

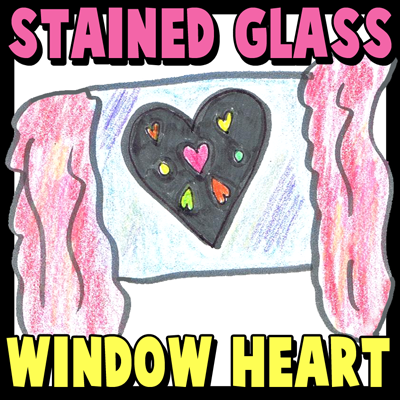
Today we will show you how to make a faux (fake) stained glass window heart. It is so easy that I bet if you try one, you won’t want to stop. When you tape these on your window, the beautiful sun shines through them and they look so beautiful.  This is a wonderful decoration to celebrate the ones you love for Valentine’s Day.

Here are Even More Valentines Day Crafts Ideas


How to Make Stained Glass Valentines Day Heart Window Hanging : Kids Craft


How to Make Stained Glass Valentines Day Heart Window Hanging : Kids Craft

Crafts Materials Needed

– Scissors
– Black Paper
– Colorful Tissue Paper or Cellophane Sheets

Step 1


Step 1 : Stained glass valentines day hearts window craft


Take a piece of black construction paper (or other type of black paper) and fold it in half.

Step 2


Step 2 : Stained glass valentines day hearts window craft


Draw a half of a heart on the folded piece of paper, along the edge. Then cut out the heart.


Step 3


Step 3 : Stained glass valentines day hearts window craft


Now draw shapes on the half of the heart…and while it is folded, cut them out.


Step 4 : Stained glass valentines day hearts window craft


This is what the heart might look like when you open it up, however, it would have your design on it.

Step 5


Step 5 : Stained glass valentines day hearts window craft


Now take pieces of colored cellophane or tissue paper and paste it behind the black paper.

Step 6


How to Make Stained Glass Valentines Day Heart Window Hanging : Kids Craft


Now when you tape it on the window, the sun will shine through it and it will look like a beautiful stained glass window. This is a wonderful decoration to celebrate the ones you love for Valentine’s Day.

Here are Even More Valentines Day Crafts Ideas

Technorati Tags: , , , , , , , , , , , , ,

Making a Greeting Card Display Wall Hanger Crafts Idea for Kids

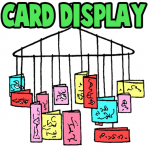
Since Valentine’s Day is coming up soon, how about learning how to make this Greeting Cards Display Craft. You can hang it on a picture hook, or hang it from other high places. Then you can look at the love that people sent to you in Valentine’s Day cards, Christmas cards, Birthday cards, or whatever.


Making a Greeting Card Display Wall Hanger Crafts Idea for Kids


Making a Greeting Card Display Wall Hanger Crafts Idea for Kids

Crafts Materials Needed

– wire coat hanger
– scraps of ribbons, any color
– decorative paper or wrapping paper (optional)
– glue
– scissors
– tape measure or ruler


Step 1 (Optional Step)

Glue and wrap strips of decorative paper, wrapper paper, ribbon, or yarn all over the hanger so that the wire does not show anywhere.

Step 2

Have 15 to 20 ribbons of varying lengths—from 15 to 36 inches. Glue them on the hanger, both on the upper and lower parts, about 1 to 2 inches apart.

Step 3

These ribbons should be used to pin on, or glue on, Christmas cards, Valentine’s Day cards, or birthday cards, or whatever.

The hanger can be displayed on a picture hook anywhere in the house.


Greeting Cards and Valentines Cards Display Hanger Crafts Idea for Kids


Technorati Tags: , , , , , , , , ,

How to Make Paper Lantern for The Chinese New Years Celebration

The Chinese New Year is coming up and this crafts project reminded me of a Chinese Paper Lantern. Today, we will show you how to make this easy-to-make arts and crafts project. These are also great for birthday parties, Christmas decorations, and other joyous get-together celebrations where you need fun decorations. Have fun..the instructions are below.

Here are Even More Chinese New Years Crafts


How to Make Paper Lantern for The Chinese New Years Celebration


How to Make Paper Lantern for The Chinese New Years Celebration

Crafts Materials Needed

– Sheet of colored paper 9 inches and 6 inches wide

– Scissors

– Ruler

– Glue or Paste

– ( Optional ) Jar Cover Lid and Tape

– String to String Up the Lantern to a Tree or Something Else

Step 1


Step 1 : Making Chinese Paper Lanterns Arts and Crafts Project Ideas


Take a sheet of colored paper 9 inches and 6 inches wide and draw 2 lines 1/2 inch from each edge as shown in Figure 1.

Step 2


Step 2 : Making Chinese Paper Lanterns Arts and Crafts Project Ideas


Then fold the paper in the middle lengthwise. Now cut the paper as shown by the dotted lines in Fig. 2. These lines measure 1/4 of an inch apart. After all the cuts have been made, cut off the left-hand strip marked A in Fig.2.


Step 3


Step 3 : Making Chinese Paper Lanterns Arts and Crafts Project Ideas


Now open the paper. Figure 3.


bend the cut paper to form a circle. Paste end tabs B and C to those marked D and E.


Put paste on the end tabs, marked B and C, and bend the cut paper to form a circle. Paste end tabs B and C to those marked D and E. When this has been done you will have a paper lantern like the one shown in Fig. 4. Add a handle to the lantern. It is then ready to be used for a Halloween, a Christmas tree, The Chinese New Year,  or garden party decoration.

If desired, a jar lid / cover may be used for a bottom to your paper lantern. This cover must fit exactly into the space at the bottom of the lantern, and be pasted or Scotch-taped into place.


String Up Your Paper Lanters for a Party


Now String up those paper lanterns to help celebrate The Chinese New Year, or other fun party get-together…such as a birthday party.

Here are Even More Chinese New Years Crafts

Technorati Tags: , , , , , , , , , , ,

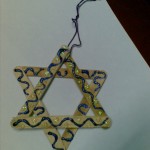
How to Make Hanukkah Decorations Star Ornaments Arts & Crafts Project for Jewish Kids

Hanukkah starts tonight so forgive me for not putting up some crafts earlier. Make  this adorable Hanukkah star with some Popsicle sticks and glitter glue. They’re so easy to make that you can make lots of them and hang them all over the house as you celebrate Hanukkah this year. Enjoy and have fun tonight and for the next week.


Image053


How to Make Hanukkah Decorations Star Ornaments Arts & Crafts Project for Jewish Kids

Craft materials required:

Popsicle sticks

Craft glue

Blue and silver glitter glue ( acrylic glitter glue is better)

Some thread


Image174


Step 1

Glue the ends of 3 sticks to form a triangle as shown


Image175


Step 2

Add a 4th and 5th stick as shown


Image177


Step 3

Glue the 6th stick as shown


Image178


Step 4

Use glitter glue to decorate the star. Allow it to dry


Image183


Step 5

Tie a thread through the top as shown. Now hang the star wherever you like.


Image184


HANUKKAH CRAFTS ACTIVITIES & IDEAS FOR JEWISH CHILDREN

It is almost Hanukkah time so check out Our Mega List of Hanukkah Crafts for KidsMega List of Crafts for Jewish Kids

Technorati Tags: , , , , , , , , , , , , ,

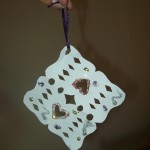
Easy to Make Winter Snowflakes Paper Cutting Crafts Ideas for Kids

This Winter activity is quick, easy and a lot of fun.  It helps the little ones to develop their hand eye co-ordination skills and, if you’re so inclined, you can use it to teach older children about symmetry.  Or you can just have fun making pretty Winter  snowflakes to hang around the house! You can hang snowflakes on your windows, doors, or walls to decorate for Winter time fun.


Easy to Make Paper Snowflakes for Winter That You Cut Out of Paper


Easy to Make Paper Snowflakes for Winter That You Cut Out of Paper

Easy to Make Paper Snowflakes Arts and Crafts Activities for Kids for Kids, Teens, Preschoolers


Craft materials required:

  • Squares of paper
  • Scissors
  • Glue
  • Glitters, sequins, etc


100_0856


1.  Fold your square of paper in half, and then in half again. Rinse and repeat. Be sure you leave the square thin enough to cut.


100_0858


I like to round off the corners; it gives the final product a more snowflake-y look.

2. Cut out different and interesting shapes and designs.  Be careful about cutting too much from the joins.  Unfold… oooh, pretty!


100_0860


100_0861


3. Use your glitter and sequins to decorate your snowflake.


100_0862


These look great grouped together on black cardboard – or, you could thread some ribbon through the top corner and hang it on your tree:


100_0863


Experiment with different shapes and colours.  Before long, you’ll be walking in a winter wonderland!

CHRISTMAS CRAFTS ACTIVITIES & IDEAS FOR KIDS

It is almost Christmas time so check out our Christmas Coloring Pages & Christmas Crafts for Kids Page to find some great Christmas crafts project ideas for kids to celebrate Xmas such as .. Advent Calendar Crafts ..Candy Cane Crafts ..Christmas Angel Crafts ..Christmas Cards Crafts ..Christmas Bells Crafts ..Christmas Coloring Pages .. Santa Coloring Pages .. Christmas Elf Crafts .. Christmas Gift Bags Crafts ..Christmas Gift Tags Crafts .. Christmas Games & Activities .. Christmas Nativity Scenes .. Christmas Soda Can Crafts .. Christmas Placemat Crafts ..Christmas Poinsettias Crafts .. Christmas Sewing Patterns .. Christmas Tree Crafts ..Christmas Tree Ornament Crafts ..Christmas Wreath Crafts ..Gingerbread House Crafts ..Gingerbread Man Crafts .. Mittens and Gloves Crafts ..Recycle Christmas Cards to Make Other Crafts ..Reindeer Crafts .. Winter Penguin Crafts .. Winter Snow Crafts .. Winter Solstice / Yule Crafts ..Santa Clause Crafts .. Santa Hats Crafts .. Santa’s Sleigh Crafts ..Snowflake Crafts ..Snowman Crafts .. Stocking Crafts .. Wrapping Paper Craft

Technorati Tags: , , , , , , , , , , , , , ,

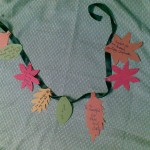
Thanksgiving Garlands Decorations Crafts for Kids

Here’s a beautiful Thanksgiving Fall leaves garland to decorate your home this Thanksgiving. What’s even better is that its a very meaningful craft to do , and will help you remember all that you’re thankful for. Its something your whole family can do together. So have fun doing it!!


Image108


Thanksgiving Garlands Decorations Crafts for Kids


Craft materials required:

Thick colored paper

markers

Black ribbon

Paper clips

scizzors


Image102


Step 1

Draw out different shaped leaved on different fall colored papers


Image103


Step 2

Cut them out as shown


Image104


Step 3

Distribute the leaves among all the members of your family . get each person to write something they’re thankful for.


Image105


Step 4

collect everyone’s leaves


Image106


Step 5

Use a paper clip to attach each leaf to the ribbon as shown


Image108


Step 6

Hang it somewhere where you can see it and be reminded of  all your blessings.

MORE THANKSGIVING COLORING PAGES AND THANKSGIVING ACTIVITIES & ARTS AND CRAFTS IDEAS BELOW

It is almost Thanksgiving time so check out our Thanksgiving Coloring Pages & Thanksgiving Crafts for Kids Page to find some great turkey and thanks-giving crafts project ideas for kids to celebrate Thanksgiving such as

Autumn / Fall Crafts ..
Cornucopia Crafts
..
Indian Corn Crafts
..
Pilgrim Crafts
..
Preschoolers & Toddlers Thanksgiving Crafts
..
Scarecrow Crafts
..
Thanksgiving Coloring Pages & Printouts
..
Thanksgiving Decorations Crafts
..
Thanksgiving Table Decorations Crafts ..
Thanksgiving Turkey Crafts ..
Thanksgiving Worksheets & Printouts

Technorati Tags: , , , , , , , , , , , , , , , , , , , ,

Thanksgiving Fall Leaf Hanging Decoration Craft for Kids

Here is a beautiful fall leaf decoration that you can hang on your wall or your door to celebrate Thanksgiving. Its very simple and easy to make. All you need is some paper, ribbon, scissors and glitter glue. The simple step by step instructions for this Thanksgiving crafts activity  follow.


Image148


Thanksgiving Fall Leaf Hanging Decoration Craft for Kids


Craft materials required:

Thick craft paper

glitter glue tubes- (Acrylic or 3D glitter glue works better)

ribbon

Scissors

pencil


Image110


Step 1

Draw out a leaf as shown


Image111


Step 2

Cut it out


Image112


Step 3

Write the words ” Give Thanks ” with pencil and go over it with glitter glue.

Decorate the rest with glitter glue


Image147


Step 4:

Turn it around and place a piece of ribbon as shown. Use cellotape  or glue to tape it in place


Image145


Step 5

Your fall leaf decoration is ready. Hang it on a wall for everyone to admire!!


Image148


MORE THANKSGIVING COLORING PAGES AND THANKSGIVING ACTIVITIES & ARTS AND CRAFTS IDEAS BELOW

It is almost Thanksgiving time so check out our Thanksgiving Coloring Pages & Thanksgiving Crafts for Kids Page to find some great turkey and thanks-giving crafts project ideas for kids to celebrate Thanksgiving such as

Autumn / Fall Crafts ..
Cornucopia Crafts
..
Indian Corn Crafts
..
Pilgrim Crafts
..
Preschoolers & Toddlers Thanksgiving Crafts
..
Scarecrow Crafts
..
Thanksgiving Coloring Pages & Printouts
..
Thanksgiving Decorations Crafts
..
Thanksgiving Table Decorations Crafts ..
Thanksgiving Turkey Crafts ..
Thanksgiving Worksheets & Printouts

Technorati Tags: , , , , , , , , , , , , , , , , , ,

Keep Kids Entertained Making Stained Glass Pictures Craft


Keep Kids Entertained Making Stained Glass Pictures Craft


How You & Your Kids Can Make This Faux Stained Glass Art Crafts Project


This “stained glass” picture is perfect for keeping kids entertained at a fun and safe activity on a rainy day. It is a bit messy so a newspaper-lined workspace is recommended, but cutting pictures from magazines and making crayon shavings will have children happily occupied for a while.


stained-glass-craft-what-youll-need


Crafts Materials That You Will Need:

Wax paper
Scissors
Crayons with a built in or separate crayon sharpener
Magazine pictures, cards, flowers, leaves – anything small and flat
Newspaper
Iron (and a grown up to use it)


stained-glass-craft-step-one


1. Cut out two pieces of wax paper in the same shape. If you’d like to incorporate an outting with this craft, take children around to look at local churches and draw the shapes of stained-glass windows they see on the trip. They can later cut out their wax paper to match one of the shapes. It’s easiest to fold a large piece of wax paper in half and cut through two pieces at once to make sure the shapes match up.


stained-glass-craft-step-two


2. Have children gather flat objects like flowers or leaves in the yard or cut up magazines or cards with pretty pictures. Place on one piece of wax paper.

3. Begin making crayon shavings by using the crayon sharpener and/or breaking up crayons. Children can choose colors that coordinate with their picture or object, or whatever strikes their fancy. This is likely to ruin crayons for further use, so you might want to buy cheap ones for the purpose.


stained-glass-craft-step-four


4. This is where the grown up steps in. Place the piece of wax paper with pictures and shavings on top of a layer of newspaper on your covered ironing board. Place second sheet of wax paper on top, and another layer of newspaper on top of that.


stained-glass-craft-step-five


5. On a medium heat setting, lightly iron over wax paper and newspaper, checking often to make sure you’re not burning anything. It should only take about a minute for all the crayon shavings to melt and the pieces of wax paper to bond together.


Keep Kids Entertained Making Stained Glass Pictures Craft


MORE FAUX STAINED GLASS CRAFTS & ACTIVITIES FOR KIDS FROM OTHER BLOGS

Crayon “Stained Glass” Cross Craft – Here is a simple craft to do with your children that would also results in some precious Easter decorations to hang from your windows.

Crafts for Kids: Stained Glass Leaves – Even if you’re not a crafty person (like myself), it’s worth trying to make crafts with your children now and then because they love it so much!

Craft Corner ~ Stained Glass Cross – Well, Easter is coming up, so here is a craft to help us remember what the Lord has done for us.  It is also quite pretty!

Easy Stained Glass – Lately I have been all about doing projects I have seen on other blogs, but here is something I actually came up with myself. (No doubt others have thought of this before me, but I patted myself on the back anyway.)

Kids Craft: Stained Glass Window – I remember growing up and making these stained glass windows with crayons with my mother – and loving to do it. Soooo I embellished a bit – being that I am now and adult – I figured it should look like someone at least over the age of 10 created this work of art!

Kisha’s Craft Corner: Beautiful Butterflies – If you’re like me, coffee brightens up your mornings. But now, with a little paint and some craftiness, those coffee filters can be used to brighten up your kitchen as well – in the form of beautiful butterflies with a stained glass look!

New Technique/Tutorial for you: Faux Stained Glass Melted Crayon Background – I love to play with techniques, especially when I can use the supplies on hand and come up with a interesting way to create backgrounds. So, I have been playing around with a technique that I saw on SCS, melted crayons. I did not want to drag out my iron and I wanted to see what would happen if I used waxed paper instead of foil.

Paper Stained Glass Christmas Trees – These Stained Glass Trees add a beautiful glow to the kitchen windows, giving the appearance of twinkly lights on a Christmas Tree. With each triangle tree cut up like a snow flake, it leaves just the right holes for colored tissue paper to shine in.

Stained Glass Art (for kids) – We are loving these bursts of color in our windows… being in the middle of February will make you appreciate such things!

Stained-Glass Crayons – A week ago, my preschool daughter came home from school with a heart-shaped crayon. She told me she made it in class with broken crayon pieces. She thought it was the best thing ever and asked if we could make some at home.

Stained Glass Eggs –  This craft was a SIMPLE one.

Wax and Paper – Earlier this week, Serena had her playgroup and the craft of the day was wax paper and crayon art. Delaney was thrilled by the pieces that Serena brought home and has been reminding us daily that we need wax paper.

Technorati Tags: , , , , , , , , , , , , ,