How to Make a Pumpkin Milk Jug Candy Holder

Last week I showed you how to make a Milk Jug Vampire Candy Holder.  Well, you seemed to have loved that idea, so I thought I would show you another cool Milk Jug Halloween Craft.  Today I’m going to show you how to make a Pumpkin Milk Jug Candy Holder perfect for handing out candy this Halloween.  Kids will love reaching inside this Pumpkin for the treats…. almost as much as your kids will love making it.  Keep in mind you will need some Adult Help for this craft as a knife and/or a scissor will be needed to cut open the milk jug.  So, let’s get started.

Check out our other Halloween Crafts.


How to Make a Pumpkin Milk Jug Candy Holder


Materials Needed

Milk Jug

Scissors

Knife (for adult only)

Orange, White, Green, Black & Red Paint

Brass Fasteners

Black Marker

Green Foam, Felt or Paper

Paper Plate

Glue

Candy


Step 1


Peel labels off milk jug.


Peel labels off milk jug.


Step 2


Cut milk jug in half.


Cut milk jug in half.


Step 3


Paint both sides orange.


Paint both sides orange.


Step 4


Use brass fasteners to attach both sides... to look like mouth is open.


Use brass fasteners to attach both sides… to look like mouth is open.


It should look like this.


Like this.


It looks like this from the back.


It looks like this from the back.


Step 5


 Draw eyes and nose.


Draw eyes and nose.


Step 6


Paint eyes white.


Paint eyes white.  I painted nose a lighter color.


Step 7


Paint red for lips.


Paint red for lips.


Step 8


Draw a leaf on foam, felt or paper.


Draw a leaf on foam, felt or paper.


Cut it out.


Cut it out.


Step 9


Roll some foam on a triangle like angle.


Roll some foam on a triangle like angle… like this.


It should look like this.


Like this.


Push top in and it stays in place on its own.


Push top in and it stays in place on its own.


Step 10


Push into open spout.


Push into open spout.


Step 11


Paint spout green.


Paint spout green.


Step 12


Outline features with black paint.


Outline features with black paint.


Step 13


Draw a letter C for each eye's pupil.


Draw a letter C for each eye’s pupil.


Step 14


 Draw rectangles on paper plate.


Draw rectangles on paper plate.


Glue in mouth.


Glue in mouth.


Step 15


Shove leaf in the spout.


Shove leaf in the spout.


Step 16


Fill with candy.


Fill with candy.

Wonderful!!  Wasn’t that fun?!  But, the fun doesn’t end there.  Use it to hand out candy to the Trick-or-Treaters….. they will love it!!

You might also like the How to make a Milk Jug Vampire Candy Holder ….. both crafts are perfect for Halloween.

Technorati Tags: , , , , , , , , , , , , ,

How to Make a Folded Paper Windmill

Today I am going to show you how to make a Folded Paper Windmill.  This windmill is so much fun to make and it is simply made from 4 sheets of paper.  The majority of the craft supplies needed can be found in your home so you can get started with this craft right away.  So, grab the materials needed and let’s get started.

Check out our other Paper Folding Activities.


How to Make a Folded Paper Windmill


Materials Needed

4 Sheets of Paper

Scissors

Paste/Glue

Ruler

Pencil

Paper Fastener


Top of Windmill

Step 1


Cut a square piece of paper


Cut a square piece of paper (such as 8 inches x 8 inches).


Step 2


Fold into 16 squares and then unfold.


Fold into 16 squares and then unfold.  Detailed steps are below.


Fold page in half.


Fold page in half.


Fold page in half again.


Fold page in half again.


Open back up.


Open back up.


Fold in half twice in the other direction.


Fold in half twice in the other direction.


Open back up again.


Open back up again.


Step 3


Cut 3 slits on both sides.


Cut 3 slits on both sides.


I am numbering the squares to help show you how to fold it.


I am numbering the squares to help show you how to fold it.


Step 4


This is the top of the windmill.


This is the top of the windmill.  The square will naturally fold into a house shape.  Paste in place as I will show you below.


Fold #8 over #12.  Paste.


Fold #8 over #12.  Paste.


Fold #9 over #5.  Paste.


Fold #9 over #5.  Paste.


Fold #16 over #4.  Paste.


Fold #16 over #4.  Paste.


Fold #13 over #1.  Paste.


Fold #13 over #1.  Paste.


View from one side.


View from one side.


View from other side.


View from other side.


House

Step 1


Start off again with 8x8 inch piece of paper, folded.


Start off again with 8×8 inch piece of paper, folded.


Step 2


Now, cut off the last column of squares.


Now, cut off the last column of squares.


It now looks like this


It now looks like this, above.


Step 3


Now, cut three slits on both sides.


Now, cut three slits on both sides.


Step 4


Fold the house and paste in place.


Fold the house and paste in place.


Windmill

Step 1


For the tall, lower part of the windmill... fold the paper so there are 15 squares


For the tall, lower part of the windmill… fold the paper so there are 15 squares (3 squares in each column).  Follow directions below.


Cut a piece of paper 8 inches x 10 inches.


Cut a piece of paper 8 inches x 10 inches.  Measure out lines 2 inches apart.  Fold on these lines.


Now fold the paper in half twice in the other direction.


Now fold the paper in half twice in the other direction.  Open back up.


Now cut off rectangle so there are 3 columns with 5 squares in each.


Now cut off rectangle so there are 3 columns with 5 squares in each.


Step 2


Now fold the paper into long rectangle, like above picture.  Glue together.


Now fold the paper into long rectangle, like above picture.  Glue together.


Now fold the paper into long rectangle, like above picture.  Glue together.


Like this.


Pinwheel

Step 1


Fold square piece of paper into fours.  Unfold.


Fold square piece of paper into fours.  Unfold.


Step 2


Cut slits on a diagonal.  Don't go thru to center.


Cut slits on a diagonal.  Don’t go thru to center.


Step 3


Bring all corners to center.


Bring all corners to center.  Put brass fastener thru center and into windmill top as seen in next pic.


Finished Windmill


And, there you have it….. you just finished making your Folded Paper Windmill.  How did you Windmill turn out?  Let me know in the comments below.  And, don’t forget to take a picture of your Windmill and share it in the comment as well.

Technorati Tags: , , , , , , , , , ,

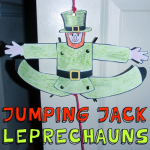
How to Make Jumping Jack Leprechauns for St. Patrick’s Day

I have a fun and easy craft for you today.  In this post I’m going to show you how to make a Jumping Jack Leprechaun for St. Patrick’s Day.  When made the way that I describe in this post the arms and legs are movable making this leprechaun actually do jumping jacks when the string is pulled.  The youngest of crafters will enjoy not only making this leprechaun craft, but also playing with it once it is finished.  So, grab the materials needed and let’s get started.

Check out our other St. Patrick’s Day crafts.


How to Make Jumping Jack Leprechauns


Materials Needed

Printer & Paper

Crayons (optional)

Scissors

Glue

Cardboard (optional)

Hole Punch

Paper Fasteners

String


Click on template image below to make larger and to print.

Color Template


Color Template


Black & White Template


Black & White Template


Step 1


Print out


Print out…. If you printed the black & white template then color it in.


Step 2


Cut out and glue to cardboard


Cut out and glue to cardboard if you want it really sturdy.


Step 3


Punch a hole in top hole on both arms and legs


Punch a hole in top hole on both arms and legs… Leave bottom hole on limbs unpunched.


Step 4


Now use paper fasteners and push thru body thru to bottom hole on legs and arms.


Now use paper fasteners and push thru body thru to bottom hole on legs and arms.


Step 5


String holes the way image says to


The red circles are where the paper fasteners have been placed.  Now, put string thru hole 1…. under and up into hole 2…. then tie knot.  Then pull under hole 3 and over and into hole 4.  Tie knot.


Like this


Like this… Make sure arms and legs are down before tying knot.


Tie knot.


Tie knot.


Do the same for leg holes.  Tie knot.


Do the same for leg holes.  Tie knot.


Step 6


Punch hole in hat and hang on door by string.


Punch hole in hat and hang on door by string.


Step 7


pull the string and his hands and legs pop up.


Hang it on a door knob…. pull the string and his hands and legs pop up.

And, there you go…. you just finished making a Jumping Jack Leprechaun for St. Patrick’s Day.  This is a wonderful decoration for St. Patrick’s Day and it is equally fun to play with.  Enjoy!!

Technorati Tags: , , , , , , , , ,

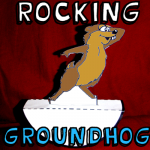
How to Make a Rocking Groundhog for Groundhog’s Day

Groundhog’s Day is coming up on February 2nd.   According to folklore if the Groundhog sees his shadow on Groundhog’s Day then winter will continue for another 6 weeks.  If he doesn’t see his shadow then winter will be ending soon.    So, in honor of Groundhog’s Day I’m going to show you how to make a Rocking Groundhog.  Rock the Groundhog craft back and forth and see if he sees his shadow.  It will be a lot of fun.  So, grab the materials needed and let’s get started.

Check out our other Groundhog Day crafts.


How to Make a Rocking Groundhog for Groundhog's Day


Materials Needed

Printer and Paper

Scissors

Paper Fastener or Staples


Click on Image Below to make Template Bigger and to Print off.  You can choose to print off a colored template or the black & white version.

Colored Template


Colored Template


Black & White Template


Black & White Template


Step 1


Print out Template.


Print out Template.


Step 2


Cut out the parts on the template.


Cut out the parts on the template.


Step 3


Cut out circle.


Cut out circle.


Step 4


Cut slit out of circle.


If you bend it (without making a crease) like this… you can cut the slit out easily.


Step 5


fold on both dotted lines


After slit is cut… fold on both dotted lines.


Step 6


Cut out support strip.


Cut out support strip.


Step 7


Fold on dashed line and then place inside the circle shape.


Fold on dashed line and then place inside the circle shape.


Step 8


Keep support in place with brass fasteners or a staple.


Keep support in place with brass fasteners or a staple.


Step 9


Push tab of groundhog into half circle rocker.


Push tab of groundhog into half circle rocker.


Rock it back and forth


Rock it back and forth.  Watch shadow move… We see it, but the groundhog doesn’t see it yet.

And there you have it…. you just finished making a rocking groundhog for Groundhog’s Day.  Isn’t he cute?  Rock him back and forth and see if he sees his shadow.

Technorati Tags: , , , , , , ,

How to Make a Log Cabin Paper Sculpture

For the past few days I have been showing you how to make different Thanksgiving crafts.  Well, today I’m going to continue with the Thanksgiving fun by showing you how to make a Log Cabin Paper Sculpture.  This is a fun craft and will show you how creative you can be.  Made from magazines or newspaper this is a clever craft perfect for the Thanksgiving season.

Check out our other Thanksgiving Crafts.


How to Make a Log Cabin Paper Sculpture


Materials Needed

Magazines or Newspaper

Glue, Tape or String

Pencil

Brown Paint (if wish to paint log cabin)

Scissors

Hole Punch (optional)

Paper Fasteners (optional)


Step 1


Cut off the two side margins and roll the page diagonally, using a pencil as a form to start the tube


Use colored pages from magazines (although you can use any paper you want…even newspaper which is easier to paint). These colored sheets create exciting patterns when rolled. Cut off the two side margins and roll the page diagonally, using a pencil as a form to start the tube. Hold the tube firmly with both hands. As you roll, the pencil will disappear. If you want to remove it before it disappears,then hold the tube with one hand and gently pull the pencil out, then continue to roll until you get to the end of the paper.


Step 2


Hold the tube with one hand and with the other apply a dab of paste or a piece of scotch tape and your tube is complete.


Hold the tube with one hand and with the other apply a dab of paste or a piece of scotch tape and your tube is complete. Don’t be discouraged if your first tube does not roll evenly; with a few tries you can make an excellent tube. Should your pencil disappear in the excitement of rolling the tube, complete the process, then place the tube between both hands and roll back and forth. The twisting will release your pencil.

A good way to attach the tubes to each other is to flatten the ends and bend them to the desired angle… then attach with scotch tape.  Holes can also be punched in the tubes… use paper fasteners to hold them together.


Another way to attach tubes is with string.


Another way to attach two tubes together is to tie them together with string.


Tubes can be joined together by inserting one end of a tube into the opening of another and gently twisting them together.


Tubes can also be joined together by inserting one end of a tube into the opening of another and gently twisting them together.


Step 3


Keep attaching your tubes together to form your log cabin.


Keep attaching your tubes together to form your log cabin.  This isn’t one of those crafts that I tell you every single step to make the finished craft.  This one is meant to force you into using your own creativity.  Each log cabin should be different from other log cabins.  There are many ways to make a log cabin paper sculpture… What way will you make yours?

Technorati Tags: , , , , , , , , , ,

How to Make Paper Sculptures – Drawing with Paper

If children have not had much experience with 3-dimensional work, you can introduce them to paper sculpture through “drawing” with strips of paper. This method can be the basis for developing an understanding of sculpture, or form in space. Since children are familiar with line drawing, the transition to drawing in space would be logical. Strips of construction paper, cut to one inch widths on the paper cutter, can be made in advance. Demonstrate how a strip can be a straight line, a curved line, or by folding the strip it can be a zig-zag line. Everyone can try it and see how many different kinds of lines they can make. A line can enclose space so that basic geometric shapes —triangles, circles and squares—can be formed. These outline shapes can be combined with scotch tape, paste, or with a stapler. What can we make with these shapes?


How to Make Paper Sculptures – 3 Techniques


Materials Needed

Strips of Paper

Tape

Paste

Stapler

Hole Punch

Paper Fasteners

String


Technique 1


Make forms in space


Make forms in space. For example, four strips of equal length can be arranged in a radial design and fastened in the middle with a stapler, or holes can be punched and a paper fastener inserted. The ends of the strips can be gathered together to form a sphere. Or two ends fastened on one side and the others on the opposite side will produce a different form. To encourage experimentation, strips can vary in color, width, length, and perhaps in shape too!


Technique 2


Make animals and people with paper.


Children love to use the paper strip figures and animals as puppets because of their lively quality. They also can be made as dangling puppets or mobiles by just tying strings to them.


Technique 3


Perhaps you would like to experiment further by making your figure or animal from one wide strip of paper


Perhaps you would like to experiment further by making your figure or animal from one wide strip of paper.

And there you have it…. 3 different techniques for making sculptures using simple paper.  This is a great way to teach children about 3 dimensional figures and space…. not to mention teaching them their basic shapes.  What types of Paper Sculptures did you make?  Let me know.

Technorati Tags: , , , ,

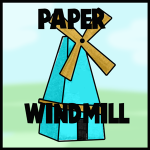
How to Make Paper Windmills with Paper Modelling Craft Instructions

Today, we will show you how to make a cute paper windmill. Below you will find two printable paper models. All you will need to do is cut and fold the model into the proper shape. Have fun.


How to Make Paper Windmills with Paper Modeling Craft Instructions for Kids


Below you will find 2 pages to print. These are diagrams to print out….then you will need to cut them out. Fold on the dotted lines and glue on the tabs. The picture of the windmill (above) is what you will want your windmill to look like so base your folding on that picture. You might want to draw windows / ladders on the windmill too…to make it unique to you. If you want your windmill to spin….you will need a paper fastener (one of those things that you push it through the paper and close it on the other side.)


How to Fold Paper Windmills craft for Kids


Click on The Above Picture to Print Out the First Set of Instructions


How to Fold Paper Windmills craft for Kids


Click on The Above Picture to Print Out the Second Set of Instructions

To attach the windmill blades to the windmill structure, use a paper fastener so that it can spin. If you don’t have a paper fastener, you can either use two buttons sewed on either side of the paper so that it can still turn, or you can just fasten it with glue (in which case it won’t be able to spin)

Technorati Tags: , , , , , , , , , , , , , ,