How to Make 3d Box Cover Shadow Box Framed Pictures

Don’t throw away those box lids because I have a fun use for them. Make these 3-dimensional pictures and use the box lids as the shadow box frame. The pictures seem to come out towards you and that is what makes them 3 dimensional. Find out how to make these with the step by step instructions found below.


How to Make 3d Box Cover Framed Pictures


Crafts Materials Needed

Box cover ( 2″ deep)

Paints

Pictures

Glue

Cardboard

Cork

Scissors

How to Make the 3D Frames

Step 1


Box Lids


Paint box cover, either oblong or square and 2″ deep, on both sides with a solid color paint, as in illustration above.

Step 2


3d-framed-box-cover-pictures-02


Inside the cover, as a background, either paint a scene, or cut a colorful scene from a magazine and glue to background, as in image above. If you want to make a barnyard scene like we did, the draw / paint a barn, some hills, and a tree.


Step 3


3d-framed-box-cover-pictures-03


Cut out or paint small pictures of people or animals. Mount on cardboard and glue to small slices of cork to make them stand (an adult should slice the cork for you), as in image above. If you want to make a barnyard scene, you might want to try some farm animals such as cows, chickens, pig, horses, sheep, and maybe some ducks. Here are some animal crafts that might help you.

Step 4


3d-framed-box-cover-pictures-04


Glue figures in place on floor of picture for 3-D effect, as in illustration above.

Technorati Tags: , , , , , , , ,

How to Make a “Beautiful Places” Key Chain

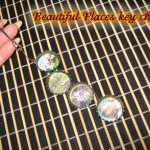
Do you have pictures you would love to remember?  For example, do you have pictures of Summer Camp, or School Trips, or perhaps a Vacation with your parents?  Aren’t these memories just wonderful and you would love to remember them for always?  Well, I have the craft for you today.  I’m going to show you how to make a “Beautiful Places” Key Chain…. perfect for holding your fondest memories close to your heart.  Or perhaps you would like to make this “Beautiful Places” Key Chain for your friend or family member who would too love to keep these memories close to them.  Either way… this key chain is sure to be loved.  So, let’s get started.

Check out our other Keepsake Crafts.

Laura from Dacian Moon Handmade will show you this craft step-by-step.


Materials Needed

– metal caps (as many as the places you want to remember)
– small pictures of those places (cut them round to enter in the cap – 2.5 cm)
– key chain accessory
– yarn
– duct tape
– glue


Step 1

Take the image…


… apply a layer of glue on it…


… and place it on the cap …


… like this.


Step 2

Repeat that for all the places you want to remember. I want to remember two castles and two ancient vestiges from Romania.


Step 3

Cut four pieces of yarn (as many as the places you have)…


… of different sizes.


Step 4

Cut a piece of duct tape…


… place a piece of yarn on it, like this…


… then place it on the exterior side of the cap.


Now we have a finished cap.


Step 5

Repeat step 4 for the other caps.


Step 6

Cut a bigger piece of yarn…


… put it through the loop …


… and knot it.


Step 7

Do that for the other caps too, taking care to let enough space between them.


That is it! Now you have a key chain with all the beautiful places you visited.


Doesn’t this “Beautiful Places” Key Chain turn out awesome?!  Imagine carrying your keys on this key chain…. it will be wonderful.  How did your key chain turn out?  Let me know in the comments below.  And, don’t forget…. take a picture of it and post it in the comment as well.  I’d love to see it.

Technorati Tags: , , , , , , ,

How to Make a 3D Refrigerator Magnet

I have a fun craft for you today.  I’m going to show you how to make a 3D Refrigerator Magnet.  What’s really cool about Refrigerator Magnet crafts is that you always have a place to display your crafts proudly…. your refrigerator or any metallic surface.  I know in my house I never have enough magnets to display all of my children’s artwork so this craft really came in handy with providing us with another magnet.  Keep in mind that the picture in the center can be any picture you want…. I used a bear, but use any cute picture you would like.

Check out our other Magnet Crafts.

Laura from Dacian Moon Handmade will show you, step by step, how to make this magnet.


Materials Needed

– glass nugget
– craft glue (transparent) – or use a transparent glue for the picture and a craft glue for the magnet
– magnet
– cute picture (small)
– scissors
– paints
– paintbrush
– pencil


Step 1

First of all, cover the magnet with the desired color, then let it dry.


I chose green because it will highlight the drawing. Leave the base unpainted.


Step 2

Take the picture…


… and place the glass nugget on it.


Draw the contour of the nugget…


… then cut it out.


It will look like this.


Step 3

Apply a layer of transparent glue on the picture…


… and place it on the bottom of the glass nugget.


It will look like that.


Step 4

Apply a layer of craft glue on the magnet (on painted side)…


… and place the glass nugget on it. Press well and let the glue dry.


Now it is ready for your refrigerator or any other metallic surface.


Awesome job….. you just finished making your 3D refrigerator magnet.  How did your magnet turn out?  What picture did you use in the center of the magnet?  Let me know in the comments below…. and don’t forget to take a picture and share that too.  I’d love to see it.

Technorati Tags: , , , , , ,

Fun Crafts Made from Photographs


Fun Crafts Made from Photographs


Did you know there are tons of crafts out there that you can make from Photographs?  There really are.  And, the cool thing about making crafts with Photographs is that you will have a keepsake for your memories for years to come.  Wouldn’t it be cool to take copies of your most precious pictures and make them into something useful?  For example, I found a craft that you can take your photographs and make wrapping paper or a tissue box…. or how about taking family photographs and making them into a Guess Who game.  Check out all of these crafts plus many more in this post. You are sure to find a Photograph craft you will enjoy to make.

Fun Crafts Made from Photographs

(1) Child’s Blocks


Childs Blocks


Aren’t these Child’s Blocks cute?  The craft is an easy one, but it turns out so adorable.  Imagine these being in your baby’s room… wouldn’t that be cute?  You can find out how to do this craft over at Parents.com.


(2) Bottle Cap Magnets & Thumbtacks


Bottle Cap Magnets & Thumbtacks


Here is another way to keep your memories close at hand.  MarthaStewart shows you how to take your favorite photographs and make them into bottlecap magnets you can put on the fridge or thumbtacks that you can post proudly at the office on your bulletin board.


(3) Homemade Wrapping Paper


Wrapping Paper


Could you imagine handing a family member a gift wrapped in wrapping paper that has pictures of their little loved ones on there?  They would love the wrapping paper just as much as they will enjoy the gift inside.  You can find the “how-to” of this craft over at FamilyFun.


(4) Guess Who Game


Guess Who Game


Ok, I think this is my favorite Photograph craft of them all.  It is just so creative.  MadsMemories takes the characters of the classic Guess Who game and replaces those characters with photographs of members of the family.  Imagine playing that Guess Who game with the kids.


(5) Photo Puzzle Box


Photo Puzzle Box


Here is a fun craft for you puzzle lovers.  How about taking one of your favorite family pictures and making it into a puzzle and putting them on blocks.  Take the picture puzzle and mess them all up…. can you put it back together again correctly?  You can find this craft over at PhotoJojo.


(6) Photo Placemat


Photo Placemat


Now here is a wonderful way to display your family photos that are sure to be seen at least 3 times a day…. make them into a Photo Placemat.  Not only will you enjoy sitting down to your meals and looking at this great way to display photos, but imagine how much your other family members would love receiving these placemats as a gift.  Check out Kaboose for the craft details.


(7) Tissue Box


Tissue-Box


This is a very cool craft…. and so much fun to not only put together, but display for all to see.  You can be creative and do only Winter Scenes on the tissue box, or funny pictures, or how about old pictures like the tissue box shown above.  Either way it is sure to be a conversation piece.  Check out the craft over at RightAtHome.


(8) Photo Stickers


Photo Stickers


I love this idea…. photo stickers.  These would be great to decorate party favors for birthday parties or graduations.  Well, really any festivity.    Here MarthaStewart shows you how to achieve this fun keepsake photo memory for yourself.


(9) Photo Bookmark


Photo Bookmark


Now, this is a great way to save your photographs in a way that you can look at them many times a day…. make them into a bookmark to use with your favorite book.  This way you know you will be enjoying it.  The crafter at About uses their favorite animal photographs for their bookmark, but you can use your friends or family members for your bookmark if you wish.


(10) Paper Napkin Decoupage


Paper Napkin Decoupage


Here is an interesting and creative way to display your pictures.  How about using napkin decoupage to transfer your pictures to a pot, plate or candle.  Not only does it turn out really cool…. but the craft itself is a ton of fun to make.  The instructions for this craft can be found at PhotoGiftGuide.com.

Technorati Tags: , , , , , , ,

How to Make a Picture Puzzle

I am going to show you a great way to take any picture and make it into a puzzle.  This is an awesome way to take your memories and make them into a fun puzzle that you can share with your family and friends.  With the Holidays just around the corner this would make a great gift.  Imagine taking a family picture and making it into a puzzle that you can give as a gift.  It would be cherished.

Check out our other Picture Crafts.

Laura from Dacian Moon Handmade will show you step-by-step how to make this Picture Puzzle.


CRAFTS MATERIALS NEEDED:
– any picture (It can even be from a magazine or you can download this cute fairy from here)
– scissors
– glue
– cardboard
– pencil
– varnish
– brush


Step 1

Print the image or cut it from the magazine.  Apply a layer of glue on the back side of it…


… then place it on the cardboard.


Step 2

Use your brush to apply a layer of varnish on the image.


Let it dry and apply another one (that will make the pieces harder and easier to play with).


Let it dry well.


Step 3

Cut out the extra cardboard.


Step 4

Use your pencil to draw different forms on the back of the cardboard.


Step 5

Cut out the pieces.


These are our puzzle pieces…


… and this is the completed puzzle.


And, that’s it.  You just finished your picture puzzle.  How did it turn out?  Let me know in the comments below.  And, don’t forget to add the picture to the comments…. I’d love to see how it turned out.

Technorati Tags: , , , , , ,

How to Make a Thanksgiving Mobile

Thanksgiving is a time to remember how blessed we are to have such great family and friends.  Well, with that being said…. I have a creative way for you to remind yourself how thankful you are…. a Thanksgiving Mobile.  With pictures and your thankful thoughts you are sure to show everyone how blessed you truly are.  So, let’s get started.

Check out our other Thanksgiving Crafts.


Image141


Materials Needed

Thick Colored Paper

Markers

Thread

Ribbon

Scissors

Glue

Pictures of Family and Friends (you can use old photos or print outs)


Image131


Step 1

Cut out pieces of paper in different colored and sized diamonds as shown.


Image130


Step 2

Stick pictures on one side. I’m also really thankful for the great times of celebrations I had this year with my family and friends, so I made a special diamond that says ” celebrations”.  You can also add some like these.


Image133


Step 3

On the other side of the diamond, write the name of the person and decorate as shown.


Image134


Step 4

Using a pencil in the center, roll some colored paper into 2 tight rolls as shown. Glue the ends and then, remove the pencil.


Image132


Step 5

Cross the two rolls at the center and tie them together as shown.


Image149


Step 6

Punch a hole on the top end of the diamond and tie a piece of thread. Attach the thread to the paper rolls as shown.


Image135


Step 7

Tie a piece of ribbon to the top of the paper rolls as shown right in the middle.


Image136


Step 8

Now, hang up your mobile.


Image141


What a unique craft, huh?!  No one will have a Thanksgiving craft like yours.  Your family and friends are sure to love it.  Where did you hang your Thanksgiving Mobile?  Let me know in the comments below.

Technorati Tags: , , , , , , , , , ,

How to Make Tri-Fold Picture Frame Present for Dad on Father’s Day

Do you want to learn how to make a unique picture frame? Most picture frame crafts are for one photograph, but this one holds 3 photos. This would be perfect to make as a gift for Dad or Mom for family photos…and it would look great on their office desk. If you want to learn how to make a tri-fold picture frame, then look at the directions below.

FYI…this craft is for older children – 9 and up….younger children can do it with help from an adult / parent / teacher.


How to Make Tri-Fold Picture Frame Gift That Holds 3 Photos for Dad’s Desk on Father’s Day

CRAFTS MATERIALS THAT YOU  WILL NEED:

– Cardboard, 15 by 5 inches
– 2 Pieces of felt, each 16 by 5′ inches
– 3 Snapshots (family photos)
–  Wool thread in contrasting color
–  Needle with large eye
–  Scissors
– Tape measure
– Glue Stick, Rubber Cement, or other Adhesive
– Chalk

HOW TO MAKE THIS CRAFT : TRI-FOLD FAMILY PICTURE FRAME

Step 1

Cut the cardboard into three pieces, each 5 by 5 inches. Paste one photography on each piece. Try to choose pictures that you father will look at and feel all mushy and sentimental.


Step 2


Arrange the three pieces side by side and lay one piece of felt over them. Leave 1/2 inch between the pieces of cardboard,since the felt is 1 inch wider than the three pieces of cardboard.


Step 3

Mark with chalk either an oval or square shape where the felt is to be cut out to show the underlying family photographs. Cut out these pieces of felt.


Step 4

Sew a long-and-short blanket-stitch border around each hole (see instructions on blanket stitching below) using the pretty wool thread.

Tip: How to Sew a Blanket Stitch


To blanket stitch, make a knot at the end of your piece of thread. Put your needle in 1/4 inch from the edge of the fabric, put the thread under the point of the needle and then pull the needle with the rest of the thread through. Repeat until finished.

Step 5

Glue the felt with the holes over the cardboard so the snapshots show through. Glue the other piece of felt to the back of the three pieces of cardboard.


Step 6

Sew a running stitch (see instructions for sewing the running stitch right below.) in places marked A and B in the illustration and then the frame is ready.


Tip : How to Make the Running Stitch


Begin sewing this stitch with three or four little stitches sewn one over the other, instead of making a knot in the thread. The running stitch itself is a small, even stitch, running on a straight line. Try to make each stitch about 1/8  inch long, though if it is closer to 1/4 of an inch no thunder or lightning are going to strike you. You can run up to six of these little stitches on the needle and then pull the needle through the fabric. Finish your seam with three or four little stitches sewn one on top of the other.

Below you can see what the finished picture frame will look like.


Technorati Tags: , , , , , , , , , , , , , , ,