How to Make a New Year Countdown to 12 Clock Craft for Preschoolers and Kids

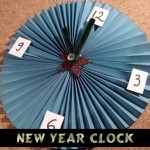
Here is a fun craft for younger kids who can’t stay up to 12:00 yet. You can make a countdown to 12  and have a pre-party with your young children, counting down to 12. This way your children don’t feel like they missed out on any of the New Year celebrations. Step by step tutorial offered by Laura from Dacian Moon Handmade

Check out our other New Years Crafts


NYclock


How to Make a New Year Countdown to 12 Clock Craft for Preschoolers and Kids

CRAFTS MATERIALS NEEDED:

– 2 sheets of blue paper
– paper glue
– white paper
– scissors
– pencil
– eye pin (or a brass fastener)
– crystal (optional)
– 1 auto-adhesive star
– 2 pieces of chenille stem (pipe cleaners)


IMG_3109


Step 1.

Cut the sheets of blue paper in half, lengthwise. You will have 4 rectangles.


IMG_3111


Step 2.

Accordion fold them.


IMG_3112


Like this.


IMG_3113


Step 3.

Apply a layer of glue on the last fold and stick it to the first on the next paper accordion.


IMG_3114


Repeat until you complete the circle.


IMG_3123


Like this.

NOTE: if the space in the middle is too big, put a small piece of tape on the back. It will keep it in place.


IMG_3124


Step 4.

Remove the protective foil of the star and place it on the middle. Like this.


IMG_3125


Cut 4 small rectangles of white paper and write on them „12”, „9”, „6”, „3”.


IMG_3127


Apply a layer of glue on one of them (on the back, of course) …


IMG_3128


… and place it on the clock, in its place.


IMG_3129


Do the same for the other ones.


IMG_3130


Step 5.

If you want to put a crystal or a bead on the eye pin, you can do that now. (Don’t use small beads or crystals with very young children). Put the crystal on the eye pin…


IMG_3132


… then wrap a piece of chenille around the pin, like this.


IMG_3134


Add the second piece of chenille. It will look like this.


IMG_3135


Put the pin through star, fix the chenille steams to point almost at 12, and the clock is ready !


IMG_3136


And there you have it. Use this cool clock to have an early countdown to 12:00 New Year Party! Have Fun!

Check out our other New Years Crafts

Technorati Tags: , , , ,

How to Make a Collage for Pi Day 3-14

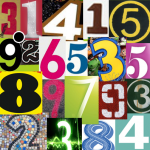
Today is 3/14….. do you know what that means?  It’s Pi Day.  π (or Pi) is a mathematical constant that is the ratio of any circle’s circumference to its diameter. π is approximately equal to 3.14.  I know it sounds confusing, but in mathematics it is one of the most important mathematical constants.  So, since today is March 14th or 3-14 it is considered Pi Day.  With that being said we are going to work on a collage surrounding all the numbers in Pi.  So, grab the materials needed and let’s get started.


How to Make a Collage for Pi Day 3-14


Materials Needed

Magazines, Brochures, Leaflets, Advertisements

Scissors

Glue

Paper


Step 1

Go through your magazines, leaflets, brochures and advertisements and find the numbers in Pi….. cut them out.  The numbers in Pi are the following:  3.141592653589793238462643383279502884197169399375105820974944592307816406286208998628
034825342117067982148086513282306647093844609550582231725359408128481117450284102701938
521105559644622948954930381964428810975665933446128475648233786783165271201909145648566
923460348610454326648213393607260249141273724587006606315588174881520920962829254091715
3643678925903600113305305488204665213841469519415116094330572703657595919530921861173819
3261179310511854807446237996274956735188575272489122793818301194912983367336244065664308
6021394946395224737190702179860943702770539217176293176752384674818467669405132000568127
1452635608277857713427577896091736371787214684409012249534301465495853710507922796892589
23542019956112129021960864034418159813629774771309960518707211349999998372978049951059731
7328160963185950244594553469083026425223082533446850352619311881710100031378387528865875
3320838142061717766914730359825349042875546873115956286388235378759375195778185778053217
12268066130019278766111959092164201989

Now, obviously Pi is an extremely long number.  Feel free to use as many numbers as you would like on your collage.


Step 2

Glue your Pi numbers in order to a piece of paper.


Step 3

Let your Pi collage dry and then hang it up proudly to celebrate Pi Day.


Pi Day Collage


Technorati Tags: , , , , , , , , , , , , , , ,

How to Make Paper Chains for the 100th Day of School

It is hard to believe, but our children have been in school almost 100 days now.  And, if your school is anything like mine they have a big party celebrating the 100th day of school.  For the younger kids it is sometimes difficult for them to grasp  just how long 100 days are.  A great way to teach them how large 100 of something is….. is to actually show them 100 of something.  That is what today’s craft is all about.  I’m going to show you how to make Paper Chains for the 100th Day of School.  Ideally, this craft should be started on the first day of school and add a chain piece to each other each day of school until you reach 100.  But, if you haven’t started that already you can do this craft on the 100th day of school as well.  So, grab the materials needed and let’s get started.
Check out our other 100th Day of School Crafts.


How to Make Paper Chains for the 100th Day of School


Materials Needed

Colorful Paper

Scissors

Black Marker

Tape


Step 1


Cut strips of colorful paper.


Cut strips of colorful paper.


Step 2


Write a number on each strip from 1 to 100.


Write a number on each strip from 1 to 100.


Step 3


Tape #1 strip into a loop.


Tape #1 strip into a loop.


Step 4


Take strip #2 and wrap around strip #1.


Take strip #2 and wrap around strip #1.  Tape.  Continue with this all the way thru #100.


Finished 100th day of school paper chain.


Now your chain is complete.  Hang the paper chain proudly and show the kids just how long 100 chains of paper is.  They will surely be amazed.  Remind them this is just how long they have been going to school.

Technorati Tags: , , , , , , , ,

How to Make a Fruit Loop Necklace for the 100th Day of School

Depending on when your school district started school the 100th Day of School will be coming up quickly.  Now, is the time to start planning what kind of crafts you are going to do to celebrate the 100th Day of School.  I’m going to show you an easy, and tasty, craft for you to do…  Today I’m going to show you how to make a Fruit Loop Necklace perfect for the 100th Day of School.   Each child will get 100 of these colorful circles of cereal and they will string them to make a necklace.  The kids will love making it almost as much as they will love eating it.  So, let’s get started.

Check out our other 100th Day of School Crafts.


How to Make a Fruit Loop Necklace for the 100th Day of School


Materials Needed

Fruit Loops (100 for each child)

String or Yarn


Step 1


Get enough fruit loops for all the children


Get enough fruit loops for all the children making necklaces.


Step 2


String 100 Fruit Loops on a String.


Cut a piece of string or yarn large enough for a necklace and then string 100 fruit loops on it.


Finished Fruit Loop Necklace


The Fruit Loop Necklaces are now finished and are ready to be tied on each child so they can wear them proudly.  Don’t they look colorfully beautiful….. almost as good as they are going to taste.  YUM!!

Technorati Tags: , , , , , , , , , ,

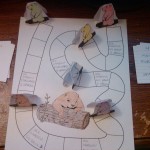
Make a Groundhogs Day Board Game Crafts Idea for Kids

This activity starts as a coloring page, then a craft, and finally a board game to play with friends or family.  We have provided you with two templates to print out: a game board and a sheet of six movers.  However, if you do not have a printer, or do not have permission to use one, you can get two sheets of plain white paper and make your own.

Here are More Groundhogs Day Crafts


Make a Groundhogs Day Board Game Crafts Idea for Kids


Make a Groundhogs Day Board Game Crafts Idea for Kids

Crafts Materials Needed:

  • Paper
  • Printer
  • Colored pencils, crayons or washable markers
  • Index cards
  • Tape
  • Safety scissors
  • Pen or pencil
  • Imagination

To start with print out the two pages provided, or draw your own.


Groundhog Gameboard


Groundhog Movers

STEP 1 – PREPARE THE BOARD

Color in the groundhog with your colored pencils, crayons, or washable markers.  I used colored pencils to get the details.  Then you can decide which side is start and which is finish, mark those.  I put START and FINISH, but you could also put WINTER and SPRING.


Add special instructions to spaces, if you want to make the game a little harder.  I put “See shadow.  Go back 3 spaces” and “No shadow.  Go forward 2 spaces” on mine.  Make sure you don’t put too many, and that you don’t put one where another space will end.  I accidentally put “Go back 3 spaces” 3 spaces in front of a “Go forward” space, so I had to change it to “Go back 2 spaces”.  If you make a mistake like this, it’s very easily fixed.


STEP 2 – MAKE THE PLAYING PIECES

First you will pick 6 different colors and color your groundhogs.  Make sure the colors are different enough you won’t get confused during game play.


Now, cut them apart leaving each pair together.  Once you have 6 pieces of paper, fold them in half so the groundhogs of the same color are both facing out.  You can hold it up towards a light to make sure the holes that the groundhogs are popping out of line up.  Then, cut a flat bottom and up around the ground hog.  Make sure you leave the two sides attaches by the heads.  I have included a picture of the pieces at various stages.


Now, take an index card and fold it lengthwise.  Cut along the fold and discard one half.  Cut the other into 3/4″ strips, you will have a little left over that you can also discard.  Now take a 1 1/2″ length of tape and lay it on your work surface, sticky side up.  Place a strip of index card on it, and tape it to the bottom of a playing piece.  Do this for each piece.  Again, I have including a picture with various stages.


STEP 3 – MAKE CARDS

If you are short on time you can grab a die from another board game, just make sure you have permission first.   If you want to play the game following the rules below then you will need 8 index cards.  Cut each one on half the short way and write Groundhog Day on the blank side.  You should now have 16 cards that look like this:


Now flip them over to the lined side and write down how many moves each card is worth.  You will need 4 each of 1, 2, 3 and 4.  Mine has the number at the top and instructions underneath, but you can make yours however you wish.


STEP 4 – PLAY THE GAME

  1. Mix the numbered cards and lay them face down to the left of the board.
  2. Place all colored playing pieces in front of the “start” space.
  3. Youngest player (or whoever made the game) goes first.  They pick the top card from the pile, move the amount of spaces stated, and discard face up to the right of the board.
  4. Play moves clockwise around the board.
  5. If a player lands on a special space they must follow all instructions on that space.
  6. The goal is to be the first player to reach the end of the game.


Here are More Groundhogs Day Crafts

Technorati Tags: , , , , , , , , , ,

How to Make Chinese Abacus for Chinese New Year or 100th Day of School

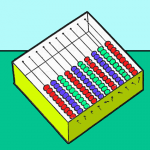
I noticed that there are 2 holidays / events coming up – The Chinese New Year and The 100th Day of School. I think that the Chinese Abacus could be a craft to tie both of these 2 celebrations together. The Abacus uses 100 beads and was created by the Chinese  people who called this calculating instrument a Swan-Pan. In face, in some countries an abacus is still widely used to add and subtract. The following step by step arts and crafts instructions will guide you the parent, teacher, child, or whomever through the process of making this Abacus. Have fun.


How to Make Chinese Abacus fro Chinese New Year or 100th Day of School


How to Make Chinese Abacus fro Chinese New Year or 100th Day of School

CRAFTS MATERIALS NEEDED:

square box

string

small colored beads

pencil

ruler

nail

Step 1

With a pencil and ruler, mark off 10 even spaces along one side of a medium-square box, about 1/2 inch down from the top. Do the same on the opposite side of the box.


With a pencil and ruler, mark off 10 even spaces along one side of a medium-square box, about 1/2 inch down from the top. Do the same on the opposite side of the box.


Step 2

With a nail, make a small hole at each mark.


With a nail, make a small hole at each mark.


Step 3

Pull one end of a piece of string through the first hole, and tie it securely with a knot.


Pull one end of a piece of string through the first hole, and tie it securely with a knot.


Step 4

String 10 colored beads on the string and fasten the other end of the string, across the box, to the first hole on the other side.


Step 4 Stringing Beads on the Abacus


Step 5

Do the same with 9 other pieces of string, placing 10 colored beads on each row. If you like, you may use a smaller box and string 7 colored beads on each row, which will make your counting toy like the ancient Roman abacus. On another note…you don’t have to use colored beads the way we did, you can use a different colored bead on each row…or vary different colors on every other row…it is completely up to you.


How to Make Chinese Abacus for Chinese New Year or 100th Day of School


Technorati Tags: , , , , , , , , , , , , , ,

Make Easter Counting Game Craft Activities for Preschoolers & Young Kids


Make Easter Counting Game for Easter or Spring : Preschoolers Craft

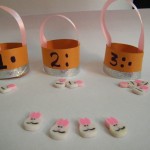
Here’s a fun game to learn counting this Easter. This craft can also be done as a group activity, every child makes one basket and in the end the kids can play a game of putting the right number of Easter bunnies  in each basket.

Craft materials required:

Thick colored paper

Broad ribbon

Scissors

glue

tape

markers

Ruler

Small bunny shaped erasers or candy

Colored tape


Step 1

Cut out strips of paper about 4 in wide and 9 in long


Step 2:

Roll it around and glue the ends together to form cylinders.


Step 3

Trace the outline of the circle formed on a piece of paper of the same colour.


Step 4

Remove the cylinder and add tabs to the design as shown below.


Step 5

Cut it out and fold the tabs as shown below.


Step 6

Place the cylinder over this piece so that the tabs are on the inside. Tape the tabs to the inside walls of the basket.


Step 7

Take a long piece of tape and stick it along the bottom as shown.


Step 8

Fold the tape over the edge to make the basket strong.


Step 9

Cut a piece of ribbon and tape it to the insides of the basket as shown.


Step 10

Stick some colored tape along the bottom of the basket as shown.


Step 11

Write a number on each basket. The game is to put the right number of objects- Easter bunnies, miniature eggs or candy into the baskets.


Technorati Tags: , , , , , , , , , , ,