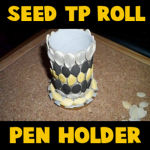
How to make a Pen and Pencil Holder for Fall with Seeds and a Cardboard Tube

Here is a pen and pencil holder craft that is easy to make and a great craft for kids during the Autumn / Fall season. This pencil holder is made with a recycled cardboard tube from a toilet paper roll or a paper towel roll. Use seeds and paint or markers to decorate the cardboard tube. Find the crafts instructions below. Your kids will love this one. Below the Step by step tutorial is offered by Laura from Dacian Moon Handmade

How to Make an Autumn Pencil Holder with Colorful Seeds and a Recycled Toilet Paper Roll


How to make a Pen holder decorated with seeds


CRAFTS MATERIALS NEEDED:

– empty paper towel or toilet paper roll
– lid
– pumpkin seeds
– craft glue
– scissors
– paints (silver, gold, black)
– paintbrush


Step 1.

Take the roll…


… and make some cuts on one end, like this.


Bend them outward…


… like this.


Step 2.

Put glue on the folded part …


… and set it on the lid.


Step 3.

Take a seed and apply a layer of glue on one side of it…


… then place it on the roll.


Cover the roll with seeds…


… like this.


Step 4.

You can let it like this or can use metallic paints to add some style to it…or
you can use any colors that you like. If your parents don’t want you to paint,
you can use markers instead.


Like this 🙂


I hope that your pencil / pen holder looks fantastic. Keep it on your desk or give it to some one that you care about.

Technorati Tags: , , , , , , ,

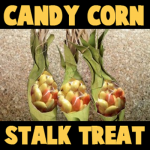
How to Make Candy Corn Stalks for Thanksgiving Treats

Who says that you can only have candy for Halloween. Here is a great treat to use as placeholders at the Thanksgiving table. You make these cute little cornstalks out of candy corn and cardboard tubes from paper towel rolls. This is a  fun way to give treats on Thanksgiving. This tutorial is offered by Laura from Dacian Moon Handmade


How to make Candy Corn Stalks for Thanksgiving treats


How to make Candy Corn Stalks for Thanksgiving treats

Crafts Materials Needed:

– recycled paper roll
– green paint
– yellow and orange candies
– paintbrush
– scissors
– bag


Step 1.

Cut a rectangle with rounded corners out of the paper roll…


… like this.


Step 2.

Using green paint…


… and paintbrush, color the roll.


Let it dry.


Step 3.

Cut triangles on the lower part…


Like this.


Step 4.

Put the candies in the bag…


… and place it inside the tube.


Step 5.

Take the rest of tube (the part that was not painted)…


… and cut thin strips of it.


Like this.


Put them in the tube above the candies, so that a part to go over the edge, outside ..


Step 6.

Squeezes the top to remain fixed (if doesn’t work, you can tie with a cord of similar color, or you can stick it.)


Then bend inward at the bottom…


And that’s all 😀


Technorati Tags: , , , , , , ,

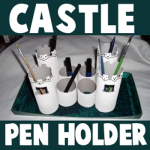
How to make a Castle Pencil Holder

Here is a unique pencil holder made from recycled toilet paper rolls (or paper towel rolls). It is also a special pencil holder  for boys, because every boy is a knight who need a castle… of course 😉 Laura from  Dacian Moon Handmade  will show you, step by step, how to make it.

How to make a Castle Pencil Holder


Cardboard Tube Castle Pencil Holders


CRAFTS MATERIALS NEEDED:

– recycled paper rolls
– scissors
– glue
– paints
– paintbrush
– rectangle cardboard box lid


IMG_6760


Step 1.

Cut every roll in half.


IMG_6761


Like this.


IMG_6762


Step 2.

Use green paint to give the cap color – like grass. You also can use grey for paved roads…


IMG_6764


Cover all the surface with paint.


IMG_6765


Add as many layers of paint until you are happy with the result.


IMG_6769


Step 3.

Let’s give shape to the rolls.


IMG_6771


On two bigger rolls draw battlements and one window…


IMG_6772


… on the other bigger rolls draw only battlements. Like this.


IMG_6773


Cut them off.


IMG_6774


Finally, our towers will look like this.


IMG_6775


Step 4.

Let’s paint the castle. Mine will be white with some black decorations.


IMG_6778


Paint them like this…


IMG_6779


Let them dry, then draw your decorations using a toothbrush.


IMG_6780


Step 5.

Apply a layer of glue on a tower base


IMG_6781


… and put it in its place.


IMG_6782


Do the same with all rolls. Let them dry well.


IMG_6783


Now your castle is ready to be populated with pens and pencils 😀


IMG_6784


Technorati Tags: , , , , , ,

Awesomely Cool Valentine’s Day Mailbox Craft Ideas


Awesomely Cool Valentine’s Day Mailbox Craft Ideas


Valentine’s Day is next month.  Now is the time to start getting your Valentine’s Day Mailboxes ready for February.  Valentine’s Day mailboxes are a great way to collect your Valentine’s Day cards from all your friends and family members.  I have searched the internet and found some really wonderful and awesomely cool Valentine’s Day Mailboxes.  Surely, out of all the Valentine’s Day mailbox crafts I have listed in this post you will find one that fits your needs…. plus, it promises to be tons of fun for you and the kids.

Check out our other Valentines Day Crafts.


Awesomely Cool Valentine’s Day Mailbox Craft Ideas

(1)  Valentine Stick Box


Valentine Stick Box


Here is a super cute way to hold all your Valentine’s Day cards this year.  Made from 65 skill sticks this Valentine’s Mailbox will surely be a ton of fun to make.  I found this craft over at Making Friends…. check it out for yourself.


(2)  Cardboard Box Valentine Mailbox


Cardboard Box Valentine Mailbox


Now, isn’t this Valentine Mailbox super cute?  It really is.  Spoonful shows us how to take a rectangular cardboard box and make it into something very useful…. collecting your Valentine’s Day cards.  Sounds like a lot of fun to me.


(3)  Robot Valentine’s Day Box


Robot Valentine's Day Box


Oh boy…. this Valentine Mailbox is outrageously adorable.  I found this craft at eHow and I just love the idea.  Here they use recycled materials… like shoe boxes and toilet paper rolls to make this mailbox.  Gotta love that!!


(4)  Crepe Paper Flowers Valentine Box


Crepe Paper Flowers Valentine Box


Wow…. what girl wouldn’t just love this Valentine Box.  Plus, it is so much fun to make.  Using crepe paper streamers of different shades of pink Todays Fabulous Finds shows you step-by-step how to make this beautiful Valentine Mailbox.


(5)  Valentine’s Day Suitcase Mailbox


Valentine's Day Suitcase Mailbox


Here is a unique Valentine’s Day Mailbox craft…. and it is one of ours from a previous year.  In this post we show you how to take a recycled cereal box and transform it into this functional suitcase Valentine Mailbox to hold all your cards.  Check out How to Make this Valentine’s Day Suitcase Mailbox for yourself.


(6)  Valentine’s Day Card Holder


Valentine's Day Card Holder


Here is a great way to make a Valentine’s Day card holder using a couple of plastic plates.  Plastic plates are very durable and a great way to hold all of your Valentine’s Day cards.  Plus, this craft is not only easy, but also a lot of fun to make.  Check out Free Kids Crafts for all the details.


(7)  Card Stock Mailbox


Card Stock Mailbox


Wow, this mailbox is really beautiful…. and perfect for holding your Valentine’s Day cards.  Splitcoast Stampers shows you how you too can make this Card Stock Valentine Mailbox.  Check out the site to find the link to her very own template to make one for yourself.


(8)  Conversation Heart Mailbox


Conversation Heart Mailbox


Here is another Valentine Mailbox that is made from a cereal box.  I love the crafts that use recycled materials…. it just makes me feel so good.  Kaboose shows us how to make this adorable Valentine Mailbox that promises to be not only easy, but a lot of fun as well.


(9)  Paper Doily Heart Valentine Box


Paper Doily Heart Valentine Box


Here is another Valentine Mailbox that came from our site last Valentine’s Day.  Here we show you how to take some paper doilies that you can get at a dollar store or discount store and also use our printable template to make this fully functional and adorable heart mailbox.  Check out How to Make a Paper Doily Heart Valentine Box for all the craft details.


(10)  Valentine Card Holder Purse


Valentine Card Holder Purse


Okay, I know that most girls are just going to love this Valentine card holder.  Made from a half gallon ice cream container this card holder purse is simply adorable.  I found this craft over at AllCrafts.net and it is amazing.  What a great way for any little girl to hold on to her Valentine’s Day cards.


(11)  Crazy Card Carrier


Crazy Card Carrier


Here is a wonderful way to carry your Valentine’s Day cards to and from your Valentine’s Day party destination.  Made from card stock and a gift bag this Valentine’s Day Mailbox Craft is just simply adorable.  Check out Spoonful for all the fun details.


(12)  Bear Valentine Bag


Bear Valentine Bag


This bear is a cutie patootie and will surely be helpful carrying your Valentine’s Day cards back and forth.  Made from a small brown gift bag it will surely be a lot of fun to make.  The kids can use their imagination to decorate the bear bag as they wish.  Check out All Kids Network to see the craft for yourself.


(13)  Tin Valentine Boxes


Tin Valentine Boxes


Here are some Tin Valentine Mailboxes…. a craft I found at The Dating Divas.  They are super cute and perfect to have for each one of your family members to collect their Valentine’s Day cards.  Make one for each of the members in your family.  They are durable enough to use every Valentine’s Day.


(14)  Kleenex Box Valentine’s Day Mailbox


Kleenex Box Valentine's Day Mailbox


Here is another fun and easy Valentine’s Day Mailbox that you can make with your kids.  Made from an empty tissue box it is another great way to make something from recycled materials.  Education.com shows you how to make this adorable Valentine’s Day mailbox step-by-step.

Technorati Tags: , , , , , , , , , , , , ,

A Collection of Fun Nativity Scene Crafts for Kids


A Collection of Fun Nativity Scene Crafts for Kids


One thing you see at most houses at Christmas time is a Nativity Scene.  But, the problem with the store bought Nativity Scenes is that they are usually very delicate…. too delicate for the children to actually play with.  And, the thing about that is…. children love to play with the Nativity Scenes.  I mean, what’s not to want to touch…. there are small people, animals and a manger.  There is an entire scene for the kids to want to act out with the characters.  Well, why not make a Nativity Scene craft ….. put together a Nativity Scene of your very own that the children can actually play with.  So, today I have put together a bunch of Fun Nativity Scene Crafts that I have found around the internet.  All are a ton of fun…. and they are all meant to be played with.

Check out our other Christmas Crafts.

A Collection of Fun Nativity Scene Crafts for Kids

(1)  Pipe Cleaners & Yarn Nativity Scene


Pipe Cleaners and Yarn Nativity Scene


Here Spoonful shows us how to make an entire Nativity Scene using such materials as yarn and pipe cleaners.  She is very detailed, so this nativity craft is very enjoyable.  This Nativity Scene would look wonderful as a Christmas decoration and it surely will be so much fun to make.


(2)  Printable Nativity Scene


Printable Nativity Scene


I love this idea.  I found this Nativity Scene Craft at Catholic Icing and it is so cute.  Here you will be able to print off about 8 pages of templates.  Cut them out, decorate them and glue them to toilet paper tubes.  It’s so much fun.  check it out.


(3)  Flower Pot Nativity Scene


Flower Pot Nativity Scene


Ok, this is really cute, right?!  Suite 101 shows us how to transform 3 terra cotta flower pots (along with some other materials) into a ridiculously cute Nativity Scene.  The craft promises to be a lot of fun.  Plus, no doubt, you will be tempted to keep this Nativity Scene out year round.


(4)  Basket Nativity Scene


Basket Nativity Scene


This Nativity Scene craft is one of ours from last Christmas.   This Nativity surely will be one that you will keep for years to come.  We show you how to make each of the figures in great detail including the Three Wise Men, Baby Jesus & Cradle, Mary & Joseph, sheep and the donkey.  It’s so much fun.  Check it out for yourself.


(5)  Rock Nativity Scene


Rock Nativity Scene


Here is another super cute and original Nativity Scene Craft.  Here Roper 5 shows us how to make this fantastic Nativity Scene completely out of backyard rocks and markers.  So, no need to buy any craft materials…. you can have fun with the kids hunting in the backyard for the perfect rocks.


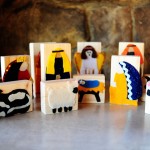
(6)  Wooden Block Nativity Scene


Wooden Block Nativity Scene


Here is an awesome Nativity Scene craft you can make with your kids with some wooden blocks, felt, glue and a few embellishments.  Imagine the fun you will have putting this craft together with your kids.  Fun part is that they are durable enough the kids can even play with this Nativity Scene.  Check out The Pioneer Woman for all the details.


(7)  Lego Nativity Scene


Lego Nativity Scene


This is such a clever idea for all you Lego fans.  Here Johan van Benthem shows us all how to make an entire Nativity Scene out of Legos.  Imagine the excitement of your kids as well as anyone who sees your Nativity Scene made completely out of Legos.  They will absolutely love it!!


(8)  Nativity Hand Puppets


Nativity Hand Puppets


What child doesn’t love hand puppets?  They all love them.  Here eHow shows us how you and your children can make these Nativity Hand Puppets for yourself.  Imagine the fun Christmas show your kids can put on with these hand puppets?  They will love using their imaginations to put on their very own program.


(9)  Nativity Blocks


Nativity Blocks


These blocks are just simply adorable.  I am a Momma – Hear Me Roar came up with this idea and I love it!!  She used homemade blocks, stickers and modge podge to make her Nativity Scene, but you can also print off Nativity Scene characters from the computer and do it that way as well.


(10)  Sun Catcher Nativity Scene


Sun Catcher Nativity Scene


Here is a clever idea by Peace Creek on the Prairie.  She uses wax paper, crayon shavings and an iron to make this beautiful Sun Catcher Nativity Scene.  Because of some of the materials used in this craft it does require some adult help.  You will have so much fun doing this Nativity Scene with your kids.


(11)  Gingerbread Nativity Scene


Gingerbread Nativity Scene


This Nativity Scene is absolutely delicious!!  Made from some of my most favorite treats this Nativity Scene craft is sure to be a big hit with the kids.  I found this craft at AOK Corral and it looks like so much fun.  You and your kids will surely enjoy putting this together.


(12)  Cardboard Tubes Nativity Scene


Cardboard Tubes Nativity Scene


Here is a simple yet fun Nativity Scene craft that all children will love putting together…. plus they can even play with this Nativity Scene once they are done.  Nurture Store shows us how to make this Nativity Scene out of toilet paper rolls.  How fun is that?!


(13)  Clothespin Nativity Scene


Clothespin Nativity Scene


This is truly a clever idea and almost all the materials used in this Nativity Scene craft can already be found in your home.  Our Dish shows us how to use a cardboard box, sharpie and a couple of clothespins (as well as a few other things) to put together this fun Nativity Scene craft.


(14)  Foam Nativity Craft


Foam Nativity Craft


Craft foam is a wonderful material that children love working with.  And, this Nativity Scene craft will be no exception.  Piggy Giggles shows us how to make a unique Nativity Scene out of craft foam.  The craft is wonderfully detailed, so believe me when I say they have covered everything.


(15)  Egg Carton Nativity Scene


Egg Carton Nativity Scene


Made from egg carton bottoms and beads this Nativity Scene is really cute.  Plus, the great thing about it is the kids will have just as much fun playing with this Nativity Scene as they had making it.  I found this craft at April Showers.  Check it out for all the craft details.

Technorati Tags: , , , , , , , , , , , , , , , ,

Fun Kwanzaa Crafts for Kids


Fun Kwanzaa Crafts for Kids


Top Image by TheBlackHour.com

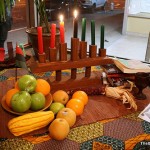
Oh boy…. do I have a treat for you today.  In this post I have compiled 14 Kwanzaa crafts from around the internet.  They are all perfect for your children to make.  Whether you celebrate Kwanzaa or not these crafts are great to help teach your children about Kwanzaa and the African culture.  Many of them not only incorporate the three colors of Kwanzaa (red, green & black), but they also help teach you about the 7 Principles of Kwanzaa…. Unity, Self Determination, Collective Work & Responsibility, Collective Economics, Purpose, Creativity and Faith.   These are wonderful principles to have and to teach your children.  So, check out these Kwanzaa crafts…. you are sure to find a few to do with your children.
Fun Kwanzaa Crafts for Kids

(1)  Kwanzaa Flag Garland


Kwanzaa Flag Garland


Here is a festive Kwanzaa craft perfect to help teach your children about Kwanzaa.  Here Kaboose shows you how to make this Kwanzaa Flag Garland in great detail.  It uses the symbolic colors of the holiday… red, green and black.


(2)  Kwanzaa Greeting Card


Kwanzaa Greeting Card


Here is one of our very own Kwanzaa crafts.  In this Kwanzaa Greeting Card craft we will show you how to make a greeting card for the Holiday Kwanzaa.  It is a very easy craft, so even young children will enjoy this craft.  You simply need some paper , scissors and glue.


(3)  Kwanzaa Mobile


Kwanzaa Mobile


I found this Kwanzaa craft over at Spoonful.  Here they use the 3 colors of Kwanzaa as well as the 7 principles of Kwanzaa to make this adorable mobile.  This will make an awesome Kwanzaa decoration as well as teach your children about Kwanzaa.


(4)  Handprint Kinara


Handprint Kinara


Here is a fun craft that children of all ages will love to make.  Activity Village shows us how to take your handprint and make it into a very cute Kinara.  It’s a quick, fun and messy Kwanzaa craft for kids!  They will love it.


(5)  Doll Pin Kinara


Doll Pin Kinara


I have another fun Kinara craft for you.  This one came from Kaboose and it promises to be tons of fun.  Here they use doll pins, spools, paint and some other materials to make this festive Kinara.  Kaboose even has tons of information to teach you more about the Holiday of Kwanzaa.


(6)  Kwanzaa Placemat


Kwanzaa Placemat


Here is another entertaining Kwanzaa craft.  In this craft Making Friends shows you how to incorporate the 3 colors of Kwanzaa into this colorful placemat.  Your kids will have fun weaving strips of red, green and black craft foam into this festive Kwanzaa placemat.


(7)  Kwanzaa Bracelet


Kwanzaa Bracelet


Here is a great Kwanzaa craft that both boys and girls will love making.  I found this craft at Yahoo! Voices and it’s a good one.  Make these Kwanzaa bracelets with the colors of Kwanzaa and give them to your family and friends as gifts.  They will love it.


(8)  Bubble Wrap Corn


Bubble Wrap Corn


Kwanzaa is about the festival of the first harvest of the crops.  So, this Bubble Wrap Corn just makes sense as a craft for Kwanzaa.  Give your child all the details about Kwanzaa as you make this fun bubble wrap craft with them.  Check out No Time for Flashcards for all the details.


(9)  Kwanzaa Bead Candles


Kwanzaa Bead Candles


Here Spoonful shows us another wonderful Kwanzaa craft.  This time they make these cute Kwanzaa bead candles.  Here they use craft cubes, oval beads as well as other materials to make these festive candles.  This is a great way to introduce the seven principles of Kwanzaa.


(10)  Kwanzaa Flag Decoration


Kwanzaa Flag Decoration


Family Education shows us a great way to teach your children a little bit about Kwanzaa and the African culture.  Here they use different flags of Africa to make a great decoration for Kwanzaa.  As you are making these flags of Africa with your children it is a great time to teach them about Kwanzaa.


(11)  Corn Necklace


Corn Necklace


Remember Kwanzaa is the festival of the first harvest of the crops.  Corn was a very important crop.  So, this Corn Necklace craft is perfect for Kwanzaa.  Here Better Homes & Gardens explains how each ear of corn represents a child in the family.  Check out the craft for all the details.


(12)  Papier Mache Bowl


Papier Mache Bowl


Check out this gorgeous and super festive Papier Mache Bowl perfect for Kwanzaa.  I found this at Crafts Holidays site and thought it was beautiful.  Here they use Papier Mache to make this bowl…. so it is sure to be a lot of fun for the kids.  Use this bowl to hold the Mazao (or fresh fruits and vegetables) at your Kwanzaa table.


(13)  Kid-Friendly Kinara


Kid Friendly Kinara


Nick Jr. has the right idea with this Kinara Kwanzaa craft.  It is just adorable and the children will love making it.   Here they use craft sticks as well as clothespins to put this Kinara together.  They also don’t forget the colors of Kwanzaa with this Kinara.


(14)  Cardboard & Tissue Paper Kinara


Cardboard & Tissue Paper Kinara


Kids love to do crafts with tissue paper and cardboard rolls.  And, this Kwanzaa craft will be no exception.  I found this craft over at PBS and thought it was a great one to include.  Make sure to check this Kinara craft out.  Plus, they also go into great detail of the 7 Principles of  Kwanzaa…. great to teach your children.

Technorati Tags: , , , , , , , ,

My Favorite Mayflower Craft Ideas for Thanksgiving

Thanksgiving will be here in no time at all.  And, one of the lessons we try to teach our children about the Thanksgiving Holiday is the Pilgrims and the Mayflower.  What I found during lessons is that teaching them visually is the easiest way to get them to understand…. hence doing a craft.  So, today I thought I would show you my Favorite Mayflower Craft Ideas for Thanksgiving.  I found these Mayflower crafts while searching the internet.  They are all really incredible and a ton of fun.  Surely, you will be able to find some Mayflower craft ideas from this list….. use them to help teach your children about the Pilgrims and their travel on the Mayflower.

Check out our other Thanksgiving Crafts.


My Favorite Mayflower Craft Ideas for Thanksgiving


My Favorite Mayflower Craft Ideas for Thanksgiving

(1)  Model Mayflower


Model Mayflower


Here is a wonderful way to make a model Mayflower.  Made from disposable coffee cups and coffee stirrers this is a great way to recycle items as well as teach your children about the Mayflower.  I found this Mayflower craft over at Parenting.  Make sure to check it out.


(2)  Hand Print Mayflower


Hand Print Mayflower


I love this Mayflower craft.  It is just simply adorable.  And, any young crafter will have a lot of fun making it.  I found this Thanksgiving craft over at Almost Unschoolers.  Make sure to check out her site to get all the Mayflower craft details.


(3)  Mayflower Walnut Boat


Mayflower Walnut Boat


Even we have our own Mayflower crafts.  Here is our first one.  We will show you how to make a Mayflower out of a walnut.  And, what is really cool about this Mayflower craft is that the boat will actually float in water.  Check out How to Make a Mayflower Walnut Boat to make one for yourself.


(4)  Mayflower Paper Plate Craft


Mayflower Paper Plate Craft


Here is a fun Mayflower craft that your little ones will really enjoy.  The Crafty Classroom will show you how to take two paper plates and a popsicle stick and make it into this awesome Mayflower.  Oh boy, this sounds like fun.


(5)  The Mayflower Simplified


Mayflower Simpliefied


I love this bloggers idea.  Her idea was to come up with a Mayflower craft that she could make with young children.  I Can Teach My Child came up with this idea and it is a great one.  Made from a paper towel roll, a straw and some other materials this craft will take on a life of its own.  Share it with your child…. they will love it.


(6)  Mayflower Sandwich


Mayflower Sandwich


I just couldn’t pass this one up.  I know it’s not technically a craft, but it is a Mayflower recipe that you and your little ones can have fun putting together.  Little Nummies put this one together and it is just precious.  Made from bread, cream cheese and pretzels this yummy recipe will be a whole lot of fun to put together… almost as much fun as eating it.


(7)  Mayflower Photo Craft


Mayflower Photo Craft


This is a great Thanksgiving craft to enhance your teachings of the Pilgrims, Mayflower and the first Thanksgiving.  Here Classified Mom adds actual photos of her own children to better engage her children in the lesson.  You can do the same.


(8)  Mayflower Crayon Holder


Mayflower Crayon Holder


I love, love, love this idea.  Made from a creamer container this Mayflower actually holds crayons.  I think this Mayflower craft will be perfect for the Thanksgiving Kids Table.  Imagine every child having one of these Mayflower Crayon Holders on Thanksgiving…. the fun they will have.  Check out It’s Overflowing for all the craft details.


(9)  Mayflower Milk Carton Craft


Mayflower Milk Carton Craft


Made from a milk carton and some tissue paper this Mayflower Craft is sure to be a fun one.  Hidden underneath the tissue paper are some apples…. perfectly festive for the fall season.  Check out Creative Holiday Gift Ideas to find out how you too can make this with your children.


(10)  Mayflower Hats


Mayflower Hats


What kid doesn’t love hats?  They just all do.  And, these Mayflower hats will be no exception.  Spoonful shows you step-by-step how to make these adorable and festive hats.  Make a few and have them ready for the kids table at Thanksgiving.  All the children will love to wear them.


(11)  Mayflower Centerpiece


Mayflower Centerpiece


Why not center your entire Thanksgiving Meal around the Mayflower…. or perhaps the kids table.  Martha Stewart shows you how to with these very detailed instructions on how you too could have a Mayflower Centerpiece.


(12)  Mayflower Cut, Tape & Play


Mayflower Cut Tape Play


Homespun With Love shows you how you can print off this really cool Mayflower and let your kids cut, tape and then play with this Mayflower.  Use this as a visual tool when teaching your children about the Mayflower, the Pilgrims and the first Thanksgiving.


(13)  Mayflower Popsicle Craft


Mayflower Popsicle Craft


Here is a fun Mayflower craft that all the children will love.  Made from Construction Paper and Popsicle Sticks it is very likely you have all the craft materials needed right in your home.  Ramblings of a Crazy Woman will show you in detail how to make this craft…. she even shows you how to make waves to remind us how the Pilgrims endured a lot to find their way here.


(14)  Moving Mayflower


Moving Mayflower


Here is another of our Mayflower crafts from our very own site.  This Mayflower craft is a little bit different than the others because it can actually move.  Made with items like a paper towel roll, craft sticks and string this moveable mayflower will make the kids smile.  Gotta love something that actually moves.  Check out our site to find out how to make this Moveable Mayflower.


(15)  Mini Mayflower


Mini Mayflower


Get the kids excited about the Pilgrims and the Mayflower with this mini mayflower craft.  Made from a milk container this mayflower is the perfect size for little kids hands.  The kids will love to play with this mayflower and it also makes the perfect Thanksgiving decoration.  Check out Parents Connect for all the details.


(16)  Cardboard Tube Mayflower


Cardboard Tube Mayflower


When I found this Mayflower craft I thought it was quite original.  I found this Thanksgiving craft over at Naturally Educational.  Here she uses a cardboard tube along with some twigs to make her original Mayflower craft.  Make sure to check out her site for all the step-by-step details.  She also adds some Mayflower book choices to help you teach your children about the Mayflower.

Technorati Tags: , , , , , , , , , , ,

How to Make a Paper Owl Decorations for Halloween

Although owls are known as being wise, they are also known as a spooky part of Halloween. They don’t seem very creepy, but walking thru a dark forest with owls hooting can be a pretty creepy experience. However, this owl is more a cute tribute to Halloween. and can also be used as a cover for glasses or whatever else you choose to use it for. Happy Halloween.

Laura from  Dacian Moon Handmade  will show you, step by step, how to make it.


How to make a Paper Owl decoration for Halloween


CRAFTS MATERIALS NEEDED:

– recycled paper roll
– red paper
– white paper
– paper glue
– permanent markers : black, gold
– pencil
– scissors


Step 1.

Take the paper roll…


…and flatten it.


Fold one part inside, like in the picture…


… then the other. Now the owl have ears 😀


Step 2.

Color it with black…


… like this.


Step 3.

Draw drops on red paper.


Cut them out.


Step 4.

Apply a layer of glue on the top of a drop…


… and place it on the black roll, like this. Must start at the bottom for feathers to sit well.


Continue to glue red feathers on the owl till close up.


Step 5.

Draw 2 bigger wings on red paper.


Cut them out and applying a layer of glue on the top of them…


… stick them on their places.


Step 6.

Draw another drop and 2 circles on white paper.


Cut them out.


The new drop will be the beak, so you’ll paint it with gold.


The circles will be the eyes and you should paint them black, like this.


Glue the beak on the middle of the „face”…


… and eyes on one side and the other.

The paper owl is ready.


Technorati Tags: , , , , , , , ,

Haunted House Crafts Perfect for Halloween


Haunted House Crafts Perfect for Halloween


Halloween is coming up quickly.  After all, it is at the end of this month.  When you think of Halloween what do you think of?  Probably bats, jack-o-lanterns and witches.  But, don’t forget the place they all live.  That’s right…. I’m talking about a Haunted House.  There is not much scarier than a Haunted House.  So, with that being said I am dedicating today’s craft to Haunted Houses.  I scoured the internet looking for an assortment of different kinds of Haunted House crafts perfect for Halloween.  With all 17 of these Haunted House crafts I have listed here you are sure to find one you will love.  So, without further ado….

Haunted House Crafts Perfect for Halloween

(1)   Haunted House Centerpiece


Haunted House Centerpiece


If you are throwing a Halloween party and you are looking for something to have as a centerpiece…. then I have the perfect craft for you.  Busy Bee Kids Crafts shows you how to make this spooky Haunted House Centerpiece step-by-step.


(2)  Paper Bag Haunted House


Paper Bag Haunted House


This Paper Bag Haunted House is perfect for decorating your house for Halloween, but it is also wonderful to use as party favors for a Halloween party.  You can fill these bags with goodies for the kids…. they will love it.  I found this craft over at Kaboose and it looks like a ton of fun.


(3) Haunted House Milk Carton (You can Fill This One with Treats)


Haunted House Milk Carton for Treats


This one is on our site and is made from a simple milk carton or creamer carton. All you have to do is fill with treats or candy, tape closed, wrap with paper, and decorate. Here are the craft instructions.

(4)   Popsicle Stick Haunted House


Popsicle Stick Haunted House


Here is a great Haunted House craft perfect for the youngest of children.  All Kids Network shows you how to make this Halloween craft and it is almost totally made up of Popsicle sticks.  And, we all know how much kids love making things with Popsicle sticks…. almost as much as they love eating the Popsicles.


(5)   Haunted Gingerbread House


Haunted Gingerbread House


Now, tell me how awesome this Haunted House is!!  It is just incredible…. and it is totally edible.  Gotta love that!!  I found this Haunted House craft over at Sisteroo and I hope you love it as much as I do.  This Gingerbread Haunted House makes for a perfect decoration or an edible treat for a Halloween party.

(6) Haunted House Pop Up Cards


Haunted House Pop Up Cards


Here is another Haunted House craft this from this site. Everyone loves pop up cards and this is one of the simplest types that you can make. We will teach you how to make these with just a few slits and a bit of folding. Find out the instructions here.


(7)  Cardboard Box Haunted House


Cardboard Box Haunted House


How cute is this Haunted House?  So cute!!  And, it is made out of an item you probably have laying around the house…. a cardboard box.  I found this Halloween craft over at Spoonful and it is a great find.  Check out this craft and get all the haunted details.


(8)  Spooky S’mores Haunted House


Spooky S'mores Haunted House


YUMMY!!  Here is another edible Haunted House craft.  I love the edible crafts.    If you love S’mores then you are going to surely love this craft.  Check out Kitchen Fun with my 3 Sons for all the yummy spooky details.


(9)  Shoe Box Haunted House


Shoe Box Haunted House


I just love those crafts where you can find the materials needed right in your home.  And, this craft is one of them.  Scribble Press shows you step-by-step how to make this creepy Haunted House out of a shoe box….. very clever!!


(10)  Poster Board Haunted House


Poster Board Haunted House


I love this Haunted House craft!!  I think what I love so much is the fact that this Haunted House is very narrow and tall…. it gives it a very creepy vibe.  Perfect for a Halloween decoration.  I found this Haunted House craft over at Crissy’s Crafts.  You have to check it out for yourself.


(11)  Paper Mâche Haunted House


Paper Mache Haunted House


Kids love working with Paper Mâche…. and making this Paper Mâche Haunted House will be no exception.  And, this haunted house really turns out amazing.  Get all the Halloween craft details over at Woman’s Day.


(12)  Mod Podge Haunted House


Mod Podge Haunted House


How amazing is this Haunted House?  So amazing!!  Mod Podge is a material that kids love working with…. they just do.  I know my children do.  Here B-Inspired Mama shows you how you too can make this incredible Haunted House using Mod Podge.


(13)  Spooky Haunted House


Spooky Haunted House


 AllYou shows you how to take an old dollhouse and make it into this awesome Haunted House.  Your kids are sure to get a kick out of using their old dollhouse and making it into a Haunted House.  Check out the website for all the craft details.


(14)  Heebie Jeebie Haunted House


Heebie Jeebie Haunted House


I found this Haunted House craft over at Crayola.  This Halloween craft is perfect if you are having a Halloween party.  Make a bunch of these Haunted Houses and use them to store candy…. hand them out as a Halloween Party favor.  How fun is that?!


(15)  Cardboard Boxes & Rolls Haunted House


Cardboard Boxes & Rolls Haunted House


Isn’t this a rock’n Haunted House?!  Or, should I say…. Haunted Mansion?!  I love it.  Patheos used different sized cardboard boxes and cardboard rolls to make this Haunted House craft.  It is a clever idea and it came out amazing.  Check out her site to see it for yourself.


(16)  Cereal Box Haunted House


Cereal Box Haunted House


What a great Haunted House.  And, what it totally cool about this Halloween craft is that it is simply made from a cereal box.  I love when you can find your craft materials right at home…. and in this case you can.  Check out Fun Lab Blog for all the Haunted House Craft details.


(17)  Glow in the Dark Haunted House


Glow in the Dark Haunted House


You know what is spooky?  Something that glows in the dark….. like this Haunted House.  I’m not sure why, but an item that has a glowing effect is just 10 times spookier.  And, it’s perfect for Halloween.  Make sure to check out Craft Project Ideas for the step-by-step “how-to” on making this Glow in the Dark Haunted House.

Technorati Tags: , , , , , , , ,

Coolest Earth Day Craft Ideas – Crafts Made from Recycled Materials


Coolest Earth Day Craft Ideas - Crafts Made from Recycled Materials


Earth Day will be here in just a couple of weeks.  In honor of Earth Day I thought I would scour the internet looking for cool ideas for Earth Day crafts.  All of the crafts that I found and have listed here are made from recycled materials.  Earth Day is a special day to celebrate the Earth and to increase awareness and appreciation of the Earth’s natural environment.  And, I think making crafts from recycled materials such as the ones found here is a great way to teach children about recycling and the importance of doing that to help save our Earth.  So, without further ado….

Coolest Earth Day Craft Ideas

(1)  Newspaper Roses


Newspaper Roses


Look how beautiful these Roses are?  They really are lovely & they are completely made from recycled newspapers.  Check out the craft and all its details over at Zakka Life.


(2)  Serving Tray


Serving Tray


I love, love, love this idea!!  Crafty Nest went to a Salvage Yard and noticed that there were old cupboards there.  She picked up a white one and with a little creativity and a lot of fun she was able to make this beautiful serving tray.  Check out her website so you too can make this.


(3)  Can-Do Robots


Can-Do Robots


Made from tin cans these robots are so freakin cute.  What is really cool is that their features are made of magnets, so they can be removed.  Which makes these robots like a Mr. Potato Head…. How fun is that?!  Check out the craft details over at Family Fun.


(4)  Cardboard Ottoman or Side Table


Cardboard Ottoman or Side Table


What a clever and creative idea!!  Made from recycled cardboard tubes you can choose to make either a side table or an ottoman…. or even make both.  When you look at them from above they are actually daisies.   Check out Esprit Cabane for all the crafting details.


(5)  Smashed Soda Can Animals


Smashed Soda Can Animals


Ok, this cow is really cute, isn’t he?!  But, wait till you check out Fave Crafts….. they have not only a cow, but they will show you how to make a pig and a bear too.  Make all three recycled can crafts and you will have a beginning to your very own recycled animal farm.


(6)  Milk Jug Shade


Milk Jug Shade


Now, this recycled craft turns out beautiful, doesn’t it?  Honestly, if I saw this I would have no idea it was actually made from recycled milk jugs.  But, it is.  I found this craft over at Mother Earth News.  Check out their site for all the wonderful craft details.


(7)  Recycled Picnic Basket


Recycled Picnic Basket


I found this recycled picnic basket over at bron marshall and for the main basket it is actually made from a recycled beer six-pack.  Isn’t that a clever idea?  They other container is actually made from a recycled half dozen egg carton…. they simply added a handle.  Make sure to check out their site for the full craft details.


(8)  Newspaper Basket


Newspaper Basket


This is an amazing basket!!  And, it is completely made from Newspaper.  Look how sturdy it looks too…. I love it.   How About Orange shows you step-by-step how to make this basket yourself.


(9)  Recycled Glass Chandelier


Recycled Glass Chandelier


Oh I just love this recycled craft idea…. it might just be my favorite.  I found this recycled craft over at Casa Sugar.    With a few recycled materials and some tea lights  you too can have this stunning glass chandelier.  I love the way they show this chandelier being outside…. it would be perfect for a fun outside party.


(10)  Creative Notepads


Creative Notepads


Here is a creative way to recycle those leftover notebook pages and even those left over paper scraps.  Esprit Cabane shows us how to take those leftover paper products and make them into cute little pocket size notepads.  Check out her site for the full details.


(11)  Toilet Paper Tube Albums


Toilet Paper Tube Albums


These Toilet Paper Tube Albums are just precious.  They are a beautiful way to store special keepsakes and pictures of events that you don’t want to lose.  Those Northern Skies shows you step-by-step how you too can make these albums from recycled toilet paper tubes.


(12)  Magazine Boxes


Magazine Boxes


Here is a creative and imaginative way to recycle those stacks of magazines you keep at home.  When made like the tutorial on Abstract Octopus you can actually store things in these boxes.  Check out the site for the full craft details.


(13)  Plastic Cup Earrings


Plastic Cup Earrings


Aren’t these earrings adorable?  You would never realize they were made from a plastic cup unless I told you.  I found this idea over at Punk Projects and I think it is a great way to recycle plastic cups… plus the craft is fun to do.  Make sure to check out her website for the details.

Technorati Tags: , , , , , , , , ,

11 Cool Outer Space Crafts for Kids


11 Cool Outer Space Crafts for Kids


Today I have some awesome craft ideas for you.  Not just any craft ideas…… today I have cool outer space crafts for you.  I was making my way through the internet looking for some really creative outer space crafts and I think I found them.  I found some that are made from food and others that are made from recycled materials.  I found crafts that are perfect for the youngest of crafters and others that are meant for older children.  But, bottom line…. there is an outer space craft here for you.  So, enough with the chit-chat….. let’s get started.

11 Cool Outer Space Crafts for Kids

(1)  Orbiting Planets


Orbiting Planets


Here is a great craft to help teach your kids about space and all the orbiting planets.  Plus, the craft is a lot of fun.  I found this craft over at BusyBeeKidsCrafts and they have the right idea….. use a fun craft to help teach your children about space.


(2) Recycled Robot Craft

Recycled Robot Craft

Look how cute this robot is….. so cute!!  And, it is made from many recycled materials which makes this robot even cooler.  FreeKidsCrafts shows you how you can take tin foil, an empty container and soda bottle lids and make it into a robot like above.  How fun!!


(3) Alien Pipe Cleaner Craft


Alien Pipe Cleaner Craft


I love this craft…. I just love how these little aliens turn out.  I found this Outer Space craft over at Craft Jr. She shows you step-by-step how to make the aliens as pictured above.  But, she also explains how if you have mismatched colors or pipe cleaners of different sizes it doesn’t matter…. they are aliens after all.


(4) Spiral Galaxy


Spiral Galaxy


What a pretty craft….. I love all the colors in this Spiral Galaxy Craft.  And, believe it or not this Outer Space craft is made with a paper plate and some glow in the dark paint.  TheCraftyClassroom shows you in detail how you too can make this craft.


(5) Out of this World Centerpiece


Out of this World Centerpiece


Here is a cool craft that will be a lot of fun to put together.  Plus, this Out of this World Centerpiece is perfect if you are having an Outer Space birthday party.  Imagine this being the centerpiece at the Birthday table.  Find out how to make this over at MakingFriends.


(6) Grass Head Monster


Grass Head Monster


This is an awesome Outer Space craft because your child is going to have to care for it everyday.  It is actually made with real grass seed so your child will have to care for it everyday for the grass to grow.  Check out FreeKidsCrafts for all the details.


(7) Googly Eyed Green Blobs


Googly Eyed Green Blobs


These are pretty creepy looking…. aren’t they?  I found this craft over at MakeAndTakes and she had it posted as a Halloween craft, but I thought this craft would also fit for an Alien…. so I am including it in this Outer Space crafts list.  Check out her site for all the “how-to” details.


(8)  Rocket Craft


Rocket Craft


Isn’t this Rocket craft just adorable?  I love it!!  And, it is made out of a cardboard box.  What a creative idea.  You will need help from an adult for this craft as they do use a craft knife.  But, it would be so much fun making this with your parents.  Check out Se7en for the step-by-step details.


(9) Space Cake


Space Cake


I just had to add this cake to this post.  I know it really isn’t a craft Per Se, but I think cooking can be quite crafty…. and it is also a ton of fun to do with an adult.  So, check out this Outer Space cake over at FamilyFun and get the recipe to cook with your parents.  This would be great for an Outer Space birthday party.


(10) Puffy Paint Moon Craft


Puffy Paint Moon Craft


AllKidsNetwork shows us how if you mix shaving cream and glue together it makes a lumpy and bumpy surface….. just like the moon.  Actually, what they explain is that while the glue dries it makes a smooth-textured material that puffs while it’s drying and then flattens out.  Isn’t that cool?  Go to AllKidsNetwork to check out the full details.


(11) Space Shuttle Craft


Space Shuttle Craft


Wow, isn’t this space shuttle amazing?!  It’s just so creative.  And, the best part…. It’s made out of mostly all recycled materials.  How cool is that?!  Kids of all ages will love making this space shuttle…. the younger kids will need help from an adult.  Check out LooLeDo for the entire craft tutorial.

Technorati Tags: , , , , , , , , , , ,

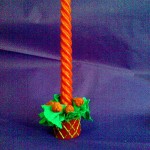
How to Make a Christmas Candle Arrangement

Today I’m going to show you how to make a Christmas Candle Arrangement.  This Christmas Candle Arrangement makes for a beautiful tabletop decoration this Holiday Season.  Make more than one candle arrangement and put them around the house as decorations.  Or, better yet….. make a few of these Christmas Candle Arrangements and give them as a gift this Christmas.  Whatever you decide to do with this craft it is sure to be a big hit this Christmas Season.

Check out our other Christmas Crafts.


Image027


Materials required:

Old toilet paper roll

Crepe paper – red, green

Glitter glue – gold

Glue

Paint – Red

Paintbrush

Scissors

A candle


Step 1

Cut through the toilet paper roll as shown below.


Image008


Step 2

Cut out a small ring of toilet paper roll about 6 cm wide.


Image009


Step 3

Overlap the ends to make a smaller roll. Tape the ends in place as shown.


Image010


Step 4

Place the candle inside the ring and stuff it with bits of torn green crepe paper. Tear the paper long enough that it comes out of the ring as shown below.


Image018


Step 5

Paint the toilet paper roll with red acrylic paint.


Image019


Step 6

Make a design on it with gold glitter glue as shown.


Image023


Step 7

Make small balls out of torn red crepe paper as shown.


Image025


Step 8

Glue the balls near the base of the candle as shown


Image026


Step 9

Place the candle on your table and you’re ready for Chistmas dinner!!


Image027


There you go…. you just finished making a Christmas Candle Arrangement.  Now, make a few more to decorate your house with this Holiday Season.  Or, have you decided to give them away as gifts?  Good for you…. either way they are sure to be enjoyed.

Technorati Tags: , , , , , , , , , , ,

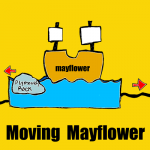
How to Make a Moving Mayflower for Thanksgiving

In 1620 the Pilgrims came to America from England on a 3000 mile voyage.  They came here on the Mayflower and landed on Plymouth Rock.  Today we will celebrate this first voyage by making a moving Mayflower for Thanksgiving.  After all, if the Pilgrims never made this trip on the Mayflower there would be no Thanksgiving.  I shutter at the thought.

Check out our other Thanksgiving Crafts.


How to Make a Moving Mayflower for Thanksgiving


Materials Needed

Paper Towel Tube

Blue, Brown and Black Construction Paper

Gray Paper (or use white paper and color it gray)

White Paper

String or Yarn

Straws, Craft Sticks or Pencils (optional)

Glue

Scissors


Step 1


Put glue all over paper towel tube.


Put glue all over paper towel tube.  Rub glue on it so now it is a thin layer of glue.


Step 2


Place cardboard tube in the center of a piece of blue construction paper.


Place cardboard tube in the center of a piece of blue construction paper.


Step 3


Fold paper so top and bottom meet.


Fold paper so top and bottom meet.


Step 4


Cut waves at the top of the blue paper.


Cut waves at the top of the blue paper.


Step 5


draw Plymouth Rock out of the paper.


First cut a gray piece of paper in half.  Then draw Plymouth Rock out of the paper. (You could also use white paper and then color it gray later.)


Step 6


draw a ship with the bottom along the fold.


Fold brown paper in half.  Then draw a ship with the bottom along the fold.  Then cut out.  Notice that the boat is a sideways bubble letter ‘C’.


Step 7


Place a 3 foot piece of string or yarn in fold of ship


Place a 3 foot piece of string or yarn in fold of ship so that equal amount is sticking out from each side.  Glue sides together.


Step 8


Cut out 2 white rectangles


Cut out 2 white rectangles…. one bigger than the other.  For masts… cut out 2 black rectangle strips.  You could also use straws, craft sticks, pencils or other items.


Step 9


Place masts in between top of glued ship while it is still wet.


Place masts in between top of glued ship while it is still wet.  Glue sails to masts by putting glue on one side and then folding together, as you see in pic #1 and #2.

Step 10


Place ship in between waves


Place ship in between waves, pull string back and forth on each side to make ship sail back and forth.

There you go…. you just finished your Moving Mayflower Boat for Thanksgiving.  How did it turn out for you?  Let me know in the comments below.

Technorati Tags: , , , , , , , , , , , ,

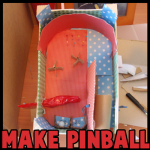
How to Make Simple Pinball Machine with Recycled Materials Crafts Project for Kids

This is a super cool crafts activity that we are going to do today. If you love playing pinball, then you will love making this simple machine…a pinball machine. Just recycle some old stuff from around your house … such as a cardboard box, pins, paper towel roll, a marble, and you will have your own handmade game / toy to play with.

You Might Also Enjoy : Making Pinball Toy from VHS Tape


How to Make Simple Pinball Machine with Recycled Materials Crafts Project for Kids


How to Make Simple Pinball Machine with Recycled Materials Crafts Project for Kids

Crafts Materials Needed

– Cardboard Box

– Extra Piece of Cardboard

– Some Thin Cardboard…Like from a Cereal Box

– Tape

– Glue

– Rubber Bands

– Strong Cardboard Tube (about 6 inches long)

– Pencil

– If you want to decorate it – decorative paper

– ruler

– marble or ball-like candy

Optional Materials to Use for Obstacles

– pins, straws, bottle caps, bottle, paper fastener, other household items (use your creativity)

Step 1


Step 1 : Making Cardboard Box Pinball Machines


Take your cardboard tube and trace 2 circles with it. Then cut them out about 1/4 inch smaller than the circle you traced.


Step 2 : Making Cardboard Box Pinball Machines


Cut Out these two circles….like I said, a bit smaller than you had traced them at.

Step 2


Step 3 : Making Cardboard Box Pinball Machines


Glue these 2 circles together.


Step 3


Step 4 : Making Cardboard Box Pinball Machines


Tape these circles to the eraser-side of the pencil. Tape it VERY well by taping it around the base of the pencil too.

Step 4


Step 5 : Making Cardboard Box Pinball Machines


Now take out 4 rubber bands, any size…just make sure that they are sturdy rubber bands. You are going to tie them all together by following the 3 steps above. Just put one end of a rubber band through another rubber band (#1) and then pull this rubber band through itself (#2) and then pull (#3).


Step 5.5 : Making Cardboard Box Pinball Machines


Link all 4 of these rubber bands together using this method.

Step 5


Step 6 : Making Cardboard Box Pinball Machines


Now take the cardboard tube out and poke a hole through it with a scissor 1 inch from the bottom. Do the same thing on the other side of the cardboard tube.


Step 6.1 : Making Cardboard Box Pinball Machines


Just showing you that I poked the hold in it with a scissor. Do the same thing on the opposite side.

Step 6


Step 6.2 : Making Cardboard Box Pinball Machines


Now pull the rubber bands through both ends of the tube so that it looks like the picture above.

Step 7


Step 7 : Construction Pinball Simple Machine Activity for Children


Now tie very loose knots on both ends of the rubber band chain…one on either end of the cardboard tube.

Step 8


Step 8 : Construction Pinball Simple Machine Activity for Children


Now pull the pencil-circles piece through the cardboard tube, making sure to avoid the rubber bands. While the cardboard circles are at the top… pull 2 rubber band loops over the pencil. Do one on the left and then the one on the right.

Step 9


Step 9 : Construction Pinball Simple Machine Activity for Children


Cut 2 inches out of the box on the bottom right. I decorated my box with cool paper, but you don’t need to.

Step 10


Step 10 : Construction Pinball Simple Machine Activity for Children


Cut out a piece of cardboard that is about half the length of the pinball box. The width of the cardboard should be about an inch higher than the height of the pinball box. Draw a line where the height of the pinball box would be, as I did above. Then cut slits in the cardboard like I did above, in the portion of the cardboard to the right of this line.


Step 10.1 : Construction Pinball Simple Machine Activity for Children


Now bend on this line.


Step 10.2 : Construction Pinball Simple Machine Activity for Children


Glue it on the left side of the opening in the box. Glue at bottom and also glue it to the side of the box, where it touches the pinball box.

Step 11


Step 11 : Construction Pinball Simple Machine Activity for Children


Cut a thin piece of cardboard that is about 1 and a half times the width of the pinball box. It should be the same height of your pinball box. Now cut slits on the right and left side of this cardboard.


Step 11.2 : Construction Pinball Simple Machine Activity for Children


Now paste it to both sides of the box.

Step 12


Step 12 : Construction Pinball Simple Machine Activity for Children


Cut another piece of cardboard that is about 1 and a half times the width of your pinball box….it should be about 2 to 2 and a half inches high. Now cut slits all down the bottom of this piece of cardboard.


Step 712.1 : Construction Pinball Simple Machine Activity for Children


Turn the pinball box over. Now bend and fold the cardboard piece that you just cut to look like the picture above. This is going to be the stand for your pinball machine so that it is tilted. Glue this stand on the bottom of the box (at the back of the box).

Step 13


Step 13 : Construction Pinball Simple Machine Activity for Children


Measure about 3/4 inches up the bottom of the pinball box. Cut a hole half way up the height of the box, at the point your measured 3/4 inches.  Then also cut a hole on the barrier.

UNTIE THE LOOSE KNOTS IN THE RUBBER BANDS ON EITHER SIDE OF THE CARDBOARD TUBE!!

Then put the cardboard tube cannon into the 2 inches gap in the box….and then put the rubber bands through each of the holes.

Double knot on both sides.

Step 14


Cut hole and put notches in the side of the box


So first make your flipper with cardboard or Popsicle sticks and. I taped mine with red duct tape to make it look nicer.

We are going to cut a hole in the pinball box to put the flipper in. Use your judgment, depending on your box, on where you want to place the flipper.

Then Make a notch at the top and bottom of this hole to fit the flipper in securely.


Step 14 : Construction Pinball Simple Machine Activity for Children


I put the flipper in. Make sure that it works properly. If this doesn’t work properly for you…use a paper fastener. Directions are in this tutorial that I found on the net.

Step 15


Step 15.1 : Construction Pinball Simple Machine Activity for Children


Cut a long and thin strip of cardboard.


how to make an envelope fold


Fan Fold it…Fold forwards, then backwards, then forwards, then backwards….


Step 15.2 : Construction Pinball Simple Machine Activity for Children


Until it looks like this.


Step 15 : Construction Pinball Simple Machine Activity for Children


Now touch the first strip to the last strip and it turns into a star. Glue it together. To hook it to your pinball machine…use a sewing pin / doll pin and stick it in the center of it. Now when a marble hits it, it spins.

Step 16


Step 16 : Construction Pinball Simple Machine Activity for Children


To make some good barriers, use doll pins or sewing pins and stick them just far enough from each other that the marble will fit through, but make it move in different directions.

Step 17


Step 17 : Construction Pinball Simple Machine Activity for Children


Cut a 2 inch piece of cardboard out and cut strips out like I did above.


Step 17.1 : Construction Pinball Simple Machine Activity for Children


Now fold and glue it at the bottom of the pinball box, like I did in the picture.


Step 17.2 : Construction Pinball Simple Machine Activity for Children


Paste another one like the previous one…do a 3rd or 4th one too if you want to.

Step 18


Step 17.3 : Construction Pinball Simple Machine Activity for Children


I put a piece of decorative paper in each half circle.

Step 19


Step 17.4 : Construction Pinball Simple Machine Activity for Children


Put a score in each of them too. These don’t have to be just at the bottom…they can be anywhere on the pinball board.

Use Your Creativity to Make More Obstacles


How to Make Simple Pinball Machine with Recycled Materials Crafts Project for Kids


I didn’t quite finish it because this is where YOUR creativity comes in. We can post your ideas here.

You Might Also Enjoy Our Other Crafts Tutorial : Making Pinball Toy from VHS Tape

I found a few other Pinball Making Tutorials Online that will give you some great ideas. Read them below

How to Make a Simple Pinball Machine

FETCH! Pinball Wizard

Design Your Own Pinball Machine.

Use Your Creativity to Make More Obstacles

Fire the marble out of the cannon / plunger by lowering the pencil a bit, putting the marble in the top of the cannon, and then pull the pencil down, and let go. Now hit the flipper to keep the ball up in the air longer. Write the number of points that you get with each turn down on a piece of paper. However…make your pinball machine the way that you WANT it to be…no the way that I want mine to be like.

Have fun!

Technorati Tags: , , , , , , , , , , , , ,

How to Make Cardboard Tubes Log Cabin for Abe Lincoln on Presidents Day

Well it is going to be February in 2 hours, so I figured that I would put up a Toy Log Cabin Craft Building craft to celebrate Abraham Lincoln’s birthday. Why? Because it is Presisents Day soon. Just use paper and cardboard tubes / rolls and then just connect them together easily.


How to Make Cardboard Tubes Log Cabin for Abe Lincoln on Presidents Day


How to Make Cardboard Tubes Log Cabin for Abe Lincoln on Presidents Day

Crafts Materials Needed

– Paper Towel Rolls
– Toilet Paper Rolls
– Construction Paper or Card Stock
– Scissors

Step 1


Step 1 : Making Paper Towel Roll Log Cabin Craft for Kids


First off, take a piece of construction paper and cut 3 or so long strips out. These will be used to connect the tubes (logs) together.

Step 2


Step 2 : Making Paper Towel Roll Log Cabin Craft for Kids


Fold the pieces of construction paper, these will be the corners of the log cabin to hold the tubes together.


Step 3


Step 2.5 : Making Paper Towel Roll Log Cabin Craft for Kids


For all of the cardboard tubes….make slits parallel to each other…as you see in the picture above.

Step 4


Step 3 : Making Toilet Paper Roll Log Cabin Craft for Kids


Here is a picture illustrating how to put the log cabin together…take the piece of folded paper…and stick the cardboard tube onto the piece of paper by inserting the paper into the slits that are on the tubes.

Step 5


Step 4 : Making Toilet Paper Roll Log Cabin Craft for Kids


Here is one of the folded pieces of paper (corner pieces) with 6 tubes on it. This shows you how we will build the log cabin. You don’t have to follow my directions…lay out the cabin the way that you want to.

Step 6


Step 5 : Making Toilet Paper Roll Log Cabin Craft for Kids


This is how you make windows and doors….you can use toilet paper rolls for the parts around the doors and windows…and use long, paper towel rolls for logs that have to go all the way across the structure.

Step 7


Step 6 : Making Toilet Paper Roll Log Cabin Craft for Kids


Use an entire piece of paper for the roof and then just place it within the four corners of your log cabin house.

Step 8


How to Make Cardboard Tubes Log Cabin for Abe Lincoln on Presidents Day


I hope that you enjoyed this building arts and crafts project to help celebrate Abraham Lincoln’s birthday for Presidents’ Day.

Technorati Tags: , , , , , , , , , , , , , , ,

How to Make Jesus in a Manger for Nativity Scene Arts and Crafts Project for Christmas

Christmas is coming up soon and this is the day that baby Jesus was born. How about making a tiny manger for the baby of Christmas, Jesus and a part of your Nativity Scene with a toilet paper roll. The step by step instructions are given below.


Image046


How to Make Jesus in a Manger for Nativity Scene Arts and Crafts Project for Christmas

Craft materials required:

Toilet paper roll

White scrap cloth

Scissors

Black and brown markers

Colored paper- hay colors


Image035


Step 1

Cut the paper roll through the center as shown.


Image036


Step 2

Cut a piece of  the toilet paper roll as shown.


Image037


Step 3

Color with black and brown markers as shown.


Image038


Step 4

Glue the other piece of the toilet roll upside down on it as shown.


Image039


Step 5

Cut thin strips of paper and glue them as shown.


Image005


Image040


Step 6

Cut out a shape for the baby as shown. Draw eyes and a mouth.


Image041


Step 7

Wrap with scrap cloths. Use tape to hold it in place.


Image043


Step 8

Wrap some more cloth loosely and place the baby on the manger.


Image046


CHRISTMAS CRAFTS ACTIVITIES & IDEAS FOR KIDS

It is almost Christmas time so check out our Christmas Coloring Pages & Christmas Crafts for Kids Page to find some great Christmas crafts project ideas for kids to celebrate Xmas such as .. Advent Calendar Crafts ..Candy Cane Crafts ..Christmas Angel Crafts ..Christmas Cards Crafts ..Christmas Bells Crafts ..Christmas Coloring Pages .. Santa Coloring Pages .. Christmas Elf Crafts .. Christmas Gift Bags Crafts ..Christmas Gift Tags Crafts .. Christmas Games & Activities .. Christmas Nativity Scenes .. Christmas Soda Can Crafts .. Christmas Placemat Crafts ..Christmas Poinsettias Crafts .. Christmas Sewing Patterns .. Christmas Tree Crafts ..Christmas Tree Ornament Crafts ..Christmas Wreath Crafts ..Gingerbread House Crafts ..Gingerbread Man Crafts .. Mittens and Gloves Crafts ..Recycle Christmas Cards to Make Other Crafts ..Reindeer Crafts .. Winter Penguin Crafts .. Winter Snow Crafts .. Winter Solstice / Yule Crafts ..Santa Clause Crafts .. Santa Hats Crafts .. Santa’s Sleigh Crafts ..Snowflake Crafts ..Snowman Crafts .. Stocking Crafts .. Wrapping Paper Craft

Technorati Tags: , , , , , , , , , , , , , , , , ,