Awesomely Cool Valentine’s Day Mailbox Craft Ideas


Awesomely Cool Valentine’s Day Mailbox Craft Ideas


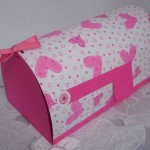
Valentine’s Day is next month.  Now is the time to start getting your Valentine’s Day Mailboxes ready for February.  Valentine’s Day mailboxes are a great way to collect your Valentine’s Day cards from all your friends and family members.  I have searched the internet and found some really wonderful and awesomely cool Valentine’s Day Mailboxes.  Surely, out of all the Valentine’s Day mailbox crafts I have listed in this post you will find one that fits your needs…. plus, it promises to be tons of fun for you and the kids.

Check out our other Valentines Day Crafts.


Awesomely Cool Valentine’s Day Mailbox Craft Ideas

(1)  Valentine Stick Box


Valentine Stick Box


Here is a super cute way to hold all your Valentine’s Day cards this year.  Made from 65 skill sticks this Valentine’s Mailbox will surely be a ton of fun to make.  I found this craft over at Making Friends…. check it out for yourself.


(2)  Cardboard Box Valentine Mailbox


Cardboard Box Valentine Mailbox


Now, isn’t this Valentine Mailbox super cute?  It really is.  Spoonful shows us how to take a rectangular cardboard box and make it into something very useful…. collecting your Valentine’s Day cards.  Sounds like a lot of fun to me.


(3)  Robot Valentine’s Day Box


Robot Valentine's Day Box


Oh boy…. this Valentine Mailbox is outrageously adorable.  I found this craft at eHow and I just love the idea.  Here they use recycled materials… like shoe boxes and toilet paper rolls to make this mailbox.  Gotta love that!!


(4)  Crepe Paper Flowers Valentine Box


Crepe Paper Flowers Valentine Box


Wow…. what girl wouldn’t just love this Valentine Box.  Plus, it is so much fun to make.  Using crepe paper streamers of different shades of pink Todays Fabulous Finds shows you step-by-step how to make this beautiful Valentine Mailbox.


(5)  Valentine’s Day Suitcase Mailbox


Valentine's Day Suitcase Mailbox


Here is a unique Valentine’s Day Mailbox craft…. and it is one of ours from a previous year.  In this post we show you how to take a recycled cereal box and transform it into this functional suitcase Valentine Mailbox to hold all your cards.  Check out How to Make this Valentine’s Day Suitcase Mailbox for yourself.


(6)  Valentine’s Day Card Holder


Valentine's Day Card Holder


Here is a great way to make a Valentine’s Day card holder using a couple of plastic plates.  Plastic plates are very durable and a great way to hold all of your Valentine’s Day cards.  Plus, this craft is not only easy, but also a lot of fun to make.  Check out Free Kids Crafts for all the details.


(7)  Card Stock Mailbox


Card Stock Mailbox


Wow, this mailbox is really beautiful…. and perfect for holding your Valentine’s Day cards.  Splitcoast Stampers shows you how you too can make this Card Stock Valentine Mailbox.  Check out the site to find the link to her very own template to make one for yourself.


(8)  Conversation Heart Mailbox


Conversation Heart Mailbox


Here is another Valentine Mailbox that is made from a cereal box.  I love the crafts that use recycled materials…. it just makes me feel so good.  Kaboose shows us how to make this adorable Valentine Mailbox that promises to be not only easy, but a lot of fun as well.


(9)  Paper Doily Heart Valentine Box


Paper Doily Heart Valentine Box


Here is another Valentine Mailbox that came from our site last Valentine’s Day.  Here we show you how to take some paper doilies that you can get at a dollar store or discount store and also use our printable template to make this fully functional and adorable heart mailbox.  Check out How to Make a Paper Doily Heart Valentine Box for all the craft details.


(10)  Valentine Card Holder Purse


Valentine Card Holder Purse


Okay, I know that most girls are just going to love this Valentine card holder.  Made from a half gallon ice cream container this card holder purse is simply adorable.  I found this craft over at AllCrafts.net and it is amazing.  What a great way for any little girl to hold on to her Valentine’s Day cards.


(11)  Crazy Card Carrier


Crazy Card Carrier


Here is a wonderful way to carry your Valentine’s Day cards to and from your Valentine’s Day party destination.  Made from card stock and a gift bag this Valentine’s Day Mailbox Craft is just simply adorable.  Check out Spoonful for all the fun details.


(12)  Bear Valentine Bag


Bear Valentine Bag


This bear is a cutie patootie and will surely be helpful carrying your Valentine’s Day cards back and forth.  Made from a small brown gift bag it will surely be a lot of fun to make.  The kids can use their imagination to decorate the bear bag as they wish.  Check out All Kids Network to see the craft for yourself.


(13)  Tin Valentine Boxes


Tin Valentine Boxes


Here are some Tin Valentine Mailboxes…. a craft I found at The Dating Divas.  They are super cute and perfect to have for each one of your family members to collect their Valentine’s Day cards.  Make one for each of the members in your family.  They are durable enough to use every Valentine’s Day.


(14)  Kleenex Box Valentine’s Day Mailbox


Kleenex Box Valentine's Day Mailbox


Here is another fun and easy Valentine’s Day Mailbox that you can make with your kids.  Made from an empty tissue box it is another great way to make something from recycled materials.  Education.com shows you how to make this adorable Valentine’s Day mailbox step-by-step.

Technorati Tags: , , , , , , , , , , , , ,

How to Make an Elegant Pen Holder

Since school is back in session I decided to show you how to make an Elegant Pen Holder.  This elegant pen holder will look wonderful on any desk and it is so useful.  No longer will you have pens and pencils floating around your desk…. you will now have a spot for all your pens and pencils.  This craft is so easy and a lot of fun.  It is made from recycled boxes so it is a great green craft too.  Add style to your desk with this elegant pen holder.  Let’s get started.

Check out our other Back to School Crafts.

Laura from Dacian Moon Handmade  will show you, step by step, how to make this craft.


Materials Needed

– recycled box
– cardboard
– pen
– craft glue
– scissors
– paint
– paintbrush
– aluminum foil


Step 1

From the recycled box we will make two holders.  Trace your shape on the box…  I made a wave shape.


Cut on the line…


… and you have the two pieces. You can adjust the edge until you are happy with the result.


Step 2

We will use aluminum foil to cover them. This way we will add a nice texture.


Cut a piece of foil (wide enough to cover the holder piece) and place one holder in the middle.


Cover it with foil.


Press well to preserve the shape of the holder.


Step 3

Apply a layer of glue on the base…


… and place it on the cardboard piece (also covered in foil).


Do the same with the other holder piece.  Flatten the foil well and let the glue dry.


Step 4

Use a wide paintbrush to cover it with paint. Apply as many layers that you need until it looks as you want.


I applied 3 layers of paint on mine and I think it looks good.


And, there you have it….. you now have an Elegant Pen Holder.  This pen holder will look great on any desk.

Technorati Tags: , , , , , , , , , , , , , ,

How to Make a Cheerful Lunch Box

In this post I’m going to show you how to make a fun and cheerful lunch box.  School has just started and one of the kids favorite times of day is lunch time.  You know what would make it more memorable for them is to make this lunch box craft with your child.  Your child will be so proud to take their homemade lunch box to school with them.  Plus, there will surely be no other person with a matching lunch box.  So, grab the materials needed and let’s get started.

Check out our other Back to School Crafts.

Laura from Dacian Moon Handmade   will show you, step by step, how to make this cheerful and girlish lunch box.


Materials Needed

– recycled box
– cotton cloth
– pen
– craft glue
– scissors
– tulle pieces
– bead
– needle and thread
– auto-adhesive crystal bead


Step 1

Cut 3 squares of tulle…


… place one on top of the other…


… and sew the bead on the middle…


… like this.


Step 2

Place the cloth over the box lid and mark the contour.


Cut it out…


… like this.


Sew the tulle flower on the middle of it…


… like this.


Step 3

Remove (as much as you can) the label on the lid, then add glue on it…


… like this…


… and place the decorated cloth on it.


Step 4

Now, that the lid is ready, is time to decorate the box.


Place the cloth over it and measure the height.


Cut a strip that measures that height.


Apply a layer of glue on it…


… and cover the box. I made some folds on the front to make it less plain.


Take the auto-adhesive crystal…


… and use it to highlight the folds.


Now the decorated lunch box is ready.


Now you have no ordinary lunch box.  You have a very girly and fun lunch box that no other person will have.  Enjoy it!!

Technorati Tags: , , , , , , , ,

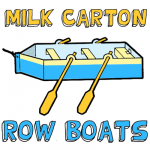
How to Make a Milk Carton Row Boat

Today I have a craft for you that is perfect for the nice warm summer season.  In this post I will show you how to make a Milk Carton Row Boat.  Made from a couple of milk cartons this row boat will actually float.  What is nice about milk cartons is that their waxy surface makes them completely water proof…. perfect for the water.  So, grab the materials needed and let’s get started.

Check out our other Milk Carton Crafts.


How to Make a Milk Carton Row Boat


Materials Needed

2 Milk Cartons

Pen or Pencil

Scissors

Tape

Nail

String


Step 1


Rinse out 2 finished Milk Cartons.


Rinse out 2 finished Milk Cartons.  Let dry.


Step 2


Put carton on its side... draw a line 2 inches from bottom.


Put carton on its side… draw a line 2 inches from bottom.  Cut along this line.

Step 3


Draw what you see above along the top edge of the carton.


Draw what you see above along the top edge of the carton.  For the oar locks…. make a dot in the center of each.


Step 4


Cut along the unwanted part using guidelines from last step.


Cut along the unwanted part using guidelines from last step.


Step 5


Use 2nd milk carton.


Use 2nd milk carton.  Cut a seat that is about 1.5 inches wide.


 Step 6


Cut strips that are a bit wider than the width of the first milk carton.


Cut strips that are a bit wider than the width of the first milk carton.  Fold tabs as seen.


Fold tabs down.


Fold tabs down.


Step 7


Draw oars on extra milk carton.


Draw oars on extra milk carton.  Cut out 4 of them.


Step 8


Tape the seats into the boat.


Tape the seats into the boat.


Step 9


With a nail, poke a hole in each oar lock.


With a nail, poke a hole in each oar lock.  Also, poke a hole in front of boat.  Put an oar in each oar lock.  Tie string around the hole in the front of the boat.  Now go play with your boat.

And that’s it.  You just made yourself your very own Milk Carton Row Boat.  Use it in your pool, bath tub or any body of water.  Enjoy!!

Technorati Tags: , , , , , , , , ,

How to Make a Leprechaun Hat for St. Patrick’s Day

I don’t know about you, but when I think of a Leprechaun I think of the big, green hat he wears.  Today I’m going to show you how to make your very own Leprechaun Hat for St. Patrick’s Day.  After all, St. Patrick’s Day is only a little over a week away.  Now is the time to get started making and displaying your St. Patrick’s Day crafts.  So, grab the materials needed and let’s get started with this fun St. Patrick’s Day craft.

Check out our other St. Patrick’s Day crafts.


How to Make a Leprechaun Hat


Materials Needed

Large Ice Cream Carton or Bucket

Green Craft Foam or Wrapping Paper

Paper Plate

Green Paint

Pencil

Scissors

Glue

Tape

Belt or Black Foam/Paper & Yellow Paper


Step 1


You need a large ice cream carton or bucket.


You need a large ice cream carton or bucket.


Step 2


Wrap with green craft foam or with green wrapping paper.


Wrap with green craft foam or with green wrapping paper.  Leave hole at bottom.


Step 3


Paint a paper plate green.


Paint a paper plate green.


Step 4


Trace carton in center of plate.


Trace carton in center of plate.


Step 5


Now draw tabs.


Now draw tabs.


Step 6


Cut out.... fold tabs inwards.


Cut out…. fold tabs inwards.


Step 7


Glue and tape tabs inside of container.


Glue and tape tabs inside of container.


Step 8


The easy way to add a belt is to borrow your Dad's belt and strap it on hat.


The easy way to add a belt is to borrow your Dad’s belt and strap it on hat.


Or..... just add black strip of foam or paper.  And, yellow square with center cut out.


Or….. just add black strip of foam or paper.  And, yellow square with center cut out.


Step 9


Wear the hat.


Wear the hat.

Isn’t this Leprechaun Hat adorable?  What child wouldn’t enjoy running around the house wearing this Leprechaun Hat for St. Patrick’s Day?  Enjoy.

Technorati Tags: , , , , , , , , , , , , ,

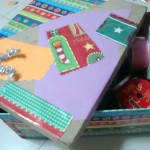
How To Make a Craft Box With a Used Gift/Shoe Box

A sturdy shoe or gift box can be transformed into a pretty craft box where you can store your art and craft materials and accessories. A few easy steps to follow, but feel free to use your own creativity.  No need to follow this craft step by step.  Each craft box made will look differently than anybody else’s craft box…. that’s how it should be.  So, grab the materials you need to make your craft box and let’s get started.


Materials Needed

Used cardboard box (gift/shoe)
Wrapping Papers
Colored Scratch Papers
Scissors
Glue/Glue Gun
Ribbons


Step 1

Prepare materials needed. Choose papers and ribbons to use.


Step 2

Place wrapping paper on the bottom and gently press it against the box to create the side’s dimension. With a pair of scissors, cut the paper giving about a half inch more on one side, and the exact measurement on the other side.


Step 3

Glue paper onto the box, folding the extra side to overlap the other side. Continue the same steps until all sides are covered. If your box has a hole handle, you may leave the wrapper until just below the handle.


Step 4

Be more creative when wrapping the box cover. You can partially cover one side and have your kid glue shaped pieces of papers and wrappers. Add a ribbon or two.

And that’s it! Your box is now ready for storing your craft accessories.  Now, you have all your craft supplies in one place so you can find them easily.

Technorati Tags: , , , , , , , , , ,

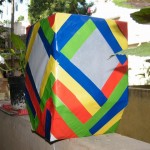
How to Make a Cardboard Box Lantern

I have a fun and creative craft for you today.  In this post I will be showing you how to make a Cardboard Box Lantern.  That’s right…. it is a lantern that you can use outside that it made from a cardboard box.  The box is simply decorated with colored sheets of paper and the box is fitted over a light bulb.  This Cardboard Box Lantern will be a great addition to any light fixtures you use outside during a party.  It is sure to help get the festivities going.  So, let’s get started with the craft.

Check out our other Cardboard Box Crafts.


Materials Needed

A square box

scissors

glue

butter paper

some wire

colored paper


Step 1

Draw lines as shown on two opposite flaps of the box.


Step 2

Cut the edges of the cardboard box equally on two opposite sides as shown.


Step 3

Now, when you bring all 4 flaps together, it will form a shape as shown below.


Step 4

On the bottom of the box, cut out a small square as shown below.


Step 5

On every side of the box, draw and cut out a diamond shape as shown below.


Step 6

Cover the box with butter paper


Step 7

Cut out colored paper strips as shown below


Step 8

Fix some wire on the top as shown to hang the lantern.


Step 9

Cover the lantern with paper strips as shown.


Step 10

Put a bulb in the lantern and hang it up on your porch.  That’s it…. the Cardboard Box Lantern is finished.  Now, set it outside for your next party….. it is sure to be a conversation piece.

Technorati Tags: , , , , , , , , ,

How to Make a Kitty Cat out of a Heart Valentines Day Box

I have a fun craft for you today….. and the coolest part is you will get to use your old Valentines Day Heart Box that you had been given as a gift on Valentines Day.  Today I’m going to show you how to make a Kitty Cat out of a Heart Valentines Day Box.  This cat is made from tissue paper and paper plates….. it is so much fun to make.   Once you are done with this craft not only will you have a cute kitty cat, but you will also have a super cool box to store whatever you would like.  So, let’s get started.


How to Make a Kitty Cat out of a Heart Valentines Day Box


Materials Needed

Valentines Day Box

Paper Plates (a few)

Tissue Paper Squares (Orange & White)

Pencil

Glue

Brown Felt

Marker

Lids (One larger than the other for tracing circles)

Paper (White, Blue & Black)

Craft Foam or String

Scissors

Tape


Step 1


Start with a Valentines Day Box.


Start with a Valentines Day Box.


Step 2


Add glue to a paper plate.


Add glue to a paper plate.


Buy or cut tissue paper squares.


Buy or cut tissue paper squares.


Grab a pencil and wrap square around eraser of pencil.


Grab a pencil and wrap square around eraser of pencil.


Dip pencil into glue.


Dip pencil into glue.


Now dab pencil onto heart


Now dab pencil onto heart… pick back up.


Now leave tissue paper behind


Now leave tissue paper behind like this.


Step 3


Keep doing this.... Orange at the top and white at the bottom.


Keep doing this…. Orange at the top and white at the bottom.


It should look like this.


Like this.


Step 4


Cut a rounded triangle from brown felt.


Cut a rounded triangle from brown felt.


cut three thin rectangles.


Also, cut three thin rectangles.


Glue them as the nose and the mouth.


Glue them as the nose and the mouth.


Step 5


Trace 2 big white circles with lids.


Trace 2 big white circles with lids.


Trace 2 slightly smaller blue circles.


Trace 2 slightly smaller blue circles.


Trace slightly smaller black circles.


Trace slightly smaller black circles.


Draw 4 small white circles.


Draw 4 small white circles.


Glue them together to look like this.


Glue them together to look like this.


Step 6


Draw an ear shape with a rectangle shape at the bottom and cut out.


Draw an ear shape with a rectangle shape at the bottom on a paper plate and cut out.


Cut out two ears... then fold rectangle inwards.


Cut out two ears… then fold rectangle inwards.


Glue and tape ears on sides.


Glue and tape ears on sides.


The ears should look like this now.


The ears should look like this now.


Step 7


Now dab / glue orange tissue paper squares around outside of ears.


Now dab / glue orange tissue paper squares around outside of ears.


Step 8


Either cut a few of these pieces from craft foam or use string.


Either cut a few of these pieces from craft foam or use string.  Tape together at one end.


Stick the ends of whiskers underneath nose.


Stick the ends of whiskers underneath nose.


Finished kitty cat craft


Look how cute this craft turns out?!  It turns out so cute!!  Plus, wasn’t it a lot of fun to make?  How did your Kitty Cat turn out?  Let me know in the comments below.  And, make sure to take a picture of your craft and post that in the comments as well…. I’d love to see it.

Technorati Tags: , , , , , , , , , , ,

How to Make an Owl Mailbox for Valentines Day

Valentines Day is coming up in less than a week.  If you don’t have a Mailbox to collect your Valentines Day Cards in then you are missing out.  No worries…. in this post I’m going to show you how to make an Owl Mailbox for Valentines Day.  This mailbox is perfect for collecting all your Valentines Day Cards.  Don’t be stuck holding a brown paper bag to collect your Valentines in…. that’s just boring.  So, grab the materials needed and let’s get started.

Check out our other Valentines Day Crafts.

Laura from Dacian Moon Handmade will show you, step by step, how to make this.


Materials Needed

– recycled box
– beautifully patterned wrapping paper
– white and red paper
– scissors
– pen
– glue
– glitter glue
– cutter


Step 1

Take the recycled box and draw a “window” on it (a rectangle in the middle) … like this.


Draw another “window” on top. Be careful to not draw too close to the edge.


Cut the “windows” out. Take care not to cut yourself.


It will look like this.


And the “window” on top.


Step 2

Put wrapping paper under the the lid with the “window” and draw its outline.


Cut it out, like this.


Apply a layer of glue on the back of it…


… and stick it in place.


Step 3

Glue wrapping paper on the other sides of the box too.

For the top do the same as in step 2.


Apply a layer of glue inside the box and cover it with white paper (you can cover only the back, because only this part is visible through windows).


Like this.


Step 4

Now, let’s decorate it.  Draw a simple owl outline and 2 wings on white paper.


Draw another one on red paper.


Cut them out.


Now let’s prepare a tree branch to stand on.


You can use your pen to give it some color, like this.


Cut  it out and glue it on a lower corner of the front window.


Step 5

Now you have to assemble owls. We’ll start with the white one. First, color its eyes.


Then, put glue on the upper side of one red wing…


… and stick it in place. Do the same with the other one.


Make sparkling points on its body with glitter glue…


… like this.


What’s missing? Cut a small triangle from the red paper to make its beak.


Do the same with the other owl. Aren’t they cute?!


Step 7

Apply glue where you want to place the owl.


I put them on the left side of the window. To keep them on sturdy, cover a little of the lid with one of them, like this.


The other one will stay near the first, holding hands (or wings). They look so cute together.


Step 8

Draw one circle on white paper and one on red paper (slightly bigger).


Cut them out.


On the white one write “Happy Valentines Day”.


Apply glue on the opposite corner of the window…


… and stick the red circle there.


Over it place the white one.


Your mailbox is now ready to be used.


There you go…. your Owl Mailbox for Valentines Day is ready.  Now, you are all set to collect all your Valentines Day Cards.  Enjoy!!

Technorati Tags: , , , , , , , , , , , , , ,

How to Make a Candy Box for Valentines Day

Are you planning on giving your special someone something special for Valentines Day?  Is that something special some candy?  Well, instead of just giving your someone special an ordinary heart shaped box filled with candy…. why not give that person a handmade Candy Box this Valentines Day?  Imagine their surprise when they see that you gave them something you made yourself.  The craft is an easy one, but turns out really beautiful.  So, grab the materials needed and let’s get started.

Check out our other Valentines Day Crafts.

Laura from Dacian Moon Handmade  will show you this Candy Box tutorial step-by-step.


Materials Needed

– pattern cardboard (ideally with different pattern on the sides)
– assorted ribbon
– scissors
– card punch
– pencil


Step 1

Cut a square from the cardboard.


Divide your card into thirds.


Rotate the card 90 degrees and divide the card into thirds again. You now have 9 squares scored on your card.


Step 2

On each of the four corner squares, score a line diagonally, from the corner of the square in toward the center.


Fold along the horizontal lines …


… then along the vertical ones…


… and eventually along the diagonal lines.


It will look like this.


Punch a hole in each of the four corner squares…


… like this.


Take a piece of ribbon …


… and thread it through the punched holes.


Draw the ends of the ribbon together and tie a knot, or a bow if you like. Now fill it with candy.


And, that’s it!!  Easy Peasy Lemon Squeezy!!  You just finished your Candy Box for Valentines Day.  How did it turn out?  Now, fill with candy and give it to your favorite someone this Valentines Day.

Technorati Tags: , , , , , , , , , ,

How to Make an Abe Lincoln Top Hat for President’s Day

Yesterday I showed you how to make a an Easy George Washington Hat for President’s Day.  Well, it wouldn’t be right to make a hat and celebrate George Washington’s special day if we don’t do the same thing for Abraham Lincoln.  So, today I will show you how to make an Abe Lincoln Top Hat for President’s Day.  After all, President’s Day is about honoring both George Washington and Abraham Lincoln.  And, what better way to honor Abraham Lincoln than to make his top hat.  So, grab the materials needed and let’s get started.

Check out our other President’s Day Crafts.


How to Make an Abe Lincoln Top Hat for President's Day


Materials Needed

Oatmeal Container

Black Felt, Paper or Foam

Paper Plate

Black Paint

Pen or Pencil

Scissors

Glue


Step 1


Grab an Oatmeal Container.


Grab an Oatmeal Container.


Step 2


Take the cap of the rolled oats container and cover with black felt


Take the cap of the rolled oats container and cover with black felt, paper or foam.


Step 3


Put the cap on the box and then wrap black paper, felt or craft foam around the box


Put the cap on the box and then wrap black paper, felt or craft foam around the box.  Leave opening unwrapped.


Step 4


Paint a plate black.


Paint a plate black.


Step 5


Trace the oatmeal box on the center of plate.


Trace the oatmeal box on the center of plate.


Step 6


Draw tabs into circles and then cut out.


Draw tabs into circles and then cut out.


Step 7


Cut out and it will look like this.  Fold tabs inwards.


Cut out and it will look like this.  Fold tabs inwards.


Step 8


Put glue on tabs and glue to inside of box.


Put glue on tabs and glue to inside of box.


Step 9


Let glue dry.


Let glue dry.

And, there you have it…. you just finished your Abe Lincoln Top Hat for President’s Day.  How did it turn out for you?  Let me know in the comments below.  Now, go wear it proudly.

Technorati Tags: , , , , , , , , ,

How to Make a Paper Doily Heart Valentine Box

Valentines Day will be here in just a few weeks.  And, with Valentines Day comes Valentines Cards from family and friends.  What better way to store these loving and wonderful Valentines Cards than to store them in a beautifully festive Valentine Box.  Today I’m going to show you how to make a Paper Doily Heart Valentine Box.  This box is a perfect way to keep your Valentines Cards for years to come.  A perfect way to keep your memories from this special Valentines Day.  Imagine how fun it would be to look back on this Valentines Day years later and read all your Valentines Cards.  It would be wonderful.  So, let’s get started.

Check out our other Valentines Day Crafts.


How to Make a Paper Doily Heart Valentine Box


Materials Needed

Printer

Paper or Cardstock

Doily

Scissors

Paste, Glue or Tape


Click on one of the Templates below to make larger and to print.  You can choose to use the colored template or if you prefer to trace your template on Cardboard or Card Stock print off the second template.

Colored Template


Color template for Doily Heart Box


Template to Trace


Paper template to trace valentine box


Step 1


Print out template.


Print out template.


Step 2


Cut out template


Cut out template.


Step 3


Fold box and paste or tape together.


Fold box and paste or tape together.


Step 4


Now glue a doily around the outside


Now glue a doily around the outside to give it a lacy valentine look.

And, that’s it….. you just made a Paper Doily Heart Valentine Box.  Isn’t it adorable?  How did your Valentine Box turn out?  Let me know in the comments below.  And, don’t forget to take a picture of your finished Valentine Box and add it to the comment…. I would love to see it.

Technorati Tags: , , , , , , , , , , , , , ,

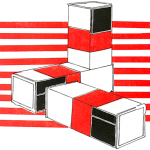
How to Make Connecting Building Blocks

Today I’m going to show you how to make Connecting Building Blocks.  These blocks are made from simple milk cartons or cream containers.  This is a great way to teach young children how items can fit together.  So, let’s get started.


How to Make Connecting Building Blocks


Materials Needed

Milk or Cream Cartons

Aluminum Foil or Cellophane

Tape

Poster Paint

1 Teaspoonful Soap Flakes or Detergent

Construction Paper, Crepe Paper, or Grocery-bag Paper

Rubber Cement


Don’t throw away those empty waxed milk cartons. You haven’t milked the last drop out of them yet! They can be washed, cut, pasted, painted, linked, and eventually thrown away with a clear conscience—after all, they’re free! Milk and cream cartons with flat tops are ideal for preschool block play. The advertising on the outside won’t bother the you at all, but covering the writing can be fun in itself.

Wrappers of aluminum foil will turn these blocks into glittering silver bricks (optionally).  Just cover as you would a gift package, and fasten each end with a tiny piece of tape; or poster paints will stick to the waxed surface if you put a teaspoonful of packaged soap or detergent into the jar of paint before you start; or paper (construction, crepe, or from grocery bags) can be made to adhere, with rubber cement.

These are more fun and more challenging than plain building blocks. They join together with great ease, and the play possibilities are endless.


If two square openings are cut in each carton, the blocks can then be linked together, one into another


If two square openings are cut in each carton, the blocks can then be linked together, one into another.


These blocks can be connected to construct all sorts of shapes and forms


These blocks can be connected to construct all sorts of shapes and forms, then taken apart and put together again, this time in a completely different way. This is more than just a “keep busy” activity —it is an engrossing project, excellent for developing co-ordination, and imagination too!

Technorati Tags: , , , , , ,

How to Make an Ant Farm Jar and Watch an Ant Colony Build Mazes

This is a great project for kids who are interested in nature and bugs. This is an easy project for kids of any age and you get to watch ants build an underground city…so it is pretty cool. This ant farm has no openings, so you don’t have to worry about the ants escaping. You can open the jar outside to feed the ants, and then close it back up and bring it inside to observe.


How to Make an Ant Farm Jar and Watch an Ant Colony Build Mazes Craft Activity for Kids


How to Make an Ant Farm Jar and Watch an Ant Colony Build Mazes Craft Activity for Kids

Crafts Materials Needed

– 2 Jars – One Big, One Smaller
– Loose, Sand-Like Soil
– Water
– Sugar

Step 1

Clean both jars out, and dry them out. Take the outside wrappers off so you will be able to see inside the ant jar.

Step 2


Put the smaller jar, without its lid, upside down, within the bigger jar. Try to center it.


Put the smaller jar, without its lid, upside down, within the bigger jar. Try to center it. Poke a few tiny holes in the jar lid, small enough for ants to not escape.


Step 3


Fill the outside area between both jars, with the sandy-soil.


Fill the outside area between both jars, with the sandy-soil. Make sure that the entire area is filled, but don’t pack it tightly or the ants will not be able to dig their way through it.

Step 4 : Finding and Trapping the Ants

Now you must find the ants for your ant farm jar. Go looking in your back yard or in the local park. If you still can not find any ants then you can build an ant trap. Ants love sugar, so what you should do is put some sugar, mixed with a tiny bit of water, into a jar or can. Put it on its side and keep an eye on it…when you have about 20 ants. Don’t get more than 20 ants…crowding too many ants in the jar will make them less active and less fun to watch. You can close the jar and put them in your ant farm jar (DO THIS OUTSIDE – NOT INSIDE YOUR HOUSE).  Important : Make sure that these ants are from the same colony or they will land up fighting and killing each other.


Step 5 : Close That Jar Tight

Make sure to close that jar tight. Don’t worry about the ants getting enough air because you will be opening it to put food in there. Believe it or not, that is plenty of air for your ants.


How to Make an Ant Farm Jar and Watch an Ant Colony Build Mazes


Feeding Your Ants

Do the feeding of your ants outside to keep them from escaping into your house (or I will get a lot of nasty emails from your Moms). 🙂

Once a week (no more than this) feed the ants a few drops of sugar water. You can put it directly into the soil. You can also drop in there a few grains of bird or grass seed.

FEEDING ANTS TOO MUCH CAN KILL THEM!

Keep Your Ants Safe

– Keep your ant jar away from direct blow of air conditioners, radiators, and heaters…keep them at normal room temperature.

– Keep them out of the direct glare of sunlight.

The Fun Part is Watching Your Ants Build an Underground City

Now just watch and observe your ants build their own littler underground city. They can build them most amazing, intricate mazes. I hope you enjoyed this project.

Technorati Tags: , , , , , , , , , , , , ,

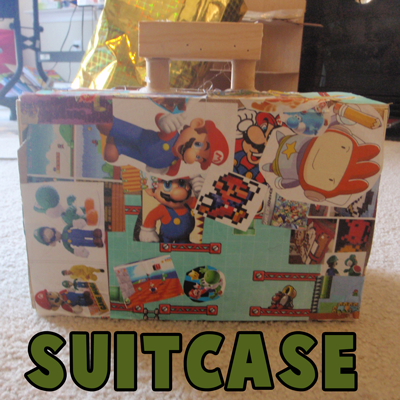
How to Make a Super Mario Wooden Suitcase From Clementines Boxes Crafts Idea

Today we will show you how to make an old-fashioned looking wooden suitcase out of Clementines Boxes and Wooden Thread Spools. You can decorate the box with any cartoon characters that you want, but my son is obsessed with Nintendo and Super Mario Bros characters so I decided to make this for him. He LOVES it…and I hope you will too. The illustrated instructions can be found below.

By the way…Yes, it does open and close. The pieces fit together so snugly, that you don’t even need a strap to keep it closed.


How to Make a Super Mario Wooden Suitcase From Clementines Boxes Crafts Idea


How to Make a Super Mario Wooden Suitcase From Clementines Boxes Crafts Idea

Crafts Materials Needed

– 2 Wooden Clementines Boxes
– Screwdriver (Prying out Staples with Parental Help)
– Elmer’s Glue
(optional) Glue Gun (with Parental Help)
– Duct Tape
– Wooden Spools
– Magazine Cutouts

Step 1


Step 1 : Making Wooden Suitcases Arts and Crafts Idea for Kids


Take out 2 Clementines Boxes (or other wooden fruit boxes).


Step 2 : Making Wooden Suitcases Arts and Crafts Idea for Kids


There are 4 wooden posts in each clementines box. With parental supervision or permission, take a screwdriver and pry out the staples to take out the 4 posts.


Step 3 : Making Wooden Suitcases Arts and Crafts Idea for Kids


Now you have all 4 posts out.

Step 2

Now glue all 4 sides back together. If your parents are around have them hot glue the sides together so you don’t have to wait for the glue to dry.

Step 3


Step 4 : Making Wooden Suitcases Arts and Crafts Idea for Kids


After the glue has dried, the boxes should fit together now, like the above picture.

Step 4


Step 5 : Making Wooden Suitcases Arts and Crafts Idea for Kids


Now stick duct tape all long the bottom so that the bottom of the boxes looks like this.


Step 6: Making Wooden Suitcases Arts and Crafts Idea for Kids


If you take the boxes apart, this is what it should look like from the inside.

Step 5


Step 7 : Making Wooden Suitcases Arts and Crafts Idea for Kids


To make the handles…use will be using all 4 posts that you took out in step #1.

If you glue 2 posts together, you will get a rectangle like the white illustration above.

Then take 2 spools and glue them to the box as seen above…notice that they are slightly off the box in to the center of the box….Then glue 1 rectangle to the top of each set of spools.

Step 6


Step 8 : Making Wooden Suitcases Arts and Crafts Idea for Kids


Cut out all the pictures that you want to glue to the box. My son loves Super Mario Bros and Donkey Kong and Scribblenauts so I made sure to cut out a lot of those video games characters.

Step 7


Step 9 : Making Wooden Suitcases Arts and Crafts Idea for Kids


We aren’t just going to glue these to the box, we are going to use a process called decoupage.

Decoupage (or découpage) is the art of decorating an object by gluing colored paper cutouts onto and object and then sealing it with a varnish over and over again until it is sealed. It will appear as if it is part of the wood or object.

So take some Elmer’s glue (or any brand obviously) and make a mixture of 50% water and 50% Elmer’s Glue.  Mix it together with a paint brush. Or if you have Modge Podge use that (something that they sell at crafts stores.

Step 8


Step 10 : Making Wooden Suitcases Arts and Crafts Idea for Kids


Brush your  mixture directly on to your suitcase surface.

Step 9


Step 11 : Making Wooden Suitcases Arts and Crafts Idea for Kids


Now start sticking on your pictures, making sure to brush the glue mixture onto the pictures as you put them down. Put more pictures down, continuing to brush the glue mixture all over the surface.


Step 12 : Making Wooden Suitcases Arts and Crafts Idea for Kids


Wrap pictures all around the box…making sure to put plenty of glue mixture all over everything. Make sure to flatten the pictures out and not to make it so wet that there are globs.

Let it dry and then put another coat on. I put 4 coats on … each time letter it dry in between putting more coats on.

Finished Nintendo Suitcase


How to Make a Super Mario Wooden Suitcase From Clementines Boxes Crafts Idea


This is my son’s finished suitcase…he loved it and all my kids want me to make one for them or to help them make one…so I guess we need to eat a LOT of Clementines (I have 4 kids) . I hope that you had fun.

Technorati Tags: , , , , , , , , , , , , , , ,

How to Make a Magnetic Travel Board Games Set with Altoids Tins Craft for Kids

Today I will show you how to make a really cool travel board games kit out of magnets, paper and an altoids tin. This is a great travel game board system that you can stick in your pocket to bring to school with you to play on the bus, in the cafeteria, or what ever. You could even bring it in the car with you to play with your sisters and brothers with. Or you can just play solo since there are 2 different solitaire games to play.


How to Make a Magnetic Travel Board Games Set with Altoids Tins Craft for Kids


How to Make a Magnetic Travel Board Games Set with Altoids Tins Craft for Kids

Crafts Materials Needed

– Altoids Tin
– Magnetic Tape, Magnetic Sheets, or Old Unwanted Fridge Magnets
– Paper
– Paste / Glue
– Scissors

First Print Out These 2 Pages


Today I will show you how to make a really cool travel board games kit out of magnets, paper and an altoids tin.


Click on Image Above to Print Out Game Boards Inserts


Today I will show you how to make a really cool travel board games kit out of magnets, paper and an altoids tin.


Click on Image Above to Print Out Game Pieces


How to Make a Magnetic Travel Board Games Set with Altoids Tins Craft for Kids


See this altoids tin…soon it will be your favorite game to take with you in your pocket.

Step 2


Making Magnetic Chess Checkers and Dots and Squares Game Boards


Cut out the game boards and just place the ones that you want to use within the tin. You don’t even need to glue them in…they will just stay inserted.


Step 3


Making a Backgammon Game Boards Kids with Magnets


If you want to use backgammon, then glue both of them to the back of the tin…as I did in the picture above.

Step 4


Making Magnetic Chess Pieces


Cut out the game pieces and glue them to the magnets.  For the Dots and Square game…you can just cut out thin slits of magnet to use as the lines.

Step 5


Backammon, Pegs Solitaire, Pyramid Solitaire, Dots and Squares Checkers and Chess Games


Above you can see all of the game inserts that come with this craft.

Here are Instructions on How to Play the Following Games:

Peg Solitaire Cross

Peg Solitaire Pyramid

Dots and Squares

Checkers

Chess

Backgammon (needs dice)

Reversi

Tic Tac Toe

Technorati Tags: , , , , , , , , , , , , , ,