How to Make Paper Thanksgiving Table Toys

Many people wonder how to keep the kids at the children’s Thanksgiving table entertained.  Sure, you will have the Thanksgiving meal which will occupy them for a little bit.  But, what about all the other time they will spend at the table?  How do you keep them entertained and safe from boredom?  Well, today I have a craft for you and the children that will keep the little ones entertained.  In this post I will show you how to make Paper Thanksgiving Table Toys.  This will surely keep them happy…. for a little while anyway.

Check out our other Thanksgiving Crafts.


How to Make Paper Thanksgiving Table Toys


Materials Needed

Printer & Paper

Scissors

Tape

Glue

Cereal Box

White Paper


Click on template images below to make larger and to print.

People Template 1


People Template 1


People Template 2


People Template 2


People Template 3


People Template 3


People Template 4


People Template 4


People Template 5


People Template 5


Pilgrims Table Food Template


Pilgrims Table Food Template


Step 1


Print out the templates.


Print out the templates.


Step 2


Cut out each individual piece.


Cut out each individual piece.


Step 3


Fold on each line.


Fold on each line…


Fold like this.


Fold like this.


Step 4


Tape in back.


Tape in back.


Step 5


Now it stands.


Now it stands.


Step 6


For the two guys who have arms... glue together.


For the two guys who have arms… glue together.


Glue basket on hands.


Glue basket on hands.

Step 7


Print template.


Print template.


Step 8


Cut out each of the legs.


Cut out each of the legs.


Step 9


Glue on cereal box cardboard.


Glue on cereal box cardboard.


Step 10


Cut out and fold and crease very well.


Cut out and fold and crease very well.


Step 11


Cut out cardboard long and wide enough for legs.


Cut out cardboard long and wide enough for legs.


Step 12


Glue on white paper.


Glue on white paper.


It should look like this.


Like this.


Step 13


Have an adult cut a few slits on the table top... spaced out.


Have an adult cut a few slits on the table top… spaced out.


Step 14


Cut out bowls of food and put tabs into slit.


Cut out bowls of food and put tabs into slit.


On bottom of table push tabs in.


On bottom of table push tabs in.


It should look like this.


Like this.

Step 15


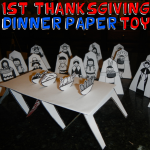
Finished Paper Thanksgiving Table Toy


And, there you go…. you just finished your Paper Thanksgiving Table Toy.  This will be perfect for the children at the Thanksgiving kids table to play with.  They will really enjoy it.

Technorati Tags: , , , , , , , , , , , , ,

Haunted House Crafts Perfect for Halloween


Haunted House Crafts Perfect for Halloween


Halloween is coming up quickly.  After all, it is at the end of this month.  When you think of Halloween what do you think of?  Probably bats, jack-o-lanterns and witches.  But, don’t forget the place they all live.  That’s right…. I’m talking about a Haunted House.  There is not much scarier than a Haunted House.  So, with that being said I am dedicating today’s craft to Haunted Houses.  I scoured the internet looking for an assortment of different kinds of Haunted House crafts perfect for Halloween.  With all 17 of these Haunted House crafts I have listed here you are sure to find one you will love.  So, without further ado….

Haunted House Crafts Perfect for Halloween

(1)   Haunted House Centerpiece


Haunted House Centerpiece


If you are throwing a Halloween party and you are looking for something to have as a centerpiece…. then I have the perfect craft for you.  Busy Bee Kids Crafts shows you how to make this spooky Haunted House Centerpiece step-by-step.


(2)  Paper Bag Haunted House


Paper Bag Haunted House


This Paper Bag Haunted House is perfect for decorating your house for Halloween, but it is also wonderful to use as party favors for a Halloween party.  You can fill these bags with goodies for the kids…. they will love it.  I found this craft over at Kaboose and it looks like a ton of fun.


(3) Haunted House Milk Carton (You can Fill This One with Treats)


Haunted House Milk Carton for Treats


This one is on our site and is made from a simple milk carton or creamer carton. All you have to do is fill with treats or candy, tape closed, wrap with paper, and decorate. Here are the craft instructions.

(4)   Popsicle Stick Haunted House


Popsicle Stick Haunted House


Here is a great Haunted House craft perfect for the youngest of children.  All Kids Network shows you how to make this Halloween craft and it is almost totally made up of Popsicle sticks.  And, we all know how much kids love making things with Popsicle sticks…. almost as much as they love eating the Popsicles.


(5)   Haunted Gingerbread House


Haunted Gingerbread House


Now, tell me how awesome this Haunted House is!!  It is just incredible…. and it is totally edible.  Gotta love that!!  I found this Haunted House craft over at Sisteroo and I hope you love it as much as I do.  This Gingerbread Haunted House makes for a perfect decoration or an edible treat for a Halloween party.

(6) Haunted House Pop Up Cards


Haunted House Pop Up Cards


Here is another Haunted House craft this from this site. Everyone loves pop up cards and this is one of the simplest types that you can make. We will teach you how to make these with just a few slits and a bit of folding. Find out the instructions here.


(7)  Cardboard Box Haunted House


Cardboard Box Haunted House


How cute is this Haunted House?  So cute!!  And, it is made out of an item you probably have laying around the house…. a cardboard box.  I found this Halloween craft over at Spoonful and it is a great find.  Check out this craft and get all the haunted details.


(8)  Spooky S’mores Haunted House


Spooky S'mores Haunted House


YUMMY!!  Here is another edible Haunted House craft.  I love the edible crafts.    If you love S’mores then you are going to surely love this craft.  Check out Kitchen Fun with my 3 Sons for all the yummy spooky details.


(9)  Shoe Box Haunted House


Shoe Box Haunted House


I just love those crafts where you can find the materials needed right in your home.  And, this craft is one of them.  Scribble Press shows you step-by-step how to make this creepy Haunted House out of a shoe box….. very clever!!


(10)  Poster Board Haunted House


Poster Board Haunted House


I love this Haunted House craft!!  I think what I love so much is the fact that this Haunted House is very narrow and tall…. it gives it a very creepy vibe.  Perfect for a Halloween decoration.  I found this Haunted House craft over at Crissy’s Crafts.  You have to check it out for yourself.


(11)  Paper Mâche Haunted House


Paper Mache Haunted House


Kids love working with Paper Mâche…. and making this Paper Mâche Haunted House will be no exception.  And, this haunted house really turns out amazing.  Get all the Halloween craft details over at Woman’s Day.


(12)  Mod Podge Haunted House


Mod Podge Haunted House


How amazing is this Haunted House?  So amazing!!  Mod Podge is a material that kids love working with…. they just do.  I know my children do.  Here B-Inspired Mama shows you how you too can make this incredible Haunted House using Mod Podge.


(13)  Spooky Haunted House


Spooky Haunted House


 AllYou shows you how to take an old dollhouse and make it into this awesome Haunted House.  Your kids are sure to get a kick out of using their old dollhouse and making it into a Haunted House.  Check out the website for all the craft details.


(14)  Heebie Jeebie Haunted House


Heebie Jeebie Haunted House


I found this Haunted House craft over at Crayola.  This Halloween craft is perfect if you are having a Halloween party.  Make a bunch of these Haunted Houses and use them to store candy…. hand them out as a Halloween Party favor.  How fun is that?!


(15)  Cardboard Boxes & Rolls Haunted House


Cardboard Boxes & Rolls Haunted House


Isn’t this a rock’n Haunted House?!  Or, should I say…. Haunted Mansion?!  I love it.  Patheos used different sized cardboard boxes and cardboard rolls to make this Haunted House craft.  It is a clever idea and it came out amazing.  Check out her site to see it for yourself.


(16)  Cereal Box Haunted House


Cereal Box Haunted House


What a great Haunted House.  And, what it totally cool about this Halloween craft is that it is simply made from a cereal box.  I love when you can find your craft materials right at home…. and in this case you can.  Check out Fun Lab Blog for all the Haunted House Craft details.


(17)  Glow in the Dark Haunted House


Glow in the Dark Haunted House


You know what is spooky?  Something that glows in the dark….. like this Haunted House.  I’m not sure why, but an item that has a glowing effect is just 10 times spookier.  And, it’s perfect for Halloween.  Make sure to check out Craft Project Ideas for the step-by-step “how-to” on making this Glow in the Dark Haunted House.

Technorati Tags: , , , , , , , ,

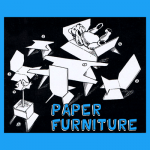
How to Make Paper Furniture Foldables

If you are looking for more furniture for your dollhouse then I have the craft for you.  Today I’m going to show you how to make Paper Furniture Foldables.  The cool part is the majority of the paper furniture doesn’t even need glue or tape to hold them together…. simply cut and fold.  We are going to make a Table, High Chair, Chair, Bed, Stool, Flower Box and even a Flower.  So, grab the materials needed and let’s get started.

Check out our other Doll House Furniture Crafts.


How to Make Paper Furniture Foldables


Materials Needed

Paper

Scissors

Toothpick

Gum, Play Dough or Clay

Paste or Tape

Thin piece of Paper (optional)


Table


Table


1.  First cut a rectangle shaped piece of paper (whatever size you decide).
2.  Then cut the 4 black slits in the piece of paper as pictured in the diagram.
3.  Now that you have cut the slits, fold down on the red dashed lines.


High Chair


High Chair


1.  First cut a rectangle shaped piece of paper (whatever size you decide).
2.  Then cut the 4 black slits in the piece of paper as pictured in the diagram.
3.  Now that you have cut the slits, fold down on the red dashed lines seen in the picture.


Chair


Chair - 1st part


1.  First cut a house-shaped piece of paper by following the directions in picture above.


Chair - 2nd part


2.  Then cut the 4 black slits in the piece of paper as pictured in the diagram.
3.  Now that you have cut the slits, fold down on the red dashed lines.


Bed


Bed


1.  First cut a rectangle shaped piece of paper.
2.  Then cut the 4 black slits in the piece of paper as pictured in the diagram.
3.  Now that you have cut the slits, fold down on the red dashed lines.


Stool


Stool


1.  First cut a square shaped piece of paper (whatever size you decide).
2.  Then cut the 4 black slits in the piece of paper as pictured in the diagram.
3.  Now that you have cut the slits, fold down on the red dashed lines.


Flower Box


Flower Box


1.  First cut a square shaped piece of paper.
2.  Then cut the 4 black slits in the piece of paper as pictured in the diagram.
3.  Now that you have cut the slits, fold down 2 sides down (as per the red dashed lines seen in the picture.) Leave 2 sides unfolded for now.
4.  Now fold the 2 remaining sides up, instead of down, as seen in the 3rd pic in the illustration above
5.  As seen in the 3rd pic of the illustration above as well…fold the corners over.
6.  If you don’t want to glue in pace, then you can use a thin piece of paper for lining and then just fold it over the sides to keep in place. Otherwise just paste or tape in place…it is as easy as that.


Flower


Flower


To make the paper flower to go in the flower box, follow these instructions…

1.  First cut a square shaped piece of paper.
2.  Then cut the 4 black slits in the piece of paper…each along the corners of the square…as pictured in the diagram.
3.  Now make a fold along each of the red dashed lines. You will now have a flower.
4.  Stick a tooth pick thru the center of the flower.
5.  Use gum, play dough or clay to stick the flower in and then place in the box.


Finished Paper Furniture Foldables


Awesome job….. you just finished making the Paper Furniture Foldables.  Now, take what you made and decorate your dollhouse…. you’ll have a blast playing with your new Paper Furniture.

Technorati Tags: , , , , , , , , , , , , , , ,

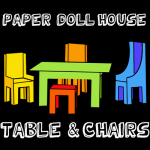
How to Make a Paper Doll House Table & Chairs

Today I’m going to show you how to make a Paper Doll House Table & Chairs perfect for any doll house.  The craft is easy to make…. perfect for a child of any age.  Simply print, cut and fold.  You can choose to print off the color templates or if you would rather color your table and chairs yourself all you need to do is print off the black and white templates.  The choice is yours.  So, let’s get started.

Check out some of our other Cardboard Doll House Furniture & other Doll House Furniture


How to Make a Paper Doll House Table & Chairs


Materials Needed

Printer

Paper

Scissors

Glue

Crayons or Markers (optional)


Below are the printable templates.  Click on the image to make larger and to print.

High Backed Chair


High backed chair printable color template


High backed chair printable black & white template


Common Chair


Common chair printable color template


Common chair printable black & white template


Stool


Stool printable color template


Stool printable black & white template


Table


Table printable color template


Table printable black & white template


All Furniture on One Template


All furniture printable color template


All furniture printable black & white template


Step 1


 Print out paper template.


Print out paper template.


Step 2


Cut out furniture.


Cut out furniture.


Step 3


If you printed out the black and white templates.... color them in.


If you printed out the black and white templates…. color them in.


Step 4


Fold on dotted lines and glue together.


Fold on dotted lines and glue together.


Finished paper doll house table & chairs


And, there you have it.  You have just finished making a paper doll house table and chairs.  This doll house furniture would go great in any doll house.  If you don’t have a doll house…. why not make one.  We have a couple for you… check out How to Make a Cardboard Doll House and How to Make a Shoe Box Doll House.

Technorati Tags: , , , , , , , , , , ,

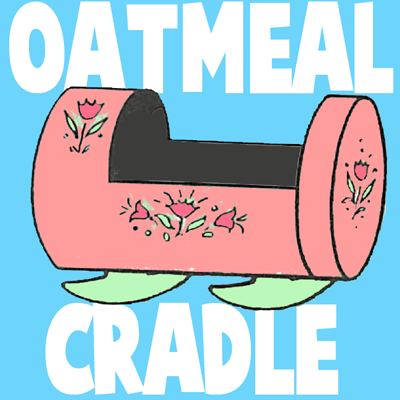
How to Make Oatmeal Containers Baby Doll Cradles Craft for Kids

If you make a little cradle like this for your favorite doll, you can be sure she won’t disturb you during the night with her crying.  This oatmeal container / box cradle is very easy to make and it really turns out great. Have fun!

You Might Like Our Other Dolls and Doll House Crafts


How to Make Oatmeal Containers Baby Doll Cradles Craft for Kids


How to Make Oatmeal Containers Baby Doll Cradles Craft for Kids

Crafts Materials Needed:

– oatmeal box

– cardboard

– ruler

– pencil

– magazine cut-outs

– glue

– scissors

– paints and brush or crayons

Step 1

Remove the cover from the oatmeal box and save it as you will need it later.


Remove the cover from the oatmeal box and save it as you will need it later.


With a pencil and ruler, mark off 2 and 1/2 inches from the bottom of the box, for the hood of the cradle.


mark off 2 and 1/2 inches from the bottom of the box, for the hood of the cradle.


Cut away the upper half of the remainder of the box. Directly in the center of the under part, and one inch from each end, make two crosswise slits, a little more than one inch in length, as in the illustration above.


Step 2


Cut two rockers from cardboard, with a small tab at the top


Cut two rockers from cardboard, with a small tab at the top, as in illustration B.

Step 3


Fit the tabs of the rockers into the slits in the under part of the cradle.


Fit the tabs of the rockers into the slits in the under part of the cradle. Try your cradle, it should rock nicely.

Step 4 (Optional) : Decorate Your Cradle with Paint or Decorative Papers or Magazines


Decorate Your Cradle with Paint or Decorative Papers or Magazines


Glue the cover back onto the box for a footboard. Paint the cradle and allow it to dry thoroughly. To decorate the cradle, glue on magazine cut-outs, or decorate with colored wax crayons, as in illustration C.
You Might Like Our Other Doll House Crafts

Technorati Tags: , , , , , , , , , ,

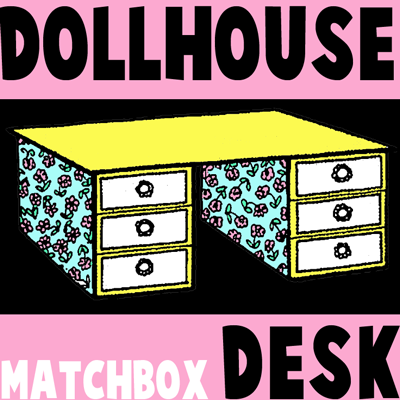
How to Make a Miniature Desk for Your Dolls House Craft for Kids

Do you want to make a desk for your dollhouse so that the dolls can actually open up the drawers and put things int he desk? This is a great craft that actually turns out fantastic. I hope you enjoy this diy dollhouse furniture miniatures tutorial for kids.

You Might Like Our Other Doll House Crafts


How to Make a Miniature Desk for Your Dolls House Craft for Kids


How to Make a Miniature Desk for Your Doll House with Empty Match Boxes for Kids

Crafts Materials Needed:

– 6 empty match boxes

– cardboard, 8 by 4 & 3/4 inches

– decorative paper

– 6 buttons

– paint

– glue

– scissors

– tape measure or ruler

Step 1


How to Make a Miniature Desk for Your Dolls House Craft for Kids


Glue three match boxes one on top of the other. Do the same with the other three match boxes. These will be for the drawers of the doll chest.

Step 2


How to Make a Miniature Desk for Your Dolls House Craft for Kids


Glue decorative paper all around the two separate sets of match boxes. Paint the ends of the inside parts of the match boxes the same color as you will paint the cardboard for the top of the chest.


Step 3


How to Make a Miniature Desk for Your Dolls House Craft for Kids


Paint the cardboard a color either matching or contrasting with the decorative paper. Glue it on top of the match boxes. There will be 3 inches between the two sets of match boxes.

Step 4


How to Make a Miniature Desk for Your Dolls House Craft for Kids


Glue on pretty buttons, or beads, as indicated in the illustration, and your chest of drawers will be finished.

Finished Desk of Drawers for Your Dolls


How to Make a Miniature Desk for Your Dolls House Craft for Kids


This is what a finished doll house desk looks like. I hope that you had fun and that your drawers desk turned out incredible! See You Later!
You Might Like Our Other Doll House Crafts

Technorati Tags: , , , , , , ,

How to Make a Shoe Box Doll House Arts and Crafts Project for Kids

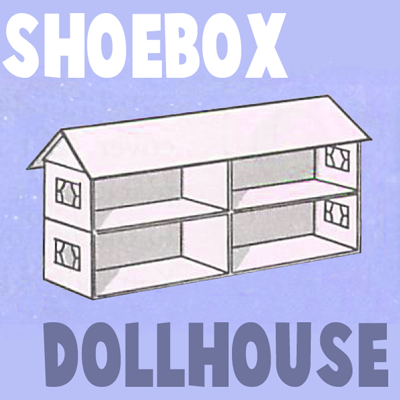
Today we will show you how to make a really great toy doll house out of shoe boxes and other materials. This little two-story doll house with its gabled roof can be made in less than a half hour by any handy boy or girl. To make it you will need the following materials below.

Check Out Our Doll House and Doll House Furniture Making Crafts Section for more of the same types of crafts.


How to Make a Shoe Box Doll House Arts and Crafts Project for Kids


How to Make a Shoe Box Doll House Arts and Crafts Project for Kids

<<Crafts Materials Needed:>>

– shoe boxes

– ruler

– cardboard

– pencil

– scissors

– glue or paste

– paints (optional)

– lace paper doilies (optional)

– brush (optional…needed only if you paint)

– fancy paper (optional…needed only if you want to wallpaper the inside of the house)

Step 1

Remove the covers from four shoe boxes of the same size, and throw them away as you will not need them. Glue one pair of shoe boxes together, end to end.


Glue one pair of shoe boxes together, end to end.


Glue the second pair of boxes the same way.

Step 2

Place the boxes with the open ends towards you, and glue the second pair over the first to make a two-story house.


Place the boxes with the open ends towards you, and glue the second pair over the first to make a two-story house.


Step 3

For the roof, measure a piece of cardboard two inches longer than the width of the house. ( When the roof is folded and placed over the house, the overhang will be one inch on each side. Cut out the roof. Fold the roof section exactly in half, the long way, as in illustration A.


For the roof, measure a piece of cardboard two inches longer than the width of the house.


Step 4

For the gables of the roof, cut two triangular pieces of cardboard, with a little flap on each of the three sides, as in illustration B.

Bend the flaps back.


For the gables of the roof, cut two triangular pieces of cardboard


Step 5

Glue the bottom flap to the box top, and the two other flaps to the underside of the roof section. Do the same to the gable at the other end.


Glue the bottom flap to the box top, and the two other flaps to the underside of the roof section.


Step 6 : Wallpaper or Paint (Either is Optional)

Paint the inside of each of the four rooms a different color. Allow them to dry thoroughly. If you like, you may glue fancy paper to the walls of the rooms, instead.

Step 7 : Cut Out Windows and Curtains

Cut out windows, and glue pieces of lace paper doilies inside the windows, for curtains, as in illustration C.


Cut out windows, and glue pieces of lace paper doilies inside the windows, for curtains


Check Out Our Doll House and Doll House Furniture Making Crafts Section for more of the same types of crafts.

Technorati Tags: , , , , , , , , , , , ,

Make a Paper Doll House Rocking Chair – Foldable Paper Crafts

Learn how to take a simple piece of paper and turn it into a doll house sized rocking chair. This is a paper folding arts and crafts project for kids (girls and boys) to make your very own toys….instead of using your money to buy them. We have a lot of paper doll house furniture to post on this crafts blog, so keep an eye open for other doll house furniture as well. Check Out Our Doll House and Doll House Furniture Making Crafts Section for more of the same types of crafts. AND if you want to make a Cool Doll House Out of Old Cardboard Boxes, this is a great crafts tutorial for you.


How to Make Doll House Rockers / Rocking Chairs with Paper Folding Instructions

Step 1


Fold into sixteen squares.

Step 2


Cut off one row of squares.

Step 3


Cut out squares A and B.

Step 4


Cut on blue lines.

Step 5

Crease and paste square D to C and F to E.

Step 6


Cut rockers and top of chair.
Check Out Our Doll House and Doll House Furniture Making Crafts Section for more of the same types of crafts. AND if you want to make a Cool Doll House Out of Old Cardboard Boxes, this is a great crafts tutorial for you.

Technorati Tags: , , , , , , , , , , , , , , , ,

Make a Paper Doll House Bed – Foldable Paper Crafts for Kids

Learn how to take a simple piece of paper and turn it into a doll house sized doll bed. This is a paper folding arts and crafts project for kids (girls and boys) to make your very own toys….instead of using your money to buy them. We have a lot of paper doll house furniture to post on this crafts blog, so keep an eye open for other doll house furniture as well. Check Out Our Doll House and Doll House Furniture Making Crafts Section for more of the same types of crafts. AND if you want to make a Cool Doll House Out of Old Cardboard Boxes, this is a great crafts tutorial for you.


Make a Paper Doll House Bed – Foldable Paper Crafts for Kids

CRAFTS MATERIALS NEEDED:

*Paper, 4-inch square.

Step 1


Fold paper into 16 squares.

Step 2


Fold edge to crease nearest to it on three sides of the square.

Step 3

Cut on the creases just made (on the blue line).

Step 4


Cut out oblongs A and B and squares C and D.

Step 5


Cut freehand the footboard, the headboard, and the sides to represent the legs.

Step 6

Crease and paste.

Step 7


Separate pieces of paper may be cut out and pasted to represent the sides of the bed.

Check Out Our Doll House and Doll House Furniture Making Crafts Section for more of the same types of crafts. AND if you want to make a Cool Doll House Out of Old Cardboard Boxes, this is a great crafts tutorial for you.

Technorati Tags: , , , , , , , , , , , , ,

How to Make Cardboard Doll House Furniture with Old Boxes

Today we are going to show you how to make cardboard doll house furniture, decorations, and wall hangings. This is a great activity for a group of girls at a sleepover slumber party, for girl scouts, or for a boring rainy day. Have fun.

Check Out Our Doll House and Doll House Furniture Making Crafts Section for more of the same types of crafts.


How to Make Cardboard Doll House Furniture with Old Boxes

Materials for Doll House Furniture:

*Small cardboard boxes of different sizes (or wooden boxes)

*Scissors

*Paste

*Scraps of materials

*Old magazines

Directions for Making Cardboard Doll House Furniture


You can make sturdy little tables, chairs, beds, bureaus, etc out of all the little boxes that find their way into your house.

Make a Cardboard Doll House Chest of Drawers


The picture above shows a little box standing on its narrow end. This has been transformed into a chest of drawers simply by outlining drawers and drawer knobs on the face of the box. Put a little bureau scarf made out of a tiny piece of material on top of it.

Make a Cardboard Doll House Cabinet with Doors


A box of similar shape will make a fine little cabinet with opening doors. The picture above shows how to cut out the cabinet’s doors. Draw little hinges on the uncut side of the doors. Use paper clips for handles.

Make a Cardboard Doll House Table


You can make tables of all sizes out of halves of boxes. Just cut out the four sides of your box in the way shown by the colored lines in the picture above.


You will then have the sturdy little one-piece table which is illustrated in the picture above.

Make a Cardboard Doll House Arm Chair

Here’s how you make an arm chair: Take the lid of a little box and use it to make the table shown in the previous step. This will serve as the bottom half of the arm chair.


You form the top of the arm chair out of the other half of the box. Cut one of the walls completely away. To shape the arms, draw lines on each side of the facing walls, as shown by the colored lines in the picture above.


Now paste this piece on top of the base and your arm chair will look above.

Other Doll House Furniture and Decorations

To make the bed, paste a piece of pretty  material over a shallow box. Then paste a little ruffle around the sides.

The spice cabinet is made by pasting half a tiny box on the kitchen wall.

You can hang a pocket mirror above the bureau.

Use old magazines to cut out little pictures for the walls. Make rugs out of scraps of cloth or paper.

The previous arts and crafts project that we did was to make a cardboard doll house out of old cardboard boxes.

Check Out Our Doll House and Doll House Furniture Making Crafts Section for more of the same types of crafts.

Technorati Tags: , , , , , , , , , , , ,

How to Make Cardboard Doll Houses from Boxes for Girls & Boys

This is a very creative crafts project for children who want to make their very own doll house. It turns out great and it is made out of cardboard boxes. We will also show you how to make cool cardboard furniture for your house. This two-story doll’s house is extraordinarily easy to make. It takes shape quickly and yet it is so sturdy that you will be playing with it for months. You will have great fun furnishing the rooms with the simple but real-looking furniture.

Here is the Next Arts and Crafts Tutorial … Making Cardboard Doll House Furniture from Old Boxes


How to Make Cardboard Doll Houses from Boxes for Girls & Boys

CRAFTS MATERIALS NEEDED:

*2 corrugated cardboard boxes (both the same size and at least 10 inches by 10 inches by 12 inches)

*Gummed paper (or Scotch tape, or adhesive tape)

*If Your Parents Are Helping, Then a Sharp Knife That They Cut With WITH PARENTAL SUPERVISION

OR

*If no parents helping, use a scissor

*Pencil

*Ruler

*4 paper clips

*Crayons (or paints)

EASY INSTRUCTIONS FOR KIDS’ ARTS AND CRAFTS PROJECT

This two-story doll’s house is extraordinarily easy to make. It takes shape quickly and yet it is so sturdy that you will be playing with it for months. You will have great fun furnishing the rooms with the simple but real-looking furniture.

Step 1

Seal one carton closed on all sides with Scotch tape or whatever kind of sealing tape you have. Turn the box, so that the largest sides form the ceiling and floor.

Step 2


On one of the larger of the four walls, draw a box about 1/2 inch in from the edges, with your pencil and ruler. This box is shown by the solid colored lines in the picture above.

If your parents are helping, have them use a knife to cut along these lines….if not, try using a scissor to cut the cardboard. Push out the piece of cardboard and save it for further use. The picture above shows the colored part, which is removed.

Step 3

You will now be able to reach into the inside of the box. Cut away the two small flaps which are on the floor of the box. Leave the ceiling flaps as they are, but lay a few strips of gummed paper or scotch tape across the ceiling to keep the flaps from falling down.

Step 4


Now draw two small squares on the back wall—the wall opposite the cut-out side—for windows, as shown by the colored lines in the picture above. Cut these out. The ground floor of your house is now completed. Put it aside for the time being.

Step 5


Here’s how you make the second story: Seal only one side of the second box. The sealed side will be the floor of the second story. The open side will form the roof. In order to make a slanting roof, draw two lines on each of the small flaps, as shown by the colored lines in. Cut along these lines.

Step 6


Now stand the four flaps up and make them meet. The two long flaps will slant in and meet the slanted edges of the two smaller flaps, as you can see in the picture above. Seal the four flaps together where they meet. The top of the roof will still be open.

Step 7

Now take this box and cut the front wall and the windows in exactly the same way as you did with the first box. The windows of this second story should be directly above the windows of the first story.

Step 8


Before you close the opening in the roof, make the chimney out of one of the cut-out pieces of cardboard that you have saved. Cut it to about 5 by 10 inches. Then, with ruler and pencil, divide it into five equal parts, as shown by the colored lines in the picture above. Run your scissor lightly along these lines. Do not cut through the cardboard. Now you will be able to bend the cardboard neatly along these lines.

Step 9


The picture above shows you how to lay and paste the open flaps over each other.

Step 10


Now take the other piece of cardboard you have saved from one of the cut-out walls. Cut it to exactly the same size as the opening in the roof. Then cut a hole in it for the chimney, as you see in the picture above. Be careful not to cut this hole too large. It’s better if it’s a bit smaller than the chimney, for if you have to force the chimney into this hole, the chimney will stand upright.

Step 11


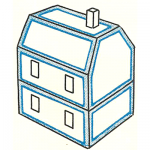
The picture above  shows the chimney in place. It also shows how you then place the top of the roof over the opening. Seal this rooftop in place with gummed paper.

The picture above also illustrates how you place one carton on top of the other with the windows of each story directly above each other. You attach the two stories together by pushing paper clips through the floor and ceiling.

Some of our next tutorials will be how to make some charming cardboard furniture and decorations for your new cardboard Doll House…take a look … Here is the Next Arts and Crafts Tutorial … Making Cardboard Doll House Furniture from Old Boxes

Technorati Tags: , , , , , , , , , , , , , , , ,