How to Make a New Years Cube Dice Time Capsule to Celebrate the New Year

Bored and don’t know what to do on New Years Eve or New Years Day? How about making a cube with the numbers 2015 (or whatever year it happens to be when you see this tutorial). A fun thing to do is to write a letter about what you hope for the following year. Put it inside the cube. Don’t look at it until the following year. See how things have changed or if things turned out the way you hoped they would. Or you can just roll it around, toss it around, or just put it up on a shelf.

You Might Also Like Our Other New Years Crafts

How to Make a New Years Cube Dice to Celebrate the New Year


How to Make a New Years Cube Dice to Celebrate the New Year


Step 1

Print out the correct template. This year, you would print out 2015 (but I also included up to 2020) for future New Years. You can either choose, aqua, pink, yellow, or black and white.

2015 Templates


2015-new-years-dice-aqua


2015-new-years-dice-bw


2015-new-years-dice-pink


2015-new-years-dice-yellow


2016 Templates


2016-new-years-dice-aqua


2016-new-years-dice-bw


2016-new-years-dice-pink


2016-new-years-dice-yellow


2017 Templates


2017-new-years-dice-aqua


2017-new-years-dice-bw


2017-new-years-dice-pink


2017-new-years-dice-yellow


2018 Templates


2018-new-years-dice-aqua


2018-new-years-dice-bw


2018-new-years-dice-pink


2018-new-years-dice-yellow


2019 Templates


2019-new-years-dice-aqua


2019-new-years-dice-bw


2019-new-years-dice-pink


2019-new-years-dice-yellow


2020 Templates


2020-new-years-dice-aqua


2020-new-years-dice-bw


2020-new-years-dice-pink


2020-new-years-dice-yellow


How to Put These New Year Cubes Together

After you print out the cube template with the right color and year, then you are going to want to cut it out and then fold on the dotted lines and on the tabs. And then glue the cube together. We already made cubes in another New Years tutorial, why don’t you check out the pictures on that folding tutorial, it is exactly the same. BEFORE YOU CLOSE THE CUBE: Write a note and place it inside the cube. Don’t peek until the following year. See how things have changed since you wrote the note.

There really isn’t much that you can do with this cube, other than put it up somewhere or toss it around with your friends. It is just a cute craft that gives you time to think about the year gone past and the year yet to come. I hope that you enjoy it.

You Might Also Like Our Other New Years Crafts

Technorati Tags: , , , , , , , , , , , ,

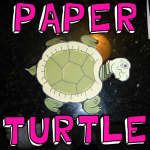
Make a Turtle Paper Toy Model

Here is a fun printable turtle papercraft that you can make. This is super easy to print, fold, and then play with. Find out how to make it below.


Make a Turtle Paper Toy Model


Crafts Materials Needed

Paper or Cardstock

Scissors

Printer

Optional – Cereal Box

Optional – Butter Knife

Optional – Ruler

Templates

PDFs

Black and White Template – Open PDF and then Print Out ( template-bw-paper-turtle-neck-in-and-out )

Color Template – Open PDF and then Print Out ( template-color-paper-turtle-neck-in-and-out )

OR

PICTURES TO SAVE AND PRINT OUT


Click on Thumbnail - Then Save Bigger Image That Opens Up


Click on Thumbnail – Then Save Bigger Image That Opens Up


Click on Thumbnail - Then Save Bigger Image That Opens Up


Click on Thumbnail – Then Save Bigger Image That Opens Up


Step 1


step1


Print out either a color or a black and white template. Then glue it onto a cereal box.


Step 2


step2


Cut it out.

Step 3


step3


To make it easier to fold, you can do something called scoring. Do this by taking a butter knife and a ruler and drag the butter knife along the ruler and line you want to score.

Then fold the legs and tail in. Then fold the neck forwards and backwards on the lines several times. You then have your turtle finished.

Technorati Tags: , , , , , , , , , ,

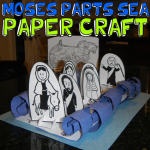
Moses Parting the Sea Old Testament Bible Exodus Printable Paper Craft for Passover

Today, I will share with you a printable paper craft for Passover. This craft is good for Jewish and Christian children as both study the old testament. In this craft, Moses is parting the sea while escaping the Egyptians. All of the Israelites are able to cross the sea, but then the Egyptians are all swallowed up by the sea when it closes back up. This is a perfect craft to celebrate Passover.

You Might Like Our Other Passover Crafts


Moses Parting the Sea Old Testament Bible Exodus Passover Craft


Crafts Materials Needed:

Printer

Printer Paper

Blue Paper

Scissors

Templates

Click Below on Each of the template images. These images will open up as a larger image. Then save these images to your computer and then print them.


template1-moses-parting-sea-paper-craft


template2-moses-parting-sea-paper-craft


template3-moses-parting-sea-paper-craft


Step 1


step1


Print out the 3 templates that you see above.


Step 2


step2


Cut out all the people, the chariot, and the stands. Cut 2 slits in each stand.

Step 3


step3


Fold the stands by folding the tabs inwards.

Step 4


step4


Now put all of the people and the chariot into the slits that are in the stands.

Step 5


step5


Get 2 blue sheets of paper. Cut lots of slits in the blue paper. Then curls them up and let go. The curls should look something like in the picture above.

Step 6


step6


Cut down the fish template to be less wide.

Step 7


step7


Now put the fish template page on top of both of the blue pieces of paper. The waves (curls) should be above the fish page so it looks like waves are on either side of the open sea floor.

Place all the people on top of the sea floor. Moses should be in the back as he is letting all of the freed slaves go before him. Behind Moses is the Egyptian chariot.

If you are using this craft to celebrate Passover, then happy Passover!

You Might Like Our Other Passover Crafts

Technorati Tags: , , , , , , , , , , , , ,


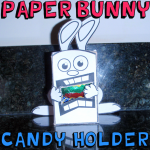
How to Make a Free Printable Paper Easter Bunny Candy Holder

Here is a free printable template that you can use to make an adorable Easter Bunny that holds candy in his mouth. This could be used as an Easter decoration or to give candy to your friends. Either way, it is simple enough to make with a little effort. Find the free printable template below as well as the instructions for putting it together.


How to Make a Free Printable Paper Easter Bunny Candy Holder


Crafts Materials Needed:

Paper or Card Stock

Printer

(Optional) Cereal Box

Scissors

Ruler

Butter Knife

TEMPLATE


How to Make a Free Printable Paper Easter Bunny Candy Holder


Click on thumbnail and then the template will open up. You can then save the image to your computer and print it out then.

Step 1


step1


Firstly, Print out the template, found above. It works best if you can print it out on card stock, but paper is fine too.

Step 2


step2


Cut out all the pieces and then glue them onto cereal box cardboard. If you are able to print out the template on card stock, this step is not necessary.


Step 3a


step3a


Use the back of a butter knife to score lines. You put a ruler up to the line and then drag the back of the butter knife along the line. This is called scoring and makes it easier to fold upon the line in a neat fashion. Do this, without the ruler, along the curved line at the top of the bunny’s head.

Step 4


step4


Have your parents cut out the inside of the mouth… as well as the 2 slits that are needed on the head. If you are able to do this with a scissor yourself, then you may do it as well.

Step 5


step5


Fold all of the tabs inward.

Step 6


step7


Glue all of the tabs together.

Step 7


step8


Push the ears into the slits at the top of the box. Also place candy inside of the box.

Step 8


step9


Now glue the head down and glue or tape legs to the back of the box like seen in the picture.

 Step 9


step10


Now bend hands at the wrist and glue them on both sides of the box, so that the hands are over the mouth.

Finished Bunny Rabbit with Candy in His Mouth


How to Make a Free Printable Paper Easter Bunny Candy Holder


There you have it – a paper foldable Easter Bunny – holding all of the candy in his mouth. I think anyone you give this too will love it!!! I hope that you had fun.

[tag]easter bunny crafts, bunny crafts, bunnies, easter bunnies, bunny rabbits, bunny rabbit crafts, paper templates, paper foldables, free paper foldables, free paper teplates, easter crafts, free easter crafts, easter paper foldables[/tags]


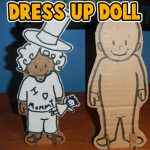
How to Make a Stand-Up Dress-Up Doll

When I was a little girl I would have so much fun dressing up paper dolls.  You know…. the paper dolls you buy in a book at the store where you cut out the clothes to put on them?  I loved them.  I used to spend hours dressing up the paper dolls and changing their clothes over and over again.  Well, today I’m going to show you how to make with your children a stand-up dress-up doll.  I got the idea from a post I saw on another site ( ikatbag.com). You are going to make the doll out of cardboard… it is much stiffer and will hold up to many, many clothes changes.  Also, in this craft you will find 4 different template sheets of different accessories for your dress-up doll.  That means hours of fun for you and your children dressing up the doll.  So, grab the few materials needed and let’s get started.

Check out our other Doll Making Crafts.


How to Make a Stand-Up Dress-Up Doll


Materials Needed

Printer & Paper

Scissors

Black Marker

Cardboard

Paste or Glue (optional)

Glue Dots


Click on template images below to open and to print off.

Accessories Template 1


Accessories Template 1


Accessories Template 2


Accessories Template 2


Accessories Template 3


Accessories Template 3


Accessories Template 4


Accessories Template 4


Stand Up Dress Up Doll Template


Stand Up Dress Up Doll Template


Step 1


Print out template.  Cut it out.  Then trace it or paste it onto cardboard.


Print out template.  Cut it out.  Then trace it or paste it onto cardboard.


Step 2


Draw a face on the doll.


Draw a face with ovals for eyes.  A letter “C” for the nose.  A curved line for the smile.


Step 3


Cut around the figure.


Cut around the figure.


Step 4


 Cut two cardboard rectangles out.  Cut slits as the image shows you.


Cut two cardboard rectangles out.  Then cut the following slits out…. On one cardboard cut a slit on the top and a slit on the bottom.  On the other cardboard rectangle cut two slits on the top.


Step 5


Now put the cardboard rectangle's slits into the doll's feet slits.


Now put the cardboard rectangle’s slits into the doll’s feet slits.


Step 6


Turn doll around.  Put these two slits into each other.


Turn doll around.  Put these two slits into each other.  One rectangle has a slit on the bottom and one has a slit on the top.


It should look like this.


Like this.


Here is a different view.


Here is a different view.


Step 7


It should stand.


It should stand.


Step 8


Print out accessories.


Print out accessories.


Step 9


Cut them out.


Cut them out.


Step 10


I used glue dots to stick the clothes on the doll.


I used glue dots to stick the clothes on the doll.  They stay sticky time after time of changing clothes.


Here are some examples of how to dress up your new stand up dress up doll.

Example 1


Example 1


Example 2


Example 2


Example 3


Example 3


Example 4


Example 4


Example 5


Example 5


I bet you and your children had fun making these stand up dress up dolls….. but wait till you see the amount of fun they have dressing them up too.  They will love it.  I gave you 5 examples of ways to dress up your doll…. How many other ways can your child come up with?  Have fun!!

Technorati Tags: , , , , , , , , , , , , , , , , , ,

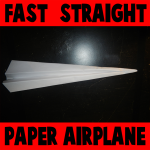
How to Make a Fast Straight Paper Airplane

I have a wonderfully fun craft for you today.  And, you only need one material for this craft…. paper.  I’m going to show you how to make a fast straight paper airplane.  It’s so much fun and it will give you hours of enjoyment well after you are finished making it.  Here I will show you step-by-step how to make this paper airplane.  Also, if you scroll down to the bottom of the steps you will see there is a video on how to make this paper airplane as well.  So, grab a piece of paper and let’s get started.

Check out our other Paper Folding Crafts.


How to Make a Fast Straight Paper Airplane


Materials Needed

Paper


Step 1


Fold a piece of paper in half the long ways.


Fold a piece of paper in half the long ways.


Fold a piece of paper in half the long ways.


Like this.


Step 2


Open the paper back up


Open the paper back up…. like this.


Step 3


Fold the top corners in towards the center.


Fold the top corners in towards the center.


Step 4


 Fold in towards center line another time.


Fold in towards center line another time.


Step 5


Fold inwards again.


Fold inwards again.


Step 6


Now fold the entire plane in half.


Now fold the entire plane in half.


Step 7


Now fold down both sides as shown above.


Now fold down both sides as shown above.


And the other side too.


And the other side too.


Step 8


There it is.  Watch the video below if you have any issues.


There it is.  Watch the video below if you have any issues.

Here is our video on How to Make a Fast Straight Paper Airplane

Technorati Tags: , , , , , , , , ,

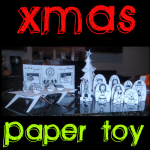
How to Make a Christmas Paper Toy

I have a fun Christmas craft for even the youngest of crafters.  Today I’m going to show you how to make a Christmas Paper Toy.  With just some paper, printer, scissors and a few other materials you and your child will be able to make this cute Christmas paper toy that they will enjoy playing with…. just as much fun as they will have making the craft.  If you want, feel free to color the templates before cutting them out to add even more fun to this craft.  So, let’s get started.

Check out our other Christmas Crafts.


How to Make a Christmas Paper Toy


Materials Needed

Printer

White Paper

Green Paper

Scissors

Tape

Pen

Glue

Cereal Box


Click on the template images below to open a new page and to print.

Christmas Background Template


Christmas Background Template


Christmas Presents Template


Christmas Presents Template


Christmas Table Template


Christmas Table Template


Christmas Characters Template


Christmas Characters Template


Christmas Tree Extras Template


Christmas Tree Extras Template


Step 1


Print templates


Print Templates.


Step 2


Cut out items from template.


Cut out items from template.


Step 3


This is the background.


This is the background.


Bend both dotted lines away from you.  Crease.


Bend both dotted lines away from you.  Crease.


Now fold the next line (solid) towards you.


Now fold the next line (solid) towards you.  Crease.  Do this on both sides.


Fold both of these tabs away from you so it acts as a stand.


Fold both of these tabs away from you so it acts as a stand.


Cut slits.


Cut slits.


Fold tabs up.


Fold tabs up.


Place the paper in the slits on both sides.


Place the paper in the slits on both sides.


Step 4


 Place each character in the stands.


Place each character in the stands.


Step 5


To make the Christmas tree... get some green paper and... Fold green paper in half twice.


To make the Christmas tree… get some green paper and… Fold green paper in half twice.


Use the template to... draw half of the tree along fold.


Use the template to… draw half of the tree along fold.


Cut both trees apart between both of them.


Cut both trees apart between both of them.


Cut down center... one on top of one and one at bottom of the other.


Cut down center… one on top of one and one at bottom of the other.


Now use the slits to slide the tree together to look like the tree above.


Now use the slits to slide the tree together to look like the tree above.


Tape some seams together.  Draw on tree if you want to.


Tape some seams together.  Draw on tree if you want to.


Write family member's names on ornaments or draw a design on each one.


Write family member’s names on ornaments or draw a design on each one.


Glue both stars together and put on top of tree.  Glue ornaments on tree.


Glue both stars together and put on top of tree.  Glue ornaments on tree.


Step 6


Cut out each of the legs.


Cut out each of the legs.


Glue on cereal box cardboard.


Glue on cereal box cardboard.


Cut out and fold and crease very well.


Cut out and fold and crease very well.


Cut out cardboard long and wide enough for legs.


Cut out cardboard long and wide enough for legs.


Glue on white paper like this.


Glue on white paper like this.


Have adult cut slits in the top of the table.


Have adult cut slits in the top of the table.


Put the food tabs in the slit.


Put the food tabs in the slit.


On the bottom of table push tabs in opposite directions.


On the bottom of table push tabs in opposite directions.


Step 7


 Cut out presents.


Cut out presents.


Fold on dotted lines and cut on slits.


Fold on dotted lines and cut on slits.


Put tab in slit.


Put tab in slit.


Completed present.


Completed present.


Step 8


Finished.


Finished.

Awesome job!!  You just finished making your Christmas Paper Toy.  Have fun playing with it…. Christmas will be here in no time.

Technorati Tags: , , , , , , , , , , , , , , , ,

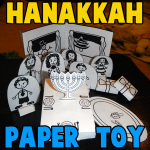
How to Make a Hanukkah Dinner Paper Craft Toy

Hanukkah will be here before you know it.  After all, Hanukkah begins on the evening of December 8th.  Today I will show you how to make a craft that is perfect for Hanukkah.  I’m going to show you how to make a Hanukkah Dinner Paper Craft Toy that any child will enjoy playing with.  Your children will enjoy cutting out all the characters and images from the template…. folding them and gluing them together.  Even the youngest of crafters will enjoy this craft…. with just a little help from an adult.  So, let’s get started.

Note to everyone…I know in the picture the menorah only has 7 candles…I used the wrong type of menorah. A Hanukkah menorah has 9 candles…I updated it in the template. Thank you!

Check out our other Hanukkah Crafts.


How to Make a Hanukkah Dinner Paper Craft Toy


Materials Needed

Printer & Paper

Scissors

Glue


Click on template images below to open a new window and to print off.

Hanukkah Paper Characters Template


Hanukkah Paper Characters Template


Hanukkah Presents Template


Hanukkah Presents Template


Hanukkah Room Template


Hanukkah Room Template


Hanukkah Table & Menorah Template


Step 1


 Print out templates.


Print out templates.


Step 2


Fold the background scene.


Fold the background scene.


Step 3


Cut out characters and rectangles.


Cut out characters and rectangles.


Cut slits.


Cut slits.


Fold tabs up.


Fold tabs up.


Put a character in the slits... This is a stand for the character.


Put a character in the slits… This is a stand for the character.


Step 4


Cut out table, rug and menorah.


Cut out table, rug and menorah.


Fold on dotted lines.  Cut on slits.


Fold on dotted lines.  Cut on slits.


Glue together.


Glue together.


Step 5


Fold and glue together bottom of table.


Fold and glue together bottom of table.


Here it is from the side.


Here it is from the side.


Have an adult cut a slit in middle of table.


Have an adult cut a slit in middle of table.


Place menorah in the slit.


Place menorah in the slit.


Bend one tab forward and one tab back.


Bend one tab forward and one tab back.


Now the menorah should stand up.


Now the menorah should stand up.


Step 6


Cut out presents.


Cut out presents.


Fold on dotted lines and cut on slits.


Fold on dotted lines and cut on slits.


Put tab in slit.


Put tab in slit.


Completed present.


Completed present.


Step 7


Completed present.


Finished paper toy.

And there you have it…. you just made a Hanukkah Dinner Paper Craft Toy.  Enjoy it.

Technorati Tags: , , , , , , , , , , , , , ,

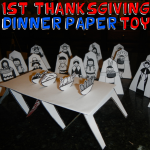
How to Make Paper Thanksgiving Table Toys

Many people wonder how to keep the kids at the children’s Thanksgiving table entertained.  Sure, you will have the Thanksgiving meal which will occupy them for a little bit.  But, what about all the other time they will spend at the table?  How do you keep them entertained and safe from boredom?  Well, today I have a craft for you and the children that will keep the little ones entertained.  In this post I will show you how to make Paper Thanksgiving Table Toys.  This will surely keep them happy…. for a little while anyway.

Check out our other Thanksgiving Crafts.


How to Make Paper Thanksgiving Table Toys


Materials Needed

Printer & Paper

Scissors

Tape

Glue

Cereal Box

White Paper


Click on template images below to make larger and to print.

People Template 1


People Template 1


People Template 2


People Template 2


People Template 3


People Template 3


People Template 4


People Template 4


People Template 5


People Template 5


Pilgrims Table Food Template


Pilgrims Table Food Template


Step 1


Print out the templates.


Print out the templates.


Step 2


Cut out each individual piece.


Cut out each individual piece.


Step 3


Fold on each line.


Fold on each line…


Fold like this.


Fold like this.


Step 4


Tape in back.


Tape in back.


Step 5


Now it stands.


Now it stands.


Step 6


For the two guys who have arms... glue together.


For the two guys who have arms… glue together.


Glue basket on hands.


Glue basket on hands.

Step 7


Print template.


Print template.


Step 8


Cut out each of the legs.


Cut out each of the legs.


Step 9


Glue on cereal box cardboard.


Glue on cereal box cardboard.


Step 10


Cut out and fold and crease very well.


Cut out and fold and crease very well.


Step 11


Cut out cardboard long and wide enough for legs.


Cut out cardboard long and wide enough for legs.


Step 12


Glue on white paper.


Glue on white paper.


It should look like this.


Like this.


Step 13


Have an adult cut a few slits on the table top... spaced out.


Have an adult cut a few slits on the table top… spaced out.


Step 14


Cut out bowls of food and put tabs into slit.


Cut out bowls of food and put tabs into slit.


On bottom of table push tabs in.


On bottom of table push tabs in.


It should look like this.


Like this.

Step 15


Finished Paper Thanksgiving Table Toy


And, there you go…. you just finished your Paper Thanksgiving Table Toy.  This will be perfect for the children at the Thanksgiving kids table to play with.  They will really enjoy it.

Technorati Tags: , , , , , , , , , , , , ,

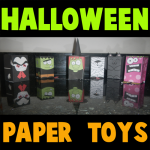
Collection of Halloween Paper Figures and Creepy Paper Toys

Here is an entire collection of Halloween paper figures. All of these are figures that you print out, fold, and glue together. You can use them as creepy paper toys on Halloween. Find all the tutorials for these paper toys below.


Collection of Halloween Paper Figures and Creepy Paper Toys


Below you will find each of the individual Tutorials for the Halloween Paper Figurines.


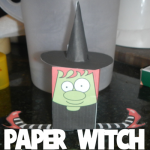
Paper Witch Toy


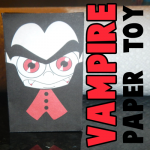
Dracula Paper Toy


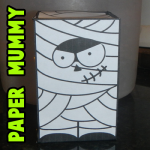
Paper Mummy Toy


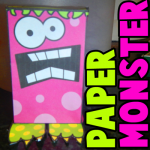
Paper Monster Toy


Frankenstein Paper Toy


Black Cat Paper Toy


 You Might Also Like Our Other Halloween Crafts

Technorati Tags: , , , , ,


Paper Witch with Hat to Print Out for Halloween

There are many characters that we associate with celebration Halloween. The witch is one of them. Today we will show you how to make your very own paper witch with hat toy, along with many other Halloween characters. Below you will find the template and instructions for the following paper witch figurine. Have fun.

More Halloween Crafts.

Here  are the Other Halloween Paper Toys in This Collection


Paper Witch Toy for Halloween


Materials Needed

Paper or Card Stock

Scissors

Glue


The Templates to Print Out:

witch-paper-foldable-toy-template

CLICK ON THIS PICTURE TO OPEN UP TEMPLATE so you can save it to your computer and then print it out.


witch-hat-paper-foldable-templates


CLICK ON THIS PICTURE TO OPEN UP HAT TEMPLATE so you can save it to your computer and then print it out.

 How To: Step 1


Cut out the witch template

 Step 2


Optionally, score the template to make it easier to fold. All you have to do is put a ruler along each fold line. Then use the dull side of a butter knife and drag it along the ruler and the line on the paper. Then when you fold it on that line, it will fold beautifully.

 Step 3


Fold on the lines.

 Step 4


Fold the tabs too.

 Step 5


Paste the tabs together.

Step 6


Now it should look like this.

 Step 7 : Witch Hat


Print out the witch’s hat template. Cut out the hat parts…hopefully you are better at cutting than me.

 Step 8


Fold the triangle-ish shape into a cone and glue to keep together.

 Step 9


Now put the cone thru the donut shape. Cut slits all the way up to the donut.

 Step 10


Fold up the slits, like this.

 Step 11


Now glue these slits to the bottom of the hat.

 Step 12


This is the finished hat.

 Step 13


Glue the legs to the bottom of the witch’s body.

 Step 14


Place the hat on the witch. If you want, you can glue in place.

More Halloween Crafts.

Here are the Other Halloween Paper Toys in This Collection

Technorati Tags: , , , , , , , , , ,

Paper Vampire Dracula Toy Figure Craft for Halloween

Halloween is coming next month so I put together a collection of Halloween characters that you can cut and fold out of paper. These are Halloween figurines that are very easy to print out, fold, and paste together. This specific character is Dracula, an evil vampire. He is sort of cute and nothing to be scared about. Find out how to make this cute Vampire paper toy below.

More Halloween Crafts.

Here are the Other Halloween Paper Toys in This Collection


Paper Vampire Dracula Toy Figure for Halloween


Materials Needed

Paper or Card Stock

Scissors

Glue


The Template to Print Out:


Vampire Dracula Paper Toy Template for Halloween


CLICK ON THIS PICTURE TO OPEN TEMPLATE. Then Save the Template to Your Computer and Print.

How To: Step 1


Step 1 Print the Template


Print the Vampire / Dracula template.

Step 2


Step 2 Cut Template


Cut out the template now.

Step 3


Step 3 Score the Template


Optionally, score the template to make it easier to fold. All you have to do is put a ruler along each fold line. Then use the dull side of a butter knife and drag it along the ruler and the line on the paper. Then when you fold it on that line, it will fold beautifully.

Step 4


Step 4 Fold on Lines


Fold on the lines.

Step 5


Step 5 Fold Tabs


Fold on the tabs too.

Step 6


Step 6 Glue Dracula Together


Paste tabs together.

Step 7


Step 7


Now Dracula / the vampire looks like this.

More Halloween Crafts.

Here are the Other Halloween Paper Toys in This Collection

Technorati Tags: , , , , , , , , , , ,

Paper Mummy Toy Figure Craft for Kids on Halloween

There are many characters that we associate with celebration Halloween. The mummy is one of them. Today we will show you how to make your very own paper mummy toy, along with many other Halloween characters. Below you will find the template and instructions for the following paper mummy figurine. Have fun.

More Halloween Crafts.

Here are the Other Halloween Paper Toys in This Collection


Foldable Paper Mummy Toy Craft for Halloween


Materials Needed

Paper or Card Stock

Scissors

Glue


The Template to Print Out:


Foldable Paper Mummy Toy Craft Template


CLICK ON THIS PICTURE TO OPEN TEMPLATE. Then Save the Template to Your Computer and Print.


How To: Step 1


Step 1 Cut out Paper Mummy Template


Cut out the template, found above.

 Step 2


Step 2 Score the Template


Optionally, score the template to make it easier to fold. All you have to do is put a ruler along each fold line. Then use the dull side of a butter knife and drag it along the ruler and the line on the paper. Then when you fold it on that line, it will fold beautifully.

 Step 3


Step 3 Fold on the lines


Fold on the lines.

 Step 4


Step 4 Fold the tabs too


Fold the tabs too.

 Step 5


Step 5 Glue the tabs together


Paste the tabs together.

 Step 6


Step 6 The Paper Mummy FIgure


Now your mummy is done and ready to play with or to display as a Halloween decoration.

More Halloween Crafts.

Here are the Other Halloween Paper Toys in This Collection

Technorati Tags: , , , , , , , , ,


Foldable Paper Monster Toy Figures for Kids to Make on Halloween

You don’t need to do very much to make these adorable paper monster figures. All you need is a printer, paper, scissor, and some paste. Find out how to make these paper monster figurines with the following instructions and a handy template.

More Halloween Crafts.

Here are the Other Halloween Paper Toys in This Collection


monster paper toy craft for halloween


Materials Needed

Paper or Card Stock

Scissors

Glue


The Template to Print Out:


Paper Foldable Monster Templates


CLICK ON THIS PICTURE TO OPEN TEMPLATE. Then Save the Template to Your Computer and Print.

How To: Step 1


Step 1 Cut out the template


Cut Out the Template.

Step 2


Step 2 score the template


Optionally, score the template to make it easier to fold. All you have to do is put a ruler along each fold line. Then use the dull side of a butter knife and drag it along the ruler and the line on the paper. Then when you fold it on that line, it will fold beautifully.

Step 3


Step 3 fold on the lines


Fold on the lines.

Step 4


Step 4 now fold on tabs


Now Fold on Tabs.

Step 5


Step 5 glue the tabs together


Glue tabs together.

Step 6


Step 6 monster foldable paper toy for kids


To Look Like This. Argghhh….scary. 🙂

Step 7


Step 7 glue feet on


Now all you have left to do is to glue the monster’s feet on to the bottom of the box. Isn’t he cute?!

More Halloween Crafts.

Here are the Other Halloween Paper Toys in This Collection

Technorati Tags: , , , , , , , ,

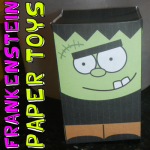
Frankenstein Foldable Paper Toy Craft for Halloween

Halloween is coming next month so I put together a collection of Halloween characters that you can cut and fold out of paper. These are Halloween figurines that are very easy to print out, fold, and paste together. This specific character is Frankenstein. He is sort of cute and nothing to be scared about. Find out how to make this cute Frankenstein paper toy below.

More Halloween Crafts.

Here are the Other Halloween Paper Toys in This Collection


Frankenstein Paper Toys Craft for Halloween


Materials Needed

Paper or Card Stock

Scissors

Glue


The Template to Print Out:


frankenstein-paper-foldable-toy-templates


CLICK ON THIS PICTURE TO OPEN TEMPLATE. Then Save the Template to Your Computer and Print.

How To: Step 1


Step 1 print template


First of all, print out the template above.

Step 2


Step 2 Cut out template


Cut out the Frankenstein template.

Step 3 (Optional)


Step 3


Optionally, score the template to make it easier to fold. All you have to do is put a ruler along each fold line. Then use the dull side of a butter knife and drag it along the ruler and the line on the paper. Then when you fold it on that line, it will fold beautifully.

Step 4


Step 4 Fold along the lines


Fold along the lines.

Step 5


Step 5 - Fold Along the Tabs


Fold the little tabs too.

Step 6


Step 6 - Glue Tabs Together


Now glue the tabs together.

Step 7


Frankenstein Paper Toys Craft for Halloween


Now Frankenstein is all folded and done. He is now ready to play with or to be used as a decoration.

More Halloween Crafts.

Here are the Other Halloween Paper Toys in This Collection

Technorati Tags: , , , , , , , ,

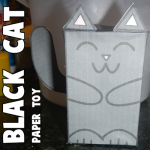
Black Cat Foldable Paper Toy Craft for Halloween

Halloween is just around the corner so I put together a bunch of Halloween characters that you can fold out of paper. These are Halloween figurines that are very easy to print out, fold, and paste together. This specific character is a black cat, however I decided to make the cat cute instead of scary. Find out how to make this cute kitty cat below.

More Halloween Crafts.

Here are the Other Halloween Paper Toys in This Collection


black-cat-paper-foldable-toy-first-pic


Materials Needed

Paper or Card Stock

Scissors

Glue


The Template to Print Out:


black-cat-paper-foldable-toy-template


CLICK ON THIS PICTURE TO OPEN TEMPLATE. Then Save the Template to Your Computer and Print.

How To: Step 1


Cut Out Cat Template


Cut Out the Template.

Step 2


Fold Paper Cat Toy on the Lines


Fold on the lines.

Step 3


Fold Paper Cat Toy on the Tabs


Fold the Tabs too.

Step 4


Now Glue Together


Glue the cat together on the tabs.


Foldable Paper Cat Figurine Pasted Together


To look like the above picture.

Step 5


Glue the Tail and Ears on


Glue the ears on the top of the cat. Glue the tail onto the back of the cat.

Now enjoy your black cat for Halloween. Print out the other foldable paper Halloween toys in this collection too.

More Halloween Crafts.

Here are the Other Halloween Paper Toys in This Collection

Technorati Tags: , , , , , , , ,