How to Make Paperclip Christmas Angels : Easy Craft Idea for Kids

You can make a cute little paperclip angel to hang on your Christmas tree or to just decorate your bedroom or house. These are super easy to make and all of the materials are probably sitting around your house somewhere. Laura from Dacian Moon Handmade  will show you today how to make this simple decoration, step by step.

Check out our Christmas Crafts.


How to Make Paperclip Christmas Angels Easy Kids Craft Tutorial


How to Make Paperclip Christmas Angels Easy Kids Craft Tutorial

CRAFTS MATERIALS NEEDED:

– butterfly paperclip
– bead
– ribbon
– sewing pin


Step 1.

Fold the ribbon in two and put it through the bead.


You can help it with the pin.


It will look like this.


Step 2.

Put the ribbon through the paperclip, like this…


…and make a knot over the bead.


Step 3.

Bring the bead near the paperclip…


… and now it looks like an angel 😀


Tie both ends together and your decoration is ready.


And there you have it, a beautiful Christmas Angel. It is so adorable, isn’t it? You can make these as a gift or use it as a Christmas ornament. Merry Christmas!

Check out our Christmas Crafts.

Technorati Tags: , , , , , ,

How to Make a Paper Christmas Tree Craft for Children Tutorial

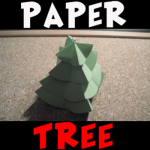
Learn how to use green construction paper and a pin to form a beautiful Christmas tree that really stands. Laura from Dacian Moon Handmade   will show you how to make a paper Xmas tree, step by step.

Check out our Christmas Crafts.


How to Make a Paper Christmas Tree Craft for Children Tutorial


How to Make a Paper Christmas Tree Craft for Children Tutorial

CRAFTS MATERIALS NEEDED:

– green paper
– scissors
– pencil
– sewing pin


Step 1.

Draw 4 circles on the green paper.


Cut them out.


Step 2.

Take one and fold it in half.


Unfold.


Fold it again in half, on the other side.


Unfold.


Step 3.

Unite two adjacent corners…


… like this.


Repeat for all sides.


Do the same for all discs.


Step 4.

Take the pin…


… and put it through the middle of the littlest one.


Put discs one on top of each other, in increasing order, and the tree is ready.


And there you have it…a stand-up, paper Christmas Tree. You can put it on a table, on a ledge, on a bookshelf, or anywhere else where people can see. Merry Christmas!

Check out our Christmas Crafts.

Technorati Tags: , , , , ,

How to Make a Winter Angel Christmas Ornament

I have a fun Christmas craft for you today.  In this post I will show you how to make a Winter Angel Christmas Ornament.  This Angel Christmas Ornament turns out amazing looking.  It would look spectacular on your Christmas Tree.  You could also make this Winter Angel Christmas Ornament as a gift for your friends and family this Christmas.  They will surely love it.   This will surely be a Christmas Ornament that they will save for a long time….. proudly representing something you made yourself.  So, let’s get started.

Check out our Christmas Crafts.

Laura from Dacian Moon Handmade   will show you how to make this, step by step.


Materials Needed

– 1 disc of white felt
– 1 smaller disc of yellow felt
– 1 acorn cap
– 1 wooden bead
– toothpick
– scissors
– needle and pin
– instant glue
– red and black paint
– silver glitter glue
– 2 red beads


Step 1

Take the wooden bead…


… and stick it on a toothpick.


Like this.


Step 2

Put the toothpick through the middle of the white felt.


Fold the felt in half, like this, and start sewing a dress for your angel.


Like this.


Step 3

Cut the extra felt.


It will look like this.


It is time to shorten the hands / wings.


Like this .


Step 4

Apply a layer of glue on the head…


… and put the yellow disc over it, like this. Note: you should do this quickly because the glue is fast drying.


This is the angel with hair.


Step 5

Apply a layer of glue inside the acorn cap…


… and fix it on the angel’s head over the yellow felt.


Step 6

Put a red bead on a piece of thread…


… and make a knot, like this.


Sew this piece of thread as a belt.


… like this. Then add another bead on the other end and tie the belt.


Step 7

Put the needle (with thread) through the yellow felt, and make a hanger.


Like this.


Decorate your angel with glitter glue, make eyes and mouth with black and red paint and your ornament is ready.


Isn’t this Winter Angel Christmas Ornament simply adorable?  It will look beautiful hanging on your Christmas tree.  It would also make a wonderful gift to a friend or family member.

Technorati Tags: , , , , , , , , , , , , ,

How to Make Simple Pinball Machine with Recycled Materials Crafts Project for Kids

This is a super cool crafts activity that we are going to do today. If you love playing pinball, then you will love making this simple machine…a pinball machine. Just recycle some old stuff from around your house … such as a cardboard box, pins, paper towel roll, a marble, and you will have your own handmade game / toy to play with.

You Might Also Enjoy : Making Pinball Toy from VHS Tape


How to Make Simple Pinball Machine with Recycled Materials Crafts Project for Kids


How to Make Simple Pinball Machine with Recycled Materials Crafts Project for Kids

Crafts Materials Needed

– Cardboard Box

– Extra Piece of Cardboard

– Some Thin Cardboard…Like from a Cereal Box

– Tape

– Glue

– Rubber Bands

– Strong Cardboard Tube (about 6 inches long)

– Pencil

– If you want to decorate it – decorative paper

– ruler

– marble or ball-like candy

Optional Materials to Use for Obstacles

– pins, straws, bottle caps, bottle, paper fastener, other household items (use your creativity)

Step 1


Step 1 : Making Cardboard Box Pinball Machines


Take your cardboard tube and trace 2 circles with it. Then cut them out about 1/4 inch smaller than the circle you traced.


Step 2 : Making Cardboard Box Pinball Machines


Cut Out these two circles….like I said, a bit smaller than you had traced them at.

Step 2


Step 3 : Making Cardboard Box Pinball Machines


Glue these 2 circles together.


Step 3


Step 4 : Making Cardboard Box Pinball Machines


Tape these circles to the eraser-side of the pencil. Tape it VERY well by taping it around the base of the pencil too.

Step 4


Step 5 : Making Cardboard Box Pinball Machines


Now take out 4 rubber bands, any size…just make sure that they are sturdy rubber bands. You are going to tie them all together by following the 3 steps above. Just put one end of a rubber band through another rubber band (#1) and then pull this rubber band through itself (#2) and then pull (#3).


Step 5.5 : Making Cardboard Box Pinball Machines


Link all 4 of these rubber bands together using this method.

Step 5


Step 6 : Making Cardboard Box Pinball Machines


Now take the cardboard tube out and poke a hole through it with a scissor 1 inch from the bottom. Do the same thing on the other side of the cardboard tube.


Step 6.1 : Making Cardboard Box Pinball Machines


Just showing you that I poked the hold in it with a scissor. Do the same thing on the opposite side.

Step 6


Step 6.2 : Making Cardboard Box Pinball Machines


Now pull the rubber bands through both ends of the tube so that it looks like the picture above.

Step 7


Step 7 : Construction Pinball Simple Machine Activity for Children


Now tie very loose knots on both ends of the rubber band chain…one on either end of the cardboard tube.

Step 8


Step 8 : Construction Pinball Simple Machine Activity for Children


Now pull the pencil-circles piece through the cardboard tube, making sure to avoid the rubber bands. While the cardboard circles are at the top… pull 2 rubber band loops over the pencil. Do one on the left and then the one on the right.

Step 9


Step 9 : Construction Pinball Simple Machine Activity for Children


Cut 2 inches out of the box on the bottom right. I decorated my box with cool paper, but you don’t need to.

Step 10


Step 10 : Construction Pinball Simple Machine Activity for Children


Cut out a piece of cardboard that is about half the length of the pinball box. The width of the cardboard should be about an inch higher than the height of the pinball box. Draw a line where the height of the pinball box would be, as I did above. Then cut slits in the cardboard like I did above, in the portion of the cardboard to the right of this line.


Step 10.1 : Construction Pinball Simple Machine Activity for Children


Now bend on this line.


Step 10.2 : Construction Pinball Simple Machine Activity for Children


Glue it on the left side of the opening in the box. Glue at bottom and also glue it to the side of the box, where it touches the pinball box.

Step 11


Step 11 : Construction Pinball Simple Machine Activity for Children


Cut a thin piece of cardboard that is about 1 and a half times the width of the pinball box. It should be the same height of your pinball box. Now cut slits on the right and left side of this cardboard.


Step 11.2 : Construction Pinball Simple Machine Activity for Children


Now paste it to both sides of the box.

Step 12


Step 12 : Construction Pinball Simple Machine Activity for Children


Cut another piece of cardboard that is about 1 and a half times the width of your pinball box….it should be about 2 to 2 and a half inches high. Now cut slits all down the bottom of this piece of cardboard.


Step 712.1 : Construction Pinball Simple Machine Activity for Children


Turn the pinball box over. Now bend and fold the cardboard piece that you just cut to look like the picture above. This is going to be the stand for your pinball machine so that it is tilted. Glue this stand on the bottom of the box (at the back of the box).

Step 13


Step 13 : Construction Pinball Simple Machine Activity for Children


Measure about 3/4 inches up the bottom of the pinball box. Cut a hole half way up the height of the box, at the point your measured 3/4 inches.  Then also cut a hole on the barrier.

UNTIE THE LOOSE KNOTS IN THE RUBBER BANDS ON EITHER SIDE OF THE CARDBOARD TUBE!!

Then put the cardboard tube cannon into the 2 inches gap in the box….and then put the rubber bands through each of the holes.

Double knot on both sides.

Step 14


Cut hole and put notches in the side of the box


So first make your flipper with cardboard or Popsicle sticks and. I taped mine with red duct tape to make it look nicer.

We are going to cut a hole in the pinball box to put the flipper in. Use your judgment, depending on your box, on where you want to place the flipper.

Then Make a notch at the top and bottom of this hole to fit the flipper in securely.


Step 14 : Construction Pinball Simple Machine Activity for Children


I put the flipper in. Make sure that it works properly. If this doesn’t work properly for you…use a paper fastener. Directions are in this tutorial that I found on the net.

Step 15


Step 15.1 : Construction Pinball Simple Machine Activity for Children


Cut a long and thin strip of cardboard.


how to make an envelope fold


Fan Fold it…Fold forwards, then backwards, then forwards, then backwards….


Step 15.2 : Construction Pinball Simple Machine Activity for Children


Until it looks like this.


Step 15 : Construction Pinball Simple Machine Activity for Children


Now touch the first strip to the last strip and it turns into a star. Glue it together. To hook it to your pinball machine…use a sewing pin / doll pin and stick it in the center of it. Now when a marble hits it, it spins.

Step 16


Step 16 : Construction Pinball Simple Machine Activity for Children


To make some good barriers, use doll pins or sewing pins and stick them just far enough from each other that the marble will fit through, but make it move in different directions.

Step 17


Step 17 : Construction Pinball Simple Machine Activity for Children


Cut a 2 inch piece of cardboard out and cut strips out like I did above.


Step 17.1 : Construction Pinball Simple Machine Activity for Children


Now fold and glue it at the bottom of the pinball box, like I did in the picture.


Step 17.2 : Construction Pinball Simple Machine Activity for Children


Paste another one like the previous one…do a 3rd or 4th one too if you want to.

Step 18


Step 17.3 : Construction Pinball Simple Machine Activity for Children


I put a piece of decorative paper in each half circle.

Step 19


Step 17.4 : Construction Pinball Simple Machine Activity for Children


Put a score in each of them too. These don’t have to be just at the bottom…they can be anywhere on the pinball board.

Use Your Creativity to Make More Obstacles


How to Make Simple Pinball Machine with Recycled Materials Crafts Project for Kids


I didn’t quite finish it because this is where YOUR creativity comes in. We can post your ideas here.

You Might Also Enjoy Our Other Crafts Tutorial : Making Pinball Toy from VHS Tape

I found a few other Pinball Making Tutorials Online that will give you some great ideas. Read them below

How to Make a Simple Pinball Machine

FETCH! Pinball Wizard

Design Your Own Pinball Machine.

Use Your Creativity to Make More Obstacles

Fire the marble out of the cannon / plunger by lowering the pencil a bit, putting the marble in the top of the cannon, and then pull the pencil down, and let go. Now hit the flipper to keep the ball up in the air longer. Write the number of points that you get with each turn down on a piece of paper. However…make your pinball machine the way that you WANT it to be…no the way that I want mine to be like.

Have fun!

Technorati Tags: , , , , , , , , , , , , ,

How to Make a Confetti Blowing Pipe to Celebrate Festivities and Parties for New Years Eve

Tomorrow is New Years Eve so it is time to party (partaaaaaaaaaaaay). So how about making a toy confetti pipe to make cool little fireworks to celebrate the upcoming New Year. We will show you how to do this with the easy illustrated steps below. Have fun.


How to Make a Confetti Blowing Pipe to Celebrate Festivities and Parties for New Years Eve


How to Make a Confetti Blowing Pipe to Celebrate Festivities and Parties for New Years Eve

Crafts Materials Needed

..Pins

..Stiff Paper or Card Stock Paper

..Colorful Paper

..Scissors

..Glue or Paste

Step 1


Step 1 : Making Sparkling Confetti Blowing Pipe to Celebrate New Years Day


Take a strip of stiff paper 3 and 1/2 inches wide and 11 inches long. Cut a hole in one end. Fig 1.

Step 2A


Step 2 : Making Sparkling Confetti Blowing Pipe to Celebrate New Years Day


Paste the 2 lengthwise edges together to form a hollow tube as seen above in fig. 2A

Step 2B


Step 3 : Making Sparkling Confetti Blowing Pipe to Celebrate New Years Day


Pin up the open end nearest to the hole. Figure 2B.

Step 3


Step 4 : Making Sparkling Confetti Blowing Pipe to Celebrate New Years Day


Cut the bowl of pipe in the form of Figure 3, making it about 4 inches across the widest part. Slash the lower edge.

Step 4


Step 5 : Making Sparkling Confetti Blowing Pipe to Celebrate New Years Day


Now paste the pipe-bowl into a funnel shape by bringing the 2 sides together in figure 4.

Step 5


Step 6 : Making Sparkling Confetti Blowing Pipe to Celebrate New Years Day


Fasten the bowl over the hole in the tube. Glue in place as seen in figure 5.

Step 6

cut a bunch of gold, silver, red, blue, yellow, green, and all different types of colorful paper into VERY small pieces. The brighter the colors, the more sparkling and intense the colorful celebratory fireworks will be.

To Play With This Toy Confetti Maker:

To play with this toy, place the open end of the pipe stem to your lips and blow. Grab more paper confetti or take it off the floor and place it back into the pipe bowl. Re-blow the toy confetti pipe.

Technorati Tags: , , , , , , , , , , , ,