How to Make Wigwams and Canoes for Thanksgiving

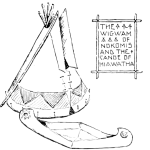
Today I’m going to show you how to Make Wigwams and Canoes for Thanksgiving.  These items are perfect to use as decorations for Thanksgiving.   Actually, add these items to our Indian Village Craft and have an entire Indian Village to Display for Thanksgiving.  Wouldn’t that be wonderful?  You can use both of these crafts to talk about the Native Americans and what they have given our Country.  Remind the children about the story of Thanksgiving.  Do a fun craft and a wonderful lesson at the same time.
Check out our other Thanksgiving Crafts.


How to Make Wigwams and Canoes for Thanksgiving


Materials Needed

Printer & Paper

Scissors

Paste

Twigs

Crayons, Markers or Colored Pencils (optional)


Template 1

Black & White Template

Indian Canoe Template black & white


Colored Template


Indian Canoe Template Color


1.  Click on one of the images above.  Click on the black and white image if you want to color it later.  Or, print off the colored image and there is no need to color it later.   Once the new page opens up print off the template.

2.  Cut out the canoe.

3.  Slit at ‘A’.

4.  Fold in half along center line.  And, paste both halves together at ‘B’.

5.  Where you slit at ‘A’, fold towards each other and paste together.


Template 2

Black & White Template


Template 2 Black & White


Colored Template


Template 2 Colored


1.  Click on one of the images above.  Click on the black and white image if you want to color it later.  Or, print off the colored image and there is no need to color it later.   Once the new page opens up print off the template.

2.  Cut out the Wigwam.

3.  Cut on the slits that are noted.

4.  Cut out portion ‘A’.

5.  Bend back the flaps ‘D’, bring ‘C’ flaps together and paste together.

6.  Optionally, get a few twigs (or some raffia) and glue at the top of the Wigwam.


Finished Wigwams and Canoes for Thanksgiving


And, there you have it…. that’s how you make Wigwams and Canoes for Thanksgiving.  Use these as Thanksgiving Decorations…. everyone will surely love them.

Technorati Tags: , , , , , , , , , , , , , , , , , , , ,

How to Work with Leather : Leatherworking Techniques for Kids Working with Adults

There are a few basics you need to know before you work with leather. Leather is one of those things that might need to be cut, so always make sure that you have adult assistance nearby. This is a great craft for Summer Camps, which is why many times kids come home with handmade leather wallets and billfolds. This article will help you with some of the basics and techniques that you might not know about. You will also learn the different lacing methods. You Might Enjoy Our Leather Crafts

Goatskin, cowhide, steer-hide, calfskin and Morocco are the most commonly used leathers. Leather can be bought in whole, half and quarter skins, and is priced by the square foot. Scrap leather, useful for small articles, can be bought by the pound. Only bark-tanned leathers are suitable for tooling. The center back part of the skin is the strongest and is used in the making of wallets, billfolds and key cases. Leather lacing is usually made of 3/32″ goatskin and can be obtained in colors.


How to Work with Leather : Leatherworking Techniques for Kids Working with Adults


How to Work with Leather : Leatherworking Techniques for Kids Working with Adults

TOOLS FOR LEATHER-CRAFT


leather-tools


1. Cutting knife — for cutting and skiving leather. (ADULT ASSISTANCE NEEDED FOR THIS TOOL)

2. Spacing wheel — for making evenly spaced marks for punching lacing holes.

3. Spoon and tracer   —  for tracing, line tooling, flat repousse’.

4. Drive punch — to make holes for lacing.

5. Wooden mallet — for striking tools used in leather-craft.

6. Fid or belt awl — for enlarging holes, stippling, and tightening laces.

7. Revolving punch—for punching holes. Has six different sized tubes on a revolving wheel.

 HOW TO WORK WITH LEATHER

Place the craft work on a smooth, soft, clear-grained board. It is wise to keep one side of the board smooth for tooling, and the other side for cutting and pounding.

Step 1


leatherworking-techniques-01


Run the spacing wheel 1/8″ in from the edge of craftwork, as in Figure 1. Punch the holes, using either the fid and mallet, or #0 punch (for 3/32″ laces) on revolving punch. Make larger holes for heavier laces.

 Step 2A


leatherworking-techniques-02A


If two pieces of leather of equal thicknesses are to be laced, edges must be “skived” so that when glued together, they will be no more than one thickness. To skive leather, shave off about 1/2″ on the wrong side of ends to be joined, as in Figure 2A.

Step 2B


leatherworking-techniques-02B


Cover skived areas with rubber cement, and when almost dry, press together and pound with mallet, as in Figure 2B.

Step 3A


leatherworking-techniques-03A


To splice or join leather, skive about 1/2″ of ends, one on the finished side, and one on the unfinished side, as in Figure 3A.

 Step 3B


leatherworking-techniques-03B


Cement skived ends, and when almost dry, press together and pound with a mallet, as in Figure 3B.

 Step 4


leatherworking-techniques-04


To point lace, cut end of lace at an angle, and cover end with household cement. Allow to dry and stiffen, as in Figure 4.

 HOW TO LACE STITCHES

Single Strand Running Stitches


leatherworking-lacing-01


A single strand running stitch, as seen above, is usually used for decoration or on a single thickness of leather.

 Spiral – Overcast or Whip Stitch (used as an edge trimming and binding thicknesses together.)

2A


leatherworking-lacing-02A


2B


leatherworking-lacing-02B


Bend end of strand (X) down over the leather and continue over casting with end Y, as in Figure 2B.

 2C


leatherworking-lacing-02C


Continue overcasting until corner is reached. Go through corner hole three times to make the turn, as in Figure 2C.

 2D


leatherworking-lacing-02D


Continue overcasting with end Y until work is completed. Finish off work by slipping end Y back under two stitches and cut off, as in Figure 2D.

You Might Enjoy Some of Our Leather Crafts

Technorati Tags: , , , , , ,

How to Make Plaster Castings of Animal Tracks or Handprints

Making Plaster of Paris castings can be a fun activity…and also a great Boy Scouts craft. You can make a keepsake craft by casting your handprints or footprints for your mom or dad. Parents love tracking the growth of their children’s hands and feet. You could also use plaster for a fun outside activity. How about making a cast of animal tracks? First you need to go outdoors and look for animal footprints…and then let the plaster do the rest. Find out how to make casts of handprints / footprints / and animal tracks below. Have fun.

How to Make Plaster Castings of Animal Tracks or Handprints


How to Make Plaster Castings of Animal Tracks or Handprints


HOW TO MIX PLASTER

Pour a little water into a can and sprinkle plaster of Paris, in small quantities. into it. Keep sprinkling in plaster until plaster rises above the water’s surface. Stir gently with a stick so as not to cause air bubbles. Use plaster immediately when made or it will harden. Caution—Never pour unused plaster down a drain or it will clog it.

CRAFTS MATERIALS NEEDED

Plaster of Paris

Water

Can

Stick

Cardboard

Paper Clip

CASTING ANIMAL TRACKS or YOUR HANDPRINTS

Step 1


clean area around it from dirt and twigs


When you’ve found a good animal track you’d like to preserve, clean area around it from dirt and twigs, as in Figure 1.

Step 2


 Fasten ends of collar with a paper clip


Make a collar around the track with a  1 inch strip of cardboard. Fasten ends of collar with a paper clip, as in Figure 2.

Step 3


Wash off dirt and paint cast with chosen colors.


Mix the plaster and pour immediately first around track, then into the track. Allow plaster to harden for about an hour, then peel off cardboard collar. Wash off dirt and paint cast with chosen colors.

Technorati Tags: , , , , , , , ,

How to Make a Flying Butterfly Toy Arts and Crafts Project for Kids

Kids love playing with this flying butterfly toy. This is an arts and crafts project to make a  butterfly toy that will really fly up to 15 feet up in the air. This is for older kids as it is too difficult for younger kids to master…although they can with some supervised guidance from an adult.


How to Make a Flying Butterfly Toy Arts and Crafts Project for Kids


How to Make a Flying Butterfly Toy Arts and Crafts Project for Kids

Crafts Materials Needed

– Paper

–  Thread Spool

– Pins

– Dowel or Stick

– Strong String or Cord

Step 1


Firstly, fold an oblong piece of paper 4 inches by 5 1/2 inches on its short diameter.


Firstly, fold an oblong piece of paper 4 inches by 5 1/2 inches on its short diameter.

Step 2


One fourth inch from fold draw a line and mark an 'x' halfway down on it.


One fourth inch from fold draw a line and mark an ‘x’ halfway down on it.


Step 3


Draw butterfly like in the drawing that you see above.


Draw butterfly like in the drawing that you see above. The dashed line is the line that we drew in the previous step. Cut out this pattern and trace on to a piece of cardboard, making a large pin hole through the ‘x’ on each side of the body. Cut out cardboard butterfly and color on both surfaces.

Step 4


Step 4 : Butterfly Flier Flying Toy


Fasten 2 pins, securely, in the top of an empty thread spool. Make sure to let them stick out about an eighth of an inch. Also, try to placed the pins so that they are exactly opposite each other across the hole and about a half inch apart from each other.

Step 5


A piece of dowel or any round stick about a half inch in diameter and a foot in length is the next requirement.


A piece of dowel or any round stick about a half inch in diameter and a foot in length is the next requirement.


Step 4 How to Make a Flying Butterfly Toy Arts and Crafts Project for Kids


Parental help / permission might be require for this part of the craft, depending on your age. Shave off some of the wood on the stick or dowel so that the stick is a little less as wide as the diameter (width) of the spool’s hole. Do this on the end of the dowel…the same length as the length of the spool. Finish so that the spool has a little platform on which to rest when thrust over end of stick.

Step 6


Step 6 in making butterfly flyer toy


Tie a knot near the end of a piece of strong string or cord about 2 feet long. Place the end with NO knot on the spool and start winding the string on the spool.

Step 7 – The Fun Part – How to Play With Your New Butterfly Toy.


Step 7 - The Fun Part - How to Play With Your New Butterfly Toy.


Now for the fun. Put the spool on the stick. Now slip pinholes in butterfly’s body over the pins that are in the spool. Then catching hold of a knot, give the string a quick jerk. Away will fly the butterfly … sometimes 15 feet or more up into the air.

Alternative to Butterfly : A Pair of Bird’s Wings


Alternative to Butterfly : A Pair of Bird's Wings


Technorati Tags: , , , , , , , , , , , , , ,

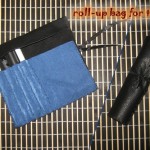
How to Make a Roll-up Bag for Pencils or Tools : Crafts Idea for Older Kids

This is a tutorial well  suited for older children. It is not a hard one and is very useful. I always needed a bag like this (for pencils or different tools) and never could find one so, I decided to make one. Today I will share it with you 🙂


How to Make a Roll-up Bag for Pencils or Tools : Crafts Idea for Older Kids

CRAFTS MATERIALS NEEDED:

– black leather, plastic / vinyl,  (it must be soft, otherwise we can’t sew it) – or other fabric : 18 cm x 18 cm
– soft cloth for inside part (blue) : 11 cm x 25 cm
– scissors
– thread
– ribbon (black)


Step 1.

On every complex crafting project is better to make a mock-up first. So, take a paper and make a sketch of how do you want the bag to look like.


Step 2.

Place the blue cloth over the leather, exactly over the lower left corner.


Start to sew, hiding the knot of the thread between the cloth and the leather.


We will sew over the edge because this will give safety to the stitch.


Sew all side until you reach the corner.


Step 3.

Place a pencil in it’s place, between the cloth and leather, near the edge.


Now we see that we must make a little crease on the blue cloth, to make enough room for the pencil. Continue.


Place the pencil again inside the bag. You can see now that it have enough space and we start to sew up.


Is the best to sew keeping the pencil inside, not too hard pressed. When we arrive at the edge of the blue cloth, we sew down to the lowest edge of the bag. So, every pencil (tool etc.)will be separated through two lines of sewing.


We make half of the bag with places for pencils and the other will stay unbroken, because we might want to place there scissors or other bigger tool.


Step 4.

We place some pencils inside…


… and close the upper part…


… because we need to know where will be the middle to sew the ribbon.


Attach it outside, letting 1/3 of it on one side of the sewing and 2/3 on the other side.


Step 5.

The last step is to close the upper part, so the pencils will not fall away.


To do that we sew the edges.


We start on top and sew again over the edge.


Do the same for the other part.


And that’s it, a roll-up bag for pencils or tools, cute, useful and practical (perfect for camping trips) offered by Laura from Dacian Moon Handmade


Technorati Tags: , , , , , , , , , , , , , , ,

How to Make a Boy Scouts Memo Holder Crafts Activity

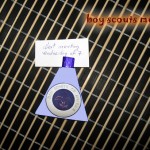
Laura from Dacian Moon Handmade will show you today how to make something simple and fun: a memo for Boy Scouts. Now the boys can have a special place where they can write important Scout related topics down .


How to Make a Boy Scouts Memo Holder Crafts Activity

CRAFTS MATERIALS NEEDED:

– paper (not too thin)
– scissors
– clothespin
– glue
– paints
– paintbrush
– pencil


Step 1.

First of all, we paint the clothespin blue (actually we will paint only the upper part – the one that pins). We will give it several layers of paint, until it looks good. Let it dry well.


Step 2.

Next, we cut a piece of paper with the width of 2/3 of the clothespin.


Step 3.

Draw a circle (let a little bit of space from the corner)


Then draw another circle, smaller, inside the forst one.


And draw a “fleur de lys” symbol in the center.


The last thing we need on our drawing to have the scouts logo is the name, so write: Boy Scouts of America.


Step 4.

Cut out the logo like in the next photo.


Cut another piece of paper identical with the first one. You can write your name on it or ”be prepared”


Step. 5

Take one of the paper pieces and apply a layer of glue on it’s back side …


… and place the clothespin on it, with the painted part up.


Then glue the other piece of paper on top of them.


Step 6.

Now you can play with paints and give it a friendly look 🙂


Technorati Tags: , , , , , , , , , ,