How to make a Cute Ghost Brooch

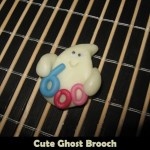
My daughter loves breaking out the Halloween jewelry as soon as October hits.  She will wear all of her Halloween jewelry at the same time… she just loves Halloween so much.  One thing she didn’t have…. until now…. is a cute Halloween brooch to wear on her Fall coat.  This cute ghost brooch is perfect and she loves wearing it proudly for all to see.

Check out our other Halloween Crafts.

Tutorial offered by Laura from Dacian Moon Handmade.  You will need help from an adult for this tutorial.


CRAFT MATERIALS NEEDED:

– night glow polymer clay
– blue, red and pink polymer clay
– eyes
– cutter
– toothpick
– 1 brooch base
– baking tray
– baking paper


Step 1

Take a piece of night glow polymer clay.


Condition it .

(Condition polymer clay by hand… simply mix it and squish it with your fingers. You may want to roll it into a log between your palms, fold it in half, and then roll again).

Make a ball of it and flatten it, then squish an end between two fingers…


…like that.


Step 2

Turn it on its back… on the middle of it place the brooch base.


Put a small amount of night glow polymer clay on it, like in the picture. It will hold it in its place.


Step 3

Using the toothpick or your nails, make the ghost mouth.


Step 4

Take a small piece of blue polymer clay…


… and make a “snake” of it, moving your fingers back and forth like that.


When is ready, bend it…


… to make a “b”…


… then place it on the ghost, like this.


Do the same with the red polymer clay…


… and make an “o”


Place it near the “b” on the ghost.


With the pink polymer clay…


… make another “o”…


… and place it near the red “o”.


Step 5

We’ll use night glow again to make her hands.


Take a small piece and make it like that.


Place it on one side as it holds the pink “o”


Make another hand …


… and make her hold the “b”.


Step 6

Place it on the baking tray, and bake it according to the instructions on the polymer clay package (they depend on the brand you use: fimo, cernit, sculpey…, but usually it is one half hour at 230 F or 110 C)  ***Have an Adult help for this Step.***


Let it cool down.


Step 7

Take an eye and remove the paper on its back.


Place it where the eye belongs and do the same with the second eye.


Isn’t the Ghost Brooch adorable?  It will be so much fun to wear it this Halloween season…. almost as fun as it was to make.  Almost!!

Technorati Tags: , , , , , , , , ,

How to make a Fairy Crown

When my daughter was little all she could talk about were fairies.  She was fascinated with them and loved to dress up and imitate them.  My daughter would have loved this craft had I known about it then.  Today I will show you how to make a Fairy Crown.  It would be perfect for Halloween or dress-up any other day of the year.

Check out our other Halloween Crafts.

Tutorial offered by Laura from Dacian Moon Handmade . Children need help from an adult for this tutorial.


CRAFT MATERIALS NEEDED:

– black, green, red and white polymer clay (or any other color you want for the flowers)
– cutter
– toothpick
– soft wire
– baking tray
– baking paper


Step 1 – The Armature

Take the wire and measure how much you need for your crown (by putting it over your head). Cut the rest.


Make waves with the wire and make it circle.


On both ends make a small spiral – this will be the closing.


With the wire you cut before… make some new branches for the crown, like this.


Well, the armature is ready.


Step 2 – The Branches

Take a piece of black polymer clay and condition it.

(Condition polymer clay by hand, simply mix it and squish it with your fingers. You may want to roll it into a log between your palms, fold it in half, and then roll again)


Flatten it.


Start covering the wire with it…


… by turning it around the wire.


This is the armature completely covered. We will let the ending spirals uncovered because when it is baked the polymer clay is hard and you can’t bend it to close the crown.


Step 3- The Leaves

Condition the green clay.


Take a small piece of it and flatten it.


Squish it gently between two fingers on one end…


… then on the other end.


Using the toothpick make a crease on the middle of the leaf.


With the toothpick or with your nails make small creases like in the picture.


You will notice that the leaf had flatten again so squish the endings again to improve its form…


… and place it on the branch.


Add as many leaves you want to make it look good.


Step 4 – The Flowers

Condition the red clay.


Take a small piece of it, make a ball and flatten it.


Make a sign with your nail on it …


… then squish it between two fingers around the sign to make a petal. Like this.


Place it on the branch.


Add four more petals and you have a flower 😀


Add as many red flowers as you want.


Then take the white clay …


… and add white flowers.


Step 5 – The Baking

When you are satisfied with your crown place it on the baking tray… bake it according to the instructions on the polymer clay package (they depend on the brand you use: fimo, cernit, sculpey…, but usually it is one half hour at 230 F or 110 C) – this is the part when you could use a little help.


Let it cool down and you have a beautiful fairy crown.


I love this fairy crown…. it turned out so beautiful.  Any girl would love to play dress-up and wear the fairy crown. It would top off any fairy costume perfectly.  Also check out How to Make Fairy Wings craft that would go beautifully with this Fairy Crown.

Technorati Tags: , , , , , , , , ,

Mask Making Fun – How to Make 3 Different Style Masks

Everyone knows that Masks are a perfect craft for Halloween.  But, if your kids are anything like my two littlest ones…. Masks are fun ANY time of year.  My children LOVE masks… love them!!  So, today I’m going to show you how to make three different style masks….. make your favorite or make all three.  Plenty of mask making fun.

Check out our other Halloween Crafts.


How to Make 3 Different Style Masks


Mask 1


Mask 1 Directions


Materials Needed

Paper Bag

Chalk

Crayons

Scissors

Paint, Construction paper, yarn…. and anything you would like to decorate the mask with.

Directions:

  1. Put a paper bag over your head. Mark with chalk or crayon the places for eyes and mouth.
  2. Remove the bag and carefully cut these openings.
  3. Funny ears, a nose, and hair may be added by painting and pasting. Color with crayons or water colors.


Mask 2


Mask 2


Materials Needed

Firm Paper (butcher paper would work)

Paint, Construction paper, yarn…. and anything you would like to decorate the mask with.

Pencil

Scissors

Hole Punch

Notebook Reinforcements (makes holes stronger)

String

Rubber Bands

Paper Clips

Directions:

  1. Cut a piece of firm paper large enough to cover your face and reach your ears. Hold the paper to your face and mark places for your eyes and mouth.
  2. Remove the paper and cut the openings.
  3. Punch holes in the sides just above the ears. Put notebook reinforcements or paper rings over the holes.
  4. Decorate the mask however way you would like.
  5. Use string, rubber bands, and paper clips to fasten the mask around your head.


Mask 3


Directions for Mask 3


Materials Needed

Clay

Cardboard, Slate or Wood

Paper Towels

Bright Colored Paint

Directions:

  1. Model a face of clay on a firm base of heavy cardboard, slate, or wood.
  2. Let the model dry. Cover it with a layer of damp strips of paper toweling.
  3. Paste four more layers over the first layer. Each layer should be at right angles to the one under it. When the paper is dry and rigid, remove the mask from the clay model.
  4. Paint the mask with bright colors.

There you have it…. 3 different style masks.  Your child is sure to find a Mask craft that fits their needs.  Have fun!!

Technorati Tags: , , , , , , , ,

How to Make a Halloween Bean Bag Balloon Pumpkin

If you are looking for new Halloween decorations to put around the house, but are finding the same Halloween decorations at the store as every other year….. I have the perfect Halloween decoration craft for you.  Here I will show you how to make a Halloween bean bag balloon pumpkin perfect for this Halloween season.

Check out our other Halloween Crafts.


How to Make a Halloween Bean Bag Balloon Pumpkin


Materials Needed:

Water Bottle

3 Balloons

Rice or Split Peas

Scissors

Black Felt or Black Marker

Green Clay or Play Doh


Step 1:


Cut water bottle bottom off to make a funnel


Cut water bottle bottom off to make a funnel.


Step 2


Fill balloon to half its size


Fill balloon to half its size.  Wait 15 seconds and then you can deflate the balloon.  This stretches the balloon out.


Step 3


Deflate balloon


This is what the deflated balloon should look like.


Step 4


Stretch the balloon over the top of the bottle.


Stretch the balloon over the top of the bottle.  Place rice or split peas into the cut water bottle…. they will then fill the balloon.


Step 5


Fill up the balloon until it is about this full


Fill up the balloon until it is about this full.


Step 6


Cut off the top of the balloon


Cut off the top of the balloon.


Step 7


Cut bottoms from two more balloons


Cut bottoms from two more balloons.


Step 8


Stretch a balloon over the filled balloon


Stretch a balloon over the filled balloon… covering the side with hole.


Step 9


Stretch 3rd balloon over the 2nd balloon


Stretch 3rd balloon over the 2nd balloon… Again over the side the hole is showing on.


Step 10


This is what your pumpkin bean bag looks like now


This is what your pumpkin bean bag looks like now.


Step 11


Add a triangle for each eye and for the nose


Go to Our – How to Draw a Jack-O-Lantern Drawing Tutorial to draw the face…or just add a triangle for each eye and for the nose.  Draw a smile as well.


Step 12


 Add green clay or play doh stem and leaf to top


Add green clay or play doh stem and leaf to top.


How to Make a Halloween Bean Bag Balloon Pumpkin


And there you go.  You have just made an original Halloween decoration for your house…. a Halloween bean bag balloon pumpkin.  Display it proudly.  And, have a very scary Halloween.

Technorati Tags: , , , , , , ,

Make a Graduation Cap and Diploma Pin in 6 Easy Steps

Graduation day is very important and everyone wants to remember it. What are the symbols of this day? The graduation cap / hat and diploma … so, we will add those to our badge pin 🙂 Learn how to make the following decorative pin in easy step by step lesson below … great for the last day of school.

This step by step tutorial is offered by Laura from Dacian Moon Handmade


How to Make Graduation Cap and Diploma Pin Badges


How to Make Graduation Cap and Diploma Pin Badges

CRAFTS MATERIALS NEEDED:

– toothpick
– polymer clay : blue – or any other colour for the background – and black – for the hat
– cutter
– 1 badge base
– thread
– craft glue
– white paper
– baking paper
– baking tray


Step 1

Condition polymer clay by hand, simply mix it and squish it with your fingers. You may want to roll it into a log between your palms, fold it in half, and then roll again.

Fortunately, in the summer the clay is conditioning more easily.

So, condition the blue clay.


Let a small part and from the rest make a ball and flatten it on a piece of baking paper.


Step 2

Place the badge base on it and press.


Use the small piece of blue clay to fix the base…


… like that.


Turn it with the face to you.


Step 3

Take a half of the black clay, condition it…


… and make a almost square form of it.


Place it to the blue background.


From the other half, make a triangle form and place it on top of the square.


Step 4

Place the on the baking tray, and bake it accordingly to the instructions on the polymer clay package (they depend on the brand you use: fimo, cernit, sculpey…, but usually is one half of hour at 230 F or 110 C)

Let it cool down.


Step 5

Take the white paper, make a roll with it…


…and tie it with the thread.


Step 6

Apply a layer of glue on it…


…and place it on the badge.

You can use paints to add the year or anything else you want.


Now you can wear it on your shirt or coat proudly. Congratulations!

Technorati Tags: , , , , , , , , ,

How to Make Pretty Earrings or Ear studs Hearts for Valentines Day Craft

Learn how to make these adorable polymer clay stud hearts (aka heart earrings). You can give these stud hearts to your Mom, Grandma, friends, etc to show them how much you care about them…especially for Valentine’s Day, Mother’s day, or a birthday. But, because we’ll use polymer clay (oven-hardening) you’ll need a little help from an adult. This is an easy to do step by step tutorial offered by Laura from Dacian Moon Handmade

Here are Even More Valentines Day Crafts Ideas


How to Make Pretty Earrings or Ear studs Hearts for Valentine's Day Craft


How to Make Pretty Earrings or Ear studs Hearts for Valentine’s Day Craft

CRAFTS MATERIALS NEEDED:

– toothpick
– red polymer clay (I placed the toothpick beside it to see how much polymer clay you need)
– cutter
– 2 flat earstuds
– 2 earnuts
– craft glue
– baking paper
– baking tray


Step 1.

Polymer clay has to be conditioned prior to use. Conditioning in this case means thorough mixing. To make conditioning easier, start with warming up your clay. The gentlest way of doing it is to carry the clay in your pocket for a while. You are ready to start conditioning your clay once it feels pliable. To condition polymer clay by hand, simply mix it and squish it with your fingers. You may want to roll it into a log between your palms, fold it in half, and then roll again.


The smaller the piece of clay you are conditioning, the faster it will soften up.


Step 2.
Make a ball with it.


Step 3.
Cut the ball in half.


Like that.


Step 4.
Squish gently between two fingers to make the lower part of the heart.


Step 5.
On the upper part, use the toothpick to shape it…


… like this.


Step 6.
Repeat the step 4 and 5 for the other half of polymer clay ball.


Step 7.
This is the moment when you need help.
Place the hearts on a baking paper in a baking tray. Bake them accordingly to the instructions on the polymer clay package (they depend on the brand you use: fimo, cernit, sculpey…, but usually is one half of hour at 230 F or 110 C)


Step 8.
Let it cool down.


Step 9.
Apply a layer of glue on the back side of the hearts and place the earstuds in the middle.


After the glue is dry, you can wear the earrings and be special on Valentine’s Day 😉


Here are Even More Valentines Day Crafts Ideas

Technorati Tags: , , , , , , , , , , , , , , , , ,

How to Make a Polymer Clay Heart Keychain Crafts Idea for Kids on Valentines Day

Today we will show you how to make this cool polymer clay heart keychain…a perfect gift to give to somebody you love or a good friend on Valentine’s day or to Mom on Mother’s Day or for a birthday. This polymer clay key chain is a cute heart adorned with flowers … perfect to decorate your phone, backpack, purse, etc.Below you will find the  step by step tutorial offered by Laura from Dacian Moon Handmade. Just to let you know…because we’ll use oven-hardening polymer clay you will need a little help from an adult.

Here are Even More Valentines Day Crafts Ideas


How to Make a Polymer Clay Heart Keychain Crafts Idea for Kids on Valentines Day


How to Make a Polymer Clay Heart Key Chain Crafts Idea for Kids on Valentines Day

CRAFTS MATERIALS NEEDED

– toothpick
– red and white polymer clay (I placed the toothpick beside it to see how much polymer clay you need)
– roll (you can use anything tubular – I use a recipient for Vitamines 😀 )
– baking paper
– baking tray
– keychain cord
– 1 jumpring


Step 1.

Condition red polymer clay by hand, simply mix it and squish it with your fingers. You may want to roll it into a log between your palms, fold it in half, and then roll again.


Step 2.

Make a ball of it and flatten it.


Step 3.

Gently squish one part, to form the lower part of the heart.


Step 4.

Use the toothpick to shape the upper part of the heart.


This is the heart 🙂


Step 5.

Place it on a piece of baking paper.


Use the toothpick again to make a hole in the upper left side.


Take care that the toothpick goes through the heart and get out on the other part.


Step 6.

Condition the white polymer clay too.


Step 7.

Make a small roll of white…


… and place it on the heart. Make a crease on it to fix it on the heart, like in the picture:


Add three more white petals.


Step 8.

Make a tiny white ball…


… and place it in the middle of the petals.


Step 9.

If you like, place two more petals on the opposite corner, for balance.


Step 10.

Now you’ll need the help of an adult.
Place the heart (with it’s piece of baking paper) on the baking tray, and bake it accordingly to the instructions on the polymer clay package (they depend on the brand you use: fimo, cernit, sculpey…, but usually is one half of hour at 230 F or 110 C)


Step 11.

Let it cool down.


Step 12.

Open the jumpring (I use a pliers for that)…


… put it through the hole that you made in the heart…


And through the keychain cord base.


Step 13.

Close the jumpring and the keychain is ready 🙂


Here are Even More Valentines Day Crafts Ideas

Technorati Tags: , , , , , , , , , , , , , , , ,