How to Make a Glove Bunny for Easter

Get ready for a fun and creative craft because I have just that for you today.  In this post I am going to show you how to make a Glove Bunny for Easter.  That’s right…. it’s an Easter bunny made out of a Glove.  This is a great craft to do to actually use that glove that you no longer have the pair for.  After stuffing the glove you have a nice, cuddly Easter Bunny that would be perfect as an Easter decoration or a nice cuddly friend.  The choice is yours.  So, let’s get started.

Check out our other Easter Crafts.


How to Make a Glove Bunny for Easter


Materials Needed

Glove

2 Safety Pins

Stuffing

Glue

Clothespins or Clips

Cap

yarn

Construction Paper

Ribbon or Twist Tie

Cotton Ball


Step 1


Get a glove.


Get a glove.  Then fold middle finger down and the two outside fingers can be pushed to the back.


This is what the other side looks like.


This is what the other side looks like.


Step 2


Pin middle finger down from inside of glove.


Pin middle finger down from inside of glove.


Step 3


Fill with stuffing.


Fill with stuffing.


Step 4


Fold bottom part inside glove.


Fold bottom part inside glove.


Step 5


Glue and clip shut.


Glue and clip shut.


Step 6


Get a cap.


Get a cap.


Fill cap with glue.


Fill cap with glue.  Fill with tiny, cut pieces of yarn… as well as tiny little paper eggs that you cut out.


For a tiny handle use a ribbon or twist tie.


For a tiny handle use a ribbon or twist tie.


Step 7


Put tiny basket handle over one arm and then pin both arms together.


Put tiny basket handle over one arm and then pin both arms together.  Pin from behind arms.


Step 8


Glue cotton ball to back.


Glue cotton ball to back.

And, that’s it…. you just finished making your Glove Bunny for Easter.  Isn’t he a cutie patootie?!  Let me know how your Glove Bunny turned out in the comments below.  And, take a picture of it too and post that with the comment as well…. I’d love to see it.

Technorati Tags: , , , , , , , , , ,

How to Make a Clothespin Butterfly

Spring is right around the corner…. it is literally days away.  In honor of Spring today I’m going to show you how to make a Clothespin Butterfly.  This craft is super simple, but it is equally that much fun too.  Make a few of these Clothespin Butterflies and decorate your house or your entire bedroom.  These Clothespin Butterflies when hung up are sure to get you in the Spring mood.  So, grab the materials needed and let’s get started.

Check out our other Spring Crafts.


How to Make a Clothespin Butterfly


Materials Needed

Paper

Clothespin

Pencil

Scissors

Crayons or Markers

Glue

Pipe Cleaner


Step 1


Fold paper.


Fold paper.


Step 2


Draw butterfly by drawing a number 3 for each wing.


Draw butterfly by drawing a number 3 for each wing.


Step 3


Cut it out.


Cut it out.


Step 4


Now color in butterfly on both sides.


Now color in butterfly on both sides.


Step 5


Paste onto clothespin.


Paste onto clothespin.


Like this.


Like this.


Step 6


Cut pipe cleaner in half and push 2 in between paper and clothespin for antennae.


Cut pipe cleaner in half and push 2 in between paper and clothespin for antennae.

Now your Clothespin Butterfly is all finished.  Didn’t it turn out adorable?  Make a few and decorate your house this Spring.  These butterflies are sure to get you in the Spring spirit.

Technorati Tags: , , , , , , , , ,

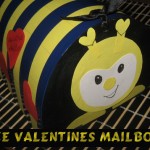
How to Make a Valentines Bee Mailbox

Today I’m going to continue with the Valentines Craft fun by showing you how to make a Valentines Bee Mailbox.  This Valentines Mailbox will be perfect for collecting all your Valentines Cards this Valentines Day.  Don’t just use a paper bag to collect your Valentines Cards…. that’s just boring.  Make something that you can be proud of…. imagine the comments all of your friends will have when they are adding their Valentines Cards to your Mailbox.  So, grab the materials needed and let’s get started.

Check out our other Valentines Day Crafts.

Laura from Dacian Moon Handmade  will show you, step by step, how to make this mailbox for Valentines Day.


Materials Needed

– white cardboard
– colored paper : yellow and red
– black pen (or marker)
– scissors
– black ribbon
– paper glue
– pencil
– black paint
– paintbrush
– black tape


Step 1

Draw lines across the yellow paper at about 2.5 cm distance.


Cut them out.


Cut a piece of tape, slightly longer than the yellow bands.


Step 2

Put a yellow band on the tape, as in the picture.


Do the same for the lower part of the tape. Take care to let enough tape uncovered.


Add another piece of tape.


Continue until you finish the yellow bands. The first band and the last one must be tape.


Step 3

Cut the cardboard a little smaller than the bands…


… and put it over, like this.


Measure the base. I made it a half of the main piece, and slightly longer.


Place it further over the yellow bands and tape, like this.


Bring the extra tape over the cardboard to fix it in place.


Make a cut on the tape in the front part, where the base is longer than the rest, then bring the tape over the cardboard.


It will look like this.


Step 4

Fold the base up…


… and add it to the other end, like this.


Press well to fix it.


This is the box body.


Step 5

Put it on a piece of cardboard, with the opening up …


… and draw the outline.


Cut it out and make another one (one for the front and one for the back)


Paint them black.


Step 6

Draw two circles (one big and one small) – head and nose, two half circles – the feet and two antennas (I made them in the shape of hearts).


Cut them out.


Place the big circle over cardboard and draw the outline.


Inside, draw an almost heart shape – the face.


Cut the face shape out.


Step 7

Apply a layer of glue on the back of the face…


… and place it over the head circle.


It will look like this.


Add glue on the small circle – the nose…


… and place it in the middle.


Draw the eyes…


… and make them black. Add a mouth too.


Next, add the feet…


… like this.


Next… add the antennas.


Isn’t it cute?!


Step 8

Fold up the extra part of the base.


Add glue on it…


… and place the front part on it. Bring the tape over the front part, like this. Then you will put the back part on its place and fix it with tape.


Step 9

Make a hole on the upper part of the box body, like this.


Make another one between the antennas, on the front part.


Take the ribbon and make a knot in both ends. Cut the ribbon in two.


Put it through the holes you made, like this.


Now tie the two part of ribbon. The mailbox is now closed. To open it untie the ribbon.


Step 10

Let’s add a bit of color. Draw 3 hearts on the red paper.


Cut them out.


Write “Valentines Mailbox” on one…


… and glue them …


… on the box.


That’s our cute bee mailbox for Valentines Day.


Doesn’t it turn out just simply BEE-utiful?!  Imagine collecting your Valentines Day Cards in this Mailbox…. you will get some wonderful comments on it, I’m sure.  Let me know how your Valentines Bee Mailbox turned out in the comments below.  You can share a picture as well in the comments…. I’d love to see how your Mailbox turned out.

Technorati Tags: , , , , , , , , , , , ,

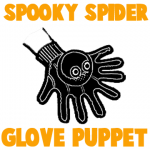
How to Make a Spooky Spider Glove Puppet

Today I have a fun craft for you.  I am going to show you how to make a spooky Spider Glove Puppet.  It’s going to be so much fun.  Plus, this spooky spider is so cute.  I know a spooky spider shouldn’t be cute.  But, it just is.  Something about seeing a spider as a puppet that makes it so cute.  So, find an old pair of gloves and grab your kids because they are going to love this craft…. and for sure playing with the finished puppet.

Check out our other Halloween Crafts.


How to Make a Spooky Spider Glove Puppet


Materials Needed

Pair of Black Gloves (old or new)

Needle

Black Thread

Cotton

Styrofoam Ball (1 1/4″ in diameter)

Scissors


Step 1


Buy a pair of black gloves....or even better, find an old pair of black gloves


Buy a pair of black gloves….or even better, find an old pair of black gloves. Decide if you want to wear this puppet on your right hand or left hand. Set one of the gloves in the pair aside…the one that you will not be wearing on your hand. For the purposes of this tutorial, we will assume that you are right handed. You are now going to cut up the glove that is NOT your good hand. If you are right handed, cut up the left glove…and vice versa if you are left handed. Now, cut off the bottom of the left handed glove(the cuff) if you are right handed. And then cut the thumb and first two fingers from the left glove as well… as shown in the picture above.


Step 2


Now you will have a piece of the left glove that included 3 fingers without the cuff


Now, you will have a piece of the left glove that included 3 fingers without the cuff. You will slip the middle finger of this left glove over the little finger of the right glove.


Step 3


You will now sew the 2 pieces together


You will now sew the 2 pieces together.  Sew the seams together carefully so that a finger still will fit into opening (see sketch above).


Step 4


Now, stuff other finger and thumb of left glove with cotton and sew to right glove


Now, stuff other finger and thumb of left glove with cotton and sew to right glove. Cut another finger from left glove and stuff it with cotton. Sew it fast between the thumb and forefinger on the right handed glove (see sketch above).


Step 5


Cover a styrofoam ball


Cover a Styrofoam ball ( about 1 1/4″ in diameter) with some of the left-over left glove cuff and sew on to the right hand glove (see x on sketch above).


Step 6


Put it on and wear it as a scary black spider


Put it on and wear it as a scary black spider. Creep people out with your scary Halloween spider.  Hey, you can even make a few and put on a Halloween spider puppet show.  How fun would that be?!

Technorati Tags: , , , , ,

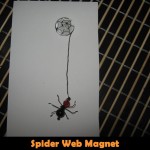
How to make a Spider Web Magnet

What item in your kitchen is seen most often by family members and company?  Your refrigerator, of course.  So, why not decorate your refrigerator too for Halloween.  Today I’m going to show you how to make a Spider Web magnet perfect for the Halloween season.

Check out our other Halloween Crafts.

Laura from Dacian Moon Handmade will show you how to make a funny Halloween magnet, step-by-step.


CRAFT MATERIALS NEEDED:

– cardboard
– pen
– magnet
– glass
– black soft wire (0.5 thickness)
– one red crystal and one black crystal (a little bigger)
– black thread
– craft glue
– round nose pliers


Step 1 – The Web

Place the magnet on the cardboard …


… and draw its contour.


Inside this contour start drawing the web. The drawing should be waterproof.

Fix a center of the web,…


… draw lines from it to the edge. The lines shouldn’t be perfect.


Then link the lines using horizontal ones. Like this.


Cut out the disc with the web.


Like this.


Step 2. Assembling the magnet

Apply a generous layer of glue on one side of the magnet…


… like this.


Then place the web disc on it (with the drawing up)


Apply a layer of glue on the glass too…


… like this…


… and place it over the web.


Take a piece of thread and roll it around the magnet, just under the glass. Don’t pull hard. It just need to be on the glue.


Let it dry well.


Step 3. The Spider

Cut a piece of black wire – about 4 cm.


Make a loop on one end.


Add the crystals – first the red one…


…  then the black one.


Make a closed spiral at the other end, letting 0.5 cm of wire to the crystals.


Place the crystals at the ends of this wire. This is the spider body.


Now we’ll make the legs of the spider.

Cut three pieces of wire about 4 cm each.


Take one piece and start turning it around the spider body, between the crystals. Turn it around for 3-4 times.


Take care that the remaining wire is equal on both sides.


Add the second piece of wire the same way.


Then the third.


Is time to bend its legs. At about 0.5 cm of the body, bend the wire like in the picture.


Do the same for all the legs.


To prevent scratches, make a little loop on the end of every leg.


Step 4 – Adding the spider

Put the black thread through the loop near the red crystal…


… and make a knot. Like this.


Now the magnet is ready to decorate any metallic surface 😉


Isn’t this Spider Web magnet adorable?  I’m not sure a spider and its web is adorable, but if any should be…. this should be the one.  I love how the spider dangles from the web.  It’s perfect as a magnet this Halloween…. or anytime of the year.

Technorati Tags: , , , , , , , ,

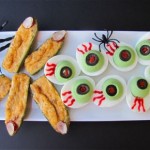
Scariest Halloween Edible Craft Ideas

I was roaming the internet the other day and I came across some of the scariest Halloween treats that I have ever seen…. I just had to share them with you.  I know food is not usually covered in this blog, but I was thinking…… not all crafts have to be made in the craft room.  Today I’m going to bring the crafts into the kitchen.  Check out some of the Scariest Halloween Edible Craft Ideas I have ever seen.

Check out our other Halloween Crafts.


Scariest Halloween Edible Craft Ideas


Let me know if you make a Scary Halloween Treat or if you came across one on the internet that I haven’t listed here.  I would love to hear about them.


(1) Edible Eyeball Recipe


Edible Eyeball Recipe


Sarah Caron at Amazing Moms put together this awesome eyeball recipe.  They look like bloodshot eyes, but I have a feeling it doesn’t taste like that.  Made from donut holes these eyeballs are sure to taste delicious.


(2) Witches Fingers


Witches Fingers


Ok, this Halloween treat is totally creepy…. and it looks so real.  Las Vegas Food Adventures knows how to make a scary, but delicious treat.  Made with almonds, cream cheese and red cake decorating gel these witch fingers are sure to be sweet.


(3) Mummy Dogs with Green Goo


Mummy Dogs with Green Goo


I found this spooky treat at 365Halloween.com and I love the idea.  They are like “pigs in a blanket”, but changed up a bit.  These Mummy Dogs will actually ooze with edible green goo as you eat them.  YIKES!!


(4) Meat Hand


Meat Hand


Made from a Meatloaf with cheese on top this is one disgusting looking hand, but promises to be delicious.  Not Martha shows you how to make this Meat Hand for yourself…. and scare all who comes near.


(5) Intestines with Subcutaneous Fat Covered in Arterial Plaque and Bile


Intestines with Subcutaneous Fat Covered in Arterial Plaque and Bile


The name of this item turns my stomach a bit…. and so does the picture.  But, Cooking at Cafe D’ tells us it is perfectly fine to eat…. perhaps even tasty.  This is one icky dish perfect for Halloween.


(6) Shrunken Heads in Cider


Shrunken Heads in Cider


I love the way these shrunken heads look…. they would be perfect at a Halloween party.  I found this recipe on the Martha Stewart site…. she has the entire recipe and even a video if you want to put together this Halloween recipe.


(7) Halloween Puff Pastry Intestines


Halloween Puff Pastry Intestines


This Halloween recipe is sure to be a big hit at any Halloween get-together.  I found this recipe at The Knead for Speed and it looks perfectly creepy and yet I find myself thinking it looks delicious.  Made from puff pastry and sweet filling what is not to love.


(8)  Eye-Popping Soup


Eye-Popping Soup


Check out this soup…. it is totally creepy, right?!  I found this Halloween Recipe on delish and it’s a good one.  Made from tomato soup it is sure to be yummy…. as long as you don’t mind it staring back at you.


(9) Witch Finger Poppers and Eye of Newt


Witch Finger Poppers and Eye of Newt


I love the presentation of this Halloween Recipe…. it’s just so colorful and equally creepy.  I found this awesome recipe over at Susi’s Kochen und Backen Adventures and it’s nothing short of awesome.


(10) Creepy Peepers Halloween Jell-O


Creepy Peepers Halloween Jell-O


In Katrina’s Kitchen put together this creepy dish and I must say the consistency of this treat looks goopy and gross.  I’m not sure I could swallow it even though I know the green goo and white eyeballs are just jell-o…. it’s the consistency that gets me with this one.

Technorati Tags: , , , , , ,

How to Make a Halloween Spider on His Web

I don’t know about you, but when I think of Halloween there are a few spooky characters I think of.  I think of witches, ghosts, skulls and of course the spider.  I just find spiders very scary.  In this post you will learn how to make a Halloween spider on his web perfect for decorating and displaying with your other Halloween paraphernalia.  On lookers will love it!!

Also check out our other Halloween Crafts OR Learn How to Draw a Cartoon Spider Web.


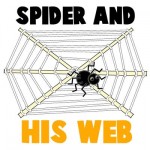
Halloween Spider and his Web Craft.


Materials Needed:

Chopsticks (or other type of sticks)

Glue

Yarn

Black Pom Poms (one big and one small)

Googly Eyes

4 Pipe Cleaners


Step 1


Place chopsticks on top of each other like above


Place chopsticks on top of each other like above (an x shape with a line through it).


Step 2


Glue all the sticks together and then take some yarn and wrap it around the middle


Glue all the sticks together and then take some yarn and wrap it around the middle.  Glue all together in the middle again.


Step 3


Start wrapping the string around the chopsticks


Start wrapping the string around the chopsticks.  Make a loop around each stick as you create the web.

Step 4


Keep wrapping yarn or string all around the sticks


Keep wrapping yarn or string all around the sticks like you see above.  Wrap the yarn around each stick as you continue the web pattern.  At the end tie a knot and glue to the end.


Step 5


Glue 2 black pom poms together


Glue 2 black pom poms together… one big and one small.  Glue googly eyes on smaller pom pom.


Step 6


Cut 4 pipe cleaners in half


Cut 4 pipe cleaners in half.  Each half is a leg.  Bend each half into a letter Z shape and glue onto big pom pom.


Step 7


 Glue the spider on the web or tie a piece of yarn


Glue the spider on the web or tie a piece of yarn to it and attach to web.


Halloween Spider and his Web Craft.


Isn’t this craft perfect for Halloween?  The kids will love doing this craft, but they will also love the finished product even more.  They will certainly enjoy displaying it proudly this Halloween season.  And, make sure to check out our other Halloween Crafts so you can decorate your entire house this Halloween.

Technorati Tags: , , , , , , , ,

How to Make an Ant Farm Jar and Watch an Ant Colony Build Mazes

This is a great project for kids who are interested in nature and bugs. This is an easy project for kids of any age and you get to watch ants build an underground city…so it is pretty cool. This ant farm has no openings, so you don’t have to worry about the ants escaping. You can open the jar outside to feed the ants, and then close it back up and bring it inside to observe.


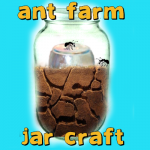
How to Make an Ant Farm Jar and Watch an Ant Colony Build Mazes Craft Activity for Kids


How to Make an Ant Farm Jar and Watch an Ant Colony Build Mazes Craft Activity for Kids

Crafts Materials Needed

– 2 Jars – One Big, One Smaller
– Loose, Sand-Like Soil
– Water
– Sugar

Step 1

Clean both jars out, and dry them out. Take the outside wrappers off so you will be able to see inside the ant jar.

Step 2


Put the smaller jar, without its lid, upside down, within the bigger jar. Try to center it.


Put the smaller jar, without its lid, upside down, within the bigger jar. Try to center it. Poke a few tiny holes in the jar lid, small enough for ants to not escape.


Step 3


Fill the outside area between both jars, with the sandy-soil.


Fill the outside area between both jars, with the sandy-soil. Make sure that the entire area is filled, but don’t pack it tightly or the ants will not be able to dig their way through it.

Step 4 : Finding and Trapping the Ants

Now you must find the ants for your ant farm jar. Go looking in your back yard or in the local park. If you still can not find any ants then you can build an ant trap. Ants love sugar, so what you should do is put some sugar, mixed with a tiny bit of water, into a jar or can. Put it on its side and keep an eye on it…when you have about 20 ants. Don’t get more than 20 ants…crowding too many ants in the jar will make them less active and less fun to watch. You can close the jar and put them in your ant farm jar (DO THIS OUTSIDE – NOT INSIDE YOUR HOUSE).  Important : Make sure that these ants are from the same colony or they will land up fighting and killing each other.


Step 5 : Close That Jar Tight

Make sure to close that jar tight. Don’t worry about the ants getting enough air because you will be opening it to put food in there. Believe it or not, that is plenty of air for your ants.


How to Make an Ant Farm Jar and Watch an Ant Colony Build Mazes


Feeding Your Ants

Do the feeding of your ants outside to keep them from escaping into your house (or I will get a lot of nasty emails from your Moms). 🙂

Once a week (no more than this) feed the ants a few drops of sugar water. You can put it directly into the soil. You can also drop in there a few grains of bird or grass seed.

FEEDING ANTS TOO MUCH CAN KILL THEM!

Keep Your Ants Safe

– Keep your ant jar away from direct blow of air conditioners, radiators, and heaters…keep them at normal room temperature.

– Keep them out of the direct glare of sunlight.

The Fun Part is Watching Your Ants Build an Underground City

Now just watch and observe your ants build their own littler underground city. They can build them most amazing, intricate mazes. I hope you enjoyed this project.

Technorati Tags: , , , , , , , , , , , , ,