A Collection of Hanukkah Menorah Crafts


A Collection of Hanukkah Menorah Crafts


Hanukkah is just days away.  And, with the beginning of Hanukkah comes the lighting of the candles.  How about making a unique and creative Menorah yourself?  Don’t think you can?  Well, take a look at the following 15 Hanukkah Menorah Crafts I found on the internet.  All are amazing and you are sure to love them all.  Some are easier than others, but surely you can find one that will meet your needs…. and you will enjoy making them yourself no doubt.
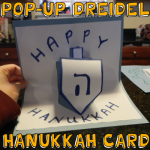
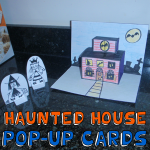
Check out our other Hanukkah Crafts.

A Collection of Hanukkah Menorah Crafts

(1)  Styrofoam Hanukkah Menorah Craft


Styrofoam-Menorah-Craft


This is a super cute craft.  It’s made from Styrofoam and some birthday candles.   It’s a whole lot of fun and it’s not difficult to make at all.  I found this craft over at All Kids Network and it is definitely worth checking out.


(2)  Plastic Toy Menorah


Plastic Toy Menorah


Isn’t this Hanukkah Menorah craft adorable?!  It really is.  I found this craft over at Aunt Peaches and I just love it.  Here she shows you how to take a toy, some clay, paint and glitter and presto you can make a super cute Hanukkah Menorah.


(3)  Plaster of Paris Hanukkah Menorah 


Plaster of Paris Hanukkah Menorah


Here with this creative Hanukkah Menorah craft you will be making 9 individual candle holders.  You and your children will be able to arrange them any way you would like to celebrate the 8 nights of Hanukkah.  Check out Kveller for all the craft details.


(4)  Birthday Candle Menorah


Birthday Candle Menorah


This might look like you are celebrating a child’s birthday that is turning 9, but it’s not.  This is a Birthday Candle Hanukkah Menorah.  Made from Birthday candles, clay and paint you and your kids will have a blast making this Hanukkah Menorah.  I found this craft over at Activity Village.  Make sure to check it out for yourself.


(5)  Tot Friendly Hanukkah Menorah


Tot Friendly Hanukkah Menorah


Here is a kid-friendly Menorah that everyone in the family will enjoy making… and lighting.  Instructables shows you how to take a few recycled materials, some Mod Podge and LED tea lights and make your very own tot friendly Hanukkah Menorah for your home.  Check it out.


(6)  Handprint Menorah


Handprint Menorah


Well, I know this isn’t exactly a Hanukkah Menorah you can light…. but it is a super fun Menorah craft for the youngest of Crafters.  This is one of our very own Menorah crafts and the kids love it.  Simply made from paint and your child’s hands your little one will love making this Handprint Menorah.


(7)  Baby Food Jar Menorah


Baby Food Jar Menorah


Here is a unique spin on the traditional Hanukkah Menorah.  Aparently Speaking shows us how to take some baby food jars and make them into a beautiful Hanukkah Menorah.  I love the way this Menorah looks.  Check out her site for all the craft details.


(8)  Glass Bottle Menorah


Glass Bottle Menorah


I love this Hanukkah Menorah craft.  I just love how natural and clean the white bottle look against the blue candles.  This is an easy craft that is sure to be a lot of fun.  Ready Made shows you how to get this same Menorah look for yourself in great detail.


(9)  Alphabet Blocks Menorah Craft


Alphabet Blocks Menorah Craft


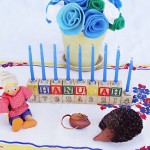
If you have little ones at home you surely have some alphabet blocks.  Your kids will get a kick out of this Hanukkah Menorah Craft.  Here Creative Jewish Mom shows you how to take ordinary alphabet blocks and transform them into this creative Hanukkah Menorah.


(10)  Wood Menorah


Wood Menorah Craft


I love this creative Menorah Craft.  It’s so colorful and just makes me happy to look at it.  I found this Menorah craft at Better Homes & Gardens.  Here they use different sized wooden beads and spools to create the individualized candlesticks used for this Menorah.  Check it out for yourself.


(11)  Cookie Menorah


Cookie Menorah


Here is a tasty Menorah you are sure to love.  Using a lollipop stick attached to the cookies you are able to attach them to a Menorah.  This Hanukkah Menorah craft looks beautiful finished and added as a centerpiece to any table.  Go to Sweet Designs to check it out.


(12)  Spool Menorah


Spool Menorah


This is a cool idea.  Here Parents explains how you can make this adorable and colorful Hanukkah Menorah for yourself.  Made from spools, colored pencils and yellow erasers (and some other materials) you can create this same look for yourself.  And, there is no flame…. so this Menorah your child can touch.


(13)  Macaroni Menorah


Macaroni Menorah Craft


I love macaroni crafts…. and so do kids.  Here is a Hanukkah Menorah Macaroni craft.  Free Kids Crafts shows you how you can take macaroni and lentils and make a festive Menorah.  Hang it up proudly during Hanukkah for all to see.  You can even talk about the Festival of Lights while doing this craft.


(14)  Sparkly Hanukkah Menorah


Sparkly Hanukkah Menorah Craft


Here is a fun Hanukkah Menorah craft that you and your kids are sure to love.  Upper West Side Mom shows us how to take a block of wood, hex nuts and some other materials and create these elegant looking Menorahs.  Check out the site for all the craft details.


(15)  Manzanita Branch Hanukkah Menorah


Manzanita Branch Hanukkah Menorah


How beautiful is this Hanukkah Menorah?  So beautiful.  And, Martha Stewart shows us how you too can have this Manzanita Branch Hanukkah Menorah.  I love how this Menorah looks as a centerpiece at the table.  It’s breathtaking.

Technorati Tags: , , , , , , , , , , , , ,

How to Make a Pop-Up Hanukkah Dreidel Greeting Card

Now is the time to start to get your Holiday greeting cards ready to be given out.  Well, today I’m going to show you how to make a Pop-Up Hanukkah Dreidel Greeting Card.  Anyone who receives this Hanukkah greeting card will love the 3D look of this card.  With some simple paper, scissors and some markers for decorating you too can make this Hanukkah Dreidel Greeting Card.  Your kids will love making this pop-up card.  Plus, they will be preparing a special card for someone they love…. they will truly get a kick out of that.

Check out our other Hanukkah Crafts.


How to Make a Pop-Up Hanukkah Dreidel Greeting Card


Materials Needed

Piece of Paper

Colorful Piece of Paper

Scissors

Markers, Crayons or Colored Pencils to Decorate Card


Step 1


Get a piece of paper.


Get a piece of paper.


Step 2


Fold in half.


Fold in half.


Step 3


Cut slits on fold.


Cut slits on fold.


Step 4


Open up page.


Open up page.


Step 5


Fold this part in.... the other direction.


Fold this part in…. the other direction.


Step 6


Now turn card in this direction.


Now turn card in this direction.


Cut down in a V shape, but don't cut all the way!


Cut down in a V shape, but don’t cut all the way!!!


Step 7


Fold right here upwards to make a crease.


Fold right here upwards to make a crease.


Step 8


Bring top part of card down on this square


Bring top part of card down on this square (not bottom of card).


Cut 2 slits.  As you can see... You are NOT cutting bottom of card as seen here.


Cut 2 slits.  As you can see… You are NOT cutting bottom of card as seen here.


 Step 9


Fold this part in opposite direction.


Fold this part in opposite direction.


Step 10


Make a crease here.


Make a crease here.


Step 11


Glue down the outer edges of white paper onto colorful paper


Glue down the outer edges of white paper onto colorful paper (the side that doesn’t pop out).


It should look like this.


Like this.


Step 12


Decorate the card.


Decorate the card.

Anyone who receives this Hanukkah card will love it!!  I love the 3D look of this greeting card…. as will the receiver.

Technorati Tags: , , , , , , , , , , , , ,

How to Make Haunted House Pop-Up Cards for Halloween

I have a super duper fun Halloween craft for you today.  In this post I’m going to show you how to make a Haunted House Pop-up Card.  People love receiving cards from their loved ones.  But, what they especially love are the homemade cards.  And, this homemade card will be no exception.  Do you know what makes this Haunted House card so special?  It’s the 3-D look of the card.  I will show you how to easily make a 3-D Haunted House Pop-up Card.  Once the Halloween Card is opened it can be displayed nicely with all the other Halloween decorations.  So, let’s get started.

Check out our other Halloween Crafts.


How to Make Haunted House Pop-Up Cards for Halloween


Materials Needed

Piece of White Paper

Colorful Piece of Paper

Scissors

Black Marker

Colorful Crayons, Markers or Colored Pencils


Step 1


Get a piece of paper.


Get a piece of paper.


Step 2


Fold in half.


Fold in half.


It should look like this.


Like this.


Step 3


Cut on the fold on the red lines.


Cut on the fold on the red lines.


It should look like this.


Like this.


Step 4


Unfold.


Unfold.  Then put your fingers into slits and fold the inside part in opposite direction.


It should look like this.


Like this.


Step 5


Fold in the spot on the above image.


Fold in the spot on the above image.


Fold here too.


Fold here too…


Step 6


Pinch the top fold and cut on the red lines.


Pinch the top fold and cut on the red lines.


It should look like this.


Like this.


Step 7


Fold here like in above picture.


Fold here like in above picture.


If you fold it down again it will look like this.


If you fold it down again it will look like this…


Open.


And, open…. like this….


Step 8


Outline edges in black.


Outline edges in black.


Step 9


Draw windows, doors and other details.


Draw windows, doors and other details.


Step 10


Color it too.


Color it too.


Step 11


Draw other details.


Draw other details.


Step 12


Add background and a sidewalk.


Add background and a sidewalk.


Step 13


Paste just the outside edges to a colorful piece of paper.


Paste just the outside edges to a colorful piece of paper.


Step 14


You can decorate the outside of the card too.


You can decorate the outside of the card too.


Step 15


Finished Haunted House Pop-up Card


Didn’t this Halloween pop-up card turn out amazing?  Anyone receiving it will love it!!  To make the Trick-or-Treat figures seen here simply print them off at How to Make a Trick-or-Treat Paper Toy.  The Trick-or-Treat figures go perfectly with today’s Halloween craft.

Technorati Tags: , , , , , , , , , , , , , , , , , , ,

How to Make a Toy Figure Pencil Topper

Since pencils are the one back to school item you will use most often…. why not make it unique.  Today I will show you how to make a Toy Figure Pencil Topper.  I can almost guarantee that no one else in your class will have a pencil like yours.  What is cool is that you probably already have the craft materials around your house.  Simply grab one of your favorite toy figurines you have around your house, get a pipe cleaner and pencil and you are good to go.  Let’s get started.

Check out our other Back to School Crafts.


How to Make a Toy Figure Pencil Topper


Materials Needed

Pencil

Pipe Cleaner

Toy Figurine


Step 1


Get a pencil out.


Get a pencil out.


Step 2


Wrap a pipe cleaner around end of pencil.


Wrap a pipe cleaner around end of pencil.


Step 3


Wrap around figurine


Wrap around figurine.


Finished toy figure pencil topper


And, there you go.  Your finished Toy Figure Pencil Topper.  Isn’t cute?  Don’t be surprised when your friends at school ask you to make one for them too.

Technorati Tags: , , , , , , , , , , , , , , ,

How to Make Color Tape Decorated Pencils

School is about ready to begin again.  And, what is the item you use most often at school?  A pencil, of course.  So, for today’s craft I’m going to show you how to take an everyday pencil and turn it into a Color Tape Decorated Pencil perfect for using at school.  Just grab a standard cheapo yellow pencil and some different color tape and you are good to go.  The more different colored tape you have the better.  So, grab the materials needed and let’s get this back to school craft started.

Check out our other Back to School Crafts.


How to Make Color Tape Decorated Pencils


Materials Needed

Pencil

Colored Tape (at least 2 different colors)

Glue Stick

Pipe Cleaner & Figure (optional)


Step 1


Wrap colored tape around pencil.


Wrap colored tape around pencil.


Step 2


Wrap another color around next area.


Wrap another color around next area.


Step 3


Alternate colors.


You only need 2 colors…. but the more the better.  Alternate colors.


Step 4


Keep going until end of pencil.


Keep going until end of pencil.


Step 5


Apply glue to entire pencil


Apply glue to entire pencil.  Let dry.


Step 6


Now there is a nice shiny coat.


Now there is a nice shiny coat.


Step 7


you can add a figure to your pencil by wrapping pipe cleaner around pencil and then your figure.


If you want…. you can add a figure to your pencil by wrapping pipe cleaner around pencil and then your figure.


Finished color tape decorated pencil


Awesome job!!!  You just finished your Color Tape Decorated Pencil.  How did your pencil turn out?  Let me know in the comments below.  And, don’t forget to take a picture too and share that in the comment as well.  I’d love to see it.

Here is our video on How to Make Color Tape Decorated Pencils

Technorati Tags: , , , , , , , , , , , , ,

How to Decorate a Notebook with Paper Squares

We are well into the month of August now…. and with August comes all the preparing you need to do for Back To School.  Well, today’s craft is perfect for back to school as I am going to show you how to Decorate a Notebook with Paper Squares.   Take an ordinary cheap notebook and decorate it with your favorite character or design.  You will be sure to have the most original notebook at school.  So, grab the materials needed and let’s get started.

Check out our other Back to School Crafts.


How to Decorate a Notebook with Paper Squares


Materials Needed

Notebook

Graph Paper

Colored Pencils or Markers

Colored Paper & Scissors or Pre-cut Colored Paper Squares

Glue


Step 1


plan out your design on graph paper with colored pencils or makers.


First, plan out your design on graph paper with colored pencils or makers.  If you need some ideas for art you can make with squares check out these Perler Bead Crafts as well as these Mosaics.  Both the Perler Bead Crafts and Mosaics are made from squares and you should have plenty of ideas to choose from.


Step 2


 Get an ordinary notebook.


Get an ordinary notebook.


Step 3


Cut squares from colored paper


Cut squares from colored paper OR buy a bag of already cut colored paper squares (It’s easier).


Step 4


Put glue where you will place squares.


Put glue where you will place squares.


Step 5


Start putting squares down.


Start putting squares down.


Keep going


Keep going….


and going


and going.


Next step is the red background.


Next step is the red background.


Keep going until the background is finished.


Keep going until the background is finished.


Finished Paper Squares Notebook


Excellent Job!!  You just finished Decorating a Notebook with Paper Squares.  You are surely going to love taking this notebook back to school to show all your friends.  Let me know how your decorated notebook turned out in the comments below.  And, don’t forget to take a picture of it too…. you can add that to the comment as well.

Technorati Tags: , , , , , , , , , , , ,

How to Make a Flying Bird Decoration

Today I’m going to show you how to make a flying bird decoration.  When made correctly this bird will flap his wings with just a bit of movement of the string.  Crafters of all ages will enjoy making this craft…. even the youngest.  We provide many templates that you can choose from to make this flying bird.  You can choose one of the colored templates or you can print off the black & white template and color the bird yourself.  The choice is yours.  So, grab the materials needed and let’s get started.

Check our our other Toy Crafts.


How to Make a Flying Bird Decoration


Materials Needed

Printer & Paper

Scissors

Glue or Tape

String

Crayons, Markers or Colored Pencils (optional)


Click on template images below to make larger and to print.

Black & White Template


flying bird black & white template


Aqua template


flying bird aqua template


Blue Template


flying bird blue template


Red template


flying bird red template


Yellow template


flying bird yellow template


Step 1


Print template.


Print template.


Step 2


color in your bird and wings


If you printed the black & white template…. color in your bird and wings.


Step 3


Cut out wings and bird.


Cut out wings and bird.


Step 4


Fold wings in middle.


Fold wings in middle.


Step 5


Glue or tape wings on bird's body cut-out.


Glue or tape wings on bird’s body cut-out.


Step 6


Fasten string to bird.


Fasten string to bird.  Raise string up and down and bird will flap wings.

And, that’s it… you just finished making your flying bird decoration.  Isn’t it cool with just raising your string up and down you can make the bird appear as if he is flying.  Enjoy playing with your flying bird.

Technorati Tags: , , , , , , , , ,

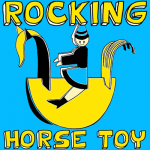
How to Make a Paper Rocking Horse Toy

Today I have a fun and easy craft for you.  In this post I will be showing you how to make a Paper Rocking Horse Toy.  If you have a printer, paper, scissors and crayons…. you are all set to make this craft.  And, the cool part is when the craft is put together correctly….. the toy actually rocks.  This craft is made from 2 simple templates so that even the youngest of crafters can enjoy making this craft.  So, grab the materials needed and let’s get started.


How to Make a Paper Rocking Horse Toy


Materials Needed

Printer & Paper

Scissors

Crayons or Markers


Click on Images below to make larger and to print off Templates.

Template 1


Template 1


Template 2


Template 2


Step 1


Print out templates.


Print out templates.


Step 2


Cut out templates.


Cut out templates.


Step 3


Fold the circle in half and then cut three slits in the fold part of it.


Fold the circle in half and then cut three slits in the fold part of it.


Step 4


Color in items.


Color in items.


Step 5


Push head, person and tail into 3 slots on half circle.


Push head, person and tail into 3 slots on half circle.


Finished Paper Rocking Horse Toy


And that’s it…. you just finished your Paper Rocking Horse Toy.  Notice how with just a tap of your finger the Rocking Horse actually rocks.  Have fun!!

Technorati Tags: , , , , , , , , , , ,

How to Make an Elegant Mask for Purim

Purim is coming up quickly….. it will be here this year on the evening of March 7th.  So, since Purim is all about hiding ones identity I thought we should make a mask perfect for celebrating Purim.  So, today I will be showing you how to make an Elegant Mask for Purim.  Made from paper and whatever you would like to use to decorate the mask…. the outcome is a Mask that you would be proud to wear.  So, grab the materials you will need and let’s get started.

Check out our other Dressing Up Crafts.

Step by step tutorial offered by Laura from Dacian Moon Handmade


Materials Needed

– colored paper
– leather cord (or any other cord)
– glitter glue (or paint markers / colored pens)
– scissors
– pencil
– synthetic self adhesive crystal


Step 1

Use the cord to measure how big should be the mask…


… and make the markings on the paper, according to your measurements.


Step 2

Draw the lower part of the mask.


Step 3

Make an arch in the middle, where the nose will be.


Step 4

Continue with the upper part of the mask – you can make any shape you like. I made it in the shape of spread wings.


Step 5

Make an inverted arch on the middle.


Step 6

Cut out the mask.


Like this.


Step 7

Measure again and make the markings for the eyes.


Step 8

Draw the eyes…


… and cut them out.


It will look like that.


Step 9

Use the pencil and decorate the mask. I like curved lines and swirls so I used them. I marked the paper near the eyes holes and the corners.


In the middle make space for the crystal.


Step 10

Using glitter glue (or paint markers / colored pens) highlight the decorations. Because my paper is light blue, I use blue glitter glue on the upper part…


… like that,


pink near the eyes…


… like this,


and mauve on the corners.


Step 11

With the scissor make two little holes on the outer edge of the eye holes, like this:


Cut the cord in half.


Make a knot on one side of every half…


… place it through the little holes…
… and the mask is ready to be worn.


Isn’t this mask just simply gorgeous?  Anyone would be proud to wear this elegant mask for Purim.  Did you use your creativity to make your mask differently from mine?  Let me know in the comments below.  And, take a picture of your mask and add that too to the comments…. I’d love to see it.

Technorati Tags: , , , , , , , , , ,

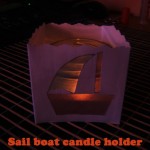
How to Make a Sailboat candle Holder

If you love candles then today’s craft is going to make you very happy.  I’m going to show you how to make a Sailboat  Candle Holder.  Made from a piece of cardboard and transparent paper this candle turns out beautifully.  The candle shimmers right through the transparent paper onto your wall.  You’ll gonna love it!!  Just keep in mind you will need some help from an adult to light the candle.  Never light it without adult supervision.  So, let’s get started.

Check out our other Candle Crafts.

Laura from Dacian Moon Handmade will show you how to make this Step-by-Step.


MATERIALS NEEDED

– cardboard
– transparent paper
– glue
– recycled jar
– pencil
– red and blue colored pencils
-ruler
– decorative edge scissors
– scissors
– tea candle


Step 1

Measure on the cardboard the height of the jar plus 1 cm …


… and cut it out.


Step 2

Using the decorative scissors, cut along one long side.


It will look like that.


Step 3

Using the jar again, measure its width …


… and mark it on the cardboard. Place the transparent paper over it and draw the new markings on it…


… to help you cut out this rectangle.


Step 4

Fold the cardboard on the marked line…


… like this.


Continue folding around it until you have this.


Step 5

Fold the last side at 0.5 cm – you will use that to close it.


Step 6

Unfold it all.


On the second side draw a boat…


… like this.


Step 7

Using the scissors, cut out the drawing.


It will look like this.


Turn it to the other side and apply a layer of glue on the rectangle with the boat.


Place the transparent paper on it.


Turn it again.


Step 8

Use the red pencil to color the boat …


… like this.

You can place a textured paper under it to have a pattern on the boat.


And blue pencil to color the sail.


Step 9

Apply a layer of glue on the last folded part (the 0.5 cm one)…


… then glue it to  the edge of the first part, like this.


Step 10

Place the jar inside…. along with the candle.


… and have an adult light it.


Notice how beautiful the candle looks shimmering through the sailboat.  Isn’t it just breathtaking.  Don’t forget…. never leave a candle lit unattended.  If you are leaving the room…. blow it out.

Technorati Tags: , , , , , , , ,

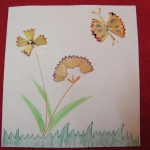
How to Make Pencil Shavings Art

Today I have a fun and creative craft for you.  I’m going to teach you how to make beautiful pictures out of pencil shavings. Its a great way to recycle waste. These pictures are amazing enough to frame and hang up on your wall. The simple steps to make it are given below, but be careful while you do this activity… pencil shavings are delicate and need to be handled gently.  So, let’s get started.


Craft materials required:

Pencils – Different Colors

Pencil Sharpener

Scissors

Glue

Card Stock


Step 1

Collect pencil shavings after sharpening your pencils.


Step 2

You can arrange 4 small bits like this and glue them in place to make one type of flower.


Step 3

You can glue two larger pieces together to make a butterfly.


Step 4

Decorate the butterfly as shown.


Step 5

Glue all the pencil shavings and decorate the rest of the picture with color pencils.


That’s it.  The craft is an easy one, but the results are big.  Every Pencil Shavings Artwork is an original, so don’t stop after one…. keep making them.  They make great gifts for the Holiday season.

Technorati Tags: , , , , , , ,