How to Fold 5 Pointed Stars

In this post I’m going to show you an easy way to fold a 5 pointed star.   The stars in the blue field of the American flag are five-pointed.  It was Betsy Ross who convinced General Washington that it was a simple matter to cut a five-pointed star from a folded sheet of paper or cloth.  These 5 pointed stars are great to use to not only make a flag, but to decorate Christmas trees, packages, boxes, cards, toy crowns, and play costumes.  So, grab some paper and a pair of scissors and let’s get started.
Check out our other Paper Folding Activities.


How to Fold 5 Pointed Stars


Materials Needed

Square Piece of Paper

Scissors


Step 1


First fold a square of paper through the middle as shown in the illustration.


First fold a square of paper through the middle as shown in the illustration.


It should look like this.


To look like this.


Step 2


Now fold corner A over to point B.


Now fold corner A over to point B.


To look like this.


To look like this.


Step 3


Fold corner A to corner B.


Now fold again.  Fold corner A to corner B.


It should look like this.


To look like this.


Step 4


Now fold left top corner over to approximately point B.


Now fold left top corner over to approximately point B.


It should look like this.


To look like this.


Step 5


Now cut on an angle.


Now cut on an angle.


Shape should look like this now.


Shape should look like this now.


Step 6


Open up and you have a star.


Open up and you have a star.

Doesn’t the star turn out awesome?  Now, what are you going to use your star for?  Let me know in the comments below.  And, take a picture of your finished project and post that in the comments too…. I’d love to see it.

Technorati Tags: , , , , , , , , , , ,

How to Make Paper Furniture Foldables

If you are looking for more furniture for your dollhouse then I have the craft for you.  Today I’m going to show you how to make Paper Furniture Foldables.  The cool part is the majority of the paper furniture doesn’t even need glue or tape to hold them together…. simply cut and fold.  We are going to make a Table, High Chair, Chair, Bed, Stool, Flower Box and even a Flower.  So, grab the materials needed and let’s get started.

Check out our other Doll House Furniture Crafts.


How to Make Paper Furniture Foldables


Materials Needed

Paper

Scissors

Toothpick

Gum, Play Dough or Clay

Paste or Tape

Thin piece of Paper (optional)


Table


Table


1.  First cut a rectangle shaped piece of paper (whatever size you decide).
2.  Then cut the 4 black slits in the piece of paper as pictured in the diagram.
3.  Now that you have cut the slits, fold down on the red dashed lines.


High Chair


High Chair


1.  First cut a rectangle shaped piece of paper (whatever size you decide).
2.  Then cut the 4 black slits in the piece of paper as pictured in the diagram.
3.  Now that you have cut the slits, fold down on the red dashed lines seen in the picture.


Chair


Chair - 1st part


1.  First cut a house-shaped piece of paper by following the directions in picture above.


Chair - 2nd part


2.  Then cut the 4 black slits in the piece of paper as pictured in the diagram.
3.  Now that you have cut the slits, fold down on the red dashed lines.


Bed


Bed


1.  First cut a rectangle shaped piece of paper.
2.  Then cut the 4 black slits in the piece of paper as pictured in the diagram.
3.  Now that you have cut the slits, fold down on the red dashed lines.


Stool


Stool


1.  First cut a square shaped piece of paper (whatever size you decide).
2.  Then cut the 4 black slits in the piece of paper as pictured in the diagram.
3.  Now that you have cut the slits, fold down on the red dashed lines.


Flower Box


Flower Box


1.  First cut a square shaped piece of paper.
2.  Then cut the 4 black slits in the piece of paper as pictured in the diagram.
3.  Now that you have cut the slits, fold down 2 sides down (as per the red dashed lines seen in the picture.) Leave 2 sides unfolded for now.
4.  Now fold the 2 remaining sides up, instead of down, as seen in the 3rd pic in the illustration above
5.  As seen in the 3rd pic of the illustration above as well…fold the corners over.
6.  If you don’t want to glue in pace, then you can use a thin piece of paper for lining and then just fold it over the sides to keep in place. Otherwise just paste or tape in place…it is as easy as that.


Flower


Flower


To make the paper flower to go in the flower box, follow these instructions…

1.  First cut a square shaped piece of paper.
2.  Then cut the 4 black slits in the piece of paper…each along the corners of the square…as pictured in the diagram.
3.  Now make a fold along each of the red dashed lines. You will now have a flower.
4.  Stick a tooth pick thru the center of the flower.
5.  Use gum, play dough or clay to stick the flower in and then place in the box.


Finished Paper Furniture Foldables


Awesome job….. you just finished making the Paper Furniture Foldables.  Now, take what you made and decorate your dollhouse…. you’ll have a blast playing with your new Paper Furniture.

Technorati Tags: , , , , , , , , , , , , , , ,

How to Make Origami Hearts

If you love Origami and other paper folding activities then you are going to love this post.  I’m going to show you how to make Origami Hearts.  I felt today’s craft was fitting as Valentines Day is only a week away.  You can use this Origami Heart for Valentines Day decorations, gift for someone special or perhaps use these Origami Hearts as the Valentines Day card itself.  The only material you need for this craft is Origami paper…. that’s it.  So, grab some paper and let’s get started.

Check out our other Valentines Day Crafts or Origami Crafts.


How to Make Origami Hearts


Materials Needed

Origami Paper


Step 1


Fold paper in half.


Fold paper in half.


Step 2


Fold in half other way now.


Fold in half other way now.


Step 3


Turn over.


Turn over.


Step 4


Fold bottom up to middle crease.


Fold bottom up to middle crease.


Step 5


Turn over.


Turn over.


Step 6


Fold bottom right corner up to center crease.


Fold bottom right corner up to center crease.


Step 7


Fold bottom left corner up to center line too.


Fold bottom left corner up to center line too.


Step 8


Flip over.


Flip over.


Step 9


Bring top right corner to center line.


Bring top right corner to center line.


Step 10


Now bring left top corner over to center line too.


Now bring left top corner over to center line too.


Step 11


Fold top corner down to crease line without folding white triangles on sides.


Fold top corner down to crease line without folding white triangles on sides.


The paper should now look like this.


The paper should now look like this.  Notice white triangles are unfolded.


Step 12


Fold white triangles in on the inner edge of each triangle.


Fold white triangles in on the inner edge of each triangle.


Like this.


Like this.


Step 13


Fold 2 triangles on each side of heart.


Fold 2 triangles on each side of heart.


Like this.


Like this.


Step 14


Fold down top a bit to make less pointy.


Fold down top a bit to make less pointy.


Finished Origami Heart


Now turn paper over and you have your Origami Heart.

And, there you go…. you just finished your Origami Heart.  How did your Origami Heart turn out?  Let me know in the comments below.  Don’t forget to take a picture of your heart as well and share it too in the comments…. I’d love to see it.

Technorati Tags: , , , , , , , , , , , , , , ,

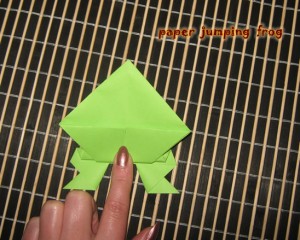
How to Make a Paper Jumping Frog

I have a super duper fun craft for you today.  I’m going to show you how to make a Paper Jumping Frog.  That’s right, a Jumping Frog simply made out of paper.  Folded just the right way this Paper Frog will actually jump… and jump well.  And, the cool part…. you only need paper for this craft.  No other materials needed.  So, grab a green piece of paper (or whatever color paper you would like) and let’s get this fun craft started.

Check out our other Paper Folding Activities.

Laura from Dacian Moon Handmade will show you how to make this step-by-step.


Materials Needed

– green paper (can be white paper too, or any other color you want your frog to be)


Step 1

Bring one corner to the opposite side to form a triangle. Cut out the extra paper.


Unfold and you’ll have a square.


Step 2

Fold on the other diagonal…


… then unfold.


Step 3

Fold the paper in cross and unfold – we will need all those creases.


Step 4

Take the right edge…


… and bring it to the lower one. Press the new formed edge until you reach the center.


Do the same on the left side.


Then flatten the upper part…


… like this.


Step 5

Take the left corner…


… and bring it over the upper one.


Repeat with the right one. It will look like this.


Step 6

Fold the upper corners like in the picture.


Our paper will look like that.


Step 7

Turn the paper.


Bring the left side over the center crease.


Do the same with the right one.


Step 8

Now we will make the feet of the frog.  Fold the right triangle outward, taking care that the base is parallel with the body…


… like in the picture.


Do the same with the the left side.


Step 9

Fold the lower part of the frog over the upper part (almost in half).


Then fold it down again (in half)


Turn it over and the frog is ready.


To play with it simply press where it is shown in the picture and the frog will rise her head and jump.


Isn’t this Paper Jumping Frog a cutie patootie?  It is just simply cute.  It’s even cuter when it jumps.  How did your Paper Jumping Frog turn out?  Let me know in the comments below.

Technorati Tags: , , , , , , , , ,

Chinese New Year Crafts – Year of the Dragon


Chinese New Years Crafts


Chinese New Year falls on January 23rd this Year.  And, in honor of Chinese New Year I put together a list of crafts just about the Chinese New Year.  You will find that most of them are Dragon Crafts and you might wonder why….. well, I will tell you why.  This year is the Year of the Dragon.  So, to honor that fact the majority of the crafts I have listed here will be Dragon Crafts.  Not all of them…. there are plenty of fun other crafts that have nothing to do with Dragons.  So, check out the post and pick a few Chinese New Year Crafts to do with the kids….. they are sure to love them.  So, let’s get started.

Here are Even More Chinese New Years Crafts

Chinese New Year Crafts – Year of the Dragon

(1) Festive Ribbon Dragon


Festive Ribbon Dragon


Here is an adorable dragon perfect for this years Chinese New Years.  This is the mini sized version of the huge size dragon they use in parades for Chinese New Years.  Check out FamilyFun for all the crafting details.


(2) Pop-Up Greeting Card


Pop-Up Greeting Card


Isn’t this Chinese Pop-Up Greeting card gorgeous?  I think it is really beautiful.  Imagine giving this to someone to celebrate the Chinese New Year.  Go to FreePaperCraftTemplate for all the details on how to print off this free template.


(3) Origami Dragon


Origami Dragon


Since this Chinese New Year is the year of the Dragon how could I not include an Origami Dragon in this post.  And, look how awesome this Origami Dragon turns out.  You can get the full instructions for this Origami by going to Origami-Instructions.


(4) Chinese New Year Fish


Chinese New Year Fish


Fish is a very popular dish on Chinese New year.  Fish is a sign of prosperity…. so it is very common to see people eating fish on Chinese New Year.  With that being said I thought it was a good idea to include Fish in this Chinese New Year Post.  Go to Julie K in Taiwan for all the craft details.


(5) Chinese Dragon Door Hanger


Chinese Dragon Door Hanger


Here is a cute craft for the youngest of crafters.  If you go to NickJr they show you how to make a simple Chinese Dragon Door Hanger that is perfect for any kid’s room.  Plus, making this craft with them is the perfect time to explain to your kids a little bit about the Chinese New Year.


(6) Dragon Mask


Dragon Mask


Now, isn’t this Dragon Mask incredible?  What little one wouldn’t love wearing this Dragon Mask all over the house.  After all, children love dressing up.  Find all the Dragon Mask “how-to’s” over at AlphaMom.  This is such a great Chinese New Year craft!!


(7) Pull-A-Long Dragon Craft


Pull-A-Long Dragon Craft


Here is a great way to make a Dragon for Chinese New Year….. made out of paper cups.  How awesome is that?!  It turns out so cute too.  This is a great way to teach your children about the Chinese culture.  Make sure to check out the craft in its entirety over at FreeKidsCrafts.


(8) Toy Spinning Hand Drum


Toy Spinning Hand Drum


Here is a fun toy for the Chinese New Year.  Not only fun to play with…. but also fun to make.  This toy is a great way to make lots of noise during the Chinese New Year.  Make sure to check out 4CrazyKings for all the fun details.


(9) Paper Dragon


Paper Dragon


This is a fun craft for the Chinese New Year.  This Paper Dragon turns out so beautiful…. I just love the colors.  I found this craft over at CraftJr and I just love it.  She explains how this craft is really so easy that a toddler can do it.  And, trust me…. the kids will love maneuvering around the dragon with the sticks.


(10) Marbled Red Vinasse Eggs


Marbled Red Vinasse Eggs


This Marbled Egg  is an extremely popular Chinese snack…. and it is extremely popular during Chinese New Year as the egg represents fertility.  To get this marbled effect you first crack the egg and then simmer the egg in colored liquid.  Get the full details at Pig Pigs Corner.


(11) Paper Chain Dragons


Paper Chain Dragons


One of the easiest crafts to teach a young child is how to make a paper chain.  So, let’s use that technique to make a Paper Dragon.  The kids will have such a fun time making this craft.  The Chinese tradition is a rich tradition….. why not show this to your kids by creating this craft.  Check out NaturallyEducational for all the craft details.


(12) Flying Dragon Puppet


Flying Dragon Puppet


Okay, I officially love this craft…. I just love how it turns out.  It turns out so colorful and festive…. just like any New year should be.  Check out JellyFishJelly for the craft details and put this Flying Dragon Puppet together.  I don’t know what your kids will love more…. putting the craft together or playing with the puppet.

Technorati Tags: , , , , , , , , ,

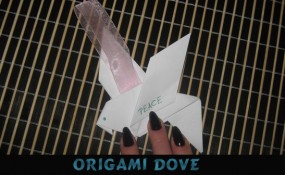
How to Make an Origami Dove

Today I’m going to show you how to make an Origami Dove.  I thought since today is Martin Luther King Day that today would be a perfect time to make a dove craft.  After all a Dove represents Peace and Tranquility and bottom line….. isn’t that what Martin Luther King wanted for everybody?  Martin Luther King was a great man and today it is all about remembering how wonderful he was and what he represented….. equality for all.  So, gather up the materials needed and let’s get started.

Check out our other Origami & Paper Folding Crafts or Check out our other Martin Luther King Crafts.

Laura from Dacian Moon Handmade  will show you, step by step, how to make an origami dove decoration.


Materials Needed

– white paper
– colored pen
– scissors
– ribbon
– glue


Step 1

Cut a square of white paper.


Place it with a corner to you.


Bring the left part over the right one.


Step 2

Bring the upper corner over the middle one, like this.


Do the same for the lower corner.


Step 3

Turn it over.


Bring the upper corner over the lower one.


Fold the left corner over the piece, like this.


Unfold.


Fold the lower corner over the piece.


Unfold.

Let’s make the wings.

Open the right part like this…


And bring the lower corner to the left, following the crease you created. Press.


It will look like this.


Do the same on the other side.


Step 4

Now it is time for the beak. Fold the left corner on the back…


… like this. Press it well because it is thick enough that it will unfold itself.


Step 5

To make the tail, bring the right part down, like this…


… and press.


Step 6

We will fold one wing down, like this, to make it look better.


Step 7

Using the colored pen draw an eye and decorate it the way you like. I wrote “Peace” on one wing.


Step 8

Apply a layer of glue on the ends of the ribbon…


… and place it between the back wing and the body.


It will look like this.


Doesn’t the Dove turn out lovely?  It will be perfect to decorate a window or a doorknob this Martin Luther King Day.  After all a Dove represents Peace and Tranquility.  Isn’t that what Martin King longed for?

Technorati Tags: , , , , , , , , , , , , ,

How to Make an Origami Santa Claus

I have another Origami craft for you today.  This time it is an Origami Santa Claus perfect for the Christmas Holiday.  Origami and other paper folding crafts are challenging, but they are also a ton of fun.  You don’t need much in the way of materials…. Simply grab a piece of red origami paper and you are good to go.  You will also need some crayons or colored pencils if you want to give your Santa a face…. but that is it.  So, let’s get started.

Check out our other Christmas Crafts and other Origami and Paper Folding Crafts.


How to Make an Origami Santa Claus


Materials Needed

Origami Paper – Red

Crayons or Colored Pencils (optional)


Step 1


Start off with a red piece of origami paper.


Start off with a red piece of origami paper.


Step 2


Fold paper in half... connecting the bottom point to the top point


Fold paper in half… connecting the bottom point to the top point.


Step 3


Open back up to reveal a crease.


Open back up to reveal a crease.


Step 4


Now fold paper in half from left corner to right.


Now fold paper in half from left corner to right.


Step 5


Now open up to reveal both creases.


Now open up to reveal both creases.


Step 6


Now turn over to the red side.


Now turn over to the red side.


Step 7


Fold both the left and right corners to center of creases.


Fold both the left and right corners to center of creases.


Like this.


Like this.


Step 8


Take each triangle and bend bottom of it over to form a red triangle.


Now you have two white triangles.  Take each triangle and bend bottom of it over to form a red triangle.


It should look like this.


It should look like this.  Notice that the red triangles are perfectly straight across as well as on the sides.


Step 9


unfold yet again


Sounds crazy…. but unfold yet again!


Step 10


Fold over left corners so that it looks like this


Fold over left corners so that it looks like this.  Do it on the right too.


Step 11


Now bend over the paper again so that it looks like this.


Now bend over the paper again so that it looks like this.  Do it on right too.


Step 12


Now fold paper in half


Now fold paper in half… top corner touching bottom corner.


Step 13


Fold bottom corner up to top of paper


Fold bottom corner up to top of paper.


Step 14


Fold only the front sheet of paper down at the top


Fold only the front sheet of paper down at the top… not quite to the bottom.


Step 15


Now fold back sheet of paper forward too


Now fold back sheet of paper forward too… but not quite as far down… leaving a bit of white outline like so.


Step 16


Now fold a bit of the tip (of front sheet) up.


Now fold a bit of the tip (of front sheet) up.


Step 17


Fold tip of it behind big triangles.


Fold tip of it behind big triangles.


Step 18


Fold left side up in a diagonal


Fold left side up in a diagonal so it meets the top edge and the left side of the middle triangle.


Do the same thing with the right side


Do the same thing with the right side.  Unfold left side to reveal the crease.


Unfold right side too... so creases are on both sides.


Unfold right side too… so creases are on both sides.


Step 19


Now fold down on diagonal


Now fold down on diagonal so each side touches top corners of middle triangle.


Step 20


Fold them over towards the center like this.


Fold them over towards the center like this.


Step 21


Use your fingers to push the right side to the back of Santa.


Use your fingers to push the right side to the back of Santa.


See now it is behind Santa and coming out the bottom like a leg.


See now it is behind Santa and coming out the bottom like a leg.


Push the left side behind Santa


Push the left side behind Santa like you did on the right.

Step 22


For the right leg push your finger up under the leg and push part of it up and to the right to form a sleeve.


This is the tricky part.  You might have to play around till you figure out what I’m talking about.

For the right leg push your finger up under the leg and push part of it up and to the right to form a sleeve.  Some of the leg will remain sticking out.


Step 23


Do the same with the left leg.


Do the same with the left leg.  You are now done.  Unless you want to…


Step 24


draw a face on Santa


… draw a face on Santa.

Awesome job…. you just finished your Origami Santa Claus.  Did you decide to draw a face on Santa?  Take a picture of your Santa and post it in the comments below.  I would love to check out your Origami Santa Claus.

Technorati Tags: , , , , , , , , , , , , ,

How to Make an Origami Snowman

Next week it will be officially winter.  So, today I felt it was appropriate to break out the Winter Crafts.  So, with that being said (drum roll please)…. I’m going to show you how to make an Origami Snowman….. perfect for the Winter season.  The craft isn’t a hard one, but it is sure to be a lot of fun.  So, grab a sheet of origami paper and some crayons or colored pencils and let’s get started.

Check out our other Winter Crafts and Origami Crafts.


How to Make an Origami Snowman


Materials Needed

Origami Paper (any color)

Crayons or Colored Pencils


Step 1


Start off with any color origami paper


Start off with any color origami paper.  It doesn’t matter because we are using the white side.


Step 2


Fold paper in half


Fold paper in half… connecting bottom point to top point.


Step 3


Open back up


Open back up to reveal a crease.


Step 4


Fold paper in half from left corner to right.


Fold paper in half from left corner to right.


Step 5


Now open up to reveal both creases.


Now open up to reveal both creases.


Step 6


Turn over to colored side.


Turn over to colored side.


Step 7


Fold top corner down to center of creases that you made.


Fold top corner down to center of creases that you made.


Crease it.


Crease it.


Step 8


Unfold to reveal crease.


Unfold to reveal crease.


Step 9


Fold top corner down to rest on the crease you made in the last step.


Fold top corner down to rest on the crease you made in the last step.


Step 10


Fold the bottom corner up to crease the center crease line.


Fold the bottom corner up to crease the center crease line.


Step 11


Open back up to reveal creases.


Open back up to reveal creases.


Step 12


Fold triangles down half way between edge and crease.


Fold triangles down half way between edge and crease.


Step 13


First fold right side over and then fold left side over the right side.


First fold right side over and then fold left side over the right side.


Step 14


Now fold bottom triangle back up.


Now fold bottom triangle back up.


Step 15


Turn over to the other side.


Turn over to the other side.


Step 16


A third from the bottom, pull at the paper then push forward to make a pleat


A third from the bottom, pull at the paper then push forward to make a pleat.


Step 17


Do again a third from the top.  Pleat looks like this.


Do step 16 again a third from the top.  Pleat looks like this.


Step 18


start pushing edges in to make corners rounded like snowballs.


It should look like this.  Now start pushing edges in to make corners rounded like snowballs.


Step 19


See how it is rounded now


See how it is rounded now… I just bent the non-rounded edges back to make rounder.


Step 20


Now draw on your origami snowman


Now draw on your origami snowman to make it come to life.

Isn’t your Origami Snowman cute?  How did your snowman turn out?  Make sure to let us know in the comments below.  Take a picture of it too…. you can share pictures in the comments as well.

Technorati Tags: , , , , , , ,

How to Make a Magazine Christmas Tree

I have a really unique Christmas Tree craft for you today.  I say it is unique because the Christmas Tree is a unique one when you see the finished craft.  This Magazine Christmas Tree will make for an awesome Christmas decoration this Holiday Season.  You can decide to paint your tree if you wish to…. whether painted or left natural the Christmas Tree is sure to be a big hit.  So, let’s do it.

Check out our other Christmas Crafts.


How to Make a Magazine Christmas Tree


Materials Needed

Magazine

Paint (optional)


Step 1


Get a magazine like this one.


Get a magazine like this one.


Step 2


Fold top right corner of page down.


Fold top right corner of page down.


Press down crease.


Press down crease.


Step 3


Fold over to middle once more.


Fold over to middle once more.


Press down to sharpen crease.


Press down to sharpen crease.


Step 4


Fold up bottom corner.


Fold up bottom corner.


Step 5


Do this to every page of the magazine.


Do this to every page of the magazine.


Step 6


Take off the front and back cover.


Take off the front and back cover.


Step 7


Let go of sheets of pages and pages will fan out like so


Let go of sheets of pages and pages will fan out like so.  You can paint the pages, but I like it like this.

How did your Magazine Christmas Tree turn out?  Did you paint your pages or leave them natural?  Let me know in the comments below.  And, take a picture and post it too…. I would love to see your Magazine Christmas Tree.

Technorati Tags: , , , , , , , , , , , ,

How to Make an Origami Christmas Tree

Oh boy…. do I have a fun craft for you today.  I’m going to show you how to make an Origami Christmas Tree.  If you like paper folding then this is the craft for you…. it is perfect for the Holiday Season.  You even have the option to paint Christmas ornaments on the tree.  Use your creativity to make this Christmas Tree different than any other.  So, let’s get started.

Check out our other Christmas Crafts and other Origami and Paper Folding Crafts.


How to Make an Origami Christmas Tree


Materials Needed

Green Origami Paper

Paint (Optional)


Step 1


Start with a green piece of origami paper.


Start with a green piece of origami paper.


Step 2


Turn paper over to the white side.


Turn paper over to the white side.


Step 3


Fold in half...


Fold in half…


It should look like this.


… to look like this.


Step 4


Open back up to see middle crease.


Open back up to see middle crease.


Step 5


Bring bottom sides into middle crease.


Bring bottom sides into middle crease.


Step 6


To look like this.


To look like this.


Step 7


Now you have to unfold it to reveal the creases.


Now you have to unfold it to reveal the creases.


Step 8


Fold the bottom corner into a small triangle


Fold the bottom corner into a small triangle by folding up.


Step 9


Now fold both bottom sides in again


Now fold both bottom sides in again… over the triangle.


Step 10


Fold both top sides into middle crease.


Fold both top sides into middle crease…


It should look like this.


…Like this.


Step 11


Open it up to reveal creases.


Open it up to reveal creases.


Step 12


Bring bottom up to the top corner.


Bring bottom up to the top corner.


Step 13


Now fold it back down so that a small bit sticks out from bottom.


Now fold it back down so that a small bit sticks out from bottom.


Step 14


Fold both sides back inwards.


Fold both sides back inwards.


Step 15


Turn over to the other side.


Turn over to the other side.


Step 16


You can paint ornaments on the tree.


*Optional* – You can paint ornaments on the tree.

There you are…. you just finished making an Origami Christmas Tree.  How did your tree turn out?  Take a picture and share it with me in the comments below…. I’d love to see it.

Technorati Tags: , , , , , , , , , ,

How to Make an Origami Dreidel for Hanukkah

Today I’m going to show you how to make an Origami Dreidel for Hanukkah.  A dreidel is a spinning top toy that is played during the Hanukkah season.  Each side of the dreidel has a different Hebrew letter on it.  The children will bet each other which letter will be on top of the dreidel when the dreidel lands.  The winner usually wins chocolate candy called gelt.  Fun stuff!!  So, let’s start today’s craft.

Check out or other Hanukkah Crafts.


How to Make an Origami Dreidel for Hanukkah


Materials Needed

Origami Paper

Glitter Glue, Marker or Paint


Step 1


Pick the color Origami paper that you want your dreidel to be.


Pick the color Origami paper that you want your dreidel to be.  Then turn it over to the white side…. like above.


Step 2


Fold in half.


Fold in half.


Step 3


Now, it should look like this.


Now, it should look like this.


Step 4


open it back up so you can now see a crease in the center.


Now, open it back up so you can now see a crease in the center.


Step 5


Fold each of the bottom corners up to the center crease.


Fold each of the bottom corners up to the center crease.


Step 6


your Origami paper should look like this


Now, your Origami paper should look like this (an upside down house).


Step 7


Fold both sides to center line over the triangles you just folded.


Fold both sides to center line over the triangles you just folded.


Step 8


Now your paper should look like this.


Now your paper should look like this.


Step 9


Bring top of paper down to bottom point.


Bring top of paper down to bottom point.


Step 10


Now it should look like this.


Now it should look like this.


Step 11


fold it part way back up, but not all the way back up.


Now, fold it part way back up, but not all the way back up.  Fold it where marked above to make a pleat.


Here is another angle of this pleat fold.


Here is another angle of this pleat fold.


Step 12


fold the top of the paper in to the center line and the corners start bending into triangles


This is really difficult to show you how to do.  Basically, fold the top of the paper in to the center line and the corners start bending into triangles.


Step 13


Notice the triangles formed.


Notice the triangles formed.


Step 14


Turn over to the other side.


Turn over to the other side.


Step 15


You can use glitter glue, marker or paint to draw a Hebrew letter on the front of the Origami.


Each side of the dreidel bears a letter of the Hebrew alphabet:  Nun, Gimel, Hei and Shin (the Hebrew letters are shown in image above).  You can use glitter glue, marker or paint to draw a Hebrew letter on the front of the Origami.

The dreidel is beautiful isn’t it?  How did your dreidel turn out?  What color did you make your dreidel?  Let me know in the comments below.  And, take a picture and share it with us as well…. we’d love to see it.

Technorati Tags: , , , , , , , , , , , , , , ,

How to Make Paper Star Ornaments

Today I’m going to show you how to make a Paper Star Ornament for Christmas.  This ornament is not any ordinary paper ornament…. the paper star ornament comes out looking crisp and beautiful.  Make a few to decorate your Christmas tree this Christmas season.  You can even use colored paper to make each ornament a different color.

Check out our other Christmas Crafts.


How to Make Paper Star Ornaments


This one looks a lot trickier than it is. This craft is for 9 years of age and up. The paper needs to be in perfect squares for this ornament, or it will turn out crooked. The paper can be any crisp paper that will fold in a sharp crease. The foil coated papers make beautiful stars, and the paper creases well. Stay away from construction paper and the like, because it folds in a crumbly fashion. For a starter, use squares 4 to 5 inches on a side, then graduate to smaller ones. Fold the paper wrong side up…meaning if you have a piece of paper with 2 different colors, then turn it to the wrong color facing up.


Materials Needed

Pencil

Glue

Scissors

Square

Paper


Step 1


Make a perfect square


You need a square piece of paper for this craft. If you don’t have square paper, then use the above trick to create a square piece of paper.


Step 2


Fold the page down on its diaganols


Fold the page down on its diaganols…in the picture above, fold B to C and A to D. You should now have an X shaped crease.


Step 3


Now fold the paper in half twice


Now fold the paper in half twice…in the picture it is A to B and C to D.


Step 4


Fold each side in to the center of the page


Fold each side in to the center of the page and then…


draw pinch marks


…draw pinch marks.


Step 5


Cut each line that you see has a dashed pinch mark on it


Cut each line that you see has a dashed pinch mark on it. Only cut it up to the pinch mark.


Step 6


fold each pair of sides in to the center line


After you cut these lines…. fold each pair of sides in to the center line as you see in the illustration.


Step 7


glue the flaps together


After folding over the spikes of the star, glue the flaps together, with the edges flush. This gives the three-dimensional effect.


Step 8


Make two of these four-pointed stars, and then glue together back to back, with the points alternating


Make two of these four-pointed stars, and then glue together back to back, with the points alternating. Run a thread through one spike for hanging on your Christmas tree or anywhere else that you want to decorate for Xmas.

How did you Paper Star Ornament turn out?  Did you use special paper like foil paper or colored paper?  Let me know in the comments below.  And, don’t forget to take a picture and post it with your comment…. I’d love to take a look at it.

Technorati Tags: , , , , , , , , , , , ,

How to Make Paper Darts – Paper Airplanes

Have you ever wanted to know how to make a fast Paper Airplane?  Well, today I’m going to show you how to make one…. it’s fast enough that I even call them Paper Darts.  The traditional Paper Airplanes are pretty slow…. boring.  Make these Paper Darts and race them with your friends.  You can even be creative and color them to give them an original look.  So, let’s get started.

Check out our other Paper Folding Crafts.


How to Make Paper Darts - Paper Airplanes


Materials Needed

Paper


Step 1


Fold paper in half both ways.


Fold paper in half both ways so it has a + crease.


Step 2


Fold a corner into center crease.


Fold a corner into center crease.


Step 3


Fold other corner in.


Fold other corner in.


Step 4


Fold in


Fold in like the above picture.


Step 5


Fold in to center.


Fold in to center.


Step 6


Fold other side


Fold other side to look like the above picture.


Step 7


Fold side inwards.


Fold side inwards.


Step 8


Fold the other side in too.


Fold the other side in too.


Step 9


just fold in half like above.


Then, just fold in half like above.


Finished paper darts


Awesome job….. you just finished making a Paper Dart.  Make a few and have races with your friends.  Find out which dart is the fastest.

Technorati Tags: , , , , , ,

How to Make your Own Envelopes for Christmas

Today I’m going to show you three different ways to make your own Envelopes for the Christmas Holiday.  Everyone loves to receive homemade drawings and paper gifts for the Holidays.  But, instead of just handing them the drawings…. how about make your own envelopes to place them in.  You don’t have to stick to the ordinary white paper envelopes either… Instead make many different envelopes out of different color paper.

Check out our other Christmas Crafts.


How to Make your Own Envelopes for Christmas


Materials Needed

Paper

Stickers

Glue (optional)


All three style envelopes require starting off with a square piece of paper.  If the only paper you have is rectangular…. that’s not a problem.  This is how you can take a rectangular piece of paper and make it a square…


This is how you can take a rectangular piece of paper and make it a square.


Fold corner A over until the side AB meets up with side BC.  Cut along the bottom.  Now, your paper is square.


Envelope 1

Step 1


Fold corners into the center.


Start with the square piece of paper.  Fold corners into the center.


Step 2


Close envelope with a sticker.


Close envelope with a sticker.


Envelope 2

Step 1


fold all corners to the center.


Start with the square piece of paper.  Again, with this envelope, fold all corners to the center.  But, then cut off part of the bottom triangle.


Step 2


fold the bottom tab up


Firstly, fold the bottom tab up… then fold each side triangle inwards.


Step 3


Fold the top triangle down over both of the others


Fold the top triangle down over both of the others.  Paste or use sticker to secure.


Envelope 3

Step 1


This envelope is a bit more complicated because of the odd shape


This envelope is a bit more complicated because of the odd shape…. but it doesn’t need to be perfect.


Step 2


Fold the side tabs in over the card


Fold the side tabs in over the card.  Then fold the bottom part up.  Then glue the top flap down or use a sticker.


How to Make your Own Envelopes for Christmas


There you have it…. 3 different ways to make envelopes yourself for Christmas or any Holiday.  Which envelope style are you going to use?  Let me know in the comments below.

Technorati Tags: , , , , , , , , , , , ,

How To Make a Paper Doll Chain

Have you ever wanted to know how to make a paper doll chain?  Well, if so…. I am going to be showing you how to make that today.  You can use old paper items like newspapers, paper bags or scrap paper.  I used 8×11 used bond paper, with printed items on one side.  But, feel free to use any kind of paper.  This is a fun craft, so let’s get started.

Check out our other Paper Folding activities.


MATERIALS NEEDED:

Sheet/s of Paper
Scissors
Crayons or Markers
Glue


Step 1

Cut a long wide strip of paper, with the dimensions depending on how big you want the paper dolls to be.  Fold the paper accordion-style, crosswise in about 1-2 inches. You should come up with neat rectangles with identical folded triangles underneath it.


Step 2


Trace a boy or girl on the front fold


Use template to trace a boy or girl on the front fold… Make sure both arms and feet are along edges.


Step 3

With a scissors, cut in the half-shape of the doll. You can make variations, like cutting one for boys, and another one for girls. Make sure the hands are on the same vertical side so it will be easier to connect the dolls.


Step 4

Pull the paper dolls apart and you should get a chain of paper dolls.   Using your crayons and markers, draw faces and design the dolls’ clothing. You can also cut colored paper shapes to use as a design on the dresses.


Step 5

Connect one paper doll hand to others, to have a longer chain.


And, there you have it.  You have just made a Paper Doll Chain.  Don’t forget to let me know how they turned out.  Share your picture in the comments below.

Here is a video we made on how to make a paper doll chain.

Technorati Tags: , , , , , , , ,

How to make Origami Butterfly Earrings

I have a treat for you today.  I will be showing you how to make a pair of Origami Butterfly Earrings.  They are really beautiful…. and they are made out of paper.  You are sure to get lots of compliments on them.  You can choose to wear them yourself or give them as a gift… after all the Holidays are just around the corner. That is if you can part with these earrings.  So, let’s get started.

Check out our other Origami Crafts.

Laura from Dacian Moon Handmade will show you how to make these earrings step-by-step.


CRAFT MATERIALS NEEDED:

– 2 paper squares (about 4 cm x 4 cm)
– 2 jump rings
– 2 earstuds with earnuts


Step 1

Take one square of paper and fold it in half…


… like this.


Step 2

Bring the right upper corner to the center of the opposite edge, as in the picture.


Step 3

Do the same with the upper left corner.


Step 4

Unfold the corners.


Step 5

Turn the right corner inside…


… like this.


Do the same with the left corner.


Step 6

Take the right lower corner and bring it to the top corner.


Do the same with the left lower corner.


Now it should look like this.


Step 7

Turn the paper upside-down.


Fold the top corner to the opposite edge, a little bit lower than the middle…


… like this.


Step 8

Force the 2 corners flat.


Step 9

Fold it in half like in the picture.


It will look like this.


Step 10

Fold on the line…


… like this.


Do the same on the other side.


Turn it upside-down.


Step 11

Model the wings with your fingers.


Now it looks like a little butterfly, doesn’t it?


Step 12

Make a little hole in one corner…


… and put the jump ring in it.


Add the stud and the earring is ready.  Do the same with the second piece of paper.


Aren’t these earrings beautiful?  They will look amazing on you.  Or, have you decided to give them as a gift this Holiday Season?  Whatever you decide they are sure to be a huge hit.

Technorati Tags: , , , , , , , , , ,