Ideas for Kids to Make Seder Plates for Passover


Ideas for Kids to Make Seder Plates for Passover


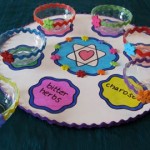
Passover will be here in just a couple of days.  And with Passover comes the wonderful Passover Seder.  And, even though we know how fantastic Passover Seder is…. we know how difficult it is to get the kids to sit still and enjoy the Passover Seder.  Well, how about if they help out with the Seder?  The kids can make the Seder Plate for Passover.  Even if it isn’t the main Seder Plate you use for the Seder they can at least work on the Children’s table Passover Seder Plate.  Beings that the children helped make the Passover Seder Plate will hold their attention a little more as they will want to pay attention to see how it will be used during the Seder.  So, scroll through the many Passover Seder Plates crafts below…. you are sure to find the one that works for you and your children.  Have a Happy Passover.
Ideas for Kids to Make Seder Plates for Passover

(1)  Spring Seder Plate


Spring Seder Plate


I found this awesome Seder Plate over at Kaboose.  Here they keep the color green to remind you of spring and all the good times ahead.  What a clever idea!!


(2)  Star of David Seder Plate


Star of David Seder Plate


 Nick Jr. has this Seder Plate Craft all figured out.  They use 6 six inch paper plates to create the Passover Seder Plate…. not to mention a Star of David Coloring Page.  Put it all together to create this awesome Passover Seder Plate.


(3)  Printable Seder Plate Craft


Printable Seder Plate Craft


If you are looking for a super easy Passover Seder Plate Craft then this is the one for you.  Free Kids Crafts gives you this craft that is simply a printable…. print off and cut.  Doesn’t get much easier than that.


(4)  Bright Passover Seder Plate


Bright Passover Seder Plate


Isn’t this a beautiful Passover Seder Plate?  I love the use of bright colors.  Nothing keeps the attention of the little ones more than bright colors.  Parent Dish shows you step-by-step how to make this Seder Plate.


(5)  Porcelain Passover Seder Plate


Porcelain Passover Seder Plate


Family Fun uses an ovenproof plate and glaze paint to prepare their Passover Seder Plate.  They have the right idea as once baked this item is quite durable.  These Seder Plates become special to the child as they will be painting them themselves.


(6) Model Clay Passover Seder Plate


Model Clay Passover Seder Plate


Crayola has an original spin on the traditional Passover Seder Plate.  Their craft is constructed from Model Clay.  Check out their site to get the full details and make this Passover Seder Plate yourself.


(7)  Jeweled Passover Seder Plate


Jeweled Passover Seder Plate


This is a beautiful Passover Seder Plate.  In case you can’t see it, there are lovely stones all around the outside of this plate.  My Activity Maker shows you how you too can make this beautiful Passover Seder Plate.


(8)  Paper Seder Plate


Paper Seder Plate


If you are looking for an easy Passover Seder Plate than this is the craft for you.  Made from a Paper Plate and pictures of the Ceremonial Food this craft doesn’t get any easier.  Check out Joyful Jewish to see how to do this craft.


(9)  Tissue Paper Passover Seder Plate


Tissue Paper Passover Seder Plate


Here is a fun craft to do with the youngest of kids for Passover.  Kids love to work with tissue paper and this Passover Seder Plate Craft has plenty of tissue paper.  Check out Delicate Construction for the full details of the craft.


(10)  Denture Cream Passover Seder Plate


Denture Cream Passover Seder Plate


Yes, you read this right…. this craft was made with Denture Cream.  Holidash used Denture Cream to hold the dishes to the Seder Plate.  Check out the full details on their site… you will have to scroll to the 2nd slide.


(11)  Passover Prep


Passover Prep


I found this Passover Seder Craft over at Maybe Sew.  She has the right idea on how to teach the kids a little bit about each of the foods on the Seder Plate…. she uses different items other than the norm and has the kids guess what they should be.  Check out the site for the full details.

Technorati Tags: , , , , , , , , , , ,

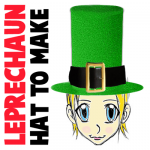
How to Make a Leprechaun Hat for St. Patrick’s Day

I don’t know about you, but when I think of a Leprechaun I think of the big, green hat he wears.  Today I’m going to show you how to make your very own Leprechaun Hat for St. Patrick’s Day.  After all, St. Patrick’s Day is only a little over a week away.  Now is the time to get started making and displaying your St. Patrick’s Day crafts.  So, grab the materials needed and let’s get started with this fun St. Patrick’s Day craft.

Check out our other St. Patrick’s Day crafts.


How to Make a Leprechaun Hat


Materials Needed

Large Ice Cream Carton or Bucket

Green Craft Foam or Wrapping Paper

Paper Plate

Green Paint

Pencil

Scissors

Glue

Tape

Belt or Black Foam/Paper & Yellow Paper


Step 1


You need a large ice cream carton or bucket.


You need a large ice cream carton or bucket.


Step 2


Wrap with green craft foam or with green wrapping paper.


Wrap with green craft foam or with green wrapping paper.  Leave hole at bottom.


Step 3


Paint a paper plate green.


Paint a paper plate green.


Step 4


Trace carton in center of plate.


Trace carton in center of plate.


Step 5


Now draw tabs.


Now draw tabs.


Step 6


Cut out.... fold tabs inwards.


Cut out…. fold tabs inwards.


Step 7


Glue and tape tabs inside of container.


Glue and tape tabs inside of container.


Step 8


The easy way to add a belt is to borrow your Dad's belt and strap it on hat.


The easy way to add a belt is to borrow your Dad’s belt and strap it on hat.


Or..... just add black strip of foam or paper.  And, yellow square with center cut out.


Or….. just add black strip of foam or paper.  And, yellow square with center cut out.


Step 9


Wear the hat.


Wear the hat.

Isn’t this Leprechaun Hat adorable?  What child wouldn’t enjoy running around the house wearing this Leprechaun Hat for St. Patrick’s Day?  Enjoy.

Technorati Tags: , , , , , , , , , , , , ,

How to Make an Abe Lincoln Top Hat for President’s Day

Yesterday I showed you how to make a an Easy George Washington Hat for President’s Day.  Well, it wouldn’t be right to make a hat and celebrate George Washington’s special day if we don’t do the same thing for Abraham Lincoln.  So, today I will show you how to make an Abe Lincoln Top Hat for President’s Day.  After all, President’s Day is about honoring both George Washington and Abraham Lincoln.  And, what better way to honor Abraham Lincoln than to make his top hat.  So, grab the materials needed and let’s get started.

Check out our other President’s Day Crafts.


How to Make an Abe Lincoln Top Hat for President's Day


Materials Needed

Oatmeal Container

Black Felt, Paper or Foam

Paper Plate

Black Paint

Pen or Pencil

Scissors

Glue


Step 1


Grab an Oatmeal Container.


Grab an Oatmeal Container.


Step 2


Take the cap of the rolled oats container and cover with black felt


Take the cap of the rolled oats container and cover with black felt, paper or foam.


Step 3


Put the cap on the box and then wrap black paper, felt or craft foam around the box


Put the cap on the box and then wrap black paper, felt or craft foam around the box.  Leave opening unwrapped.


Step 4


Paint a plate black.


Paint a plate black.


Step 5


Trace the oatmeal box on the center of plate.


Trace the oatmeal box on the center of plate.


Step 6


Draw tabs into circles and then cut out.


Draw tabs into circles and then cut out.


Step 7


Cut out and it will look like this.  Fold tabs inwards.


Cut out and it will look like this.  Fold tabs inwards.


Step 8


Put glue on tabs and glue to inside of box.


Put glue on tabs and glue to inside of box.


Step 9


Let glue dry.


Let glue dry.

And, there you have it…. you just finished your Abe Lincoln Top Hat for President’s Day.  How did it turn out for you?  Let me know in the comments below.  Now, go wear it proudly.

Technorati Tags: , , , , , , , , ,

Chinese New Year Crafts – Year of the Dragon


Chinese New Years Crafts


Chinese New Year falls on January 23rd this Year.  And, in honor of Chinese New Year I put together a list of crafts just about the Chinese New Year.  You will find that most of them are Dragon Crafts and you might wonder why….. well, I will tell you why.  This year is the Year of the Dragon.  So, to honor that fact the majority of the crafts I have listed here will be Dragon Crafts.  Not all of them…. there are plenty of fun other crafts that have nothing to do with Dragons.  So, check out the post and pick a few Chinese New Year Crafts to do with the kids….. they are sure to love them.  So, let’s get started.

Here are Even More Chinese New Years Crafts

Chinese New Year Crafts – Year of the Dragon

(1) Festive Ribbon Dragon


Festive Ribbon Dragon


Here is an adorable dragon perfect for this years Chinese New Years.  This is the mini sized version of the huge size dragon they use in parades for Chinese New Years.  Check out FamilyFun for all the crafting details.


(2) Pop-Up Greeting Card


Pop-Up Greeting Card


Isn’t this Chinese Pop-Up Greeting card gorgeous?  I think it is really beautiful.  Imagine giving this to someone to celebrate the Chinese New Year.  Go to FreePaperCraftTemplate for all the details on how to print off this free template.


(3) Origami Dragon


Origami Dragon


Since this Chinese New Year is the year of the Dragon how could I not include an Origami Dragon in this post.  And, look how awesome this Origami Dragon turns out.  You can get the full instructions for this Origami by going to Origami-Instructions.


(4) Chinese New Year Fish


Chinese New Year Fish


Fish is a very popular dish on Chinese New year.  Fish is a sign of prosperity…. so it is very common to see people eating fish on Chinese New Year.  With that being said I thought it was a good idea to include Fish in this Chinese New Year Post.  Go to Julie K in Taiwan for all the craft details.


(5) Chinese Dragon Door Hanger


Chinese Dragon Door Hanger


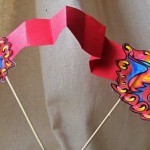
Here is a cute craft for the youngest of crafters.  If you go to NickJr they show you how to make a simple Chinese Dragon Door Hanger that is perfect for any kid’s room.  Plus, making this craft with them is the perfect time to explain to your kids a little bit about the Chinese New Year.


(6) Dragon Mask


Dragon Mask


Now, isn’t this Dragon Mask incredible?  What little one wouldn’t love wearing this Dragon Mask all over the house.  After all, children love dressing up.  Find all the Dragon Mask “how-to’s” over at AlphaMom.  This is such a great Chinese New Year craft!!


(7) Pull-A-Long Dragon Craft


Pull-A-Long Dragon Craft


Here is a great way to make a Dragon for Chinese New Year….. made out of paper cups.  How awesome is that?!  It turns out so cute too.  This is a great way to teach your children about the Chinese culture.  Make sure to check out the craft in its entirety over at FreeKidsCrafts.


(8) Toy Spinning Hand Drum


Toy Spinning Hand Drum


Here is a fun toy for the Chinese New Year.  Not only fun to play with…. but also fun to make.  This toy is a great way to make lots of noise during the Chinese New Year.  Make sure to check out 4CrazyKings for all the fun details.


(9) Paper Dragon


Paper Dragon


This is a fun craft for the Chinese New Year.  This Paper Dragon turns out so beautiful…. I just love the colors.  I found this craft over at CraftJr and I just love it.  She explains how this craft is really so easy that a toddler can do it.  And, trust me…. the kids will love maneuvering around the dragon with the sticks.


(10) Marbled Red Vinasse Eggs


Marbled Red Vinasse Eggs


This Marbled Egg  is an extremely popular Chinese snack…. and it is extremely popular during Chinese New Year as the egg represents fertility.  To get this marbled effect you first crack the egg and then simmer the egg in colored liquid.  Get the full details at Pig Pigs Corner.


(11) Paper Chain Dragons


Paper Chain Dragons


One of the easiest crafts to teach a young child is how to make a paper chain.  So, let’s use that technique to make a Paper Dragon.  The kids will have such a fun time making this craft.  The Chinese tradition is a rich tradition….. why not show this to your kids by creating this craft.  Check out NaturallyEducational for all the craft details.


(12) Flying Dragon Puppet


Flying Dragon Puppet


Okay, I officially love this craft…. I just love how it turns out.  It turns out so colorful and festive…. just like any New year should be.  Check out JellyFishJelly for the craft details and put this Flying Dragon Puppet together.  I don’t know what your kids will love more…. putting the craft together or playing with the puppet.

Technorati Tags: , , , , , , , , ,

11 Cool Outer Space Crafts for Kids


11 Cool Outer Space Crafts for Kids


Today I have some awesome craft ideas for you.  Not just any craft ideas…… today I have cool outer space crafts for you.  I was making my way through the internet looking for some really creative outer space crafts and I think I found them.  I found some that are made from food and others that are made from recycled materials.  I found crafts that are perfect for the youngest of crafters and others that are meant for older children.  But, bottom line…. there is an outer space craft here for you.  So, enough with the chit-chat….. let’s get started.

11 Cool Outer Space Crafts for Kids

(1)  Orbiting Planets


Orbiting Planets


Here is a great craft to help teach your kids about space and all the orbiting planets.  Plus, the craft is a lot of fun.  I found this craft over at BusyBeeKidsCrafts and they have the right idea….. use a fun craft to help teach your children about space.


(2) Recycled Robot Craft

Recycled Robot Craft

Look how cute this robot is….. so cute!!  And, it is made from many recycled materials which makes this robot even cooler.  FreeKidsCrafts shows you how you can take tin foil, an empty container and soda bottle lids and make it into a robot like above.  How fun!!


(3) Alien Pipe Cleaner Craft


Alien Pipe Cleaner Craft


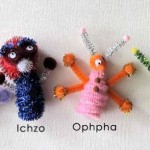
I love this craft…. I just love how these little aliens turn out.  I found this Outer Space craft over at Craft Jr. She shows you step-by-step how to make the aliens as pictured above.  But, she also explains how if you have mismatched colors or pipe cleaners of different sizes it doesn’t matter…. they are aliens after all.


(4) Spiral Galaxy


Spiral Galaxy


What a pretty craft….. I love all the colors in this Spiral Galaxy Craft.  And, believe it or not this Outer Space craft is made with a paper plate and some glow in the dark paint.  TheCraftyClassroom shows you in detail how you too can make this craft.


(5) Out of this World Centerpiece


Out of this World Centerpiece


Here is a cool craft that will be a lot of fun to put together.  Plus, this Out of this World Centerpiece is perfect if you are having an Outer Space birthday party.  Imagine this being the centerpiece at the Birthday table.  Find out how to make this over at MakingFriends.


(6) Grass Head Monster


Grass Head Monster


This is an awesome Outer Space craft because your child is going to have to care for it everyday.  It is actually made with real grass seed so your child will have to care for it everyday for the grass to grow.  Check out FreeKidsCrafts for all the details.


(7) Googly Eyed Green Blobs


Googly Eyed Green Blobs


These are pretty creepy looking…. aren’t they?  I found this craft over at MakeAndTakes and she had it posted as a Halloween craft, but I thought this craft would also fit for an Alien…. so I am including it in this Outer Space crafts list.  Check out her site for all the “how-to” details.


(8)  Rocket Craft


Rocket Craft


Isn’t this Rocket craft just adorable?  I love it!!  And, it is made out of a cardboard box.  What a creative idea.  You will need help from an adult for this craft as they do use a craft knife.  But, it would be so much fun making this with your parents.  Check out Se7en for the step-by-step details.


(9) Space Cake


Space Cake


I just had to add this cake to this post.  I know it really isn’t a craft Per Se, but I think cooking can be quite crafty…. and it is also a ton of fun to do with an adult.  So, check out this Outer Space cake over at FamilyFun and get the recipe to cook with your parents.  This would be great for an Outer Space birthday party.


(10) Puffy Paint Moon Craft


Puffy Paint Moon Craft


AllKidsNetwork shows us how if you mix shaving cream and glue together it makes a lumpy and bumpy surface….. just like the moon.  Actually, what they explain is that while the glue dries it makes a smooth-textured material that puffs while it’s drying and then flattens out.  Isn’t that cool?  Go to AllKidsNetwork to check out the full details.


(11) Space Shuttle Craft


Space Shuttle Craft


Wow, isn’t this space shuttle amazing?!  It’s just so creative.  And, the best part…. It’s made out of mostly all recycled materials.  How cool is that?!  Kids of all ages will love making this space shuttle…. the younger kids will need help from an adult.  Check out LooLeDo for the entire craft tutorial.

Technorati Tags: , , , , , , , , , , ,

How to Make Milk Carton Boats


making milk carton sail boats


Fall is a great time to play with boats in the water.  There is a nice crisp breeze in the air perfect for giving the boats the momentum to go.  Don’t have a boat?  No problem.  Today I’m going to show you how to make a Boat out of a milk carton and a paper plate.  The craft is an easy one…. perfect for kids of any age.  So, grab a pair of scissors, a milk carton and a paper plate and let’s get started.

Materials Needed

Milk Carton

Paper Plate

Scissors


Step 1


Clean out a milk carton


Clean out a milk carton… then cut the milk carton on a diagonal.


Step 2


Cut a slit in the milk carton.


Cut a slit in the milk carton.


Step 3


Decorate a paper plate to be a beautiful sail


Decorate a paper plate to be a beautiful sail and then place it in the slit you made.

Now, your boat is ready to set sail.  Take your boat to the bathtub, pool or pond and send your boat craft on it’s way.  It’ll be so much fun!!

Technorati Tags: , , , , ,

How to Make a Girl Paper Plate Pilgrim for Thanksgiving

Earlier today I showed you how to make a Boy Paper Plate Pilgrim for Thanksgiving.  But, how can I show you how to make a boy Pilgrim without showing you how to make the girl.  After all, women were an important part of the Pilgrims and their new colony.  Women were a big help when it came to creating a Harvest.  And, if it wasn’t for a successful harvest there would have been no Thanksgiving.  I shutter at the thought.  So, let’s make a Girl Paper Plate Pilgrim for Thanksgiving.

Check out our other Thanksgiving Crafts.


How to Make a Girl Paper Plate Pilgrim for Thanksgiving


Materials Needed

3 Paper Plates

Paint or Crayons

Black Marker

Gold or Yellow Yarn

Glue

Scissors


Step 1


Paint or color the back of a paper plate.


Paint or color the back of a paper plate.


Step 2


It looks really good if you take a black marker and draw an outline around the outer edge.


It looks really good if you take a black marker and draw an outline around the outer edge.


Step 3


Cut a fourth of a second paper plate and color the center of it black.  Then glue it to the bottom of the first plate.


Step 4


Paint or use a black marker to draw an oval for each eye and a letter C for the nose and a curved line for the smile.


Paint or use a black marker to draw an oval for each eye and a letter C for the nose and a curved line for the smile.


Step 5


Paint or color in a pink circle for each cheek.


Paint or color in a pink circle for each cheek.  Then draw a black letter C on either side of the smile.


Step 6


Add strips of yarn for hair... glue down.


Add strips of yarn for hair… glue down.


Step 7


Now just glue a larger plate behind the first plate.


Now just glue a larger plate behind the first plate.


Finished girl pilgrim craft


There you go…. you just finished making the girl paper plate pilgrim perfect for decorating for Thanksgiving.  Make sure to make the boy paper plate pilgrim so you have the pair.

Technorati Tags: , , , , , , , , , , ,

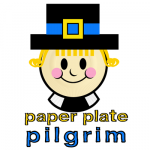
How to Make a Paper Plate Pilgrim for Thanksgiving

Pilgrims are an important part of Thanksgiving.  After all, they were the first to have a Thanksgiving back in 1621.  Well, it wasn’t really Thanksgiving back then…. it was a celebration.  They were celebrating the fact that they finally had a good harvest.  Today I’m going to show you how to make a Paper Plate Pilgrim perfect for Thanksgiving.

Check out our other Thanksgiving Crafts.


How to Make a Paper Plate Pilgrim for Thanksgiving


Materials Needed

2 Paper Plates

Paint or Crayons

Black Marker

Glue

Black, Blue & Yellow Construction Paper

Scissors


Step 1


Paint or color the back of a paper plate.


Paint or color the back of a paper plate.


Step 2


It looks really good if you take a black marker and draw an outline around the outer edge.


It looks really good if you take a black marker and draw an outline around the outer edge.


Step 3


Cut a fourth of a second paper plate and color the center of it black.


Cut a fourth of a second paper plate and color the center of it black.  Then glue it to the bottom of the first plate.


Step 4


Paint or use a black marker to draw an oval for each eye


Paint or use a black marker to draw an oval for each eye and a letter C for the nose and a curved line for the smile.


Step 5


Paint or color in a pink circle for each cheek.


Paint or color in a pink circle for each cheek.  Then draw a black letter C on either side of the smile.


Step 6


Cut a long, black paper rectangle for the bottom of the hat.


Cut a long, black paper rectangle for the bottom of the hat.


Step 7


Now, cut a black square and paste it on the top of the rectangle.


Now, cut a black square and paste it on the top of the rectangle.


Step 8


Cut a blue strip of paper and glue it above the black rectangle.


Cut a blue strip of paper and glue it above the black rectangle.


Step 9


First, cut a yellow square... then fold in half.


First, cut a yellow square… then fold in half.  Now, cut a rectangle out of the center where fold is.  Unfold, and you should have a square with the center square missing…. like above.


Step 10


Glue buckle on top of blue strip.


Glue buckle on top of blue strip.


Step 11


Curl strips of paper on a pencil and then glue them on sides of plate as hair.


Curl strips of paper on a pencil and then glue them on sides of plate as hair.


Step 12


For bangs glue strips of paper and glue under hat.


For bangs glue strips of paper and glue under hat.


Finished paper plate Pilgrim


Isn’t that one awesome Pilgrim… so colorful!!  This Pilgrim will be wonderful for decorating for the Thanksgiving holiday.  And, keep an eye out…. as the next post I make will be a Paper Plate Pilgrim Girl.

Technorati Tags: , , , , , , , , , , ,

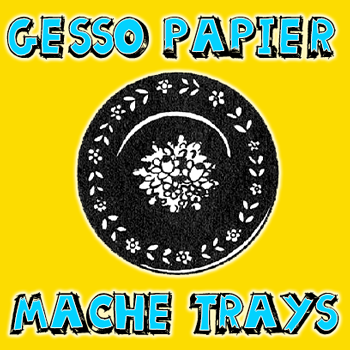
How to Make Gesso Papier Mache Trays

Today we will show you how to make papier mache trays that are made with something called Gesso. Gesso is a compound that is normally used by painted to prime  canvases…but it has plaster of paris in it and is actually quite amazing to use to make papier mache items. Find out how to make these trays that are finished with enamel paint. Find out how to make it below.


How to Make Gesso Papier Mache Trays


CRAFTS MATERIALS NEEDED

3 Paper plates (same size)

Gesso

Enamel paint

(optional) Magazine pages

Shellac

Scissors

How to Make the Papier Mache Tray

Step 1


gesso-papier-mache-plates-trays-01


Coat the three picnic plates on both sides with gesso, as in picture above.

Step 2


gesso-papier-mache-plates-trays-02


Place plates, one into the other, and press together tightly. Allow to dry. When thoroughly dry, trim edge of tray with a scissor.

Step 3


gesso-papier-mache-plates-trays-03


Apply several more gesso coats until desired thickness is attained. When last gesso coat is dry smooth surface and edge with fine sandpaper as in  the image above.

Step 4


gesso-papier-mache-plates-trays-04


Apply coat of glossy enamel paint. Allow to dry and sandpaper lightly. Apply three coats in all following same procedure, as in the illustration above.

Step 5


gesso-papier-mache-plates-trays-05


When last coat is thoroughly dry, decorate with a different shade of paint. When paint is dry, apply protective coat of clear shellac. Or glue magazine picture to tray and when dry apply shellac.

Technorati Tags: , , , , , , ,

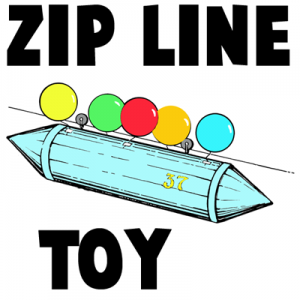
How to Make a Mini Zip Line Moving Toy Crafts Idea for Kids

This is a really cool toy idea…one that can be changed for a lot of different variations of moving toys. This is an air ship / space ship zip line moving toy. Find out how to make this zip line toy that zips and moves, by reading the step by step, illustrated instructions below in our crafts project tutorial. Have fun.


How to Make a Mini Zip Line Moving Toy Crafts Idea for Kids


How to Make a Mini Zip Line Moving Toy Crafts Idea for Kids

Crafts Materials Needed

-Poster Board
– Paper Clips
– Sewing Bobbin
– Paste
– Staples (optional)
– Balloons (optional)
– Tape (Optional)


How to Make a Mini Zip Line Moving Toy Crafts Idea for Kids


This is a labeled image of the craft that we are going to be making today. Find the more detailed instructions below.

Step 1


fold poster board into a tube


The dimensions of the poster board are just a suggestion…use any size that you have. Roll poster board into a tube shape and glue and staple. If you don’t have staples…just use glue.


Step 2


For the cone shapes at the end of our air ship, use a paper plate (or any type of disposable plate). All you have to do is cut a triangle in the plate and the fold like you see in the image below. You can also cut out triangles on the ends of the plate … but not necessary if you are in a hurry.

Step 3


how to make toy zipline space ship


Fold the paper plates into cones and paste them to the poster board. At the top of the poster board I start showing you how to make the wheels for the zip line. Detailed instructions are below.

Step 4


bobbin and paper clip zip line craft


Take a paper clip, thread it through one side of the bobbin and then bend it OVER the bobbin and around it to form a letter ‘J’ like you see in the illustration above.

Step 5


bobbin and paper clip zip line craft


Now take the ‘J’ part of the paper clip and thread it through the poster board and bend it over to make sure that they stay fastened to the air space ship.

Step 6


How to Make a Mini Zip Line Moving Toy Crafts Idea for Kids


If you have balloons, tape them to the top of the airship. Now just take string / cord and attach it to two different places….one of the attachments should be higher than the other attachment. Make sure that the string is taught (tight). Now just put the bobbins on top of the string and let it go for a lot of fun!

Technorati Tags: , , , , , , , , , , ,