Painting with Sand – A Fun Kids Crafts Activity

finished1

Painting with Sand – A Fun Kids Crafts Activity

[ad#ahc]

Paint.  It is a staple of every childhood and is almost a right of passage for all of them. Children love to paint.  They will paint at home, on sidewalks, and at school.  In the classroom, it seems to be the one area that draws all the kids to it and no matter how many interesting toys are out in a preschool room, the children are always willing to done a paint smock and get busy creating.

I love painting myself, although I lack a lot of the skill needed.  Still, whenever I get a chance to paint with my children, I am there doing it.  Sure, they have far surpassed me in a lot of areas, I can still create a nice abstract piece without too much problem.

Although painting is so popular with children, I find at times that it can become rather boring.  This is probably why I am always thinking up new ways to take a break from the norm.  Painting doesn’t have to be with paintbrushes, it doesn’t have to be done on paper, and it doesn’t have to be just painting.  What it does need to be is creative and most children bring more than their share of creativity to the painting table.

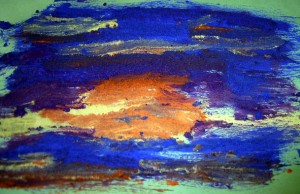
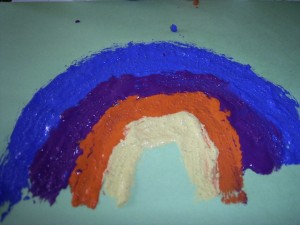
This craft, while it still relies on paint brushes, is a popular craft with children.  It brings in both the creative and a sensory stimulation that is not always there in a painting craft.  In addition, the finished pieces have a 3D-effect to them and it looks amazing under the glass of a frame.  My personal favorite is to use blue, white and silver, since the children often create pictures that resemble beautiful ocean scenes.

Painting with Sand : How to Break from the Norm with Paint

rimg2008

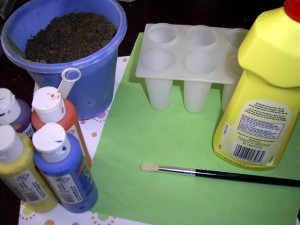
  • Paint (acrylics work well but you can use any type of paint except oils and water)
  • Sand
  • Paper (try to use a heavier paper since this paint has some weight to it)
  • Dish Soap
  • Container(s) for paint (I find that old Popsicle makers work well because they take enough paint and you can put a lot of colors in them.  Also, you can wrap them in saran wrap for storage if you don’t use all the paint.
  • Paint Brushes (one for each color)

rimg2009

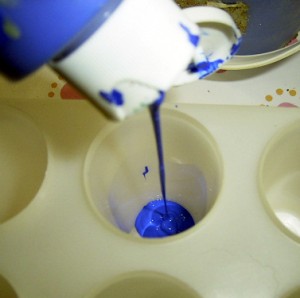
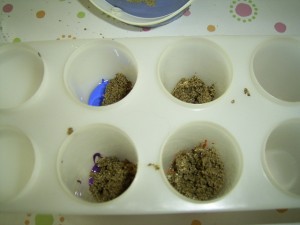
1 – Decide on the colors that you would like to use and pull out the paint.  Pour the first color into the container (if you are using separate containers, simply put the paint in and then repeat in each container you have).
rimg2010

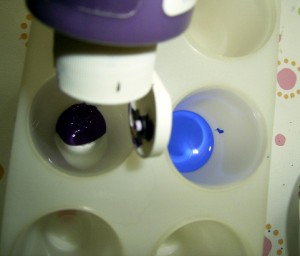
2 – Repeat until you have all the colors that you want to use.  Make sure that you only fill them up between a quarter of the way to half way since the sand will increase the volume quickly.

rimg2011

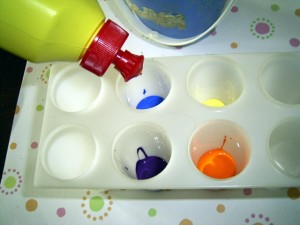
3 – Now for an old teacher’s secret (shh…don’t tell anyone), place a few drops of dish soap into each container of paint.  This makes it a bit easier to clean off of things and whenever I use paint, except oils and water, I use dish soap in it.

rimg2012

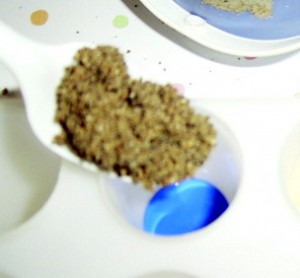
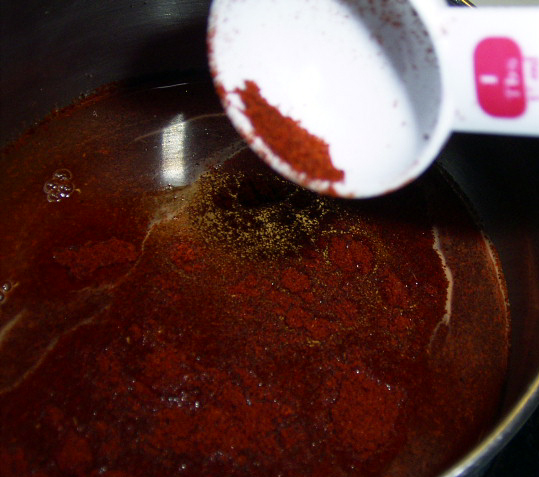
4 – Once you have your paint ready, add in the sand.  This is usually done to the eye but you will probably want about 2 teaspoons to every 3 or 4 tablespoons.

rimg2013

5 – Repeat with all the paint

rimg2015

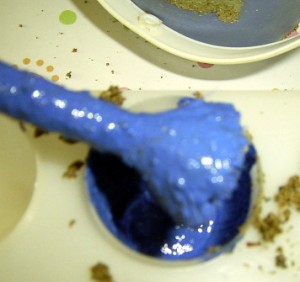
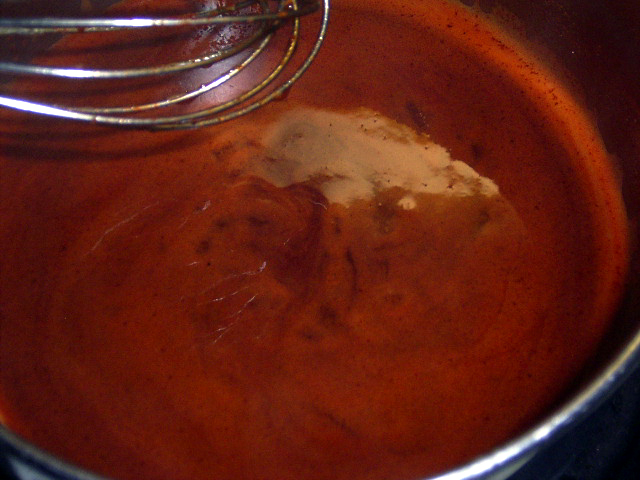
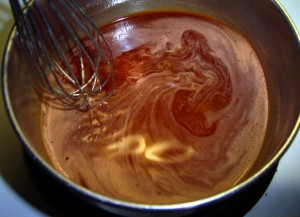
6 – Stir the and into the paint until it is well blended.  You will want to have a paint that has a lot of texture to it but is still wet and easily applied to the paper so add more sand if necessary.  Repeat with all the paint, using a different paint brush with each paint color.

rimg2017

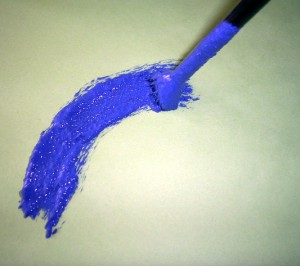
7 – And now your paint is ready for painting.  Have your child paint whatever they would like but encourage them to really play with the paint.  You will find that it has a bumpy texture on the paper and it will clump at some parts but don’t try to remove them, this is the whole reason behind the sand paint.

rimg2018

8 – Allow the art piece to dry completely on a flat surface before you hang it up.  This is very important since the paint is heavier than others and it can ruin the picture if you hang it before it is ready.

rimg2020

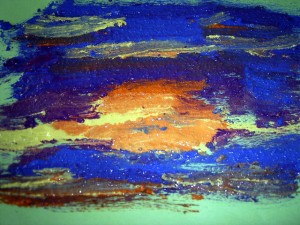
One of the best points about this paint is how it blends together.  Since the paint is so heavy, it keeps most of the color and when you blend, you are less likely to have one big brown mess and more likely to have a range of shades.  This makes it an excellent paint for blending and other painting techniques that rely on pulling colors into another.

Here is our video on How to Paint with Sand

HERE ARE MORE SIMILAR SAND CRAFTS FOR KIDS

Sand Crafts for Kids

How To Make a Sand Painting

Make a Native American Sandpainting

9 Summer Craft Ideas For Toddlers And Preschoolers Fun Summer Crafts For Kids

Colored Sand – June 26, 2009 – Quick and Easy Daily Crafts for Kids

Colored Sand Candleholder

Make a Portable Mini-Sandbox

How to Make Sand Art With Kids

Mother’s Day Crafts for Kids to Make for Their Moms

Technorati Tags: , , , , , , , , , , , , , ,

The Handbag Addiction Starts Early With a Felt Purse

felt-purse-main

If your little girl wants to be just like Mommy and the big girls with her own purse, this is a creative way to give in without actually spending money on expensive accessories for a pint-sized clothes horse. It could easily be made as a pouch or satchel for a boy as well.

felt-purse-what-youll-need

Crafts Materials That You Will Need:

One full sheet of felt or scraps to equal two half sheets
Hole punch (if you don’t have a new and well working hole punch this could be a painstaking process)
Scissors
At least 3 feet of ribbon (I repurposed ribbon from a gift)
A button about the size of a quarter with large holes
A pipe cleaner

felt-purse-step-one

1. Cut your felt so you have two half sheets. Then, fold one sheet 1/3 of the way down and cut off the top third. (See next photo.)

felt-purse-step-two

2. Line up pieces of felt and evenly punch five holes in the side and two on the bottom of both pieces. Then punch two more holes at top center of the shorter piece for your button.

felt-purse-step-three

3. Cut the top of the longer piece into a flap for your purse.

felt-purse-step-four

4. Thread your button with a 3″ piece of pipe cleaner, twist to secure. Thread it through the holes you punched in the middle of the top of the shorter piece of felt, twist to secure, and cut off excess.

felt-purse-step-five

5. Thread ribbon through holes in purse as you would if you were sewing.

felt-purse-step-six

6. cut a slit into your flap for the button hole and voila!

Check Out More Felt Crafts and Even More Felt Crafts on Artists Helping Children

More Similar Crafts for Kids Online

Felt Crafts

Fun Felt Crafts for Kids

Easy Kids Crafts – Felt Flowers

Felt Board for Kids

Purse and Notepad Card

How to Make a Paper Pumpkin Purse Craft

Kids’ Crafts: Making a Stylish Woven Purse

“Kid Flick” Girl’s Purse Tutorial

Technorati Tags: , , , , , , , ,

Sculpting with Fimo: The Goldfish Crafts Project for Kids

goldfish-finished

My husband is a toy sculptor and he can do some pretty amazing things with his sculpting medium and at times it can be rather depressing when my sculpting abilities are very basic. I mean, I can create with paper but I have a bit of a hard time creating anything that is three dimensional, which is why I always delight when I can create something that is worthy of even a little bit of praise.  For this reason, I love working with fimo or clay and I enjoy the time spent with my kids as we make little critters that can be hardened into masterpieces that I can enjoy for a lifetime.

Sculpting is a wonderful activity for children and most have some experience with it through playdough.  While I love playdough, I find that not being able to really keep the finished product can be disheartening at times so I find that giving children an opportunity to make some lasting pieces is worth the extra expense that clay or fimo can present (although fimo isn’t that expensive, usually around 5 dollars for a small block that goes a long way).

In this craft, I will teach you how to create a very basic fimo sculpture fish that most children will enjoy making again and again.

Sculpting with Fimo: The Goldfish : How to Make a Goldfish with basic supplies

[ad#ahc]

supplies1

Gather all the materials you need:

  • Fimo (you can use any color, in the step by step I use grey so I can paint it later but in the finished product I used orange, white and black.)
  • Toothpicks
  • Paint Brush or a round chopstick (if you have any)
  • Paint (optional)

1.  Remove a 2 or 3 inch piece of the Fimo from the block and knead it until it softens.  Usually this doesn’t take too long but if the Fimo is harder, you should expect about 5 minutes of kneading to soften it enough.

ball

2.  Take a small piece from the softened Fimo and roll it into the a ball to form the body of your goldfish. This will be the biggest piece and the size you take will depend on how big you want your goldfish to be. Once you have rolled it into a ball, flatten the bottom slightly so it will rest on the table without falling over.

making-a-tail

3.  Now that you have the body, it is time to make the fins of your goldfish.  To do this, create a small triangle with the Fimo.

tail

4.  When the triangle is formed, cut away a small “v” in the largest part or base of the triangle and then cut away the excess from the top of the triangle.

5.  Using the toothpick, carve a small “v” design into the tail and then attach it to the end of the ball by gently pressing it into

making-the-fins

6.  Once the tail is attached, it is time to work on the fins.  To do this, create two small tear drop shapes with the Fimo and then draw a few lines on your fins before you attach them.

putting-on-a-fin

7.  Attach the fins to the ball and smooth the Fimo with the flat side of the toothpick.  Fix any of the lines that were erased.

making-the-mouth-part-one

8.  Roll a small ball with the Fimo for the mouth and place it onto the front of the ball.

making-the-mouth

9.  Using the rounded tip of a paint brush or chopstick, gently press it into the small ball until you have an indent that looks like fish lips.

fish-finished

10. Roll two more small balls, smaller than the mouth, and carefully press them into the large ball above the mouth. These are the eyes.  Finish them off with a smaller ball that works as the pupil.  If you are painting, you can do all of this in one color but if you don’t want to paint the finished piece, use white Fimo for the eyes and black Fimo for the pupils.

11.  Bake in the oven according to the package until the sculpture hardens.

goldfish-finished

12.  At this point you will be done, unless you used all one color.  If you did, take the time to paint the sculpture with acrylic paints.

Fimo is an excellent craft for children that are 8 and up but I have seen children as young as 4 make some truly spectacular sculptures with this medium.  One word of advice; however, is to make sure that the children wash their hands after they are finished using it.

Technorati Tags: , , , , , , , , , , ,

Keep Kids Entertained Making Stained Glass Pictures Craft

Keep Kids Entertained Making Stained Glass Pictures Craft

How You & Your Kids Can Make This Faux Stained Glass Art Crafts Project

[ad#ahc]

This “stained glass” picture is perfect for keeping kids entertained at a fun and safe activity on a rainy day. It is a bit messy so a newspaper-lined workspace is recommended, but cutting pictures from magazines and making crayon shavings will have children happily occupied for a while.

stained-glass-craft-what-youll-need

Crafts Materials That You Will Need:

Wax paper
Scissors
Crayons with a built in or separate crayon sharpener
Magazine pictures, cards, flowers, leaves – anything small and flat
Newspaper
Iron (and a grown up to use it)

stained-glass-craft-step-one

1. Cut out two pieces of wax paper in the same shape. If you’d like to incorporate an outting with this craft, take children around to look at local churches and draw the shapes of stained-glass windows they see on the trip. They can later cut out their wax paper to match one of the shapes. It’s easiest to fold a large piece of wax paper in half and cut through two pieces at once to make sure the shapes match up.

stained-glass-craft-step-two

2. Have children gather flat objects like flowers or leaves in the yard or cut up magazines or cards with pretty pictures. Place on one piece of wax paper.

3. Begin making crayon shavings by using the crayon sharpener and/or breaking up crayons. Children can choose colors that coordinate with their picture or object, or whatever strikes their fancy. This is likely to ruin crayons for further use, so you might want to buy cheap ones for the purpose.

stained-glass-craft-step-four

4. This is where the grown up steps in. Place the piece of wax paper with pictures and shavings on top of a layer of newspaper on your covered ironing board. Place second sheet of wax paper on top, and another layer of newspaper on top of that.

stained-glass-craft-step-five

5. On a medium heat setting, lightly iron over wax paper and newspaper, checking often to make sure you’re not burning anything. It should only take about a minute for all the crayon shavings to melt and the pieces of wax paper to bond together.

Keep Kids Entertained Making Stained Glass Pictures Craft

MORE FAUX STAINED GLASS CRAFTS & ACTIVITIES FOR KIDS FROM OTHER BLOGS

Crayon “Stained Glass” Cross Craft – Here is a simple craft to do with your children that would also results in some precious Easter decorations to hang from your windows.

Crafts for Kids: Stained Glass Leaves – Even if you’re not a crafty person (like myself), it’s worth trying to make crafts with your children now and then because they love it so much!

Craft Corner ~ Stained Glass Cross – Well, Easter is coming up, so here is a craft to help us remember what the Lord has done for us.  It is also quite pretty!

Easy Stained Glass – Lately I have been all about doing projects I have seen on other blogs, but here is something I actually came up with myself. (No doubt others have thought of this before me, but I patted myself on the back anyway.)

Kids Craft: Stained Glass Window – I remember growing up and making these stained glass windows with crayons with my mother – and loving to do it. Soooo I embellished a bit – being that I am now and adult – I figured it should look like someone at least over the age of 10 created this work of art!

Kisha’s Craft Corner: Beautiful Butterflies – If you’re like me, coffee brightens up your mornings. But now, with a little paint and some craftiness, those coffee filters can be used to brighten up your kitchen as well – in the form of beautiful butterflies with a stained glass look!

New Technique/Tutorial for you: Faux Stained Glass Melted Crayon Background – I love to play with techniques, especially when I can use the supplies on hand and come up with a interesting way to create backgrounds. So, I have been playing around with a technique that I saw on SCS, melted crayons. I did not want to drag out my iron and I wanted to see what would happen if I used waxed paper instead of foil.

Paper Stained Glass Christmas Trees – These Stained Glass Trees add a beautiful glow to the kitchen windows, giving the appearance of twinkly lights on a Christmas Tree. With each triangle tree cut up like a snow flake, it leaves just the right holes for colored tissue paper to shine in.

Stained Glass Art (for kids) – We are loving these bursts of color in our windows… being in the middle of February will make you appreciate such things!

Stained-Glass Crayons – A week ago, my preschool daughter came home from school with a heart-shaped crayon. She told me she made it in class with broken crayon pieces. She thought it was the best thing ever and asked if we could make some at home.

Stained Glass Eggs –  This craft was a SIMPLE one.

Wax and Paper – Earlier this week, Serena had her playgroup and the craft of the day was wax paper and crayon art. Delaney was thrilled by the pieces that Serena brought home and has been reminding us daily that we need wax paper.

Technorati Tags: , , , , , , , , , , , , ,

Homemade Easter Egg Dye: How to Make Easter Egg Dye from Things in your Cupboards

dye-finished

Homemade Easter Egg Dye: How to Make Easter Egg Dye from Things in your Cupboards

Obviously, I like to dye Easter Eggs, I mean, I go to the painstaking effort of blowing out each shell and I spend several hours decorating eggs to place around the house the night before Easter morning.  I’m not sure why I like the eggs, since I don’t eat them but I do.  For this reason, I am always looking for new ways to do the eggs and new ways to create wonderful dyes for the eggs.  Usually, I will purchase a nice kit from the store and I have done them all; neon, pastels, glow in the dark, speckled, you name it, I have probably used the product.

One thing that I had never done, was make my own dyes so I finally decided that I would gather a few things together and create some homemade dyes.  It does take a little more effort but the effect can be some truly beautiful eggs that are unique and truly yours.

The best point about this craft is it brings your children’s crafts into the kitchen, and as any chef or baker knows, you can create some true masterpieces on a stove.

Homemade Easter Egg Dye: How to Make Easter Egg Dye from Things in your Cupboards

dye-supplies

Crafts Materials That You Will Need:

  • Saucepan
  • 1 cup of water
  • Measuring Cup
  • Measuring Spoons 1tsp and 1 tbsp
  • Item for Dye (see the list below)
  • Stove

Dye Colors:

Orange:  Paprika

Green: Spinach

Blue: Blueberries

Red: Red Onions

Pink: Raspberries

Yellow: Orange peels

1.   The first thing that you should do before you start making your own dyes is talk to your child about kitchen safety.  Depending on the age, your child may not be able to help with the stove portion of this craft but there are other things that your child can do, such as measure out ingredients.

dye-add-water

2.   Measure out 1 cup of water and have your child pour it into the saucepan.

3.   Place the saucepan on the stove and set the temperature to medium-high.

4.  While the water is beginning to heat, have your child measure out the ingredients.  Usually, you will want about 2 or 3 tablespoons of the ingredient.  Sometimes you may need more, especially if you are trying to leach the color from a fruit or vegetable.

dye-add-paprika

5.   Add the ingredients to the water.  In this case, I am using a paprika to create orange dye.

dye-boiling

6.   Bring the water and ingredients to a slow boil.

dye-stirring

7.  Lower heat to a low-medium and simmer.  Usually it can take about 15 minutes but for vibrant colors, you will want to simmer for about an hour.  Lower the heat if your water is evaporating too quickly.  Make sure you occasionally stir the mixture.

dye-cooked-dye

8.  Once the simmering time has passed, remove from the heat and pour into a small container or bowl for dying the eggs.

dye-add-vinegar

9.  Add two to three teaspoons of vinegar to the dye and stir until it is blended in.

dye-eggs-in-dye

10.  Take out the eggs you will be dying out of the fridge, or blow them out if you want them hollow, and place them into the bowl.

11.  Allow the eggs to sit in the dye until you get the desired color.  If you want dark, full color, let the eggs sit in the dye overnight.  Make sure you put it in the fridge or close the container to prevent the dye from spilling.

dye-eggs

12.  Remove the eggs from the dye and wipe off the excess dye.

The eggs that are produced from these types of dyes are flat and do not produce a shiny finish.  If you want to have a shiny finish, coat the eggs with a spray sealer that you can pick up at most craft stores in the ceramics section.

dye-finished

MORE EASTER CRAFTS ON THIS BLOG

MORE EASTER CRAFTS ON OUR CRAFTS FOR KIDS SITE

Easter Basket Crafts for Kids

Easter Bunny Crafts for Kids

Easter Chicks Crafts for Kids

Easter Lambs Crafts Ideas for Kids

Easter Hats & Bonnets Crafts Activities for Kids

Easter Eggs & Egg Decoration Crafts Activities for Kids

Crafts with Egg Shells

Crafts with Egg Cartons

Jesus Crafts Ideas for Kids

MORE EASTER FLOWER CRAFTS & ACTIVITIES FOR KIDS FROM OTHER BLOGS

Dyeing Easter Eggs the Natural Way – With a lot of us here having our own chickens or access to fresh eggs this could be a great project for kids!  Let us know if you have any favorite recipes for natural dye for the eggs!

How To Naturally Dye Easter Eggs – With everyone ‘going green’, why not have a green Easter? Healthy, all-natural alternatives exist and make beautifully colored eggs (and are just as much fun to use).

5 Great Reasons to Dye your own Easter Eggs – Sans Boxed Kits – Until I get a mini-farm and raise Araucana Chickens (Easter Egg Chickens)I am dependant on dying my own Easter Eggs.  This year I wanted to dye them with found things from my kitchen.  I refused to be dependant on what was offered me from the mega-chains.

Easter Egg Fun! – Egg dyeing is a fun and educational Easter tradition to start with your little one. Follow these tips and instructions for making homemade and easy designs that your kids will love. PLUS: Learn how to make eco-friendly dye from vegetables!

Simple Ways to Dye Easter Eggs – While growing up the only method I knew for dying Easter eggs was to use PAAS dyes. Something about those slim boxes filled with little plastic cups and colored tablets excited me much more than they should have.

Improving on natural Easter egg dyeing – Seattle photographer Emily Weaver Brown has produced some spectacular dyed Easter eggs. She made a bright yellow using a paste made of turmeric and vinegar, and made other colors out of blackberries, beets, and pomogranate juice. Here’s the kicker:

Fun This Week: Dyeing Easter Eggs – No matter what else you have going on, take some time this week to dye a few Easter Eggs.

The Easiest Easter Eggs of All – I’d never before heard of the “tie dye” egg method—but after spending an afternoon trying it out, I can vouch that not only is it completely mess- and hassle-free, the results look amazing. In fact, this weekend, I’m planning on hitting the flea market to pick up a few silk neckties for my own eggs. Want to give this technique a try? Here’s how.

Naturally Dyed Easter Eggs – The canned food selection in Germany is nothing like it is in The United States.  Back home, I could find anything from spinach to sweet potatoes in a can.  In German, we’ve got cans of peas and cans of corn.  And at the risk of getting really wild, the grocery store where I shop also has peas and corn in the same can.

Coloring Easter Eggs Naturally – The gorgeous copper color came from onion skins and the blue from red cabbage leaves. I used about 3 tablespoons of  turmeric and 1 Tbs. vinegar to acheive  this sunny golden color and red beets produced a light mauve.

Technorati Tags: , , , , , , , ,

Easy Easter Basket Craft for Kids to Fill with Treats

bunny-basket-finished

If you’ve had a new addition to the family, are having an unexpected guest, or just don’t have enough Easter baskets around the house, here is a simple an inexpensive way to create your own Easter basket to fill with goodies and put on display.

Easy Easter Basket Craft for Young Kids, Preschoolers, Kindergarteners, and Moms

[ad]

bunny-basket-what-youll-need

CRAFTS MATERIALS THAT YOU WILL NEED:

A box – a shoebox or milk or orange juice carton would work nicely

Pipe cleaners

Construction paper

Scissors

Hole Punch

Glue

Stapler

Crayons or googly eyes

bunny-basket-step-1

1. First,  cut off or remove the top of your box or one side of your carton. If using a carton, staple the open end closed. Save this discarded piece for your basket handle if desired.

bunny-basket-step-2

2. Choose one color of construction paper and make sure you have enough for all sides of your box. Cut the construction paper to fit the box and glue to all sides of the outside.

bunny-basket-step-3

3. Punch a hole in the front of your box. Bend four pipe cleaners in half and stick through the hole, half on the inside of the box, half on the outside. Position the pipe cleaners so they are in place on the outside, and then staple the pipe cleaners into place on the inside. Trim pipe cleaners inside if needed.

bunny-basket-step-4

4. Draw on eyes, or glue on googly eyes if you have them on hand.

bunny-basket-step-5

5. For ears, cut out ear shapes from the original color construction paper you used to cover the box. Then cut smaller ear shapes out of pink contruction paper and glue them to the center of the larger ear shapes. Staple ears to the box so they stand up. (Hint: staple pipe cleaner scraps vertically behind the ears to help keep them upright.)

6. If your discarded box top is large enough cut out a 1″ strip and cover it with construction paper to form a handle. Or, simply use construction paper for a decorative handle.

bunny-basket-finished

MORE EASTER CRAFTS ON THIS BLOG

MORE EASTER CRAFTS ON OUR CRAFTS FOR KIDS SITE

Easter Basket Crafts for Kids

Easter Bunny Crafts for Kids

Easter Chicks Crafts for Kids

Easter Lambs Crafts Ideas for Kids

Easter Hats & Bonnets Crafts Activities for Kids

Easter Eggs & Egg Decoration Crafts Activities for Kids

Crafts with Egg Shells

Crafts with Egg Cartons

Jesus Crafts Ideas for Kids

MORE EASTER FLOWER CRAFTS & ACTIVITIES FOR KIDS FROM OTHER BLOGS

Personalized Easter Basket For Kids Will Make Then Smile – Making your Easter basket for kids in 2009 is going to be great fun for the whole family but there are a few things to keep in mind too. Things like safety and durability are the major concerns.

Egg Basket : Quick and Easy Daily Crafts for Kids – Have children cut strips of colored paper and weave them in and out of tomato

Quick And Easy Easter Decor – Daisies in a Vase – Today’s craft is going to be a super simple decoration for spring.  I hesitate to even call it a “craft”;  it’s more like an assembly of items.  All you need for this little project is: 1) a clear glass vase, 2) small plastic Easter eggs (I used pastel shimmer eggs), 3) rice, and 4) three artificial Gerber daisies on long stems.

Easter Art & Creativity Kits From ELC – Increasing numbers of people are looking for alternatives to chocolate when buying Easter gifts. If you too have noticed chocolates eggs becoming seemingly less special then you may find Early Learning Centre’s Easter Art & Creativity range a delightful way of marking this holiday.

Easter Bunny Egg/Flower Holder – Make this cute Easter bunny holding a flower in front of an Easter egg.

Felt and Button Easter Cards Craft for Kids & Adults – Flower-bouquet I created a whole bouquet of these felt button flowers for a craft magazine last year but knowing bouquets would be far too much cutting for 5 and 6 year olds I opted for a single flower for each mum.

Kids Crafts for Holidays & Easter – Easter is coming up which got me thinking about how I am going to keep my kids occupied this year.

Easter Craft For Kids (including a bouquet of flowers) – My absolute favorite book for Toddler Crafts is called The Toddler’s Busy Book by Trish Kuffner. It has 365 Games and Activities in it that are easy and fun to do!  There are crafts for every holiday.  It breaks the crafts down into great categories like : Rainy Day Play, Kids in the Kitchen, Water Play, Outdoor Adventures, Arts & Crafts and much more.  I highly recommend getting this book!!  It is a great resource, one I have used over and over!!  Below is one of the craft ideas for Easter that is in the book.

Easter Craft Ideas for Kids – Get crafty and create a colorful Easter holiday for the kids.  Along with the Easter egg masterpieces you have planned using some of the ideas in our article about 20 ways to decorate an Easter egg, craft your own panoramic sugar eggs, chocolate Easter lollipops, feathered Easter baskets, and more to celebrate the holiday.

Keeping Easter Fun and Frugal –   Finding great activities for your kids to do for Easter can be easier than you think, here’s a little craft making felt Easter decorations that you can use every year.

Easter Bouquet To Make At Home – This is a quick and easy way to make an Easter Bouquet that is cheap and fun to do – and it doesn’t make much mess either – always a plus with any Easter activities and crafts!

Easter and Springtime Crafts for Kids – Easter and springtime traditionally signals the turn of the year into a time of rebirth and fresh beginnings. It’s a season groaning with possibilities for so many crafts for kids to enjoy.

Technorati Tags: , , , , , , , ,

Easy Origami Heart Paper Folding Origami Craft for Kids

origami-heart-finished

This is an easy paperfolding craft to make with your kids before visiting a grandparent or loved-one who would surely love this *heartfelt* keepsake. It’s also easy to include in a card or letter, since it’s flat. One of the best parts about origami and paper folding projects is that all you need for this crafts project is paper and tape.  Not only will this be a fun arts and crafts activity, but it can also be given to someone that you love as a gift (such as Mom on Mother’s Day or Dad on Father’s Day).

Easy Origami Heart Paper Folding Origami Craft for Kids

[ad]

origami-heart-what-youll-need

Crafts Materials That You Will Need:

A regular piece of rectangular paper, like construction paper
Tape, if desired

origami-heart-step-one

1. Create creases by folding your paper in half one way, and then the other, and unfolding again. (There is a lot of folding and unfolding in origami. The crease is the thing, so make sure yours are sharp.)

origami-heart-step-two

2. Holding your paper horizontally, fold in the upper left and upper right corners so that the point meets the vertical middle crease. The points will extend just past the horizontal middle crease.

origami-heart-step-three

3. Now fold the bottom left and bottom right corners up so that the point meets the verticle middle crease. This should form your paper into a square shape with points facing north, south, east and west.

origami-heart-step-four

4. Turn your paper over, and fold the top point down to meet the bottom point. This should leave about a 1″ unfolded section at the top. You should be left with a diamond-like shape as seen above.

origami-heart-step-five

5. Fold in the outer left and outer right points so that they appear as small, folded-in triangles, as seen above.

origami-heart-step-six

6. Fold in the two top, center points to form a shape as seen above.

origami-heart-step-seven

7. Tape down folds, if desired, and turn over – you have a lovely paper heart!

origami-heart-finished

Origami heart bookmarks – Here are some little folded heart bookmarks you can whip up in minutes. I used instructions from Origami Club

How To Fold A Dollar Into An Origami Heart – How To Fold A Dollar Into An Origami Heart

How to fold an origami heart envelope – This is an easy fold and perfect for sending a love note to your Valentine!

How to origami a dollar heart –   No April Fools! You can now origami a heart with a dollar note, and insert a dime in too! Check out this tutorial!

Money Origami Heart Folding Instructions – These step by step instructions help you to fold your own money origami heart. Perfect for beginners. LisaShea.com has many more photos of origami and origami folding instructions. Money origami is great for presents and tips!

Origami Floral Heart Tutorial – I made a bunch of cards a couple of years ago with this origami heart that I learned to make from, hmmm,

Origami Heart Bookmarks –  Here’s a cute idea from Origami Club which would be a sweet little valentines gift.

Simple Plain Origami heart – Have you ever dreamt (like in a dream) of making an origami heart fast so that you could give it to someone or something. Now you can make a normal (not beating or anything) simple heart in origami. Just follow this simple plain origami heart making video which is simple and plain too.

Technorati Tags: , , , , , , , , , , , ,

How to Make a Spring Easter Bonnet, Hat, or Flower Crown with Your Kids

easter-bonnet1

An Easter bonnet is a longstanding tradition for little girls in many families – and calling it a flower crown will make any little boy excited to be the king of spring! Explain the history of the Easter bonnet to your children and even teach them the song from Irvin Berlin’s “Easter Parade.” Then, get started!

Easter Bonnet or Flower Crown Craft for Kids : How to Make an Easter Bonnet, Hat, or Flower Crown with Your Children

easter-bonnet-what-you-need

What you’ll need:

Paper plate – I used one with flowers for a pretty inside trim to my bonnet

Construction paper

Crayons, markers or paint

Ribbon, glitter or tissue paper for embellishments

Scissors

Glue

Step 1: Turn paper plate upside down and color or paint it green.

Step 2: Cut three slits from edge to edge of paper plate, leaving about 1″ margins.

easter-bonnet-step-2

Step 3: Bend the points created by slits upward.

easter-bonnet-step-4

Step 4: Cut out some flowers out of contruction paper or tissue paper. Have your child identify flowers that grow in your yard or you typically see around Easter and draw them, or just be creative and create your own spring foliage!

easter-bonnet-step-5

Step 5: Glue your flowers to the points and add any other decorations you want – like glitter or stickers. I added ribbons down the back of my bonnet.

easter-bonnet-finished

easter-bonnet1

MORE EASTER CRAFTS ON THIS BLOG

MORE EASTER CRAFTS ON OUR CRAFTS FOR KIDS SITE

Easter Basket Crafts for Kids

Easter Bunny Crafts for Kids

Easter Chicks Crafts for Kids

Easter Lambs Crafts Ideas for Kids

Easter Hats & Bonnets Crafts Activities for Kids

Easter Eggs & Egg Decoration Crafts Activities for Kids

Crafts with Egg Shells

Crafts with Egg Cartons

Jesus Crafts Ideas for Kids

MORE EASTER FLOWER CRAFTS & ACTIVITIES FOR KIDS FROM OTHER BLOGS

Easter Hat –  Just in time for Easter I’ve dragged out my Fiskars tools and stash and created a masterpiece !  This gorgeous Easter Hat was the result of an afternoon’s work, an empty nappy box, some Fiskars goodies, and a little bit of creativity.

Paper mache eggs and Easter Bonnet Hats –  How to make an Easter Bonnet Hat and Paper Mache Eggs with Your Kids.

Easter Hats and other ramblings – Loughie’s is set on his Goofy Hat – a rather fine base I must say and Hettie’s is set on a pink cowboy hat – deceptively simple, 100% cool 🙂

Easter Bunny holds treats –  Boxes can be filled with sweet surprises for someone special

Celebrating Easter Week –  Make Easter meaningful for your family this year by celebrating it for an entire week,  all the while focusing on the true meaning of Easter.

Make Animal Masks for Your Eggs -Making a paper crown might also be a good way to make animal masks for your eggs. Just make a narrow paper crown for your egg, attach eyes, nose, ears, hair, etc. to it as befits your chosen animal.

Easter Celebration Ideas – Easter Fun Craft Activities For All The Family – Easter egg hunting is what my children love the most and now that we live in an apartment we aren’t able to have an Outdoor Easter egg hunt so I make a luck dip for my children in the shape of an Easter hen.   I make a big Paper Mache’ hen and paint her in autumn colors. She sits on a nest with eggs underneath her.  Through out the holiday the children can find eggs hidden underneath the hen and inside the body wings head and beak of our Easter hen.

Craft Project: Easter Egg Duck – Kids will enjoy making these cute and easy ducks from purchased plastic Easter eggs.

Preschool Easter Crafts for Kids Inspire Young Minds – Easter crafts for kids is a great way to mark the Easter festivities, and a great excuse to get your classroom talking about Easter.

Paper Dot Easter Egg Craft for Kids – The paper dots can be used like glitter to embellish cards, decorate picture frames, and yes, even coat styrofoam Easter eggs.  With a few simple craft items that you probably have on hand, create an Easter activity workstation for your young children and make some paper dot Easter eggs for decorations and gifts this Easter season!

Tie Dyed Easter Eggs Craft for Kids –  Tie Dye Easter EggsI saw this egg dying craft on Martha Stewart’s site and I have no idea if everyone else on the planet has already seen it but I’m going to take the risk that the majority of you out there are just as behind the times as I am and this will be new to you as well.

Easter Art & Creativity Kits From ELC – Increasing numbers of people are looking for alternatives to chocolate when buying Easter gifts. If you too have noticed chocolates eggs becoming seemingly less special then you may find Early Learning Centre’s Easter Art & Creativity range a delightful way of marking this holiday.

Easter Kids Crafts – It is Easter time and with Easter comes Spring break.  Spring break means that the kids are home and need something to do.  I have been researching crafts all day to find just the right ones.  I have compiled a list with the links of crafts we are intending to try.

Easter and Spring Crafts for Toddlers, Preschoolers, and Kids – As always these crafts are suited from 18 months and up, depending on how much parental help is needed.  As for egg cartons, I prefer the cardboard type as they are easier to color, using crayons, markers and color pencils.  But this time I did the crafts with a Styrofoam egg carton, which can only be colored on with crayon and some pressure.

Easter Bunny Egg/Flower Holder – Make this cute Easter bunny holding a flower in front of an Easter egg.

Kids Crafts for Holidays & Easter – Easter is coming up which got me thinking about how I am going to keep my kids occupied this year.

Easter Craft For Kids (including a bouquet of flowers) – My absolute favorite book for Toddler Crafts is called The Toddler’s Busy Book by Trish Kuffner. It has 365 Games and Activities in it that are easy and fun to do!  There are crafts for every holiday.  It breaks the crafts down into great categories like : Rainy Day Play, Kids in the Kitchen, Water Play, Outdoor Adventures, Arts & Crafts and much more.  I highly recommend getting this book!!  It is a great resource, one I have used over and over!!  Below is one of the craft ideas for Easter that is in the book.

Easter Craft Ideas for Kids – Get crafty and create a colorful Easter holiday for the kids.  Along with the Easter egg masterpieces you have planned using some of the ideas in our article about 20 ways to decorate an Easter egg, craft your own panoramic sugar eggs, chocolate Easter lollipops, feathered Easter baskets, and more to celebrate the holiday.

Keeping Easter Fun and Frugal –   Finding great activities for your kids to do for Easter can be easier than you think, here’s a little craft making felt Easter decorations that you can use every year.

Easter and Springtime Crafts for Kids – Easter and springtime traditionally signals the turn of the year into a time of rebirth and fresh beginnings. It’s a season groaning with possibilities for so many crafts for kids to enjoy.

Easter Family Fun – For many families, Easter is a time honored tradition when the earth is reborn and loved ones reunite. A time for honey baked ham, mashed potatoes and, of course, chocolate, chocolate and more chocolate.

Free Kids Crafts for Easter – I’ve been posting mostly patterns for things tou make FOR kids, well, here’s some crafts that they can make theirselves!

Have Fun With Your Easter Egg Hunt – The tradition of Easter egg hunts goes back centuries in one form or another. As a symbol of fertility and new birth, eggs planted around the home bring to mind the rebirth of Spring. Incorporate that same feeling of joy into your hunt to make it fun for the whole family.

Preschool Easter Crafts for Kids Promotes Creativity – Children can be very trying at times, anyone with kids knows that. But there comes a time, after the terrible twos, but before pre-teens, that they are simply delightful. They haven’t learnt any bad behavior yet, and all they want to do is please you.

Two Super Easy Easter Crafts for Kids! – Easter is only two weeks away! Here are some fun and thrifty crafts to do with your kiddos.

Technorati Tags: , , , , , , , , , , , , , , ,

Keepsake Easter Eggs Decorating Craft for Kids

eggs-finished

Every year, there are a hundred celebrations and events that I want to keep something from.  Sometimes my keepsakes are countless photographs, while at other times, those keepsakes are little toys, pieces of artwork, or a dozen other little things. The main point is that I have something to remember the event by.  Easter, while filled with many photographs, has always been something that I could never keep something from.  Every year, a few days before Easter Sunday, I would break out the eggs and boil them up for dying.  Then my children and I would spend a few hours creating small masterpieces on the eggs.  Unfortunately, hard boiled eggs never last and I would have to throw away everything that had taken so long to make.

That was until I realized that there was a way to keep the eggs without any worry of them becoming rotten and that is what I will share with you today; making your own keepsake Easter eggs.

Keepsake Easter Eggs Decorating Craft for Kids : How to Make These Decorated Easter Eggs with Your Children

[ad]

materials

Gather all the crafts materials you need:

  • Eggs (about a dozen and I prefer to use the large sized eggs)
  • Easter Egg Dye Kit
  • Bowl
  • Needle
  • Stickers (optional)
  • Vinegar (for the dye)

1.     Before you begin, take a few minutes to wash the eggs since you will need to put your mouth on the shell. This cuts down on any risk of salmonella.

needle

2.    This stage of the project will need to be done by an adult to prevent any injuries.  Once the eggs are washed, take the needle and carefully push it through the tip (or top) of the egg.  Carefully remove a few pieces of shell so you have a small whole in one end of the egg.  Repeat the process with the other end so that you have a hole on both ends of the egg. (Note: This should be the top and bottom of the oval and not the sides of the egg.)

egg-and-needle

3.   When you have a hole in both sides, insert a long needle into the hole and swirl it around the inside of the egg.  The goal is to break the yolk and remove the membrane from the sides of the egg.  If you miss this stage you won’t be able to clean out the egg.

blowing-egg

4.   Wipe off the egg white that has leaked out of the top of the egg and then place your lips around the hole.  Firmly blow into the egg while you have the egg resting over a bowl.  The egg should pour out of the other hole but if it doesn’t, repeat the swirling with needle until you are sure that the yolk has broken.  Continue to blow until all the yolk and egg white is removed from the inside of the shell.

blown-egg

5.    Now that the eggs are ready, wipe off any excess egg white or yolk and set aside.  Prepare the egg dye according to the directions on the package.  (Most egg dyes use vinegar but not all of them do.)

dying

6.   Have your child dye the eggs.  If you want to add layers to the design, you can actually use wax (or crayons) to draw on designs before you dye the eggs.  Once the egg is dyed, you can wipe off the wax to display the design.  When you remove the eggs from the dye, make sure that you allow them to drain completely since the shells will fill up with the dye.

dyed

7.   Dry the eggs completely and then finish decorating them with stickers (optional)

rimg1738

On Easter, the eggs can be used for the egg hunt or they can be used to make beautiful decorations.  One of the best things about blowing the eggs before you dye them is that you can use them for crafts, ornaments or you can simply pack them into an egg carton (with your child’s name and the year on each egg) and place them into your keepsake box.

eggs-finished

So if you are looking for a way to decorate eggs that you can keep, then this is definitely the way to do it.

MORE EASTER CRAFTS ON THIS BLOG

MORE EASTER CRAFTS ON OUR CRAFTS FOR KIDS SITE

Easter Basket Crafts for Kids

Easter Bunny Crafts for Kids

Easter Chicks Crafts for Kids

Easter Lambs Crafts Ideas for Kids

Easter Hats & Bonnets Crafts Activities for Kids

Easter Eggs & Egg Decoration Crafts Activities for Kids

Crafts with Egg Shells

Crafts with Egg Cartons

Jesus Crafts Ideas for Kids

MORE EASTER FLOWER CRAFTS & ACTIVITIES FOR KIDS FROM OTHER BLOGS

Craft Project: Easter Egg Duck – Kids will enjoy making these cute and easy ducks from purchased plastic Easter eggs.

Preschool Easter Crafts for Kids Inspire Young Minds – Easter crafts for kids is a great way to mark the Easter festivities, and a great excuse to get your classroom talking about Easter.

Paper Dot Easter Egg Craft for Kids – The paper dots can be used like glitter to embellish cards, decorate picture frames, and yes, even coat styrofoam Easter eggs.  With a few simple craft items that you probably have on hand, create an Easter activity workstation for your young children and make some paper dot Easter eggs for decorations and gifts this Easter season!

Tie Dyed Easter Eggs Craft for Kids –  Tie Dye Easter EggsI saw this egg dying craft on Martha Stewart’s site and I have no idea if everyone else on the planet has already seen it but I’m going to take the risk that the majority of you out there are just as behind the times as I am and this will be new to you as well.

Easter Art & Creativity Kits From ELC – Increasing numbers of people are looking for alternatives to chocolate when buying Easter gifts. If you too have noticed chocolates eggs becoming seemingly less special then you may find Early Learning Centre’s Easter Art & Creativity range a delightful way of marking this holiday.

Easter Kids Crafts – It is Easter time and with Easter comes Spring break.  Spring break means that the kids are home and need something to do.  I have been researching crafts all day to find just the right ones.  I have compiled a list with the links of crafts we are intending to try.

Easter and Spring Crafts for Toddlers, Preschoolers, and Kids – As always these crafts are suited from 18 months and up, depending on how much parental help is needed.  As for egg cartons, I prefer the cardboard type as they are easier to color, using crayons, markers and color pencils.  But this time I did the crafts with a Styrofoam egg carton, which can only be colored on with crayon and some pressure.

Easter Bunny Egg/Flower Holder – Make this cute Easter bunny holding a flower in front of an Easter egg.

Kids Crafts for Holidays & Easter – Easter is coming up which got me thinking about how I am going to keep my kids occupied this year.

Easter Craft For Kids (including a bouquet of flowers) – My absolute favorite book for Toddler Crafts is called The Toddler’s Busy Book by Trish Kuffner. It has 365 Games and Activities in it that are easy and fun to do!  There are crafts for every holiday.  It breaks the crafts down into great categories like : Rainy Day Play, Kids in the Kitchen, Water Play, Outdoor Adventures, Arts & Crafts and much more.  I highly recommend getting this book!!  It is a great resource, one I have used over and over!!  Below is one of the craft ideas for Easter that is in the book.

Easter Craft Ideas for Kids – Get crafty and create a colorful Easter holiday for the kids.  Along with the Easter egg masterpieces you have planned using some of the ideas in our article about 20 ways to decorate an Easter egg, craft your own panoramic sugar eggs, chocolate Easter lollipops, feathered Easter baskets, and more to celebrate the holiday.

Keeping Easter Fun and Frugal –   Finding great activities for your kids to do for Easter can be easier than you think, here’s a little craft making felt Easter decorations that you can use every year.

Easter and Springtime Crafts for Kids – Easter and springtime traditionally signals the turn of the year into a time of rebirth and fresh beginnings. It’s a season groaning with possibilities for so many crafts for kids to enjoy.

Easter Family Fun – For many families, Easter is a time honored tradition when the earth is reborn and loved ones reunite. A time for honey baked ham, mashed potatoes and, of course, chocolate, chocolate and more chocolate.

Free Kids Crafts for Easter – I’ve been posting mostly patterns for things tou make FOR kids, well, here’s some crafts that they can make theirselves!

Have Fun With Your Easter Egg Hunt – The tradition of Easter egg hunts goes back centuries in one form or another. As a symbol of fertility and new birth, eggs planted around the home bring to mind the rebirth of Spring. Incorporate that same feeling of joy into your hunt to make it fun for the whole family.

Preschool Easter Crafts for Kids Promotes Creativity – Children can be very trying at times, anyone with kids knows that. But there comes a time, after the terrible twos, but before pre-teens, that they are simply delightful. They haven’t learnt any bad behavior yet, and all they want to do is please you.

Two Super Easy Easter Crafts for Kids! – Easter is only two weeks away! Here are some fun and thrifty crafts to do with your kiddos.

Technorati Tags: , , , , , , , , , , , , , , , , , , ,

The Origami Fox Box for the Beginner Paper Folder Child

fox-box

The Origami Fox Box for the Beginner Paper Folder Child : Great for Easter Grab Gift Bags

[ad#ahc]

Years ago, and I mean “years,” I had the great opportunity to try origami at school.  I actually loved it and most of the people in my class enjoyed creating various objects out of paper.  In fact, the love of paper folding quickly became a common past time in my school and we would make everything from cootie catchers to little paper balls.

One thing that I have noticed is that paper folding crafts are still a big hit with kids and my own children have brought home their own share of cootie catchers and paper balls. One of their favorite paper crafts that they have brought home is the Fox Box.  This is a very simple paper craft and is excellent for a beginner paper folder.  It doesn’t require very much skill and only uses simple folding techniques.  In addition, the Fox Box is quick to make and you can hide little treasures inside, which are perfect for grab bags. These are also great for Easter grab bags.

The Fox Box for the Beginner Paper Folder : How to Make a Fox Box with 3 pieces of paper’

fox-box-materials

Gather all the materials you need:

  • Printed or Origami Paper: You will need 3 sheets of  paper that has a print on one side or a decorative origami paper
  • Scissors or a straight-edge cutter
  • Stickers (optional)
  • Treasure or Trinket (optional)

1.    Carefully cut out 3 squares, one from each sheet of paper.  The best measurement is 6 inches by 6 inches but you can make it smaller or larger depending on the end result that you would like.  If your child is able to cut the paper by himself, then feel free to allow him to do so.

fox-box-first-triangle

2.    Give your child one piece of paper and have him fold it in half diagonally until the top edge is in line with the bottom edge.  Your child should be left with a large triangle.  Make sure that the print is on the outside of the triangle.

fox-box-smaller-triangle

3.    Fold the triangle in half to form a new, smaller triangle by bringing the corner over to the side of the other corner.  Have your child crease the paper and then fold the triangle open again to reveal the first triangle with a crease down the center.

square-fox-box

4.    Now you are ready to create a square with the paper.  Have your child take one corner from the bottom of the triangle and fold it along the crease that runs down the center of the large triangle.  Crease the paper and then unfold it.  Flip the paper over and fold the same piece to the center fold, crease and then fold it back.  This should create a hinged crease where the paper can fold both ways without difficulty.

5.    Repeat the process with the other corner of the paper.  Your child will be left with a small square of folded paper.

fox-box-small-triangle-fold

6.    At the top of the large triangle, fold down one edge so there is a small white triangle showing at the top.

fox-box-repeat-with-paper

7.    Repeat steps 2 to 6 with the other two pieces of paper.

fox-box-assembly-1

8.    Once you have all the paper folded, it is time for your child to start assembling his fox box.  At this point, depending on your child’s age, you may need to assist your child with the assembly. Take two of the folded papers and slide them together.  To do this, you slide the two small triangles, “ear shaped paper” between the folded paper at the top of the large triangle with the other paper.  This means that the two smaller triangles will slide under the small white triangle in the main body of the paper.

fox-box-assembly

9.    With the third piece of paper, repeat the process except you will need to close the box by sliding the small triangles under the third paper.  Crease the paper whenever needed as you make the paper fit together.

rimg1712

10.  Finish the fox box by decorating it with stickers (optional) and place a treasure into the fox box if you desire to do so.

The first time you and your child makes a fox box, it will feel as though you are all thumbs when you assemble the box but after the first time, it becomes very easy to create the box.

fox-box

Technorati Tags: , , , , , , , , , , , , ,

How to Make Easter Lilies / Bouquet of Flowers Craft With Your Kids Handprints

Finished Craft Handprint Easter Lily Bouquet of Flowers Craft Activity for Kids

How You & Your Kids Can Make This Handprint Easter Lily Bouquet of Flowers : Easter Crafts for Your Children

[ad#ahc]

Easter is not so far away anymore so I thought that I would share with you an adorable Easter lily flower bouquet craft for young children and preschoolers … even older children will enjoy it. With just a few craft materials that are probably already around your house, you will be able to make cute Easter Lilies with your child’s own handprints.  Not only will this be a fun arts and crafts activity, but it can also be a keepsake to keep forever. You will be surprised at how fast your little one’s hands grow when you look back at past crafts activities. Have fun.

Supplies for Handprint Easter Lily Bouquet of Flowers Craft Activity for Kids

CRAFTS MATERIALS NEEDED

  1. Chenille Stems / AKA Pipe Cleaners in the following colors: 1 yellow, 3 green
  2. Chenille  Stem or Pipe Cleaner for ribbon, or curling ribbon
  3. Tape
  4. Scissors
  5. Crayon, pencil or magic marker
  6. White heavy construction paper

Trace Your Child's Hand for Handprint Easter Lily Bouquet of Flowers Craft Activity for Kids

1 – Trace your child’s hand onto the white paper with a crayon or pencil or magic marker. Then cut out as many hands as you want for the lily blooms.

Cut out Hands for Handprint Easter Lily Bouquet of Flowers Craft Activity for Kids

2 – Roll the paper handprint vertically to form a funnel shape. When this is complete then secure the side with clear tape.

Turn Paper Inwards for Handprint Easter Lily Bouquet of Flowers Craft Activity for Kids

3 – Now you should roll each paper hand’s  finger down to form the curls of each flower bloom.

Use Chenille Stems for Handprint Easter Lily Bouquet of Flowers Craft Activity for Kids

4 – Now it is time to cut the yellow chenille stem / pipe cleaner to approx 3 inches each. Now loosely bend the yellow piece to form a ‘U’ shape. Wrap the top of one of the green pipe cleaners at the bottom of the ‘U’. Curl the ends of the yellow pipe cleaner to form the center of the flower’s bloom.

Handprint Easter Lily Bouquet of Flowers Craft Activity for Kids

5 – Insert the completed green Lily stem into the center of the flower’s bloom and pull through.

Handprint Easter Lily Bouquet of Flowers Craft Activity for Kids

6 – Gather the Lilies / flowers and wrap the pink pipe cleaner once around the stems to fasten together . Then make one loop for the ribbon and wrap around, repeat for 2nd loop.

Handprint Easter Lily Bouquet of Flowers Craft Activity for Kids

7 – These make great surprises for MOM on Mother’s Day or for an Easter Decoration.

Finished Craft Handprint Easter Lily Bouquet of Flowers Craft Activity for Kids

This is what the completed crafts project looks like. Enjoy and Happy Easter!

MORE EASTER CRAFTS ON THIS BLOG

MORE EASTER CRAFTS ON OUR CRAFTS FOR KIDS SITE

Easter Basket Crafts for Kids

Easter Bunny Crafts for Kids

Easter Chicks Crafts for Kids

Easter Lambs Crafts Ideas for Kids

Easter Hats & Bonnets Crafts Activities for Kids

Easter Eggs & Egg Decoration Crafts Activities for Kids

Crafts with Egg Shells

Crafts with Egg Cartons

Jesus Crafts Ideas for Kids

MORE EASTER FLOWER CRAFTS & ACTIVITIES FOR KIDS FROM OTHER BLOGS

Quick And Easy Easter Decor – Daisies in a Vase – Today’s craft is going to be a super simple decoration for spring.  I hesitate to even call it a “craft”;  it’s more like an assembly of items.  All you need for this little project is: 1) a clear glass vase, 2) small plastic Easter eggs (I used pastel shimmer eggs), 3) rice, and 4) three artificial Gerber daisies on long stems.

Easter Art & Creativity Kits From ELC – Increasing numbers of people are looking for alternatives to chocolate when buying Easter gifts. If you too have noticed chocolates eggs becoming seemingly less special then you may find Early Learning Centre’s Easter Art & Creativity range a delightful way of marking this holiday.

Easter Bunny Egg/Flower Holder – Make this cute Easter bunny holding a flower in front of an Easter egg.

Felt and Button Easter Cards Craft for Kids & Adults – Flower-bouquet I created a whole bouquet of these felt button flowers for a craft magazine last year but knowing bouquets would be far too much cutting for 5 and 6 year olds I opted for a single flower for each mum.

Kids Crafts for Holidays & Easter – Easter is coming up which got me thinking about how I am going to keep my kids occupied this year.

Easter Craft For Kids (including a bouquet of flowers) – My absolute favorite book for Toddler Crafts is called The Toddler’s Busy Book by Trish Kuffner. It has 365 Games and Activities in it that are easy and fun to do!  There are crafts for every holiday.  It breaks the crafts down into great categories like : Rainy Day Play, Kids in the Kitchen, Water Play, Outdoor Adventures, Arts & Crafts and much more.  I highly recommend getting this book!!  It is a great resource, one I have used over and over!!  Below is one of the craft ideas for Easter that is in the book.

Easter Craft Ideas for Kids – Get crafty and create a colorful Easter holiday for the kids.  Along with the Easter egg masterpieces you have planned using some of the ideas in our article about 20 ways to decorate an Easter egg, craft your own panoramic sugar eggs, chocolate Easter lollipops, feathered Easter baskets, and more to celebrate the holiday.

Keeping Easter Fun and Frugal –   Finding great activities for your kids to do for Easter can be easier than you think, here’s a little craft making felt Easter decorations that you can use every year.

Easter Bouquet To Make At Home – This is a quick and easy way to make an Easter Bouquet that is cheap and fun to do – and it doesn’t make much mess either – always a plus with any Easter activities and crafts!

Easter and Springtime Crafts for Kids – Easter and springtime traditionally signals the turn of the year into a time of rebirth and fresh beginnings. It’s a season groaning with possibilities for so many crafts for kids to enjoy.

Technorati Tags: , , , , , , , , , ,

How to Make an Alphabet Letters Tactile Guessing Game with Your Preschoolers or Autistic Children

Today we are going to how to play a fun Montessori game that promotes good hand writing skills while also helping kids to learn the alphabet on their own. This is an educational, yet fun arts and craft activity for both you and your young children to do together. This crafts idea is beneficial for preschoolers, Kindergartners, as well as children who are autistic / on the spectrum / or those who have sensory disorders. (even older children enjoy it). I have a friend with an Autistic child and this game is very similar to the way she had to teach her child the alphabet since he wasn’t able to learn the alphabet through sight since he was more into sensory and tactile learning techniques. As a warning, this craft might cause random bursts of laughter from both you and your child. Comment to tell us how your child reacts to this fun tactile game and craft. Enjoy.

Have the child close his eyes and feel letters to guess for Alphabet Letters Tactile Guessing Game Craft
Photographer: Marind

How to Make an Alphabet Letters Tactile Guessing Game with Your Preschoolers or Autistic Children

[ad#ahc]

CRAFTS MATERIALS NEEDED:

Gather Crafts Materials for Alphabet Letters Tactile Guessing Game Craft

Gather the crafts materials that you will need for this arts and crafts project / game.

-Magic Markers

-A spare piece of rug, cloth, felt, or craft foam

-Heavy duty scissors

Trace the Alphabet Letters on the Felt for Alphabet Letters Tactile Guessing Game Craft

1-Trace the letters you want on the material that you chose to use (rug / cloth / felt / foam) with the marker.

Now cut the alphabet letters out of the felt for Alphabet Letters Tactile Guessing Game Craft

2-Now cut out the letters as shown above.

Have the Kids Feel the Letters for Alphabet Letters Tactile Guessing Game Craft

3-Now for the fun part. Have the kids feel the letters and say the letters at the same time. Do this two or three time until they have memorized the letters.

Have the child close his eyes and feel letters to guess for Alphabet Letters Tactile Guessing Game Craft

4-Now for the game. Have the children close their eyes. Spread the letters out on the floor. Then say a letter. Have students crawl around and feel the letters till they find the correct letter. Now, have the winning student tell the other kids to close their eyes. The winning student now repeats the game. Make sure you do this a few times, it’s fun. The students should be able to play the game on their own.

Here Are Some Other Links That You Might Find Useful – It is important to practice learning all the letters of the ABC! As you do your child will become familiar with each individual letter.

Lowercase and Uppercase Floor Alphabet Game –  An uppercase and lowercase floor alphabet game for younger kids and preschoolers.

Technorati Tags: , , , , , , , , , , , , , ,

Bunny Ears Easter Bunny Craft Idea for Kids

finished-finished handprint easter bunny craft for kids

Easter is not so far away anymore so I thought that I would share with you an adorable Easter bunny craft for young children and preschoolers … even older children will enjoy it. With just a few craft materials that are probably already around your house, you will be able to make a cute Easter Bunny with your child’s own handprints.  Not only will this be a fun arts and crafts activity, but it can also be a keepsake to keep forever. You will be surprised at how fast your little one’s hands grow when you look back at past crafts activities. Have fun.

Easter Bunny Ears Craft for Kids : How to Make an Easter Bunny with Your Child’s Handprints

[ad]

Crafts Supplies to Make Easter Bunny with Ears with Child's Handprints

Gather all the Craft Supplies That You Will Need:

1. Construction paper, White, Pink, Green, Blue, Yellow
2. Scissors
3. Glue
4. Markers or crayons
5. Cotton ball

Trace Your Kids Handprints for Easter Bunny Handprints Craft for Kids

1 – Sit your son or daughter down at a table and then trace his hand on a clean piece of paper. Now cut out your child’s hand onto a white piece of construction paper as shown in the picture above.

2 Handprints Easter Bunny Craft for Children

2 – Now, take out a piece of pink construction paper. Out of this pink piece of construction paper, cut out 2 “slivers” that fit into the first 2 fingers of the white handprint and then glue them  into place.

3- Handprint Easter Bunny Craft for Kids

3 – The next step is to fold over the third and fourth fingers and the thumb and then glue them  into place.

4- handprint Easter Bunny craft for kids

4 – Now cut the bottom of the green piece of paper and the corner of the yellow piece of paper to make the grass and the sun.

5- handprint easter bunny craft for kids

5 – Cut a white oval for the bunny’s body. Then glue the hand as the bunny’s head, and the cotton ball as the bunny’s cottontail. Now you can glue the grass and sun into place.

6-handprint easter bunny craft for kids

6 – Now that all of the above steps are complete you can draw a cute bunny face. You might have to wait if the bunny’s face is still wet from the glue.

finished-finished handprint easter bunny craft for kids

7 – You can add cut-out paper Easter eggs or other Easter themed decorations if you want!!

You are finished. Take a look at your child’s masterpiece and enjoy. Happy Easter!

HERE ARE EVEN MORE EASTER CRAFTS

HERE ARE EVEN MORE EASTER BUNNY CRAFTS

Tip Junkie : Easter & Spring Craft Ideas

Gardner Family Times : Easter Craft

Easter Egg Bunny Craft

Easter Craft: Fun with Felt Easter Decorations

Easter Craft : Bunny Napkin Rings

Our Easter Crafts Project

Cute Easter Bunny Craft Toy

Easter Craft Ideas

Technorati Tags: , , , , , , , , , ,

Easter Basket Craft for Kids : How to Make an Easter Basket with Your Child’s Handprints

Finished Handprint Easter Basket Crafts Activity Project for Kids

Easter is quickly coming so I thought that I would share with you a cute craft for young children and preschoolers … even older children will enjoy it. With just a few craft materials that are probably already around your house, you will be able to make a cute Easter Basket  with your child’s own handprints.  Not only will this be a fun arts and crafts activity, but it can also be a keepsake to keep forever. You will be surprised at how fast your little one’s hands grow when you look back at past crafts activities. Have fun.

Easter Basket Craft for Kids : How to Make an Easter Basket with Your Child’s Handprints

Kids Handprint Easter Basket Craft for Kids and Preschoolers

(1) Get Your Crafts Materials Out and Ready to use. You will Need:

– Tape or Glue
– Scissors
– Craft Foam, Colored Construction Paper, or Card Stock
– Crayons, Colored Pencils, Markers
– Other items to decorate your Easter Basket with, such as glitter, sequins, ribbons, etc.

[ad]

Have Your Child Trace His Hand on the Colored Construction Paper

(2) Now have your child trace his hand on the color paper or craft foam. If your child is too young to trace his hand then you can help him.  Cut out paper or foam hands is many different colors.

Lay Out 8 or More Colored Construction Paper Hands

(3) Cut out at least 8 or more paper / foam hands. You will need at least this many handprints to make your Easter Basket’s handle.

Cut Out an Easter Basket Shape

(4) Now take a brown piece of construction paper, craft foam, or cardstock and draw a basket shape like the picture above.

Cut Out a Hole in the Easter Basket Craft for the Easter Eggs to Go

(5) Now cut out the Easter Basket shape and then with black marker outline where the top of the basket is (like in the picture above). Now take the scissor and cut out a hole in the middle of the basket (like in the picture above). This is where the Easter Eggs will sit.

Put Your Child's Handprints in a layered fashion to make the easter basket handle

(6) Now start laying out the handprints in a rainbow shape to form the Easter Basket’s handle.

Tape or Glue the Child's handprints into an easter basket handle

(7) Now tape or glue the handprints in place.

Place the Easter Eggs into the Easter Basket's slit or hole.

(8) Cut out some Easter Egg Shapes from the construction paper, card stock, or craft foam. Now place them in the Easter basket’s hole.

Finished Handprint Easter Basket Crafts Activity Project for Kids

(9) Now you have completed the Handprint Easter Basket Crafts Idea for Kids.

I hope that you and your children had a lot of fun making this handprint Easter basket crafts project.

Technorati Tags: , , , , , , , , , , ,