How to Make a Paper Doily Heart Valentine Box

Valentines Day will be here in just a few weeks.  And, with Valentines Day comes Valentines Cards from family and friends.  What better way to store these loving and wonderful Valentines Cards than to store them in a beautifully festive Valentine Box.  Today I’m going to show you how to make a Paper Doily Heart Valentine Box.  This box is a perfect way to keep your Valentines Cards for years to come.  A perfect way to keep your memories from this special Valentines Day.  Imagine how fun it would be to look back on this Valentines Day years later and read all your Valentines Cards.  It would be wonderful.  So, let’s get started.

Check out our other Valentines Day Crafts.


How to Make a Paper Doily Heart Valentine Box


Materials Needed

Printer

Paper or Cardstock

Doily

Scissors

Paste, Glue or Tape


Click on one of the Templates below to make larger and to print.  You can choose to use the colored template or if you prefer to trace your template on Cardboard or Card Stock print off the second template.

Colored Template


Color template for Doily Heart Box


Template to Trace


Paper template to trace valentine box


Step 1


Print out template.


Print out template.


Step 2


Cut out template


Cut out template.


Step 3


Fold box and paste or tape together.


Fold box and paste or tape together.


Step 4


Now glue a doily around the outside


Now glue a doily around the outside to give it a lacy valentine look.

And, that’s it….. you just made a Paper Doily Heart Valentine Box.  Isn’t it adorable?  How did your Valentine Box turn out?  Let me know in the comments below.  And, don’t forget to take a picture of your finished Valentine Box and add it to the comment…. I would love to see it.

Technorati Tags: , , , , , , , , , , , , , ,

14 Fun Snowflake Crafts for Winter


14 Fun Snowflake Crafts for Winter


Winter is well on its way….. and when you think of Winter what do you think of?  I know what I think of….. snow.  So, in honor of Winter and snow today’s craft is all about snowflakes.  I scoured the internet to find some really awesome snowflake crafts.  And, there are some really cool snowflake crafts out there.  So, today I’m going to present you with 14 Fun Snowflake Crafts for Winter.  For some of these crafts you will need to know how to make a snowflake, so check out these great snowflake patterns.

Check out some of our Snowflake Crafts.

14 Fun Snowflake Crafts for Winter

(1) Multicolor Snowflake Wreath


Snowflake Wreath


Here is a really cute Wreath perfect for the Winter Season.  It turns out quite beautiful.  BHG shows you how you too can make this Winter Wreath.  Made from left over card stock from all those Christmas Cards you got during the Christmas Season.  What a great way to recycle those greeting cards.


(2) Sparkly Snowflake


Sparkly Snowflake


Now this is a beautiful snowflake craft.  Made from long and short sparkly beads this winter craft turns out lovely…. perfect for decorating the house for this Winter Season.  CountryLiving shows you how to do this Snowflake craft step-by-step…. you have to scroll to Slide #2.


(3) Wooden Snowflake


Wooden Snowflake


Now this is a fun Snowflake Craft perfect for the youngest of crafters.  Made from Popsicle sticks, glue and fake snow…. this craft promises to be a lot of fun.  You can learn how to do this craft by going to Crafts-for-all-Seasons.


(4) Pipe Cleaner Snowflake


Pipe Cleaner Snowflake


What child doesn’t like a pipe cleaner craft.  Pipe Cleaners are just so much fun to make crafts with…. and this Snowflake craft is no exception.  Check out the MarthaStewart site to get the entire step-by-step tutorial.


(5) Snowflake Window Clings


Snowflake Window Clings


I don’t know about your kids, but I know my kids love window clings.  They love decorating the windows for all the Holidays.  Well, winter is no exception.  Imagine decorating the windows with Snowflakes that you and your child made yourself.  FamilyFun shows you how to achieve this.


(6) Recycled Plastic Ring Snowflake Craft


Recycled Plastic Ring Snowflake Craft


Here is a very cool snowflake craft because it is made out of recycled materials.  FreeKidsCrafts shows you how you can take those 6-pak ring holders from soda and make them into beautiful snowflakes that you can hang proudly this Winter Season.


(7) Q-Tip Snowflakes


Q-Tip Snowflakes


It’s hard to believe that something made from Q-Tips can turn out so beautifully…. but it does.  Made with Q-Tips, glitter and glue this Snowflake craft is not only fun…. but it also turns out perfect to hang up this Winter Season.  Check out AllFreeCrafts for the step-by-step “how-to”.


(8) Snowflake Puzzle


Snowflake Puzzle


Here is an interesting Snowflake Craft.   This easy craft is made from Popsicle sticks and black marker.  BusyBeeKidsCrafts shows you how you can simply take a Snowflake picture and make it into a puzzle just by adding it to a row of Popsicle sticks and cutting the picture with scissors…… this makes it into a puzzle.  Simply mix up the pieces and try to put it back together again.


(9) Woven Snowflake


Woven Snowflake


This woven snowflake is a great craft for kids of all ages.  Made from Popsicle sticks, yarn and glue…. you will have this snowflake craft finished in no time.  Make a few and decorate the whole house this Winter Season.  Check out the “how-to’s” of this craft over at ActivityVillage.


(10) Button Snowflakes


Button Snowflakes


HandMadeBeginnings has the right idea for a Snowflake Craft…. make the snowflakes out of Popsicle sticks and Buttons.  The idea is so easy, but yet very creative.  I love it.  And, I love how the snowflakes turn out.  She explains how taking these snowflakes and adding string will make for great window decorations.  I have to agree.


(11) String Snowflake


String Snowflake


Here is a great snowflake craft for the older children.  Basically this snowflake is made from white string and some fabric stiffener, but look how magnificent it turns out.  The snowflake craft would look awesome hanging in a window by itself or in groups.  Check out FreeCraftUnlimited for the details.


(12) Sparkly Snowflake Mobile


Sparkly Snowflake Mobile


This is a cool craft that when done looks great hung from the ceiling.  Made from paper and glitter this snowflake craft will look festive this Winter Season hung in a classroom or even a child’s bedroom.  Get all the craft details over at Kaboose.


(13) Beaded Snowflake


Beaded Snowflake


I love, love, love this snowflake craft.   I dig that they used pearls in this craft….. it just gives this beaded snowflake a really wintery look.  I found this craft over at Crafts-For-All-Seasons and they did a really beautiful job putting this snowflake craft together.  Make sure to check it out.


(14) Lace Snowflakes


Lace Snowflakes


Who would have thought that Lace can look so much like a snowflake?  But, when put together the right way…. it really does.  AllFreeCrafts did a really great job coming up with this snowflake craft.   They simply added lace to wire to create this beautiful snowflake.  Now, that’s creative.

Technorati Tags: , , , , , , ,

How to Make a Thread Painting Greeting Card

I am going to show you how to make a greeting card that is so unique from any other you have seen or made before.  It uses a new technique called thread painting and it is so much fun.  This greeting card is perfect for anytime of year and for any family or friend.  They are sure to love it.  So, let’s get started on this thread painting craft.  Not only will you enjoy doing it…. the result of this craft is always a surprise.

Check out our other Greeting Card crafts.


Materials Needed

Thread

Paint

Card Paper / Card Stock

Scissors

Paintbrush


Step 1

Take white card paper and fold it into two.


Step 2

Take a piece of twine/ thread and paint it in any color you like. You can also use more than one color as done below. Make sure that the paint does not dry completely.


Step 3

Place the wet thread/ twine between the folded card in any design you like. Leave one end of the thread coming out of the folded paper.


Step 4

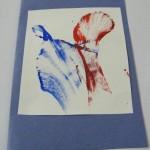
Fold the paper on it, put a book or weight on the paper to keep the 2 papers close together and pull the loose end of the thread. When you completely pull the thread out, take off the book, and open the folded paper. You will see a design like this.


Step 5

Cut off one half of the paper and glue it on a different colored folded card paper to make a greeting card.


Write a special message inside and give it to someone you love.  I’d love to see how neat your Thread Painting Greeting Card turned out.  Take a picture of it and post it in the comments below…. I’d love to see it.

Here is our video on How to Make a Thread Painting Greeting Card .

Technorati Tags: , , , , , , , ,

How to Make Egg Head Christmas People

I have a fun craft for you today.  I’m going to show you how to make Egg Head Christmas People out of eggshells.  You can even make an entire series of egg people…Use your creativity to make angels, shepherds, Mary and Joseph. These make great tabletop Christmas decorations…. so make a few.  Let’s get started.

Check out our other Christmas Crafts.


Image005


Craft materials required:

Thick purple paper

Thick brown colored paper (or any skin color shade)

Egg Shell

Glitter Glue

Gold Paper

Permanent Marker

Glue

Scissors


Image006


Step 1

Take a square piece of purple paper.


Image105


Step 2

Roll it to make a cone and glue the end to hold it in place. Cut the edge to form a perfect cone that will stand as shown.


Image106


Step 3

Wash and dry an egg which has been broken from one end and emptied as shown.


Image100


Step 4

Cut a strip of gold paper and snip the edges to make a zigzag design as shown.


Image104


Step 5

Roll the strip and glue. Glue the crown to the top of the head as shown.


Image107


Step 6

Take a small strip of brown card paper and fold in the center as shown.


Image001


Step 7

Glue the ends of the paper strip to the cone as shown to form folded hands.


Image002


Step 8

Draw a face using a permanent marker.


Image003


Step 9

Decorate the clothes with glitter glue as shown


Image005


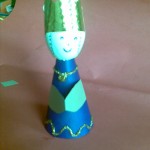
Isn’t it beautiful?  Who would have thought that this could have been started from an eggshell.  But, of course it was.  Please let me know in the comments below how your Egg Head Christmas People turned out.  And, don’t forget to share a picture in your comment…. I’d love to see them.

Technorati Tags: , , , , , , , , , ,

How to Make a Clothespin Airplane Toy

Oh boy….. do I have a fun craft for you today.  I’m going to show you how to make a Clothespin Airplane Toy.  This airplane toy actually works.  After the craft is done the child will simply hold on to the airplane’s string and start running…. the airplane should start flying.  Doesn’t that sound like fun?  Almost as much fun as it will be putting the craft together.  So, let’s get started.

Check out our other Toy Crafts.


How to Make a Clothespin Airplane Toy


Materials Needed

Old Fashioned Clothespin

6-inch Stick or Pencil

Stiff Pieces of Paper

String

Crayons, Markers or Stickers

Glue


Step 1


Force a 6-inch stick (pencil size) into the groove of an old-fashioned clothespin.


Force a 6-inch stick (pencil size) into the groove of an old-fashioned clothespin.


Step 2


Glue stiff pieces of paper 3 inches square on both ends of the stick for wings.


Glue stiff pieces of paper 3 inches square on both ends of the stick for wings.


Step 3


Tie a string to the head of the clothespin.


Tie a string to the head of the clothespin.


Step 4


You can choose to make designs or place stickers on the wings.


You can choose to make designs or place stickers on the wings.


Finished Clothespin Airplane Toy


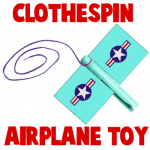
To fly the plane, the child holds the string and runs.

So, there you go…. you have your very own airplane toy that you made yourself.  How fun is that?!  How did you decorate your plane?  Let me know in the comments below.  You can even take a picture of the airplane toy and share it in the comments.  I would love to see it.

Technorati Tags: , , , , , , , ,

How to Make Pencil Shavings Art

Today I have a fun and creative craft for you.  I’m going to teach you how to make beautiful pictures out of pencil shavings. Its a great way to recycle waste. These pictures are amazing enough to frame and hang up on your wall. The simple steps to make it are given below, but be careful while you do this activity… pencil shavings are delicate and need to be handled gently.  So, let’s get started.


Craft materials required:

Pencils – Different Colors

Pencil Sharpener

Scissors

Glue

Card Stock


Step 1

Collect pencil shavings after sharpening your pencils.


Step 2

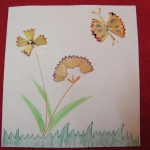
You can arrange 4 small bits like this and glue them in place to make one type of flower.


Step 3

You can glue two larger pieces together to make a butterfly.


Step 4

Decorate the butterfly as shown.


Step 5

Glue all the pencil shavings and decorate the rest of the picture with color pencils.


That’s it.  The craft is an easy one, but the results are big.  Every Pencil Shavings Artwork is an original, so don’t stop after one…. keep making them.  They make great gifts for the Holiday season.

Technorati Tags: , , , , , , ,

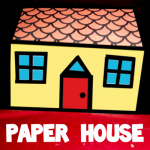
How to Make a Paper House

I have a fun craft for you today.  I am going to show you how to make a paper house.  This is a craft for a child of any age…. young or old.  For a sturdier house instead of using paper use Card Stock.  If you don’t have any Card Stock at home…. no biggie.  Simply print the template on regular paper and glue it onto the back of a cereal box and cut it to the size of the paper.  So, let’s get started.


How to Make a Paper House


Materials Needed

Paper (for a sturdier house use Card Stock or paste the printed paper on cereal box cardboard)

Printer

Scissors

Glue


Below are the printable templates.  You can choose to print the template with the house already on it or print out the blank template and draw your own house.

Click on the image to make larger and to print.


Paper house template


Blank Paper House Template


Blank paper house template


Step 1


Print out template.


Print out template.


Step 2


Cut template out of paper.


Cut template out of paper.  Before you start folding on the lines…. decide whether you want your windows and doors to open and close.  If you do move to the optional instructions below before folding on the red lines.


To Make Door Open *Optional*


To make the door open...


To make the door open… you can cut the top, bottom and right line… then fold on the crease.


To Make Windows Open *Optional*


To make the windows open...


To make the windows open… you can cut the top, bottom and center line… then fold on the crease.


Step 3


cut the lines


Now, once you have folded the red lines like the above picture in step #2… cut the lines like shown above.


This is what your house should look like now.


This is what your house should look like now.


Step 4


Fold B and C together and glue to hold.


Fold B and C together and glue to hold…


Your house should look like this now


… like this.


Step 5


Now, glue D and A together.


Now, glue D and A together.


Finished paper house.


Your house should look a lot like my house above.  Keep in mind, I did not make my windows and door open and close.  Did you?  How did your house turn out?  Take a picture and share it with me in the comments below.

Technorati Tags: , , , , , ,

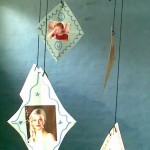
How to Make a Thanksgiving Mobile

Thanksgiving is a time to remember how blessed we are to have such great family and friends.  Well, with that being said…. I have a creative way for you to remind yourself how thankful you are…. a Thanksgiving Mobile.  With pictures and your thankful thoughts you are sure to show everyone how blessed you truly are.  So, let’s get started.

Check out our other Thanksgiving Crafts.


Image141


Materials Needed

Thick Colored Paper

Markers

Thread

Ribbon

Scissors

Glue

Pictures of Family and Friends (you can use old photos or print outs)


Image131


Step 1

Cut out pieces of paper in different colored and sized diamonds as shown.


Image130


Step 2

Stick pictures on one side. I’m also really thankful for the great times of celebrations I had this year with my family and friends, so I made a special diamond that says ” celebrations”.  You can also add some like these.


Image133


Step 3

On the other side of the diamond, write the name of the person and decorate as shown.


Image134


Step 4

Using a pencil in the center, roll some colored paper into 2 tight rolls as shown. Glue the ends and then, remove the pencil.


Image132


Step 5

Cross the two rolls at the center and tie them together as shown.


Image149


Step 6

Punch a hole on the top end of the diamond and tie a piece of thread. Attach the thread to the paper rolls as shown.


Image135


Step 7

Tie a piece of ribbon to the top of the paper rolls as shown right in the middle.


Image136


Step 8

Now, hang up your mobile.


Image141


What a unique craft, huh?!  No one will have a Thanksgiving craft like yours.  Your family and friends are sure to love it.  Where did you hang your Thanksgiving Mobile?  Let me know in the comments below.

Technorati Tags: , , , , , , , , , ,

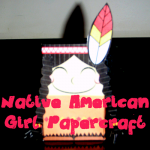
How to Make a Indian Girl out of Paper with Printable Foldable Papercraft

Well, earlier today we made an Indian boy out of paper.  It would make sense that I would post an Indian girl next.  If you thought that, you are absolutely right.  Indians were a very important part of Thanksgiving happening at all.  They taught the Pilgrims how to grow food…. before that the Pilgrims were starving to death.  After the Indians taught the Pilgrims how to grow food they had an amazing harvest and that’s how Thanksgiving came about.  So, let’s make our Indian Girl out of paper.

Check out our other Thanksgiving Crafts.


How to Make a Indian Girl out of Paper


Materials Needed

Paper or Card Stock

Scissors

Glue


Below is the printable template.  Click on the image to make larger and to print.


Printable template for Indian girl paper craft


How To:

Cut out items on template… make sure to cut around tabs carefully.  Fold on lines and glue tabs together.  When dry glue feathers on to headband.  Glue the braids on the sides of the head.  Your finished Indian girl should look like this.


This is how your Indian Girl should look.


Isn’t the Indian girl adorable.  She is very cute.  And, she will look even better beside all the Thanksgiving characters like the TurkeyPilgrim girl, Pilgrim boy and the Indian boy Make sure to do them all.


Make all 4 Thanksgiving Characters


Technorati Tags: , , , , , , , , , , , ,

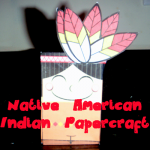
How to Make an Indian Boy out of Paper with Printable Foldable Papercraft

The Indians were an important part of the first Thanksgiving.  After all, if it wasn’t for the Indians the Pilgrims wouldn’t have had such a wonderful Harvest back in 1621.  And, if there was no harvest there would have been no Thanksgiving.  The Indians taught the Pilgrims how, what and where to plant the food.  So, today I’m going to show you how to make an Indian Boy out of Paper.

Check out our other Thanksgiving Crafts.


How to Make an Indian Boy out of Paper


Materials Needed

Paper or Card Stock

Scissors

Glue


Below is the printable template.  Click on the image to make larger and to print.


Printable template for Indian boy paper craft


How To:

Cut out items on template… make sure to cut around tabs carefully.  Fold on lines and glue tabs together.  When dry glue feathers on to headband.  Your finished Indian boy should look like this.


Your finished Indian boy should look like this.


What a cute little Indian boy.  Now, make sure to come back to make all the Thanksgiving Characters.  We will make a Pilgrim boy, Pilgrim girl as well as an Indian girl.  All your characters will look so cute together on Thanksgiving. And you might even want to do the foldable  papercraft  Turkey.


All your characters will look so cute together on Thanksgiving.


Technorati Tags: , , , , , , , , , , , ,

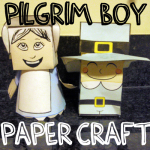
How to Make a Pilgrim Boy out of Paper with Printable Foldable Papercraft

I have a paper craft that is perfect for kids of all ages…. even the youngest of children.  In this post I’m going to show you how to make a Pilgrim Boy out of Paper.  Just use the included template, cut and paste… that’s it.  And, don’t be fooled by the ease of this craft…. it is still a ton of fun.  Keep an eye out for other Thanksgiving paper crafts as I will be showing you how to make a Pilgrim girl, Indian boy and even an Indian girl.

Check out our other Thanksgiving Crafts.


How to Make a Pilgrim Boy out of Paper


Materials Needed

Paper or Cardstock

Scissors

Glue


Below are the printable templates.  Click on the image to make larger and to print.

Template Page 1


Pilgrim boy Template 1


Template Page 2


Pilgrim boy Template 2


Step 1

Print off Template Page 1.  Cut out Pilgrim boy being very careful to cut around all the tabs.  Fold on lines and glue tabs together.  Let dry.


Step 2

Print off Template Page 2.  Cut out Hat being very careful to cut around all the tabs.  Fold on lines and glue tabs together.  Then glue blue tabs to bottom of hat.  When hat is dry… push down over top of Pilgrim’s head.


Finished Pilgrim boy paper craft


See, you did it!!  Now, you have a Pilgrim boy.  Make sure to come back because I will be showing you how to make a Pilgrim girl, Indian boy and an Indian girl.  All together it will make for a great Thanksgiving decoration. And you might even want to do the foldable papercraft Turkey.


Make all 4 crafts for Thanksgiving


Technorati Tags: , , , , , , , , , , , ,

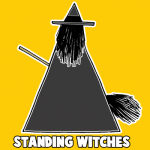
How to Make Standing Witches for Halloween

Today we are going to be making Standing Witches for Halloween.  You can choose to either use the printable template and cardstock to make this item.  Or, if you want the craft to be a little more difficult you can use such items as yarn, sticks, construction paper and straw to make the Standing Witch from scratch.  The choice is your own.

Check out our other Halloween Crafts.


How to Make Standing Witches for Halloween


Materials Needed

Heavy Paper, Cardstock or Construction Paper

Yarn or Thread (optional)

Stick & Straw (optional)

Paste

Scissors


If you choose follow the printable template below to make the Standing Witch.

CLICK ON IMAGE TO OPEN IT UP BIGGER TO PRINT.


Printable template for standing witches


Directions:

  1. In making this standing Halloween witch, the hat and coat must be drawn on rather heavy paper for it to stand well (with normal paper, if you walk past the witches, they might blow over from the slight breeze otherwise). So you can use normal paper if you want to, but I suggest tracing the patterns onto cardstock or construction paper.
  2. As for the hair, you can either use the template provided or use yarn or thread for the hair. It could even be straw pasted on the other side of the hat to hang down. The back of the witch is shown, so that no face will be needed to be drawn. This was intentional, as younger children might get frustrated with drawing a face. Plus, I think the silhouette of the witch is quite nice to look at. If the hair is made with thread, a vertical strip of paper will be needed to fasten the hat at a proper distance from the body, so it might just be easier to use the drawing of hair or paste the thread / yarn on to the cut-out-drawn hair provided. The lower part of the hair will then be pasted on to the coat.
  3. The broom may be made either of two ways. A stick may serve as the handle with a few real broom straws tied in a bunch at the end, or the broom may merely be cut from the paper template given like the rest of the witch. It is then pasted on the other side (front side, really) so that it would seem as if the witch was carrying it in her hand.

So, as you can see you can make this Standing Witch as easy or as complicated as you would like.  This is great for all different age groups.

Technorati Tags: , , , , , ,

How to Make Opening and Closing Halloween Skulls

It’s time for a very spooky craft.  We are about to make an opening and closing Halloween skull.  Halloween skulls are scary, but can be a little boring.  These clever Halloween skulls are different because they actually move…. and they are easy to make.

Check out our other Halloween Crafts.


How to Make Opening and Closing Halloween Skulls


Materials Needed:

Card Stock or Cardboard

Scissors

Paper Fasteners


Materials needed


Follow the template below to make the two piece skull.

CLICK ON IMAGE TO OPEN IT UP BIGGER TO PRINT.


printable-template-opening-jaw-skull


(or if you want to…learn how to draw the very same skull with my cartoon skull drawing tutorial.)

Step 1


Cut slits in jaw and holes in skull


Cut slits in jaw and holes in skull cheek bones.


Step 2


 Put paper fastener in cheek bone hole and then thru slit in jaw slit


Put paper fastener in cheek bone hole and then thru slit in jaw slit.


Step 3


 Close fasteners in back of skull


Close fasteners in back of skull.


Step 4


This is what the craft looks like with the jaw closed


This is what the craft looks like with the jaw closed.


Step 5


This is what the craft looks like with the jaw opened


This is what the craft looks like with the jaw opened…. CREEPY!!


How to Make Opening and Closing Halloween Skulls


I told you the craft was easy!!  But, the ease of this craft does not take away from the fact that you have one scary and creepy opening and closing Halloween Skull.  Why not make a few and decorate your entire house.  Now THAT would be spooky.

Here is our video on How to Make an Opening & Closing Halloween Skull

Technorati Tags: , , , , ,