How to Make Rubber band Powered Toy Dump Trucks and Cars Lesson

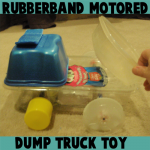
Today we will show you how to make a rubber band motored dump truck, cars, or other vehicles. It is much easier than you think it would be and it is a lot of fun figuring out ways to make it roll faster or just smoother. If you like a challenge, then go on and find out how to make this rubber band powered vehicle.

How to Make Rubber band Powered Toy Dump Trucks and Cars Lesson


How to Make Rubber band Powered Toy Dump Trucks and Cars Lesson

Crafts Materials Needed

– Plastic Container or Cardboard Box
– Rubber Bands
(optional) Glue Gun (Parental Supervision or Help)
– If can’t use glue gun, then other glue
– Electrical Tape or Duct Tape or Strong Tape
– Old Markers for the Axles (parts that hold the wheels) (however, you can use chopsticks or something else if you want)
– Materials for Wheels (I used Spray Butter Caps and VCR Spools but you can use plastic caps or something else)
– Materials for Top of Truck and Dump Truck Part (I used Disposable plastic and styrofoam containers from around my house)

Step 1 (If You Want to Use VCR Spools)


How to Make Rubber band Powered Toy Dump Trucks and Cars Lesson


Make sure this is a VCR tape that isn’t used any more!! Rewind the tape. Take the screws out of the VCR tape.


How to Make Rubber band Powered Toy Dump Trucks and Cars Lesson


Open up the VCR tape and take out the 2 white / clear spools. You need to take the tape off of the wheels….this is annoying but these are amazing wheels!

These are what the wheels look like now.


Step 2


If you are using old markers for the axles then glue 2 together.

Step 3


Now glue the cap part to the inside of one of the vcr spools.

Step 4


Now poke 2 holes in the truck’s base (mine is a large plastic container).

Make these holes opposite of each other for the back wheels.

Step 5


Now stick the markers through these holes…make sure that the markers looks like they go through the container evenly.

Step 6


Now glue another cap on the end of the marker that doesn’t have a wheel yet. After that is glued, glue the last vcr spool on to that cap.

Step 7


Now lets make the front wheels. I used butter spray caps. Glue the bottom of a marker to the center of the cap.

Glue another marker to the top of the first marker.

Step 8


Now the side that needs a wheel will have a cap on it. Since the cap has a hole in it, I couldn’t get it to glue down to the spray butter cap. But it glued VERY well when I first put electrical tape on the cap and THEN glued it. Try this and hopefully it will work great for you.

Step 9


I then took electrical tape and secured all of the markers together  – just in case.

Step 10


Now cut a hole in the front of the car. I secured the hole with electrical tape so that the hole wouldn’t get bigger with use.

Step 11


Now for the rubber band part of the tutorial. Take a few rubber bands…I used 3. You will need to connect them together like I did above. You loop one around another rubber band and then you pull it through its own self, and then you pull…look at the above pictures to help you.

Do this with all 4 rubber bands.

Step 12


Now wrap it around the markers and pull it through itself.


Electrical tape the rubber band on the back axle.

Then pull it to the front of the car and tie it a few times to make sure that it is secure.

Step 13


To make sure that the car works (before adding to its looks)…get onto the floor (might only work on the rugs if your wooden floors are slippery) and roll the back wheels towards yourself as you crawl backwards. When you feel tension and it feels like it is harder to use, then let go…it should drive all by itself.

Step 14


Now put the plastic cap on the container and then glue the front of the truck onto the surface of the container (in my case I used a mushroom container).

Step 15


I cut out the front of the mushroom container so my kids  can put people in there.

Step 16


To make a dump truck, just tape a plastic container (or cardboard box) on to the back of the truck, but only tape it on the side that is closest to the back of the truck. Now you have a dump truck.


See….

Step 17


How to Make Rubber band Powered Toy Dump Trucks and Cars Lesson


If you want to, you can paint it or draw on it. I also placed the cut-out window part for a decoration on the top of the truck.

I hope that you had fun like I did!

Technorati Tags: , , , , , , , , , , , ,

How to Make Simple Pinball Machine with Recycled Materials Crafts Project for Kids

This is a super cool crafts activity that we are going to do today. If you love playing pinball, then you will love making this simple machine…a pinball machine. Just recycle some old stuff from around your house … such as a cardboard box, pins, paper towel roll, a marble, and you will have your own handmade game / toy to play with.

You Might Also Enjoy : Making Pinball Toy from VHS Tape


How to Make Simple Pinball Machine with Recycled Materials Crafts Project for Kids


How to Make Simple Pinball Machine with Recycled Materials Crafts Project for Kids

Crafts Materials Needed

– Cardboard Box

– Extra Piece of Cardboard

– Some Thin Cardboard…Like from a Cereal Box

– Tape

– Glue

– Rubber Bands

– Strong Cardboard Tube (about 6 inches long)

– Pencil

– If you want to decorate it – decorative paper

– ruler

– marble or ball-like candy

Optional Materials to Use for Obstacles

– pins, straws, bottle caps, bottle, paper fastener, other household items (use your creativity)

Step 1


Step 1 : Making Cardboard Box Pinball Machines


Take your cardboard tube and trace 2 circles with it. Then cut them out about 1/4 inch smaller than the circle you traced.


Step 2 : Making Cardboard Box Pinball Machines


Cut Out these two circles….like I said, a bit smaller than you had traced them at.

Step 2


Step 3 : Making Cardboard Box Pinball Machines


Glue these 2 circles together.


Step 3


Step 4 : Making Cardboard Box Pinball Machines


Tape these circles to the eraser-side of the pencil. Tape it VERY well by taping it around the base of the pencil too.

Step 4


Step 5 : Making Cardboard Box Pinball Machines


Now take out 4 rubber bands, any size…just make sure that they are sturdy rubber bands. You are going to tie them all together by following the 3 steps above. Just put one end of a rubber band through another rubber band (#1) and then pull this rubber band through itself (#2) and then pull (#3).


Step 5.5 : Making Cardboard Box Pinball Machines


Link all 4 of these rubber bands together using this method.

Step 5


Step 6 : Making Cardboard Box Pinball Machines


Now take the cardboard tube out and poke a hole through it with a scissor 1 inch from the bottom. Do the same thing on the other side of the cardboard tube.


Step 6.1 : Making Cardboard Box Pinball Machines


Just showing you that I poked the hold in it with a scissor. Do the same thing on the opposite side.

Step 6


Step 6.2 : Making Cardboard Box Pinball Machines


Now pull the rubber bands through both ends of the tube so that it looks like the picture above.

Step 7


Step 7 : Construction Pinball Simple Machine Activity for Children


Now tie very loose knots on both ends of the rubber band chain…one on either end of the cardboard tube.

Step 8


Step 8 : Construction Pinball Simple Machine Activity for Children


Now pull the pencil-circles piece through the cardboard tube, making sure to avoid the rubber bands. While the cardboard circles are at the top… pull 2 rubber band loops over the pencil. Do one on the left and then the one on the right.

Step 9


Step 9 : Construction Pinball Simple Machine Activity for Children


Cut 2 inches out of the box on the bottom right. I decorated my box with cool paper, but you don’t need to.

Step 10


Step 10 : Construction Pinball Simple Machine Activity for Children


Cut out a piece of cardboard that is about half the length of the pinball box. The width of the cardboard should be about an inch higher than the height of the pinball box. Draw a line where the height of the pinball box would be, as I did above. Then cut slits in the cardboard like I did above, in the portion of the cardboard to the right of this line.


Step 10.1 : Construction Pinball Simple Machine Activity for Children


Now bend on this line.


Step 10.2 : Construction Pinball Simple Machine Activity for Children


Glue it on the left side of the opening in the box. Glue at bottom and also glue it to the side of the box, where it touches the pinball box.

Step 11


Step 11 : Construction Pinball Simple Machine Activity for Children


Cut a thin piece of cardboard that is about 1 and a half times the width of the pinball box. It should be the same height of your pinball box. Now cut slits on the right and left side of this cardboard.


Step 11.2 : Construction Pinball Simple Machine Activity for Children


Now paste it to both sides of the box.

Step 12


Step 12 : Construction Pinball Simple Machine Activity for Children


Cut another piece of cardboard that is about 1 and a half times the width of your pinball box….it should be about 2 to 2 and a half inches high. Now cut slits all down the bottom of this piece of cardboard.


Step 712.1 : Construction Pinball Simple Machine Activity for Children


Turn the pinball box over. Now bend and fold the cardboard piece that you just cut to look like the picture above. This is going to be the stand for your pinball machine so that it is tilted. Glue this stand on the bottom of the box (at the back of the box).

Step 13


Step 13 : Construction Pinball Simple Machine Activity for Children


Measure about 3/4 inches up the bottom of the pinball box. Cut a hole half way up the height of the box, at the point your measured 3/4 inches.  Then also cut a hole on the barrier.

UNTIE THE LOOSE KNOTS IN THE RUBBER BANDS ON EITHER SIDE OF THE CARDBOARD TUBE!!

Then put the cardboard tube cannon into the 2 inches gap in the box….and then put the rubber bands through each of the holes.

Double knot on both sides.

Step 14


Cut hole and put notches in the side of the box


So first make your flipper with cardboard or Popsicle sticks and. I taped mine with red duct tape to make it look nicer.

We are going to cut a hole in the pinball box to put the flipper in. Use your judgment, depending on your box, on where you want to place the flipper.

Then Make a notch at the top and bottom of this hole to fit the flipper in securely.


Step 14 : Construction Pinball Simple Machine Activity for Children


I put the flipper in. Make sure that it works properly. If this doesn’t work properly for you…use a paper fastener. Directions are in this tutorial that I found on the net.

Step 15


Step 15.1 : Construction Pinball Simple Machine Activity for Children


Cut a long and thin strip of cardboard.


how to make an envelope fold


Fan Fold it…Fold forwards, then backwards, then forwards, then backwards….


Step 15.2 : Construction Pinball Simple Machine Activity for Children


Until it looks like this.


Step 15 : Construction Pinball Simple Machine Activity for Children


Now touch the first strip to the last strip and it turns into a star. Glue it together. To hook it to your pinball machine…use a sewing pin / doll pin and stick it in the center of it. Now when a marble hits it, it spins.

Step 16


Step 16 : Construction Pinball Simple Machine Activity for Children


To make some good barriers, use doll pins or sewing pins and stick them just far enough from each other that the marble will fit through, but make it move in different directions.

Step 17


Step 17 : Construction Pinball Simple Machine Activity for Children


Cut a 2 inch piece of cardboard out and cut strips out like I did above.


Step 17.1 : Construction Pinball Simple Machine Activity for Children


Now fold and glue it at the bottom of the pinball box, like I did in the picture.


Step 17.2 : Construction Pinball Simple Machine Activity for Children


Paste another one like the previous one…do a 3rd or 4th one too if you want to.

Step 18


Step 17.3 : Construction Pinball Simple Machine Activity for Children


I put a piece of decorative paper in each half circle.

Step 19


Step 17.4 : Construction Pinball Simple Machine Activity for Children


Put a score in each of them too. These don’t have to be just at the bottom…they can be anywhere on the pinball board.

Use Your Creativity to Make More Obstacles


How to Make Simple Pinball Machine with Recycled Materials Crafts Project for Kids


I didn’t quite finish it because this is where YOUR creativity comes in. We can post your ideas here.

You Might Also Enjoy Our Other Crafts Tutorial : Making Pinball Toy from VHS Tape

I found a few other Pinball Making Tutorials Online that will give you some great ideas. Read them below

How to Make a Simple Pinball Machine

FETCH! Pinball Wizard

Design Your Own Pinball Machine.

Use Your Creativity to Make More Obstacles

Fire the marble out of the cannon / plunger by lowering the pencil a bit, putting the marble in the top of the cannon, and then pull the pencil down, and let go. Now hit the flipper to keep the ball up in the air longer. Write the number of points that you get with each turn down on a piece of paper. However…make your pinball machine the way that you WANT it to be…no the way that I want mine to be like.

Have fun!

Technorati Tags: , , , , , , , , , , , , ,

How to Make Cardboard Tubes Log Cabin for Abe Lincoln on Presidents Day

Well it is going to be February in 2 hours, so I figured that I would put up a Toy Log Cabin Craft Building craft to celebrate Abraham Lincoln’s birthday. Why? Because it is Presisents Day soon. Just use paper and cardboard tubes / rolls and then just connect them together easily.


How to Make Cardboard Tubes Log Cabin for Abe Lincoln on Presidents Day


How to Make Cardboard Tubes Log Cabin for Abe Lincoln on Presidents Day

Crafts Materials Needed

– Paper Towel Rolls
– Toilet Paper Rolls
– Construction Paper or Card Stock
– Scissors

Step 1


Step 1 : Making Paper Towel Roll Log Cabin Craft for Kids


First off, take a piece of construction paper and cut 3 or so long strips out. These will be used to connect the tubes (logs) together.

Step 2


Step 2 : Making Paper Towel Roll Log Cabin Craft for Kids


Fold the pieces of construction paper, these will be the corners of the log cabin to hold the tubes together.


Step 3


Step 2.5 : Making Paper Towel Roll Log Cabin Craft for Kids


For all of the cardboard tubes….make slits parallel to each other…as you see in the picture above.

Step 4


Step 3 : Making Toilet Paper Roll Log Cabin Craft for Kids


Here is a picture illustrating how to put the log cabin together…take the piece of folded paper…and stick the cardboard tube onto the piece of paper by inserting the paper into the slits that are on the tubes.

Step 5


Step 4 : Making Toilet Paper Roll Log Cabin Craft for Kids


Here is one of the folded pieces of paper (corner pieces) with 6 tubes on it. This shows you how we will build the log cabin. You don’t have to follow my directions…lay out the cabin the way that you want to.

Step 6


Step 5 : Making Toilet Paper Roll Log Cabin Craft for Kids


This is how you make windows and doors….you can use toilet paper rolls for the parts around the doors and windows…and use long, paper towel rolls for logs that have to go all the way across the structure.

Step 7


Step 6 : Making Toilet Paper Roll Log Cabin Craft for Kids


Use an entire piece of paper for the roof and then just place it within the four corners of your log cabin house.

Step 8


How to Make Cardboard Tubes Log Cabin for Abe Lincoln on Presidents Day


I hope that you enjoyed this building arts and crafts project to help celebrate Abraham Lincoln’s birthday for Presidents’ Day.

Technorati Tags: , , , , , , , , , , , , , , ,

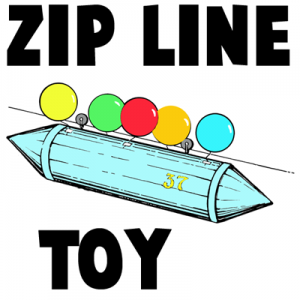
How to Make a Mini Zip Line Moving Toy Crafts Idea for Kids

This is a really cool toy idea…one that can be changed for a lot of different variations of moving toys. This is an air ship / space ship zip line moving toy. Find out how to make this zip line toy that zips and moves, by reading the step by step, illustrated instructions below in our crafts project tutorial. Have fun.


How to Make a Mini Zip Line Moving Toy Crafts Idea for Kids


How to Make a Mini Zip Line Moving Toy Crafts Idea for Kids

Crafts Materials Needed

-Poster Board
– Paper Clips
– Sewing Bobbin
– Paste
– Staples (optional)
– Balloons (optional)
– Tape (Optional)


How to Make a Mini Zip Line Moving Toy Crafts Idea for Kids


This is a labeled image of the craft that we are going to be making today. Find the more detailed instructions below.

Step 1


fold poster board into a tube


The dimensions of the poster board are just a suggestion…use any size that you have. Roll poster board into a tube shape and glue and staple. If you don’t have staples…just use glue.


Step 2


For the cone shapes at the end of our air ship, use a paper plate (or any type of disposable plate). All you have to do is cut a triangle in the plate and the fold like you see in the image below. You can also cut out triangles on the ends of the plate … but not necessary if you are in a hurry.

Step 3


how to make toy zipline space ship


Fold the paper plates into cones and paste them to the poster board. At the top of the poster board I start showing you how to make the wheels for the zip line. Detailed instructions are below.

Step 4


bobbin and paper clip zip line craft


Take a paper clip, thread it through one side of the bobbin and then bend it OVER the bobbin and around it to form a letter ‘J’ like you see in the illustration above.

Step 5


bobbin and paper clip zip line craft


Now take the ‘J’ part of the paper clip and thread it through the poster board and bend it over to make sure that they stay fastened to the air space ship.

Step 6


How to Make a Mini Zip Line Moving Toy Crafts Idea for Kids


If you have balloons, tape them to the top of the airship. Now just take string / cord and attach it to two different places….one of the attachments should be higher than the other attachment. Make sure that the string is taught (tight). Now just put the bobbins on top of the string and let it go for a lot of fun!

Technorati Tags: , , , , , , , , , , ,

How to Make a Boy Scouts Memo Holder Crafts Activity

Laura from Dacian Moon Handmade will show you today how to make something simple and fun: a memo for Boy Scouts. Now the boys can have a special place where they can write important Scout related topics down .


How to Make a Boy Scouts Memo Holder Crafts Activity

CRAFTS MATERIALS NEEDED:

– paper (not too thin)
– scissors
– clothespin
– glue
– paints
– paintbrush
– pencil


Step 1.

First of all, we paint the clothespin blue (actually we will paint only the upper part – the one that pins). We will give it several layers of paint, until it looks good. Let it dry well.


Step 2.

Next, we cut a piece of paper with the width of 2/3 of the clothespin.


Step 3.

Draw a circle (let a little bit of space from the corner)


Then draw another circle, smaller, inside the forst one.


And draw a “fleur de lys” symbol in the center.


The last thing we need on our drawing to have the scouts logo is the name, so write: Boy Scouts of America.


Step 4.

Cut out the logo like in the next photo.


Cut another piece of paper identical with the first one. You can write your name on it or ”be prepared”


Step. 5

Take one of the paper pieces and apply a layer of glue on it’s back side …


… and place the clothespin on it, with the painted part up.


Then glue the other piece of paper on top of them.


Step 6.

Now you can play with paints and give it a friendly look 🙂


Technorati Tags: , , , , , , , , , ,

How to Fold a Paper Jet Airplane with Folding Pictures and Directions

Today, we will show you how to fold a paper airplane jet. There are 7 illustrated steps, that are also lettered to make it as easy to follow as possible for kids and others. You might want to actually letter your paper to make it easier for you to follow. Ask for your parents help if you can’t follow the pictures. Have fun.


How to Fold a Paper Jet Airplane with Folding Pictures and Directions


How to Fold a Paper Jet Airplane with Folding Pictures and Directions

Step 1


Step 1 : Folding Origami Paper Jet Airplanes Arts and Crafts Project


(1) Fold Your Paper in Half

Step 2


Step 2 : Folding Origami Paper Jet Airplanes Arts and Crafts Project


(2) Open Your Paper and Bring ‘A’ to Center Fold and Crease.

Step 3


Step 3 : Folding Origami Paper Jet Airplanes Arts and Crafts Project


(3) Bring ‘B’ to center fold and crease. Now bring ‘D’ over to the center fold and crease on line ‘C’-‘E’.


3b


Step 4


Step 4 : Folding Origami Paper Jet Airplanes Arts and Crafts Project


(4) Bring ‘G’ over to center fold and crease on line ‘C’ – ‘F’.

Step 5


Step 5 : Folding Origami Paper Jet Airplanes Arts and Crafts Project


(5) Your shape now looks like this. Leave it in this position.

Step 6


Step 6 : Folding Origami Paper Jet Airplanes Arts and Crafts Project


(6) Now fold along line ‘C’ to ‘H’ so that ‘E’ falls on ‘F’.

Step 7


Step 7 : Folding Origami Paper Jet Airplanes Arts and Crafts Project


(7) Place your shape in position shown in picture above. Bring ‘E’ down to ‘H’ so edges meet. Crease along line ‘C’ – ‘I’. Turn shape over. Fold top edge down to bottom edge in the same way.

Technorati Tags: , , , , , , , , , , ,

How to Make a Toy Soldiers Parachute with a Paper Napkin Crafts Idea

Today we will show you how to make a toy parachute for your toy soldiers. If you don’t want to hook this to a toy soldier, you can use a cork instead.  It’s fun to make a parachute and more fun to see it float downward as a real parachute does. It’s easy to make, too.


How to Make a Toy Soldiers Parachute with a Paper Napkin Crafts Idea


How to Make a Toy Soldiers Parachute with a Paper Napkin Crafts Idea

Crafts Materials Needed:

– Paper Napkin
– 4 Lengths of String, each 12 inches long
– Cork


Crafts Materials Needed:


Step 1


Tie a piece of string to each of the 4 corners of the napkin.


Ask your Mom or Dad for a paper napkin. Then find 4 lengths of string, each 12 inches long. Also find a small cork (ask your Mom or Dad if they have one that you can have). Tie a piece of string to each of the 4 corners of the napkin.

Step 2


Then tie the loose ends of the strings around the cork.


Then tie the loose ends of the strings around the cork. Later on you can hook it to a toy soldier or guy…but first use the cork to see if it works.


How to Play With Your Toy Soldier Guy’s Parachute


How to Play With Your Toy Soldier Guy's Parachute


Ask your Mom or Dad if it is okay that you stand on a chair. If so, find a chair, stand on it, hold the parachute by the middle of the top of the napkin, then drop it. Down, down it will float the floor. If you aren’t allowed to stand on a chair, then toss it up in the air and sometimes this works just as well.


How to Play With Your Toy Soldier Guy's Parachute


How to Play With Your Toy Soldier Guy's Parachute


Technorati Tags: , , , , , , ,

Make a Robot Costume for Halloween with Arts and Crafts Idea

Any boy or girl can become a mechanical robot costume for Halloween and Trick-or-Treating with the aid of two packing cases and a little work. There is only one precaution, do your “scaring of friends and family” in a safe place if you can not see properly out of your mask. If you are going to use this costume for trick-or-treating, MAKE SURE THAT YOU CAN SEE PROPERLY. Otherwise, Do not attempt to walk off the sidewalk or cross a street while wearing your robot costume unless your Mom / Dad/ Grandparents / etc are with you to hold your hand while crossing the street.


How to Make a Robot Costume with Cardboard Boxes for Halloween Costume

CRAFTS MATERIALS THAT YOU WILL NEED:

To make a robot costume, you will need the following materials.

– Large cardboard carton / box to fit from your shoulders to below your waist line

– Small cardboard carton / box to fit over your head

– Over-sized workman’s gloves

– Paints

– Paint brushes

– Crayons

– Scissors

Step 1

Remove the lids or covers off of both cartons and throw them away as you will not need them.

Step 2


Start with the larger of the two cartons / boxes. Cut a hole in the top large enough to get your head through.

Step 3

Cut 2 arm holes in the sides of the box / carton, near the top for your arms.

Step 4

Now take the smaller box. Cut out a slot, about 8 inches long and 2 inches wide, in the front of the carton at your eye level.

Step 5

Decorate the costume with outer space designs, in paints or crayons.

How to Put Your Robot Costume On

To put on the robot costume, hold the body carton high over your head, and slip your head and arms through the proper holes. The body carton should rest comfortably on your shoulders. Slip the smaller carton over your head. Your eyes should be able to focus through the slot. Pull a pair of workman’s gloves over your hands and you are ready to have a little fun scaring your friends.

PLEASE READ BEFORE WEARING ON TRICK OR TREAT

If you are going to use this costume for trick-or-treating, MAKE SURE THAT YOU CAN SEE PROPERLY. Otherwise, Do not attempt to walk off the sidewalk or cross a street while wearing your robot costume unless your Mom / Dad/ Grandparents / etc are with you to hold your hand while crossing the street.

Technorati Tags: , , , , , , , , , , , , , , , ,

How to Make a Native American / Indian Headdress Headband Costume

This is a really cute idea to make a Native American Indian Headdress for a Costume or to just play dress up. This is easy enough for kids 8 years and older to make themselves. Find the instructions below.


Make Native American Indian Headdress for Halloween Costume

CRAFTS MATERIALS THAT YOU WILL NEED:

-Corrugated Cardboard / Paper

– Ruler

– Scissors

– Feathers

– Red Crepe Paper

– Paste or Glue

– 2 Pronged Paper Fastener

STEP 1


From corrugated cardboard, cut a strip 1 & 1/2 inches wide and 2 inches longer than your head size.

STEP 2


Into the holes of the cardboard, stick feathers.

STEP 3

Then cover the outside of the headband with a strip of bright red crepe paper 2 inches wide and long enough to make long streamers.

STEP 4

Frill the edges of this strip of paper.

STEP 5

Paste in place.

STEP 6

Overlap ends of corrugated headband.

STEP 7

Punch a hole in each end.

STEP 8

Slip a 2-pronged paper fastener through these holes and spread the prongs to keep it in place.


Technorati Tags: , , , , , , , , , , ,

HOW TO MAKE CRAFTS PROJECT : TOTEM LETTER POLE

Make Totem Pole Mail & Notes Holder Gift for Dad’s Office on Father’s Day

This is a really cute idea to make a totem pole to hold letters and special notes. This would probably look really great in your Dad’s office…so why not make it for your Dad as a gift on Father’s Day? It is a tall totem pole of VIP’s handles letters, memos and notes. Find the instructions below.


Make Totem Pole Mail Holders Gift for Dad’s Office on Father’s Day

CRAFTS MATERIALS THAT YOU WILL NEED:

– Rubber Hose

– Scissor

– Paint or Glue

– Letters and Notes

HOW TO MAKE CRAFTS PROJECT : TOTEM LETTER POLE

Step #1


On a length of rubber garden hose cut downward slits every 1 & 1/2″ or so.

Step #2


Carve and paint on faces or glue on photos to identify each section.

Step #3

Arrange occupants in order of importance.


Your Dad can tack the totem pole on his bulletin board or wall and this totem pole and its’ creatures will put the bite on papers and letters according to what must be done first.

Technorati Tags: , , , , , , , , , , , , , , ,

Make Pull-Along Toy Snakes with Corks and String

Learn how to make your very own pull-along toy snake with the following instructions. It really turns out to be a really cool toy when finished. This is a great toy for boys…who tend to love to scare girls with these cork snakes. Find the directions below.

How to Make Pull-Along Toy Snakes with Corks and String Crafts Idea for Kids


Crafts Materials Needed:

– Corks (From 14 to 20 of Them)
– Strong String
– Large Mending Needle
– Sewing Pins
– Paint or Markers
– Need Mom or Dad to Cut a Mouth OR Paint on Face


There are harmless snakes on many farms, and you should have one in your collection. Make one from corks —from 14 to 20 of them if you want a long snake. The corks can be of different sizes, getting smaller towards the tail, or, if yours are all the same size, your Mom and Dad can cut some.


Use a strong string and a large mending needle to put the snake together. Start at the head, and let some knotted string dangle, as in the picture. When all the corks are strung together, cut a mouth and make two eyes from pins. For the final touch, paint the snake some real snake color.

Technorati Tags: , , , , , , , , , , , , , ,