How to make a Flower Necklace

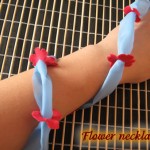
December is going to be here before we know it.  And, with December comes all the gift giving holidays.  Well, today I have a craft for you if you are looking to make a gift for a female.  In this post I’m going to show you how to make a flower necklace perfect for gift giving.  Made from red velvet and ribbon the necklace will be absolutely beautiful.  So, let’s begin the craft.

Check out our other Jewelry Crafts.

Laura from Dacian Moon Handmade will show you this craft step-by-step.


CRAFTS MATERIALS NEEDED

– a piece of red velvet (or denim or other fabric but it should stay stiff)
– ribbon
– scissors


Step 1

Cut a small rectangle of the red fabric (about 3 cm x 3 cm)


You will need 5 pieces.


Step 2

Take one piece and fold it in half…


… then again in half, to obtain a smaller rectangle.


Step 3

Cut a rounded corner, like in the picture…


… then cut the corners beside the rounded part.


Unfold. It will look like this.


Step 4

Fold it again and cut the remaining corner, to make a small hole in the middle of the flower.


Unfold.


Step 5

Repeat step 3 and 4 for the other red pieces.


Step 6

Take the blue ribbon and put it through the middle hole of the flowers.


Take care to let enough space between them. The flowers will stay where you place them because they are stiff and the hole in the middle is small. If they don’t stay, make a knot before the flower and another one after the flower.


Your flower cord is ready. You can use it as a necklace, belt, bracelet, hair adornment…


And, there you go.  You just made a beautiful gift for a loved one.  The real question is…. which lucky person are you going to give this necklace to?

Technorati Tags: , , , , , , ,

How to Make a Hearts Friendship Bracelet

If you love making friendship bracelets you are going to love this craft!!  I am going to show you how to make a Hearts Friendship Bracelet.  And, don’t worry….. I’m not going to show you a few steps and then send you off on your own.  No way…. I am going to show you every little step from the very beginning all the way to the point where you have mastered this heart friendship bracelet.  So, let’s get started.

Check out our V Shaped Arrows Friendship Bracelet and our other Friendship Bracelets


How to Make a Hearts Friendship Bracelet


Materials Needed

Embroidery Floss (preferred) or Yarn

Scissors

Optional – Cardboard

Optional – Doll Pins or Sewing Pins


Step 1

Measuring the Embroidery Thread for your Bracelets


Measuring the Embroidery Thread for your Bracelets


To measure the lengths of your threads, take a piece and hold it from your hand to your shoulder. This is one arm’s length of thread. However, you need 2 arms lengths for each thread, so just use the first arms length of thread to measure out a 2nd arms length. Look at the picture above to see how I folded the string over to get the 2nd arms length. Use this first string to measure out 3 more strings. You need 4 different colors for this bracelet.


Step 2


Find 2 different colors of strings.


Find 2 different colors of strings. You will need 2 threads from each color … each 2 arms lengths long. Put them each end to end and then smooth them out.


Step 3


Now fold the threads in half


Now fold the threads in half like in the picture above.


Step 4


We are now going to make a loop at the end to make a clasp type feature to tie the bracelet together


We are now going to make a loop at the end to make a clasp type feature to tie the bracelet together after it is done. Do this by holding the top of the string in a loop and then holding a bit down with your other hand, but keeping your index finger out. Then take the loop-holding hand and wrap the string around your index finger of the other hand.


Step 5


with the index finger hand, pinch the circle that was just created on the index finger


Now, with the index finger hand, pinch the circle that was just created on the index finger… pinch it where the threads cross.


Step 6


Now slip the circle off of the index finger.


Now slip the circle off of the index finger.


Step 7


Pull the loop through the pinched circle.


Pull the loop through the pinched circle.


This is what it looks like with a real picture.


This is what it looks like with a real picture.


Step 8

***TIP – THE WAY THAT IS EASIEST TO WORK***


The way it is easiest to work.


Before we start making our friendship bracelet, let me show you the way that I worked on this. I took a cut-out piece of cardboard, 2 pins, and a clip, and put them together like in the picture above. I took the clip and hooked it on the loop…to hold it down. I took the 2 pins to keep strings out of the way while I worked. It worked out AMAZINGLY. I wish I had done this when I was a child, I used to work with just tape and this works so much better.


Step 9


You should have 8 strings hanging out from the bottom of the loop. Spread them out like I did above


Okay, now lets start. You should have 8 strings hanging out from the bottom of the loop. Spread them out like I did above…like in a mirror image. In this project, we will call the strings on the left, the left strings. We will call the strings on the right, the right strings. It might help you to take some crayons or colored pencils and map out your colors on paper…just the way that I did above, so you don’t get confused.


Step 10


Now we will start on the left side strings.


Now we will start on the left side strings. Put the right-side strings up on the pin to get them out of the way. On the left side strings, we will go from left to right….so the pink string (string #1) will be the knotting string…in other words, the string that we will be making knots with. Form a letter ‘L’ with the pink string…as pictured above.


Step 11


Now tuck the pink #1 string under the pink #2 string and into gap between these 2 strings.


Now tuck the pink #1 string under the pink #2 string and into gap between these 2 strings. You are making a knot. Think of the way that you tie a knot on your shoe lace, however in this case, always make sure the knotting string (Pink #1) goes over and then under the string you are knotting over (Pink #2) before pulling.


Step 12


Now pull the pink #1 string up until a beautiful pink knot is made.


Now pull the pink #1 string up until a beautiful pink knot is made. Make sure to hold the pink #2 string down, so the other strings don’t get in the way while pulling.


Step 13


You can see your first knot in the picture above.


You can see your first knot in the picture above. Do the same exact thing over again to make a double knot.


Step 14


Now we will knot the pink #1 string over the blue #3 string since it is next in line.


Notice that you made 2 pink knots on the top of the pink #2 string. Notice that the pink #1 string is now in place #2. Now we will knot the pink #1 string over the blue #3 string since it is next in line.


Step 15


Knot the pink #1 string over the blue #3 string twice to make a double knot.


Knot the pink #1 string over the blue #3 string twice to make a double knot.


Step 16


Now we will knot pink #1 over blue #4 thread since it is next in line.


Now you can see that there are 2 pink knots on the blue #3 thread. Now we will knot pink #1 over blue #4 thread since it is next in line.


Step 17


Make the 2 knots over blue #4.


Make the 2 knots over blue #4.


Step 18


Now you can see the 2 pink knots on top of the blue #4.


Now you can see the 2 pink knots on top of the blue #4. You can now see that pink #1 is now in the fourth place.


Step 19


Now take all of the left-side strings and put them on the left pin to get them out of the way.


Now take all of the left-side strings and put them on the left pin to get them out of the way. Fan out the right-side strings in the correct order…in the mirror image that you created in step #9 of this tutorial.


Step 20


We will now be working on the right side strings.


We will now be working on the right side strings. We will be knotting pink string #1 (just like we did on the right). However, since we are working on the right side, when we make the letter L shape with the knotting thread (pink #1), the Letter L will be backwards…so just keep that in mind.


Step 21


Tuck string pink #1 under pink #2 and into gap between both strings


Tuck string pink #1 under pink #2 and into gap between both strings, because you are making a knot just like you did on the left side strings.


Step 22


Now pull thread pink #1 up until a knot is made, while holding pink #2 down.


Now pull thread pink #1 up until a knot is made, while holding pink #2 down.


Step 23


you made your first knot on the right side.


See, you made your first knot on the right side. Now make another knot to make a double knot.


Step 24


make a double knot with pink #1 over pink #2, blue #3, and blue #4 until pink #1 is all the way to the far left.


Now make a double knot with pink #1 over pink #2, blue #3, and blue #4 until pink #1 is all the way to the far left. This is just like you did on the left strings, but we are doing it on the right in the opposite direction(like in a mirror).


Step 25


we have to knot the 2 pink #1 strings together in the middle to make a ‘v’ shape.


Now we are done with the right side and we have to knot the 2 pink #1 strings together in the middle to make a ‘v’ shape. So Take pink #1 string off of the left side pin. Then you will have 2 pink threads on the left (see pic). You will now double knot pink Right #1 over Pink Left #1.


Step 26


In the pic above, on the left, I show you the double knot process of the 2 pink strings. On the right, I show you the Letter 'V' shape that has been made.


In the pic above, on the left, I show you the double knot process of the 2 pink strings. On the right, I show you the Letter ‘V’ shape that has been made.


Step 27


double knot pink #2 over blue #3 thread.


Now you will be putting all of the right side threads up on the pin and take down the left side threads to spread them out. We will now use pink #2 as the knotting string. So double knot pink #2 over blue #3 thread.


Step 28


Notice that the pink #2 string has moved to the 2nd spot.


As you see, you have made 2 pink knots on the blue #3 string. Notice that the pink #2 string has moved to the 2nd spot.


Step 29


We will be starting to make the blue heart now


This is where things get a little bit more confusing. We will be starting to make the blue heart now. Take string blue #4 and knot it over the pink #1 string (by making a backwards letter L shape) to make 2 blue knots.


Step 30


Now you can see 2 blue knots on top of pink string #1.


Now you can see 2 blue knots on top of pink string #1.


Step 31


Now we will be knotting blue #4 over pink #2 to make 2 more blue knots.


Now we will be knotting blue #4 over pink #2 to make 2 more blue knots.


Step 32


we will place all of the left side strings back on to the pin.


Now we will place all of the left side strings back on to the pin. We will be doing on the right side, what we just did on the left side.


Step 33


Double knot pink #2 over Blue #3.


Fan out the right side threads. Double knot pink #2 over Blue #3.


Step 34


Now double knot blue #4 thread back over pink #1 thread to make 2 blue knots.


Now double knot blue #4 thread back over pink #1 thread to make 2 blue knots.


Step 35


Now double knot blue #4 over pink #2 thread to make 2 more blue knots.


Now double knot blue #4 over pink #2 thread to make 2 more blue knots.


Step 36


we will be double knotting Right Blue #4 over Left Blue #4 Thread.


Now take the Left blue #4 thread off of the left side pin. Now we will be double knotting Right Blue #4 over Left Blue #4 Thread.


Step 37


Now place the right side strings on the pin and fan out the left sided pins.


Now place the right side strings on the pin and fan out the left sided pins.


Step 38


Now double knot blue #3 over pink #1.


We are working on the left strings now again. Now double knot blue #3 over pink #1.


Step 39


Double knot blue #3 over pink #2 and blue #4.


We know how to do this now, so I won’t baby you as much now. Double knot blue #3 over pink #2 and blue #4. You are now done with the left side again.


Step 40


Put left side threads up on pin.


Put left side threads up on pin. Take down right side strings and fan them out. Now double knot blue #3 over pink #1.


Step 41


Double knot blue #3 over pink #2 and blue #4.


Double knot blue #3 over pink #2 and blue #4. You are now done with the right side and it is time to tie the blue #3 threads together.


Step 42


Take the left side blue #3 off of the left side pin.


Take the left side blue #3 off of the left side pin. Then double knot Right blue #3 over Left blue #3.


Step 43


You made a heart shape.


Hooray! You made a heart shape. You went thru the pattern one full time now.


Step 44


You should repeat the pattern until you are done with the bracelet.


You should repeat the pattern until you are done with the bracelet. However, I will go thru part of the process quickly again. Put your right-sided threads up on the pin and take down the left threads. Double knot pink #1 over pink #2, blue #3, and blue #4. Pink #1 will now be on the far right.


Step 45


Now put the left strings on the pin and take the right strings down.


Now put the left strings on the pin and take the right strings down. Double knot pink #1 over pink #2, blue #3, and blue #4. Pink #1 will now be on the far left.


Step 46


You will now go to Step 27 and continue over and over again


You will now go to Step 27 and continue over and over again until you have a bracelet long enough to cover your friend’s wrist.


Finished illustrated hearts friendship bracelet


Finished hearts friendship bracelet


How did your Hearts Friendship Bracelet turn out?  Any friend would be proud to wear a bracelet like this.  Now, the real issue…. which friend are you going to give it to???   Hmmmmm…..

Technorati Tags: , , , , , , , , , , , ,

How to Make Woven Paper Bracelets

If you love making bracelets, but you are sick of making the same old bracelets all the time…. then I have the bracelet craft for you.  I am going to show you how to make woven paper bracelets that you can make for yourself or share with friends.  And, don’t worry… they are stronger than you might think.  These paper bracelets are woven with many, many different folds causing the bracelets to be quite strong.  So, let’s get started.

Check out our other Bracelet Crafts and Jewelry Crafts.


How to Make Woven Paper Bracelets


Materials Needed

2 Different Color Sheets of Paper

Tape or Glue

Ribbon

Scissors


Step 1


Cut 4 strips of paper that are about 10 inches long and a 1/4 inch wide


Cut 4 strips of paper that are about 10 inches long and a 1/4 inch wide… we used two different colors.


Step 2


Tape or glue 2 strips end to end twice


Tape or glue 2 strips end to end twice…. making the strips 20 inches long.


Step 3


Place one strip horizontal and the other in a letter 'V' around the first strip.


Place one strip horizontal and the other in a letter ‘V’ around the first strip.  Number them 1, 2, 3 and 4.


Step 4


Fold #4 over #3, so it is parallel with #2.


Fold #4 over #3, so it is parallel with #2.  (Like a number 11)


Step 5


Fold #1 behind #2 so it is parallel with #3.


Fold #1 behind #2 so it is parallel with #3.


Step 6


Now, push #1 in front of #4.


Now, push #1 in front of #4.


Step 7


Now, fold #3 over #1 so it is parallel with #2 and #4.


Now, fold #3 over #1 so it is parallel with #2 and #4.


Step 8


Now, fold #2 behind #4 and over #3 so it is parallel with #1.


Now, fold #2 behind #4 and over #3 so it is parallel with #1.


Step 9


Push #1 in front of #4.


Push #1 in front of #4.


Step 10


Fold #3 over #1 so it is parallel with #2 and #4.


Fold #3 over #1 so it is parallel with #2 and #4.


Step 11


Fold #2 behind #4 and over #3 so it is parallel with #1.


Fold #2 behind #4 and over #3 so it is parallel with #1.


Step 12


Fold #1 over #2.


Fold #1 over #2.


Step 13


Fold #4 under #3 and over #1.


Fold #4 under #3 and over #1.


Step 14


Continue this process until there is no more paper


Continue this process until there is no more paper, then… tape loose end together.


Step 15


Put ribbon through spaces to tie bracelet together.


Put ribbon through spaces to tie bracelet together.

Wow, doesn’t it look beautiful?!  Now, the question is…. are you going to keep it for yourself or give it to a friend?  Hmmmmm…. what are you going to do?

Technorati Tags: , , , , , , , ,

How to Make a Springy Paper Bracelet

I have a fun bracelet craft for you…. and the only materials you need for it can be found in your home.  I am going to show you how to make a springy paper bracelet made from colorful paper.  And, don’t think just because this bracelet is made out of paper that it is weak.  On the contrary, it is very strong.  The bracelet is made up of many, many folds in the paper making it very strong.  So, let’s get started.

Check out our other Bracelet Crafts and Jewelry Crafts.


How to Make a Springy Paper Bracelet


Materials Needed

2 Different Color Sheets of Paper

Glue or Tape

Scissors


Step 1


Cut 4 slits of paper from each color paper.


Cut 4 slits of paper from each color paper.  If you are using longer sheets of paper then just cut 3 slits of paper from each color paper.


Step 2


Glue or tape strips together end to end.


Glue or tape strips together end to end.


Step 3


Now, take the 2 different color strips of paper and glue or tape together at a 90 degree angle... like a letter "L".


Now, take the 2 different color strips of paper and glue or tape together at a 90 degree angle… like a letter “L”.


Step 4


Pull strip #1 over strip #2 and fold it over.


Pull strip #1 over strip #2 and fold it over.


Step 5


Now orange (#1) is folded over blue (#2).


Now orange (#1) is folded over blue (#2).


Step 6


Pull blue (#2) and fold #2 over orange (#1).


Pull blue (#2) and fold #2 over orange (#1).


Step 7


Now, blue (#2) is folded over orange (#1).


Now, blue (#2) is folded over orange (#1).


Step 8


Fold orange over blue (1 over 2).


Fold orange over blue (1 over 2).


Step 9


This is what it should look like with orange (#1) folded over blue (#2).


This is what it should look like with orange (#1) folded over blue (#2).


Step 10


Fold blue over orange (#2 over #1).


Fold blue over orange (#2 over #1).


Finished springy paper bracelet


Continue folding the bracelet in this way until it is the desired length you want.  Cut and either glue or tape.  That’s it.  You have a springy paper bracelet.  You can even make a necklace by making a longer one.  Keep it for yourself or give it to a friend.  They’ll love it.


Technorati Tags: , , , , , , , , , ,

How to Make Cardboard Beading Looms

I’m going to show you a great way to make beautiful beaded bracelets on your own.  We are going to make our very own Cardboard Beading Loom perfect for making awesome bracelets.  Do you have any idea who your first handmade beaded bracelet will go to?  How about your very best friend…. she’d love it!!

You Might Enjoy Our Other Friendship Bracelets Crafts Too


How to Make Cardboard Beading Looms


Materials Needed

Wide Box

Needle

Ruler

Pencil or Pen

Thread or Dental Floss

Scissors

Beads (Usually Perler Beads)


Materials Needed


Step 1


On both short sides of the box... mark off every quarter inch.


On both short sides of the box… mark off every quarter inch.


Step 2


Now cut the marks that you penciled off in the last step.


Now cut the marks that you penciled off in the last step.


Step 3


Push thread or floss into one of the notches that you cut.


Push thread or floss into one of the notches that you cut.  Then wrap it around to the next notch and push it into that one.  Then continue to wrap the floss around these 2 notches a few times to secure the floss to the box.


Step 4


Now pull the floss over to the notch that lies opposite to it on the other side of the box.


Now pull the floss over to the notch that lies opposite to it on the other side of the box.  Push the floss down into that notch so that the floss is taut (tightly secured).


Step 5


Now do this over and over again until you have the number of rows that you want.


Now do this over and over again until you have the number of rows that you want.  If you want your beaded bracelet or beaded creation to have 5 rows… then you need 6 strings… if you want 4 rows… then you need 5 strings across… etc.


Step 6


Then to make sure that the strings stay taut and secured, you will need to wrap the thread or floss around the next notch


Then to make sure that the strings stay taut and secured, you will need to wrap the thread or floss around the next notch, directly to the right of the last string… like you did on the first notch.


Step 7


With a second piece of thread or floss... you should thread a needle.


With a second piece of thread or floss… you should thread a needle.  Make sure the needle fits thru your beads before you use it… I learned that they hard way.


Step 8


Make sure that this 2nd string is at least 2 arms length... and then cut it off the spool.


Make sure that this 2nd string is at least 2 arms length… and then cut it off the spool.  Then tie it to the first string on the loom.  See how I tied it very close to the edge of the box?!  DON’T DO THIS.  This leaves no room for you to tie a clasp or knot on it.   TIE THE KNOT FURTHER DOWN THAN I DID.


Step 9


Since I have 4 strings... I can have 3 rows of beads.  So, place 3 beads onto your needle.


Since I have 4 strings… I can have 3 rows of beads.  So, place 3 beads onto your needle.


Step 10


Now pull the needle and beads under ALL of the strings.


Now pull the needle and beads under ALL of the strings.  Pull the needle thru beads so that the beads are now ON the string.


Step 11


Now push each between in between 2 strings and then push your fingers below the beads and strings ... pushing the beads up.


Now push each between in between 2 strings and then push your fingers below the beads and strings … pushing the beads up.  Then push the needle thru all the beads and pull thru.  The first row is the hardest row… so don’t get frustrated… because the rest of the rows will be much easier.  I didn’t get a good picture of this with the little beads so I am showing you this with bigger beads.


Step 12


Pull the thread thru and you have your first row.


Pull the thread thru and you have your first row.


Step 13


Again... put beads on the needle... Push it under ALL the threads.


Again… put beads on the needle… Push it under ALL the threads.  Pull all beads onto the thread and then push all beads in between 2 threads…which will be MUCH easier this time than the 1st time.


Step 14


Push the beads up with your fingers... then push the needle thru the beads.


Push the beads up with your fingers… then push the needle thru the beads.


Step 15


Continue doing this until it looks big enough.


Continue doing this until it looks big enough.


Step 16


Cut the floss at both ends.


Cut the floss at both ends.

Step 17


Tie a knot.


Tie a knot.


Step 18


Tie a knot.


Tie it around your friend’s wrist.

You just finished your first beautiful bracelet with your Cardboard Beading Loom.  Wasn’t it a lot of fun?  Now the only thing left to do is  find the perfect friend to give it to.  Or, keep it for yourself.

You Might Enjoy Our Other Friendship Bracelets Crafts Too

Technorati Tags: , , , , , , , , , , , , ,

How to make Ghost Earrings

Do you love Halloween like I do?  Do you love the dressing up and the scary Halloween characters?  Well good, today I have the craft for you.  Today I will show you how to make Ghost Earrings that you will surely enjoy wearing this Halloween….. and the future ones too.

Check out our other Halloween Crafts.

Tutorial offered by Laura from Dacian Moon Handmade . You will need help from an adult for this tutorial.


CRAFT MATERIALS NEEDED:

– night glow polymer clay
– eyes
– cutter
– toothpick
– jump-rings
– 2 earring hooks
– baking tray
– baking paper


Step 1

Take a piece of night glow polymer clay.


Cut it in half.


Condition it .

(Condition polymer clay by hand… simply mix it and squish it with your fingers. You may want to roll it into a log between your palms, fold it in half, and then roll again.)

Take the night glow polymer clay and make a ball of it and flatten it.


Squish an end between two fingers, like that.


Do the same with the other half.


Step 2

Using the toothpick or your nails…. make each ghost a mouth.


Make a hole on top of both ghosts…


… like that.


Step 3

Place them on the baking tray, and bake them according to the instructions on the polymer clay package (they depend on the brand you use: fimo, cernit, sculpey…, but usually it is one half  hour at 230 F or 110 C) – *Must have adult supervision.*


Let them cool down.


Step 4

Take one eye, remove the paper from its back…


And place it on its place.


Do the same with the other eye.


Do the same with the other ghost. Aren’t they cute?!


Step 5

Open one jump ring …


… and place it through the hole.


With it, link the ghost of the earring hook.

Do the same for the other and you have a pair of earrings that will glow in the night.


And, there you have it.  Two adorable earrings that will be so fun to wear this Halloween.

Technorati Tags: , , , , , , , , ,

How to make a Cute Ghost Brooch

My daughter loves breaking out the Halloween jewelry as soon as October hits.  She will wear all of her Halloween jewelry at the same time… she just loves Halloween so much.  One thing she didn’t have…. until now…. is a cute Halloween brooch to wear on her Fall coat.  This cute ghost brooch is perfect and she loves wearing it proudly for all to see.

Check out our other Halloween Crafts.

Tutorial offered by Laura from Dacian Moon Handmade.  You will need help from an adult for this tutorial.


CRAFT MATERIALS NEEDED:

– night glow polymer clay
– blue, red and pink polymer clay
– eyes
– cutter
– toothpick
– 1 brooch base
– baking tray
– baking paper


Step 1

Take a piece of night glow polymer clay.


Condition it .

(Condition polymer clay by hand… simply mix it and squish it with your fingers. You may want to roll it into a log between your palms, fold it in half, and then roll again).

Make a ball of it and flatten it, then squish an end between two fingers…


…like that.


Step 2

Turn it on its back… on the middle of it place the brooch base.


Put a small amount of night glow polymer clay on it, like in the picture. It will hold it in its place.


Step 3

Using the toothpick or your nails, make the ghost mouth.


Step 4

Take a small piece of blue polymer clay…


… and make a “snake” of it, moving your fingers back and forth like that.


When is ready, bend it…


… to make a “b”…


… then place it on the ghost, like this.


Do the same with the red polymer clay…


… and make an “o”


Place it near the “b” on the ghost.


With the pink polymer clay…


… make another “o”…


… and place it near the red “o”.


Step 5

We’ll use night glow again to make her hands.


Take a small piece and make it like that.


Place it on one side as it holds the pink “o”


Make another hand …


… and make her hold the “b”.


Step 6

Place it on the baking tray, and bake it according to the instructions on the polymer clay package (they depend on the brand you use: fimo, cernit, sculpey…, but usually it is one half hour at 230 F or 110 C)  ***Have an Adult help for this Step.***


Let it cool down.


Step 7

Take an eye and remove the paper on its back.


Place it where the eye belongs and do the same with the second eye.


Isn’t the Ghost Brooch adorable?  It will be so much fun to wear it this Halloween season…. almost as fun as it was to make.  Almost!!

Technorati Tags: , , , , , , , , ,

Make Autographed Friends Necklaces or Bracelets on Last Day of School or Camp

School is going to be over soon and you’ll be parted from your friends until Autumn comes again. Wouldn’t be nice to keep them with you during the entire Summer? Laura from Dacian Moon Handmade will show you how 🙂 You can get your friend’s autographs and wear them around your arm or neck all Summer along with a bracelet or necklace craft.


How to Make Autographed Friends Necklaces on Last Day of School or Camp


How to Make Autographed Friends Necklaces on Last Day of School or Camp

CRAFTS MATERIALS NEEDED:

– orange paper
– yellow paper
– scissors
– string and needles
– red crystals
– line
– colored pens


Step 1.

Trace 6 parallel lines on the papers at 1 cm.


Cut them out, so you’ll have 6 orange strips of paper and 6 yellow.


Step 2.

Take a strip of paper. Start at one end and make a hoop around the other end. Take care that one of the ends to be short.


Slip through your short end into the hoop …


… and pull, but not too hard.


Turn it  and fold the short end inside.


Turn it over again.


Now you must wrap around the pentagon…


… following the red arrow…


… like this.


And again, on the dotted line, following the red arrow,


And again…


… until is just a small piece left.


Now, you’re going to tuck that little left over tail into the body of the star.


If is too long – as in my case – you can cut it with your scissors.


That’s the star.


Step 3.

It’s time to puff it 😀

Using your nail or a sharp edge, press in, half-way between two points. Make sure you are totally perpendicular to the paper.


The first star is ready.


Make stars from the other paper strips too.


Step 4.

Take the string and make a knot at 10 cm from the end. This will let you tie the necklace when is ready.


Step 5.

Let’s start to assemble the necklace. Start with a crystal – use the needle to add it…


… then add an orange star…


… a crystal, an yellow star and so on.


Step 6.

It’s almost ready. Take care to finish with a crystal and make a knot near it.


Step 7.

Now it’s fun. Ask your friends to write their name on the stars.


That way you’ll have them with you all the summer 😉


Technorati Tags: , , , , , , , , , , , ,

Make a Graduation Cap and Diploma Pin in 6 Easy Steps

Graduation day is very important and everyone wants to remember it. What are the symbols of this day? The graduation cap / hat and diploma … so, we will add those to our badge pin 🙂 Learn how to make the following decorative pin in easy step by step lesson below … great for the last day of school.

This step by step tutorial is offered by Laura from Dacian Moon Handmade


How to Make Graduation Cap and Diploma Pin Badges


How to Make Graduation Cap and Diploma Pin Badges

CRAFTS MATERIALS NEEDED:

– toothpick
– polymer clay : blue – or any other colour for the background – and black – for the hat
– cutter
– 1 badge base
– thread
– craft glue
– white paper
– baking paper
– baking tray


Step 1

Condition polymer clay by hand, simply mix it and squish it with your fingers. You may want to roll it into a log between your palms, fold it in half, and then roll again.

Fortunately, in the summer the clay is conditioning more easily.

So, condition the blue clay.


Let a small part and from the rest make a ball and flatten it on a piece of baking paper.


Step 2

Place the badge base on it and press.


Use the small piece of blue clay to fix the base…


… like that.


Turn it with the face to you.


Step 3

Take a half of the black clay, condition it…


… and make a almost square form of it.


Place it to the blue background.


From the other half, make a triangle form and place it on top of the square.


Step 4

Place the on the baking tray, and bake it accordingly to the instructions on the polymer clay package (they depend on the brand you use: fimo, cernit, sculpey…, but usually is one half of hour at 230 F or 110 C)

Let it cool down.


Step 5

Take the white paper, make a roll with it…


…and tie it with the thread.


Step 6

Apply a layer of glue on it…


…and place it on the badge.

You can use paints to add the year or anything else you want.


Now you can wear it on your shirt or coat proudly. Congratulations!

Technorati Tags: , , , , , , , , ,

How To Make Pot Of Gold Pins for Saint Patricks Day Arts and Crafts Project

Everyone wants their very own pot of gold decorative pins for St. Patrick’s Day and kids will love having their own to wear. Learn how to make this pot of gold and shamrock out of crafts foam.

You Might Like Our Other St. Patrick’s Day Crafts Ideas


How To Make Pot Of Gold Pins for Saint Patrick's Day Arts and Crafts Project


How To Make Pot Of Gold Pins for Saint Patrick’s Day Arts and Crafts Project

Pot Of Gold Pin Supplies

*Black craft foam

*Yellow or gold craft foam

*(optionol)Green craft foam

*Glue

*Latch pin, usually comes in bags from the craft stores

*Scissors

Pot Of Gold Instructions

Step 1


 ​Cut the black c​raft foam into the shape of a pot.


Cut the black c​raft foam into the shape of a pot by first cutting out a circle.


And then an oval


And then an oval


 And then putting them together to form a pot.


And then gluing them together to form a pot.

Step 2


Cut a smaller oval, in gold / yellow this time and glue it to the black oval...in the center.


Cut a smaller oval, in gold / yellow this time and glue it to the black oval…in the center.


Step 3


Cut the yellow or gold craft foam into small circles for the coins.


Cut the yellow or gold craft foam into small circles for the coins. Glue them on the pot.


Step 4


cut out 4 hearts


We are going to cut out 4 small hearts to make a 4 leaf clover. To do this fold a green scap piece of paper in half length-wise…and draw half of a heart on the fold…then cut it out.


4 hearts


Step 5


glue 4 hearts onto the pot


Glue the 4 hearts on to the pot as pictured above.

Step 6


cut out a stem


Cut out a letter ‘J’ to make the green stem.

Step 7


Take a pin and glue the pot and the gold onto the pin.


Take a pin and glue the pot and the gold onto the pin.


And you are done…now you have something festive and green to wear on St. Patrick’s Day.

You Might Like Our Other St. Patrick’s Day Crafts Ideas

Technorati Tags: , , , , , , , , ,

How to Make V Shaped Arrows Friendship Bracelets Illustrated Instructions

Today I will show you how to make this amazing friendship bracelet that has a letter ‘v’ pattern within it. This bracelet pattern is a bit more difficult than normal friendship bracelet instructions, so you will need a free afternoon to make this one. If you are still interested, find the illustrated instructions below.

You Might Enjoy Our Other Friendship Bracelets Crafts Too


How to Make V Shaped Arrows Friendship Bracelets Illustrated Instructions


How to Make V Shaped Arrows Friendship Bracelets Illustrated Instructions

Crafts Materials Needed

– Embroidery Floss (preferred) or Yarn
– Scissors
– Optional – Cardboard
– Optional – Doll Pins or Sewing Pins

Measuring the Embroidery Thread for your Bracelets


Step 1 : Making Flat Wide Friendship Bracelets Craft for Girls


To measure the lengths of your threads, take a piece and hold it from your hand to your shoulder. This is one arm’s length of thread. However, you need 2 arms lengths for each thread, so just use the first arms length of thread to measure out a 2nd arms length. Look at the picture above to see how I folded the string over to get the 2nd arms length.

Use this first string to measure out 3 more strings. You need 4 different colors for this bracelet.

Step 2


Step 2 : Making Flat Wide Friendship Bracelets Craft for Girls


Find 4 different colors of strings…each 2 arms lengths. Put them each end to end and then smooth them out.


Step 3


Step 3 : Making Flat Wide Friendship Bracelets Craft for Girls


Now fold the threads in half like in the picture above.

Step 4


Step 4 : Making Flat Wide Friendship Bracelets Craft for Girls


We are now going to make a loop at the end to make a clasp type feature to tie the bracelet together after it is done.

Do this by holding the top of the string in a loop and then holding a bit down with your other hand, but keeping your index finger out.

Then take the loop-holding hand and wrap the string around your index finger of the other hand.

Step 5


Step 5 : Making Flat Wide Friendship Bracelets Craft for Girls


Now, with the index finger hand, pinch the circle that was just created on the index finger….pinch it where the threads cross.

Step 6


Step 6 : Making Flat Wide Friendship Bracelets Craft for Girls


Now slip the circle off of the index finger.

Step 7


Step 7 : Making Flat Wide Friendship Bracelets Craft for Girls


Pull the loop through the pinched circle.


What my loop looks like


This is what my loop looks like.

The Way That is Easiest to Work


Before we start making our friendship bracelet, let me show you the way that I worked on this. I took a cut-out piece of cardboard, 2 pins, and a clip, and put them together like in the picture above. I took the clip and hooked it on the loop…to hold it down. I took the 2 pins to keep strings out of the way while I worked. It worked out AMAZINGLY. I wish I had done this when I was a child, I used to work with just tape and this works so much better.

Step 9


Step 8 : Making Flat Wide Friendship Bracelets Craft for Girls


Okay, now lets start. You should have 8 strings hanging out from the bottom of the loop. Spread them out like I did above…like in a mirror image.

In this project, we will call the strings on the left, the left strings. We will call the strings on the right, the right strings.

It might help you to take some crayons or colored pencils and map out your colors on paper…just the way that I did above, so you don’t get confused.

Step 10


Step 9 : Making Flat Wide Friendship Bracelets Craft for Girls


Now we will start on the left side strings. Put the right-side strings up on the pin to get them out of the way.

On the left side strings, we will go from left to right….so the blue string (string #1) will be the knotting string…in other words, the string that we will be making knots with.

Form a letter ‘L’ with the blue string…as pictured above.

Step 11


Step 10 : Making Flat Wide Friendship Bracelets Craft for Girls


Now tuck the blue string under the yellow string and into gap between blue and yellow string. You are making a knot, think of the way that you tie a knot on your show lace, however in this case, always make sure the knotting string (blue) goes over and then under the string you are knotting over (yellow) before pulling.

Step 12


Step 11 : How to Make V Shaped Arrowhead Bracelets


Now pull the blue string up until a beautiful blue knot is made. Make sure to hold the yellow string down, and that not other strings get in the way while pulling.

Step 13


Step 12 : How to Make V Shaped Arrowhead Bracelets


Do the same exact thing over again to make a double knot.

Step 14


Step 13 : How to Make V Shaped Arrowhead Bracelets


Notice that you made 2 blue knots on the top of the yellow string.

Notice that the blue string is now in place #2.

Now we will knot the blue string over the pink string.

Step 15


Step 14 : How to Make V Shaped Arrowhead Bracelets


Knot the blue string over the pink string twice to make a double knot.

Step 16


Step 15 : How to Make V Shaped Arrowhead Bracelets


Now this is what your friendship bracelet will look like now.

Step 17


Step 16 : How to Make V Shaped Arrowhead Bracelets


Now double knot the blue string over the orange string.

Step 18


Step 17 : How to Make V Shaped Arrowhead Bracelets


Now this is what your friendship bracelet will look like. You are now done with the left-side strings…for now.

Step 19


Step 18 : How to Make V Shaped Arrowhead Bracelets


Now take all of the left-side strings and put them on the left pin to get them out of the way.

Fan out the right-side strings in the correct order…in the mirror image that you created in step #9 of this tutorial.

Step 20


Now we are making knots with the blue string on the right side.

This time, we are going from right to left.

Form a backwards letter ‘L’ with the blue string over the yellow string.

Step 21


Pull the blue string up over the yellow string, under it and through the gap between the 2 strings. Pull it up and make a blue knot. Do this a second time to make a double knot.

Step 22


Next we will pull the blue string over the pink string and make 2 blue knots over the pink string.

Step 23


Here I show you the process of making the blue knots over the pink string.

Step 24


This is what your bracelet looks like now.

Step 25


Lets now make the blue knots over the orange string.

Step 26


This is what your strings look like now. You are now done on the right (typo on the picture above where it says left).

Step 27


Step 19 : How to Make V Shaped Arrowhead Bracelets


Now we are done with the right side and we have to knot the 2 blue strings together in the middle to make the ‘v’ shape.

Step 28


Step 20 : How to Make V Shaped Arrowhead Bracelets


Double knot the 2 blue strings together.


Step 21 : How to Make Friendship Bracelets Tutorial with Pictures


This is what your letter ‘v’ shaped arrow shape looks like.

Step 29


Step 22 : How to Make Friendship Bracelets Tutorial with Pictures


Now lets start all over again but with the yellow string as the knotting string.

Knot over the pink, orange, and blue strings on the left-strings side.


Step 23 : How to Make Friendship Bracelets Tutorial with Pictures


Knot over the pink, orange, and blue strings on the left-strings side. This is what it should look like.

Step 30


Step 24 : How to Make Friendship Bracelets Tutorial with Pictures


Now put the left-side strings over the pin to get them out of the way.

Now fan out the strings on the right side. We will now double knot the yellow string over the pink, orange, and blue strings on the right side.

Step 31


Step 25 : How to Make Friendship Bracelets Tutorial with Pictures


After we have done all the right-side knotting, take the yellow string down off the left-side pin and then double knot the right-side yellow string over the left-side yellow string.

Step 32


Step 26 : How to Make Friendship Bracelets Tutorial with Pictures


Now put the right side strings back on the pin.

Fan out the left side strings…and then double knot the pink strings over the orange, blue, and yellow strings. Then put all of these strings back on the pin.

Take the right side strings down off of the pin and fan them out. Then double knot the pink strings over all of the strings.

Then double knot the 2  pink strings together in the center.

Step 33


Step 27 : How to Make Friendship Bracelets Tutorial with Pictures


Do the same thing with the orange strings.

Step 29


Step 28 : How to Make Friendship Bracelets Tutorial with Pictures


Now this is what your string will look like with all four colors done once.

Now just repeat again and again and again until you are sick of it.

Finished Bracelet


How to Make V Shaped Arrows Friendship Bracelets Illustrated Instructions


When you have gotten enough done to cover most of the front of the bracelet. You can then…braid the left side of the strings….the braid the right side of the strings … so you have only 2 strings now. Then you can tie the 2 strings around the loop for a closed clasped- bracelet.

I hope that you enjoyed this craft!!

You Might Enjoy Our Other Friendship Bracelets Crafts Too

Technorati Tags: , , , , , , , , , , , , , ,

How to Make Pretty Earrings or Ear studs Hearts for Valentines Day Craft

Learn how to make these adorable polymer clay stud hearts (aka heart earrings). You can give these stud hearts to your Mom, Grandma, friends, etc to show them how much you care about them…especially for Valentine’s Day, Mother’s day, or a birthday. But, because we’ll use polymer clay (oven-hardening) you’ll need a little help from an adult. This is an easy to do step by step tutorial offered by Laura from Dacian Moon Handmade

Here are Even More Valentines Day Crafts Ideas


How to Make Pretty Earrings or Ear studs Hearts for Valentine's Day Craft


How to Make Pretty Earrings or Ear studs Hearts for Valentine’s Day Craft

CRAFTS MATERIALS NEEDED:

– toothpick
– red polymer clay (I placed the toothpick beside it to see how much polymer clay you need)
– cutter
– 2 flat earstuds
– 2 earnuts
– craft glue
– baking paper
– baking tray


Step 1.

Polymer clay has to be conditioned prior to use. Conditioning in this case means thorough mixing. To make conditioning easier, start with warming up your clay. The gentlest way of doing it is to carry the clay in your pocket for a while. You are ready to start conditioning your clay once it feels pliable. To condition polymer clay by hand, simply mix it and squish it with your fingers. You may want to roll it into a log between your palms, fold it in half, and then roll again.


The smaller the piece of clay you are conditioning, the faster it will soften up.


Step 2.
Make a ball with it.


Step 3.
Cut the ball in half.


Like that.


Step 4.
Squish gently between two fingers to make the lower part of the heart.


Step 5.
On the upper part, use the toothpick to shape it…


… like this.


Step 6.
Repeat the step 4 and 5 for the other half of polymer clay ball.


Step 7.
This is the moment when you need help.
Place the hearts on a baking paper in a baking tray. Bake them accordingly to the instructions on the polymer clay package (they depend on the brand you use: fimo, cernit, sculpey…, but usually is one half of hour at 230 F or 110 C)


Step 8.
Let it cool down.


Step 9.
Apply a layer of glue on the back side of the hearts and place the earstuds in the middle.


After the glue is dry, you can wear the earrings and be special on Valentine’s Day 😉


Here are Even More Valentines Day Crafts Ideas

Technorati Tags: , , , , , , , , , , , , , , , , ,

How to Make a Polymer Clay Heart Keychain Crafts Idea for Kids on Valentines Day

Today we will show you how to make this cool polymer clay heart keychain…a perfect gift to give to somebody you love or a good friend on Valentine’s day or to Mom on Mother’s Day or for a birthday. This polymer clay key chain is a cute heart adorned with flowers … perfect to decorate your phone, backpack, purse, etc.Below you will find the  step by step tutorial offered by Laura from Dacian Moon Handmade. Just to let you know…because we’ll use oven-hardening polymer clay you will need a little help from an adult.

Here are Even More Valentines Day Crafts Ideas


How to Make a Polymer Clay Heart Keychain Crafts Idea for Kids on Valentines Day


How to Make a Polymer Clay Heart Key Chain Crafts Idea for Kids on Valentines Day

CRAFTS MATERIALS NEEDED

– toothpick
– red and white polymer clay (I placed the toothpick beside it to see how much polymer clay you need)
– roll (you can use anything tubular – I use a recipient for Vitamines 😀 )
– baking paper
– baking tray
– keychain cord
– 1 jumpring


Step 1.

Condition red polymer clay by hand, simply mix it and squish it with your fingers. You may want to roll it into a log between your palms, fold it in half, and then roll again.


Step 2.

Make a ball of it and flatten it.


Step 3.

Gently squish one part, to form the lower part of the heart.


Step 4.

Use the toothpick to shape the upper part of the heart.


This is the heart 🙂


Step 5.

Place it on a piece of baking paper.


Use the toothpick again to make a hole in the upper left side.


Take care that the toothpick goes through the heart and get out on the other part.


Step 6.

Condition the white polymer clay too.


Step 7.

Make a small roll of white…


… and place it on the heart. Make a crease on it to fix it on the heart, like in the picture:


Add three more white petals.


Step 8.

Make a tiny white ball…


… and place it in the middle of the petals.


Step 9.

If you like, place two more petals on the opposite corner, for balance.


Step 10.

Now you’ll need the help of an adult.
Place the heart (with it’s piece of baking paper) on the baking tray, and bake it accordingly to the instructions on the polymer clay package (they depend on the brand you use: fimo, cernit, sculpey…, but usually is one half of hour at 230 F or 110 C)


Step 11.

Let it cool down.


Step 12.

Open the jumpring (I use a pliers for that)…


… put it through the hole that you made in the heart…


And through the keychain cord base.


Step 13.

Close the jumpring and the keychain is ready 🙂


Here are Even More Valentines Day Crafts Ideas

Technorati Tags: , , , , , , , , , , , , , , , ,

How to make a Valentine Gift Box with a Bear Heart Brooch Pin – Part 1

This is a cute and easy to do, Valentine’s Day gift that kids can make for their parents, grandparents, or close friends. This arts and crafts lesson is in 2 parts. In this arts and crafts tutorial, we will show you how to make a Teddy Bear Heart Brooch Pin. Below is the simple-to-follow, step by step instructional tutorial. Have fun.

GO TO PART 2 – THE CASE

Here are Even More Valentines Day Crafts Ideas

How to make a Valentine Gift Box with a Bear Heart Brooch Pin – Part 1


How to make a Valentine Gift Box with a Bear Heart Brooch Pin - Part 1


CRAFTS MATERIALS NEEDED (for part 1 and 2):

– paper (not too thin)
– scissors
– craft glue
– paints
– paintbrush
– 1 brooch base
– 2 small leather pieces (brown and red) – or other thick material
– pencil


Let’s make the brooch.

Step 1.

Draw a simple sketch of a bear and one heart.


Step 2.

Cut out the drawings…


… and use them to cut the leather (of course, the bear will be brown and the heart will be red)


Like this:


Step 3.

Apply a layer of glue on the heart (on the back side)…


… and place it on the bear.


Step 4.

Cut out two small circles of paper – those will be the eyes.


Step 5.

Use a toothpick to apply some glue on the eyes and place them where they should be.


It will look like that:


Step 6.

Use the toothpick to paint eyeballs on the white circles, and a snout.


Now it looks like a bear.


Step 7.

Turn the bear over and take the brooch base.


Apply a layer of glue on the base…


… and place it on the larger part of the bear.


Now, the brooch is ready : a cute little bear with a big heart and lots of love to give.


GO TO PART 2 – MAKING THE CASE

Here are Even More Valentines Day Crafts Ideas

Technorati Tags: , , , , , , , , , , , , , , , , , , ,

How to Make Friendship Bracelets Easy Step by Step Tutorial for Kids

Friendship bracelets were very popular when I was a little girl, and they are making a big come back. Our friendship bracelets resource page is our most popular page on our site, so I would say that they have come back to be a very popular arts and crafts activity. The best part is that these are super cheap to make…all you need is yarn or string, scissors, and tape. Give one to your best friends and they are supposed to return the favor. It is fun to see how many bracelets you can get back from your friends. Try it out.

You Might Enjoy Our Other Friendship Bracelets Crafts Too


How to Make Friendship Bracelets Easy Step by Step Tutorial for Kids


How to Make Friendship Bracelets Easy Step by Step Tutorial for Kids

Crafts Materials Needed

Step 1


Step 1 : Making Double Knotted Friendship Bracelets Instructions


Step 2


Step 2 : Making Double Knotted Friendship Bracelets Instructions


Step 3


Step 3 : Making Double Knotted Friendship Bracelets Instructions


Step 4


Step 4 : Making Double Knotted Friendship Bracelets Instructions


Step 5


Step 5 : Making Double Knotted Friendship Bracelets Instructions


Step 6


Step 6 : Making Double Knotted Friendship Bracelets Instructions


Step 7


Step 7 : Making Double Knotted Friendship Bracelets Instructions


Step 8


Step 8 : Making Double Knotted Friendship Bracelets Instructions


Step 9


Step 9 : Making Double Knotted Friendship Bracelets Instructions


Step 10


Step 10 : Making Double Knotted Friendship Bracelets Instructions


Step 11


Step 11 : Making Double Knotted Friendship Bracelets Instructions


Step 12


Step 12 : Making Double Knotted Friendship Bracelets Instructions


Step 13


Step 13 : Making Double Knotted Friendship Bracelets Instructions


Step 14


Step 14 : Making Double Knotted Friendship Bracelets Instructions


Step 15


Step 15 : Making Double Knotted Friendship Bracelets Instructions


Step 16


Step 16 : Making Double Knotted Friendship Bracelets Instructions


Step 17


How to Make Friendship Bracelets Easy Step by Step Tutorial for Kids


This is what the finished friendship bracelet should look like. To finish up, just put it around your friend’s wrist, and then tie it loosely around your friend’s wrist.

You can make more advanced friendship bracelets by adding more strings and using the same exact process as you did with 3 strings. You can also try using 2 knots for one color, 5 knots for another, and 1 knot for the 3rd color (and other variations) to make some cool looking patterns. You would have to vary the lengths of the strings to do this (the more knots that you want to make with a string, the longer it would have to bet).

You Might Enjoy Our Other Friendship Bracelets Crafts Too

Technorati Tags: , , , , , , , , , ,

How to Make Mini Paper Fan Earrings for the Chinese New Year

I have another funny way to celebrate Chinese New Year : let’s make a pair of earrings (you’ll need a little help on step # 4). These will be made of paper and will have two very important Chinese symbols : the fan and the cherry blossom. The fan is a traditional Chinese handicraft used for cooling and as prop in the “fan dance”. For the Chinese, the cherry blossom is a very significant symbol of power. It represent a feminine beauty and within the language of herbs and herbal lore of the Chinese the cherry blossom is often the symbol of love.

You Might Also Like Our Other Chinese New Year Crafts

This crafts ideas was contributed by Laura from Dacian Moon Handmade


How to Make Mini Paper Fan Earrings for the Chinese New Year : Arts and Crafts Project for Kids

CRAFTS MATERIALS NEEDED:

– paper (not too thin)
– scissors
– ribbon (about 10 cm)
– paints
– paintbrush
– 2 earrings findings
– 2 jumprings
– pencil


Step 1

Cut two square pieces from the paper (about 3 cm on each side)


With the pencil make a line like in this picture…


…then cut it out.


Repeat for the second square and your pieces of paper should look like this.


Step 2

Take black and pink paint (if you don’t have pink, just mix red and white) and paint black cherry branches and pink flowers on them.


Don’t worry if you don’t draw the same on the two paper pieces. Your earrings will be more funny.

Let the paint dry very well.


Step 3

Take one piece of paper, keep it with the curved side to you and fold the left corner.


Continue folding like in this photo…


… and one fan is ready.


Repeat for the second piece of paper.


Step 4

Cut the ribbon in half.


This is the part where you’ll need a little help from an adult. Ask him to make a hole on the top of the fan (with a needle)…


… and then open the jumpring, put it through the hole and through the earrings finding and then close the jumpring.

It should look like in this photo.


Step 5

Take one piece of ribbon and put it through the jumpring, like in the photo.


Make two knots…


… and then cut the ribbon letting just a little near the knot.


Repeat for the other earring and you just finished a beautiful and funny pair of earrings that you can wear on the Chinese New Year or you can give them to your mother / sister… on that ocasion, just to bring them luck 🙂


Technorati Tags: , , , , , , , , , , , , ,