How to Make a Pair of Doll Earrings

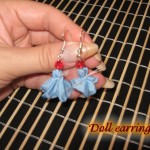
I have a fun craft for the girls today.  I’m going to show you how to make a Pair of Doll Earrings.  These earrings turn out so cute…. they really are fun and playful.  These earrings are simply made from a few pieces of ribbon, some crystals and a few other materials.  They are simple, but trust me the craft is fun.  The Doll Earrings turn out looking like little tiny rag dolls…. just adorable.  So, grab the materials needed and meet me back here so we can get started.

Check out our other Jewelry Crafts.

Laura from Dacian Moon Handmade will show this tutorial step-by-step.


Materials Needed

– 2 small rectangles of ribbon (about 3 cm x 3 cm)
– thread and needle
– scissors
– 4 crystals
– 2 earring hooks
– 2 head pins
– round nose pliers


Step 1

Take a rectangle and fold it in half…


… then again in half, to obtain a small rectangle.


Round cut the corner. Unfold. It will look like that.


Step 2

Place one crystal on one pin…


… then put it through the middle of the ribbon (it may be necessary to make a LITTLE hole with the scissors)


Step 3

Using the thread and needle sew under the crystal…


… like this…


… letting enough thread on both sides to tie it.


Cut the extra thread.


Step 4

Place another crystal on top of it.


Step 5

Using the round nose pliers, make a loop on top of the crystal…


… place the hook in it then close the loop.


This is the finished earring.


Repeat all the steps to make the second earring.


And, there you have it… your finished pair of Doll Earrings.  Aren’t they super cute?!   How did your earrings turn out?  Let me know in the comments below.  And, take a picture of the earrings and share them in the comment as well…. I’d love to see them.

Technorati Tags: , , , , , , , ,

How to Make a Dried Flower Pendant

Today I’m going to show you how to make a Dried Flower Pendant.  I know we are smack dab in the middle of Winter, but I thought this would be a great way to bring a bit of Spring back in our lives.  Using a few dried flowers, or whatever materials you would rather use, you can make this super beautiful Pendant.  Imagine all the comments you would get on this pendant when you wore it…. and your excitement telling them that you made it yourself.  You would be so proud.  So, grab the materials needed and let’s get started.

Check out our other Jewelry Crafts.

Step by step tutorial offered by Laura from Dacian Moon Handmade


Materials Needed

– cardboard (4 cm x 4 cm)
– dried flower
– dried moss (or you can use decorative green scented sand from the store, like me)
– craft glue
– scissors
– pin


Step 1

Cut the cardboard in the shape you want your pendant to be.


I chose this shape because this way my pendant will be easier to match with my clothes.


Step 2

Make a hole on the upper part of the pendant, so you can put it on chain or cord when it is ready. For the moment keep the pin there, to prevent the glue from going there.


Step 3

Apply a generous layer of glue.


Step 4

Carefully place the moss on the glue, or pour decorative sand on it (plenty of it).


Step 5

Let it dry well.


Step 6

When is completely dried, turn it upside down so the extra decorative sand falls off.

*If you use dried moss you don’t need to do that.


Step 7

Apply a layer of glue on the dried flower (on one part of it)…


… and place it where you want on the pendant. Press as hard as you can without destroying the flower.


Step 8

Let it dry well.


This is the finished pendant, ready to be worn.


Doesn’t it turn out nice?  Did you make your pendant like mine or were you super creative and did it differently from mine?  Let me know in the comments below.  Don’t forget you can take a picture of your Dried Flower Pendant and leave it in your comments as well.  I’d love to see it.

Technorati Tags: , , , , , , , , ,

How to Make a Paper Bead Bracelet

If you love making jewelry I have a fun craft for you today.  I’m going to show you how to make a Paper Bead Bracelet.  That’s right…. it’s a bracelet made out of paper.  With paper you actually make the beads that make up this bracelet.  Surprisingly enough….. by simply rolling paper and adding glue it creates a very strong and durable bead.  Choose your favorite color paper to make the beads and the result is a beautiful bracelet you will be proud to wear with your favorite outfit.  So, let’s get started.

Check out our other Jewelry Crafts.


Materials Needed

Colored paper

Scissors

Glue

Ruler

Pencil

Needle

Thread


Step 1

Using a ruler, on one edge of a rectangular piece of paper, mark points that are 1.5 inches apart… starting from the edge.


Step 2

On the other end of the paper, mark a point 0.8 inch away from the edge of the paper. Draw a second point 1.5 inches from this point. Mark a few more points, each 1.5 inch away from the last point. After you are done, draw lines joining the points on both ends as shown below.


Step 3

Cut along the lines to get long triangles as shown below.


Step 4

Fold the edge near the wide end of the triangle and start rolling it as tight as possible.


Step 5

Apply some glue to the end of the triangle and roll to form a bead as shown below.


Step 6

Make many beads as shown below and thread them together into a bracelet using a needle and thread.


Step 7

Wear the pretty bracelet around your wrist and show it off to all your friends.


Isn’t it unbelievable that you can make such an awesome bracelet simply out of paper and glue?  How did your Paper Bead Bracelet turn out?  Let me know in the comments below.  Take a picture of your bracelet and share it in the comment as well…. I’d love to see it.

Technorati Tags: , , , , , , , , ,

How to Make a Fruit Loop Necklace for the 100th Day of School

Depending on when your school district started school the 100th Day of School will be coming up quickly.  Now, is the time to start planning what kind of crafts you are going to do to celebrate the 100th Day of School.  I’m going to show you an easy, and tasty, craft for you to do…  Today I’m going to show you how to make a Fruit Loop Necklace perfect for the 100th Day of School.   Each child will get 100 of these colorful circles of cereal and they will string them to make a necklace.  The kids will love making it almost as much as they will love eating it.  So, let’s get started.

Check out our other 100th Day of School Crafts.


How to Make a Fruit Loop Necklace for the 100th Day of School


Materials Needed

Fruit Loops (100 for each child)

String or Yarn


Step 1


Get enough fruit loops for all the children


Get enough fruit loops for all the children making necklaces.


Step 2


String 100 Fruit Loops on a String.


Cut a piece of string or yarn large enough for a necklace and then string 100 fruit loops on it.


Finished Fruit Loop Necklace


The Fruit Loop Necklaces are now finished and are ready to be tied on each child so they can wear them proudly.  Don’t they look colorfully beautiful….. almost as good as they are going to taste.  YUM!!

Technorati Tags: , , , , , , , , , ,

How to Make a “Unity for All” Bracelet for Martin Luther King Day

Today is Martin Luther King Day.  Martin Luther King is best know for his “I Had a Dream” speech where he basically said in his dream all men were created equal.  He lived his entire life fighting for that fact.   Today I’m going to show you how to make a “Unity for All” Bracelet for Martin Luther King Day.  This bracelet represents Unity for all…. bringing us all together no matter the color of our skin.  Isn’t that what Martin Luther King would have wanted?  So, grab the materials needed and let’s get started.

Check out our other Martin Luther King Crafts.

Tutorial offered by Laura from Dacian Moon Handmade.


Materials Needed

– cardboard
– pencil
– a band of leather (can be replaced with ribbon)
– varnish (can be nail varnish too)
– black and blue paint
– paintbrush
– toothpick
– round nose pliers
– 2 jump rings
– 2 ribbon cord ends
– 1 lobster clasp


Step 1

Draw a circle on the cardboard.


Cut it out.


Step 2

Place the cardboard circle over the leather …


… and mark the  places where leather will go through the cardboard…


… like this.


Make two cuts on the marks.


Put a side of the leather through one cut…


… then the other side through the other cut, until the circle is in the middle.


Step 3

Using the pencil…


… draw two curves on the cardboard, like this.


Then two human silhouettes.


Step 4

Paint one of them with black – I used the toothpick.


It will look like this.


With blue, color the up and down parts…


… like this…


… and write with black…


… “Unity for All”.


Step 5

To protect the cardboard it is good to use a varnish on it. It can even be nail varnish.


Apply it with the paintbrush all over the cardboard.


Let it dry well.


Step 6

Take a cord end…


… and put it on one end of the leather band, using the round nose pliers.


Like this.


Open one jump ring…


… and attach the lobster clasp of the cord end with it.


Do the same on the other side. You can add here a piece of chain (or you can put only the jump ring).

Now your bracelet is ready.


And, there you have it… you just finished your “Unity for All” Bracelet for Martin Luther King Day.  Wear it proudly….. after all Martin Luther King worked hard to make sure that everyone is created equal.

Technorati Tags: , , , , , , , , , , , ,

How to make an “I Have a Dream” Pendant for Martin Luther King Day

Today is Martin Luther King Day.  And, what better way to celebrate Martin Luther King’s Life than to make a craft in is honor.  Remember that Martin Luther King had a dream….. in his dream everyone was created equal.  Martin Luther King was a great man and today we are going to honor the “I Have a Dream” speech he made by making an “I Have a Dream” pendant.  You can wear this pendant to honor Martin Luther king today and everyday you want to remember what Martin Luther King was all about.

Check out our other Martin Luther King Day crafts.

Laura from Dacian Moon Handmade will show you, step by step, how to make this simple pendant.


Materials Needed

– a cardboard disc
– colored pen
– scissors
– cord
– thick thread and needle


Step 1

Put the thread in two on the needle and make a little hole on one side of the disc, near the edge.


Like this.


Put the thread again through the same hole, next make another hole near first, and so on…


… until you cover all the edge.


Step 2

Now, put the needle under a bunch of thread…


… and make a knot, like this.


Make knots on every bunch of threads.


Step 3

Start a second row of knots.


It will look like this (if you make the holes more close to one another, the pattern will look more tight).


Use the pen to write in the middle “I Have a Dream”…


… like this.


The only thing you have to do now is put the cord through the upper part (under a bunch of thread).


And there you go…. the finished Martin Luther King Day “I Have a Dream” pendant.  Doesn’t it turn out awesome?!  How did your pendant turn out?  Let me know in the comments below.  Also, take a picture of the “I Have a Dream” Pendant and share that with me in the comments below too…. I’d love to see it.

Technorati Tags: , , , , , , , , , , , , , ,

How to Make a Paper Clip Necklace

Today I’m going to show you a fun craft you can make with some of the supplies you probably have at home.  I’m going to show you how to make a very cute Paper Clip Necklace.  This craft is made from paper clips and colored paper…. it’s really quite an easy craft, but so much fun.  It’s great for children of all ages.  So grab the materials needed and let’s get started.

Check out our other Jewelry Crafts.

Laura from Dacian Moon Handmade will show you this tutorial step-by-step.


Materials Needed

– colored paper (I used a white/pink transparent paper)
– paper clips
– glue
– scissors
– ruler


Step 1

Connect the paper clips together into a necklace.


Try it and see if it is the length you need it to be. Mine will have 14 paper clips.


Step 2.

Cut a piece of paper with a 2 cm width. You will see that is almost as big as the paper clip.


Make 13 rectangles of it, with 4 cm length. The 14th paper clip will be used to close the necklace, so it will stay as it is.


Step 3

Apply a layer of glue on one little rectangle…


… place it on one paper clip and wrap it around it.


It will look like this.


Step 4

Repeat step 3 for all the other little rectangles and the necklace is ready.


And, there you have it…. a Paper Clip Necklace.   Doesn’t it turn out quite pretty?  How did your Paper Clip Necklace turn out?  Let me know in the comments below.  Make sure to take a picture of it too…. you  can post the picture with your comment for all to see.

Technorati Tags: , , , , , ,

How to Make a Colorful Pendant from a Magazine

I have a very easy and fun craft for you today.  I am going to show you how to make a really cute pendant that is made from a magazine page.  Yep, that’s right… a magazine page.  This craft is easy enough that any crafter of any age will have fun making this pendant.  Plus, it turns out so fantastic that you will love wearing it…. or better yet make a few and give it out to your best of friends.  They will love it!!

Check out our other Jewelry Crafts.

Laura from Dacian Moon Handmade  will show you how to make this pendant.


MATERIALS NEEDED

– magazine
– glue
– scissors
– thick thread


Step 1

Cut a rectangle from a magazine page. You should choose one with many colors.


Cut two corners from it to make this triangle.


Step 2

Apply a layer of glue on the back of it.


Like this.


Step 3

Put a piece of thread (folded in half) on the base of the triangle, and glue…


… then roll the paper over it…


Like this.


When you finish rolling the paper it will look like this.


Now, cut the thread that goes down from the paper pendant and let it dry well.


You can put it on a cord or on a chain – and you are good to go.  See how easy that was?  But, it was so much fun, wasn’t it?  Now, are you keeping this adorable pendant for yourself or are you giving it to one of your friends?  That is the true question.  Either way, you will get so many compliments on it.

Here is our video on how to make a Magazine Pendant.

Technorati Tags: , , , , , , , ,

How to Make a Charm Bracelet with Wishes

Here is a jewelry craft perfect for the New Year.  I am going to show you how to make a Charm Bracelet…. but not just any charm bracelet.  This charm bracelet is made up solely of wishes…. your wishes.  How beautiful would that be to wear?  So beautiful!!  We all have wishes for the New Year…. and you can proudly wear your wishes around your wrist.  So, come up with your wishes, grab the craft materials… and let’s get started.

Check out our other New Years Crafts and Jewelry Crafts.

Laura from Dacian Moon Handmade will show you how to make it, step by step.


MATERIALS NEEDED

– white cardboard
– crystals
– pins
– jump rings
– chain
– round nose pliers
– pen
– 1 lobster clasp
– optional: varnish – can be even nail polish


Step 1

Draw 6 circles on the cardboard (diameter ~2cm).


Cut them out.


Step 2

Write on them, on the lower part, wishes for the new year.  Some examples: love, hope, laugh, live, happy, dream.


Like this.


Step 3 – optional

Apply a layer of varnish on them – first on one side, let them dry, then on the other. This will extend the life of the bracelet and will protect it from water.

Let them dry well.


Step 4

Using a pin make holes on top of the circles. You can make the holes before varnishing them (it’s easier).


Step 5

Use the pliers to open a jump ring and put it through one circle. Like this.


Do the same for all circles.


Step 6

Place the chain in front of you – it should be of the right size to fit your wrist. (You could use a cord in place of the chain, but then you should make a knot around every jump ring and circle…you will then tie the bracelet to your arm.)


Arrange all the pieces (circle with jump ring) along the chain, to see where all of them will be.


When you know their places, put the jump rings through the chain eyes… like this.


This is the bracelet with all the pieces linked.


Step 7

Take a pin…


… and put a crystal on it.


Make a loop (using the pliers) on the pin end, like this.


Now, put it on one jump ring, in front of the circle.


Close the loop.


Add crystals to all the pieces.


Step 8

Now the only thing you have to do is to add the closure part. Open a new jump ring…


… and link the clasp…


… to the chain. Like this.


The bracelet is ready!


I told you this bracelet turns out beautifully.  Don’t you agree?  How proud would you be to wear this Charm Bracelet around town?  I imagine so proud…. as you made this Charm Bracelet with Wishes yourself.  Enjoy wearing it!!

Technorati Tags: , , , , , , , , , , , , ,

How to Make a Leather Star Brooch

Today I have a very special craft for you.  I’m going to show you how to make a Leather Star Brooch perfect to be worn all Winter long.  Made from two different shades of leather this craft is sure to turn out beautifully.  Imagine how proud you will be to wear a brooch that you made yourself.  Every compliment you will get will make you feel so good…. because you, in fact, made it yourself.  So, grab the materials needed and let’s get started.

Check out our other Leather Crafts and Jewelry Crafts.

Tutorial offered by Laura from Dacian Moon Handmade .


MATERIALS NEEDED

– red and brown leather
– pen
– scissors
– needle and thread
– brooch base
– craft glue


Step 1

Take the red leather and using your pen…


…draw a star on it.


Draw another star, bigger, on the brown leather.


Cut them out…


… like this.


Step 2

Place the red star over the brown one…


… and start sewing them.


You should sew the red star to the brown one, then continue over the edge of the brown one.


It will look like this.


Step 3

Let’s make the center decoration. Start somewhere on the center part…


… and make this snowflake. When you are finished…. make a knot on the back and cut the thread.


Step 4

Apply a layer of glue on the brooch base…


… and place it on the back of the star, over the knot.


Take a small piece of red leather and glue it over the base. Let it dry well.


That’s all! The brooch is ready.


And, there you have it.  You just finished your Leather Star Brooch.  How did your star turn out?  Let me know in the comments below.  And, don’t forget to take a picture and post that too…. I would love to see it.

Technorati Tags: , , , , , , , , , , , ,

How to Make a Pair of New Years Earrings

I have a super fun craft for the girls today.  I am going to show you how to make a pair of New Years Earrings.  This craft isn’t as complicated as it sounds…. the earrings are actually made out of paper that is decorated by you.  You can use your imagination to decorate the earrings however you see fit.  Or, if you rather…. you can copy how I decorated my New Years earrings.  Whatever you would like.  So, grab the craft materials and let’s get started.

Check out our other New Years Crafts.

Laura from Dacian Moon Handmade  will show you, step by step, how to make them.


MATERIALS NEEDED:

– yellow paper (or any other color you want your earrings to be)
– colored pen (I used green)
– scissors
– pin
– earring hooks
– 2 jump rings
– glitter glue (I used green, silver and purple)


Step 1

Draw an arc on one corner, like this.


Cut it out.


Use your colored pen to write in the middle “Happy New Year” or “Happy 2012”.


Step 2

Make a cone from it.


Step 3

You will see that the writing is on one side, so we’ll use this side as the front part.


Take the pin and make a hole in the upper part of the cone, like this.


Put a jump ring through it.


Add the earring hook, then close the jump ring.

If the writing does not stay in front (as the earring stays in your ear) you can:

– Open the jump ring and put the hook in reverse (if the writing is to the back side)

– Add another jump ring between the first one and the hook (if the writing is on one side)


It will look like this.


Step 4

Use glitter glue to decorate the cone and let it dry well.


Repeat step 1, 2, 3, 4 to make the second earring.


Now you have cute glittering earrings to wear at a New Years Party.  Did you make your earrings like mine or did you use your imagination to make them differently?  Either way…. I’d love to see them.  Take a picture of them and post it in the comments below.

Technorati Tags: , , , , , , , , , , ,

How to Make Christmas Tree Earrings

I have a fun and festive craft for you today.  I am going to show you how to make Christmas Tree Earrings.  They are perfect for a giftimagine how excited the receiver of this gift would be.  They would absolutely love them.  Or, they are so beautiful…. maybe you would like to keep them for yourself.  Either way…. the craft turns out lovely and perfect for this Holiday Season.

Check out our other Christmas Crafts.

Laura from Dacian Moon Handmade will show you how to make this, step by step.  You will need help from an adult for this tutorial.


MATERIALS NEEDED

– polymer clay: green and brown
– metallic gold paint (optional)
– cutter
– toothpick
– 2 pins with loop on one end
– 2 earring hooks
– baking tray
– baking paper


Step 1

Take a piece of brown polymer clay.


Condition it .

(Condition polymer clay by hand, simply mix it and squish it with your fingers. You may want to roll it into a log between your palms, fold it in half, and then roll again).

Part it in half.


Take one half and, with your nail or with the toothpick, make some creases on it – like bark.


Place it on a small piece of baking paper.


Step 2

Take a piece of green clay.


Condition it …


… and part it in three: one bigger, one a little bit smaller and the third even smaller.


Take the big one and flatten it.


Squish it gently between two fingers…


… then place it over the brown piece…


… like this.


Take the second piece of green clay…


And do the same…


… then put it over the first.


Do the same with the third piece of green clay – this will be the top.


Place it over the other two and the tree is ready.


Because we want to put it on an earring hook, we must place the pin through it.


Like this.


Step 3

Repeat the steps 1 and 2 to make another tree.


Step 4

Place them on the baking tray, and bake them according to the instructions on the polymer clay package (they depend on the brand you use: fimo, cernit, sculpey…, but usually it is one half hour at 230 F or 110 C) – this is the part when you could use a little help.

Let them cool down.


Step 5

Open the loop of the earring hook…


… and place the pin through it, like in the picture. Close the loop.


Do the same for the other tree and the earrings are ready.


Step 6 – optional

Use metallic gold paint to make points on the trees – they will look like globes.


The earrings are ready to be worn.


I told you these earrings are beautiful.  How did you earrings turn out?  Let me know in the comments below.  And, don’t forget to take a picture…. you can share your picture in the comment as well.  Now, go wear your Christmas Tree Earrings proudly.

Technorati Tags: , , , , , , , , , , , ,

How to Make a Rose Pendant

The Holidays are coming up really quickly.  And, with the Holidays comes the joy of gift giving.  For today’s craft I’m going to show you how to make a Rose Pendant perfect for giving to a special person this Holiday season.  Made from ribbon and a piece of leather….. this craft is sure to be loved by anyone receiving it as a gift.  So, let’s get started.

Step by step tutorial offered by Laura from Dacian Moon Handmade


MATERIALS NEEDED:

– pink satin ribbon
– some burgundy leather
– scissors
– needle and thread


Step 1

Take the ribbon and roll it tight for two – three times.


Secure the base by sewing it. This will make the work a lot easier.


Step 2

Now fold the ribbon against itself …


… and continue to gently roll around the center…


… like that.


Now secure again by sewing it.


Step 3

Repeat step 2: fold….


… and roll … then sew.


Step 4

Do that again and again until the ribbon is ending. It should look like that.


Step 5

Bring the last part of ribbon behind the rose and sew it there.


This is the rose.


Step 6

Take the burgundy leather and put it like that on the back of the rose.


Sew it there.


Now the pendant is ready.


And, there you go…. you made a Rose Pendant perfect for gift giving this Holiday Season.  How did your Rose Pendant turn out?  What color did you make your Rose?  Let me know in the comments below.  Now, the real question is…. who are you going to give it to this Holiday?  Whoever it is…. they are sure to love it.

Technorati Tags: , , , , , , , ,

How to Make a Paper Bead Necklace

Today I’m going to show you how to make a Paper Bead Necklace.  Believe it or not the beads are made out of magazines and glue, but you would never know that by looking at the finished craft.  The finished Paper Bead Necklace turns out beautifully.  Beautiful enough that you could give it as a gift this Holiday season.  Or, keep it for yourself…. the choice is yours.

Check out our other Jewelry Crafts.


How to Make a Paper Bead Necklace


Materials Needed

Colorful Magazines/Catalogs

Toothpick

Glue

Needle

Thread

Scissors


Step 1


Gather some colorful magazines and catalogs.


Gather some colorful magazines and catalogs.


Step 2


Cut out long triangles from the catalogs.


Cut out long triangles from the catalogs.


Step 3


Place a toothpick on the wide side of the triangle paper strip.


Place a toothpick on the wide side of the triangle paper strip.


Step 4


Roll the paper and toothpick tightly.


Roll the paper and toothpick tightly.


Step 5


Dab glue on the end and hold closed to secure.


Dab glue on the end and hold closed to secure.


Step 6


Hold for a few seconds to securely hold shut.


Hold for a few seconds to securely hold shut.


Step 7


Take bead off of toothpick.


Take bead off of toothpick.


Step 8


Make a whole bunch of beads.


Make a whole bunch of beads.


Step 9


Thread a needle.


Thread a needle.


Step 10


Place the beads over the needle and pull down over thread.


Place the beads over the needle and pull down over thread.


Step 11


When you strung enough beads... then tie it shut like shown in the picture.


When you strung enough beads… then tie it shut like shown in the picture.


Finished Paper Bead Necklace


And, there you have it…. you have just finished making your Paper Bead Necklace.  How did it turn out?  Let me know in the comments below.  And, don’t forget to take a picture and share it in the comments as well.

Here is our video on How to Make a Paper Bead Necklace step-by-step.

Technorati Tags: , , , , , , , ,

How to make a Turkey Brooch

What is the most known symbol of Thanksgiving Day? The turkey, of course! Thanksgiving wouldn’t be Thanksgiving without the Turkey.  So, with that being said…. today I’m going to show you how to make a Turkey Brooch perfect for Thanksgiving.  What better way to show your love for the Thanksgiving Holiday than to parade around town wearing a Turkey Brooch?  So, let’s get started.

Check out our other Thanksgiving Crafts and Jewelry Crafts.

Tutorial offered by Laura from Dacian Moon Handmade . You will need help from an adult for this tutorial.


MATERIALS NEEDED

– white, red, green, terracotta polymer clay (and small parts of pink, black and blue)
– black paint
– craft glue
– cutter
– toothpick
– 1 brooch base


Step 1

Take a piece of white polymer clay.


Condition it .

(To condition polymer clay by hand… simply mix it and squish it with your fingers. You may want to roll it into a log between your palms, fold it in half, and then roll again).

Divide it in 4 parts.


Take 1 part, make a ball of it and flatten it…


Squish an end between two fingers, like this…


… then the other. Now it looks like a petal.


Repeat and make another 2 white petals.


Step 2

Take a piece of green polymer clay…


… condition it and divide it in 4 parts too.


Make two green petals and place them over the white ones, between them.


Step 3

Take the last piece of white clay…


… and make a bar under the petals with it…


… then continue with another two green petals, taking care that their edges are over the white bar too. This will make the brooch stronger.


Step 4

It’s time to make his head, so, take a piece of terracotta clay…


…condition it and make a ball with it. Flatten it.


Squish gently one end to look like this.


Place it in the middle of petals. This is the head.


Step 5

Take the blue clay and condition it. Make two bigger parts and one smaller of it.


Make a ball of one bigger part and flatten it.


Squish it gently on one end to look like this.


Place it beside the head and make two lines on it with the toothpick.


Make another one …


… and a small ball flattened in the middle. Now our turkey has a bow.


Step 6

Make a small heart of the pink clay…


… and place it in the middle of his face.


Over it we will put his nose, made of a small piece of red clay. Make it a roll …


… and squish an end.


Then, using the toothpick, place it over the small heart (this is his beak).


Step 7

Take a smaller piece of black clay…


… and part it in half. Those will be his eyes.


Step 8

Place it on the baking tray, and bake it according to the instructions on the polymer clay package (this depends on the brand you use: fimo, cernit, sculpey…, but usually it is one half of an hour at 230 F or 110 C) – this is the part when you could use a little help from an adult.


Let it cool down.


Step 9

The only thing you should do now is glue the brooch base on the back of our turkey… and, using the black paint and the toothpick, write something on the white bar. It can be anything but I think “How about a cheeseburger?” will be funny.


Now your brooch is ready.  Isn’t it adorable?  How did your turkey turn out?  Make sure to let me know in the comments below.  Add a picture to your comments so I can see your turkey.  I’d love to see how it turned out.

Technorati Tags: , , , , , , , , , , , , , ,

How to make Origami Butterfly Earrings

I have a treat for you today.  I will be showing you how to make a pair of Origami Butterfly Earrings.  They are really beautiful…. and they are made out of paper.  You are sure to get lots of compliments on them.  You can choose to wear them yourself or give them as a gift… after all the Holidays are just around the corner. That is if you can part with these earrings.  So, let’s get started.

Check out our other Origami Crafts.

Laura from Dacian Moon Handmade will show you how to make these earrings step-by-step.


CRAFT MATERIALS NEEDED:

– 2 paper squares (about 4 cm x 4 cm)
– 2 jump rings
– 2 earstuds with earnuts


Step 1

Take one square of paper and fold it in half…


… like this.


Step 2

Bring the right upper corner to the center of the opposite edge, as in the picture.


Step 3

Do the same with the upper left corner.


Step 4

Unfold the corners.


Step 5

Turn the right corner inside…


… like this.


Do the same with the left corner.


Step 6

Take the right lower corner and bring it to the top corner.


Do the same with the left lower corner.


Now it should look like this.


Step 7

Turn the paper upside-down.


Fold the top corner to the opposite edge, a little bit lower than the middle…


… like this.


Step 8

Force the 2 corners flat.


Step 9

Fold it in half like in the picture.


It will look like this.


Step 10

Fold on the line…


… like this.


Do the same on the other side.


Turn it upside-down.


Step 11

Model the wings with your fingers.


Now it looks like a little butterfly, doesn’t it?


Step 12

Make a little hole in one corner…


… and put the jump ring in it.


Add the stud and the earring is ready.  Do the same with the second piece of paper.


Aren’t these earrings beautiful?  They will look amazing on you.  Or, have you decided to give them as a gift this Holiday Season?  Whatever you decide they are sure to be a huge hit.

Technorati Tags: , , , , , , , , , ,