How to Make Standing Witches for Halloween

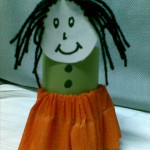
Today we are going to be making Standing Witches for Halloween.  You can choose to either use the printable template and cardstock to make this item.  Or, if you want the craft to be a little more difficult you can use such items as yarn, sticks, construction paper and straw to make the Standing Witch from scratch.  The choice is your own.

Check out our other Halloween Crafts.


How to Make Standing Witches for Halloween


Materials Needed

Heavy Paper, Cardstock or Construction Paper

Yarn or Thread (optional)

Stick & Straw (optional)

Paste

Scissors


If you choose follow the printable template below to make the Standing Witch.

CLICK ON IMAGE TO OPEN IT UP BIGGER TO PRINT.


Printable template for standing witches


Directions:

  1. In making this standing Halloween witch, the hat and coat must be drawn on rather heavy paper for it to stand well (with normal paper, if you walk past the witches, they might blow over from the slight breeze otherwise). So you can use normal paper if you want to, but I suggest tracing the patterns onto cardstock or construction paper.
  2. As for the hair, you can either use the template provided or use yarn or thread for the hair. It could even be straw pasted on the other side of the hat to hang down. The back of the witch is shown, so that no face will be needed to be drawn. This was intentional, as younger children might get frustrated with drawing a face. Plus, I think the silhouette of the witch is quite nice to look at. If the hair is made with thread, a vertical strip of paper will be needed to fasten the hat at a proper distance from the body, so it might just be easier to use the drawing of hair or paste the thread / yarn on to the cut-out-drawn hair provided. The lower part of the hair will then be pasted on to the coat.
  3. The broom may be made either of two ways. A stick may serve as the handle with a few real broom straws tied in a bunch at the end, or the broom may merely be cut from the paper template given like the rest of the witch. It is then pasted on the other side (front side, really) so that it would seem as if the witch was carrying it in her hand.

So, as you can see you can make this Standing Witch as easy or as complicated as you would like.  This is great for all different age groups.

Technorati Tags: , , , , , ,

How to Make No-Sew Stuffed Puppy Dog Animal Toy with Socks & Rubber Bands

Today we will show you how to make stuffed puppy dogs out of socks and rubber bands. This craft will probably take less than 10 minutes for you…it is that easy. These are no-sew stuffed animals…that is right…no sewing necessary at all. If you like sock monkeys, but you were too lazy to make them, then this arts and crafts project is for you. Have fun.

You Might Like Our No-Sew Baby Doll Craft

You Might Like Our Other No-Sew Crafts


How to Make No-Sew Stuffed Puppy Dog Animal Toy


How to Make No-Sew Stuffed Puppy Dog Animal Toy with Socks & Rubber Bands

Crafts Materials Needed

– Stretchy Socks – I used Knee High Girls Socks
– Small Rubber Bands or Yarn
– Buttons or Sharpie Marker or Fabric Markers or Needle and Thread
– Stuffing
-Scissors

Step 1


Step 1 : Start Sock Doggy with a Sock


Take out your sock….preferably socks that are stretchy and ones that have an interesting pattern or color.

Step 2


Step 2 : Put Stuffing in the Sock


Put your stuffing in to your sock…put it all the way down to the tip of the sock.

Step 3


Step 3


Now on the side ‘A’ (pictured above), form a ball by making sure that some of the stuffing is at that corner and then just pushing down with your thumbs to form a ball.

Step 4


If this stuffed dog is being made for a younger child (under 3 or 4 of age) you should use yarn instead of a rubber band, just in case it comes off…you never know what a child will put in his or her mouth and chock on. If you use a rubber band just put the rubber band around the ball until it is tight. If you are using yarn, wrap it around that ball-shape and tie knots and wrap it around more and tie more knots…then cut it off.

Step 5


Now you should do the same thing for the other dog paw, side B.

Step 6


Now put stuffing above the paws for the puppy dog’s belly area.

Step 7


Now make 2 arms the same way that you made the paws.

Step 8


Tie the yarn or rubber band next for the neck.

Step 9


This is what the real thing looks like so far.

Step 10


Add stuffing to the sock for the puppy dog’s head and then again, tie off with rubber band or yarn.

Step 11


This is what the real puppy dog looks like so far.

Step 12


Now cut the remaining sock (the part above the head and rubber band) in the center….like you see above.

Step 13


Now on each side – there are 2 sides – cut in 3 slits. So basically you have 6 slits in all then.

Step 14


Now braid each side. If you don’t know how to braid…then visit the Wikipedia page on braiding.

Step 15


Now rubber band each side in a loop.

Step 16


Now rubber band both loops together in the center.

Step 17


How to Make No-Sew Stuffed Puppy Dog Animal Toy


Cut off the excess that was on the top of the 2 loops (you will be cutting off the rubber bands too from step #15)

Step 18


Now this is what your doggy will look like.

Step 19


How to Make No-Sew Stuffed Puppy Dog Animal Toy


If you want to…glue on button eyes and nose. If your parents are around, ask them to hot glue them on, otherwise use fabric glue. If you have a sharpie or paint, make the dog’s mouth too.

I hope that you had a lot of fun.

You Might Like Our No-Sew Baby Doll Craft

You Might Like Our Other No-Sew Crafts

Technorati Tags: , , , , , , , , , , , , , , , , , , , ,

How to Make Twist Tie Doll Figures with Moving Arms and Legs Crafts Idea for Kids

If you want to make your very own play dolls out of recycled twist ties, then find out how to. They come out really cool, with hug-gable & twist-able arms and legs … especially cool for Mom dolls that hug baby dolls. Find out how to make these from unused items around your house. Have fun.


How to Make Twist Tie Doll Figures with Moving Arms and Legs Crafts Idea for Kids


How to Make Twist Tie Doll Figures with Moving Arms and Legs Crafts Idea for Kids

Crafts Materials Needed

– Embroidery Thread or Floss
– Glue
– Scissors
– Twist Ties
– Markers or Paints

Step 1


Step 1 : Making Play Figures Figurines and Dolls Crafts Project


Take a twist tie and bend it in half.

Step 2


Step 2 : Making Play Figures Figurines and Dolls Crafts Project


Now take a second twist tie and bend it in half around the first twist tie…


Step 3


Step 3 : Making Play Figures Figurines and Dolls Crafts Project


and then wrap it around like this so you have 2 arms.

Step 4


Twist the first twist tie, below the arms, so it looks like this (after spreading the legs out).

Step 5


Now glue one end of embroidery thread / floss to the top of the figure…we are going to make the head. When you start wrapping the thread, make sure to leave a little of the twist tie at the top (the loop), unwrapped so you can put the hair through it at the end.

Step 6


Keep wrapping it around the head and put a bunch of glue on it when you feel you are done…cut the end and push the end down.

Step 7


Wrap a different color for the shirt….wrap all around the arms and chest….put a bunch of glue down, cut, and push the end of string down…You can fold the hands over the shirt if you want to.

Step 8


Choose another color for the pants and wrap the string all around the legs and thighs…cut and glue down. You can then fold the feet over.

Step 9


Fold some string and then push it through the loop at the top of the head.

Step 10


Step 10 : Making Play Figures Figurines and Dolls Crafts Project


You can either braid it or cut the ends off so the hair hangs better.


Step 11 : Making Play Figures Figurines and Dolls Crafts Project


Like this.


Step 12 : Making Play Figures Figurines and Dolls Crafts Project


Or braided like this.

Finished Miniature Doll Figurines


How to Make Twist Tie Doll Figures with Moving Arms and Legs Crafts Idea for Kids


You can paint or draw faces on them if you want to.

This is what the finished dolls look like. The neat thing is that the arms can bend around other figures to hug. I used a smaller twist tie for the baby and a long garbage bag twist tie for the Mommy figure.

Technorati Tags: , , , , , , , , , , , , , , ,

How to Make a People Peace Dance Paper Cutout Craft for Martin Luther King Day

Because Martin Luther King Day is approaching, I think we should remember that, even if we are looking different, we are equals and we wish for the same things in life. One of those things is PEACE. Today, Laura from Dacian Moon Handmade will be showing you how to make a Peace Dance out of paper.

You Might Like Our Other Martin Luther King Day Crafts as well.


peace dance


CRAFTS MATERIALS NEEDED:

– paper
– scissors
– pencil
– colored pencils


Step 1.

Take one corner of the paper and bend it to the opposite side.


Step 2.

Press well the edge…


… and then, with the scissor cut the remaining part of paper.


Step 3.

Now, we have a triangle. Set it on the table with the peak to you. Bring the right corner over the left one, like in the picture.


We have now a smaller triangle. Press well the new formed edge.


Step 4.

Set the triangle on the table with the bigger edge to you.


Then bring again the right corner over the left one.


Now, we have an even smaller triangle who have on one side 3 corners one over the other, and on the other side, only one corner.


Step 5.

Let the triangle folded, with the 3 corners one over the other in the left.


Draw with the pencil two silhouettes – one girl and one boy, like in the following picture.


Step 6.

With the scissor cut out the silhouettes from the paper, following the contour. First the lower part…


… then the upper part. Take care at the hands of the silhouettes because they should be merged, so don’t cut them on the paper edge.


On this point you should have :


Step 7.

Look at the boy’s hand. You’ll see that can be opened:


Gently, pull the detachable corners and you’ll have 4 kids.


Repeat that and …


Mmm, it looks good. Look very carefully: can you open it more?


Yes, you can !
Now, you have the “peace dance”.


Step 8.

The last step:


You can play with coloured pencils, to make the dance full of joy. Don’t forget to make kids with different skin colours, because we are all equals, we like to play, to dance… we like Peace. I begin to play with colours. What are you waiting for?


… and most important: HAVE FUN!

You Might Like Our Other Martin Luther King Day Crafts as well.

Technorati Tags: , , , , , , , , , , , , ,

Sheep or Lamb Stand-Up Paper Toy Model to Print Out Craft for Kids

Today, we will show you how to make some stand up paper-figure animals. This one is a standing lambs / sheep paper figure. There is only a black and white version to print out since sheep are white.


Sheep or Lamb Stand-Up Paper Toy Model to Print Out Craft for Kids


Today we will show you how to make paper lambs / sheep that can stand up on their own. You can use them as models or to play with. Click on the image below to open up a new page with the sheep picture. You should then print that page out….cut it out…and then fold on the line. It is as easy as that.

Print Out Black and White Sheep figure (for Coloring In)


Print Out Black and White Sheep figure (for Coloring In)


I hope you enjoyed this craft. If you did, visit our other Origami / Paper Folding Crafts or Printout Standing Figures

Technorati Tags: , , , , , , , , , , , , , , , , , , ,

Wolf Stand-Up Paper Toy Model to Print Out Craft for Kids

Today, we will show you how to make some stand up paper-figure animals. This one is a standing wolf paper figure. You can choose a black and white version to color in, or you can choose the one that is already colorized. Either way … have fun.


Wolf Stand-Up Paper Toy Model to Print Out Craft for Kids


Today we will show you how to make paper wolves that can stand up on their own. You can use them as models or to play with. Click on the image below to open up a new page with the wolf picture. You should then print that page out….cut it out…and then fold on the line. It is as easy as that.

Print Out Black and White Wolf figure (for Coloring In)


Print Out Black and White Camel figure (for Coloring In)


Click on the Image Above to Open up the Black and White Wolf Stand up to Print Out

Print Out Color Version


Colorized Wolf Standing Up Paper Toy to Print Out


Click on the Image Above to Open up the Colorized Wolf Stand up to Print Out


I hope you enjoyed this craft. If you did, visit our other Origami / Paper Folding Crafts or Printout Standing Figures

Technorati Tags: , , , , , , , , , , , , , , , , ,

Moose Stand-Up Paper Toy Model to Print Out Craft for Kids

Today, we will show you how to make some stand up paper-figure animals. This one is a standing moose paper figure. You can choose a black and white version to color in, or you can choose the one that is already colorized. Either way … have fun.


Moose Stand-Up Paper Toy Model to Print Out Craft for Kids


Today we will show you how to make paper moose that can stand up on their own. You can use them as models or to play with. Click on the image below to open up a new page with the moose picture. You should then print that page out….cut it out…and then fold on the line. It is as easy as that.

Print Out Black and White Moose figure (for Coloring In)


Print Out Black and White Moose figure (for Coloring In)


Click on this image to print out a black and white version of this moose standup

Print Out Color Version


Print Out Color Version of Stand up Moose


Click on Above Image to Print Out a Colorized Moose Standup Animal


I hope you enjoyed this craft. If you did, visit our other Origami / Paper Folding Crafts or Printout Standing Figures

Technorati Tags: , , , , , , , , , , , , , , ,

Camel Stand-Up Paper Toy Model to Print Out Craft for Kids

Today, we will show you how to make some stand up paper-figure animals. This one is a standing camel paper figure. You can choose a black and white version to color in, or you can choose the one that is already colorized. Either way … have fun.


Camel Stand-Up Paper Toy Model to Print Out (and Color if You Want to) : Craft for Kids


Today we will show you how to make paper camels that can stand up on their own. You can use them as models or to play with. Click on the image below to open up a new page with the camel picture. You should then print that page out….cut it out…and then fold on the line. It is as easy as that.

Print Out Black and White Camel figure (for Coloring In)


Black and White Camel stand Up Paper TOy


Click On this Image to Open up Black and White Camel Stand up In New Page

Print Out Color Version


Colorized Camel stand Up Paper TOy


Click on the Image Above to Open up Colorized Camel Stand up in New Page


I hope you enjoyed this craft. If you did, visit our other Origami / Paper Folding Crafts or Printout Standing Figures

Technorati Tags: , , , , , , , , , , , , , , , ,

How to Fold a Standing Paper Goose and Duck with Paper Arts Instructions

Spring is here so it is is a great time to make ducks and geese and other creatures and critters to celebrate the new season. Today I have provided you with 2 patterns, one for a stand-up paper duck, and one for a stand-up paper goose. Just print out the pattern, fold it in half, cut it out, and stand it up…it is as easy as that.


How to Fold a Standing Paper Goose and Duck with Paper Arts Instructions


Stand-up Paper Duck Pattern


Print the pattern (BELOW). Fold the page in half and cut out the duck shape. Then you will have a duck shape as seen on the picture above (LEFT). Fold the neck as seen in the picture above and the fold the wings in a bit so that the duck is standing.


Click on This Pattern to Open up a New Page to Print Out

Stand-up Paper Goose Pattern


Print the pattern (BELOW). Fold the page in half and cut out the goose shape. Then you will have a goose shape as seen on the picture above (LEFT). Fold the neck as seen in the picture above and the fold the wings up so that the goose is standing on its own.


Click on This Pattern to Open up a New Page to Print Out

Technorati Tags: , , , , , , , , , , , , ,

Easter Bunny – Peter Cottontail Rabbit Paper Stand Up Dolls Craft for Kids

Peter Rabbit is a fictional character in various children’s stories by Beatrix Potter. He is a well-known, loved character that usually comes out in schools around the country during Spring and Easter-time. Below you will find 2 pages to print out of Peter Rabbit story characters and items such as a picnic basket, umbrella, etc. These are all paper-folding dolls that you can play with like toys for Easter time or after you have heard this great story. Have a great time.


Click Here for PDF File to Print Out Peter Rabbit Coloring Pages / and Play Stand Up Toys / Dolls

OR

Click on the 2 Pictures Below and Print Them Out Instead


Technorati Tags: , , , , , , , , , , , , , , , , , ,

Make a Mothers Day Foam Chef Doll Gift for Moms Who Like to Cook

Does your Mom cook the best food? Does she love hanging out in the kitchen to cook you the best food? Don’t you think that your Mom is the world’s greatest chef? Show her what you think of her by making this chef doll out of foam for a Mother’s Day present. The simple step by step instructions are given below.


Make a Mothers Day Foam Chef Doll Gift for Moms Who Like to Cook

Craft materials required:

Sponge, or a rectangle piece of foam.

Ribbon

Black Yarn

Glue

Tape

White and red paper

Markers

Scissors


Step 1

Tie a piece of ribbon arouund the foam tightly as shown below.


Step 2

Take about 20 pieces of yarn about 16 incles long.


Step 3

Tie the yarn in two places as shown below.


Step 4

Draw and colour two eyes and cut them out.


Step 5

Glue the hair on top of the head and the eyes on the face as shown below. Also cut out a red piece of paper for the mouth.


Step 6

Make an apron as shown below for the bottom half


Step 7

Glue it on the doll. Write the words ” World’s greatest chef- Mom” on it.


Step 8

Tale a piece of paper long enough to go around the head.


Step 9

Roll it to form a cylinder.


Step 10

Fix it on the head as shown below.The doll is ready. Give it to your Mom on Mother’s day to thank her for all the lovely meals she makes.


Technorati Tags: , , , , , , , , , , , ,

Easy Angel Christmas Tree Topper to Make : Arts & Crafts Ideas for Kids

No Christmas tree is complete without a beautiful angel placed on top.  This craft gives your children the opportunity to make their own Christmas angel ornament / Christmas tree topper.


Easy Angel Christmas Tree Topper to Make : Arts & Crafts Ideas for Kids


Easy Angel Christmas Tree Topper to Make : Arts & Crafts Ideas for Kids

Easy Angel Christmas Tree Topper to Make : Arts & Crafts Ideas for Kids, Teens, Preschoolers


Craft materials required:

  • 1 large clothespin
  • 1 toilet roll
  • Wrapping paper or material
  • White cardboard
  • Magic Markers
  • Glitter, sequins, etc (for decoration)


100_0823


1.  Cut vertical slits (a couple of inches long) along the bottom of your toilet roll.  This will help the angel to stay in place once you’ve put her on the tree.


100_0835


2.  Using the toilet roll as a guide, cut a rectangle from your wrapping paper or material that is a little longer than the roll, and that will wrap around it easily.  This will be the angels dress. Then, spread glue along the inside of the top of the toilet roll (the end that hasn’t been cut) and attach the paper or material.


100_0839


You may need to leave a gap at the back (otherwise, the ‘dress’ will not sit right.)


100_0841


3.  Next, we will make the angels body. Use your Magic Markers to draw a face and hair on the top part of the clothespin (everything from the split down will be hidden, as you will soon see.) I’ve given mine long brown hair and bangs, just like me!


100_0855


100_0854


4. Attach the clothespin to the inside of your toilet roll.


100_0843


100_0845


5. The only thing missing now are her wings. If you’re planning on using a lot of glue or paint, it’s usually a good idea to do this part first and work on the rest of the angel while the wings dry.

Fold your cardboard in half and draw one half of the wings (a quick Google search will bring up templates for this if you’re not much of a drawer!)


100_0846


6.  Cut out, unfold and decorate.


100_0848


(That green blob is supposed to be a star – it’s been awhile since I’ve used glitter glue!)

7. Attach your wings to the angel’s body and voila! A beautiful angel for your Christmas tree:


100_0851


CHRISTMAS CRAFTS ACTIVITIES & IDEAS FOR KIDS

It is almost Christmas time so check out our Christmas Coloring Pages & Christmas Crafts for Kids Page to find some great Christmas crafts project ideas for kids to celebrate Xmas such as .. Advent Calendar Crafts ..Candy Cane Crafts ..Christmas Angel Crafts ..Christmas Cards Crafts ..Christmas Bells Crafts ..Christmas Coloring Pages .. Santa Coloring Pages .. Christmas Elf Crafts .. Christmas Gift Bags Crafts ..Christmas Gift Tags Crafts .. Christmas Games & Activities .. Christmas Nativity Scenes .. Christmas Soda Can Crafts .. Christmas Placemat Crafts ..Christmas Poinsettias Crafts .. Christmas Sewing Patterns .. Christmas Tree Crafts ..Christmas Tree Ornament Crafts ..Christmas Wreath Crafts ..Gingerbread House Crafts ..Gingerbread Man Crafts .. Mittens and Gloves Crafts ..Recycle Christmas Cards to Make Other Crafts ..Reindeer Crafts .. Winter Penguin Crafts .. Winter Snow Crafts .. Winter Solstice / Yule Crafts ..Santa Clause Crafts .. Santa Hats Crafts .. Santa’s Sleigh Crafts ..Snowflake Crafts ..Snowman Crafts .. Stocking Crafts .. Wrapping Paper Craft

Technorati Tags: , , , , , , , , , , , , , , , , , , , , , , , , , , ,

Christmas Tree Angels Crafts for Kids : Easy to Make Angel Ornaments

Here is a beautiful angel that you and your kids will love to be on your Christmas tree. The following crafts project includes simple instructions to make the Christmas angel ornaments arts and crafts project that  follows.


DSC04090


Easy to Make Christmas Tree Angel Ornaments Arts and Crafts Activities for Kids for Kids, Teens, Preschoolers


Craft materials required:

Wax paper

Gold wide ribbon

Gold Twine

Tape

Cotton


Image137


Step 1

Cut out a square of wax paper


Image103


Step 2

Put a ball of cotton in the center of the paper


Image105


Step 3

Fold around the cotton ball as shown


angel 5


Step 4

Tie the ribbon as shown, with the knot at the back


Image107


Step 5

Fold the wings backward and stick as shown


angel wings


Step 6

Cut a piece of twine as shown


Image108


Step 7

Tape the ends together as shown.


Image109


Step 8

Tape this to the back of the head.

angel wings

Your pretty angel is ready to hang on your tree


DSC04090


CHRISTMAS CRAFTS ACTIVITIES & IDEAS FOR KIDS

It is almost Christmas time so check out our Christmas Coloring Pages & Christmas Crafts for Kids Page to find some great Christmas crafts project ideas for kids to celebrate Xmas such as .. Advent Calendar Crafts ..Candy Cane Crafts ..Christmas Angel Crafts ..Christmas Cards Crafts ..Christmas Bells Crafts ..Christmas Coloring Pages .. Santa Coloring Pages .. Christmas Elf Crafts .. Christmas Gift Bags Crafts ..Christmas Gift Tags Crafts .. Christmas Games & Activities .. Christmas Nativity Scenes .. Christmas Soda Can Crafts .. Christmas Placemat Crafts ..Christmas Poinsettias Crafts .. Christmas Sewing Patterns .. Christmas Tree Crafts ..Christmas Tree Ornament Crafts ..Christmas Wreath Crafts ..Gingerbread House Crafts ..Gingerbread Man Crafts .. Mittens and Gloves Crafts ..Recycle Christmas Cards to Make Other Crafts ..Reindeer Crafts .. Winter Penguin Crafts .. Winter Snow Crafts .. Winter Solstice / Yule Crafts ..Santa Clause Crafts .. Santa Hats Crafts .. Santa’s Sleigh Crafts ..Snowflake Crafts ..Snowman Crafts .. Stocking Crafts .. Wrapping Paper Craft

Technorati Tags: , , , , , , , , , , , , , , , , , , , , , , ,

Free Thanksgiving Pigrim Girl Paper Toys Model : Make Printable Foldable Pilgrims Paper Crafts for Kids


Free Thanksgiving Pilgrim Girl Paper Model Toys Printouts Paper Crafts


Free Thanksgiving Pigrim Girl Paper Toys Model : Make Printable Foldable Pilgrims Paper Crafts for Kids


Have a free afternoon and want to make the coolest craft you have ever made? All you need are a printer, paper, scissors, glue, and patience and you will have a fun Thanksgiving arts and crafts activity to keep you busy. Find out more below. (Also learn how to draw a cartoon pilgrim girl with step by step drawing lessons).

Materials Required:

Printer

Paper

Scissors

Glue

Small Stick

Patience

Free Pilgrim Girl Paper Models Diagrams Below:


Free Thanksgiving Pilgrim Girl Paper Model Toys Printouts Paper Crafts Diagram 1


Free Thanksgiving Pilgrim Girl Paper Model Toys Printouts Paper Crafts Diagram 2


Free Turkey Paper Models Instructions Below:

(1) Print out Template 1 & 2 and read directions that are on the templates.
(2) Cut out all the pieces along the dark outer lines.
(3) Score all inner lines. You can use a dull butter knife to score the folds.
(4) After you score all the inner lines & tabs, most shapes will take on a 3d-like shape..and you should be able to figure out how it folds up. If not, take a look at the finished image  to help you out.
(5) After you visualize how the shape should fold, glue tabs and push together. Use small sticks such as a chopstick, toothpick, end of a paint brush, etc to push together hard-to- reach areas.
(6) Let dry and then play with your toy pilgrim girl.

Then Make all the Thanksgiving characters like the Turkey, Pilgrim girl, Pilgrim boy and the Indian boy, and Indian Girl Make sure to do them all.


Also Make this Printable Foldable Turkey Paper Craft for Thanksgiving


Also Learn How to Draw a Pilgrim Girl with Step by Step Lesson


How to Draw Pilgrim Girls


MORE THANKSGIVING ARTS AND CRAFTS IDEAS BELOW

It is almost Thanksgiving time so check out our Thanksgiving Coloring Pages & Thanksgiving Crafts for Kids Page to find some great turkey and thanks-giving crafts project ideas for kids to celebrate Thanksgiving such as

Autumn / Fall Crafts ..
Cornucopia Crafts
..
Indian Corn Crafts
..
Pilgrim Crafts
..
Preschoolers & Toddlers Thanksgiving Crafts
..
Scarecrow Crafts
..
Thanksgiving Coloring Pages & Printouts
..
Thanksgiving Decorations Crafts
..
Thanksgiving Table Decorations Crafts ..
Thanksgiving Turkey Crafts ..
Thanksgiving Worksheets & Printouts

Technorati Tags: , , , , , , , , , , , , , , , , , , , , , , , , , , ,

Napkin Holder Doll for Thanksgiving Dinner Table Decorations Crafts Idea for Kids


Image094


Napkin Holder Doll for Thanksgiving Dinner Table Decorations Crafts Idea for Kids


This pretty doll will hold your napkins or cutlery for you at thanksgiving dinner. Today we are going to share an idea for making a ‘Happy Thanksgiving’ Dinner Table Napkins or Silverware Holder to use  as a decoration at your Thanksgiving dinner table. Below you will find instructions for this Thanksgiving table decoration.

Materials required:

Crepe paper

Toilet paper roll

Colored paper

Marker

Yarn- black

Thick white paper

Some thread/ twine

Cut out a piece of clored paper thats wider than half the length of the toilet paper roll and long enough to go around the roll once. Roll it around the roll and stick with glue.


Image077


Image078


Step 1

Cut a circle on white card for the head.


Image079


Step 2

Cut yarn into pieces as shown. Use glue to fix them to the top of the face like hair.


Image081


Image082


Step 3

Cut out a long piece of crepe paper. Make sure the natural creases of the paper are the same as shown in the picture. This paper shoudd be a little less than half the width of the roll and should go around the roll at least twice.


Image083


Step 4

Make a fold about one inch from the edge as shown.


Image084


Step 5

Apply glue to the edge of the paper only as shown.


Image085


Step 6

Place thread or twine along the fold. Fold the edge over it.


Image086


Step 7

Pull the thread to make the skirt fold


Image087


Step 8

Tie the skirt around the roll as shown. in the back, pull the edges together and glue as shown.


Image088


Image089


Step 9

Draw buttons on the dress


Image090


Step 10

Fix the head. Add eyes, nose and a wide smile.


Image094


Step 11

Your doll is ready. You can use the inside of the doll to store napkins or cutlery.


Image093


MORE THANKSGIVING ARTS AND CRAFTS IDEAS BELOW

It is almost Thanksgiving time so check out our Thanksgiving Coloring Pages & Thanksgiving Crafts for Kids Page to find some great turkey and thanks-giving crafts project ideas for kids to celebrate Thanksgiving such as

Autumn / Fall Crafts ..
Cornucopia Crafts
..
Indian Corn Crafts
..
Pilgrim Crafts
..
Preschoolers & Toddlers Thanksgiving Crafts
..
Scarecrow Crafts
..
Thanksgiving Coloring Pages & Printouts
..
Thanksgiving Decorations Crafts
..
Thanksgiving Table Decorations Crafts ..
Thanksgiving Turkey Crafts ..
Thanksgiving Worksheets & Printouts

Technorati Tags: , , , , , , , , , , , , , , , , , ,