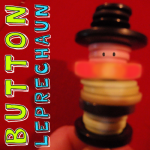
How to Make a Button Leprechaun for St. Patrick’s Day

St. Patrick’s Day is coming up in less than 2 weeks.  So, with that being said…. I thought that we could work on a fun craft in honor of St. Patrick’s Day.  In this post I will show you how to make a Button Leprechaun.  A Leprechaun is supposed to be a fairy type of being that takes the shape of an old man…. he usually wears a green jacket.  a Leprechaun is popular in Irish folklore.  So, in preparation of the upcoming St. Patrick’s Day Holiday let’s get this craft started.
Check out our other St. Patrick’s Day Crafts.


How to Make a Button Leprechaun


Materials Needed

Pipe Cleaner

4 Small Black Buttons

1 Large Black Button

2 Medium Black Buttons

6 Green Buttons

3 Pink Buttons

1 Large Orange Button

Black Marker or Paint


Step 1


Get a pipe cleaner.


Get a pipe cleaner.


Step 2


Start placing buttons on pipe cleaner.


Start placing buttons on pipe cleaner.


Step 3


Lace buttons on pipe cleaner in the following order


Lace buttons on pipe cleaner in the following order:  1 Black, 3 Greens, 1 Black, 3 Greens, 1 Large Orange, 3 Pinks, 1 Big Black, 4 Small Black.


Step 4


Push pipe cleaner down into hole diagonal to the hole that the pipe cleaner is coming out of.


Push pipe cleaner down into hole diagonal to the hole that the pipe cleaner is coming out of.


Step 5


Twist pipe cleaner at bottom.... cut.


Twist pipe cleaner at bottom…. cut.


Step 6


Draw eyes on the pink buttons.


Draw eyes on the pink buttons.


Finished Button Leprechaun


Check out the finished Button Leprechaun.  Isn’t he cute?  How did your Button Leprechaun turn out?  Let me know in the comments below.  And, make sure to take a picture of your finished craft and leave that in the comment as well…. I’d love to see it.

Technorati Tags: , , , , , , , , , , ,

How to Make Chalk Sculptures

I have a fun and creative craft for you today.  I’m going to show you how to make Chalk Sculptures simply with a pin and some blackboard chalk.  I give you some examples of things to make with your chalk sculptures, but please feel free to use your imagination to make whatever you would like with your chalk sculptures.  The choices are virtually endless of the things you can make.  So, grab the materials needed and let’s get started.

Check out our other Sculpting Crafts.


How to Make Chalk Sculptures


Material Needed

Chalk

Pin


How To

Get a piece of chalk…any size…although I would say younger children would have an easier time with a thicker piece of chalk though.  Scrape away unwanted portions of blackboard chalk with a pin, Work slowly, exerting very little pressure so that chalk will not crumble.

Robed Women

Here are four views of a robed woman figurine.


Robed Woman Figurine


Don’t feel as if you need to make sculptures of images that are on this page…try anything…even flowers, stuffed animals, or whatever you want to make.


Other Examples of Figurines

Here are some more examples….


More Examples of Figurines


And, there you have it….. that is how you make a Chalk Sculpture simply with a pin.  How did your Chalk Sculptures turn out?  Let me know in the comments below.  Also, take a picture of your sculptures and post them in the comments as well…. I’d love to see them.

Technorati Tags: , , , , , , , ,

How to Make a Layered Paper Doll

Today I’m going to show you how to make a Layered Paper Doll.  This craft can be made with any character you would like.  For purposes of explaining this tutorial I will show you how to make this Layered Paper Doll using a Beauty and the Beast Character…. Belle.  Once you know the technique of how this is done you can do this to any character.  This craft is a lot of fun, so grab the materials needed and let’s get started.

Check out our other People Figures & Doll Crafts.

Laura from Dacian Moon Handmade will show you today how to make a layered paper doll.  We’ll make Belle from Beauty and the Beast. You can take the picture from here.


Materials Needed

– image or sketch from here
– color card stock (brown, green, yellow, red, orange, white)
– glue (paintbrush for applying the glue – optional)
– thin markers for the face


Step 1

Print the picture and cut out the doll.


Step 2

Trace the contour of every single piece on its corresponding color card stock.  Start from the big ones to the little ones.  On the yellow cardstock draw the contour of the dress.


On brown draw the hair.


Step 3

Cut out the hair and the body.


Take care to draw every part of the hair on brown – you’ll have 3 parts: one general (drawn with black), and two pieces in front (blue and green).


The rest is the dress and the hands. Complete the contour of the dress on the yellow card stock.


Cut out the lower part of the dress, the hands and the upper part of the dress (we need everything that goes on top of something else.)


Replicate them on corresponding colors.


Step 4

Start cutting the layers of the dress…


… replicating every single one.


In the end we’ll have something like that.


Step 5

Cut all of them out.


Step 6

On a white cardboard start gluing the pieces, from bigger to smaller.  First of all will come the hair (the general piece).


Apply a layer of glue on the back of the body piece…


… and place it on top of the hair.


Glue the next piece of hair…


… and then the face and the last piece of hair.


Now that the head is ready, glue the bigger piece of dress in its place.


Next comes the hands…


So glue them on there place.


Cover them with yellow gloves…


… like that.


Add the top of the dress – the orange band.


Now, let’s make the lower part of the dress.


Glue the layers in order, one on top of the other…


And finish with the orange band.


Next, add the orange edges to her gloves.  Now her dress is ready. Add two little pieces of green as a rose stem in her hands.


Step 7

Let’s give her life: draw her eyes and mouth with colored markers.


Step 8

The last thing: the rose flower. On red card stock draw two petals and a rectangle. Cut them out.


Glue one of the petals on top of the stem.


Roll the rectangle and glue it on top…


… then add the last petal over it.


The layered doll is ready! With this technique you can make any favorite character a layered paper doll.  The question is…. what are you going to make next?

Technorati Tags: , , , , , , , , , , ,

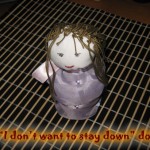
How to Make an “I Don’t Want to Stay Down” Doll

Today I’m going to show you how to make a traditional Romanian Toy.  It is called a “Hopa Mitica” Doll.  But, we will call it an “I Don’t Want to Stay Down” Doll because this doll will not stay down.  When you try to lay it down it will pop right back up.  It’s a cute, funny toy that will be a ton of fun to make…. almost as much fun as it will be playing with the Doll.  So, grab the materials needed and let’s get started with the crafting fun.

Check out our other Doll Making Crafts.

Laura from Dacian Moon Handmade will show you this craft step-by-step.


Our doll will not be made of wood, so …


Materials Needed

– round top (I use a round top from a roll-on)
– scissors
– a red marker and a black one
– 2 cloth pieces – one white or light pink for the face and one colored for the dress
– anti-shock wrap (bubble wrap)
– yarn (whatever color you want her hair to be) and needle
– 1 toothpick
– weights (could be anything heavy but small, it should stay on the bottom of the round top.)
– one piece of ribbon


Step 1

Make a ball (not perfect, of course) from the bubble wrap…


… roll up the white cloth around it…


… and tie it with a piece of yarn. This will be the head.


Step 2

Use the needle to add hair to the head, like in the picture.


Cut the yarn near the needle…


… and make a knot (or two) with the two parts of yarn.


Add as many yarn pieces until you are happy with the result. An alternate method is to glue the yarn to the head of the doll.


Step 3

Now we will place the weights in the round top. They should stay on the bottom of it. You can place there just enough weights to keep the round top up. If you will add more, the doll will not work.


Step 4

Make another ball of bubble wrap …


… and stuff it in the round top, in order to keep the weights in place.


Step 5

Place the toothpick on the lower part of the head, like in the picture.


Step 6

Roll up the rest of the bubble wrap around the toothpick…


… and fix it on top of the other bubble wrap, on the round top.


Step 7

Take the colored cloth …


… and wrap it around the doll, keeping out the head.


Step 8

Tie the cloth with the ribbon, at the base of the head. Take care to let her hair out too.


The doll will look like that.


Step 9

Using the markers, draw eyes and mouth.


And that’s it.


Now try to put her down.


She will jump up …


… waiting to play with you.


And that is how you make your “I Don’t Want to Stay Down” Doll.  Try and knock her over and see what happens…. she pops right back up again ready to play some more.  Have fun!!

Technorati Tags: , , , , , , , , ,

How to Make a Kokeshi Doll

Kokeshi are Japanese dolls, originally from northern Japan. They are handmade from wood, have a simple trunk and an enlarged head with a few thin, painted lines to define the face. One characteristic of kokeshi Dolls is their lack of arms or legs.  So, with that being said…. today I’m going to show you how to make a Kokeshi Doll.  It will be a lot of fun…. almost as much fun as it will be showing to people the Kokeshi Doll you made yourself.  So, grab the materials needed and let’s get started.

Check out our other Doll Making Crafts.

Laura from Dacian Moon Handmade will show you how to make a kokeshi doll step-by-step.


Materials Needed

– 1 cylinder wooden bead – I use a cork – this will be the body
– 1 round wooden bead – I use a walnut – this will be the head (she would be prettier if you’ll use a wooden ball in place of the walnut)
– a piece of paper with flowers
– a piece of white paper
– a piece of red paper (or a ribbon)
– craft glue
– paints (red and black)
– paintbrush


Step 1

Cut the paper with flowers a little bit (with 1 or 2 mm) shorter then the cylinder.


Apply a layer of glue on the back of this paper…


… and roll it around the cylinder.


Step 2

Take the white paper and cut it the same length as the first one, but shorter. Apply a layer of glue on it…


… and place it in the middle of the paper with flowers …


… like this.


Step 3

Apply a layer of glue on the red paper / ribbon too …


… and place it on the middle…


… like this.


Step 4

Now is the time to make the head.


Take the walnut / ball and, using the black paint, make her hair and eyes. Remember that her face should be made of simple, thin lines. Let it dry.


Step 5

Apply a layer of glue on the bottom of the head…


… and place it on top of the body.


Step 6

You can add blush and a mouth… and your doll is ready!


Isn’t this Kokeshi Doll just adorable?  Imagine how cute she would look sitting on your dresser.  How did your Kokeshi Doll turn out?  Let me know in the comments below.  And, make sure to take a picture of your Kokeshi Doll and post that in the comment as well… I’d love to see it.

Technorati Tags: , , , , , , , ,

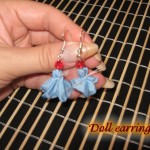
How to Make a Pair of Doll Earrings

I have a fun craft for the girls today.  I’m going to show you how to make a Pair of Doll Earrings.  These earrings turn out so cute…. they really are fun and playful.  These earrings are simply made from a few pieces of ribbon, some crystals and a few other materials.  They are simple, but trust me the craft is fun.  The Doll Earrings turn out looking like little tiny rag dolls…. just adorable.  So, grab the materials needed and meet me back here so we can get started.

Check out our other Jewelry Crafts.

Laura from Dacian Moon Handmade will show this tutorial step-by-step.


Materials Needed

– 2 small rectangles of ribbon (about 3 cm x 3 cm)
– thread and needle
– scissors
– 4 crystals
– 2 earring hooks
– 2 head pins
– round nose pliers


Step 1

Take a rectangle and fold it in half…


… then again in half, to obtain a small rectangle.


Round cut the corner. Unfold. It will look like that.


Step 2

Place one crystal on one pin…


… then put it through the middle of the ribbon (it may be necessary to make a LITTLE hole with the scissors)


Step 3

Using the thread and needle sew under the crystal…


… like this…


… letting enough thread on both sides to tie it.


Cut the extra thread.


Step 4

Place another crystal on top of it.


Step 5

Using the round nose pliers, make a loop on top of the crystal…


… place the hook in it then close the loop.


This is the finished earring.


Repeat all the steps to make the second earring.


And, there you have it… your finished pair of Doll Earrings.  Aren’t they super cute?!   How did your earrings turn out?  Let me know in the comments below.  And, take a picture of the earrings and share them in the comment as well…. I’d love to see them.

Technorati Tags: , , , , , , , ,

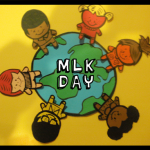
How to Make a Multicultural Kids Around Earth Craft for Martin Luther King Day

Martin Luther King Day is this Monday.  The Martin Luther King Day Holiday represents what he taught us…. equality in all people…. no matter what color their skin is.  That is an amazing thing.  So, today we will be honoring Martin Luther King and all he taught us… by making a craft for this Holiday.  So, in this post I will be showing you how to make a Multicultural Kids Around Earth craft for Martin Luther King Day.  The craft is a lot of fun and has tons of meaning.  So, let’s get started, shall we…

Check out our other Martin Luther King Day crafts.


Multicultural Kids Around Earth Craft for Martin Luther King Day


Materials Needed

Printer & Paper

Scissors

pencil

Many Different Colored Pieces of Paper

Black Marker

Glue


Click on Templates below to make larger and to print both off.

Children Template


Children Template


Earth Template


Earth Template


Step 1


 Print out Template.


Print out Template.


Step 2


Cut out


Cut out the images on the template.


Step 3


trace on different colors of paper


Cut out like this then trace on different colors of paper.


Trace it like this.


Trace it like this.


Step 4


Cut about 7 out


Cut about 7 out… all in different colors.


Step 5


outline with black marker.


To make each one look nicer, outline with black marker.


Step 6


Draw a dot for each eye.


Draw a dot for each eye.


Draw a letter 'C' for nose.


Draw a letter ‘C’ for nose.


Draw a curved line for mouth.


Draw a curved line for mouth.


Draw a curved line above each eye


Draw a curved line above each eye and on each side of the mouth.


Step 7


Trace hair on colored paper


Trace hair on colored paper…. like you did with the people.


You can outline the hair too


You can outline the hair too.


Step 8


 You can draw on clothes too


You can draw on clothes too if you want to.


Step 9


Glue hair on figure.


Glue hair on figures.


Step 10


Cut out circle.  Then trace it on blue paper


Cut out circle.  Then trace it on blue paper like seen above.


Step 11


Cut out the pencil outline of the circle.


Cut out the pencil outline of the circle.


Step 12


Now cut out the small parts of the template.


Now cut out the small parts of the template.


Step 13


Trace the template onto green paper.


Trace the template onto green paper.


Step 14


Outline the blue circle in black marker.


Outline the blue circle in black marker.


Step 15


Glue green land on to the blue circle


Glue green land on to the blue circle globe.


Step 16


Glue kids around the globe.


Glue kids around the globe.

Awesome job!!  You just finished making your Multicultural Kids Around Earth craft for Martin Luther King Day.  Now go hang it proudly for all to see.  You are sure to get some really amazing compliments on it.

Technorati Tags: , , , , , , , , , , , , , , ,

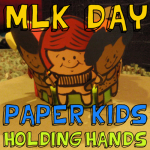
How to Make a Paper Kids Holding Hands Craft for Martin Luther King Day

I have a great craft to share with you today.  I’m going to show you how to make a Paper Kids Holding Hands craft for Martin Luther King Day.  Martin Luther King Day is about remembering Martin Luther King and what he was all about.  This craft is a great way to honor Martin Luther King and to remind the children what the holiday is all about.   Today’s craft reminds us that no matter what we look like…. no matter the color of our skin we should all be created equal.  So, in honor of that and Martin Luther King let’s make today’s craft together.  So, gather up the materials needed and let’s get started.

Check out our other Martin Luther King crafts.


How to Make a Paper Kids Holding Hands for Martin Luther King Day


Materials Needed

Printer and Paper

Many Different Colored Sheets of Paper

Pencil

Scissors

Black Marker

Round Object or Lid (I used an Ice Breakers Container)

Glue


Click on Template below to make larger and to print off.


Children Holding Hands Template


Step 1


Print out Template


Print out template.


Step 2


Cut out images on Template


Cut out images on template.


Step 3


trace on different colors of paper


Cut out like this and then trace on different colors of paper.


Trace it like this.


Trace it like this.


Step 4


Cut about 7 out


Cut about 7 out… all in different colors.


Step 5


outline with black marker


To make each one look nicer, outline with black marker.


Step 6


Draw a dot for each eye


Draw a dot for each eye.


Draw a letter 'C' for the nose.


Draw a letter ‘C’ for the nose.


Draw a curved line for the mouth.


Draw a curved line for the mouth.


Draw a curved line above each eye


Draw a curved line above each eye and on each side of the mouth.


Step 7


Trace hair on colored paper


Trace hair on colored paper like you did with the people.


You can outline the hair too.


You can outline the hair too.


Step 8


You can draw on clothes too


You can draw on clothes too if you want to.


Step 9


 Glue hair on figure.


Glue hair on figure.


Step 10


To connect the hands... cut a slit on each arm


To connect the hands… cut a slit on each arm.  To connect two hands… Cut a slit on top of one arm and the bottom of the other.  Then slide the two arms together to hold in place.


Slide arms together.


Slide arms together… do with all arms.


Hook arms together


Hook arms together like so.


Step 11


connect arms around a round lid


I connected the last 2 arms around an Ice Breakers container, but you can use any round object like a lid.


Finished Martin Luther King Kids Holding Hands Craft


Isn’t this Martin Luther King Day craft cute?!  I love the meaning behind it too…. that makes it even more beautiful.  How did your Martin Luther King Day craft turn out?  Let me know in the comments below.  And, don’t forget to take a picture of the craft and share that too in the comments…. I’d love to see how yours turned out.

Technorati Tags: , , , , , , , , , , , , , , ,

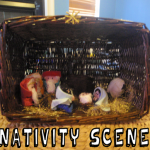
How to Make a Nativity Scene for Christmas

All week long I have been showing you how to make the characters for a Nativity Scene.  Well, today you are going to set up your Nativity Scene complete with basket.  You have been working hard and today you are going to get to see the results of all your hard work.  If you need to still complete the Nativity character crafts…. not a problem.  I have all the crafts for the Nativity characters below.  So, let’s complete the Nativity Scene for Christmas, shall we….

Check out our other Christmas Crafts.


How to Make a Nativity Scene for Christmas


How to Set up the Nativity Basket

Materials Needed

Basket – large enough to hold the nativity scene

Gold or Yellow Thread

4 Twist Ties

Glue


Step 1


Take 4 twist ties and wrap gold or yellow thread around them.


Take 4 twist ties and wrap gold or yellow thread around them.


Step 2


Fold over corners to keep thread on.


Fold over corners to keep thread on.


Step 3


Twist one of the twist ties over the other, like a letter V.


Twist one of the twist ties over the other, like a letter V.


Step 4


Fold one side down to now look like a cross.


Fold one side down to now look like a cross.


Step 5


Twist another one around the first two.


Twist another one around the first two.


Step 6


Do one more to look like this.


Do one more to look like this.


Step 7


Glue the star on top of basket.


Glue the star on top of basket.  Add gold or yellow thread to the bottom of the basket.

Now that you have the background to the Nativity Scene done it is time to make the characters that will fill this Nativity Scene.


Nativity Scene Character Crafts


Nativity Scene Characters


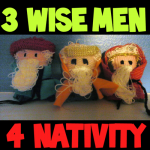
How to Weave the 3 Wise Men


How to Weave the 3 Wise Men for a Nativity Scene


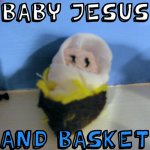
How to Weave a Baby Jesus and Cradle


How to Weave a Baby Jesus and Cradle for a Nativity Scene


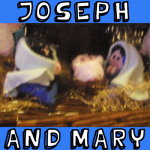
How to Weave Mary and Joseph


How to Weave Mary and Joseph for a Nativity Scene


How to Make Yarn Clothespin Sheep


How to Make Yarn Clothespin Sheep for a Nativity Scene


How to Make Yarn Clothespin Donkeys


How to Make Yarn Clothespin Donkeys for a Nativity Scene


And, there you have it…. you have all the crafts needed to complete your Nativity Scene.  I would love to see how your Nativity Scene turned out.  Please share your Nativity Scene with all of us by leaving a picture in the comments below.  I’d love to see how it turned out.

Technorati Tags: , , , , , , , , , , , , , ,

How to Weave Mary and Joseph for a Nativity Scene

For the past few days I have been showing you how to weave different characters for a Nativity Scene.  First, I showed you how to Weave the 3 Wise Men.  Next, I showed you how to Weave a Baby Jesus.  Today I’m going to continue showing you how to weave a Nativity Scene by showing you how to Weave Mary and Joseph.  So, let’s get started.

Check out our other Christmas Crafts.


How to Weave Mary and Joseph for a Nativity Scene


Materials Needed

2 inch x 4 inch Piece of Cardboard

Ruler

Pencil

Scissors

Tape

String or Yarn (different color yarn, make sure to have some skin color yarn like Peach, Tan, Brown, etc.)

Needle

Fork

Stones, Coins, or Something Else Heavy

Cotton or other Filling

Black Thread

Old Piece of Fabric

4 Hand Shaped Beads


Step 1


Cut out 2" x 4" piece of cardboard.


Cut out 2″ x 4″ piece of cardboard.


Step 2


Mark sides with lines about 1/8 inch apart


Mark sides with lines about 1/8 inch apart… so every two lines on the inches side of the ruler.


Step 3


start cutting slits on lines that we drew in the previous step.


If you think your cardboard will fall apart by cutting slits… firstly, cover with clear tape.  Otherwise, just start cutting slits on lines that we drew in the previous step.


Step 4


Put string in the notch that is alone on one side.


Put string in the notch that is alone on one side.  Tape it down.  Then pull the string all the way up the back of the cardboard.


Step 5


pull the yarn through the first notch


In the last step you brought the yarn up to the top left side notch from behind the cardboard.  Now, pull the yarn through the first notch… now the yarn is in the front again.


Step 6


bring yarn over the next notch and pull down back again


Now, bring yarn over the next notch and pull down back again.


Step 7


Bring the string all the way down to the bottom.


Bring the string all the way down to the bottom.


Step 8


Bring string over from back and up thru the first notch again


Bring string over from back and up thru the first notch again.


Step 9


pull the yarn behind and thru the 2nd tab


Now, pull the yarn behind and thru the 2nd tab so that there is now a loop in front and behind the first tab.


Step 10


bring the yarn down behind cardboard and up thru the next slit.


Now, bring the yarn down behind cardboard and up thru the next slit.  Make loop in front of tab and bring down back of cardboard again.


Step 11


bring yarn down back and up bottom and thru the slit and make a loop in back and down next slit and down front again


Now, bring yarn down back and up bottom and thru the slit and make a loop in back and down next slit and down front again… continue this pattern.


Step 12


When done... tape string down


When done… tape string down.


Step 13


Thread a needle with yarn or string.


Thread a needle with yarn or string.


Step 14


Pull the yarn over and under each piece of yarn and leave a short tail


Make your yarn as long as you want it to be.  Pull the yarn over and under each piece of yarn and leave a short tail.


Step 15


turn the cardboard over and you will weave on this side too


Now, turn the cardboard over and you will weave on this side too.  On the other side you went UNDER the last thread… so here go OVER the first thread.  ***Don’t go under the taped string.


Step 16


Every few times or so, take a fork and push the threads down


Keep weaving on both sides of the cardboard.  Every few times or so, take a fork and push the threads down.


Step 17


When the thread is nearing an end, then push the needle down thru loops in past rows


When the thread is nearing an end, push the needle down thru loops in past rows.


How to start a new string


To start a new piece of yarn… just put the string in where you left off… like you see in the above image.


Step 18


Weave back and forth with skin color only in center strings


Weave back and forth with skin color (tan, brown, peach, etc.) only in the center strings.  So, you will NOT be turning cardboard over and weave along back.


start by pushing the yarn through the same loop that the bottom left side of the face used


Choose the color that will be around face.  You will be using this yarn to weave around the face for a hood.  We start by pushing the yarn through the same loop that the bottom left side of the face used.


weave around back.


Now, weave around back.


come over on the right side of the face.


Now, come over on the right side of the face.  Loop thru the string on the right side of the face and then go over it and weave around back again.


Keep going.


Keep going.  At the top of the figure you can weave all around it again.


This is what your figure should look like now


This is what your figure should look like now.


Step 19


Use your needle to pull loops off of cardboard.


Use your needle to pull loops off of cardboard.


Step 20


pull the woven fabric off of the cardboard


Now, loops are off… You can now pull the woven fabric off of the cardboard.


Step 21


Tie any loose threads into a knot.


Tie any loose threads into a knot.


Step 22


You should now stuff with stones, coins or something else heavy.


You should now stuff with stones, coins or something else heavy.  Only fill enough to look like she is kneeling.  Then fill the rest of the figure with cotton.


Step 23


Use black thread to sew on hair and eyes


Use black thread to sew on hair and eyes.


Step 24


For Joseph.... sew on a beard.


For Joseph…. sew on a beard.


Step 25


Bend figures into an L shape


Bend figures into an L shape like above.  Sew them in this position with same color yarn as shirt.


Step 26


Somehow I lost the pictures of the last few steps....


Somehow I lost the pictures of the last few steps…. Basically, just cut a bit of fabric and wrap around (like in image) and sew to head (just a few stitches will do).  Then just glue two hand shaped beads to the bottom of their face to look like praying hands.


Step 27


Sit Joseph and Mary around Baby Jesus


Sit Joseph and Mary around Baby Jesus from our Baby Jesus craft tutorial.

Awesome job…. you just finished weaving Mary and Joseph for a Nativity Scene.  How did they turn out for you?  Let me know in the comments below.  And, if you haven’t already done so…. make sure to complete the entire Nativity Scene by weaving the 3 Wise Men, Baby Jesus, Clothespin Donkey and the Clothespin Sheep.

Technorati Tags: , , , , , , , , , , , , , ,

How to Weave a Baby Jesus and Cradle for a Nativity Scene

Yesterday I showed you how to Weave the 3 Wise Men for a Nativity Scene…. well, today I’m going to continue the weaving fun by showing you how to Weave a Baby Jesus and Cradle.  Imagine how proud you will be to have made an entire Nativity Scene yourself… so proud!!  So, let’s get started.

Check out our other Christmas Crafts.


How to Weave a Baby Jesus and Cradle for a Nativity Scene


Materials Needed

2 Pieces of Cardboard Measuring 3 inch x 1 1/2 inch

Ruler

Scissors

Tape

String or Yarn (Brown, Yellow & Skin Color Yarn like Pink, Tan, Brown, etc.)

Needle

Black String or Thread

Cotton or other Filler

Burp Cloth or Similar Fabric

Fork


Step 1


Cut a piece of cardboard about 3 inches x 1.5 inches.


We will start by making a cardboard loom to weave the basket with. Cut a piece of cardboard about 3 inches x 1.5 inches.


Step 2


Cut slits about 1/4 inch apart on one of the long sides.


Cut slits about 1/4 inch apart on one of the long sides.  Cut one slit on the other side.


Step 3


Put string in slit that is alone.


Put string in slit that is alone.  Tape down.


Step 4


Pull string around back and down thru top slit.


Pull string around back and down thru top slit.


Step 5


Wrap string around front of tab to the next slit.


Wrap string around front of tab to the next slit.  The string will now be hanging down back of cardboard.


Step 6


Bring string down back of cardboard and up around to the front


Bring string down back of cardboard and up around to the front and slide thru the first slit.


Step 7


Bring string around back and thru second slit.


Bring string around back and thru second slit.


Step 8


Bring string around back and then thru next slit


Bring string around back and then thru next slit… now it’s hanging down front again.


Step 9


Put string into next slit so string hanging down back to make loop in front.


Put string into next slit so string hanging down back to make loop in front.


Step 10


Bring down back of cardboard and then up around the front.


Bring down back of cardboard and then up around the front.  Place in the slit and make a loop in back by putting in 2nd slit.


Step 11


When done winding... tape last string down.


When done winding… tape last string down.


Step 12


Thread some yarn or string.


Thread some yarn or string.


Step 13


Basics of Weaving


We will now start weaving. Above in the illustration, O is over and U is under. Basically, put the needle under and over the strings. For the first string, you can pull the yarn all the way through, leaving just a bit of yarn left under the first string. When you get to the edge of cardboard, turn over the cardboard. Then start weaving again. if you ending going under the last string on the other side, then this time go over.


Stick needle with yarn under and over strings.


Stick needle with yarn under and over strings.


You can leave a bit of a tail on the yarn you are weaving with.


You can leave a bit of a tail on the yarn you are weaving with.


Step 14


go under the first string on the other side.


Turn over the cardboard… we ended by going over the last string, so go under the first string on the other side.  Make sure to skip taped down string.  ***Always weave on the side with OUT the loops… as seen above.


Step 15


take a fork and push the threads down.


Keep weaving on both sides of the cardboard.  Every few times or so take a fork and push the threads down.


Step 16


When the thread is nearing the end, then push the needle down thru loops in past row.


When the thread is nearing the end, then push the needle down thru loops in past row.


Step 17


To start a new piece of yarn... just put the string in where you left off


To start a new piece of yarn… just put the string in where you left off… like you see in the image above.


Step 18


Fill up the entire piece of cardboard with brown yarn.


Fill up the entire piece of cardboard with brown yarn.


Step 19


Use your needle to pull loops off of cardboard.


Use your needle to pull loops off of cardboard…


pull the weaved fabric off of cardboard


… Now the loops are off like this and you can pull the weaved fabric off of cardboard.


Step 20


You now have a little basket.


Take the woven fabric off the cardboard.  Tie any loose threads.  You now have a little basket.


Step 21


Cut a piece of cardboard that is about 1.5 inches by 3 inches


Cut a piece of cardboard that is about 1.5 inches by 3 inches.


Step 22


Wind string around it like you did with the other cardboard loom.


Cut slits on one of the short ends.  Then cut one slit on the other side.  Wind string around it like you did with the other cardboard loom.  Make skin color such as pink, tan, brown, etc.


Step 23


Then weave with the skin color you chose when winding string.


Then weave with the skin color you chose when winding string.  Weave all the way to the top.  Use needle to take the loops off of top.  Take woven fabric off of cardboard.


Step 24


Tie loose threads into knots.


Tie loose threads into knots.


Step 25


Get some black string or thread and tie a knot.


Get some black string or thread and tie a knot.


step 26


Start sewing the eyes.


Bring the needle up thru unclosed end and pull it out where you want one of the eyes to be.


Step 27


Sew second eye.


Then just push the needle back down where you want the eyes shape to end.  From underneath push up where you want 2nd eye to be.


Step 28


Fill with cotton or other filler.


Fill with cotton or other filler. Then sew the bottom of the figure shut with skin colored yarn that you used previously.


Step 29


Cut a piece of burp cloth or other similar fabric.


Cut a piece of burp cloth (ask Mom or Dad if they saved any from when you were a baby) or other similar fabric.  Make it a rectangle.  Fold down a triangle on the left top corner.


Step 30


Place woven baby on it with head all the way to top of triangle.


Place woven baby on it with head all the way to top of triangle.


Step 31


Push bottom of fabric up to below eyes.


Push bottom of fabric up to below eyes.


Step 32


Push the left side of fabric over the baby.


Push the left side of fabric over the baby.  The push it under right side of baby.


Step 33


Bring right side of fabric over the baby


Bring right side of fabric over the baby and push it down under the left side of baby.


Step 34


Baby should look like this now.


Baby should look like this now.


Step 35


Place baby in cradle.


Place baby in cradle.  Cut up some yellow yarn and stick in basket if you want to.


Finished Baby Jesus in Cradle Craft.


And, there you have it…. you finished weaving a Baby Jesus and Cradle for a Nativity Scene.  Awesome job!!  This woven Baby Jesus goes perfectly with the woven 3 Wise Men we made yesterday. Make sure to also do the Mary & Joseph craft, Yarn Clothespin Sheep craft  and the Yarn Clothespin Donkey craft to complete your Nativity Scene.

Technorati Tags: , , , , , , , , , , , , , ,

How to Weave the 3 Wise Men for a Nativity Scene

Today I have a great craft perfect for the Christmas Holiday Season.  I am going to show you how to Weave the 3 Wise Men for a Nativity Scene.  There are a lot of steps to this craft, but I don’t want you to be intimidated by that.  The craft isn’t too complicated…. there are just a lot of steps because I wanted to be detailed in my instructions for you.  And, keep an eye out… I will be showing you how to Weave a Baby Jesus for this Nativity Scene in the next day or so too.

Check out our other Christmas Crafts.


How to Weave the 3 Wise Men for a Nativity Scene


Materials Needed

2″ x 4″ Piece of Cardboard

Pencil

Ruler

Scissors

Yarn or String  (Different colors for skin, beard, hair, clothes and crowns)

Needle

Fork

Black and Gold String or Thread

Rock, Stones, or Coins (something heavy)

Cotton for Filling

Safety Pin

Fabric from Old Clothes or Baby Clothes

Tape

Twist Tie

Sturdy Cardboard Box

Small Beads


Step 1


Cut out 2" x 4" piece of cardboard


Cut out 2″ x 4″ piece of cardboard.


Step 2


Mark sides with lines about 1/8 inch apart


Mark sides with lines about 1/8 inch apart… so every two lines on the inches side of the ruler.


Step 3


start cutting slits on lines that we drew in the previous step.


If you think that your cardboard will fall apart by cutting slits… firstly cover with clear tape.  Otherwise, just start cutting slits on lines that we drew in the previous step.


Step 4


Put string in the notch that is alone on one side


Put string in the notch that is alone on one side.  Tape it down.  Then pull the string all the way up the back of the cardboard.


Step 5


pull the yarn thru the first notch


In the last step you brought the yarn up to the top left side notch from behind the cardboard.  Now, pull the yarn thru the first notch… now yarn is in front again.


Step 6


bring the yarn over the next notch and pull down back again


Now, bring the yarn over the next notch and pull down back again.


Step 7


Bring the string all the way down to the bottom.


Bring the string all the way down to the bottom.


Step 8


Bring string over from back and up thru the first notch again


Bring string over from back and up thru the first notch again.


Step 9


pull the yarn behind and thru the 2nd tab


Now, pull the yarn behind and thru the 2nd tab so that there is now a loop in front and behind the first tab.


Step 10


bring yarn down behind cardboard and up thru next slit.


Now, bring yarn down behind cardboard and up thru next slit.  Make loop in front of tab and bring down back of cardboard again.


Step 11


bring yarn down back and up bottom and thru the slit and make a loop in back and down next slit and down front again


Now, bring yarn down back and up bottom and thru the slit and make a loop in back and down next slit and down front again… continue this pattern.


Step 12


When done... tape string down.


When done… tape string down.


Step 13


Thread a needle


Thread a needle with yarn or string.


Step 14


Pull the yarn over and under each piece of yarn and leave a short tail.


Make your yarn as long as you want it to be.  Pull the yarn over and under each piece of yarn and leave a short tail.  ***Notice that you start weaving on the side that does not have loops.


Step 15


go OVER the first thread


Now, turn the cardboard over and you will weave on this side too.  On the other side, you went UNDER the last thread…. so here go OVER the first thread.


Step 16


Keep weaving on both sides of the cardboard


Keep weaving on both sides of the cardboard.  Every few times or so, take the fork and push the threads down.


Step 17


push the needle down thru loops in past rows


When the thread is nearing the end, then push the needle down thru loops in past rows….


To start a new piece of yarn... just put the string in where you left off


… To start a new piece of yarn… just put the string in where you left off… like you see above.


Step 18


When you get to about the half way point... change the yarn to skin color - which could be brown, tan, pink, cream, etc.


When you get to about the half way point… change the yarn to skin color – which could be brown, tan, pink, cream, etc.  Go as far to the top as you can.


Alternative Way to Make the Face

Step A


Weave back and forth on center strings if you want to make skin only in the center.


An alternative way to make these figures are to make the face only in the center (like small image above).  Weave back and forth on center strings if you want to make skin only in the center.  So, don’t go around the back for making the face.


Step B


We start by pushing the yarn through the same loop that the bottom left side of the face used.


Choose the color that will be around the face.  You will be using this yarn to weave around the face for a hood.  We start by pushing the yarn through the same loop that the bottom left side of the face used.


Step C


weave around back.


Now, weave around back.


Step D


Loop thru the string on the right side of the face


Now, come over on the right side of the face.  Loop thru the string on the right side of the face and then go over it and weave around back again.


Step E


Keep going


Keep going.  At the top of the figure you can weave all around it again.


Step 19


Use your needle to pull the loops off of cardboard.


Use your needle to pull the loops off of cardboard.


Step 20


you can now pull the weaved fabric off of cardboard


The loops are now off like this… you can now pull the weaved fabric off of cardboard.


Step 21


Take fabric off of cardboard


Take fabric off of cardboard…. it now looks like above image.


Step 22


Fold inside out and then tie loose threads into knots.


Fold inside out and then tie loose threads (the ones that were taped down in the beginning) into knots.  Turn back to right side.


Step 23


Get some black string or thread.


Get some black string or thread.  Tie a knot at one end.


Step 24


Make the eye.


Put needle inside of hole on top of the head… and then put the needle where the eye should be and pull it out the front of the face.  This way the knot is inside the figure and can’t be seen.


Step 25


just sew in eyes by pulling string in and out of the fabric until they look like eyes.


Then just sew in eyes by pulling string in and out of the fabric until they look like eyes.  To sew in the 2nd eye… pull needle under fabric and up in the spot where the 2nd eye should be.


Step 26


Tie a knot inside of figure.


Tie a knot inside of figure.


Step 27


Place a rock, coins or something else heavy in the bottom and make sure figure stands.


Place a rock, coins or something else heavy in the bottom and make sure figure stands.  Then fill the rest of the figure with cotton or something soft.


Step 28


Sew top of head closed


Sew top of head closed… with knot on the inside.


Step 29


To make belt... tie 3 pieces of string together and braid them.


To make belt… tie 3 pieces of string together and braid them.  Pin it to your pants to keep it down while you braid.  Tie knot when done with belt.


Step 30


Cut a piece of fabric from old shirt or baby clothes


Cut a piece of fabric from old shirt or baby clothes (ask Mom or Dad first).  Then wrap around figure and tie shut with belt.


Step 31


Use cardboard loom to make the beard.


Use cardboard loom to make the beard.  Wrap string around the short side of the loom.


Step 32


push a 2nd string under all the wrapped strings


When done wrapping string around side of loom… push a 2nd string under all the wrapped strings… like so.


Step 33


Take it off of cardboard.


Take it off of cardboard.


Step 34


Fold it in half and then sew it on below the eyes.


Fold it in half and then sew it on below the eyes.


Step 35


To make hair, push needle thru top of head


To make hair, push needle thru top of head, until just a bit of string is sticking out.


Step 36


with tail of string still out, push the needle back into the head somewhere else.


Then, with tail of string still out, push the needle back into the head somewhere else.


Step 37


When you have a loop of string... don't pull any further.  You just made a curl.


When you have a loop of string… don’t pull any further.  You just made a curl.  Now, stick the needle thru again… and the curl will stay now.


Step 38


When your figure has enough curls... then tie a knot and you are finished with the hair.


When your figure has enough curls… then tie a knot and you are finished with the hair.


Step 39


Tie a twist tie and wrap colored thread around it.


Tie a twist tie and wrap colored thread around it.  I used gold thread… you can use any color you wish.


Step 40


Fold ends of twist tie over to keep threads on and then push it onto your figure's head.


Fold ends of twist tie over to keep threads on and then push it onto your figure’s head.


Step 41


The 2nd crown is beaded on a cardboard loom.


The 2nd crown is beaded on a cardboard loom.  Just make slits 1/2 inch apart on both sides of a sturdy box.  The loom is threaded by putting string in first notch… taping it down.  Then just pull over to other side and put thru that notch.  Then put thru 2nd notch and pull to other side and continue.  When done… wrap around extra notches to keep in place.


Step 42


Tie thread to first string.


Tie thread to first string. ***Make sure to leave extra room on strings so you can tie knots at end.


Step 43


Put some small beads onto the needle and thread.


Put some small beads onto the needle and thread.  If you have 6 strings, you need 5 beads…. If you have 5 strings, you need 4 beads.


Step 44


Pull threads and beads under all 6 strings


Pull threads and beads under all 6 strings, so they are on the opposite side now.


Step 45


Push all the beads so that each bead is in between 2 strings.


The first row is the trickiest… and then each row gets easier.  Push all the beads so that each bead is in between 2 strings.


Step 46


push the needle thru all of them so that the needle is now on the opposite side again.


Then, while beads are up above the strings (because you are pushing below them)… push the needle thru all of them so that the needle is now on the opposite side again.


Step 47


Now, do this for all the rows.


Now, do this for all the rows.  Make as many as you feel fit.


Step 48


I took some gold thread and wove it over and under all of the strings a few times


Optionally, as an added touch… I took some gold thread and wove it over and under all of the strings a few times to make the crown surrounded in gold.


Step 49


Cut off string on both sides.


Cut off string on both sides.


Step 50


Tie it shut to make a crown.


Tie it shut to make a crown.


Step 51


Place crown on figure.


Place crown on figure.


Step 52


For the 3rd crown, you can use the same loom that you used for beading.  Thread it the same way.


For the 3rd crown, you can use the same loom that you used for beading.  Thread it the same way.  Weave over and under.


Step 53


When you have woven a long strip, then take loops off.


When you have woven a long strip, then take loops off.


Step 54


Cut loops in half.


Cut loops in half.


Step 55


Tie these strings into knots.


Tie these strings into knots.


Step 56


Roll this woven fabric lengthwise


Roll this woven fabric lengthwise…. like above image.  Sew it so it stays like that.


Step 57


Then sew into donut shape and place on figure's head.


Then sew into donut shape and place on figure’s head.


Finished 3 wise men craft


You have just finished weaving the 3 Wise Men for a Nativity Scene…. How did they turn out?  Please let me know in the comments below.  Also, take a picture of your Wise Men and share them in the comment as well.  I’d love to see them.  Come back to check out how to Weave a Baby Jesus for a Nativity Scene as well the Mary & Joseph craft, Yarn Clothespin Sheep craft and the Yarn Clothespin Donkey craft to complete your Nativity Scene.

Technorati Tags: , , , , , , , , , , , , , ,

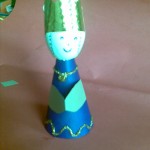
How to Make Egg Head Christmas People

I have a fun craft for you today.  I’m going to show you how to make Egg Head Christmas People out of eggshells.  You can even make an entire series of egg people…Use your creativity to make angels, shepherds, Mary and Joseph. These make great tabletop Christmas decorations…. so make a few.  Let’s get started.

Check out our other Christmas Crafts.


Image005


Craft materials required:

Thick purple paper

Thick brown colored paper (or any skin color shade)

Egg Shell

Glitter Glue

Gold Paper

Permanent Marker

Glue

Scissors


Image006


Step 1

Take a square piece of purple paper.


Image105


Step 2

Roll it to make a cone and glue the end to hold it in place. Cut the edge to form a perfect cone that will stand as shown.


Image106


Step 3

Wash and dry an egg which has been broken from one end and emptied as shown.


Image100


Step 4

Cut a strip of gold paper and snip the edges to make a zigzag design as shown.


Image104


Step 5

Roll the strip and glue. Glue the crown to the top of the head as shown.


Image107


Step 6

Take a small strip of brown card paper and fold in the center as shown.


Image001


Step 7

Glue the ends of the paper strip to the cone as shown to form folded hands.


Image002


Step 8

Draw a face using a permanent marker.


Image003


Step 9

Decorate the clothes with glitter glue as shown


Image005


Isn’t it beautiful?  Who would have thought that this could have been started from an eggshell.  But, of course it was.  Please let me know in the comments below how your Egg Head Christmas People turned out.  And, don’t forget to share a picture in your comment…. I’d love to see them.

Technorati Tags: , , , , , , , , , ,

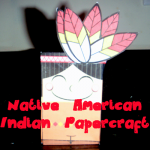
How to Make an Indian Boy out of Paper with Printable Foldable Papercraft

The Indians were an important part of the first Thanksgiving.  After all, if it wasn’t for the Indians the Pilgrims wouldn’t have had such a wonderful Harvest back in 1621.  And, if there was no harvest there would have been no Thanksgiving.  The Indians taught the Pilgrims how, what and where to plant the food.  So, today I’m going to show you how to make an Indian Boy out of Paper.

Check out our other Thanksgiving Crafts.


How to Make an Indian Boy out of Paper


Materials Needed

Paper or Card Stock

Scissors

Glue


Below is the printable template.  Click on the image to make larger and to print.


Printable template for Indian boy paper craft


How To:

Cut out items on template… make sure to cut around tabs carefully.  Fold on lines and glue tabs together.  When dry glue feathers on to headband.  Your finished Indian boy should look like this.


Your finished Indian boy should look like this.


What a cute little Indian boy.  Now, make sure to come back to make all the Thanksgiving Characters.  We will make a Pilgrim boy, Pilgrim girl as well as an Indian girl.  All your characters will look so cute together on Thanksgiving. And you might even want to do the foldable  papercraft  Turkey.


All your characters will look so cute together on Thanksgiving.


Technorati Tags: , , , , , , , , , , , ,

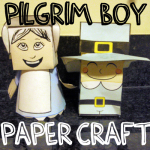
How to Make a Pilgrim Boy out of Paper with Printable Foldable Papercraft

I have a paper craft that is perfect for kids of all ages…. even the youngest of children.  In this post I’m going to show you how to make a Pilgrim Boy out of Paper.  Just use the included template, cut and paste… that’s it.  And, don’t be fooled by the ease of this craft…. it is still a ton of fun.  Keep an eye out for other Thanksgiving paper crafts as I will be showing you how to make a Pilgrim girl, Indian boy and even an Indian girl.

Check out our other Thanksgiving Crafts.


How to Make a Pilgrim Boy out of Paper


Materials Needed

Paper or Cardstock

Scissors

Glue


Below are the printable templates.  Click on the image to make larger and to print.

Template Page 1


Pilgrim boy Template 1


Template Page 2


Pilgrim boy Template 2


Step 1

Print off Template Page 1.  Cut out Pilgrim boy being very careful to cut around all the tabs.  Fold on lines and glue tabs together.  Let dry.


Step 2

Print off Template Page 2.  Cut out Hat being very careful to cut around all the tabs.  Fold on lines and glue tabs together.  Then glue blue tabs to bottom of hat.  When hat is dry… push down over top of Pilgrim’s head.


Finished Pilgrim boy paper craft


See, you did it!!  Now, you have a Pilgrim boy.  Make sure to come back because I will be showing you how to make a Pilgrim girl, Indian boy and an Indian girl.  All together it will make for a great Thanksgiving decoration. And you might even want to do the foldable papercraft Turkey.


Make all 4 crafts for Thanksgiving


Technorati Tags: , , , , , , , , , , , ,

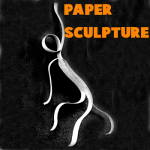
How to Make Paper Sculptures – Drawing with Paper

If children have not had much experience with 3-dimensional work, you can introduce them to paper sculpture through “drawing” with strips of paper. This method can be the basis for developing an understanding of sculpture, or form in space. Since children are familiar with line drawing, the transition to drawing in space would be logical. Strips of construction paper, cut to one inch widths on the paper cutter, can be made in advance. Demonstrate how a strip can be a straight line, a curved line, or by folding the strip it can be a zig-zag line. Everyone can try it and see how many different kinds of lines they can make. A line can enclose space so that basic geometric shapes —triangles, circles and squares—can be formed. These outline shapes can be combined with scotch tape, paste, or with a stapler. What can we make with these shapes?


How to Make Paper Sculptures – 3 Techniques


Materials Needed

Strips of Paper

Tape

Paste

Stapler

Hole Punch

Paper Fasteners

String


Technique 1


Make forms in space


Make forms in space. For example, four strips of equal length can be arranged in a radial design and fastened in the middle with a stapler, or holes can be punched and a paper fastener inserted. The ends of the strips can be gathered together to form a sphere. Or two ends fastened on one side and the others on the opposite side will produce a different form. To encourage experimentation, strips can vary in color, width, length, and perhaps in shape too!


Technique 2


Make animals and people with paper.


Children love to use the paper strip figures and animals as puppets because of their lively quality. They also can be made as dangling puppets or mobiles by just tying strings to them.


Technique 3


Perhaps you would like to experiment further by making your figure or animal from one wide strip of paper


Perhaps you would like to experiment further by making your figure or animal from one wide strip of paper.

And there you have it…. 3 different techniques for making sculptures using simple paper.  This is a great way to teach children about 3 dimensional figures and space…. not to mention teaching them their basic shapes.  What types of Paper Sculptures did you make?  Let me know.

Technorati Tags: , , , ,