How to Make a Simple 3D Christmas Tree Ornament

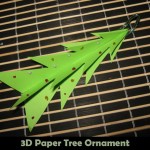
I will continue with the Christmas crafts with this fun craft.  In this post I will show you how to make a simple 3D Christmas Tree Ornament.  And, just like the title says…. this craft is a simple one.  The kids will love making it…. especially the part where they get to decorate the ornament.  They will have so much fun decorating it…. almost as much as they will have fun decorating your Christmas tree at home.  So, grab the materials needed and let’s get started.

Check out our other Christmas Crafts.

Tutorial offered by Laura from Dacian Moon Handmade.


Materials Needed

– green paper
– scissors
– glitter glue (red, gold, blue)
– glue
– metallic silver paint (or silver glitter glue)
– a small piece of ribbon
– pencil


Step 1

Cut the paper in half.


Take one part and fold it in two.


… like this.


Step 2

Using your pencil draw a half of tree, like this…


… then cut it out.


It will look like this.


Unfold, and you have a tree.


Step 3

Repeat to make a second tree from the other piece of paper.


Step 4

Cut on the crease the upper part of one tree and the lower part of the second tree…


… like this.


Combine the two trees.


Use a small amount of glue to keep in place at the top and and the base.


Step 5

Decorate the tree using glitter glue.


I decorate it with small globes.


Step 6

Take the ribbon and fold it in two…


… then glue it on top of the tree and the ornament is ready.


Isn’t this 3D Christmas Tree Ornament precious?  It simply is.  It will look terrific on your Christmas tree.  It’s so simple you will be able to make a few to spread around your tree.

Technorati Tags: , , , , , , , , , , ,

How to Make Paper Log Cabins for Thanksgiving

Whether you want to teach your children about the Pilgrims or whether you are just looking for some Thanksgiving decorations to put around the house…. I have a great Thanksgiving craft for you.  Today I’m going to show you how to make Paper Log Cabins for Thanksgiving.  This would be a great craft to help teach your children about Thanksgiving and how important the Pilgrims were to that…. plus, the craft is a lot of fun.  Use the finished Log Cabin to put around the house as a Thanksgiving decoration.  Let’s get started.

Check out our other Thanksgiving Crafts.


How to Make Paper Log Cabins for Thanksgiving


Materials Needed

Printer & Paper

Scissors

Ruler

Butter Knife

Glue


Click on template image below to open up new page and to print.


Log Cabin Template


Step 1


Print out the cabin template.


Print out the cabin template.


Step 2


Cut out both parts.


Cut out both parts.


Step 3


Score on lines by using a ruler and dull side of butter knife.  Then fold.


Score on lines by using a ruler and dull side of butter knife.  Then fold.


Step 4


Glue together with side tab.


Glue together with side tab.


Step 5


The chimney folds into a 3D rectangle.


The chimney folds into a 3D rectangle.


Step 6


Paste chimney on top tabs.


Paste chimney on top tabs.


Step 7


Let dry.


Let dry.

There you go…. you just finished making one of your Paper Log Cabins for Thanksgiving.  Make a few and use them for a Pilgrim Lesson for your kids and as Thanksgiving decorations for around your house.

Technorati Tags: , , , , , , , , , , , , ,

How to Make Wigwams and Canoes for Thanksgiving

Today I’m going to show you how to Make Wigwams and Canoes for Thanksgiving.  These items are perfect to use as decorations for Thanksgiving.   Actually, add these items to our Indian Village Craft and have an entire Indian Village to Display for Thanksgiving.  Wouldn’t that be wonderful?  You can use both of these crafts to talk about the Native Americans and what they have given our Country.  Remind the children about the story of Thanksgiving.  Do a fun craft and a wonderful lesson at the same time.

Check out our other Thanksgiving Crafts.


How to Make Wigwams and Canoes for Thanksgiving


Materials Needed

Printer & Paper

Scissors

Paste

Twigs

Crayons, Markers or Colored Pencils (optional)


Template 1

Black & White Template

Indian Canoe Template black & white


Colored Template


Indian Canoe Template Color


1.  Click on one of the images above.  Click on the black and white image if you want to color it later.  Or, print off the colored image and there is no need to color it later.   Once the new page opens up print off the template.

2.  Cut out the canoe.

3.  Slit at ‘A’.

4.  Fold in half along center line.  And, paste both halves together at ‘B’.

5.  Where you slit at ‘A’, fold towards each other and paste together.


Template 2

Black & White Template


Template 2 Black & White


Colored Template


Template 2 Colored


1.  Click on one of the images above.  Click on the black and white image if you want to color it later.  Or, print off the colored image and there is no need to color it later.   Once the new page opens up print off the template.

2.  Cut out the Wigwam.

3.  Cut on the slits that are noted.

4.  Cut out portion ‘A’.

5.  Bend back the flaps ‘D’, bring ‘C’ flaps together and paste together.

6.  Optionally, get a few twigs (or some raffia) and glue at the top of the Wigwam.


Finished Wigwams and Canoes for Thanksgiving


And, there you have it…. that’s how you make Wigwams and Canoes for Thanksgiving.  Use these as Thanksgiving Decorations…. everyone will surely love them.

Technorati Tags: , , , , , , , , , , , , , , , , , , , ,

How to make Paper Ghosts for Halloween

This cute Halloween decoration is so easy to do and kids just love how each ghost takes on a life of its own. Each design is unique and each one is adorable in its own way. Find out how to make your very own spiral paper ghosts with the easy to follow instructions below.

Laura from Dacian Moon Handmade   will show you, step by step, how to make it.


How to make Paper Ghosts for Halloween


CRAFTS MATERIALS NEEDED:

– paper
– black permanent marker
– pencil
– needle and thread
– scissors


Step 1.

Draw a „snail” on the paper, like this.


Step. 2

Use the permanent marker…


… to draw eyes and mouth on „snail” head.


Step 3.

Cut on the line.


It will look like this.


Step 4.

Put the needle through the head, over the eyes…


Cut the thread and make a knot.


Now the ghost is ready to hang.


Technorati Tags: , , , , , , ,

How to Make a Paper Owl Decorations for Halloween

Although owls are known as being wise, they are also known as a spooky part of Halloween. They don’t seem very creepy, but walking thru a dark forest with owls hooting can be a pretty creepy experience. However, this owl is more a cute tribute to Halloween. and can also be used as a cover for glasses or whatever else you choose to use it for. Happy Halloween.

Laura from  Dacian Moon Handmade  will show you, step by step, how to make it.


How to make a Paper Owl decoration for Halloween


CRAFTS MATERIALS NEEDED:

– recycled paper roll
– red paper
– white paper
– paper glue
– permanent markers : black, gold
– pencil
– scissors


Step 1.

Take the paper roll…


…and flatten it.


Fold one part inside, like in the picture…


… then the other. Now the owl have ears 😀


Step 2.

Color it with black…


… like this.


Step 3.

Draw drops on red paper.


Cut them out.


Step 4.

Apply a layer of glue on the top of a drop…


… and place it on the black roll, like this. Must start at the bottom for feathers to sit well.


Continue to glue red feathers on the owl till close up.


Step 5.

Draw 2 bigger wings on red paper.


Cut them out and applying a layer of glue on the top of them…


… stick them on their places.


Step 6.

Draw another drop and 2 circles on white paper.


Cut them out.


The new drop will be the beak, so you’ll paint it with gold.


The circles will be the eyes and you should paint them black, like this.


Glue the beak on the middle of the „face”…


… and eyes on one side and the other.

The paper owl is ready.


Technorati Tags: , , , , , , , ,

How to Make Haunted House Pop-Up Cards for Halloween

I have a super duper fun Halloween craft for you today.  In this post I’m going to show you how to make a Haunted House Pop-up Card.  People love receiving cards from their loved ones.  But, what they especially love are the homemade cards.  And, this homemade card will be no exception.  Do you know what makes this Haunted House card so special?  It’s the 3-D look of the card.  I will show you how to easily make a 3-D Haunted House Pop-up Card.  Once the Halloween Card is opened it can be displayed nicely with all the other Halloween decorations.  So, let’s get started.

Check out our other Halloween Crafts.


How to Make Haunted House Pop-Up Cards for Halloween


Materials Needed

Piece of White Paper

Colorful Piece of Paper

Scissors

Black Marker

Colorful Crayons, Markers or Colored Pencils


Step 1


Get a piece of paper.


Get a piece of paper.


Step 2


Fold in half.


Fold in half.


It should look like this.


Like this.


Step 3


Cut on the fold on the red lines.


Cut on the fold on the red lines.


It should look like this.


Like this.


Step 4


Unfold.


Unfold.  Then put your fingers into slits and fold the inside part in opposite direction.


It should look like this.


Like this.


Step 5


Fold in the spot on the above image.


Fold in the spot on the above image.


Fold here too.


Fold here too…


Step 6


Pinch the top fold and cut on the red lines.


Pinch the top fold and cut on the red lines.


It should look like this.


Like this.


Step 7


Fold here like in above picture.


Fold here like in above picture.


If you fold it down again it will look like this.


If you fold it down again it will look like this…


Open.


And, open…. like this….


Step 8


Outline edges in black.


Outline edges in black.


Step 9


Draw windows, doors and other details.


Draw windows, doors and other details.


Step 10


Color it too.


Color it too.


Step 11


Draw other details.


Draw other details.


Step 12


Add background and a sidewalk.


Add background and a sidewalk.


Step 13


Paste just the outside edges to a colorful piece of paper.


Paste just the outside edges to a colorful piece of paper.


Step 14


You can decorate the outside of the card too.


You can decorate the outside of the card too.


Step 15


Finished Haunted House Pop-up Card


Didn’t this Halloween pop-up card turn out amazing?  Anyone receiving it will love it!!  To make the Trick-or-Treat figures seen here simply print them off at How to Make a Trick-or-Treat Paper Toy.  The Trick-or-Treat figures go perfectly with today’s Halloween craft.

Technorati Tags: , , , , , , , , , , , , , , , , , , ,

How to Make a Glue Stick Man out of your Recycled Glue Sticks

With all the crafts that I do  I go through a lot of glue sticks.  I always hate the idea of throwing them away…. I always try to find crafts that I can make out of recycled items.  And, glue sticks are no exception.  Here is a great craft you can make with your used glue sticks.  Today I’m going to show you how to make a Glue Stick Man out of your recycled glue sticks.  You will see what a great feeling you get from making something out of recycled materials.  Plus, you get a very cool toy man.

Check out our other Green Environmental Crafts.


How to Make a Glue Stick Man


Materials Needed

Empty Glue Stick

Glue

Paint, Paper, Foam or Felt

Black & White Paint


Step 1


Take an empty Glue Stick and peel the label off of it.


Take an empty Glue Stick and peel the label off of it.


Step 2


Glue the cap in place like this.


Glue the cap in place like this.


Step 3


Paint on clothes or glue on clothes with paper, foam or felt.


Paint on clothes or glue on clothes with paper, foam or felt.


Step 4


If painted clothes, then use black paint to outline.


If painted clothes, then use black paint to outline.


Step 5


Paint a sleeve on each side.


Paint a sleeve on each side.  Also, draw a dot for each eye.


Step 6


Draw a circle for each hand.


Draw a circle for each hand.


Step 7


Paint each hand white.


Paint each hand white.  Also, paint white buttons on the shirt.

How adorable is this little guy?  So adorable!!  Make a few of these Glue Stick people and you can have a small family.  What a great way to recycle those used glue sticks.

Technorati Tags: , , , , , , , , ,

Paper Witch with Hat to Print Out for Halloween

There are many characters that we associate with celebration Halloween. The witch is one of them. Today we will show you how to make your very own paper witch with hat toy, along with many other Halloween characters. Below you will find the template and instructions for the following paper witch figurine. Have fun.

More Halloween Crafts.

Here  are the Other Halloween Paper Toys in This Collection


Paper Witch Toy for Halloween


Materials Needed

Paper or Card Stock

Scissors

Glue


The Templates to Print Out:

witch-paper-foldable-toy-template

CLICK ON THIS PICTURE TO OPEN UP TEMPLATE so you can save it to your computer and then print it out.


witch-hat-paper-foldable-templates


CLICK ON THIS PICTURE TO OPEN UP HAT TEMPLATE so you can save it to your computer and then print it out.

 How To: Step 1


Cut out the witch template

 Step 2


Optionally, score the template to make it easier to fold. All you have to do is put a ruler along each fold line. Then use the dull side of a butter knife and drag it along the ruler and the line on the paper. Then when you fold it on that line, it will fold beautifully.

 Step 3


Fold on the lines.

 Step 4


Fold the tabs too.

 Step 5


Paste the tabs together.

Step 6


Now it should look like this.

 Step 7 : Witch Hat


Print out the witch’s hat template. Cut out the hat parts…hopefully you are better at cutting than me.

 Step 8


Fold the triangle-ish shape into a cone and glue to keep together.

 Step 9


Now put the cone thru the donut shape. Cut slits all the way up to the donut.

 Step 10


Fold up the slits, like this.

 Step 11


Now glue these slits to the bottom of the hat.

 Step 12


This is the finished hat.

 Step 13


Glue the legs to the bottom of the witch’s body.

 Step 14


Place the hat on the witch. If you want, you can glue in place.

More Halloween Crafts.

Here are the Other Halloween Paper Toys in This Collection

Technorati Tags: , , , , , , , , , ,

Paper Vampire Dracula Toy Figure Craft for Halloween

Halloween is coming next month so I put together a collection of Halloween characters that you can cut and fold out of paper. These are Halloween figurines that are very easy to print out, fold, and paste together. This specific character is Dracula, an evil vampire. He is sort of cute and nothing to be scared about. Find out how to make this cute Vampire paper toy below.

More Halloween Crafts.

Here are the Other Halloween Paper Toys in This Collection


Paper Vampire Dracula Toy Figure for Halloween


Materials Needed

Paper or Card Stock

Scissors

Glue


The Template to Print Out:


Vampire Dracula Paper Toy Template for Halloween


CLICK ON THIS PICTURE TO OPEN TEMPLATE. Then Save the Template to Your Computer and Print.

How To: Step 1


Step 1 Print the Template


Print the Vampire / Dracula template.

Step 2


Step 2 Cut Template


Cut out the template now.

Step 3


Step 3 Score the Template


Optionally, score the template to make it easier to fold. All you have to do is put a ruler along each fold line. Then use the dull side of a butter knife and drag it along the ruler and the line on the paper. Then when you fold it on that line, it will fold beautifully.

Step 4


Step 4 Fold on Lines


Fold on the lines.

Step 5


Step 5 Fold Tabs


Fold on the tabs too.

Step 6


Step 6 Glue Dracula Together


Paste tabs together.

Step 7


Step 7


Now Dracula / the vampire looks like this.

More Halloween Crafts.

Here are the Other Halloween Paper Toys in This Collection

Technorati Tags: , , , , , , , , , , ,

Paper Mummy Toy Figure Craft for Kids on Halloween

There are many characters that we associate with celebration Halloween. The mummy is one of them. Today we will show you how to make your very own paper mummy toy, along with many other Halloween characters. Below you will find the template and instructions for the following paper mummy figurine. Have fun.

More Halloween Crafts.

Here are the Other Halloween Paper Toys in This Collection


Foldable Paper Mummy Toy Craft for Halloween


Materials Needed

Paper or Card Stock

Scissors

Glue


The Template to Print Out:


Foldable Paper Mummy Toy Craft Template


CLICK ON THIS PICTURE TO OPEN TEMPLATE. Then Save the Template to Your Computer and Print.


How To: Step 1


Step 1 Cut out Paper Mummy Template


Cut out the template, found above.

 Step 2


Step 2 Score the Template


Optionally, score the template to make it easier to fold. All you have to do is put a ruler along each fold line. Then use the dull side of a butter knife and drag it along the ruler and the line on the paper. Then when you fold it on that line, it will fold beautifully.

 Step 3


Step 3 Fold on the lines


Fold on the lines.

 Step 4


Step 4 Fold the tabs too


Fold the tabs too.

 Step 5


Step 5 Glue the tabs together


Paste the tabs together.

 Step 6


Step 6 The Paper Mummy FIgure


Now your mummy is done and ready to play with or to display as a Halloween decoration.

More Halloween Crafts.

Here are the Other Halloween Paper Toys in This Collection

Technorati Tags: , , , , , , , , ,


Foldable Paper Monster Toy Figures for Kids to Make on Halloween

You don’t need to do very much to make these adorable paper monster figures. All you need is a printer, paper, scissor, and some paste. Find out how to make these paper monster figurines with the following instructions and a handy template.

More Halloween Crafts.

Here are the Other Halloween Paper Toys in This Collection


monster paper toy craft for halloween


Materials Needed

Paper or Card Stock

Scissors

Glue


The Template to Print Out:


Paper Foldable Monster Templates


CLICK ON THIS PICTURE TO OPEN TEMPLATE. Then Save the Template to Your Computer and Print.

How To: Step 1


Step 1 Cut out the template


Cut Out the Template.

Step 2


Step 2 score the template


Optionally, score the template to make it easier to fold. All you have to do is put a ruler along each fold line. Then use the dull side of a butter knife and drag it along the ruler and the line on the paper. Then when you fold it on that line, it will fold beautifully.

Step 3


Step 3 fold on the lines


Fold on the lines.

Step 4


Step 4 now fold on tabs


Now Fold on Tabs.

Step 5


Step 5 glue the tabs together


Glue tabs together.

Step 6


Step 6 monster foldable paper toy for kids


To Look Like This. Argghhh….scary. 🙂

Step 7


Step 7 glue feet on


Now all you have left to do is to glue the monster’s feet on to the bottom of the box. Isn’t he cute?!

More Halloween Crafts.

Here are the Other Halloween Paper Toys in This Collection

Technorati Tags: , , , , , , , ,

Frankenstein Foldable Paper Toy Craft for Halloween

Halloween is coming next month so I put together a collection of Halloween characters that you can cut and fold out of paper. These are Halloween figurines that are very easy to print out, fold, and paste together. This specific character is Frankenstein. He is sort of cute and nothing to be scared about. Find out how to make this cute Frankenstein paper toy below.

More Halloween Crafts.

Here are the Other Halloween Paper Toys in This Collection


Frankenstein Paper Toys Craft for Halloween


Materials Needed

Paper or Card Stock

Scissors

Glue


The Template to Print Out:


frankenstein-paper-foldable-toy-templates


CLICK ON THIS PICTURE TO OPEN TEMPLATE. Then Save the Template to Your Computer and Print.

How To: Step 1


Step 1 print template


First of all, print out the template above.

Step 2


Step 2 Cut out template


Cut out the Frankenstein template.

Step 3 (Optional)


Step 3


Optionally, score the template to make it easier to fold. All you have to do is put a ruler along each fold line. Then use the dull side of a butter knife and drag it along the ruler and the line on the paper. Then when you fold it on that line, it will fold beautifully.

Step 4


Step 4 Fold along the lines


Fold along the lines.

Step 5


Step 5 - Fold Along the Tabs


Fold the little tabs too.

Step 6


Step 6 - Glue Tabs Together


Now glue the tabs together.

Step 7


Frankenstein Paper Toys Craft for Halloween


Now Frankenstein is all folded and done. He is now ready to play with or to be used as a decoration.

More Halloween Crafts.

Here are the Other Halloween Paper Toys in This Collection

Technorati Tags: , , , , , , , ,

Black Cat Foldable Paper Toy Craft for Halloween

Halloween is just around the corner so I put together a bunch of Halloween characters that you can fold out of paper. These are Halloween figurines that are very easy to print out, fold, and paste together. This specific character is a black cat, however I decided to make the cat cute instead of scary. Find out how to make this cute kitty cat below.

More Halloween Crafts.

Here are the Other Halloween Paper Toys in This Collection


black-cat-paper-foldable-toy-first-pic


Materials Needed

Paper or Card Stock

Scissors

Glue


The Template to Print Out:


black-cat-paper-foldable-toy-template


CLICK ON THIS PICTURE TO OPEN TEMPLATE. Then Save the Template to Your Computer and Print.

How To: Step 1


Cut Out Cat Template


Cut Out the Template.

Step 2


Fold Paper Cat Toy on the Lines


Fold on the lines.

Step 3


Fold Paper Cat Toy on the Tabs


Fold the Tabs too.

Step 4


Now Glue Together


Glue the cat together on the tabs.


Foldable Paper Cat Figurine Pasted Together


To look like the above picture.

Step 5


Glue the Tail and Ears on


Glue the ears on the top of the cat. Glue the tail onto the back of the cat.

Now enjoy your black cat for Halloween. Print out the other foldable paper Halloween toys in this collection too.

More Halloween Crafts.

Here are the Other Halloween Paper Toys in This Collection

Technorati Tags: , , , , , , , ,

How to Make a Simple Desk Organizer

There is not much worse than doing your homework on a cluttered unorganized desk.  Who wants to hunt for the homework supplies you need on a messy desk?  Well, you don’t have to worry about that anymore.  Today I’m going to show you how to make a Simple Desk Organizer.  It will be perfect to hold on to some paper, pencils, erasers, and pretty much anything else you want to keep organized on your desk.  So, grab the materials needed and let’s get started.

Check out our other Back to School Crafts.


How to Make a Simple Desk Organizer


Tutorial offered by Laura from  Dacian Moon Handmade  .

Materials Needed

– recycled box
– white paint
– scissors
– pencils (one with eraser head)
– paper glue
– red paper


Step 1

Take the box…


… and draw the contour of our organizer on it, like in the picture.


Cut on the line.


It will look like this.


Step 2

Place the box on its side on the paper and draw the contour.


Turn it on the other side and continue the contour. It will look like this.


Apply a layer of glue on half of the paper…


… and place the box on it.


Then glue the other half.


Like this.


Continue covering  the sides of the box.


You can cover the inside of the sides too.


It will look like this.


Step 3

Put a little bit of paint on a piece of paper…


… and use the pencil with eraser head…


… to make white dots.


Decorate the box with white dots.


Finally, let’s add a thin band of paint on the edges.


Let it dry well.


Now you can use the organizer.


Isn’t this a great Desk Organizer?  And, it was so simple to make.  Now, you have a great way to organize your desk perfect for doing your homework.  Enjoy!!

Technorati Tags: , , , , , , , , , , , ,

How to Decorate a Notebook with Paper Squares

We are well into the month of August now…. and with August comes all the preparing you need to do for Back To School.  Well, today’s craft is perfect for back to school as I am going to show you how to Decorate a Notebook with Paper Squares.   Take an ordinary cheap notebook and decorate it with your favorite character or design.  You will be sure to have the most original notebook at school.  So, grab the materials needed and let’s get started.

Check out our other Back to School Crafts.


How to Decorate a Notebook with Paper Squares


Materials Needed

Notebook

Graph Paper

Colored Pencils or Markers

Colored Paper & Scissors or Pre-cut Colored Paper Squares

Glue


Step 1


plan out your design on graph paper with colored pencils or makers.


First, plan out your design on graph paper with colored pencils or makers.  If you need some ideas for art you can make with squares check out these Perler Bead Crafts as well as these Mosaics.  Both the Perler Bead Crafts and Mosaics are made from squares and you should have plenty of ideas to choose from.


Step 2


 Get an ordinary notebook.


Get an ordinary notebook.


Step 3


Cut squares from colored paper


Cut squares from colored paper OR buy a bag of already cut colored paper squares (It’s easier).


Step 4


Put glue where you will place squares.


Put glue where you will place squares.


Step 5


Start putting squares down.


Start putting squares down.


Keep going


Keep going….


and going


and going.


Next step is the red background.


Next step is the red background.


Keep going until the background is finished.


Keep going until the background is finished.


Finished Paper Squares Notebook


Excellent Job!!  You just finished Decorating a Notebook with Paper Squares.  You are surely going to love taking this notebook back to school to show all your friends.  Let me know how your decorated notebook turned out in the comments below.  And, don’t forget to take a picture of it too…. you can add that to the comment as well.

Technorati Tags: , , , , , , , , , , , ,

How to Make a Double Edged Paper Airplane

Paper airplanes are a lot of fun to make and today’s paper airplane craft is no exception.  Put a spin on the traditional paper airplane with this Double Edged Paper Airplane craft.  This paper airplane can not only fly well, but it flies fast too.  Today I will show you step-by-step how to make this plane and if you scroll down towards the end of the post I will even show you how to make this Double Edged Paper Airplane with a video.  So, grab the materials needed and let’s get started.

Check out our other Paper Folding Crafts.


How to Make a Double Edged Paper Airplane


Materials Needed

Standard Printer Paper

Stapler (staples)

Scissors


Step 1


Fold sheet of paper over once.


Fold sheet of paper over once.


Fold sheet a second time.


Fold sheet a second time.


Fold sheet a third time.


Fold sheet a third time.


Step 2


Unfold the paper.


Unfold the paper.


Step 3


Cut center fold about half way down.


Cut a line a little further than half way down the paper


Step 4


Cut a short line... 2 lines up on each side


On the opposite side of the line cut in the last step, you will be making 2 short cuts. Cut 2 short lines on the second line over on both sides.


Here is another look at this step.


Here is another look at this step.


Step 5


Fold triangle on both sides up to the second line


Fold a triangle on each side of the top second line over.


Step 6


Fold over again.... this time to the center.


Fold it over again except to the middle.


Step 7


Fold over tops of each point.


Fold over the tops to the side, as shown.


Step 8


Fold over 2nd top point and then staple together.


Staple over the two flaps, holding the two sides together.


It should then look like this.


It should then look like this.


Step 9


Fold down top third of airplane.


Fold top third of the airplane down.


Like this.


Like this.


Step 10


Fold corner over.


Fold down two triangles from the corners to about the center of the airplane, as shown.


like this.


like this.


Step 11


Now, fold entire flap over.


Fold down two triangles to about the center of the airplane from the sides, as shown.


Fold the other side the same way.


Like this.


Step 12


Fold in half lengthwise.


Fold airplane in half length-wise.


Like this.


Like this.


Step 13


Fold top of each side to bottom of plane.


Fold top of each side to bottom of airplane to make the wings, as shown.


Step 14


now you have your finished Doubled Edged Paper Airplane.


And, now you have your finished Doubled Edged Paper Airplane.  Go fly it and watch it soar.  Enjoy.

Here is our video on How to Make a Double Edged Paper Airplane

Technorati Tags: , , , , , , , ,