How to Make a Popcorn Bracelet

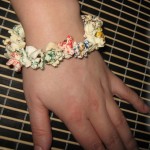
I have a super fun and easy craft for you today.  I’m going to show you how to make a Popcorn Bracelet.  This just might be the only jewelry you can make that while you make it you can eat it as well.  Just keep it mind that once you have painted the popcorn you CAN NOT eat it.  But, until the popcorn has been painted it is a tasty treat.  So, grab your friends, a good movie to watch and some popcorn and let’s make this fun craft.

Check out our other Jewelry Crafts.

Tutorial offered by Laura from Dacian Moon Handmade


Materials Needed

– popcorn
– thread and needle
– paints
– paintbrush


Step 1

Paint the popcorn in your favorite colors.


Step 2

Let them dry.


Step 3

Make a knot on one side of the thread, leaving enough extra thread to tie the bracelet.


Step 4

Start placing the popcorn on the thread, using the needle.


It will look like that.


Step 5

After the last popcorn is on the thread, make another knot near it…. and cut the thread (letting again enough extra thread to tie the bracelet).


Now, you have a cute bracelet.


Isn’t that adorable?  And, it was so much fun to make, wasn’t it?    How did your Popcorn Bracelet turn out?  Let me know in the comments below.  And, take a picture of the Popcorn Bracelet and add that to the comment as well… I’d love to see it.

Technorati Tags: , , , , , , , , , , , , ,

How to Make a St. Patrick’s Day Shamrock Streamer Decoration

St. Patrick’s Day is coming up in just a few weeks…. March 17th to be exact.  Have you started decorating yet?  If you haven’t, but you’d like to start…. then I have the craft for you today.  I’m going to show you how to make a St. Patrick’s Day Shamrock Streamer Decoration.  It is a super easy craft, so this is a great craft for the youngest of crafters.  But, it is also fun enough to keep the attention of all age crafters.  So, no matter what your age is…. grab the materials needed and let’s get started.

Check out our other St. Patrick’s Day Crafts.


Materials Needed

Green colored paper

Thick white paper

Nylon/ transparent thread

Scissors

Glue


Step 1

Draw out a few shamrocks


Step 2

Cut them out.


Step 3

Draw some more shamrocks, slightly smaller than the first set.  This time, draw a second outline around them as shown below.


Step 4

Cut along the inside and outside line to form an outline of a shamrock.


Step 5

Glue both types of shamrocks on the thick white paper.


Step 6

Cut them all out .  On each shamrock pierce two holes , one at the top and the other at the bottom, as shown below.


Step 7

Tape a piece of ribbon to the most top shamrock as shown below.


Step 8

Use the nylon thread to tie the bottom hole of one shamrock and the top hole of the next shamrock as shown below.  When you are tying together the shamrocks, make sure that you alternate one fully colored shamrock with one outline shamrock .


Step 9

Make it as long as you like.  Hang it up on a wall.  Let the festivities begin!!


There you go…. you just finished your St. Patrick’s Day Shamrock Streamer Decoration.  How did it turn out for you?  Let me know in the comments below.   And, take a picture of the streamer hung up and share that in the comment as well…. I’d love to see it.

Technorati Tags: , , , , , , , , , , ,

How to Make Magazine Folded Hearts for Valentines Day

Valentines Day is just a week away.  And, if you are still looking for ideas for Valentines Day decorations I have the craft for you today.  I’m going to show you how to make Magazine Folded Hearts for Valentines Day.  These Magazine Folded Hearts are the perfect decoration for Valentines Day.  You can hang them from the ceiling or from a door…. either way the craft turns out really cute.  And, what’s really cool…. it gives you something to do with all those extra magazines you have sitting around.  So, let’s get started.

Check out our other Valentines Day Crafts.


How to Make Magazine Folded Hearts


Materials Needed

Magazine

Scissors

Yarn or String


Step 1


Get a magazine like this one.


Get a magazine like this one.


Step 2


Fold top right corner of page down.


Fold top right corner of page down.


Press down crease.


Press down crease.


Step 3


Fold over to middle once more.


Fold over to middle once more.


Press down to sharpen crease.


Press down to sharpen crease.


Step 4


Continue with all of the magazine pages


Continue with all of the magazine pages… I tore the cover off.


Step 5


Cut a curved line at the top of each page.


Cut a curved line at the top of each page… I was able to cut several pages at once.


Step 6


Take yarn or string and tie 2 times around center of heart.


Take yarn or string and tie 2 times around center of heart.  Leave enough yarn to hang heart up.


Finished Magazine Fold Hearts Craft


Now, you are finished with your Magazine Fold Hearts craft.  Didn’t it turn out awesome?  Go hang it up proudly for all to see this Valentines Day.

Here is a video on how to make these Magazine Folded Hearts.

Technorati Tags: , , , , , , , , ,

How to Make an Under the Sea Decoration

Do you like Under the Sea creatures?  If you do then I have a craft for you today that you will truly enjoy.  I’m going to show you how to make an Under the Sea Decoration that will look so wonderful hung up in your bedroom.  Imagine how lovely it will look hung up on your ceiling as your stare at it below from your bed.  Well, you don’t have to imagine anymore… let’s help it become a reality.  Today I’m going to show you how to make this Under the Sea Decoration step-by-step.  So, let’s get started.

Laura from Dacian Moon Handmade will show you, step by step, how to make this decoration.


Materials Needed

– “Under the Sea Friends” template: download here
– thick paper or card stock
– glue (transparent)
– thread and needle
– scissors


Step 1

Print the template on thick paper and cut out the drawings.


That is what you’ll have when you are finished.


Step 2

Take one fish and apply a layer of glue on it’s back.


… then place it’s pair on it.


Step 3

Repeat step 2 until every friend has the two sides glued.


Step 4

We will start with the last one saved. Take the rainbow colored fish and, with the needle make a hole on its top, like in the picture.


Let the thread go through the hole …


… and, when you have a little thread left, make a knot. That way, the fish won’t fall again.


Measure about 5 cm and make another knot.


This is where you will place the crab. With the needle make a hole in one jaw…


…and take him down until you reach the knot.


Make another hole in his other jaw…


That way, the little crab is secured with the rope. He will not fall again.


Do the same with the other friends.


Step 5

Make a knot around the seahorse’s tail and wrap around the rope once, take it just under his head – it is easier to use the needle here too.


Step 6

The final step: make a knot on the end of the thread.


And. look at that…. you just finished making the entire “Under the Sea” Decoration.  Isn’t it just adorable?!  Imagine how cute it will look hung up.  Enjoy it.

Technorati Tags: , , , , , , , , ,

How to Make a Fruit Loop Necklace for the 100th Day of School

Depending on when your school district started school the 100th Day of School will be coming up quickly.  Now, is the time to start planning what kind of crafts you are going to do to celebrate the 100th Day of School.  I’m going to show you an easy, and tasty, craft for you to do…  Today I’m going to show you how to make a Fruit Loop Necklace perfect for the 100th Day of School.   Each child will get 100 of these colorful circles of cereal and they will string them to make a necklace.  The kids will love making it almost as much as they will love eating it.  So, let’s get started.

Check out our other 100th Day of School Crafts.


How to Make a Fruit Loop Necklace for the 100th Day of School


Materials Needed

Fruit Loops (100 for each child)

String or Yarn


Step 1


Get enough fruit loops for all the children


Get enough fruit loops for all the children making necklaces.


Step 2


String 100 Fruit Loops on a String.


Cut a piece of string or yarn large enough for a necklace and then string 100 fruit loops on it.


Finished Fruit Loop Necklace


The Fruit Loop Necklaces are now finished and are ready to be tied on each child so they can wear them proudly.  Don’t they look colorfully beautiful….. almost as good as they are going to taste.  YUM!!

Technorati Tags: , , , , , , , , , ,

How to Make a Thread Painting Greeting Card

I am going to show you how to make a greeting card that is so unique from any other you have seen or made before.  It uses a new technique called thread painting and it is so much fun.  This greeting card is perfect for anytime of year and for any family or friend.  They are sure to love it.  So, let’s get started on this thread painting craft.  Not only will you enjoy doing it…. the result of this craft is always a surprise.

Check out our other Greeting Card crafts.


Materials Needed

Thread

Paint

Card Paper / Card Stock

Scissors

Paintbrush


Step 1

Take white card paper and fold it into two.


Step 2

Take a piece of twine/ thread and paint it in any color you like. You can also use more than one color as done below. Make sure that the paint does not dry completely.


Step 3

Place the wet thread/ twine between the folded card in any design you like. Leave one end of the thread coming out of the folded paper.


Step 4

Fold the paper on it, put a book or weight on the paper to keep the 2 papers close together and pull the loose end of the thread. When you completely pull the thread out, take off the book, and open the folded paper. You will see a design like this.


Step 5

Cut off one half of the paper and glue it on a different colored folded card paper to make a greeting card.


Write a special message inside and give it to someone you love.  I’d love to see how neat your Thread Painting Greeting Card turned out.  Take a picture of it and post it in the comments below…. I’d love to see it.

Here is our video on How to Make a Thread Painting Greeting Card .

Technorati Tags: , , , , , , , ,

How to Make a Nativity Scene for Christmas

All week long I have been showing you how to make the characters for a Nativity Scene.  Well, today you are going to set up your Nativity Scene complete with basket.  You have been working hard and today you are going to get to see the results of all your hard work.  If you need to still complete the Nativity character crafts…. not a problem.  I have all the crafts for the Nativity characters below.  So, let’s complete the Nativity Scene for Christmas, shall we….

Check out our other Christmas Crafts.


How to Make a Nativity Scene for Christmas


How to Set up the Nativity Basket

Materials Needed

Basket – large enough to hold the nativity scene

Gold or Yellow Thread

4 Twist Ties

Glue


Step 1


Take 4 twist ties and wrap gold or yellow thread around them.


Take 4 twist ties and wrap gold or yellow thread around them.


Step 2


Fold over corners to keep thread on.


Fold over corners to keep thread on.


Step 3


Twist one of the twist ties over the other, like a letter V.


Twist one of the twist ties over the other, like a letter V.


Step 4


Fold one side down to now look like a cross.


Fold one side down to now look like a cross.


Step 5


Twist another one around the first two.


Twist another one around the first two.


Step 6


Do one more to look like this.


Do one more to look like this.


Step 7


Glue the star on top of basket.


Glue the star on top of basket.  Add gold or yellow thread to the bottom of the basket.

Now that you have the background to the Nativity Scene done it is time to make the characters that will fill this Nativity Scene.


Nativity Scene Character Crafts


Nativity Scene Characters


How to Weave the 3 Wise Men


How to Weave the 3 Wise Men for a Nativity Scene


How to Weave a Baby Jesus and Cradle


How to Weave a Baby Jesus and Cradle for a Nativity Scene


How to Weave Mary and Joseph


How to Weave Mary and Joseph for a Nativity Scene


How to Make Yarn Clothespin Sheep


How to Make Yarn Clothespin Sheep for a Nativity Scene


How to Make Yarn Clothespin Donkeys


How to Make Yarn Clothespin Donkeys for a Nativity Scene


And, there you have it…. you have all the crafts needed to complete your Nativity Scene.  I would love to see how your Nativity Scene turned out.  Please share your Nativity Scene with all of us by leaving a picture in the comments below.  I’d love to see how it turned out.

Technorati Tags: , , , , , , , , , , , , , ,

How to Make Yarn Clothespin Donkeys for a Nativity Scene

Today we are continuing our Nativity Scene crafts… in this post I’m going to show you how to make Yarn Clothespin Donkeys for your Nativity Scene.  This craft is very similar to the Yarn Clothespin Sheep we made yesterday…. and, this craft turn out just as cute too.  With some cardboard and a few clothespins you can make this Yarn Clothespin Donkey…. so let me show you how.

Check out our other Christmas Crafts.


How to Make Yarn Clothespin Donkeys for a Nativity Scene


Materials Needed

2 Pieces of Cardboard

Pencil

Brown or Gray Yarn

Black Yarn or String

3 Clothespins

Scissors


Step 1


Draw this shape on cardboard and then cut it out


Draw the above shape on cardboard and then cut it out.  You can draw the above shape by drawing 2 ovals as shown above.


Step 2


Wrap brown or gray yarn around cardboard.


Wrap brown or gray yarn around cardboard.  Then place 2 clothespins on him for legs.  Start wrapping over those too.


Step 3


Wrap the clothespins with yarn part way to look like thighs.


Wrap the clothespins with yarn part way to look like thighs.


Step 4


Add clothespin to top of head for ears.


Add clothespin to top of head for ears.


Step 5


Cover clothespin and head with yarn.


Cover clothespin and head with yarn.


Step 6


Wrap black yarn or string around cardboard.


To make a tail… Wrap black yarn or string around cardboard.


Step 7


Then push black string or yarn under all strings.


Then push black string or yarn under all strings.


Step 8


Tie into a knot and then take off of cardboard.


Tie into a knot and then take off of cardboard.


Step 9


The knot is in the middle


The knot is in the middle like in above pic.


Step 10


Push knot up to the top.


Push knot up to the top.


Step 11


Push tail into the wrapped yarn.


Push tail into the wrapped yarn.

And, there you have it… you just finished your Yarn Clothespin Donkey for the Nativity Scene.  How did it turn out?  Make sure to let me know in the comments below.  Also, make sure to make the rest of our Nativity Scene including, The 3 Wise Men, Baby Jesus, Mary & Joseph and Sheep.  Make them all and display your Nativity Scene proudly.

Technorati Tags: , , , , , , , , , , , , , ,

How to Weave Mary and Joseph for a Nativity Scene

For the past few days I have been showing you how to weave different characters for a Nativity Scene.  First, I showed you how to Weave the 3 Wise Men.  Next, I showed you how to Weave a Baby Jesus.  Today I’m going to continue showing you how to weave a Nativity Scene by showing you how to Weave Mary and Joseph.  So, let’s get started.

Check out our other Christmas Crafts.


How to Weave Mary and Joseph for a Nativity Scene


Materials Needed

2 inch x 4 inch Piece of Cardboard

Ruler

Pencil

Scissors

Tape

String or Yarn (different color yarn, make sure to have some skin color yarn like Peach, Tan, Brown, etc.)

Needle

Fork

Stones, Coins, or Something Else Heavy

Cotton or other Filling

Black Thread

Old Piece of Fabric

4 Hand Shaped Beads


Step 1


Cut out 2" x 4" piece of cardboard.


Cut out 2″ x 4″ piece of cardboard.


Step 2


Mark sides with lines about 1/8 inch apart


Mark sides with lines about 1/8 inch apart… so every two lines on the inches side of the ruler.


Step 3


start cutting slits on lines that we drew in the previous step.


If you think your cardboard will fall apart by cutting slits… firstly, cover with clear tape.  Otherwise, just start cutting slits on lines that we drew in the previous step.


Step 4


Put string in the notch that is alone on one side.


Put string in the notch that is alone on one side.  Tape it down.  Then pull the string all the way up the back of the cardboard.


Step 5


pull the yarn through the first notch


In the last step you brought the yarn up to the top left side notch from behind the cardboard.  Now, pull the yarn through the first notch… now the yarn is in the front again.


Step 6


bring yarn over the next notch and pull down back again


Now, bring yarn over the next notch and pull down back again.


Step 7


Bring the string all the way down to the bottom.


Bring the string all the way down to the bottom.


Step 8


Bring string over from back and up thru the first notch again


Bring string over from back and up thru the first notch again.


Step 9


pull the yarn behind and thru the 2nd tab


Now, pull the yarn behind and thru the 2nd tab so that there is now a loop in front and behind the first tab.


Step 10


bring the yarn down behind cardboard and up thru the next slit.


Now, bring the yarn down behind cardboard and up thru the next slit.  Make loop in front of tab and bring down back of cardboard again.


Step 11


bring yarn down back and up bottom and thru the slit and make a loop in back and down next slit and down front again


Now, bring yarn down back and up bottom and thru the slit and make a loop in back and down next slit and down front again… continue this pattern.


Step 12


When done... tape string down


When done… tape string down.


Step 13


Thread a needle with yarn or string.


Thread a needle with yarn or string.


Step 14


Pull the yarn over and under each piece of yarn and leave a short tail


Make your yarn as long as you want it to be.  Pull the yarn over and under each piece of yarn and leave a short tail.


Step 15


turn the cardboard over and you will weave on this side too


Now, turn the cardboard over and you will weave on this side too.  On the other side you went UNDER the last thread… so here go OVER the first thread.  ***Don’t go under the taped string.


Step 16


Every few times or so, take a fork and push the threads down


Keep weaving on both sides of the cardboard.  Every few times or so, take a fork and push the threads down.


Step 17


When the thread is nearing an end, then push the needle down thru loops in past rows


When the thread is nearing an end, push the needle down thru loops in past rows.


How to start a new string


To start a new piece of yarn… just put the string in where you left off… like you see in the above image.


Step 18


Weave back and forth with skin color only in center strings


Weave back and forth with skin color (tan, brown, peach, etc.) only in the center strings.  So, you will NOT be turning cardboard over and weave along back.


start by pushing the yarn through the same loop that the bottom left side of the face used


Choose the color that will be around face.  You will be using this yarn to weave around the face for a hood.  We start by pushing the yarn through the same loop that the bottom left side of the face used.


weave around back.


Now, weave around back.


come over on the right side of the face.


Now, come over on the right side of the face.  Loop thru the string on the right side of the face and then go over it and weave around back again.


Keep going.


Keep going.  At the top of the figure you can weave all around it again.


This is what your figure should look like now


This is what your figure should look like now.


Step 19


Use your needle to pull loops off of cardboard.


Use your needle to pull loops off of cardboard.


Step 20


pull the woven fabric off of the cardboard


Now, loops are off… You can now pull the woven fabric off of the cardboard.


Step 21


Tie any loose threads into a knot.


Tie any loose threads into a knot.


Step 22


You should now stuff with stones, coins or something else heavy.


You should now stuff with stones, coins or something else heavy.  Only fill enough to look like she is kneeling.  Then fill the rest of the figure with cotton.


Step 23


Use black thread to sew on hair and eyes


Use black thread to sew on hair and eyes.


Step 24


For Joseph.... sew on a beard.


For Joseph…. sew on a beard.


Step 25


Bend figures into an L shape


Bend figures into an L shape like above.  Sew them in this position with same color yarn as shirt.


Step 26


Somehow I lost the pictures of the last few steps....


Somehow I lost the pictures of the last few steps…. Basically, just cut a bit of fabric and wrap around (like in image) and sew to head (just a few stitches will do).  Then just glue two hand shaped beads to the bottom of their face to look like praying hands.


Step 27


Sit Joseph and Mary around Baby Jesus


Sit Joseph and Mary around Baby Jesus from our Baby Jesus craft tutorial.

Awesome job…. you just finished weaving Mary and Joseph for a Nativity Scene.  How did they turn out for you?  Let me know in the comments below.  And, if you haven’t already done so…. make sure to complete the entire Nativity Scene by weaving the 3 Wise Men, Baby Jesus, Clothespin Donkey and the Clothespin Sheep.

Technorati Tags: , , , , , , , , , , , , , ,

How to Weave a Baby Jesus and Cradle for a Nativity Scene

Yesterday I showed you how to Weave the 3 Wise Men for a Nativity Scene…. well, today I’m going to continue the weaving fun by showing you how to Weave a Baby Jesus and Cradle.  Imagine how proud you will be to have made an entire Nativity Scene yourself… so proud!!  So, let’s get started.

Check out our other Christmas Crafts.


How to Weave a Baby Jesus and Cradle for a Nativity Scene


Materials Needed

2 Pieces of Cardboard Measuring 3 inch x 1 1/2 inch

Ruler

Scissors

Tape

String or Yarn (Brown, Yellow & Skin Color Yarn like Pink, Tan, Brown, etc.)

Needle

Black String or Thread

Cotton or other Filler

Burp Cloth or Similar Fabric

Fork


Step 1


Cut a piece of cardboard about 3 inches x 1.5 inches.


We will start by making a cardboard loom to weave the basket with. Cut a piece of cardboard about 3 inches x 1.5 inches.


Step 2


Cut slits about 1/4 inch apart on one of the long sides.


Cut slits about 1/4 inch apart on one of the long sides.  Cut one slit on the other side.


Step 3


Put string in slit that is alone.


Put string in slit that is alone.  Tape down.


Step 4


Pull string around back and down thru top slit.


Pull string around back and down thru top slit.


Step 5


Wrap string around front of tab to the next slit.


Wrap string around front of tab to the next slit.  The string will now be hanging down back of cardboard.


Step 6


Bring string down back of cardboard and up around to the front


Bring string down back of cardboard and up around to the front and slide thru the first slit.


Step 7


Bring string around back and thru second slit.


Bring string around back and thru second slit.


Step 8


Bring string around back and then thru next slit


Bring string around back and then thru next slit… now it’s hanging down front again.


Step 9


Put string into next slit so string hanging down back to make loop in front.


Put string into next slit so string hanging down back to make loop in front.


Step 10


Bring down back of cardboard and then up around the front.


Bring down back of cardboard and then up around the front.  Place in the slit and make a loop in back by putting in 2nd slit.


Step 11


When done winding... tape last string down.


When done winding… tape last string down.


Step 12


Thread some yarn or string.


Thread some yarn or string.


Step 13


Basics of Weaving


We will now start weaving. Above in the illustration, O is over and U is under. Basically, put the needle under and over the strings. For the first string, you can pull the yarn all the way through, leaving just a bit of yarn left under the first string. When you get to the edge of cardboard, turn over the cardboard. Then start weaving again. if you ending going under the last string on the other side, then this time go over.


Stick needle with yarn under and over strings.


Stick needle with yarn under and over strings.


You can leave a bit of a tail on the yarn you are weaving with.


You can leave a bit of a tail on the yarn you are weaving with.


Step 14


go under the first string on the other side.


Turn over the cardboard… we ended by going over the last string, so go under the first string on the other side.  Make sure to skip taped down string.  ***Always weave on the side with OUT the loops… as seen above.


Step 15


take a fork and push the threads down.


Keep weaving on both sides of the cardboard.  Every few times or so take a fork and push the threads down.


Step 16


When the thread is nearing the end, then push the needle down thru loops in past row.


When the thread is nearing the end, then push the needle down thru loops in past row.


Step 17


To start a new piece of yarn... just put the string in where you left off


To start a new piece of yarn… just put the string in where you left off… like you see in the image above.


Step 18


Fill up the entire piece of cardboard with brown yarn.


Fill up the entire piece of cardboard with brown yarn.


Step 19


Use your needle to pull loops off of cardboard.


Use your needle to pull loops off of cardboard…


pull the weaved fabric off of cardboard


… Now the loops are off like this and you can pull the weaved fabric off of cardboard.


Step 20


You now have a little basket.


Take the woven fabric off the cardboard.  Tie any loose threads.  You now have a little basket.


Step 21


Cut a piece of cardboard that is about 1.5 inches by 3 inches


Cut a piece of cardboard that is about 1.5 inches by 3 inches.


Step 22


Wind string around it like you did with the other cardboard loom.


Cut slits on one of the short ends.  Then cut one slit on the other side.  Wind string around it like you did with the other cardboard loom.  Make skin color such as pink, tan, brown, etc.


Step 23


Then weave with the skin color you chose when winding string.


Then weave with the skin color you chose when winding string.  Weave all the way to the top.  Use needle to take the loops off of top.  Take woven fabric off of cardboard.


Step 24


Tie loose threads into knots.


Tie loose threads into knots.


Step 25


Get some black string or thread and tie a knot.


Get some black string or thread and tie a knot.


step 26


Start sewing the eyes.


Bring the needle up thru unclosed end and pull it out where you want one of the eyes to be.


Step 27


Sew second eye.


Then just push the needle back down where you want the eyes shape to end.  From underneath push up where you want 2nd eye to be.


Step 28


Fill with cotton or other filler.


Fill with cotton or other filler. Then sew the bottom of the figure shut with skin colored yarn that you used previously.


Step 29


Cut a piece of burp cloth or other similar fabric.


Cut a piece of burp cloth (ask Mom or Dad if they saved any from when you were a baby) or other similar fabric.  Make it a rectangle.  Fold down a triangle on the left top corner.


Step 30


Place woven baby on it with head all the way to top of triangle.


Place woven baby on it with head all the way to top of triangle.


Step 31


Push bottom of fabric up to below eyes.


Push bottom of fabric up to below eyes.


Step 32


Push the left side of fabric over the baby.


Push the left side of fabric over the baby.  The push it under right side of baby.


Step 33


Bring right side of fabric over the baby


Bring right side of fabric over the baby and push it down under the left side of baby.


Step 34


Baby should look like this now.


Baby should look like this now.


Step 35


Place baby in cradle.


Place baby in cradle.  Cut up some yellow yarn and stick in basket if you want to.


Finished Baby Jesus in Cradle Craft.


And, there you have it…. you finished weaving a Baby Jesus and Cradle for a Nativity Scene.  Awesome job!!  This woven Baby Jesus goes perfectly with the woven 3 Wise Men we made yesterday. Make sure to also do the Mary & Joseph craft, Yarn Clothespin Sheep craft  and the Yarn Clothespin Donkey craft to complete your Nativity Scene.

Technorati Tags: , , , , , , , , , , , , , ,

How to Make a Hearts Friendship Bracelet

If you love making friendship bracelets you are going to love this craft!!  I am going to show you how to make a Hearts Friendship Bracelet.  And, don’t worry….. I’m not going to show you a few steps and then send you off on your own.  No way…. I am going to show you every little step from the very beginning all the way to the point where you have mastered this heart friendship bracelet.  So, let’s get started.

Check out our V Shaped Arrows Friendship Bracelet and our other Friendship Bracelets


How to Make a Hearts Friendship Bracelet


Materials Needed

Embroidery Floss (preferred) or Yarn

Scissors

Optional – Cardboard

Optional – Doll Pins or Sewing Pins


Step 1

Measuring the Embroidery Thread for your Bracelets


Measuring the Embroidery Thread for your Bracelets


To measure the lengths of your threads, take a piece and hold it from your hand to your shoulder. This is one arm’s length of thread. However, you need 2 arms lengths for each thread, so just use the first arms length of thread to measure out a 2nd arms length. Look at the picture above to see how I folded the string over to get the 2nd arms length. Use this first string to measure out 3 more strings. You need 4 different colors for this bracelet.


Step 2


Find 2 different colors of strings.


Find 2 different colors of strings. You will need 2 threads from each color … each 2 arms lengths long. Put them each end to end and then smooth them out.


Step 3


Now fold the threads in half


Now fold the threads in half like in the picture above.


Step 4


We are now going to make a loop at the end to make a clasp type feature to tie the bracelet together


We are now going to make a loop at the end to make a clasp type feature to tie the bracelet together after it is done. Do this by holding the top of the string in a loop and then holding a bit down with your other hand, but keeping your index finger out. Then take the loop-holding hand and wrap the string around your index finger of the other hand.


Step 5


with the index finger hand, pinch the circle that was just created on the index finger


Now, with the index finger hand, pinch the circle that was just created on the index finger… pinch it where the threads cross.


Step 6


Now slip the circle off of the index finger.


Now slip the circle off of the index finger.


Step 7


Pull the loop through the pinched circle.


Pull the loop through the pinched circle.


This is what it looks like with a real picture.


This is what it looks like with a real picture.


Step 8

***TIP – THE WAY THAT IS EASIEST TO WORK***


The way it is easiest to work.


Before we start making our friendship bracelet, let me show you the way that I worked on this. I took a cut-out piece of cardboard, 2 pins, and a clip, and put them together like in the picture above. I took the clip and hooked it on the loop…to hold it down. I took the 2 pins to keep strings out of the way while I worked. It worked out AMAZINGLY. I wish I had done this when I was a child, I used to work with just tape and this works so much better.


Step 9


You should have 8 strings hanging out from the bottom of the loop. Spread them out like I did above


Okay, now lets start. You should have 8 strings hanging out from the bottom of the loop. Spread them out like I did above…like in a mirror image. In this project, we will call the strings on the left, the left strings. We will call the strings on the right, the right strings. It might help you to take some crayons or colored pencils and map out your colors on paper…just the way that I did above, so you don’t get confused.


Step 10


Now we will start on the left side strings.


Now we will start on the left side strings. Put the right-side strings up on the pin to get them out of the way. On the left side strings, we will go from left to right….so the pink string (string #1) will be the knotting string…in other words, the string that we will be making knots with. Form a letter ‘L’ with the pink string…as pictured above.


Step 11


Now tuck the pink #1 string under the pink #2 string and into gap between these 2 strings.


Now tuck the pink #1 string under the pink #2 string and into gap between these 2 strings. You are making a knot. Think of the way that you tie a knot on your shoe lace, however in this case, always make sure the knotting string (Pink #1) goes over and then under the string you are knotting over (Pink #2) before pulling.


Step 12


Now pull the pink #1 string up until a beautiful pink knot is made.


Now pull the pink #1 string up until a beautiful pink knot is made. Make sure to hold the pink #2 string down, so the other strings don’t get in the way while pulling.


Step 13


You can see your first knot in the picture above.


You can see your first knot in the picture above. Do the same exact thing over again to make a double knot.


Step 14


Now we will knot the pink #1 string over the blue #3 string since it is next in line.


Notice that you made 2 pink knots on the top of the pink #2 string. Notice that the pink #1 string is now in place #2. Now we will knot the pink #1 string over the blue #3 string since it is next in line.


Step 15


Knot the pink #1 string over the blue #3 string twice to make a double knot.


Knot the pink #1 string over the blue #3 string twice to make a double knot.


Step 16


Now we will knot pink #1 over blue #4 thread since it is next in line.


Now you can see that there are 2 pink knots on the blue #3 thread. Now we will knot pink #1 over blue #4 thread since it is next in line.


Step 17


Make the 2 knots over blue #4.


Make the 2 knots over blue #4.


Step 18


Now you can see the 2 pink knots on top of the blue #4.


Now you can see the 2 pink knots on top of the blue #4. You can now see that pink #1 is now in the fourth place.


Step 19


Now take all of the left-side strings and put them on the left pin to get them out of the way.


Now take all of the left-side strings and put them on the left pin to get them out of the way. Fan out the right-side strings in the correct order…in the mirror image that you created in step #9 of this tutorial.


Step 20


We will now be working on the right side strings.


We will now be working on the right side strings. We will be knotting pink string #1 (just like we did on the right). However, since we are working on the right side, when we make the letter L shape with the knotting thread (pink #1), the Letter L will be backwards…so just keep that in mind.


Step 21


Tuck string pink #1 under pink #2 and into gap between both strings


Tuck string pink #1 under pink #2 and into gap between both strings, because you are making a knot just like you did on the left side strings.


Step 22


Now pull thread pink #1 up until a knot is made, while holding pink #2 down.


Now pull thread pink #1 up until a knot is made, while holding pink #2 down.


Step 23


you made your first knot on the right side.


See, you made your first knot on the right side. Now make another knot to make a double knot.


Step 24


make a double knot with pink #1 over pink #2, blue #3, and blue #4 until pink #1 is all the way to the far left.


Now make a double knot with pink #1 over pink #2, blue #3, and blue #4 until pink #1 is all the way to the far left. This is just like you did on the left strings, but we are doing it on the right in the opposite direction(like in a mirror).


Step 25


we have to knot the 2 pink #1 strings together in the middle to make a ‘v’ shape.


Now we are done with the right side and we have to knot the 2 pink #1 strings together in the middle to make a ‘v’ shape. So Take pink #1 string off of the left side pin. Then you will have 2 pink threads on the left (see pic). You will now double knot pink Right #1 over Pink Left #1.


Step 26


In the pic above, on the left, I show you the double knot process of the 2 pink strings. On the right, I show you the Letter 'V' shape that has been made.


In the pic above, on the left, I show you the double knot process of the 2 pink strings. On the right, I show you the Letter ‘V’ shape that has been made.


Step 27


double knot pink #2 over blue #3 thread.


Now you will be putting all of the right side threads up on the pin and take down the left side threads to spread them out. We will now use pink #2 as the knotting string. So double knot pink #2 over blue #3 thread.


Step 28


Notice that the pink #2 string has moved to the 2nd spot.


As you see, you have made 2 pink knots on the blue #3 string. Notice that the pink #2 string has moved to the 2nd spot.


Step 29


We will be starting to make the blue heart now


This is where things get a little bit more confusing. We will be starting to make the blue heart now. Take string blue #4 and knot it over the pink #1 string (by making a backwards letter L shape) to make 2 blue knots.


Step 30


Now you can see 2 blue knots on top of pink string #1.


Now you can see 2 blue knots on top of pink string #1.


Step 31


Now we will be knotting blue #4 over pink #2 to make 2 more blue knots.


Now we will be knotting blue #4 over pink #2 to make 2 more blue knots.


Step 32


we will place all of the left side strings back on to the pin.


Now we will place all of the left side strings back on to the pin. We will be doing on the right side, what we just did on the left side.


Step 33


Double knot pink #2 over Blue #3.


Fan out the right side threads. Double knot pink #2 over Blue #3.


Step 34


Now double knot blue #4 thread back over pink #1 thread to make 2 blue knots.


Now double knot blue #4 thread back over pink #1 thread to make 2 blue knots.


Step 35


Now double knot blue #4 over pink #2 thread to make 2 more blue knots.


Now double knot blue #4 over pink #2 thread to make 2 more blue knots.


Step 36


we will be double knotting Right Blue #4 over Left Blue #4 Thread.


Now take the Left blue #4 thread off of the left side pin. Now we will be double knotting Right Blue #4 over Left Blue #4 Thread.


Step 37


Now place the right side strings on the pin and fan out the left sided pins.


Now place the right side strings on the pin and fan out the left sided pins.


Step 38


Now double knot blue #3 over pink #1.


We are working on the left strings now again. Now double knot blue #3 over pink #1.


Step 39


Double knot blue #3 over pink #2 and blue #4.


We know how to do this now, so I won’t baby you as much now. Double knot blue #3 over pink #2 and blue #4. You are now done with the left side again.


Step 40


Put left side threads up on pin.


Put left side threads up on pin. Take down right side strings and fan them out. Now double knot blue #3 over pink #1.


Step 41


Double knot blue #3 over pink #2 and blue #4.


Double knot blue #3 over pink #2 and blue #4. You are now done with the right side and it is time to tie the blue #3 threads together.


Step 42


Take the left side blue #3 off of the left side pin.


Take the left side blue #3 off of the left side pin. Then double knot Right blue #3 over Left blue #3.


Step 43


You made a heart shape.


Hooray! You made a heart shape. You went thru the pattern one full time now.


Step 44


You should repeat the pattern until you are done with the bracelet.


You should repeat the pattern until you are done with the bracelet. However, I will go thru part of the process quickly again. Put your right-sided threads up on the pin and take down the left threads. Double knot pink #1 over pink #2, blue #3, and blue #4. Pink #1 will now be on the far right.


Step 45


Now put the left strings on the pin and take the right strings down.


Now put the left strings on the pin and take the right strings down. Double knot pink #1 over pink #2, blue #3, and blue #4. Pink #1 will now be on the far left.


Step 46


You will now go to Step 27 and continue over and over again


You will now go to Step 27 and continue over and over again until you have a bracelet long enough to cover your friend’s wrist.


Finished illustrated hearts friendship bracelet


Finished hearts friendship bracelet


How did your Hearts Friendship Bracelet turn out?  Any friend would be proud to wear a bracelet like this.  Now, the real issue…. which friend are you going to give it to???   Hmmmmm…..

Technorati Tags: , , , , , , , , , , , ,

How to Make a “Thank You” Bookmark for Thanksgiving

Thanksgiving is just around the corner.  Thanksgiving is a day to give thanks for all that you have… for all the love and support you have around you.  What better way to show your loved ones you are thankful for them than to give them a gift you made yourself.  Today I’m going to show you how to make a “Thank You” Bookmark perfect for giving as a gift for Thanksgiving.

Check out our other Thanksgiving Crafts and Bookmark Crafts.


Image172


Materials Needed

Thick White Paper

Colored Paper to Make Letters (you could also use stickers)

Glue

Scissors

Thread – Different Colors ( I used 6 stranded embroidery thread)

Hole Punch

Pencil


Image173


Step 1

Cut out letters in different colors (or use stickers, or print out letters and cut them out)


Image151


Step 2

Arrange them in a row and glue to the white paper as shown


Image152


Step 3

Draw a line around the letters according to the shape of the letters as shown


Image153


Step 4

On the top, make a semi circle and draw as shown


Image154


Step 5

Cut along the line and punch a hole in the top.


Image156


Step 6

Take threads of different colors


Image162


Step 7

Cut them out into pieces 6 inches long, and fold them in the middle as shown


Image165


Step 8

Push the folded end through the punched hole on top of the bookmark as shown


Image166


Step 9

Pull the loose ends of the threads up and put them into the loop that is formed as shown.


Image169


Step 10

Pull tightly, till it looks like this.


Image172


And, that’s it.  It is a simple craft, but it will go over big as a gift.  So, whose the lucky person who is going to get this gift from you?

Technorati Tags: , , , , , , , , , , ,

How to Make a Model Magic Yo-Yo

Yo-yo’s have been a popular toy since the 1920’s.  Kid’s love them now just as much as they loved them then.  When I was a kid I use to love playing with Yo-yo’s.  I actually got pretty good at it.  Well, today I’m going to show you how to make your very own yo-yo.  Made from Model Magic Clay and string you will be playing with your homemade Yo-yo in no time.

Check out our other Clay & Sculpting Crafts Ideas


How to Make a Model Magic Yo-Yo


Materials Needed

Model Magic Clay

Dull Butter Knife

2 Feet of String


Step 1


Roll Model Magic clay into a ball within the palms of your hand.


Roll Model Magic clay into a ball within the palms of your hand.


Step 2


Use a dull butter knife to cut two lines about a pinkie's width apart.


Use a dull butter knife to cut two lines about a pinkie’s width apart.  Dig out the clay… leave center intact.


Step 3


Let dry and then... Tie 2 feet of string onto center of the yo-yo.


Let dry and then… Tie 2 feet of string onto center of the yo-yo.


Step 4


Go play with your yo-yo.


That’s it…. you did it.  You just made a model magic yo-yo yourself.  Good for you!!  Now, go play with your yo-yo.

Technorati Tags: , , , , , , ,

How to Make a Thanksgiving Mobile

Thanksgiving is a time to remember how blessed we are to have such great family and friends.  Well, with that being said…. I have a creative way for you to remind yourself how thankful you are…. a Thanksgiving Mobile.  With pictures and your thankful thoughts you are sure to show everyone how blessed you truly are.  So, let’s get started.

Check out our other Thanksgiving Crafts.


Image141


Materials Needed

Thick Colored Paper

Markers

Thread

Ribbon

Scissors

Glue

Pictures of Family and Friends (you can use old photos or print outs)


Image131


Step 1

Cut out pieces of paper in different colored and sized diamonds as shown.


Image130


Step 2

Stick pictures on one side. I’m also really thankful for the great times of celebrations I had this year with my family and friends, so I made a special diamond that says ” celebrations”.  You can also add some like these.


Image133


Step 3

On the other side of the diamond, write the name of the person and decorate as shown.


Image134


Step 4

Using a pencil in the center, roll some colored paper into 2 tight rolls as shown. Glue the ends and then, remove the pencil.


Image132


Step 5

Cross the two rolls at the center and tie them together as shown.


Image149


Step 6

Punch a hole on the top end of the diamond and tie a piece of thread. Attach the thread to the paper rolls as shown.


Image135


Step 7

Tie a piece of ribbon to the top of the paper rolls as shown right in the middle.


Image136


Step 8

Now, hang up your mobile.


Image141


What a unique craft, huh?!  No one will have a Thanksgiving craft like yours.  Your family and friends are sure to love it.  Where did you hang your Thanksgiving Mobile?  Let me know in the comments below.

Technorati Tags: , , , , , , , , , ,

How to Make Cardboard Beading Looms

I’m going to show you a great way to make beautiful beaded bracelets on your own.  We are going to make our very own Cardboard Beading Loom perfect for making awesome bracelets.  Do you have any idea who your first handmade beaded bracelet will go to?  How about your very best friend…. she’d love it!!

You Might Enjoy Our Other Friendship Bracelets Crafts Too


How to Make Cardboard Beading Looms


Materials Needed

Wide Box

Needle

Ruler

Pencil or Pen

Thread or Dental Floss

Scissors

Beads (Usually Perler Beads)


Materials Needed


Step 1


On both short sides of the box... mark off every quarter inch.


On both short sides of the box… mark off every quarter inch.


Step 2


Now cut the marks that you penciled off in the last step.


Now cut the marks that you penciled off in the last step.


Step 3


Push thread or floss into one of the notches that you cut.


Push thread or floss into one of the notches that you cut.  Then wrap it around to the next notch and push it into that one.  Then continue to wrap the floss around these 2 notches a few times to secure the floss to the box.


Step 4


Now pull the floss over to the notch that lies opposite to it on the other side of the box.


Now pull the floss over to the notch that lies opposite to it on the other side of the box.  Push the floss down into that notch so that the floss is taut (tightly secured).


Step 5


Now do this over and over again until you have the number of rows that you want.


Now do this over and over again until you have the number of rows that you want.  If you want your beaded bracelet or beaded creation to have 5 rows… then you need 6 strings… if you want 4 rows… then you need 5 strings across… etc.


Step 6


Then to make sure that the strings stay taut and secured, you will need to wrap the thread or floss around the next notch


Then to make sure that the strings stay taut and secured, you will need to wrap the thread or floss around the next notch, directly to the right of the last string… like you did on the first notch.


Step 7


With a second piece of thread or floss... you should thread a needle.


With a second piece of thread or floss… you should thread a needle.  Make sure the needle fits thru your beads before you use it… I learned that they hard way.


Step 8


Make sure that this 2nd string is at least 2 arms length... and then cut it off the spool.


Make sure that this 2nd string is at least 2 arms length… and then cut it off the spool.  Then tie it to the first string on the loom.  See how I tied it very close to the edge of the box?!  DON’T DO THIS.  This leaves no room for you to tie a clasp or knot on it.   TIE THE KNOT FURTHER DOWN THAN I DID.


Step 9


Since I have 4 strings... I can have 3 rows of beads.  So, place 3 beads onto your needle.


Since I have 4 strings… I can have 3 rows of beads.  So, place 3 beads onto your needle.


Step 10


Now pull the needle and beads under ALL of the strings.


Now pull the needle and beads under ALL of the strings.  Pull the needle thru beads so that the beads are now ON the string.


Step 11


Now push each between in between 2 strings and then push your fingers below the beads and strings ... pushing the beads up.


Now push each between in between 2 strings and then push your fingers below the beads and strings … pushing the beads up.  Then push the needle thru all the beads and pull thru.  The first row is the hardest row… so don’t get frustrated… because the rest of the rows will be much easier.  I didn’t get a good picture of this with the little beads so I am showing you this with bigger beads.


Step 12


Pull the thread thru and you have your first row.


Pull the thread thru and you have your first row.


Step 13


Again... put beads on the needle... Push it under ALL the threads.


Again… put beads on the needle… Push it under ALL the threads.  Pull all beads onto the thread and then push all beads in between 2 threads…which will be MUCH easier this time than the 1st time.


Step 14


Push the beads up with your fingers... then push the needle thru the beads.


Push the beads up with your fingers… then push the needle thru the beads.


Step 15


Continue doing this until it looks big enough.


Continue doing this until it looks big enough.


Step 16


Cut the floss at both ends.


Cut the floss at both ends.

Step 17


Tie a knot.


Tie a knot.


Step 18


Tie a knot.


Tie it around your friend’s wrist.

You just finished your first beautiful bracelet with your Cardboard Beading Loom.  Wasn’t it a lot of fun?  Now the only thing left to do is  find the perfect friend to give it to.  Or, keep it for yourself.

You Might Enjoy Our Other Friendship Bracelets Crafts Too

Technorati Tags: , , , , , , , , , , , , ,

How to Make a Dog Leash

How would you like to learn how to make a dog leash for your dog?  Wouldn’t it be nice to walk your dog holding the leash that you made on your very own?  Well, today I’m going to show you how to do that…. I’m going to show you how to make your very own Dog Leash.  So, grab some twine and a pair of scissors and you are good to go.


How to Make a Dog Leash


Materials Needed

Ball of Twine – 1/16th of an inch thick

Scissors


Use twine that is smooth and hard, not hairy. It should be about 1/16th of an inch thick. You are going to braid eight pieces of this twine together, so you don’t want the cord to be too clumsy to handle. A round braid is usually made of four strands, but four double strands will be much stronger; and that’s what is recommended.

Important: To make the explanation simpler, we are going to speak of each double strand as if it were just One single strand.

Step 1


Cut your twine into eight 6 1/2 foot lengths. Tie them on a doorknob or on the back of a chair, knotting them together.


Cut your twine into eight 6 1/2 foot lengths. Tie them on a doorknob or on the back of a chair, knotting them together. These strands will make a six-foot leash. In the pictures, you will see that the strands are numbered 1, 2, 3, and 4.


Step 2


Take hold of Strand 1 which is on the extreme left. Move it behind Strand 2 and Strand 3.


Take hold of Strand 1 which is on the extreme left. Move it behind Strand 2 and Strand 3. Then bring it forward and fold Hold it there with your left hand: Then take Strand 4 which is on the extreme right. Move Strand 4 behind the two strands that are now next to it.


Step 3


Then bring Strand 4 around over Strand 1. Strand 4 will then be between Strand 1 and Strand 3.


Then bring Strand 4 around over Strand 1. Strand 4 will then be between Strand 1 and Strand 3. Keep repeating this process. First use the strand on the left side, then do the same thing with the strand on the right side. Braid slowly and tightly. Smooth the strands out often so that they don’t get tangled.


Step 4


When you have completed your braid, slide it off the doorknob and knot the ends so that the weaving doesn't unravel.


When you have completed your braid, slide it off the doorknob and knot the ends so that the weaving doesn’t unravel. Now you can tie one end of this nice strong leash to your dog’s collar, and tie the other end into a big knot to hold on to.

You did it!!  You just finished making a Dog Leash on your own.  Think how proud you will be to walk your dog around the block carrying your homemade leash.  What color twine did you use?  Let me know.

Technorati Tags: , , , , , , ,