How to Make a Colored Hands Wreath for Martin Luther King Day

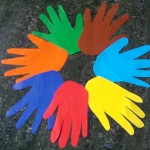
Martin Luther King Day is just around the corner.  Martin Luther King Day is always the 3rd Monday in January and it marks Martin Luther King’s Birthday.  Well, today’s craft is in honor of Martin Luther King’s Birthday.  I’m going to show you how to make a colored hands wreath for Martin Luther King Day.  This craft is just perfect for the occasion, in celebration of Martin Luther King’s birthday. The colored hands represents children of different races joining hands in peace and unity.  A few colored papers, a pair of scissors and a glue is what you need.  So, let’s get started.


MATERIALS NEEDED

colored papers, assorted
scissors
glue


Step 1

With the back portion of the colored papers, let your child trace his/her hand with a marker. Do the same to the other paper colors until you have around 7-8 pieces.


Step 2

With a pair of scissors, cut the drawings and set aside.


Step 3

When all hand shapes are cut, arrange it in a circle as if the hands are reaching outwards. Make sure the colors are alternately placed. Glue the outer side so it touches the side of the other hand. Continue doing this until you create a circle that resembles a wreath.

There you have it….. you just finished making your colored hands wreath for Martin Luther King Day.  Doesn’t it look awesome when finished?  Now go hang it proudly for all to see.

Technorati Tags: , , , , , , , , , , , ,

How to Make Tin Foil Light Shows

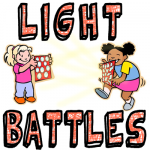
Today I am going to show you how to have fun with light.  Yep, I said light.  Using pieces of tin foil and the light inside or outside….. it is reflective fun.  The light reflects off the tin foil making a light show all over the walls.  Or, grab a friend…. each having their own tin foil cardboard and battle one another.  That is just hours of fun waiting to happen.


How to Make Tin Foil Light Shows


Materials Needed

Tin Foil

Cardboard

Scissors

Glue/Paste


Step 1


Cut tin foil out in different shapes and paste them onto cardboard


Cut tin foil out in different shapes and paste them onto cardboard.


Step 2


Turn boards at different angles for different light patterns


Turn boards at different angles for different light patterns.  Two kids can have light battles.

Did you learn anything new about reflective light by doing this craft?  Let me know in the comments below.

Here is our video on How to Make Tin Foil Light Shows

Technorati Tags: , , , , , , ,

How to Make Connecting Building Blocks

Today I’m going to show you how to make Connecting Building Blocks.  These blocks are made from simple milk cartons or cream containers.  This is a great way to teach young children how items can fit together.  So, let’s get started.


How to Make Connecting Building Blocks


Materials Needed

Milk or Cream Cartons

Aluminum Foil or Cellophane

Tape

Poster Paint

1 Teaspoonful Soap Flakes or Detergent

Construction Paper, Crepe Paper, or Grocery-bag Paper

Rubber Cement


Don’t throw away those empty waxed milk cartons. You haven’t milked the last drop out of them yet! They can be washed, cut, pasted, painted, linked, and eventually thrown away with a clear conscience—after all, they’re free! Milk and cream cartons with flat tops are ideal for preschool block play. The advertising on the outside won’t bother the you at all, but covering the writing can be fun in itself.

Wrappers of aluminum foil will turn these blocks into glittering silver bricks (optionally).  Just cover as you would a gift package, and fasten each end with a tiny piece of tape; or poster paints will stick to the waxed surface if you put a teaspoonful of packaged soap or detergent into the jar of paint before you start; or paper (construction, crepe, or from grocery bags) can be made to adhere, with rubber cement.

These are more fun and more challenging than plain building blocks. They join together with great ease, and the play possibilities are endless.


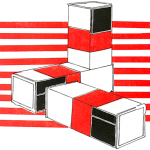
If two square openings are cut in each carton, the blocks can then be linked together, one into another


If two square openings are cut in each carton, the blocks can then be linked together, one into another.


These blocks can be connected to construct all sorts of shapes and forms


These blocks can be connected to construct all sorts of shapes and forms, then taken apart and put together again, this time in a completely different way. This is more than just a “keep busy” activity —it is an engrossing project, excellent for developing co-ordination, and imagination too!

Technorati Tags: , , , , , ,

How To Make Hand Print Rainbows for St. Patrick’s Day Preschooler Activity

Rainbows bring smiles to faces everywhere and these hand print rainbow are very easy for children of all ages to make. This is a perfect activity for toddlers, preschoolers, and Kindergartners. They are fun to make and parents just love handprints from their children.

You Might Like Our Other St. Patrick’s Day Crafts Ideas


How To Make Hand Print Rainbows for St. Patrick's Day Preschooler Activity


How To Make Hand Print Rainbows for St. Patrick’s Day Preschooler Activity

Crafts Materials Needed

*Construction Paper in Rainbow Colors (Red, Yellow, Orange, Green, Blue, Indigo, and Violet)

* Pencils or Markers

* Scissors

* Glue


Hand Print Rainbow Instructions

Step 1

Teach the kids about the rainbow and the spectrum of light and all that jazz. If they are very young….teach them the order of the colors in a rainbow by telling them about the name Roy G. Biv (Red, Orange, Yellow, Green, Blue, Indigo, Violet)


Step 2

Have the child trace his or her hand on each color of paper (or trace it for them if they are very young)

Step 3


How To Make Hand Print Rainbows for St. Patrick's Day Preschooler Activity


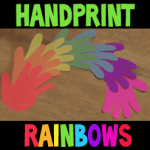
Glue each hand together, in order (Red, Yellow, Orange, Green, Blue, Indigo, and Violet) in a rainbow-like arc.

You Might Like Our Other St. Patrick’s Day Crafts Ideas

Technorati Tags: , , , , , , , , , ,

Making an Alphabet Letters Memory Game from Milk Jug Caps with Printables and Instructions for Kids

Today I will show you how to make a really cool Memory game that is great for any age child, but especially good for preschoolers and Kindergarteners who are still working on Alphabet Letters recognition. If you don’t have enough Milk Jug caps, you could also use coins, checkers, cardboard, or whatever else you have lying around the house.

DON’T USE WATER BOTTLE CAPS – USE LARGE MILK CAPS TO ENSURE THE CHILD WON’T BE ABLE TO SWALLOW THEM! EITHER WAY, WATCH THE CHILD TO MAKE SURE THEY DON’T INGEST THE CAPS!


Making a Memory Game from Bottle Caps with Printables and Instructions for Kids


Making a Memory Game from Bottle Caps with Printables and Instructions for Kids

Crafts Materials Needed

– 52  Milk Bottle Caps

– Glue

– Printer and Paper

– Scissors


Step 1 : Print Out the Bottle Cap Letters

Pick the Letters that you want below (choose from color or black and white, as well as milk jug bottle caps or water bottle caps). Print out the templates twice as you are going to be playing a matching game in which you need 2 of every letter.


Black and White Water Bottle Caps Letters


Click on Above Image for BLACK AND WHITE WATER BOTTLE CAPS


Colorized Water Bottle Caps


Click on Above Image for COLORIZED WATER BOTTLE CAPS


Black and White Milk Bottles Caps Letters


Click on Above Image for BLACK AND WHITE MILK BOTTLE CAPS


Black and White Milk Bottles Caps Letters


Click on Above Image for BLACK AND WHITE MILK BOTTLE CAPS Part 2


Colorized Milk Bottle Caps Letters


Click on Above Image for COLORIZED MILK BOTTLE CAPS


Colorized Milk Bottles Caps Letters Part 2


Click on Above Image for COLORIZED MILK BOTTLE CAPS Part 2


Step 2 : Attaching Letters to Bottle Caps


Making a Memory Game from Bottle Caps with Printables and Instructions for Kids


To attach the letters to the milk jug caps, either glue them to the top or simple insert them inside the cap (which depending on the size of the cap, might not even need glue. If you are using coins…simply tape the letters to the coins.

How to Play Alphabet Memory Game

(1) Make sure that all the caps are messed up so that they aren’t in order.

(2)  Turn all of the caps over so you cannot see the letters anymore.

(3) Place them in neat rows.

(4) A player turns over 2 caps.

….. If there is a match, they put those caps in their own pile and then gets to take another turn.

….. If there is NOT a match, the player then turns the caps back over ( in the same spot that they found them) .   The next player then gets to take a turn.

(5) The game is over when all of the matches are found. The player with the most caps wins the game.

Technorati Tags: , , , , , , , , , , , , ,

Make a Groundhogs Day Board Game Crafts Idea for Kids

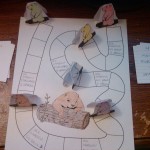
This activity starts as a coloring page, then a craft, and finally a board game to play with friends or family.  We have provided you with two templates to print out: a game board and a sheet of six movers.  However, if you do not have a printer, or do not have permission to use one, you can get two sheets of plain white paper and make your own.

Here are More Groundhogs Day Crafts


Make a Groundhogs Day Board Game Crafts Idea for Kids


Make a Groundhogs Day Board Game Crafts Idea for Kids

Crafts Materials Needed:

  • Paper
  • Printer
  • Colored pencils, crayons or washable markers
  • Index cards
  • Tape
  • Safety scissors
  • Pen or pencil
  • Imagination

To start with print out the two pages provided, or draw your own.


Groundhog Gameboard


Groundhog Movers

STEP 1 – PREPARE THE BOARD

Color in the groundhog with your colored pencils, crayons, or washable markers.  I used colored pencils to get the details.  Then you can decide which side is start and which is finish, mark those.  I put START and FINISH, but you could also put WINTER and SPRING.


Add special instructions to spaces, if you want to make the game a little harder.  I put “See shadow.  Go back 3 spaces” and “No shadow.  Go forward 2 spaces” on mine.  Make sure you don’t put too many, and that you don’t put one where another space will end.  I accidentally put “Go back 3 spaces” 3 spaces in front of a “Go forward” space, so I had to change it to “Go back 2 spaces”.  If you make a mistake like this, it’s very easily fixed.


STEP 2 – MAKE THE PLAYING PIECES

First you will pick 6 different colors and color your groundhogs.  Make sure the colors are different enough you won’t get confused during game play.


Now, cut them apart leaving each pair together.  Once you have 6 pieces of paper, fold them in half so the groundhogs of the same color are both facing out.  You can hold it up towards a light to make sure the holes that the groundhogs are popping out of line up.  Then, cut a flat bottom and up around the ground hog.  Make sure you leave the two sides attaches by the heads.  I have included a picture of the pieces at various stages.


Now, take an index card and fold it lengthwise.  Cut along the fold and discard one half.  Cut the other into 3/4″ strips, you will have a little left over that you can also discard.  Now take a 1 1/2″ length of tape and lay it on your work surface, sticky side up.  Place a strip of index card on it, and tape it to the bottom of a playing piece.  Do this for each piece.  Again, I have including a picture with various stages.


STEP 3 – MAKE CARDS

If you are short on time you can grab a die from another board game, just make sure you have permission first.   If you want to play the game following the rules below then you will need 8 index cards.  Cut each one on half the short way and write Groundhog Day on the blank side.  You should now have 16 cards that look like this:


Now flip them over to the lined side and write down how many moves each card is worth.  You will need 4 each of 1, 2, 3 and 4.  Mine has the number at the top and instructions underneath, but you can make yours however you wish.


STEP 4 – PLAY THE GAME

  1. Mix the numbered cards and lay them face down to the left of the board.
  2. Place all colored playing pieces in front of the “start” space.
  3. Youngest player (or whoever made the game) goes first.  They pick the top card from the pile, move the amount of spaces stated, and discard face up to the right of the board.
  4. Play moves clockwise around the board.
  5. If a player lands on a special space they must follow all instructions on that space.
  6. The goal is to be the first player to reach the end of the game.


Here are More Groundhogs Day Crafts

Technorati Tags: , , , , , , , , , ,

How to Make Color Wheel Spinning Toys Craft Idea for Kids

This is a good arts and crafts activity to teach kids about colors (and it is a lot of fun to play with). Kids will be so surprised when they find out that when they spin the toys, the colorful rainbow of colors turns into a charcoal gray. You can teach kids a little bit of science and lit bit of art with the use of this crafts project. Have fun.

You Might Enjoy Our Other Toy Making Crafts and Our Spinning Toys Crafts


How to Make Color Wheel Spinning Toys Craft Idea for Kids


How to Make Color Wheel Spinning Toys Craft Idea for Kids

Crafts Materials Needed

– Cardboard
-String
-Crayons or Paint
-Scissors

Step 1


Take a piece of white cardboard, and from it cut a circle about 3 inches across.


Take a piece of white cardboard, and from it cut a circle about 3 inches across.

Step 2


Now from the middle of this cut another circle about 3/4 inches across.


Now from the middle of this cut another circle about 3/4 inches across.


Step 3


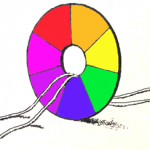
Divide the circle into 7 equal parts, and paint or crayon the sections with the colors of the rainbow


Divide the circle into 7 equal parts, and paint or crayon the sections with the colors of the rainbow : red, orange, yellow, green, blue, indigo, and violet.

Step 4


When this is dry, make a large loop of string and put it through the round hole of the card.


When this is dry, make a large loop of string and put it through the round hole of the card.

How to Play With Your New Color Wheel Spinning Toy

Now hold the ends of the loop one in each hand. Now if you turn the string at one end as if you were turning a skipping rope, and then suddenly pull it tight, your card will revolve very rapidly, and you will find that instead of a colored card you have what appears to be a light grey one. This is really a little piece of science, for it shows that the white light about us is really made up of the different colors of the rainbow.

You Might Enjoy Our Other Toy Making Crafts and Our Spinning Toys Crafts

Here is our video on how to make a Color Wheel Spinning Toy

Technorati Tags: , , , , , , , , , , ,

How to Make a Peace Handprints Flower Craft Idea for Martin Luther King Day

What is Equality? What is Peace? Peace is to get up in the morning and your mommy and daddy will welcome you with a smile. You have good friends and you can play and have fun with them. You have dreams that one day will be true…Every children on this word wants those things. Think at Peace as a beautiful flower. How this flower will look like? You can make this to celebrate the great Martin Luther King Jr. on Martin Luther King Day.


How to Make a Peace Handprints Flower Craft Idea for Martin Luther King Day

CRAFTS MATERIALS NEEDED:

– paper
– scissors
– pencil
– colored paper (pink, light brown, dark brown, green)
– glue


Step 1.

We take the pink paper,


Place your left hand on it,


And draw it’s contour with your pencil.


Step 2.

Take the scissor and cut out the drawing.


Now you have a paper hand.


Step 3.

Repeat the steps 1 and 2 using the brown papers, so, in the end you’ll have 3 paper hands, to use as petals.


Step 4.

We want to make a flower… what every flower have? You said steam? Yes, you’re right! So, let’s draw a steam on the green paper. You can add some leaves too.


Step 5.

Take the scissor and cut out the steam and the leaves.


It really looks like a plant 🙂


Step 6.

Apply a thin layer of glue on the back of the steam and leaves,


Then place it on the white paper.


Take care to put the steam low enough to let space for the flower.


Step 7.

Apply the glue on the back of the paper hands too and place them on top of the steam.


That’s it! The Peace flower…


offered by Laura from Dacian Moon Handmade

You Might Like Our Other Martin Luther King Day Crafts as well.

Technorati Tags: , , , , , , , , , , , , , ,

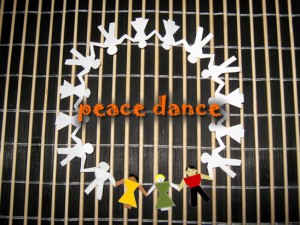
How to Make a People Peace Dance Paper Cutout Craft for Martin Luther King Day

Because Martin Luther King Day is approaching, I think we should remember that, even if we are looking different, we are equals and we wish for the same things in life. One of those things is PEACE. Today, Laura from Dacian Moon Handmade will be showing you how to make a Peace Dance out of paper.

You Might Like Our Other Martin Luther King Day Crafts as well.


peace dance


CRAFTS MATERIALS NEEDED:

– paper
– scissors
– pencil
– colored pencils


Step 1.

Take one corner of the paper and bend it to the opposite side.


Step 2.

Press well the edge…


… and then, with the scissor cut the remaining part of paper.


Step 3.

Now, we have a triangle. Set it on the table with the peak to you. Bring the right corner over the left one, like in the picture.


We have now a smaller triangle. Press well the new formed edge.


Step 4.

Set the triangle on the table with the bigger edge to you.


Then bring again the right corner over the left one.


Now, we have an even smaller triangle who have on one side 3 corners one over the other, and on the other side, only one corner.


Step 5.

Let the triangle folded, with the 3 corners one over the other in the left.


Draw with the pencil two silhouettes – one girl and one boy, like in the following picture.


Step 6.

With the scissor cut out the silhouettes from the paper, following the contour. First the lower part…


… then the upper part. Take care at the hands of the silhouettes because they should be merged, so don’t cut them on the paper edge.


On this point you should have :


Step 7.

Look at the boy’s hand. You’ll see that can be opened:


Gently, pull the detachable corners and you’ll have 4 kids.


Repeat that and …


Mmm, it looks good. Look very carefully: can you open it more?


Yes, you can !
Now, you have the “peace dance”.


Step 8.

The last step:


You can play with coloured pencils, to make the dance full of joy. Don’t forget to make kids with different skin colours, because we are all equals, we like to play, to dance… we like Peace. I begin to play with colours. What are you waiting for?


… and most important: HAVE FUN!

You Might Like Our Other Martin Luther King Day Crafts as well.

Technorati Tags: , , , , , , , , , , , , ,

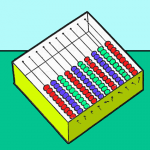
How to Make Chinese Abacus for Chinese New Year or 100th Day of School

I noticed that there are 2 holidays / events coming up – The Chinese New Year and The 100th Day of School. I think that the Chinese Abacus could be a craft to tie both of these 2 celebrations together. The Abacus uses 100 beads and was created by the Chinese  people who called this calculating instrument a Swan-Pan. In face, in some countries an abacus is still widely used to add and subtract. The following step by step arts and crafts instructions will guide you the parent, teacher, child, or whomever through the process of making this Abacus. Have fun.


How to Make Chinese Abacus fro Chinese New Year or 100th Day of School


How to Make Chinese Abacus fro Chinese New Year or 100th Day of School

CRAFTS MATERIALS NEEDED:

square box

string

small colored beads

pencil

ruler

nail

Step 1

With a pencil and ruler, mark off 10 even spaces along one side of a medium-square box, about 1/2 inch down from the top. Do the same on the opposite side of the box.


With a pencil and ruler, mark off 10 even spaces along one side of a medium-square box, about 1/2 inch down from the top. Do the same on the opposite side of the box.


Step 2

With a nail, make a small hole at each mark.


With a nail, make a small hole at each mark.


Step 3

Pull one end of a piece of string through the first hole, and tie it securely with a knot.


Pull one end of a piece of string through the first hole, and tie it securely with a knot.


Step 4

String 10 colored beads on the string and fasten the other end of the string, across the box, to the first hole on the other side.


Step 4 Stringing Beads on the Abacus


Step 5

Do the same with 9 other pieces of string, placing 10 colored beads on each row. If you like, you may use a smaller box and string 7 colored beads on each row, which will make your counting toy like the ancient Roman abacus. On another note…you don’t have to use colored beads the way we did, you can use a different colored bead on each row…or vary different colors on every other row…it is completely up to you.


How to Make Chinese Abacus for Chinese New Year or 100th Day of School


Technorati Tags: , , , , , , , , , , , , , ,

Make Easter Counting Game Craft Activities for Preschoolers & Young Kids


Make Easter Counting Game for Easter or Spring : Preschoolers Craft

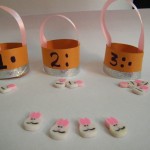
Here’s a fun game to learn counting this Easter. This craft can also be done as a group activity, every child makes one basket and in the end the kids can play a game of putting the right number of Easter bunnies  in each basket.

Craft materials required:

Thick colored paper

Broad ribbon

Scissors

glue

tape

markers

Ruler

Small bunny shaped erasers or candy

Colored tape


Step 1

Cut out strips of paper about 4 in wide and 9 in long


Step 2:

Roll it around and glue the ends together to form cylinders.


Step 3

Trace the outline of the circle formed on a piece of paper of the same colour.


Step 4

Remove the cylinder and add tabs to the design as shown below.


Step 5

Cut it out and fold the tabs as shown below.


Step 6

Place the cylinder over this piece so that the tabs are on the inside. Tape the tabs to the inside walls of the basket.


Step 7

Take a long piece of tape and stick it along the bottom as shown.


Step 8

Fold the tape over the edge to make the basket strong.


Step 9

Cut a piece of ribbon and tape it to the insides of the basket as shown.


Step 10

Stick some colored tape along the bottom of the basket as shown.


Step 11

Write a number on each basket. The game is to put the right number of objects- Easter bunnies, miniature eggs or candy into the baskets.


Technorati Tags: , , , , , , , , , , ,

George Washington’s Camp Paper Folding Crafts Model Craft for Kids to Make for President’s Day


George Washington’s Camp Paper Folding Crafts Model for Kids to Make for President’s Day


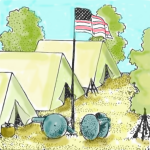
Presidents Day is coming up on February 15th this year (2010) and I am posting a great project for teachers to do with their classrooms full of students. This is a great group project to celebrate George Washington’s birthday. This project includes paper folding and cutting and the use of clay. See below for the instructions to make George Washington’s camp. Use this to teach the kids about the Revolutionary War and General George Washington who later became America’s first president.

Make the Soldier’s Tents from Washington’s Camp


Below is the paper folding instructions to make the tent. Get a 4 inch square piece of paper (or cut 4 inches by 4 inches out of a larger piece of paper)


(1) Fold into 16 squares

(2) Fold diagonals of the corner squares.

(3) Cut on these diagonal lines.

(4) Now cut on the solid lines.

(5) Paste square A to square B.

(6) Paste square C to square D.

(7) A slit may be cut in one end and the edges folded out to represent the opening of the tent.

Fold several tents …at least 5 of 6.

Make a Canon for Washington’s Camp


(1) Make the cannon by forming 2 thin circular pieces of clay.

(2) Join these 2 circular pieces of clay with a toothpick.

(3) Make the cannon’s stock with clay and place it between the 2 wheels that you just made.

(4) Make cannon with clay and place on top of the stock that you formed in step #3.

(5) Let clay dry.

Make a Drum and Drum Sticks for Washington’s Camp


Below is the paper folding instructions to make the drum. 


(1) Cut out a rectangle that is about 8 inches x 2 inches long

(2) Make a crease that is about 1/2 inch from the bottom (as seen above).

(3) Make vertical cuts (up and down) from edge to edge along this crease (see the image above).

(4) Paste ends together so that it forms a cylinder-like shape.

(5) Remember when you made all of those cuts along the bottom of this paper…now fold them in.

(6) Cut a circle that fits the cylinder shape that you just made.

(7) Paste this circle onto the slits of paper you just cut and folded in.

To Make the Drum Sticks, you can either use toothpicks or make them from clay.

Print Rifles & US Colonial Flag

Print out these military rifles by (1) right clicking on them to open them in a new window (2) Click on File > Print.


Print out this Colonial US Flag by (1) right clicking on them to open them in a new window (2) Click on File > Print.


Find a chopstick, a stick from outside or other sturdy stick-like object. Fold this Colonial US flag in half and past it around the stick.


Now let the groups of children place their tents and cannons on to the poster board (or cardboard) to represent George Washington’s camp. Attach the flag to the cardboard or poster board by punching it through the board and then placing the Cannons Around it. You can also cut out trees and place them around the camp and if you want, you can place rifles in formation (as seen in the picture above).

Good luck and Happy Presidents Day.

Here are More President’s Day Crafts for Kids

Technorati Tags: , , , , , , , , , ,

The Origami Fox Box for the Beginner Paper Folder Child


fox-box


The Origami Fox Box for the Beginner Paper Folder Child : Great for Easter Grab Gift Bags


Years ago, and I mean “years,” I had the great opportunity to try origami at school.  I actually loved it and most of the people in my class enjoyed creating various objects out of paper.  In fact, the love of paper folding quickly became a common past time in my school and we would make everything from cootie catchers to little paper balls.

One thing that I have noticed is that paper folding crafts are still a big hit with kids and my own children have brought home their own share of cootie catchers and paper balls. One of their favorite paper crafts that they have brought home is the Fox Box.  This is a very simple paper craft and is excellent for a beginner paper folder.  It doesn’t require very much skill and only uses simple folding techniques.  In addition, the Fox Box is quick to make and you can hide little treasures inside, which are perfect for grab bags. These are also great for Easter grab bags.

The Fox Box for the Beginner Paper Folder : How to Make a Fox Box with 3 pieces of paper’


fox-box-materials


Gather all the materials you need:

  • Printed or Origami Paper: You will need 3 sheets of  paper that has a print on one side or a decorative origami paper
  • Scissors or a straight-edge cutter
  • Stickers (optional)
  • Treasure or Trinket (optional)

1.    Carefully cut out 3 squares, one from each sheet of paper.  The best measurement is 6 inches by 6 inches but you can make it smaller or larger depending on the end result that you would like.  If your child is able to cut the paper by himself, then feel free to allow him to do so.


fox-box-first-triangle


2.    Give your child one piece of paper and have him fold it in half diagonally until the top edge is in line with the bottom edge.  Your child should be left with a large triangle.  Make sure that the print is on the outside of the triangle.


fox-box-smaller-triangle


3.    Fold the triangle in half to form a new, smaller triangle by bringing the corner over to the side of the other corner.  Have your child crease the paper and then fold the triangle open again to reveal the first triangle with a crease down the center.


square-fox-box


4.    Now you are ready to create a square with the paper.  Have your child take one corner from the bottom of the triangle and fold it along the crease that runs down the center of the large triangle.  Crease the paper and then unfold it.  Flip the paper over and fold the same piece to the center fold, crease and then fold it back.  This should create a hinged crease where the paper can fold both ways without difficulty.

5.    Repeat the process with the other corner of the paper.  Your child will be left with a small square of folded paper.


fox-box-small-triangle-fold


6.    At the top of the large triangle, fold down one edge so there is a small white triangle showing at the top.


fox-box-repeat-with-paper


7.    Repeat steps 2 to 6 with the other two pieces of paper.


fox-box-assembly-1


8.    Once you have all the paper folded, it is time for your child to start assembling his fox box.  At this point, depending on your child’s age, you may need to assist your child with the assembly. Take two of the folded papers and slide them together.  To do this, you slide the two small triangles, “ear shaped paper” between the folded paper at the top of the large triangle with the other paper.  This means that the two smaller triangles will slide under the small white triangle in the main body of the paper.


fox-box-assembly


9.    With the third piece of paper, repeat the process except you will need to close the box by sliding the small triangles under the third paper.  Crease the paper whenever needed as you make the paper fit together.


rimg1712


10.  Finish the fox box by decorating it with stickers (optional) and place a treasure into the fox box if you desire to do so.

The first time you and your child makes a fox box, it will feel as though you are all thumbs when you assemble the box but after the first time, it becomes very easy to create the box.


fox-box


Technorati Tags: , , , , , , , , , , , , ,

How to Make an Alphabet Letters Tactile Guessing Game with Your Preschoolers or Autistic Children

Today we are going to how to play a fun Montessori game that promotes good hand writing skills while also helping kids to learn the alphabet on their own. This is an educational, yet fun arts and craft activity for both you and your young children to do together. This crafts idea is beneficial for preschoolers, Kindergartners, as well as children who are autistic / on the spectrum / or those who have sensory disorders. (even older children enjoy it). I have a friend with an Autistic child and this game is very similar to the way she had to teach her child the alphabet since he wasn’t able to learn the alphabet through sight since he was more into sensory and tactile learning techniques. As a warning, this craft might cause random bursts of laughter from both you and your child. Comment to tell us how your child reacts to this fun tactile game and craft. Enjoy.


Have the child close his eyes and feel letters to guess for Alphabet Letters Tactile Guessing Game Craft


Photographer: Marind

How to Make an Alphabet Letters Tactile Guessing Game with Your Preschoolers or Autistic Children


CRAFTS MATERIALS NEEDED:


Gather Crafts Materials for Alphabet Letters Tactile Guessing Game Craft


Gather the crafts materials that you will need for this arts and crafts project / game.

-Magic Markers

-A spare piece of rug, cloth, felt, or craft foam

-Heavy duty scissors


Trace the Alphabet Letters on the Felt for Alphabet Letters Tactile Guessing Game Craft


1-Trace the letters you want on the material that you chose to use (rug / cloth / felt / foam) with the marker.


Now cut the alphabet letters out of the felt for Alphabet Letters Tactile Guessing Game Craft


2-Now cut out the letters as shown above.


Have the Kids Feel the Letters for Alphabet Letters Tactile Guessing Game Craft


3-Now for the fun part. Have the kids feel the letters and say the letters at the same time. Do this two or three time until they have memorized the letters.


Have the child close his eyes and feel letters to guess for Alphabet Letters Tactile Guessing Game Craft


4-Now for the game. Have the children close their eyes. Spread the letters out on the floor. Then say a letter. Have students crawl around and feel the letters till they find the correct letter. Now, have the winning student tell the other kids to close their eyes. The winning student now repeats the game. Make sure you do this a few times, it’s fun. The students should be able to play the game on their own.

Here Are Some Other Links That You Might Find Useful – It is important to practice learning all the letters of the ABC! As you do your child will become familiar with each individual letter.

Lowercase and Uppercase Floor Alphabet Game –  An uppercase and lowercase floor alphabet game for younger kids and preschoolers.

Technorati Tags: , , , , , , , , , , , , , ,