How to Make Paper Flowers – Make a Daisy for Mom on Mothers Day

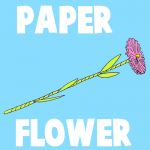
Oh no! Mother’s Day is coming up and you didn’t make your Mom a Mother’s Day present!!! No worries…here is a fun and easy craft that will knock the socks off of your mother. This paper flower craft sort of looks like a daisy, but you can use any colors you want to make it look like any type of flower. Find out how to make this paper daisy below.


How to Make Paper Flowers - Make a Daisy for Mom on Mothers Day


Crafts Materials Needed:

Colorful Paper

Scissors

Step 1


step1


Take a long strip of colorful paper and roll it up as in the picture seen above. Now paste the rolled paper shut.

Step 2


step2


Now cut slits in one end of the rolled paper tube.


Step 3


step3


Now flatten out the slitted side and turn it upside down, as seen in the picture above.

Step 4


step4


This part is a little hard to explain, but basically take a small piece of colorful paper (in the finished picture this part would be orange) and twist it into a rounded stump.

 Step 5


step5


Now put this rounded stump into the center of the flatten flower.

Step 6


step6


Now take a narrow strip of green paper. Paste one end on the short stump below the flower. Start twisting the strip round and round, each time a little more downward, in a spiral fashion…as seen in the pic above.

Step 7


step7


Now get a green piece of paper and fold it forwards/backwards/forwards/backwards, etc like an accordion.

 Step 8


step8


Now draw the shape of half of a leaf on top of the fold and then cut it out. You will now gets tons of leaves out of this.

Step 9


step9


Flatten out the leaves and then work them into the spiral folds on the stem as seen in the picture above.

Finished Paper Daisy Craft


Finished paper flower for mom on mothers day


Now you have a beautiful paper flower or daisy for your Mom on Mother’s Day. I hope you enjoyed this craft!

Technorati Tags: , , , , , , , , ,


Make a Turtle Paper Toy Model

Here is a fun printable turtle papercraft that you can make. This is super easy to print, fold, and then play with. Find out how to make it below.


Make a Turtle Paper Toy Model


Crafts Materials Needed

Paper or Cardstock

Scissors

Printer

Optional – Cereal Box

Optional – Butter Knife

Optional – Ruler

Templates

PDFs

Black and White Template – Open PDF and then Print Out ( template-bw-paper-turtle-neck-in-and-out )

Color Template – Open PDF and then Print Out ( template-color-paper-turtle-neck-in-and-out )

OR

PICTURES TO SAVE AND PRINT OUT


Click on Thumbnail - Then Save Bigger Image That Opens Up


Click on Thumbnail – Then Save Bigger Image That Opens Up


Click on Thumbnail - Then Save Bigger Image That Opens Up


Click on Thumbnail – Then Save Bigger Image That Opens Up


Step 1


step1


Print out either a color or a black and white template. Then glue it onto a cereal box.


Step 2


step2


Cut it out.

Step 3


step3


To make it easier to fold, you can do something called scoring. Do this by taking a butter knife and a ruler and drag the butter knife along the ruler and line you want to score.

Then fold the legs and tail in. Then fold the neck forwards and backwards on the lines several times. You then have your turtle finished.

Technorati Tags: , , , , , , , , , ,

How to Make a Simple No-Sew Sock Bunny Rabbit for Easter or for Fun

Today, we will show you how to make a sock doll bunny rabbit…the best part is that there is NO sewing involved in this craft. Anybody can make these sock bunnies and they can make it pretty quickly. I think you can probably make one of these is 20 or 30 minutes. And these sock bunnies turn out so adorable that you are going to make a few of them so your bunnies can keep each other company. This shouldn’t be played with by young kids who might eat the rubber bands if they come off!


How to Make a Simple No-Sew Sock Bunny Rabbit for Easter or for Fun


Crafts Materials Needed

– 1 Stretchy Sock  – I used Knee High Girls Socks
– 1 Normal Sock for the Hat
– Small Rubber Bands or Yarn
– Buttons or Sharpie Marker or Fabric Markers or Needle and Thread
– Stuffing
-Scissors

Step 1 Thru 9


Step 1 Thru 9 How to Make a Simple No-Sew Sock Bunny Rabbit for Easter or for Fun


We have a crafts tutorial for making a no-sew sock doll. Steps 1-9 are the same for this tutorial…so first go to the sock doll tutorial, and do steps 1-9 and then come back to this tutorial for step 10. Your doll should look like the above picture when you are done with step 9.

Step 10


Step 10


Now cut the top part in half…as seen in picture above.


Step 11


Step 11


Now, in this picture above, we have already done one of the 2 sides. The left side has been braided already…we did this by cutting the left side into three strips and then braiding that side and rubber banding the end as if it was hair. Now the right side needs to be done…we cut the right side into 3 strips…now we just need to braid it. If you don’t know how to braid, please see this tutorial.


real-pic-06


Now both sides should be braided and look like this.

Step 12


Step 12


Now both the right side and left side is looped into a letter ‘U’ shape. Then hold both loops together in the center and rubber band both sides together. I used more than one rubber band to make sure both sides stayed together.

Step 13


Step 13


Cut a second sock in half.

Step 14


Step 14


Now put the bottom of the sock (toe part) on top of the bunny.

Step 15


Step 15


Now fold up the bottom of the sock…so it is rolled up like a normal winter hat is.

Step 16


Step 17


Now cut a small slit on both sides of the hat.

Step 17


Step 18


Now pull an ear thru


real-pic14


And another ear thru.

Step 18


Step 19


Cut a nose out of fabric or felt (a triangle shape). Use a button(s) for eyes.

Step 19


Step 19


Ask mom or dad to help you hot glue the eyes and nose on. That is it…you have a stuffed bunny rabbit to play with. Wasn’t that easy?!

This shouldn’t be played with by young kids who might eat the rubber bands if they come off!

Moses Parting the Sea Old Testament Bible Exodus Printable Paper Craft for Passover

Today, I will share with you a printable paper craft for Passover. This craft is good for Jewish and Christian children as both study the old testament. In this craft, Moses is parting the sea while escaping the Egyptians. All of the Israelites are able to cross the sea, but then the Egyptians are all swallowed up by the sea when it closes back up. This is a perfect craft to celebrate Passover.

You Might Like Our Other Passover Crafts


Moses Parting the Sea Old Testament Bible Exodus Passover Craft


Crafts Materials Needed:

Printer

Printer Paper

Blue Paper

Scissors

Templates

Click Below on Each of the template images. These images will open up as a larger image. Then save these images to your computer and then print them.


template1-moses-parting-sea-paper-craft


template2-moses-parting-sea-paper-craft


template3-moses-parting-sea-paper-craft


Step 1


step1


Print out the 3 templates that you see above.


Step 2


step2


Cut out all the people, the chariot, and the stands. Cut 2 slits in each stand.

Step 3


step3


Fold the stands by folding the tabs inwards.

Step 4


step4


Now put all of the people and the chariot into the slits that are in the stands.

Step 5


step5


Get 2 blue sheets of paper. Cut lots of slits in the blue paper. Then curls them up and let go. The curls should look something like in the picture above.

Step 6


step6


Cut down the fish template to be less wide.

Step 7


step7


Now put the fish template page on top of both of the blue pieces of paper. The waves (curls) should be above the fish page so it looks like waves are on either side of the open sea floor.

Place all the people on top of the sea floor. Moses should be in the back as he is letting all of the freed slaves go before him. Behind Moses is the Egyptian chariot.

If you are using this craft to celebrate Passover, then happy Passover!

You Might Like Our Other Passover Crafts

Technorati Tags: , , , , , , , , , , , , ,


How to Make an Afikoman Bag for Passover

Passover starts in about a week and I thought that some of our Jewish followers might want a Passover craft. Today I will show you how to make an Afikoman Bag, which can then be used to hide Matzah for the little kiddies to search for. Although I sewed this Afikoman Bag, you could use fabric glue to put your Afikoman bag together. Learn how to make it below.


How to Make an Afikomen Bag for Passover


Crafts Materials Needed:

Long Piece of Felt or Fabric

A Second Color of Fabric to Use for Letters and Stars

Either Needle and Thread or Fabric Glue

Scissors

Step 1


step1


step2


You May Use Felt or Fabric, either one is fine. Place a piece of Matza on the Felt and measure out enough felt to place two and a half pieces of matzah. This will be enough felt to make your bag.

Then place the matzah a little bit to the right of the center of the felt. Then fold the felt over the matzah as seen in the picture above.

Step 2


step3


Now sew on either side of the felt (or use fabric glue), as seen in the picture above.


Step 3


step4


Now the right side of the felt will be the flap. You can fold it over now.

Step 4


step4b


Like This.

Step 5


step5


Now Push fabric inwards to form a triangle (in the same fashion you would do with wrapping paper when wrapping a present). Pin the triangle in place with a safety pin or sewing pins, then sew the triangle so that the fabric stays like this…this will be the flap.


This is What the Flap Looks Like When Sewn


step5b


Above is what the flap looks like when open.


step5c


And this is what the flap looks like from the inside.

Step 6


step6


I think yellow and blue are perfect for this craft because it is the colors of Israel and Judaism. Get some yellow felt and cut out some letters. I used Find Me for the outside of the Afikoman bag and Yay for the inside. But I’ve seen ‘Find This’ for the outside and ‘Found It’ on the inside. The normal thing to do is to write Afikoman on the outside or in hebrew  –

אפיקומן

Step 7


step7


Before sewing or gluing letters on, put cardboard into the bag to keep you from sewing bag’s two sides together.

Step 8


finished-afikomen-bag-craft-for-passover


Sew the letters on the front – ‘Find Me’ or ‘Afikoman’ or אפיקומן  or what you wish.

Sew the letters on the inside – ‘Found Me’ or ‘Yay’ or what you wish.

Finish Up


step9


Now wrap some matzah in a cloth napkin and then place in your bag. Close the flap and then hide it someplace. Let kiddies go searching for it. Give the ones who find the matzah some sort of prize. Have fun and Happy Passover!

Technorati Tags: , , , , , , , , , ,


How to Make a Free Printable Paper Easter Bunny Candy Holder

Here is a free printable template that you can use to make an adorable Easter Bunny that holds candy in his mouth. This could be used as an Easter decoration or to give candy to your friends. Either way, it is simple enough to make with a little effort. Find the free printable template below as well as the instructions for putting it together.


How to Make a Free Printable Paper Easter Bunny Candy Holder


Crafts Materials Needed:

Paper or Card Stock

Printer

(Optional) Cereal Box

Scissors

Ruler

Butter Knife

TEMPLATE


How to Make a Free Printable Paper Easter Bunny Candy Holder


Click on thumbnail and then the template will open up. You can then save the image to your computer and print it out then.

Step 1


step1


Firstly, Print out the template, found above. It works best if you can print it out on card stock, but paper is fine too.

Step 2


step2


Cut out all the pieces and then glue them onto cereal box cardboard. If you are able to print out the template on card stock, this step is not necessary.


Step 3a


step3a


Use the back of a butter knife to score lines. You put a ruler up to the line and then drag the back of the butter knife along the line. This is called scoring and makes it easier to fold upon the line in a neat fashion. Do this, without the ruler, along the curved line at the top of the bunny’s head.

Step 4


step4


Have your parents cut out the inside of the mouth… as well as the 2 slits that are needed on the head. If you are able to do this with a scissor yourself, then you may do it as well.

Step 5


step5


Fold all of the tabs inward.

Step 6


step7


Glue all of the tabs together.

Step 7


step8


Push the ears into the slits at the top of the box. Also place candy inside of the box.

Step 8


step9


Now glue the head down and glue or tape legs to the back of the box like seen in the picture.

 Step 9


step10


Now bend hands at the wrist and glue them on both sides of the box, so that the hands are over the mouth.

Finished Bunny Rabbit with Candy in His Mouth


How to Make a Free Printable Paper Easter Bunny Candy Holder


There you have it – a paper foldable Easter Bunny – holding all of the candy in his mouth. I think anyone you give this too will love it!!! I hope that you had fun.

[tag]easter bunny crafts, bunny crafts, bunnies, easter bunnies, bunny rabbits, bunny rabbit crafts, paper templates, paper foldables, free paper foldables, free paper teplates, easter crafts, free easter crafts, easter paper foldables[/tags]


Using Legos to Learn Sight Words and How to Read and Sound Out Words

My youngest daughter is in Kindergarten and she is learning how to read. Her teacher sends home lists of sight words that she has to learn and although we use flash cards to help her learn them, using Legos / Duplo Blocks  sounds a lot more fun to her. I saw someone else online use Legos to make sight words fun and I just loved the idea. Legos are also great for alphabet letters. The child can snap the Legos together to form and sound out words.

My daughter was getting bored with playing with these ‘little kid’ blocks as she now only wants to play with the little Lego blocks that older kids use. So this is a great way to recycle these Duplo / Lego blocks.


1st-pic-learning-sight-words-and-reading-with-legos


Crafts Materials Needed

Legos / Duplo Blocks

Labels (These are the ones I used   … Avery Removable Rectangular Labels, 0.5 x 0.75 Inches, White, Pack of 525  -6737  )

Step 1


Write Sight Words and Alphabet Letters on Labels


If you want to use the Legos to practice sight words and making sentences, then write sight words on the labels. If you want your child to practice creating words and sounding out letter combinations, then write alphabet letters on labels. I repeated consonants a few times and I repeated vowels many times.


Step 2


Add Alphabet Letters to 4 Sides of Blocks


I used the 4 peg Duplo squares for the Alphabet letter blocks. I put a letter on each side, so then the child can spin the blocks to make different words. My child loved forming words with the letters. I used blank squares to for spaces.

Step 3


Put Word Labels on the blocks


Then I put sight words on bigger Duplo blocks. They would fit on the square blocks but I didn’t have any more left. I put a label on 2 sides of the blocks, but you can definitely put them on all 4 sides if you want to. I also added other words that my child knows. I also made several blocks with words such as ‘I’, ‘and’, ‘my’, ‘too’, and ‘the’. I also added labels for people and animals that she knows so that she can talk about specific people. She LOVES playing with these blocks now.


Pixelated Shamrock with Paper Weaving Craft for Saint Patricks Day

This is a great craft for Saint Patrick’s Day. Have you ever heard of pixel art…well it is drawing with blocks (pixels)…this is how graphic images that you see on the screen are made. Anyways, it is sort of like mosaics with tiles because tiles are square blocks as well. Even if you don’t understand what I’m trying to say, you can appreciate this craft for its coolness factor. This is an interesting form of paper weaving as you will see when you take a look at the steps. Happy St. Patrick’s Day everyone.


Pixelated Shamrock with Paper Weaving Craft for Saint Patricks Day


Crafts Materials Needed:

White Paper

Green Paper

Scissor

Tape

Template to Print


Pixelated Shamrock Template


Click on Image and It Will Open Larger. Then Save Image to Your Computer.

Step 1


step1


Firstly, cut strips of paper. You can cut them to any width, but I cut them each 1/2 inch wide. Cut about 15 of each color.

 Step 2


step2


Now lay strips of white paper down as seen above. Tape either the right or left side down. I taped it down on the right.


 Step 3


step3a


Then start weaving. You just look at the paper template provided and see how many green are needed on each line. In the pic above, 2 blocks are needed. (I taped too many white strips down and that is why the green starts 5 blocks away instead of 3 like in the template).

 Keep Going


step3b


Keep going.

 Until Completed


step3c


This is what the shamrock looks like when completed.

 Step 4


step4


I taped the white strips to the green strips on the bottom and top ( as seen in the picture ). Now that it is secured, you can turn it over and tape it in place on the back as well. You then have a really cool shamrock. I hope that this was fun for you.

Technorati Tags: , , , , , , , , , , , , , , , ,


How to Make Lego Pinball Machines with Step by Step Instructions

This is a craft idea that my 14 year old son, Ben, came up with. He actually made a Lego pinball machine when he was about 11 and I was so impressed with it that I asked if he could build one for the site. I hope that you enjoy it.

You Might Also Like VCR Tape Pinball Machines and Making Simple Pinball Machines Craft


How to Make Lego Pinball Machines with Step by Step Instructions


NOTE ABOUT THIS CRAFT: This craft is meant to push you into creatively thinking for yourself. As you probably won’t have the same Lego pieces that we have, you should push yourself to think outside the box and use trial and error to make the best Lego pinball machine for yourself from the Lego pieces that you have available. Have fun.


Step 1


step1


Make a tall stack of one block-wide blocks. Make sure that you put a lot of blocks in that have the circle holes within them. You don’t need to exactly copy what is in this picture…you can use your creativity.

 Step 2a


step2a


Now make a few rows of double width blocks (as seen in the pic below). One of these blocks should be a hinge block (circled in the pic). Soon we will place them on top of the single width blocks (from the last step).

 Step 2b


step2b


Now put this type of block on the hinge block (as seen in pic above).

 Step 2b


step2c


Now use this hinge Lego as the stand in the back of the Pinball Machine. This will give the Pinball Machine its downward slant.


 Step 3a


step3a


Find a long Technic Beam (as seen in pic above)…ours has 15 holes, but whatever you decide to use will be fine. Then connect the legos shown above to the Technic Beam.

 Step 3b


step3b


Now stick a Lego connector in the other end, as seen above.

 Step 3c


step3c


Now we will stick this one one side of the Pinball Machine base. Make one of these for the other side too.

Step 4a


step4


Now we will finally stick the double width blocks (from step 2a) on top of the single width blocks.

 Step 4b


step5a


Now connect the tower (#1) to the Legos that are connected to the Technic Beam (#2) with a 4 length block (#3).

 Step 4c


step5b


Now it Looks Like This.

 Step 5


step6


Now use connector pegs to attach Technic Beams to the bottom of the Pin Ball machine base.

 Step 6


step7


Now use connector pegs to put barriers in the way…be creative and use trial and error to create best pinball machine for you.

 More Trial and Error


step8


I like to add spinners and other barriers.

 Change it Up Some More


step9


Or just change things around to make your older brother mad. My older son made this pinball machine and wasn’t too happy that his younger brother was adding to it. 🙂

To play with the Pinball machine…find a bead that is the right size and use the levers at the bottom to make the ball go. Have fun.

You Might Also Like VCR Tape Pinball Machines and Making Simple Pinball Machines Craft

Technorati Tags: , , , , , , , , , ,

How to Make a Woven Leprechaun Beard with a Cardboard Loom for St. Patricks Day

Today we are making a woven yarn Leprechaun beard and we are doing it with a simple cardboard loom. I have seen some crafts online for making crocheted or knitted bears and I figured I would show you a way that you, as a child, can make a fabric beard. This is something you can do, just by  making a cardboard loom. This will be a great homemade Saint Patrick’s Day craft that I know you will have fun making.


How to Weave a Leprechaun Beard


Crafts Materials Needed:

Yarn

Scissors

Cardboard

(Optionally) Packaging Tape

Sewing Needle

Rubber Bands or Hair Rubber Bands

Step 1


step1


Cut a sturdy piece of cardboard that is about 9 inches wide. The height depends on how long you want the beard to be.

 Step 2


step2


If your cardboard isn’t very sturdy and bends easily then you will want to strengthen it by wrapping it in packaging tape. Otherwise, skip this step.

 Step 3


step3


Cut slits, 1/2 inches apart, along the top of the cardboard. Then cut diagonally downwards to make a beard shape. See the picture above.

 Step 4


step4


Now cut a slit across from the slits that you made in the previous step.

 Step 5


step5


I used red yarn, but if you have orange yarn this would probably be better for a Leprechaun. Tape yarn in the first slit as seen in the picture above.

Step 6


step6


I wrapped the yarn in a slightly different way then illustrated here. I then decided this way would be easier so that is why I had to draw the yarn in the picture above. Anyways, this is easy so don’t make it harder than it is. You are simply just wrapping the yarn around the cardboard, and each time inserting the yarn in the slits.

 Step 7


step7


Thread yarn thru a needle.

 Step 8


step8


If you haven’t ever woven anything, you will need to know that you are just putting the yarn under the first thread, then over the next one, under the next one, and so on. Do this now.

 Step 9


step9


Pull yarn thru until there is just a tiny tail of yarn hanging out, as seen in the picture above. To push yarn up, you can use a fork.

 Step 10


step10


When you get to the end of the row, you just turn around and go the other way. If you ended by going over the yarn, then on the next row you will go under the yarn. If you ended the row going under the yarn, in the next row you will go over though.

 Step 11


step11


When your yarn runs out, you will want to push the needled up thru some loops and then cut the yarn loose.

 Step 12


step12


Now you can start a new piece of yarn, just weave it exactly the way you did previously.

 Step 13


step13


Remember we will need a hole in our beard so we can talk thru it and show our mouth. To do this, you just weave back and forth along a few of the outside lines like I did in the picture. After you do a few rows (maybe about 5-6 rows), then you can start weaving along the entire width of the cardboard loom again.

 Step 14


step14


This is what your beard should look like when you finish the entire length of the loom.

 Step 15


step15


I want you to know sew around the border of the mouth. Nothing fancy, just loop around the outside border of the mouth. This will ensure that the yarn won’t come loose. After this cut the inside lines of yarn that you see inside the mouth.

 Step 16


step16


Next cut in half all of the yarn lines in the back of the cardboard loom.

 Step 17


step17


Now you will see that there will be free threads of yarn. Tie them together into knots so your woven beard doesn’t come apart.

 Step 18


step18


Now your beard will look like this.

 Step 19


step19


Now you will need rubber bands. I couldn’t find any normal rubber bands so I used hair bands. However, I believe that normal rubberbands would work better.

Push a rubber band thru the top corner of the beard.

 Step 20


step20


Now push one end of rubber band thru the loop of the other end and pull.

 Step 21


step21


It should now look like this. Do the same exact thing on the other top corner of the beard. If your beard doesn’t fit, you might need two rubber bands looped together on both sides. You basically just put a second rubber band thru the first rubber band…then you loop one side thru the other side (like you did in the last step) and pull.  This is called a rubber band chain…find out how to make one here.


step22


Like in the above picture…

Wear Your Leprechaun Beard


How to Weave a Leprechaun Beard


Now just loop the rubber bands over your ears. Perhaps you would like to put a Leprechaun hat on your head and really play the part. Perhaps make a goofy face like my son did. 🙂 Have a Very Happy Saint Patrick’s Day!!!

How to Make Leather Eye Glasses Cases with Etched Design

Here on this page you will find instructions for a beautiful eye glasses case to make. This is a leather craft, so you will need leather crafting tools. Also, if you are new to working with leather, you will want to refer to our article about Working with Leather!  This craft instructional will also guide you through etching a design into the cover of the case. When this craft is complete, it would make a great gift for mom, dad, or someone else that you love.  This craft requires adult supervision and assistance! 

How to Make Leather Eye Glasses Cases with Etched Design


How to Make Leather Eye Glasses Cases with Etched Design


Crafts Materials Needed

2 Pieces of tooling leather 3″ x 61/2″

4 yards lacing

Steel angle and board

Spacing wheel

#0 punch

Water and sponge

Tracing paper

Pencil

Modeling tool

How to Make This Etched Leather Eye Glass Case Craft

Step 1


Round off corners of both pieces of leather, as shown by broken line in Figure 1.


Round off corners of both pieces of leather, as shown by broken line in Figure 1.

Step 2


eyeglasses-cases-02


On strong tracing paper, draw pattern to fit eye glass ease, allowing 1″ all around for lacing. Draw design within pattern. Put a dab of rubber cement to hold design in place on leather, and transfer design to right side of leather with tracer, as in Figure 2.

HOW TO TOOL LEATHER (Etch Design into Leather)

Step 3

Moisten leather on both sides with a sponge and water, until leather becomes dark. Place leather, face up, on work board. Deepen the outline of the design with the tracer, using a ruler for straight lines (as in Figure 3 above) If leather puckers while in work, dampen all over again, and deepen outline again with tracer. Holding spoon end of modeling tool sideways, follow outline of design. The edge of the tool should rest in the dent. Press down and away from outline towards the center of the background. Go around the entire design this way to throw design in sharp relief. To stipple background of design, use tracer end of modeler.

Step 4


eyeglasses-cases-04


Trim edges. Run spacing wheel on three sides of case. Skive leather where it is to be joined. Cement skived areas and make holes for lacing. Lace pieces together with whip stitch, as in Figure 4.

You Might Enjoy Our Leather Crafts

Technorati Tags: , , , , ,

Turn a Deck of Cards into a 52 Reasons I Love You Book for a Valentines Day Gift

I am sure that you can think of way more than 52 reasons that you love someone. However, it will only take those 52 reasons to make your loved-one break down into tears of happiness. Take the time to tell your Mom / Dad / Sister / Brother / Grandparents etc how much you love them with this special project. Versions of this craft are all over the Internet…each a little different from the other, and I am not sure who was the first craftster to come up with this idea…but it is super cool. So know that I didn’t come up with this idea, however, it isn’t exactly the same as others.


Turn a Deck of Cards into a 52 Reasons I Love You Book for a Valentines Day Gift


Crafts Materials Needed:

A Deck of Cards

Glue or Paste

Jump Rings

Paper / Printer (or you can write out by hand)

Hole Puncher

Templates


template 3 - 52 ways i love you template 1


Click on Pic and Save Pic That Opens Up


template 1 - 52 ways i love you template 1


Click on Pic and Save Pic That Opens Up


template 2 - 52 ways i love you template 1


Click on Pic and Save Pic That Opens Up


template 4 - 52 ways i love you template 1


Click on Pic and Save Pic That Opens Up

Step 1


step1


Download and then print out the 4 pages of templates. Then write something for each number. Each thing should be something you love about the person you are writing the book for.

Step 2


step2 : 52 reasons why I love you


Cut each number rectangle out.


Step 3


step 3 : 52 reasons why I love you


Paste each number rectangle on a playing card.

Step 4


step4a


Now take a hole puncher and punch 2 holes in each card. Line cards up so holes are in about the same place on each card.


step4b


Here is what the holes look like on the other side of the cards.

Step 5


step 5 : 52 reasons why I love you


Open jump rings and thread it through all the cards…2 this for both holes.

Now Your Loved One Can Flip Thru Pages


step6d


step6c


step6b


step6a


This might be the most special gift you ever give any one. Your loved one will cherish this book forever.

Technorati Tags: , , , , , , , , , ,

How to Make Valentines Day Cards with Fist Holding Lollipops

I saw somewhere a handmade Valentine’s Day card with a little girl or boy holding a lollipop and I thought it was so cool. It stuck in my mind and I decided to try it out for my daughter’s Valentine’s Day card that goes out to her classmates. This is a great way to personalize your child’s Valentine’s Day card … as it display’s your child within the card. Now in a perfect situation, I would have printed this card out with colors, but of course I ran out of ink. And, I also would have printed this out on white card stock, however Walmart only had card stock in bright colors. So, decided for yourself which elements you want your card to have. Have fun.

Also, this is a craft that has to be mostly done by and adult…as a craft knife is needed. Also, you need to prepare the image on the computer…so if you have an older child and they know how to do this, then by all means, let them help.


How to Make Valentines Day Cards with Fist Holding Lollipops


Crafts Materials Needed:

Computer, Printer, Card Stock, Lollipops, Scissors, Craft Knife (for Only Mom or Dad to Use)

Step 1


step1 : Take a Picture of Your Child


Ask your child to hold out their hand in a fist. Do a better job than I did. I am an awful photographer. Oh well.

Step 2


step2 : Print Out Pictures of Child


I too k my picture into Adobe Photoshop. I then cut her cute little arm off and made it bigger so the hand looked closer / larger. This is NOT a necessary step if you are a better photographer. 🙂

Then make 4 of them so they are the right size for a Valentine’s day card.


Step 3


step3 Cut Cards Into Separate Cards


Cut into 4 separate cards.

Step 4


step4 Cut Slits in Card and Put Lollipops Thru


(For Parents / Adults Only). Take a craft knife. and cut on the left AND right side of the fist. Then put the lollipop thru like this.

Step 5


step5 : Hand Out Your Cards


Once you get the hang of it, they are really easy to make. Make sure to make enough for all of your child’s classmates.

Technorati Tags: , , , , , , , , ,

How Mommy and You Make Spaghetti Octopus Dogs

Do you want a fun cooking craft to make with your kids? Here is a super easy and tasty edible craft to make. You can call these Octopus or Squid Dogs – Either way, they are super cool to look at and super yummy to eat. Find out how to make these below. This is a craft that the parent / adult does most of the work.


Spaghetti Octopus Dogs


Crafts Materials Needed:

Hot Dogs, Spaghetti or Linguini, Large Pot, Water, Stove

Step 1


Step 1 Hot Dog Squids Octopus Dogs


Cut up each hot dog into quarters.


Step 2


Step 2a Hot Dog Squids


Now you can stick spaghetti or linguini into the hot dogs. To make a squid, just push the spaghetti thru the center. To make an octopus (like we did), push the spaghetti in both directions (2 one way and 2 the other).


A View of All of Them Done


Step 2b Hot Dog Squids


Step 3


Step 3 Hot Dog Squids


Have Mom or Dad put them into large pot of boiling water. Take them out when spaghetti is finished.


Step 4


Hot Dog Squids Octopus Dogs


Place them on a plate and eat them … yummy.

OR Eat Them on a Hot Dog Bun


step5 Hot Dog Squid Sandwiches


Or eat them in a hot dog bun and call it an Octopus Sandwich or a Squid Sandwich. Yummy.

Technorati Tags: , , , , , , , , , , , , , ,


How to Make Square Weaving Looms : Woodworking Craft

This is a great woodworking project for children to do with Dad or Mom. And it makes a terrific weaving loom to be used over and over again. So this craft is one of those crafts that you only have to do once…but you can use it forever to make new crafts with. This loom will be a great first-time weaver loom for your kids to learn about weaving with. Have fun making it and have a great time weaving on it later on. Here are More Weaving Crafts.

How to Make Square Wood Weaving Looms


How to Make Square Cardboard Weaving Looms


Crafts Materials Needed:

1/4″ plywood 4″ x 4″

Coping saw (adult assistance required)

60 wire brads 1/2″ long

Hammer

Sandpaper

Pencil

Ruler

How to Make a Square Weaver

Step 1 : Making the Loom


measure and mark off 1/2" border from the edge


On 4″ x 4″ plywood square, measure and mark off 1/2″ border from the edge, as heavy line (see pic above).

Step 2 : Making the Loom


There will be 15 brads on each side, but no brads in corners


(This portion requires adult assistance / supervision) Cut out center portion with coping saw (shaded area) and sandpaper edges smooth. Measure and mark off a line 1/4″ from edge all around. Divide line into 1/4″ spaces. Drive 1/2″ brads into each 1/4″ space. There will be 15 brads on each side, but no brads in corners, as in illustration above.


Step 3 : How to Weave with this Loom


 Continue until entire loom weaver is strung


Fasten end of a 4-yard piece of yarn to brad at lower left-hand corner (A). Carry yarn across weaving loom and around brad on opposite side (B). Bring yarn down again to brad next right on lower side of loom (C). Continue until entire loom weaver is strung, as in illustration above.

Step 4 : : How to Weave with this Loom


Weave from right to left with an over-and under stitch, and from brad on one side of weaver to brad directly opposite on the other  side


Thread end of same yarn through a 5″ weaving needle. Weave from right to left with an over-and under stitch, and from brad on one side of weaver to brad directly opposite on the other  side, as in picture above.

Have fun Weaving!

Here are More Weaving Crafts.

Technorati Tags: , , , , , , , ,

How to Decoupage Trays Baskets and Boxes

Decoupage is a French word which means “cutting out”. It applies to any material that can be cut out. We are going to do paper decoupage.

How to Decoupage Trays Baskets and Boxes


How to Decoupage Trays Baskets and Boxes


CRAFTS MATERIALS NEEDED

A tray, basket or box

Magazine Pictures

Scissors

Glue

Old playing card

Varnish

Enamel

HOW TO DO PAPER DECOUPAGE

Step 1

Give the article to be covered, a coat of glossy or flat-finish enamel. Allow it to dry.


Step 2

Cut out pictures, or parts of pictures, from magazine pages printed on heavy paper. (Thin paper will show the printing on the reverse side).

Step 3

Arrange the cut-outs on the surface of the article. Shift pictures around until you arrive at the most effective arrangement.

Step 4

Remove a single cut-out, and spread a thin layer of glue on the back of it. Put the cut-out back into position and press down firmly and evenly, using edge of playing card to smooth out wrinkles. Carefully remove excess glue with a damp cloth.

Step 5

Do each cut-out in the same manner, until entire surface is covered.

Step 6

Allow glue to dry for several hours. Then give entire article a coat of clear, waterproof varnish in glossy, semi-gloss or dull finish.

Technorati Tags: , , , , , ,