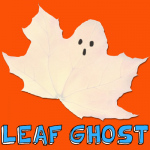
How to Make Leaf Ghosts for Halloween

I have a fun Halloween craft for you today.  And, the cool part is you probably already have the craft materials around your house.  In this post I’m going to show you how to make Leaf Ghosts for Halloween.  Make a bunch of these and you can easily decorate your house this year for Halloween.  It is best to use a Maple Leaf for this craft as this is the one we used for the craft.  With just some minor cutting they can look like a ghost.  The kids will love collecting the leaves and even more so making the craft.  So, let’s get started.
Check out our other Halloween Crafts.


How to Make Leaf Ghosts for Halloween


Materials Needed

Maple Leaf

White Paint

Black Paint

Scissors


Step 1


Find a nice maple leaf.


Find a nice maple leaf.


Step 2


Paint leaf white.


Paint leaf white.


Step 3


Paint 3 black ovals.


Paint 3 black ovals.


Step 4


Cut the top of the head to be more rounded.


Cut the top of the head to be more rounded.


Step 5


Cut off the stem.


Cut off the stem.

And, there you have it…. you have just made a Leaf Ghosts.  Make a few and decorate your house for Halloween.

Technorati Tags: , , , , , , , , ,

18 Cool Mummy Craft Ideas for Halloween


14 Cool Mummy Craft Ideas for Halloween


You are in for a treat today.  I have searched the internet to find what I thought was the best in Mummy crafts for Halloween.  I came up with 18 of my favorite Halloween Mummy crafts.  They are all totally creative and equally creepy.  Some of them are edible, some are meant to be used as decorations and others are actually moveable mummies.  But, I’m sure you will find them all fun and festive.  I hope you have a blast looking at all of these cool mummy craft ideas for Halloween…. I know I did.  So, without further ado…. let’s get started.

Check out our other Halloween Crafts.

18 Cool Mummy Craft Ideas for Halloween

(1)  Craft Stick Mummy


Craft Stick Mummy


I found this silly craft over at First Palette.  This Halloween Mummy Craft is made out of craft sticks and guaze.  And, the finished item is perfectly creepy for Halloween.  Make a few and put them around the house this Halloween.


(2)  Mummy Candy Holder


Mummy Candy Holder


Are you having a Halloween Party this year?  If you are I have the perfect decorations and party favors for you.  How about making this Halloween Mummy Craft.  It’s a Mummy Candy Holder…. the kids are sure to love it.  Check out Parents for all the craft details.


(3) Printable Paper Mummy Toy


Printable Paper Mummy Toy


Here is a paper toy craft from this site…for a paper mummy. This is very easy to make and a lot of fun to play with. Find out how here.

(4)  Bendable Mummy


Bendable Mummy


Here is a great Halloween craft that is made from an old shirt.  This is a great craft to recycle those old T-shirts.  Got to love recyclable crafts.  You want the craft details?  Check out Family Sponge.


(5)  Mummy Cupcakes


Mummy Cupcakes


Ok, I love the yummy crafts…. the edible ones.  Well, these Mummy Cupcakes are certainly no exception.  They are adorable…. and they look delicious.  Get the entire Mummy recipe at The Craft Patch….. make sure to check it out.


(6)  Mummy Sign


Mummy Sign


If you are looking for an outside Halloween decoration craft…. then you have found it here.  I found this Mummy craft over at Woman’s Day.  It is so terribly cute…. I just adore it.  This craft is for the more mature as there is a Saber Saw being used.   Adult Supervision is a must for this craft.

 (7) Mummy Bowling


Mummy Bowling


My daughter’s Girl Scouts troop made these for a Halloween Fair party they had. The Brownies and Daisies loves playing Mummy Bowling. Find out how to make these out of water bottles here.

(8)  Mummy Cookies


Mummy Cookies


Are you throwing a Halloween Party?  If so, you know that you cannot have a Halloween Party without some Halloween Cookies.  And, Halloween is just not Halloween without some Mummy treats.  So, make sure to check out this Mummy Cookie recipe I found over at Crystal and Comp….. the kids are sure to love them!!


(9)  Origami Mummy


Origami Mummy


Here is a simple fun Halloween Mummy craft you are sure to enjoy.  It is an Origami Mummy.  You simply need some origami paper, googly eyes and magic marker and you are good to go.  Make a few and decorate your room for Halloween.  Check out the entire craft at Activity Village.


(10)  Mummy Pumpkins


Mummy Pumpkins


Check out this awesome Halloween Mummy craft.  It combines two of the most popular items for Halloween…. a Pumpkin and Mummy.  It is just so fitting for a Halloween decoration.  You can see the Halloween craft in its entirety by going to Celeb Baby Laundry.

(11) Bead Pipe Cleaner and Bandages Mummy


Bead Pipe Cleaner and Bandages Mummy


Find out how to make these mummies with movable arms and legs. All you will need is bandages, pipe cleaners, and a bead. Learn how to make these mummies with the following instructions.

(12)  Juice Box Mummy


Juice Box Mummy


If you are anything like me…. you have tons of juice boxes at home.  I always try to come up with crafts that use empty juice boxes because I hate just throwing the empty juice boxes away.  Well, when I found this Mummy craft made from recycled juice boxes I was overjoyed.  Check it out for yourself at Kaboose.


(13)  Mummy Jars


Mummy Jars


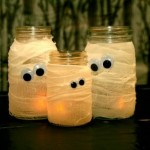
This is one of my favorite Mummy crafts i found.  It seems to be really easy, but a ton of fun.  Plus, look at the outcome…. you have these glowing mummy jars that can be placed around the house as a Halloween Decoration.  You can take a look at the craft for yourself over at Crafts reDesigned.


(14)  Mummy Door Hanger


Mummy Door Hanger


This Mummy craft is pretty darn cute.  I found the craft over at TLC and I think it is perfect for Halloween.  It can be put on your front door for all the Trick-or-Treaters to see or simply place it on one of your many indoor doors as an inside Halloween Decoration.


(15)  Aged Mummy


Aged Mummy


I love this Mummy craft.  Do you know why?  Because Craftaholics Anonymous made it look pretty authentic by dirtying up the gauze around the mummy’s body.  I love that.    Make sure to check out her site as she will show you too how to make this Aged Mummy.


(16)  Tissue Paper Mummies


Tissue Paper Mummies


I found this great Halloween Mummy craft over at Happy Hooligans.  And, it is super cute!!  They simply used recycled empty toilet paper rolls and white tissue paper…. and these mummies turned out amazing.  They are perfect for decorating…. the kids will love telling everyone they made the mummies themselves.

 (17) Mummy Trick-or-Treat Baskets


Mummy Trick-or-Treat Baskets


Find out how to make these trick-or-treat baskets – it is a lot easier than you would think. They come out looking really unique and fun. Find the instructions here.

(18)  Egyptian Mummy


Egyptian Mummy


Now, I know this isn’t exactly the kind of Mummy you think of when you think of Halloween mummies.  But, I love this craft and had to include it once I found it.  Check it out over at 123 Peppy…. I think you will like it too.

Technorati Tags: , , , , , , ,

Haunted House Crafts Perfect for Halloween


Haunted House Crafts Perfect for Halloween


Halloween is coming up quickly.  After all, it is at the end of this month.  When you think of Halloween what do you think of?  Probably bats, jack-o-lanterns and witches.  But, don’t forget the place they all live.  That’s right…. I’m talking about a Haunted House.  There is not much scarier than a Haunted House.  So, with that being said I am dedicating today’s craft to Haunted Houses.  I scoured the internet looking for an assortment of different kinds of Haunted House crafts perfect for Halloween.  With all 17 of these Haunted House crafts I have listed here you are sure to find one you will love.  So, without further ado….

Haunted House Crafts Perfect for Halloween

(1)   Haunted House Centerpiece


Haunted House Centerpiece


If you are throwing a Halloween party and you are looking for something to have as a centerpiece…. then I have the perfect craft for you.  Busy Bee Kids Crafts shows you how to make this spooky Haunted House Centerpiece step-by-step.


(2)  Paper Bag Haunted House


Paper Bag Haunted House


This Paper Bag Haunted House is perfect for decorating your house for Halloween, but it is also wonderful to use as party favors for a Halloween party.  You can fill these bags with goodies for the kids…. they will love it.  I found this craft over at Kaboose and it looks like a ton of fun.


(3) Haunted House Milk Carton (You can Fill This One with Treats)


Haunted House Milk Carton for Treats


This one is on our site and is made from a simple milk carton or creamer carton. All you have to do is fill with treats or candy, tape closed, wrap with paper, and decorate. Here are the craft instructions.

(4)   Popsicle Stick Haunted House


Popsicle Stick Haunted House


Here is a great Haunted House craft perfect for the youngest of children.  All Kids Network shows you how to make this Halloween craft and it is almost totally made up of Popsicle sticks.  And, we all know how much kids love making things with Popsicle sticks…. almost as much as they love eating the Popsicles.


(5)   Haunted Gingerbread House


Haunted Gingerbread House


Now, tell me how awesome this Haunted House is!!  It is just incredible…. and it is totally edible.  Gotta love that!!  I found this Haunted House craft over at Sisteroo and I hope you love it as much as I do.  This Gingerbread Haunted House makes for a perfect decoration or an edible treat for a Halloween party.

(6) Haunted House Pop Up Cards


Haunted House Pop Up Cards


Here is another Haunted House craft this from this site. Everyone loves pop up cards and this is one of the simplest types that you can make. We will teach you how to make these with just a few slits and a bit of folding. Find out the instructions here.


(7)  Cardboard Box Haunted House


Cardboard Box Haunted House


How cute is this Haunted House?  So cute!!  And, it is made out of an item you probably have laying around the house…. a cardboard box.  I found this Halloween craft over at Spoonful and it is a great find.  Check out this craft and get all the haunted details.


(8)  Spooky S’mores Haunted House


Spooky S'mores Haunted House


YUMMY!!  Here is another edible Haunted House craft.  I love the edible crafts.    If you love S’mores then you are going to surely love this craft.  Check out Kitchen Fun with my 3 Sons for all the yummy spooky details.


(9)  Shoe Box Haunted House


Shoe Box Haunted House


I just love those crafts where you can find the materials needed right in your home.  And, this craft is one of them.  Scribble Press shows you step-by-step how to make this creepy Haunted House out of a shoe box….. very clever!!


(10)  Poster Board Haunted House


Poster Board Haunted House


I love this Haunted House craft!!  I think what I love so much is the fact that this Haunted House is very narrow and tall…. it gives it a very creepy vibe.  Perfect for a Halloween decoration.  I found this Haunted House craft over at Crissy’s Crafts.  You have to check it out for yourself.


(11)  Paper Mâche Haunted House


Paper Mache Haunted House


Kids love working with Paper Mâche…. and making this Paper Mâche Haunted House will be no exception.  And, this haunted house really turns out amazing.  Get all the Halloween craft details over at Woman’s Day.


(12)  Mod Podge Haunted House


Mod Podge Haunted House


How amazing is this Haunted House?  So amazing!!  Mod Podge is a material that kids love working with…. they just do.  I know my children do.  Here B-Inspired Mama shows you how you too can make this incredible Haunted House using Mod Podge.


(13)  Spooky Haunted House


Spooky Haunted House


 AllYou shows you how to take an old dollhouse and make it into this awesome Haunted House.  Your kids are sure to get a kick out of using their old dollhouse and making it into a Haunted House.  Check out the website for all the craft details.


(14)  Heebie Jeebie Haunted House


Heebie Jeebie Haunted House


I found this Haunted House craft over at Crayola.  This Halloween craft is perfect if you are having a Halloween party.  Make a bunch of these Haunted Houses and use them to store candy…. hand them out as a Halloween Party favor.  How fun is that?!


(15)  Cardboard Boxes & Rolls Haunted House


Cardboard Boxes & Rolls Haunted House


Isn’t this a rock’n Haunted House?!  Or, should I say…. Haunted Mansion?!  I love it.  Patheos used different sized cardboard boxes and cardboard rolls to make this Haunted House craft.  It is a clever idea and it came out amazing.  Check out her site to see it for yourself.


(16)  Cereal Box Haunted House


Cereal Box Haunted House


What a great Haunted House.  And, what it totally cool about this Halloween craft is that it is simply made from a cereal box.  I love when you can find your craft materials right at home…. and in this case you can.  Check out Fun Lab Blog for all the Haunted House Craft details.


(17)  Glow in the Dark Haunted House


Glow in the Dark Haunted House


You know what is spooky?  Something that glows in the dark….. like this Haunted House.  I’m not sure why, but an item that has a glowing effect is just 10 times spookier.  And, it’s perfect for Halloween.  Make sure to check out Craft Project Ideas for the step-by-step “how-to” on making this Glow in the Dark Haunted House.

Technorati Tags: , , , , , , , ,

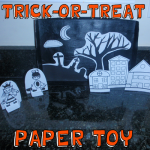
How to Make a Trick-or-Treat Paper Toy

Today I have a fun and festive Halloween craft.  It can be either a spooky Halloween decoration as well as a fun Halloween toy for the little ones.  In this post I’m going to show you how to make a Trick-or-Treat Paper Toy.  Using the 4 templates included in this craft you are going to make a little town with people that you can actually pretend they are going Trick-or-Treating.  Kids love pretending and even more than that they will love pretending to trick-or-treat with this toy because they made it themselves.  Let’s get started.

Check out our other Halloween Crafts.


How to Make a Trick-or-Treat Paper Toy


Materials Needed

Printer & Paper

Scissors

Cereal Box

Tape

Black Paint

Glue

Thread


Click on template images below to make larger and to print off.

Template 1


Template 1


Template 2


Template 2


Template 3


Template 3


Template 4


Template 4


Step 1


Print out first three templates.


Print out first three templates.


Step 2


Cut out parts.


Cut out parts.


Step 3


Cut both slits.  Then fold sides in to center.


Cut both slits.  Then fold sides in to center.


It should look like this.


Like this.


Step 4


Place a person in the slots.


Place a person in the slots…


Step 5


Here's the line up of figures.


Here’s the line up of figures.


Step 6


The cat and pumpkin just need to be folded in half.


The cat and pumpkin just need to be folded in half.


Step 7


Cut everything out.


Cut everything out…. Leave a white outline around the edges…


Step 8


Cut off the front of a cereal box so you get this


Cut off the front of a cereal box so you get this…


Step 9


Tape outside of box together.


Tape outside of box together.


Step 10


Paint the inside of box black.


Paint the inside of box black…


Step 11


Glue pieces of cardboard to back of paper cutouts so they appear like they are sticking out from box.


Glue pieces of cardboard to back of paper cutouts so they appear like they are sticking out from box.


Step 12


It should look like this.


Like this.


Step 13


Tape thread to back of moon and clouds and tape to top of box.


Tape thread to back of moon and clouds and tape to top of box.  Now, they pop out at you.


Step 14


Print out houses paper


Print out houses paper (template 4).


Step 15


Cut out like this... then fold on the dotted lines.


Cut out like this… then fold on the dotted lines.


Step 16


If first dotted line is folded towards you... then fold the next away from you.


If first dotted line is folded towards you… then fold the next away from you.


Step 17


Notice you also fold the right and left side away from you


Like this…. Notice you also fold the right and left side away from you…


Step 18


Here are all the pieces... Now you can play pretend Trick-or-Treat games.


Here are all the pieces… Now you can play pretend Trick-or-Treat games.

Technorati Tags: , , , , , , , , , , , ,

15 Spooky Halloween Crafts using Milk Jugs


14 Spooky Halloween Crafts using Milk Jugs


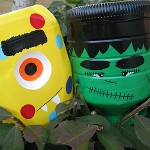
I had no idea how many super cool crafts are out there for Halloween using Milk Jugs.  There are just so many…. and they all are just so cool.   I was searching the internet for some awesomely creepy Halloween crafts and I found some doozies for you.  In this post I have listed 15 spooky Halloween crafts using Milk Jugs.  What’s so wonderful about these Halloween crafts is that they all use milk jugs…. an item that most of us use every day.  So, you are sure to at least have the most important material for these crafts.  Scroll through all 15 of these Halloween milk jug crafts to find some to do with your kids at home.  They will love it.

15 Spooky Halloween Crafts using Milk Jugs

(1)  Spooky Spider


Spooky Spider


Check out this spider.  It’s super awesome and super big…. I love it!!  It will be a wonderful Halloween Decoration this Season.  It is sure to creep out all who see it.  Check out Family Fun to get all the details on this great Halloween Milk Jug Craft.


(2)  Halloween Table Centerpiece


Halloween Table Centerpiece


I don’t know about you, but I’m always looking for a unique way to show off my Halloween spirit with a great centerpiece.  Well, folks I think I found it.  Check out this awesome Halloween Table Centerpiece.  I found it over at The Ramblings of a Crazy Woman and I absolutely dig it!!


(3)  Spirit Jugs


Spirit Jugs


I have a great Halloween Craft for you to use up those extra Milk Jugs you have along with some old Christmas Lights.  Eighteen25 shows us in great detail how to make this amazing looking outside decoration.  By simply decorating a bunch of milk jugs into ghosts you can have a cheap and fun way to decorate the house this Halloween Season.


(4)  Trick-or-Treat Basket


Trick-or-Treat Basket


Every Halloween I look for original ways for the kids to carry their candy.  How about making a unique Trick-or-Treat Basket using a Milk Jug.  I found this great Milk Jug Halloween Craft over at TLC Family.  What is great about using a Milk Jug for this craft is that the Trick-or-Treat Basket will not only be sturdy, but it will be rain proof too.


(5)  Recycled Halloween Windsock


Recycled Halloween Windsock


Here is another fantastic way to use a Milk Jug to make an outside Halloween Decoration.  Here Thrifty Fun shows you how to take a milk jug along with some plastic garbage bags and make a terrific windsock.  The ghost will actually look like he is flying through the night.


(6)  Milk Jug Storm Trooper Helmet


Milk Jug Storm Trooper Helmet


This has got to be one of the most creative ways to use a milk jug for Halloween.  Filth Wizardry shows us step-by-step how to take an everyday milk jug and make it into a storm trooper helmet perfect for dressing up this Halloween.  Any child will not only love making the craft, but using it to dress up too.


(7)  Halloween Monster Yard Lights


Halloween Monster Yard Lights


Here is a wonderfully colorful way to decorate the outside for Halloween.  Take milk jugs and transform them into Monster Yard Lights.  This is a fun way to decorate your yard or walkway and the kids will absolutely love it.  Do you know what they will love even more?  Making them with you.  Check out Crafts by Amanda for all the craft details.


(8)  Milk Jug Pumpkin


Milk Jug Pumpkins


If you are tired of decorating your usual pumpkins…. why not try something a little bit different this year.  Kiwi shows us how to take a milk jug and decorate it into a pumpkin.  Let the kids decorate whatever way they want to come up with unusual and unique pumpkins.  They will become great Halloween decorations and you will create loving memories of the time you made these together.


(9)  Milk Jug Pinata


Milk Jug Pinata


If you are having a Halloween Party this year this is an excellent Halloween craft for you.  You can make this creepy looking Halloween Pinata with the help of Cathie Filian.  Here she describes in great detail how you too can make this one of a kind scary pinata for your next Halloween party.


(10)  Halloween Masks


Halloween Masks


Why not take those extra milk jugs you have and make them into Halloween Masks.  Your kids can be as creative as they would like to.   These Halloween masks are as much fun to make as they are to wear.  Check out TLC Family for all the how-to’s to make this craft.


(11)  Milk Jug Ghost


Milk Jug Ghost


Here is a great Halloween Decoration….. perfect for inside your house.  Because this craft is made with Christmas lights the ghost actually lights up.  Turn off the lights and check out how your Ghost will actually glow.  Spooky, right?  Sure is.  Get all the craft details at She Knows.


(12)  Monster Light Jug


Monster Light Jug


This friendly little monster is not only cute during the day, but also lights up the night!  Not everything about Halloween has to be scary or spooky.  Some little ones just can’t handle too much scary.  For these little ones this Halloween Milk Jug craft is perfect.  Check out Kaboose for all the details on this craft.


(13)  Milk Jug Skeleton


Milk Jug Skeleton


This Halloween Milk Jug Craft is so creative!!  And, it looks like an incredibly fun craft for the kids as well as the adults.  I found this craft over at The Party Animal and I just love it!!  You will need plenty of Milk Jugs for this craft…. 7 to be exact.  But, if your kids drink a lot of milk like my kids… you will have the 7 milk jugs in no time.


(14)  Halloween Milk Jug Lanterns


Halloween Milk Jug Lanterns


I found this creative Halloween craft over at Ladies Home Journal.    In this post they show you how to take Milk Jugs and make them into Skeletons, Frankensteins and Cats.  Line a bunch of these down your driveway or a path to make a spooky lit area for the trick-or-treaters to walk.


(15)  Milk Jug Vampire Candy Holder


Milk Jug Vampire Candy Holder


We just put up our very own Halloween Milk Jug Craft.  We made a Milk Jug Vampire Candy Holder and it’s perfect for Trick-or-Treat night.  You can actually put tons of candy in the mouth and let the Trick-or-Treaters reach in the Vampire’s mouth and take the candy.  They are sure to get a big kick out of this.

Technorati Tags: , , , , , , , , , ,

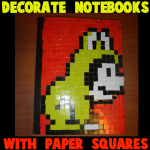
How to Decorate a Notebook with Paper Squares

We are well into the month of August now…. and with August comes all the preparing you need to do for Back To School.  Well, today’s craft is perfect for back to school as I am going to show you how to Decorate a Notebook with Paper Squares.   Take an ordinary cheap notebook and decorate it with your favorite character or design.  You will be sure to have the most original notebook at school.  So, grab the materials needed and let’s get started.

Check out our other Back to School Crafts.


How to Decorate a Notebook with Paper Squares


Materials Needed

Notebook

Graph Paper

Colored Pencils or Markers

Colored Paper & Scissors or Pre-cut Colored Paper Squares

Glue


Step 1


plan out your design on graph paper with colored pencils or makers.


First, plan out your design on graph paper with colored pencils or makers.  If you need some ideas for art you can make with squares check out these Perler Bead Crafts as well as these Mosaics.  Both the Perler Bead Crafts and Mosaics are made from squares and you should have plenty of ideas to choose from.


Step 2


 Get an ordinary notebook.


Get an ordinary notebook.


Step 3


Cut squares from colored paper


Cut squares from colored paper OR buy a bag of already cut colored paper squares (It’s easier).


Step 4


Put glue where you will place squares.


Put glue where you will place squares.


Step 5


Start putting squares down.


Start putting squares down.


Keep going


Keep going….


and going


and going.


Next step is the red background.


Next step is the red background.


Keep going until the background is finished.


Keep going until the background is finished.


Finished Paper Squares Notebook


Excellent Job!!  You just finished Decorating a Notebook with Paper Squares.  You are surely going to love taking this notebook back to school to show all your friends.  Let me know how your decorated notebook turned out in the comments below.  And, don’t forget to take a picture of it too…. you can add that to the comment as well.

Technorati Tags: , , , , , , , , , , , ,

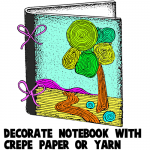
How to Decorate a Notebook with Yarn or Crepe Paper

I have a super fun craft for you today!!  And, it’s totally perfect for back to school.  In this craft I will show you how to decorate a notebook with yarn or crepe paper.  Your notebook will be an original…. no one else will have a notebook like yours.  This craft is not only a lot of fun, but it is really simple.  Simply use crepe paper or yarn to make a one of a kind design on the front of your back to school notebook.  So, grab the materials needed and let’s get started.

Check out our other Back to School Crafts.


How to Decorate a Notebook with Yarn or Crepe Paper


Materials Needed

Yarn or Crepe Paper

Glue

Scissors

Notebook


Step 1


Put glue down where you are going to glue yarn or paper.


Put glue down where you are going to glue yarn or paper.


Step 2


Place yarn or crepe paper on glue.


Place yarn or crepe paper on glue.

And, that’s it!!  What kind of awesome design for your notebook did you come up with?  Let me know in the comments below.  And, don’t forget to take a picture of the notebook and share that too in the comment.

Here is our video on How to Decorate a Notebook with Yarn or Crepe Paper

Technorati Tags: , , , , , , , ,

How to Make Papier Mache Bowls

Today I’m going to show you how to make Papier Mache Bowls.  Using a wooden, glass or ceramic bowl for your armature for this project as well as newspaper strips and the papier mache paste we will make together you will be able to make a beautiful bowl that you can actually hold stuff in.  Once dry you will paint the bowl in the beautiful colors of your choice…. it is an all around fun project.  So, grab the materials needed and let’s get started.

Check out our other Sculpting Crafts.


How to Make Papier Mache Bowls


Materials Needed

Wooden, Glass, or Ceramic Bowls

Grease, Lard or Salad Oil

Newspaper Strips

1 Cup Water

4 tsp Salt

1 Cup Flour

Elmer’s Glue (optional)

Tempera or Acrylic Paint

Shellac or Lacquer (optional)


Step 1


Select simple wooden, glass, or ceramic bowls to serve as the armature for this project.


Select simple wooden, glass, or ceramic bowls to serve as the armature for this project. Make sure that the bowl you have selected is free from undercuts so that no problems arise in the removal of the following papier mache forms. Go over the surface of the bowl lightly with grease, lard, or salad oil to facilitate removal of the finished papier mache form.


Step 2


In beginning this project, tear newspaper strips.


In beginning this project, tear newspaper strips.


Step 3


Make Papier Mache Paste.


Make Papier Mache Paste…it should be the consistency of light cream. Soak newspaper strips in prepared paste.  To make Papier Mache paste mixture…. mix 1 cup water… 4 tsp salt… and 1 cup flour.  Mix together.  Or, mix together 1/2 Elmer’s Glue and 1/2 water.  Mix together.


Step 4


Dip / soak each newspaper strip in the papier mache mixture


Dip / soak each newspaper strip in the papier mache mixture and then you will place them on the bowl. Build up a shell of about six layers of newspaper strips around the outside of the bowl.


Step 5


When the papier mache is dry, lift the shell from the original bowl


When the papier mache is dry, lift the shell from the original bowl and build up the lip on the papier mache bowl as illustrated above. This will provide extra strength and will give a more finished appearance to the bowl.


Step 6


When the papier mache is dry, paint with tempera or acrylic paint.


When the papier mache is dry, paint with tempera or acrylic paint. You can finish with an application of shellac or lacquer for final, durable surface conditioning.

And, there you have it….. that’s how you make Papier Mache Bowls.  How did your bowl turn out?  Let me know in the comments below?  Also, take a picture of your finished Papier Mache Bowl and share it with your comment as well.  I’d love to see it.

Technorati Tags: , , , , , , , , ,

How to Make a Handkerchief Bunny Cup Cover

Today I’m going to show you how to make a Handkerchief Bunny Cup Cover.  If you don’t have a Handkerchief available…. you might have to ask one of your grandparents to borrow one for this craft.  You are going to be folding the handkerchief to create an Easter Bunny.  Once completed, this craft is perfect to use as an Easter decoration this Easter.  It would look great on any tabletop.  So, grab the materials needed and let’s get started.

Check out our other Easter Crafts.


How to Make a Handkerchief Bunny Cup Cover


Materials Needed

Handkerchief

Cup


Step 1


Fold hankie over.


Fold hankie over.


Step 2


It should look like this.


It should look like this.


Step 3


turn so fold is at bottom.


First, turn so fold is at bottom.  Then… Fold up bottom about 2 inches.  Turn over.


Step 4


Fold B & C over as seen.


Fold B & C over as seen.


It should look like this.


It should look like this.  Turn over.


Step 5


It should look like this.


It should look like this.


Step 6


Bend A down.


Bend A down.


Step 7


Now tie a bow around the neck ….and for a face, draw eyes and nose or cut out felt shapes for facial features. Then put it over a cup or glass.

There you have it…. you just finished your Handkerchief Bunny Cup Cover.  Now, use it to decorate your tabletop for Easter.  People will love it!!

Technorati Tags: , , , , , , , , , , , ,

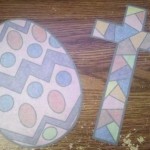
How to Make Stained Glass Easter Ornaments

For this craft you will learn how to turn normal paper into a fun, translucent stained glass decoration which you can hang on a window. It’s a definite eye-catcher.  In this craft we will be making an Easter decoration that will look gorgeous hanging from any window.  You can chose to print off the templates I have below or you can simply draw and color your own…. the choice is yours.  So, grab the materials needed and let’s get started.

Check out our other Easter Crafts.


How to Make Stained Glass Easter Ornaments


Materials Needed

Sheet of paper
Printer, or a thick black marker
Crayons, colored pencils and/or markers
Safety scissors
Vegetable oil
Cotton ball
Paper towels
Newspaper

Step 1

Print out the design or draw your own with a thick black marker. You can print out these templates (one cross, one egg, or a sheet with one of each).

Click on template image below to make larger and to print.


Step 2


Color the design however you see fit, make sure to use brighter colors so the light shines through when finished. Markers provide the most vibrant colors but be wary of purples and reds when only using them.


Step 3


Cut out the designs, leaving some of the black outline.


Step 4


Flip the designs around and put them face down on the newspaper. Apply oil over the entire back of each design using the cotton ball or paper towel.


Step 5


Lay the designs between two sheets of paper towel and blot and/or rub off the excess oil. Be sure to be gentle, this is only paper after all.


Step 6


Hang your new beautiful stain glass decoration outside or in a window so it can catch the sunlight.

Doesn’t this make for a beautiful Easter decoration?  Any window will look beautiful with this hung up on it.  Take a picture of your Stained Glass Easter Ornament and post it along with a comment in the comment section below.  I would love to see how your ornament turned out.

Technorati Tags: , , , , , , , , , , , , , ,

How to Make Easter Standup Animals

I have a fun and easy craft for you today.  I’m going to show you how to make Easter Standup Animals.  These Easter Standup Animals are a perfect decoration for inside your house this Easter.  And, the youngest of crafters will enjoy making these as they are made from a template.  You can choose to print off the colored templates or print off the black & white templates and color them yourself.  The choice is yours.  So, grab the materials needed and let’s get started.

Check out our other Easter Crafts.


How to Make Easter Standup Animals


Materials Needed

Printer & Paper

Scissors

Glue

Crayons


Click on template images below to make larger and to print.

Baby Chick Black & White


Baby Chick Black & White


Baby Chick Color Template


Baby Chick Color Template


Baby Chick 2 Black & White


Baby Chick 2 Black & White


Baby Chick 2 Color Template


Baby Chick 2 Color Template


Bunny Rabbit Black & White


Bunny Rabbit Black & White


Bunny Rabbit Color Template


Bunny Rabbit Color Template


Step 1


Print out template.


Print out template.


Step 2


Cut the figures out.


Cut the figures out.


Step 3


If you printed out the black and white template..... color them now.


If you printed out the black and white template….. color them now.


Step 4


Paste and fold where images above tell you to.


Paste and fold where images above tell you to.  Spread paste near the top on the back of each figure, and paste them together. The bottom part should not be pasted, as it spreads apart. Fold the bases (bottoms) outwards, each side in an opposite direction.


Step 5


Then stand your figures up for Easter.


Then stand your figures up for Easter.

There you go…. you did it.  You finished making your Easter Standup Animals.  Now you are all set to begin decorating your house for Easter.  Enjoy!!

Technorati Tags: , , , , , , , , , , , , , ,

How to Make Paper Sculpture Birds

Today I have a fun craft for you.  I’m going to show you how to make a Paper Sculpture Bird.  When made correctly the birds are 3 dimensional and look so cool hanging from a ceiling.  These Paper Sculpture Birds can be used to decorate a classroom or  child’s bedroom.  A great number of birds and animals can be made by using this technique…. so feel free to use your imagination,  Grab the materials needed and let’s get started.

Check out some other Paper Folding Activities.


How to Make Paper Sculpture Birds


Materials Needed

8 1/2″ x 11″ typewriting or mimeograph paper

Scissors

Ruler

Pencil Paper punch

Thread


Step 1


8 1/2 x 11" typewriting paper is folded in half and a freehand cut is made to suggest the bird form.


8 1/2 x 11″ typewriting paper is folded in half and a freehand cut is made to suggest the bird form.


A paper punch is used to make the eyes.


A paper punch is used to make the eyes.


Step 2


Unfolding the paper reveals a symmetrical design.


Unfolding the paper reveals a symmetrical design.


Step 3


Using a ruler as a straight edge, fold upward the wings of the bird at points "A''.


Using a ruler as a straight edge, fold upward the wings of the bird at points “A”.


Step 4


draw two triangular peaks lightly with pencil as shown in Figure 4


In making the pleat, draw two triangular peaks lightly with pencil as shown in Figure 4. Carefully fold the pleats down; this will bring the tail of the bird up.


Step 5


The wing tips are curled by rolling them tightly around a pencil.


The wing tips are curled by rolling them tightly around a pencil.


Step 6


In Figure 6 another pleat is made at the neck; and the bird is suspended from the ceiling with thread.


In Figure 6 another pleat is made at the neck; and the bird is suspended from the ceiling with thread.

And, there you have it…..you just finished making a Paper Sculpture Bird.  This Paper Sculpture Bird would look so cool hanging from your bedroom ceiling.  Where are you going to hang your bird?

Technorati Tags: , , , , , , , , , , , ,

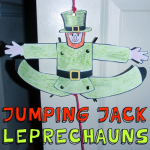
How to Make Jumping Jack Leprechauns for St. Patrick’s Day

I have a fun and easy craft for you today.  In this post I’m going to show you how to make a Jumping Jack Leprechaun for St. Patrick’s Day.  When made the way that I describe in this post the arms and legs are movable making this leprechaun actually do jumping jacks when the string is pulled.  The youngest of crafters will enjoy not only making this leprechaun craft, but also playing with it once it is finished.  So, grab the materials needed and let’s get started.

Check out our other St. Patrick’s Day crafts.


How to Make Jumping Jack Leprechauns


Materials Needed

Printer & Paper

Crayons (optional)

Scissors

Glue

Cardboard (optional)

Hole Punch

Paper Fasteners

String


Click on template image below to make larger and to print.

Color Template


Color Template


Black & White Template


Black & White Template


Step 1


Print out


Print out…. If you printed the black & white template then color it in.


Step 2


Cut out and glue to cardboard


Cut out and glue to cardboard if you want it really sturdy.


Step 3


Punch a hole in top hole on both arms and legs


Punch a hole in top hole on both arms and legs… Leave bottom hole on limbs unpunched.


Step 4


Now use paper fasteners and push thru body thru to bottom hole on legs and arms.


Now use paper fasteners and push thru body thru to bottom hole on legs and arms.


Step 5


String holes the way image says to


The red circles are where the paper fasteners have been placed.  Now, put string thru hole 1…. under and up into hole 2…. then tie knot.  Then pull under hole 3 and over and into hole 4.  Tie knot.


Like this


Like this… Make sure arms and legs are down before tying knot.


Tie knot.


Tie knot.


Do the same for leg holes.  Tie knot.


Do the same for leg holes.  Tie knot.


Step 6


Punch hole in hat and hang on door by string.


Punch hole in hat and hang on door by string.


Step 7


pull the string and his hands and legs pop up.


Hang it on a door knob…. pull the string and his hands and legs pop up.

And, there you go…. you just finished making a Jumping Jack Leprechaun for St. Patrick’s Day.  This is a wonderful decoration for St. Patrick’s Day and it is equally fun to play with.  Enjoy!!

Technorati Tags: , , , , , , , , ,

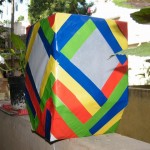
How to Make a Cardboard Box Lantern

I have a fun and creative craft for you today.  In this post I will be showing you how to make a Cardboard Box Lantern.  That’s right…. it is a lantern that you can use outside that it made from a cardboard box.  The box is simply decorated with colored sheets of paper and the box is fitted over a light bulb.  This Cardboard Box Lantern will be a great addition to any light fixtures you use outside during a party.  It is sure to help get the festivities going.  So, let’s get started with the craft.

Check out our other Cardboard Box Crafts.


Materials Needed

A square box

scissors

glue

butter paper

some wire

colored paper


Step 1

Draw lines as shown on two opposite flaps of the box.


Step 2

Cut the edges of the cardboard box equally on two opposite sides as shown.


Step 3

Now, when you bring all 4 flaps together, it will form a shape as shown below.


Step 4

On the bottom of the box, cut out a small square as shown below.


Step 5

On every side of the box, draw and cut out a diamond shape as shown below.


Step 6

Cover the box with butter paper


Step 7

Cut out colored paper strips as shown below


Step 8

Fix some wire on the top as shown to hang the lantern.


Step 9

Cover the lantern with paper strips as shown.


Step 10

Put a bulb in the lantern and hang it up on your porch.  That’s it…. the Cardboard Box Lantern is finished.  Now, set it outside for your next party….. it is sure to be a conversation piece.

Technorati Tags: , , , , , , , , ,

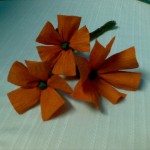
How to Make Crepe Paper Flowers

Crepe paper flowers are very beautiful, but usually require a lot of skill to make. But here’s a type of crepe paper flowers that are easy to make and look very pretty.   You don’t have to use the colors I did…. instead pick out a bunch of Spring colors to get in the Spring spirit.  After all, Spring will be here in just a couple of weeks.   These Crepe Paper Flowers are perfect for an upcoming party…. or better yet just decorate your child’s room with beautiful colors.  Either way…. let’s have fun making this craft.

Check out our other Crepe Paper Crafts.


Image093


Materials Needed


Crepe paper

Black color paper

Pipe cleaners- brown or green

Scissors

Ruler


Image091


Step 1

Cut out a piece of crepe paper about 15 inches  long and 10 inches wide. Make sure that the creases are from top to bottom along the width of the paper as shown.


Image082


Step 2

Fold the paper into half as shown.


Image079


Step 3

Cut out pieces of paper as shown (about 1 inch wide)


Image081


Image080


Step 4

Cut out a square of black paper, each side measuring about 1 inch. Place a small ball of paper inside it as shown.


Image084


Step 5

Use the paper to cover the ball and form a shape as shown.


Image085


Step 6

Arrange 5- 6  flower petals and black center like this. Hold it all together in your hand to arrange it. Make sure each petal is about 1.5 in long above the place you are holding it.


Image086


Step 7

Hold the bottom together and wind the pipe cleaner around it a few times as shown.


Image088


Step 8

Fold the pipe cleaner back to make a thick stem.

Fold each petal outwards.

Use your fingers to stretch the end of each petal, making it wider and curving it outward


Image092


Step 9

Make a bunch of flowers like this and use it to decorate your house this Spring.


Image093


And, there you have it….. you just completed making a bunch of crepe paper flowers.  Great job!!  Now, you are ready to decorate for a party this Spring…. or better yet just decorate the child’s bedroom with beautiful Spring color flowers…. it will be beautiful.

Technorati Tags: , , , , , , , , , , ,

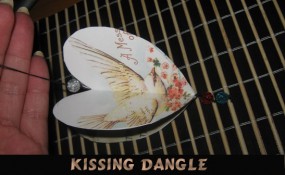
How to Make a Kissing Dangle Decoration for Valentines Day

Are you still looking for decorations for Valentines Day?  If so, then I have the craft for you today.  In this post I’m going to show you how to make a Kissing Dangle Decoration for Valentine’s Day.  It’s an easy craft, but turns out really beautiful to hang up for Valentines Day.  Plus, making this craft is a lot of fun…. almost as much fun as it will be seeing people’s reactions when they find out you made this decoration yourself.  So, grab the materials needed and let’s get started.

Check out our other Valentines Day Crafts.

Laura from Dacian Moon Handmade  will show you how to make this, step by step.


Materials Needed

– 4 recycled valentines cards
– white paper
– scissors
– thick thread
– pencil
– paper glue
– assorted color beads (I used blue, red and white)


Step 1

Take the card with the smaller width and draw its width on the white paper.


Do the same with the card with the smaller height.


Complete the rectangle…


… then cut it out. This is the maximum size that can be used on all the cards.


Draw a heart inside this rectangle. Make it as large as you can.


Cut it out.  This is our heart template.


Step 2

Place the template on a card …


… and draw the outline.


Cut it out, then fold it in half.


Do the same for all 4 cards.


Step 3

Apply a layer of glue on one half of one heart (on the back)…


… then place another heart over it. Press well.


Do the same to add another heart. Now we have only one left.


Step 4

Take the thread and make a knot on its end.


Add the blue bead…


… and make another knot over it.


Add the red bead …


… and make another knot.


Step 5

Apply a layer of glue on the center of hearts.


Put the thread there…


… add glue and the last heart over it, like this.


Make another knot.


Add the last bead and make the last knot.


Now your kissing dangle is ready! Hang it where people can see and enjoy it.


How did your Kissing Dangle Decoration turn out?  Let me know in the comments below.  And, take a picture of the decoration too and share that in the comment as well.  I’d love to see it.  Now, go hang up your Kissing Dangle.

Technorati Tags: , , , , , , , , ,