How to make a Chalk Pastel Jars for Valentines Day or for Summer Fun

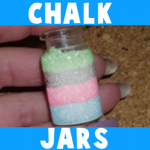
Today we will show you how to make a really cool item that you have never made before. This project is to make a jar filled with beautiful pastel chalk…it looks like sand art, but instead with chalk. Look below to find out how to make these awesome jars…great for a Valentines Day gift or for a Cool Summer Project. Laura from Dacian Moon Handmade   will show you today how to make a cute gift for your Valentine.

How to make a Chalk Pastel Jars for Valentines Day or for Summer Fun


Chalk Pastel Jars


CRAFTS MATERIALS NEEDED:

– chalk: blue, pink, green
– sugar
– small jar
– paper


IMG_3796


Step 1.

Put some sugar on a piece of paper.


IMG_3798


Spread it.


IMG_3799


Rub the blue chalk over the sugar…


IMG_3800


… and the sugar will become blue.


IMG_3801


Use the paper as a funnel to put the blue sugar into the jar.


IMG_3802


like this.


IMG_3803


Step 2.

Repeat step 1 using pink chalk. Put pink sugar over the blue one.


IMG_3805


 Step 3.

Add a layer of white sugar on the jar, then make some green sugar (repeating step 1, with green chalk).


IMG_3809


Add the green layer over the white one, like this.


IMG_3810


Seal the jar and the gift is ready.


IMG_3811


Technorati Tags: , , , , , , , , , ,

How to Make a Cute Little Fabric Snowman

Today we will show you how to make this cute little fabric snowman. He is a lot of fun to make and even more fun to play with. On this cold Winter day, I thought this would be a great craft to share with you.

Step by step tutorial offered by Laura from Dacian Moon Handmade

How to Make a Cute Little Fabric Snowman


CRAFTS MATERIALS NEEDED:

– dark blue fabric
– white fabric
– filling material (I use some cotton pads broken into pieces)
– scissors
– ribbon
– black paint or marker
– button


Step 1.

Cut a disc of blue fabric and a smaller one of white fabric.


Step 2.

Start sewing around the edges…


… like this.


Pull the thread ends …


… and fill the inside with the filling material.


Tie the thread ends.


Do the same for the white disc.


Step 3.

Put the needle and thread through the middle of white part…


… then through the middle of the blue part…


… and through the button (we will use the button to make a solid part on the base. It will help our snowman to stay.)


Get back through the blue part and the white part to fix all parts together.


Step 4.

Cut two rectangles of blue fabric, one wider than the other.


Fold the lower part on the big one…


… and wrap it around the snowman’s head (the white part)


Use the ribbon to tie it, like this. Now the snowman have a hat.


Step 5.

Let’s make a scarf now. Take the other blue fabric rectangle…


… and wrap it around the neck of your snowman, then tie it.


Make some cuts on both ends of the scarf and on the upper part of the hat.


Thus, the hat and scarf will have fringes.


Use black paint / marker to draw eyes and mouth, and your little snowman is ready.


Technorati Tags: , , , , , ,

How to Make Beaded Christmas Tree Ornaments

Here is a crafts tutorial to make a Christmas tree from pipe cleaners, safety pins, and some beads. With this craft, you make a beautiful Christmas tree that is also an ornament. Use this step by step tutorial offered by Laura from Dacian Moon Handmade.

How to Make Beaded Christmas Tree Ornaments


How to Make Beaded Christmas Tree Ornaments


CRAFTS MATERIALS NEEDED:

– 3 pieces of chenille stem
– green, orange, red, brown crystals / beads
– blue bigger beads
– self – adhesive star
– safety pins


Step 1.

Take one safety pin. Open it.


Put crystals on it, like this.


Close the pin.


Do the same for the other safety pins. You will need 8.


Step 2.

Take 1 piece of chenille stem…


… and put one safety pin on it.


Add two in the other direction, one, two again and one. Like in the picture.


Put another chenille through the ends of the 3 safety pins, like this.


Bring the safety pins ends together.


Raise the ends of the last chenille stem…


… and wrap them one around the other, to make a hanger


Bend the extra chenille to the back of the tree.


Put another one through the other ends of the safety pins…


… and add a blue bead between the safety pins.


It will look like this.


Fix the self-adhesive star on the ornament…


… and it is ready to adorn your Christmas tree.


Technorati Tags: , , , , , ,

How to Make Candy Corn Stalks for Thanksgiving Treats

Who says that you can only have candy for Halloween. Here is a great treat to use as placeholders at the Thanksgiving table. You make these cute little cornstalks out of candy corn and cardboard tubes from paper towel rolls. This is a  fun way to give treats on Thanksgiving. This tutorial is offered by Laura from Dacian Moon Handmade


How to make Candy Corn Stalks for Thanksgiving treats


How to make Candy Corn Stalks for Thanksgiving treats

Crafts Materials Needed:

– recycled paper roll
– green paint
– yellow and orange candies
– paintbrush
– scissors
– bag


Step 1.

Cut a rectangle with rounded corners out of the paper roll…


… like this.


Step 2.

Using green paint…


… and paintbrush, color the roll.


Let it dry.


Step 3.

Cut triangles on the lower part…


Like this.


Step 4.

Put the candies in the bag…


… and place it inside the tube.


Step 5.

Take the rest of tube (the part that was not painted)…


… and cut thin strips of it.


Like this.


Put them in the tube above the candies, so that a part to go over the edge, outside ..


Step 6.

Squeezes the top to remain fixed (if doesn’t work, you can tie with a cord of similar color, or you can stick it.)


Then bend inward at the bottom…


And that’s all 😀


Technorati Tags: , , , , , , ,

How to make Vampire Teeth and Fangs for Halloween

If you want to be a spooky vampire for Halloween, you are going to need a set of fangs for your costume. Here is the easiest way to complete your Halloween costume with vampire fangs / teeth. You will need a disposable fork and little less to complete this craft.  Laura from  Dacian Moon Handmade  will show you, step by step, how to make them.

WARNING: This is only for older kids … and make sure they know to be careful to not swallow the fangs/teeth.


How to make Vampire Teeth and Fangs for Halloween


CRAFTS MATERIALS NEEDED:

– plastic fork
– scissors
– nail file
– straight pliers


Step 1.

Break fork tail.


Like this.


Step 2.

Straighten the edges with scissors so that it remains a convenient length.


Like this.


Step 3.

Use pliers to shorten the teeth in the middle of the fork.


Like this.


Round all edges and corners (using nail file) that will not hurt when you wear them.


Your perfect vampire fangs are ready ! 😀


WARNING: This is only for older kids … and make sure they know to be careful to not swallow the fangs/teeth.

Technorati Tags: , , , , ,

How to Make Glow in the Dark Ghost Nails for Halloween

If you want to be unique around Halloween time, you will love this idea for painted on ghost nails. This is a perfect nail decoration for Halloween:  and these nails  glow in the dark! . Laura from  Dacian Moon Handmade  will show you, step by step, how to paint them.


How to Make Glow in the Dark Ghost Nails for Halloween


CRAFTS MATERIALS NEEDED:

– protective base (nail shield )
– very dark blue nail polish
– clear lacquer
– acrylic paints – silver, opaque white, white glow
– toothpick


Step 1.

Apply a protective layer on your nails using the base…


Like this. Let it dry.


Step 2.

Apply a layer of dark nail polish and let it dry well.


If color is not uniform, apply another layer. Let it dry well.


Step 3.

Put a drop of silver paint on a cardboard.


We will apply it using a toothpick.


Draw 3 lines from a corner…


… then connect them with curves. Like this.


Add a new row of curves and the spider web is ready.


Draw this spider web on every nail.

Let it dry.


Step 4.

Next we add ghosts using opaque white.


I will show on the cardboard what to do. Put a small drop of paint.


Using toothpick pull down a little to make her tail. Like this.


Let it dry a bit, then with the other end of the toothpick make the eyes and mouth. Like this.

If you can’t make the eyes and mouth this way, use a little black paint to draw them, once the white paint is dry.


So, do that on your nails, on the opposite corner.


Repeat for all the nails.


Step 5.

Add a layer of glow in the dark paint on the ghost. You can apply it with a toothpick or a cotton stick. Let it dry.

Take care if you will use black paint for the eyes and mouth, the glow in the dark layer should be applied before that.


Your nails are almost ready.


Step 6.

To protect your manicure, apply a coat of clear lacquer.


Thus colors will not fade with water. In order to remove them, use nail polish remover.


Technorati Tags: , , , , , , , ,

How to make Floating Ghosts for Halloween

Picture Trick-or-Treaters coming to your house, and you coming to the door. When you open the door, they see glowing ghosts behind you. They scream until they realize that they didn’t see a real ghost; all they saw was just a floating balloon. Laura from  Dacian Moon Handmade  will show you, step by step, how to make a cool decoration for Halloween: a floating ghost :D.

How to Make Floating Glow in the Dark Ghosts for Halloween


How to make Floating Ghosts for Halloween


CRAFTS MATERIALS NEEDED:

– balloon
– black permanent marker
– glow in the dark acrylic paint (I use orange glow paint with gold balloon. If you have white glow paint, use a white balloon)
– paintbrush


Step 1.

Put some paint on a cardboard…


… and apply it with the paintbrush…


… on the balloon.


Like this.


Let it dry well.


Step. 2

Use the permanent marker to add eyes and mouth. Let it dry.


Now, on daylight the balloon is gold, but in the dark, it glows.

Note:

If for some reason the paint is peeling, clean the balloon and repeat the steps above on the inflated balloon.


Technorati Tags: , , , , , ,


How to Make Cute Halloween Candy Bats

You can’t have Halloween without the treats! So we might as well make them cute 😉  Laura from  Dacian Moon Handmade  will show you, step by step, how to turn a normal candy bar into vampire bats. This bat can close his wings around the candy bar.


Candy Bats


CRAFTS MATERIALS NEEDED:

– black cardboard
– little chocolate
– pen
– scissors
– paper glue
– self adhesive eyes


Step 1.

Measuring the right size, we leave 2 cm above and below the chocolate. On the sides we let 4 cm.


Cut the cardboard to the right size.


Step. 2

We measure chocolate on board, marking the corners.


Draw two lines from the upper markings to the edges, like this.


Step 3.

Draw a bat wing on the right side, based on the markings. Like this.


Draw another one on the left side.


Step 4.

Next, we will draw some feet for our bat – not too complex because you’ll find it hard to cut when is ready.


The feet looks like this, because the bat has claws 😀


To finish our design we must add the head…


… so, draw it as a half of a circle with two pointy ears.


Step 5.

Cut it out.


It will look like this.


Step 6.

Add the eyes.

Bend the wings up…


… like this.


Step 7.

Add a layer of glue on the chocolate…


… and place it on its place.


Join the wings in front and you have the cutest treat ever 😀


Technorati Tags: , , , , ,


How to Make a Shark Pencil Holder Pouch

I think you’ll love this pencil pouch … He is so fierce! And when I say ‘He’, I mean Sharky…Sharky the Pencil Pouch. And he will keep your pencils safe as nobody messes with sharks! 😉  Laura from  Dacian Moon Handmade will show you, step by step, how to make it this awesome (yet adorable) shark pencil holder pouch.

How to Make a Shark Pencil Holder Pouch


How to Make a Shark Pencil Holder Pouch


CRAFTS MATERIALS NEEDED:

– a piece of denim (or other fabric if you don’t have it)
– a piece of black leather or vinyl or different colored fabric
– paints: white and black
– needle and thread
– scissors
– zipper


IMG_6850


Step 1.

You need a rectangle piece of denim to make the shark body.  To start, cut two of the corners off. Like this.


IMG_6853


Bring the long edges toward the center line…


IMG_6854


… and draw a curve, like this. This will be the mouth.


IMG_6855


Cut it out and unfold.


IMG_6859


Sew the two edges together…


IMG_6860


… like this, until you almost reach the end. The shark will have the stitch on his belly.


IMG_6861


Step 2.

Take the piece of leather…


IMG_6862


… and draw on it a tail, two lateral fins and the central fin.


IMG_6864


Cut them out.


IMG_6865


Step 3.

It is time to add some teeth to our shark. Flatten the body with the stitch on the middle, like this.


IMG_6866


Place the zipper over the mouth…


IMG_6867


… and start sewing each part on a side.


IMG_6868


Like this.


IMG_6870


Cut the extra zipper.


IMG_6871


Step 4.

Now is time to assemble all the pieces. Turn it inside out.


IMG_6872


This is the other end, where we will attach the tail.


IMG_6873


Apply a layer of glue on the start of the tail…


IMG_6875


and put it in place. Keep it there a bit until it is glued (take care not to glue your fingers).


IMG_6876


Then take a lateral fin…


IMG_6877


… put some glue on the starting edge…


IMG_6878


… and fix it on the shark body.


IMG_6879


Do the same with the other one…


IMG_6880


… and with the central fin.


IMG_6881


Like this. Our shark looks good but… it is blind!!!


IMG_6882


Step 5.

Let’s make the eyes!  Use some white paint to make two white circles.


IMG_6884


Like this.


IMG_6885


Then some black to complete the eyes.


IMG_6886


Let it dry well…


IMG_6887


… then you can put some pencils in it 😉


IMG_6888


Technorati Tags: , , , , , , , ,

How to make a Castle Pencil Holder

Here is a unique pencil holder made from recycled toilet paper rolls (or paper towel rolls). It is also a special pencil holder  for boys, because every boy is a knight who need a castle… of course 😉 Laura from  Dacian Moon Handmade  will show you, step by step, how to make it.

How to make a Castle Pencil Holder


Cardboard Tube Castle Pencil Holders


CRAFTS MATERIALS NEEDED:

– recycled paper rolls
– scissors
– glue
– paints
– paintbrush
– rectangle cardboard box lid


IMG_6760


Step 1.

Cut every roll in half.


IMG_6761


Like this.


IMG_6762


Step 2.

Use green paint to give the cap color – like grass. You also can use grey for paved roads…


IMG_6764


Cover all the surface with paint.


IMG_6765


Add as many layers of paint until you are happy with the result.


IMG_6769


Step 3.

Let’s give shape to the rolls.


IMG_6771


On two bigger rolls draw battlements and one window…


IMG_6772


… on the other bigger rolls draw only battlements. Like this.


IMG_6773


Cut them off.


IMG_6774


Finally, our towers will look like this.


IMG_6775


Step 4.

Let’s paint the castle. Mine will be white with some black decorations.


IMG_6778


Paint them like this…


IMG_6779


Let them dry, then draw your decorations using a toothbrush.


IMG_6780


Step 5.

Apply a layer of glue on a tower base


IMG_6781


… and put it in its place.


IMG_6782


Do the same with all rolls. Let them dry well.


IMG_6783


Now your castle is ready to be populated with pens and pencils 😀


IMG_6784


Technorati Tags: , , , , , ,

How to Make Glitter Bottle Timers for Timing Reading or Homework or Time Outs

Most kids have gone back to school by now, so I’m sure that you’re kids have too. We thought that this would be a good craft to post because sometimes when doing school work, you need to know how much time has passed. With this timer you can check it in 30 minutes or one hour (60 minutes).  Laura from  Dacian Moon Handmade  will show you how to make a cute timer.

How to Make Glitter Bottle Timers for Timing Reading or Homework or Time Outs


How to Make Glitter Bottle Timers for Kids


CRAFTS MATERIALS NEEDED:

– 0.5 liter recycled plastic bottle
– one and a half glitter glue bottle
– some extra fine glitter
– instant glue
– hot water


IMG_6731


Step 1.

Fill about 3/4 of the bottle with hot water.


IMG_6734


Step 2.

Add the glitter glue…


IMG_6735


like this.


IMG_6736


Step 3.

Add the extra glitter.


IMG_6737


It will look like this. You should shake the bottle until the glue melts.  Now you can play with the quantities. If you want it go clear faster, just add more water. If you want it to clear slower, add more glitter glue.


IMG_6738


When you are happy with the result, use instant glue to fix the cap.


IMG_6742


Shake well the timer to start it.


IMG_6739


In a half of hour it will look like this.


IMG_6740


When an hour is gone, the bottle is clear.


IMG_6741


Technorati Tags: , , , , , , , , ,

How to Make Coffee Filter or Napkin Butterfly

This is a cute project for little ones – a cheerful butterfly made of napkin or a coffee filter 😀 This is perfect for Kindergarteners or Preschoolers. They can do everything on their own with a little bit of guidance. Laura from Dacian Moon Handmade  will show you, step by step, how to make it.


How to Make Coffee Filter or Napkin Butterfly


CRAFTS MATERIALS NEEDED:

– napkin
– laundry tongs
– paints
– black marker
– paintbrush
– coffee filter or small piece of napkin
– glue


IMG_6571


Step 1.

Unfold the napkin.


IMG_6572


Bring the middle part together…


IMG_6573


… like this.


IMG_6574


Step 2.

Put there the laundry tongs…


IMG_6575


… like this. This is the butterfly body.


IMG_6577


Step 3.

Rub the little piece of napkin between your fingers, until it look like this.


IMG_6578


Fold it in two…


IMG_6579


… and stick it on the upper part of the body.


IMG_6580


Step 4.

Use black marker to draw eyes and mouth …


IMG_6581


and to darken the antennas.


IMG_6582


Step 5.

Use the paintbrush to add color to the wings


IMG_6583


like this.


IMG_6584


When you have added all the color you want, gently smudge it.

Let it dry. The butterfly is ready.


IMG_6585


Technorati Tags: , , , , , , ,

How to Make Apple Lunch Boxes with Recyled Plastic Soda Bottles

This project is perfect as a “back to school” project. It is very simple and fun, as well as a great way to store your packed lunch. This is also a great way to recycle / upcycle plastic soda bottles. Laura from  Dacian Moon Handmade  got inspiration for this craft from Creative Jewish Mom. Laura will show you, step by step, how to make this new lunch box.


How to Make Apple Lunch Boxes with Recyled Plastic Soda Bottles


CRAFTS MATERIALS NEEDED:

– two 2.5l plastic bottles (the sort where the bottom looks a bit like a flower with five petals)
– scissors
– instant glue
– green felt
– pen


IMG_6745


Step 1.

Clear the bottles – remove the labels.


IMG_6746


Step 2.

Use the scissors to cut off the end of one bottle.


IMG_6747


Like this.


IMG_6748


Cut also the end of the other bottle .


IMG_6749


Take care to cut one a centimeter taller than the other…


IMG_6750


… so you could overlap them and they stick together.


IMG_6751


Like this.


IMG_6752


Step 3.

Draw two leaves on the felt…


IMG_6753


… then cut them out.


IMG_6754


Step 4.

Add a bit of glue on the middle of one “flower”…


IMG_6755


… and place one leaf on it.


IMG_6756


Add the second leaf.


IMG_6757


Let it dry and you have an apple lunch box 😉


IMG_6759


Technorati Tags: , , , , , ,

How to Make a Steampunk USB Memory Stick Pendant

Here is a Back to School craft that you can work on in the next few weeks. Learn how to take a normal USB memory stick and decorate it with paint and random objects…turn it into a Steampunk masterpiece.You can then wear it around your neck as a special pendant necklace. Laura from Dacian Moon Handmade  will show you today how to make this cool and useful pendant.


How to Make a Steampunk USB Memory Stick Pendant


CRAFTS MATERIALS NEEDED:

– USB memory stick
– black paint
– silver metallic paint
– bronze powder
– instant glue
– a piece of thin fabric for texture (I use tulle)
– a little wheel
– bronze bead – I use a little stylized flower
– scissors
– paintbrush
– toothpick (useful to put little pieces in place)


IMG_5462


Step 1.

First of all, remember that you don’t have to do everything we do…just use our tutorial as a guide. You won’t have the same exact materials as us…but just be creative.

Paint the stick in black.


IMG_5465


Like this. Let it dry.


IMG_5466


Step 2.

Cut a piece of fabric…


IMG_5467


… and wrap it around the stick so as to form creases.


IMG_5468


Apply some glue to fix it in place.


IMG_5469


Like this.


IMG_5470


Add the decorations among the creases. Glue them in place.


IMG_5471


Add glue on every edge to fix the fabric.


IMG_5472


Let it dry.


IMG_5474


Do the same for the cover. It will look like this.


IMG_5478


Step 3.

Use your paintbrush to paint the fabric in black. Also paint where the glue reached and bleached the paint.


IMG_5479


Like this.


IMG_5481


Prior it dry out, add a little bronze powder …


IMG_5484


… with your paintbrush.


IMG_5486


Like this.


IMG_5487


Let it dry well.


IMG_5485


Step 4.

Use the silver paint to add a metallic patina on some elements, especially the wheel.


IMG_5488


Like this.


IMG_5490


Also, add a bit of bronze powder on it, to keep the atmosphere.


IMG_5491


Let it dry completely.


IMG_5526


Step 5.

Put the cord through the hole on upper part of the stick…


IMG_5529


And make a knot. Now you can wear it as a pendant or key chain accessory.


IMG_5532


How to Make Fairy Lights with Bubbles and Paint

This is a cool and fun project for summer. What can be more pleasant than playing with water on a hot Summer day? How about painting with colorful bubbles, just the way a fairy would. Laura from  Dacian Moon Handmade will show you, step by step, how to make this.

How to Make Fairy Lights by Blowing Bubbles


How to Make Fairy Lights with Bubbles and Paint


CRAFTS MATERIALS NEEDED:

– plastic bottle
– 1 sock
– paints
– tape
– scissors
– liquid soap / shower gel… mixed with water


IMG_6670


Step 1.

Cut off the lower part of the bottle.


IMG_6672


Like this.


IMG_6673


Step 2.

Put the sock on the cut.


IMG_6674


Like this. You can use tape to fix it in place.


IMG_6676


Step 3.

Add some paint on the sock.


IMG_6677


Dip the sock in the soap / water mixture …


IMG_6678


Then gently blow through the mouth of the bottle. Take care not to suck in air through the bottle, because of the soap and paint.


IMG_6681


It is a fun project and you can make very beautiful fairy lights 😉


IMG_6679


Technorati Tags: , , , , , , , , , , , , ,

How to Make Pencil Pendants or Necklaces for Back to School

August is here and school is drawing nearer. This is a great Back-To-School Craft … make a cute pendant with a pencil that can still be used. Laura from Dacian Moon Handmade will show you, step by step, how to make it.

How to Make Pencil Pendants or Necklaces for Back to School


How to Make Pencil Pendants or Necklaces for Back to School


CRAFTS MATERIALS NEEDED:

– pencil
– glue
– scissors
– white thick thread
– khaki thick thread


Step 1.

Apply a good layer of glue on the pencil (not on the sharpened part)


Step 2.

Begin to cover the bottom of the pencil, wrapping around it the white thread.


Let the center uncovered and make another white part near the other end.


Step 3.

If the glue on the uncovered part is already dry, add another layer. Glue the end of the khaki thread beside the  white thread, and begin to cover the other parts.


The middle one…


… and the upper one (you will go with a khaki thread over the white for that). When you reach the top, make a loop of khaki thread and put glue on it to set it on top of the pendant…


… like this.

Now you can wear it on a chain or cord and, if you forget your pencils… you can use it 😉


Technorati Tags: , , , , , , ,