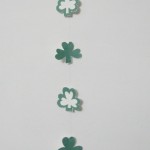
How to Make a St. Patrick’s Day Shamrock Streamer Decoration

St. Patrick’s Day is coming up in just a few weeks…. March 17th to be exact.  Have you started decorating yet?  If you haven’t, but you’d like to start…. then I have the craft for you today.  I’m going to show you how to make a St. Patrick’s Day Shamrock Streamer Decoration.  It is a super easy craft, so this is a great craft for the youngest of crafters.  But, it is also fun enough to keep the attention of all age crafters.  So, no matter what your age is…. grab the materials needed and let’s get started.

Check out our other St. Patrick’s Day Crafts.


Materials Needed

Green colored paper

Thick white paper

Nylon/ transparent thread

Scissors

Glue


Step 1

Draw out a few shamrocks


Step 2

Cut them out.


Step 3

Draw some more shamrocks, slightly smaller than the first set.  This time, draw a second outline around them as shown below.


Step 4

Cut along the inside and outside line to form an outline of a shamrock.


Step 5

Glue both types of shamrocks on the thick white paper.


Step 6

Cut them all out .  On each shamrock pierce two holes , one at the top and the other at the bottom, as shown below.


Step 7

Tape a piece of ribbon to the most top shamrock as shown below.


Step 8

Use the nylon thread to tie the bottom hole of one shamrock and the top hole of the next shamrock as shown below.  When you are tying together the shamrocks, make sure that you alternate one fully colored shamrock with one outline shamrock .


Step 9

Make it as long as you like.  Hang it up on a wall.  Let the festivities begin!!


There you go…. you just finished your St. Patrick’s Day Shamrock Streamer Decoration.  How did it turn out for you?  Let me know in the comments below.   And, take a picture of the streamer hung up and share that in the comment as well…. I’d love to see it.

Technorati Tags: , , , , , , , , , , ,

How to Make Paper Heart Flowers for Valentines Day

Valentines Day is just days away.  Are you still looking for decorations for Valentines Day?  If so, then I have the craft for you today.  In this post I will show you how to make Paper Heart Flowers perfect for Valentines Day.  This craft is really simple, but so much fun.  In no time at all you can make a whole bunch of Paper Heart Flowers…. enough that you can decorate your house.  The cool part is you probably have the materials needed for this craft at home already… no need to buy anything more.  So, grab the materials needed and let’s get started.
Check out our other Valentines  Day Crafts.


How to Make Paper Heart Flowers


Materials Needed

Paper

Pen, Pencil or Marker

Red Crayon (optional)


Step 1


Start off with a square piece of paper.


You need to have a square paper for this craft.  So, if your paper is not square do this…  Fold corner A over until the side AB meets up with side BC.  Cut along the bottom.  Your paper should now be square.


Step 2


Fold paper in half and then fold corner A to D


Fold paper in half and then fold corner A to D… then open.  Fold corner B to C.


It should now look like this.


It should now look like this.


Step 3


Draw a line that looks line the one in the above picture.


Draw a line that looks line the one in the above picture.


Step 4


Unfold.


Unfold.


Step 5


You can draw a heart on each leaf.


You can draw a heart on each leaf.  And, color each heart red if you so desire.

And, there you have it.  You just finished making your Paper Heart Flowers.  Make a few of them to decorate your house this Valentines Day.  Have fun!!

Technorati Tags: , , , , , , , , , , ,

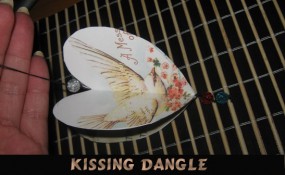
How to Make a Kissing Dangle Decoration for Valentines Day

Are you still looking for decorations for Valentines Day?  If so, then I have the craft for you today.  In this post I’m going to show you how to make a Kissing Dangle Decoration for Valentine’s Day.  It’s an easy craft, but turns out really beautiful to hang up for Valentines Day.  Plus, making this craft is a lot of fun…. almost as much fun as it will be seeing people’s reactions when they find out you made this decoration yourself.  So, grab the materials needed and let’s get started.

Check out our other Valentines Day Crafts.

Laura from Dacian Moon Handmade  will show you how to make this, step by step.


Materials Needed

– 4 recycled valentines cards
– white paper
– scissors
– thick thread
– pencil
– paper glue
– assorted color beads (I used blue, red and white)


Step 1

Take the card with the smaller width and draw its width on the white paper.


Do the same with the card with the smaller height.


Complete the rectangle…


… then cut it out. This is the maximum size that can be used on all the cards.


Draw a heart inside this rectangle. Make it as large as you can.


Cut it out.  This is our heart template.


Step 2

Place the template on a card …


… and draw the outline.


Cut it out, then fold it in half.


Do the same for all 4 cards.


Step 3

Apply a layer of glue on one half of one heart (on the back)…


… then place another heart over it. Press well.


Do the same to add another heart. Now we have only one left.


Step 4

Take the thread and make a knot on its end.


Add the blue bead…


… and make another knot over it.


Add the red bead …


… and make another knot.


Step 5

Apply a layer of glue on the center of hearts.


Put the thread there…


… add glue and the last heart over it, like this.


Make another knot.


Add the last bead and make the last knot.


Now your kissing dangle is ready! Hang it where people can see and enjoy it.


How did your Kissing Dangle Decoration turn out?  Let me know in the comments below.  And, take a picture of the decoration too and share that in the comment as well.  I’d love to see it.  Now, go hang up your Kissing Dangle.

Technorati Tags: , , , , , , , , ,

How to Make Magazine Folded Hearts for Valentines Day

Valentines Day is just a week away.  And, if you are still looking for ideas for Valentines Day decorations I have the craft for you today.  I’m going to show you how to make Magazine Folded Hearts for Valentines Day.  These Magazine Folded Hearts are the perfect decoration for Valentines Day.  You can hang them from the ceiling or from a door…. either way the craft turns out really cute.  And, what’s really cool…. it gives you something to do with all those extra magazines you have sitting around.  So, let’s get started.

Check out our other Valentines Day Crafts.


How to Make Magazine Folded Hearts


Materials Needed

Magazine

Scissors

Yarn or String


Step 1


Get a magazine like this one.


Get a magazine like this one.


Step 2


Fold top right corner of page down.


Fold top right corner of page down.


Press down crease.


Press down crease.


Step 3


Fold over to middle once more.


Fold over to middle once more.


Press down to sharpen crease.


Press down to sharpen crease.


Step 4


Continue with all of the magazine pages


Continue with all of the magazine pages… I tore the cover off.


Step 5


Cut a curved line at the top of each page.


Cut a curved line at the top of each page… I was able to cut several pages at once.


Step 6


Take yarn or string and tie 2 times around center of heart.


Take yarn or string and tie 2 times around center of heart.  Leave enough yarn to hang heart up.


Finished Magazine Fold Hearts Craft


Now, you are finished with your Magazine Fold Hearts craft.  Didn’t it turn out awesome?  Go hang it up proudly for all to see this Valentines Day.

Here is a video on how to make these Magazine Folded Hearts.

Technorati Tags: , , , , , , , , ,

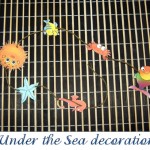
How to Make an Under the Sea Decoration

Do you like Under the Sea creatures?  If you do then I have a craft for you today that you will truly enjoy.  I’m going to show you how to make an Under the Sea Decoration that will look so wonderful hung up in your bedroom.  Imagine how lovely it will look hung up on your ceiling as your stare at it below from your bed.  Well, you don’t have to imagine anymore… let’s help it become a reality.  Today I’m going to show you how to make this Under the Sea Decoration step-by-step.  So, let’s get started.

Laura from Dacian Moon Handmade will show you, step by step, how to make this decoration.


Materials Needed

– “Under the Sea Friends” template: download here
– thick paper or card stock
– glue (transparent)
– thread and needle
– scissors


Step 1

Print the template on thick paper and cut out the drawings.


That is what you’ll have when you are finished.


Step 2

Take one fish and apply a layer of glue on it’s back.


… then place it’s pair on it.


Step 3

Repeat step 2 until every friend has the two sides glued.


Step 4

We will start with the last one saved. Take the rainbow colored fish and, with the needle make a hole on its top, like in the picture.


Let the thread go through the hole …


… and, when you have a little thread left, make a knot. That way, the fish won’t fall again.


Measure about 5 cm and make another knot.


This is where you will place the crab. With the needle make a hole in one jaw…


…and take him down until you reach the knot.


Make another hole in his other jaw…


That way, the little crab is secured with the rope. He will not fall again.


Do the same with the other friends.


Step 5

Make a knot around the seahorse’s tail and wrap around the rope once, take it just under his head – it is easier to use the needle here too.


Step 6

The final step: make a knot on the end of the thread.


And. look at that…. you just finished making the entire “Under the Sea” Decoration.  Isn’t it just adorable?!  Imagine how cute it will look hung up.  Enjoy it.

Technorati Tags: , , , , , , , , ,

All Colors are Beautiful Martin Luther King Craft

I have a really special craft for you today.  I am going to show you how to make an All Colors are Beautiful Martin Luther King Craft.  This craft is meant to remind all of us how no matter the color of the skin that people are the same and should be treated equally.  That is what Martin Luther King represented.  In this craft you will draw a picture of yourself, copy it and color each picture with different colors.   The craft turns out beautifully…. and should be hung up this Martin Luther King Day.  So, let’s get started.

Check out our other Martin Luther King crafts.


All Colors are Beautiful Martin Luther King Craft


Materials Needed

Large piece of Cardboard, Paper or Poster Board

Paper

Pencil

Photocopier

Glue

Crayons or Markers


Step 1


Draw a picture of yourself.


Draw a picture of yourself.


Step 2


Make 3 photocopies of the picture and glue them on a big piece of cardboard


Make 3 photocopies of the picture and glue them on a big piece of cardboard or paper…. like this.


Step 3


Now color each picture with different colors


Now color each picture with different colored skin, hair, background, shirt…


It should look something like this.


…. like this.


Finished Martin Luther King - All Colors are Beautiful Craft


Doesn’t this Martin Luther King Craft turn out just amazing?!  It really gets the idea across that you are beautiful no matter what color skin, hair or clothes you wear.  You still are the same person inside.  Please let me know how your Martin Luther King craft turned out by posting your picture in the comments below.  I would love to see it.

Technorati Tags: , , , , , , , , ,

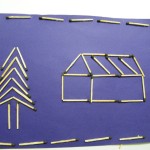
How to Make a Matchstick Picture

Here is a craft that is easiest enough that even the youngest of crafters are sure to enjoy.  I am going to show you how to make a beautiful matchstick picture that your child will love to have hung on the wall.  I am showing you just one idea….  Feel free to use your own creativity and create your own designs.  Now, keep it mind that we are using matchsticks…. always supervise your child during this craft.


Materials Needed

Craft paper

Matchsticks

Scissors

Glue


Step 1

Take a plain sheet of thick paper


Step 2

Apply glue on one side of a matchstick


Step 3

Place the matchsticks to make a house as shown below.


Step 4

Make a tree as shown below.


Step 5

Make a border with matchsticks as shown below. Put up the picture on your wall and enjoy it!!


Easy, peasy, lemon squeezy!!  How did your Matchstick Picture turn out?  Did you make the design I made or did you use your own creativity to make your own?  Let me know in the comments below.

Technorati Tags: , , , ,

How to Make New Years Resolution Reminders

Today I’m going to show you how to make New Years Resolution Reminders.  A New Years Resolution is something you want to change or do better in the new year.  Such as conserve more water or save electricity, for example.  You probably have different ones.  Well, with today’s craft you will have an easier time remembering your New Years Resolutions throughout the new year, so you can keep working on your New Years Resolutions.  Do you know what your New Years Resolutions will be?  Come up with a few and then let’s get started on the craft.

Check out our other New Years Crafts.

Laura from Dacian Moon Handmade  will show you how to make these resolution reminders, step by step.


MATERIALS NEEDED:

– two pieces of cloth of different colors (I chose blue and white)
– black and white textile paint
– needle and thread
– scissors
– cotton pads
– 6 beads (4 white and 2 blue)
– 9 paper clips


Step 1

Cut one rectangle from the blue cloth ( ~12 cm x 5 cm)


Fold it in half, like this…


… and start sewing the fold.


Near the edge, place a paper clip over the cloth…


… and sew it in place.


Continue to sew the lower part and add the second paper clip near the other edge.


Sew the sides too.


When you finish it will look like this.


Step 2

Take one cotton pad …


… and part it in small pieces.


Put all those pieces inside the blue cloth…


… and sew the upper part too. We made a pillow.


Step 3

On the right upper part, sew 2 white beads…


… like this. Those will be the eyes.


On the middle sew a paper clip – this will be needed to hang the reminders somewhere.


Now we have a blank reminder.


Step 4

Using white paint, write the first resolution. My example, “keep my room clean”.


With black paint, complete the eyes.


Like this.


Step 5

Take a piece of white cloth and follow all the steps above…


… to make a white cute pillow with blue eyes and a new message, “study harder”. Take care that you must have two paper clips on the upper part, to link to the first reminder, and two paper clips on the lower part to link to the next.


Step 6

Make the third cute pillow, blue. You can add as many reminders as you like. Just take care that the last of them should have paper clips only on the upper part.


Link them together and place it somewhere you will easily see. It will help you remember your New Years Resolutions.


And, there you have it…. you just finished your New Years Resolution Reminders.  Isn’t it cute?  What were your New Years Resolutions?  Let me know in the comments below.  Also, take a picture of your craft and share it with your comments…. we’d love to see it.

Technorati Tags: , , , , , , , , ,

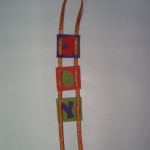
How to Make a Joy Christmas Decoration

Believe it or not it is December already.  Now is the time to get in the Christmas spirit.  This craft will get you in the Christmas spirit for sure.  Today I’m going to show you how to make a Joy Christmas Decoration.  This Christmas decoration is perfect to hang on a door knob or even your Christmas tree.  You can even make other words like, Peace, Hope and Love too.  So, let’s get started.

Check out our other Christmas Crafts.


DSC04091


Craft materials required:

Ribbon

Thick Colored Paper

Hole Punch

Glue

Tape

Scissors


Step 1

Cut out 3  squares of about 5 cm wide each side, in different colors.


joy ornament


Step 2

Cut out letters J, O and Y (you can also use stickers instead).


JOY


Step 3

Stick the letters on the squares on contrasting colors.


JOY ornament2


Step 4

Punch one hole near every corner as shown.


Image115


Step 5

Take a piece of ribbon through the Y letter bottom hole as shown. (from back to front)


Image116


Step 6

Through the second hole on Y , take the ribbon back. Arrange all the other letters as shown and cut the ribbon length as required.


Image117


Step 7

Repeat the process of weaving the ribbon through O and J


Image119


Step 8

Complete the weaving as shown.  Turn to the back of the ornament and tape all the ribbons in place.  Your ornament is ready.


joy ornament3


What a beautiful Christmas decoration, huh?!  As I said above, you can use this tutorial to make more of these Christmas decorations with other words like Peace, Hope and Love…. wouldn’t that look festive hanging on all your door knobs?  It sure would.

Technorati Tags: , , , , , , , , , , , ,

How to Make a Bats Mobile for Halloween

Bats come out at night….. and Halloween is no exception.  Why not totally spook out your house by adding this creative Bats Mobile decoration inside this Halloween.  Or, better yet…. have your child make a few of these mobile crafts and they can fill their bedroom with these spooky Halloween creatures.

Check out our other Halloween Crafts.


How to Make a Bats Mobile for Halloween


Materials Needed

Sticks of Different Sizes

Thread

Printer

Hole Punch

Scissors


CLICK ON IMAGE TO OPEN IT UP BIGGER TO PRINT.


Printable Template for Bats Mobile


You will be printing the above template shortly.


Step 1


Fasten a few sticks of different sizes together with thread


Fasten a few sticks of different sizes together with thread.  Tie some pieces of thread from these sticks.


Step 2


Print bat templates.  Cut out... Punch a hole in each bat


Print bat templates.  Cut out… Punch a hole in each bat.


Step 3


Now just pull thread thru hole and tie a knot


Now just pull thread thru hole and tie a knot.


How to Make a Bats Mobile for Halloween


Now, THAT’S a fun craft that is pretty easy to make.  Have fun decorating for Halloween and don’t forget to get a little “Batty”.   🙂

Technorati Tags: , , , , , , , , ,

How to Make a Halloween Spider on His Web

I don’t know about you, but when I think of Halloween there are a few spooky characters I think of.  I think of witches, ghosts, skulls and of course the spider.  I just find spiders very scary.  In this post you will learn how to make a Halloween spider on his web perfect for decorating and displaying with your other Halloween paraphernalia.  On lookers will love it!!

Also check out our other Halloween Crafts OR Learn How to Draw a Cartoon Spider Web.


Halloween Spider and his Web Craft.


Materials Needed:

Chopsticks (or other type of sticks)

Glue

Yarn

Black Pom Poms (one big and one small)

Googly Eyes

4 Pipe Cleaners


Step 1


Place chopsticks on top of each other like above


Place chopsticks on top of each other like above (an x shape with a line through it).


Step 2


Glue all the sticks together and then take some yarn and wrap it around the middle


Glue all the sticks together and then take some yarn and wrap it around the middle.  Glue all together in the middle again.


Step 3


Start wrapping the string around the chopsticks


Start wrapping the string around the chopsticks.  Make a loop around each stick as you create the web.

Step 4


Keep wrapping yarn or string all around the sticks


Keep wrapping yarn or string all around the sticks like you see above.  Wrap the yarn around each stick as you continue the web pattern.  At the end tie a knot and glue to the end.


Step 5


Glue 2 black pom poms together


Glue 2 black pom poms together… one big and one small.  Glue googly eyes on smaller pom pom.


Step 6


Cut 4 pipe cleaners in half


Cut 4 pipe cleaners in half.  Each half is a leg.  Bend each half into a letter Z shape and glue onto big pom pom.


Step 7


 Glue the spider on the web or tie a piece of yarn


Glue the spider on the web or tie a piece of yarn to it and attach to web.


Halloween Spider and his Web Craft.


Isn’t this craft perfect for Halloween?  The kids will love doing this craft, but they will also love the finished product even more.  They will certainly enjoy displaying it proudly this Halloween season.  And, make sure to check out our other Halloween Crafts so you can decorate your entire house this Halloween.

Technorati Tags: , , , , , , , ,

Ideas for Displaying Your Kids’ Artwork So You Can See Your Fridge Again

As a parent, I love receiving beautiful artwork from my children. However, there comes a point when you feel like your entire refrigerator is covered with artwork. I have 4 kids, so not only is my fridge covered, but my fireplace’s mantle, my kitchen window, and the rest of my windows are all being taken over with artwork. This got me thinking…what else can I do with the artwork? I would love to see my refrigerator again…what color is it…I want to know….maybe soon I can find out again. 🙂


Ideas for Displaying Your Kids' Artwork So You Can See Your Fridge Again


Now for the ideas. Please comment below to add your own ideas or suggestions…everyone can contribute.

(1) Clothesline Art


Hang childs artwork with clothespins


Hang a Clothesline in your child’s room or playroom (high enough that the child can’t get hurt) and then use clothespins to hang your child’s art.

(2) Curtain Hangers for Art


drapes artwork


This is similar to the clothespin idea, but instead by a curtain hanging system. Instead of hanging curtains with the clips, hang the artwork.  This idea comes from Project Nursery … visit it to find out how she did it.

(3) Plexiglass Table Cover to Display Artwork


Plexiglass Table Cover to Display Artwork


There is a great how-to article, on the Examiner.com, about making a Plexiglass table cover in order to display artwork underneath. You can just go to Home Depot or Lowes and have them cut down a sheet of plexiglass to the same size as your table. Then just  place the plexiglass on top of your child’s art that you want to showcase.

(4) Hang Clipboards to Display Art


Hang Clipboards to Display Art


On a Blog called Clean and Scentsible, we found another way to display your child’s artwork. Hang Clipboards, and place newest artwork on the top layer that is showing. This is a really smart and sensible way to display your child’s artwork.


(5) Vertical Lines of Hanging Yarn


Vertical Lines of Hanging Yarn


I found a great example of hanging art from vertical lines of yarn or string or wire on a site called Spiral Montessori Mama. As this talented teacher / blogger suggests…just hang yarn from the ceiling with tape….then as your child brings home artwork just tape it to the yarn. I like how this teacher places a colorful piece of paper behind each piece of art to sort of frame it or mat it.

(6) Paint a Magnetic Wall – Maybe Even Chalkboard Paint


Paint a Magnetic Wall - Maybe Even Chalkboard Paint


On Zillow.com, I found a great idea. How about paint an entire wall with magnetic paint and then covering it with chalkboard paint (optional). You can then display all of your child’s artwork on a giant wall, instead of your refrigerator. Just a note…I did the same thing…I put 2 coats of magnetic paint and then a coat of chalkboard paint. It isn’t magnetic…although the chalkboard paint works great. I am just telling you this so you know that you might need to coat the wall with many coats of magnetic paint for it to work.

(7) Frame Them on a Special Wall


Frame Kids Artwork on a Special Wall


How about creating a special museum wall in your house….all with your child’s framed artwork. The above picture comes from Inside-OutDesigns.com.

(8) Using a Pocket Display


Using a Pocket Display


I found a simple pocket display case that has 9 pockets on each side of the case. You can then hang it either on a door knob or on the wall without damaging it.  If you want to make one of these one your own (so you don’t have to buy it), you can see a similar sort of creation here.

(9) Give Art as Gifts


Give Art as Gifts


This artwork was found on the blog called Quince and Quire.  This blogger sewed her child’s artwork to a moleskin sketchbook to give to somebody as a gift. This is a great idea…but for somebody who hates sewing, this sounds tedious….how about just using hot glue or even colorful duct tape as a frame. Another idea is finding a notebook that has a clear cover and attaching it underneath the clear cover.

(10) Mod Podge Your Child’s Artwork to Anything


Mod Podge Your Child's Artwork to Anything


You can Mod Podge your kids’ artwork to coasters or any other item such as your child’s bookcase or wooden bed. This will bring your child’s room alive with color…and it is quite easy to do. This was found on the site…Mod Podge Rocks!

(11) Use Artwork for Gift Wrapping Paper


Use Artwork for Gift Wrapping Paper


On Krafty Guts Blog, the blogger used her child’s artwork for wrapping paper. This is a great idea…this makes the child feel so special.

(12) Laminate the Artwork and Use as Placemats


Laminate the Artwork and Use as Placemats


On the blog, Make Create Do, there is an example of a place mat made from a child’s piece of art. This is also a great idea. How special is it to your child that you would make a permanent use for his creativity. Awesome idea.

(13) Showcase Art with Digital Frames


Showcase Art with Digital Frames


I love, love, love this idea. How about you scan all of your child’s work and put them all on permanent display in a digital frame.

(14) Use a L’il DaVinci Store and Display Art Cabinet


Use a L'il DaVinci Store and Display Art Cabinet


This is a really cool idea to have a cabinet that holds up to 50 pages of artwork. It then has a hinge that lets you open up the frame like a book to turn thru the pages. I found it here, see if you like it when you take a closer look.

(15) Make a Puzzles, Notebooks, Stickers, Magnets, Coffee Table Books and Other Items from Artwork


Make a Puzzles, Notebooks, Stickers, Magnets and Other Items from Artwork


On sites like Snapfish.com, you can create all sorts of things from your child’s artwork, such as stickers, puzzles, magnets, notebooks, coffee table books, posters, t-shirts, playing cards, etc.

Technorati Tags: , , , , , , , , , , ,

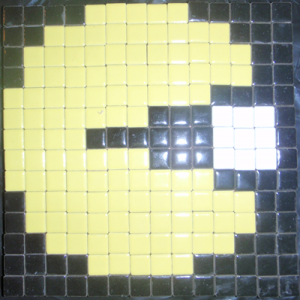
How to Make a Mosaic Pacman Pixelated Picture from Tiles

Pacman was the hottest arcade game from the 1980’s and it is still crazy popular today.  I’m going to show you how to make a super cool pixelated Pacman picture that is very easy and fun to make…. just follow the easy-to-follow pattern and you are as good as gold.

Click here for more mosaic tutorials


Mosaic Pacman Pixelated Picture from Tiles


Materials Needed:

Glue

Cardboard or Wood

Tiles or Cut up Squares from Paper or Foam


Materials Needed


Here is a pattern for you to print or just look at while you are making your Mosaic Pacman.


Mosaic Pacman Pattern


The surrounding area of your Mosaic Pacman can be any color you would like.  I made this area black, but feel free to use any color.

Step 1:


Put Glue on First Tile


Put glue on first tile.


Step 2


Place square firmly on cardboard


Place square firmly on cardboard or wood.

Step 3


Finished Mosaic Pacman


Once you have the pattern completely finished make sure to place a heavy book on top of your finished craft overnight.  This will insure that your Mosaic Pacman craft is glued fast and ready to be shown proudly for all to see.

Technorati Tags: , , , , ,

How to Paint, Glaze, and Fire Ceramic Tiles without a Kiln

Do you want to learn how to make your own customized ceramic tile? Well, then you’re in luck because today we will show you how to take a pencil design and then transfer it to your tile. From there you can take your liquid glaze and paint your design onto the tile. You don’t need a kiln to fire your ceramic tile, you just need a normal kitchen oven. Learn all about firing & glazing your ceramic tiles at home in the step by step tutorial below.

How to Paint, Glaze, and Fire Ceramic Tiles without a Kiln


How to Paint, Glaze, and Fire Ceramic Tiles


Crafts Materials Needed:

Blank glazed tiles

Low Fire Liquid Glaze

Watercolor brush

Tracing paper

Pencil

Paints or crayons

How to Design and Paint on a Ceramic Tile

Step 1


How to Design and Paint on a Ceramic Tile


On a piece of paper that is the same size as tile, draw a design.  Color design with paints or crayons, as in picture above.

Step 2


With pencil and tracing paper, trace off colored design outline, omitting most of the details


With pencil and tracing paper, trace off colored design outline, omitting most of the details. Remove tracing paper and scratch the back with soft pencil


Step 3


Place tracing paper, scratched side down, over tile


Place tracing paper, scratched side down, over tile, and trace design on tile, as in picture above.

Step 4


Stir liquid glaze, and thin with reducer if necessary with watercolor brush, fill in tile


Stir liquid glaze, and thin with reducer if necessary with watercolor brush, fill in tile, as in picture above.

HOW TO FIRE A CERAMIC TILE


oven


Place tile in a cold oven and heat slowly to 250°F. Keep oven at the same temperature, with the oven slightly open, for 2 hours. Turn off oven, and leave tiles in oven until cool. Ask an adult to remove tile, and when thoroughly dry, wash with soap and water to remove all traces of pencil marks.

Technorati Tags: , , , , , , , ,

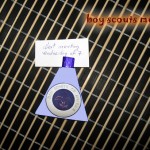
How to Make a Boy Scouts Memo Holder Crafts Activity

Laura from Dacian Moon Handmade will show you today how to make something simple and fun: a memo for Boy Scouts. Now the boys can have a special place where they can write important Scout related topics down .


How to Make a Boy Scouts Memo Holder Crafts Activity

CRAFTS MATERIALS NEEDED:

– paper (not too thin)
– scissors
– clothespin
– glue
– paints
– paintbrush
– pencil


Step 1.

First of all, we paint the clothespin blue (actually we will paint only the upper part – the one that pins). We will give it several layers of paint, until it looks good. Let it dry well.


Step 2.

Next, we cut a piece of paper with the width of 2/3 of the clothespin.


Step 3.

Draw a circle (let a little bit of space from the corner)


Then draw another circle, smaller, inside the forst one.


And draw a “fleur de lys” symbol in the center.


The last thing we need on our drawing to have the scouts logo is the name, so write: Boy Scouts of America.


Step 4.

Cut out the logo like in the next photo.


Cut another piece of paper identical with the first one. You can write your name on it or ”be prepared”


Step. 5

Take one of the paper pieces and apply a layer of glue on it’s back side …


… and place the clothespin on it, with the painted part up.


Then glue the other piece of paper on top of them.


Step 6.

Now you can play with paints and give it a friendly look 🙂


Technorati Tags: , , , , , , , , , ,

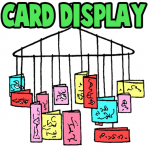
Making a Greeting Card Display Wall Hanger Crafts Idea for Kids

Since Valentine’s Day is coming up soon, how about learning how to make this Greeting Cards Display Craft. You can hang it on a picture hook, or hang it from other high places. Then you can look at the love that people sent to you in Valentine’s Day cards, Christmas cards, Birthday cards, or whatever.


Making a Greeting Card Display Wall Hanger Crafts Idea for Kids


Making a Greeting Card Display Wall Hanger Crafts Idea for Kids

Crafts Materials Needed

– wire coat hanger
– scraps of ribbons, any color
– decorative paper or wrapping paper (optional)
– glue
– scissors
– tape measure or ruler


Step 1 (Optional Step)

Glue and wrap strips of decorative paper, wrapper paper, ribbon, or yarn all over the hanger so that the wire does not show anywhere.

Step 2

Have 15 to 20 ribbons of varying lengths—from 15 to 36 inches. Glue them on the hanger, both on the upper and lower parts, about 1 to 2 inches apart.

Step 3

These ribbons should be used to pin on, or glue on, Christmas cards, Valentine’s Day cards, or birthday cards, or whatever.

The hanger can be displayed on a picture hook anywhere in the house.


Greeting Cards and Valentines Cards Display Hanger Crafts Idea for Kids


Technorati Tags: , , , , , , , , ,